Star Stitch or Marguerite Stitch |
Star Stitch or Marguerite Stitch The Marguerite
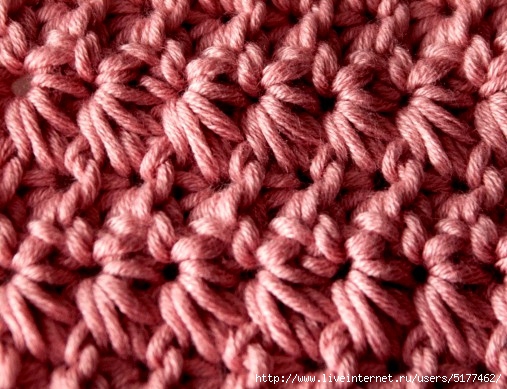
Stitch comes in several variations. The easiest of all has 3 spikes, and is know as the Simple Marguerite Stitch – and I had a lot of fun demonstrating it! When you read just “Marguerite Stitch” it could mean 4 or 5 spikes – both versions share the name. But the 5 spike Marguerite Stitch goes by another name… the Star Stitch! Still following? Good, because today I’m showing you how to make this full size, 5 spiked, Star Stitch – AKA the Marguerite Stitch!

Star Stitch or Marguerite Stitch Video Tutorial
Star Stitch or Marguerite Stitch Photo Tutorial
This tutorial was filmed and photographed using LB Collection Cotton Bamboo yarn and an H hook.
The Star Stitch or Marguerite Stitch is worked over a multiple of 2 plus 1, plus 3 for the starting chain! So for this swatch I started with a chain of 12 (8 (4 x 2) +1, +3 = 12). Each Marguerite or Star takes up 2 sts, so this swatch will make 4 stars (note that this is the multiple of 2 above – easy to plan your starting chain now, right?). I recommend working into the underside loops of the chain for this stitch.
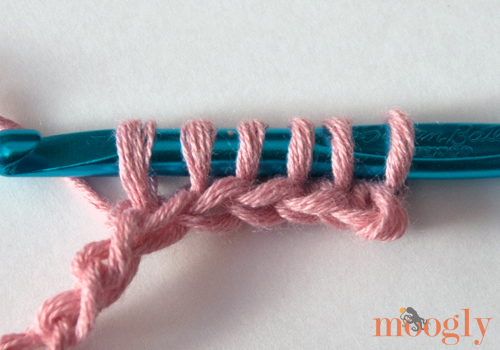
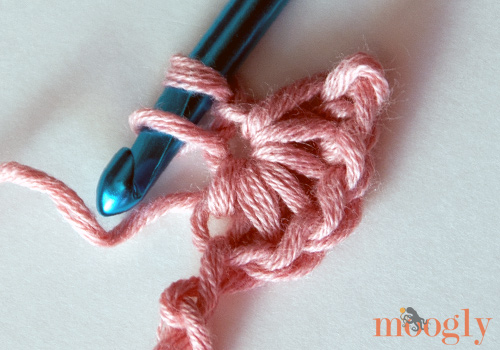
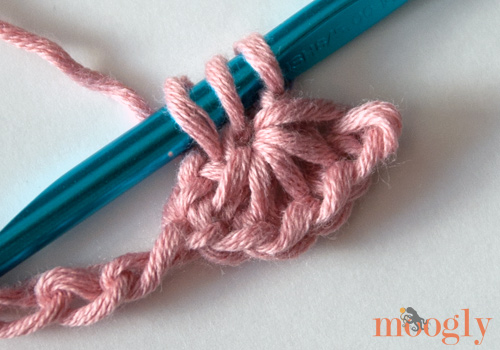
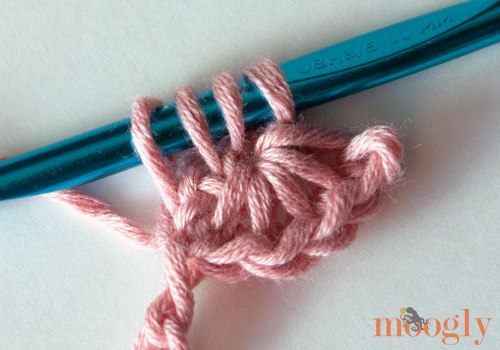
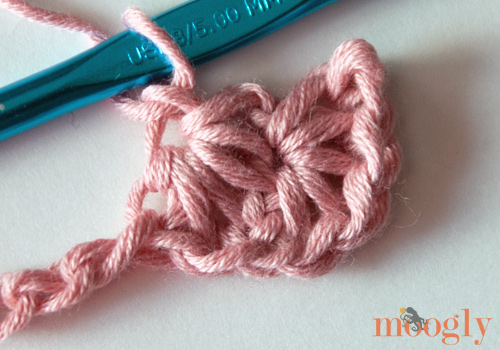
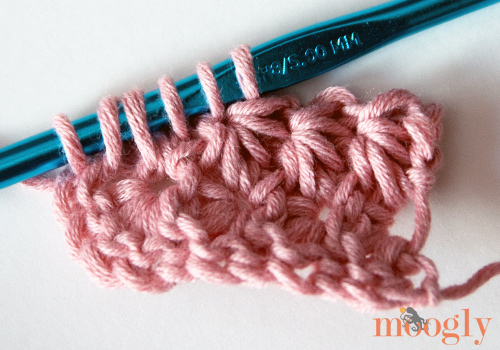
After making your starting chain, insert the hook into the 2nd ch from the hook and pull up a loop. Then do the same in the 3rd, 4th, 5th, and 6th ch from the hook. This leaves you with 6 loops on the hook. Try to pull the last couple of loops up a bit higher than the others.
Yarn over and pull through all 6 loops.
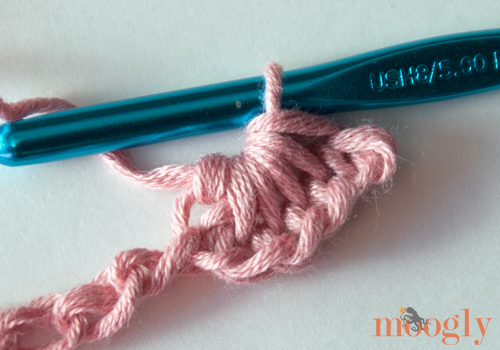
Ch 1 to finish off the stitch. First Star made!
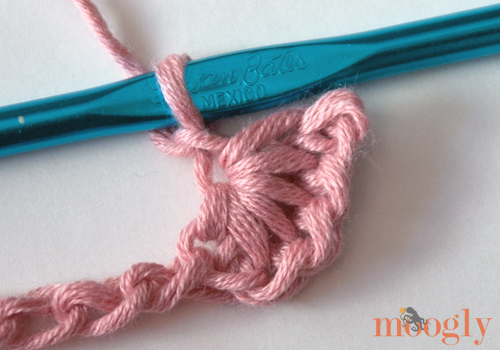
To start the next Star, insert the hook into the ch 1 just made, and pull up a loop.
Then insert the hook under the 2 strands on the side of the last spike or loop made in the previous stitch, and pull up a loop.
Then insert the hook into the same ch that the last loops of the previous stitch was worked in, and pull up a loop.
Finally, insert the hook into the next ch and pull up a loop, and then into the next ch and pull up a loop. Try to pull these last two loops up a little higher than the others.
Yarn over and pull through all 6 loops, then ch 1 to finish off the stitch. Second Star made!
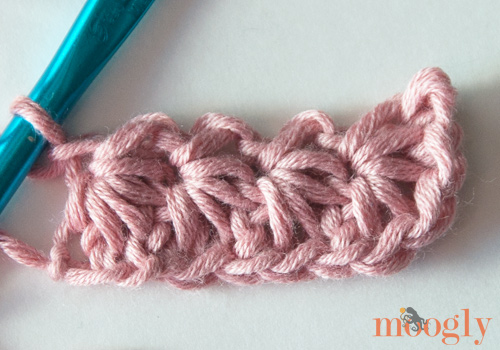
Continue as for the second Star until the end of the chains, finishing the last Marguerite in the last ch.
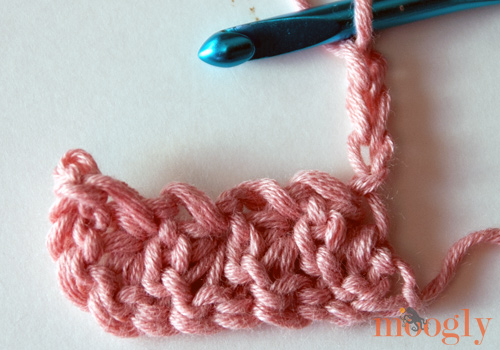
To start the second row, you’re going to start with a ch 3. But wait! Before you turn, before you chain, very carefully remove the hook from the active loop and replace it in the loop from the other direction. THEN turn and make your ch 3. This way the underside loop of the chains is on the “inside” of the row, and the Vs are on the outside edge – a much nicer look (at least in my opinion – feel free to try it both ways and see what you think!). Oh, and make sure that the chains are nice and loose – you’ll be working into all 3 eventually!
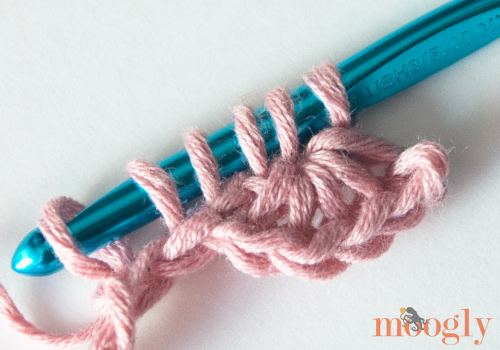
After the ch 3, insert your hook in the 2nd ch from the hook and pull up a loop. Then do the same in the 3rd ch, then in the 1st, 2nd, and 3rd st of the row.
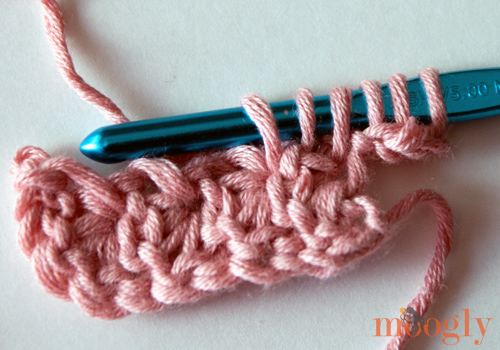
Yarn over and pull through all 6 loops, then ch 1 to finish off the stitch. First Star of the second row made!
Continue making Stars to the end of the row, working them as you did the second and subsequent stars of the 1st row. When you get to the end of the row, the last loop will be in the ch that you skipped when you made the very first Star! This is why, as you make each row, you’re going to want to have made all 3 chs at the beginning of the previous row nice and loose. Working into that skipped ch is no fun when it’s tight!
And that’s all there is to it! Just repeat the directions for the second row until you’ve got the length you want. To work the Star Stitch or Marguerite Stitch in the round, you’ll start with a multiple of 2 plus 1, and save that ch 3 until after you’ve joined in a circle.
If you’re curious about the 4 spike Marguerite – it’s easy as can be! Just skip the 3rd loop in the version above - work the loops in the 2nd ch, 4th ch, 5th ch, and 6th chain for the first st. Then make the next 4 spike Marguerite by working into the ch 1 that closed the previous st, the same ch that the last loop was worked in, and the next 2 chains. Easy peasy!
| Комментировать | « Пред. запись — К дневнику — След. запись » | Страницы: [1] [Новые] |


