Here are the steps in Photos repair broken off slates. Two variants
Of course, if you're in the heart's broken off from the sole, as always out of place ...


 Дешевые авиабилетыВыгодные цены, удобный поиск, без комиссии, 24 часа. Бронируй сейчас – плати потом!
 Я - фотографПлагин для публикации фотографий в дневнике пользователя. Минимальные системные требования: Internet Explorer 6, Fire Fox 1.5, Opera 9.5, Safari 3.1.1 со включенным JavaScript. Возможно это будет рабо
 ОткрыткиПерерожденный каталог открыток на все случаи жизни

lace lampshades |
|
Огромный ассортимент столов. Шведское качество. Отличный дизайн. Доставка.
www.brafab-furniture.ru |
|
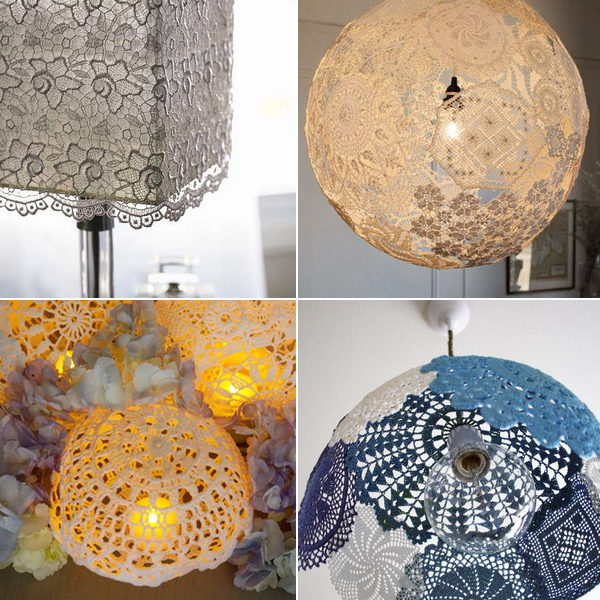
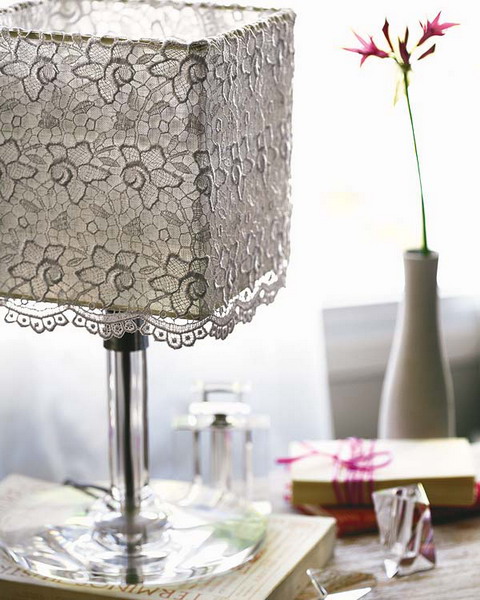
В заключение нашего сериала о том, что можно сделать из кружева и вязаных салфеток своими руками, предлагаем познакомиться с разными способами сделать из кружева светильники. Один из вариантов мы уже показывали, еще кое-что “бродит по рунету” уже давно, но, думаем, такую коллекцию вы увидите в первый раз.
Самое ценное качество у светильника из кружева - это ажурные тени, которые он отбрасывает на стены и потолок. Но, кроме того, есть и практическая польза: маленькие рукодельные изделия или остатки от творчества (которые, возможно, уже заполонили дом) волшебством ваших рук превращаются в красивый аксессуар для интерьера.
Мы разделили все руководства здесь на 4 основные части:
Для реализации большинства этих способов вам потребуется одна или несколько вязаных салфеток, а в некоторых случаях - фабричное кружево (кружевная ткань - гипюр). В некоторых ситуациях пригодится каркас от старой лампы, но и без него тоже можно будет обойтись.
Все способы создать светильники из кружева и вязаных салфеток сопровождаются подробной инструкцией в картинках, тем не менее, краткое текстовое описание вы тоже увидите.
И еще несколько слов перед стартом:
Желаем приятного творчества и очаровательного результата!
__________________________
способ №1:
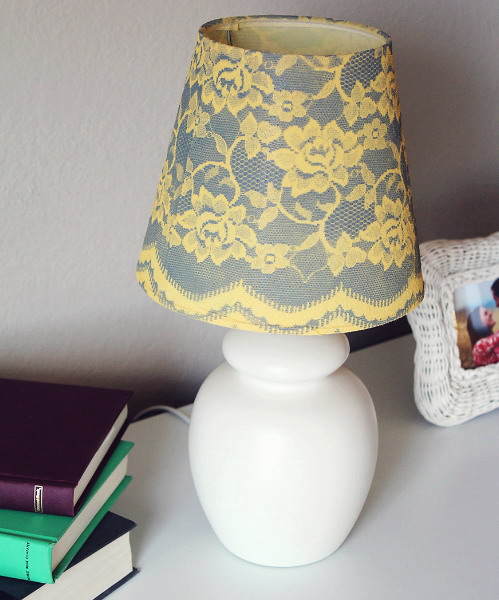
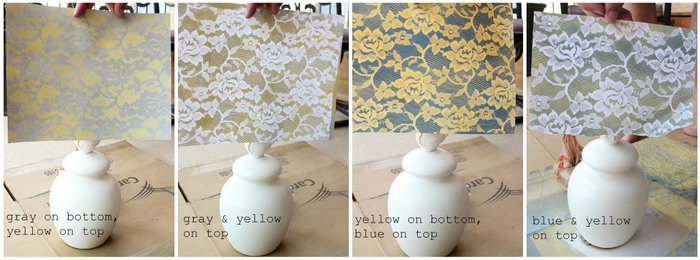
Вам потребуется: отрез белого гипюра + любая настольная лампа с тканевым абажуром. Кружево предпочтительнее каймовое (с присутствием ажурного “края”). Идея хорошо смотрится в 2х вариантах: либо на явном контрасте цвета кружева и цвета абажура, либо тон в тон. Значит, ваша задача - покрасить то, что отличается по цвету от вашего замысла: либо абажур, либо - кружево, либо и то и другое - с помощью краски-спрея. После высыхания окрашенных деталей прикрепите кружево к абажуру тонкой ниткой или аккуратно приклейте (с внутренней верхней стороны).


вариации на эту тему:
кружевом можно закрыть разную площадь абажура - полностью или частично, сбоку, по верху или по краю.
Метки: lamps lace doily |
cape into sheet |
Метки: transformation |
mending a jeans |
Наверняка знакомая картина – дырки в уголках карманов. Если джинсы вполне можно носить и рано списывать со счетов, а случается что это единственные джинсы которые хорошо сидят, то нужно их реанимировать и дать им ещё один шанс. В моей практике был случай когда я, любимые джинсы заказчицы штопала 12 раз!

Вот что имеем. И сегодня вы узнаете как заштопать дырку на джинсах в уголке кармана и сделать это профессионально.

Для начала отпороть карман до угла, удалить нитки. Как правило карман фиксируют в месте соединения мелким зигзагом. Рекомендую не мучиться с отпарыванием, а просто аккуратно обрезать строчку вокруг зигзага, освобождая карман. Останется дырка под карманом, но она у нас и так есть и мы её заштопаем, как говорит моя подруга: “Плюс минус трамвайная остановка”.

С обратной стороны при помощи клеевой паутинки наклеить бязь, ситец, подкладку или кусок джинсы.

С лицевой стороны нитками в тон джинсы сделать штопку, воспользуйтесь руководством из прошлых публикаций.

Результат через 15 минут. Осталось наложить и приколоть карман на своё место и нитками в цвет отстрочки пришить его.

Вид штопки с изнаночной стороны. Обрежьте лишнюю ткань заплатки.

Теперь, когда вас спросят: “Как заштопать дырку на джинсах?”, вы можете показать, рассказать или промолчать и молча её заштопать.
Любите себя, дорогие рукодельницы, покупайте новые джинсы если сносились старые и штопайте только любимые!
Буду благодарна, если копируя мои статьи на свой сайт, блог, личную страничку или дневник, укажете ссылку на источник.http://alyonamaslova.ru/shitie-kroi/remont-odezhdy/shtopaem-dyirki-u-karmanov-dzhins
Серия сообщений "Mending":
Часть 1 - Mending bag's corners
Часть 2 - using lace
Часть 3 - fix a leather cut
Часть 4 - mending a jeans
Часть 5 - mending a shirt
Часть 6 - solution for faulty pattern
Часть 7 - widen pants
Часть 8 - diy belts
Часть 9 - re fashion a skirt
|
Метки: mending |
thread tealight |

I was messing around with different materials trying to dress up a little LED tealight, and this is one of the versions I ended up liking (plus it’s dirt cheap since it’s just thread!). I love me some textures. This may be useful for those with wedding venues that don’t allow real flames.
Finding these* at the dollar store is what started this mess…

1) Get your hands on some thin cardboard that you’ll be recycling anyway. I used the back of a pasta box.

2) Find some wrapping plastic (try to use something you’ll toss anyway!)

3. Cut cardboard to desired height. The width should be AT LEAST a little more than the circumference of the tealight (it can be bigger if you want).
4. Roll the cardboard and tape the edge.

5. Make sure your cardboard roll can at least fit the tealight inside.

6. Cut and wrap the plastic over the cardboard roll, then tape it down.

7. Wrap thread (thicker thread recommended) around the roll loosely. It should be tight enough to stay in place, but loose enough to slide off with a little help. Make sure the edges are relatively close to perpendicular to your roll (otherwise they’ll be tilted). You can use more thread for a thicker cover or to make it taller if you’d like. I did here what I think is close to the minimum to let the most light shine through.
8. Saturate with a fabric stiffener (available at craft stores or fabric stores) and follow instructions on the bottle for drying.

9. Mine said I could microwave it for super speed drying, so I did for 30 seconds. Freaked me out a little to see the liquid bubbling on the thread, but it turned out fine.

10. Check and make sure it’s close to dry. 11. Carefully crumble and pull out the cardboard without damaging the shape of the thread. 12. Carefully remove the plastic without damaging the shape of the thread.

13. Now stick the LED tealight in it and there ya go!
You can make different sizes and shapes. It probably works with yarn and ribbons just as well. And of course, you can use whatever color thread you like…

… and configure it however you want!

* Batteries were included, and they lasted for many hours. They even flickered to imitate a real flame… can’t beat that for fiddy-cent a pop. Though, I gotta say that they’re a tad dim. If you want to do a bunch of these, you should buy one and make sure it’s bright enough for you first.
Happy crafting!
Серия сообщений "Candles":
Часть 1 - candles out of baby jars
Часть 2 - candles
...
Часть 26 - candle holder
Часть 27 - candle decoration
Часть 28 - thread tealight
Часть 29 - mesh candle holder
Часть 30 - houses by night
...
Часть 39 - with coffee bean
Часть 40 - candle holder
Часть 41 - diy candleholder
Серия сообщений "Cabbage":
Часть 1 - Stuffed Cabbage
Часть 2 - Stuffed Cabbage (New Look):)
Часть 3 - New way for cabbage
Часть 4 - Canbbage pie with meat
Часть 5 - thread tealight
Метки: candle holder thread |
ice cream cup cake |
 I tried to bake these cupcakes several times, and every time it ended with a face palm – except for the time before my birthday, that ended in tears. See, each of the four times – no matter what technique I used – the cones fell over in the oven. I guess the batter that rises affects the cupcake’s balance or some BS like that, and results in an inedible mess.
Without the creative and clever ideas of my (very blonde) friend Erna, this post would not have happened.
So here’s what you need:
 Cupcake or cake batter. Instant works fine, but you want to start from scratch here is a nice recipe.
Step 1: Fill the cones
 Do not fill the cones to the rim. The batter rises in the oven and makes a nice mess if it spills over.
Step 2: Bake the cupcakes
 Instead of placing the cones, standing, in a pan, place it in the oven grid. It fits perfectly, and (thank gawd!) doesn’t fall over.
Bake about 15 min on 180C.

Step 3: Decorate!
Wait for the cupcakes to cool before you attempt this step.


Let is cool and dry and Voila! Much deliciousness!


Серия сообщений "Ice Cream":
Часть 1 - Edible Flower Pot
Часть 2 - Five Minute Ice Cream
...
Часть 7 - Last Minute Peach & Yogurt Ice Cream
Часть 8 - orange basket
Часть 9 - ice cream cup cake
Часть 10 - easy ice cream
Часть 11 - ice cream without cream
Часть 12 - just banana icecream
Метки: cake decorative serving dessert |
decorate with marker and ink |


http://madeinpretoria.wordpress.com/
Метки: refashion |
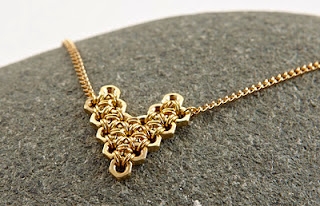
nut jewelry |
The young man creates his own hands such creations!


Серия сообщений "Tins & Cans":
Часть 1 - candles out of baby jars
Часть 2 - Thread storage
...
Часть 18 - again wooden spoons and others......
Часть 19 - tin can box
Часть 20 - nut jewelry
Часть 21 - making your own cutters
Часть 22 - recycled lighthouse
Метки: jewelry hardware |
natural dye |


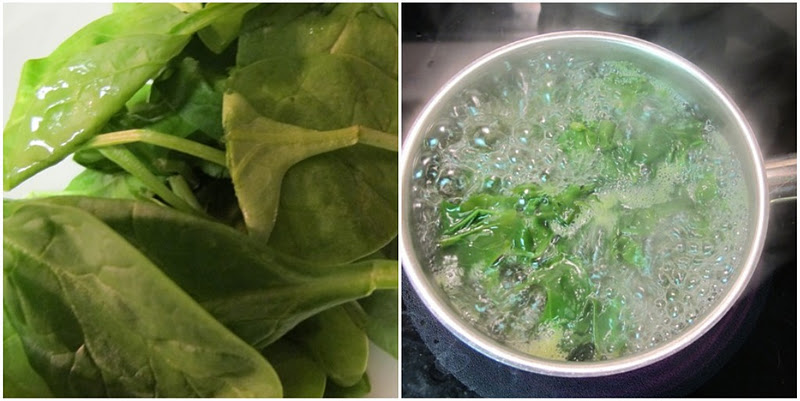
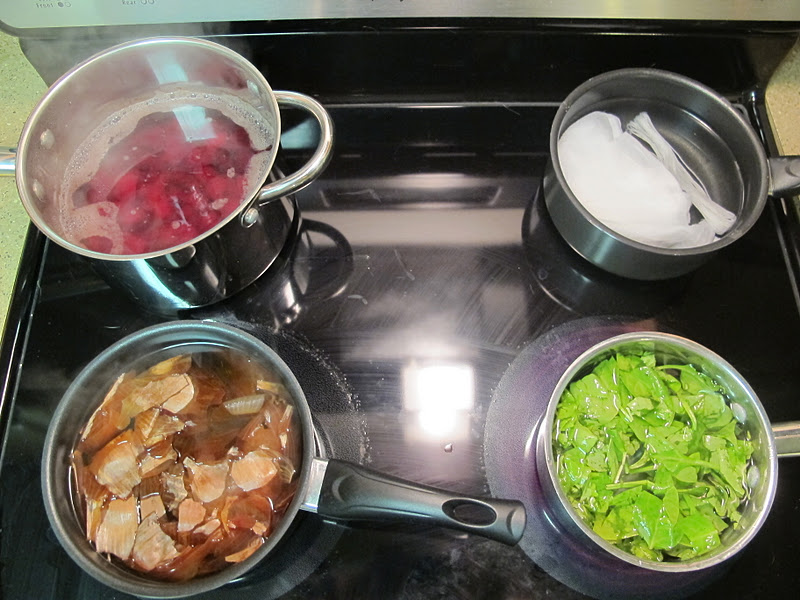
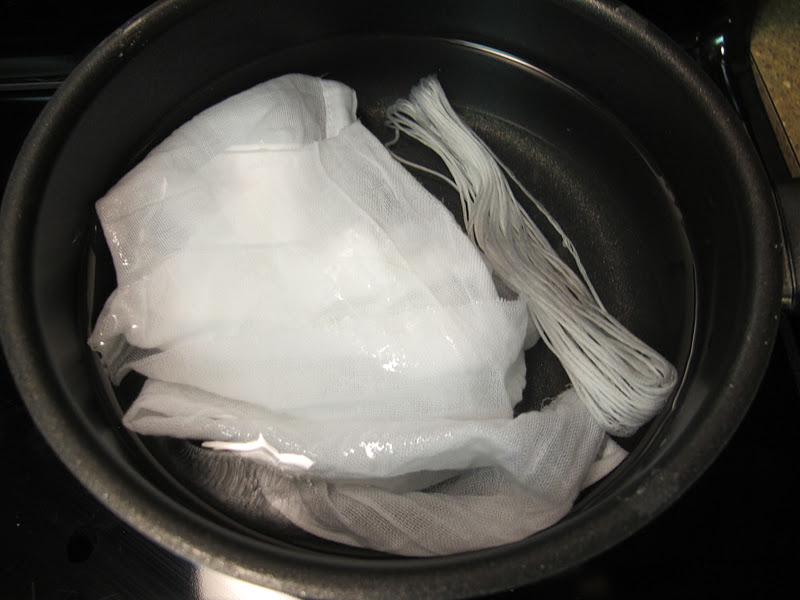


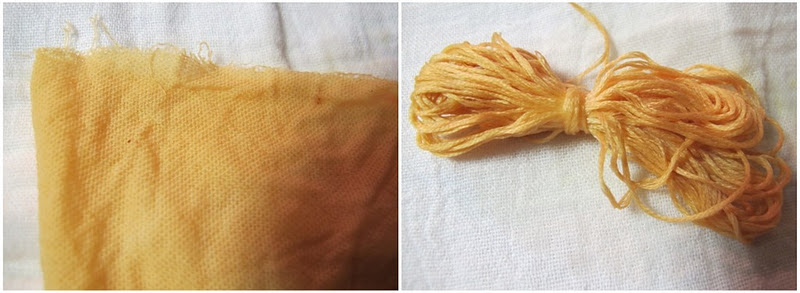

Метки: dye refashion |
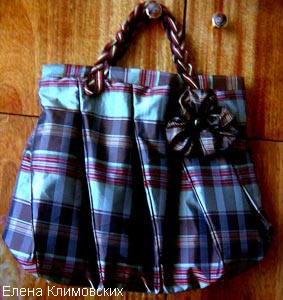
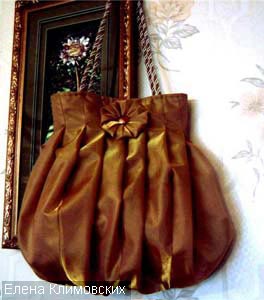
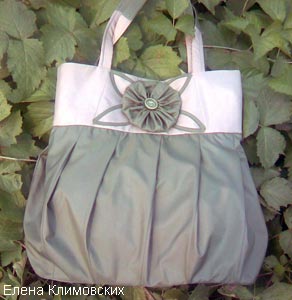
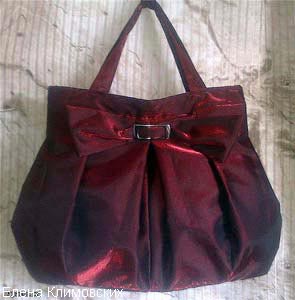
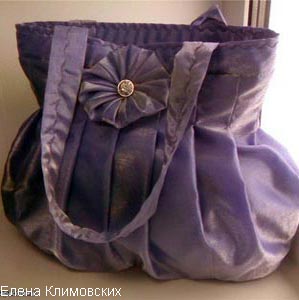
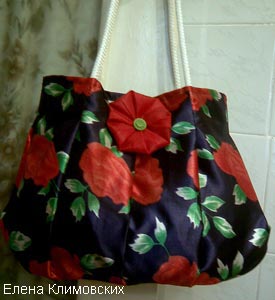
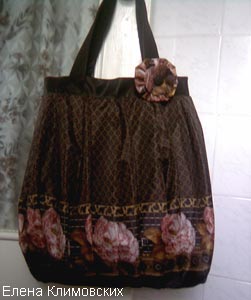
bag from umbrella |
| Umbrellas are different: blue, green, red ... And how sad it is when they break down. But do not throw them away, from your favorite umbrella can make a nice handbag, which will also become a favorite. |
|
The number of variations on the theme of umbrellas bags unlimited, since umbrellas are available various colors, sizes, and the tissue they are different. In such a bag can lay the folds to make the assembly or drapery. Folds can be either at the bottom and top of the bag. Sumochnaya accessories too will its diversity. I'll show you a fairly simple structure, which is the power of those who are just starting to sew bags. Well, craftswomen from experience will not be difficult to change the model from the bottom and then sew bag will be completely different. So, we begin! Elena Klimovskikh (Parasolka) Udmurt August 27, 2010 |
 |
 |
|
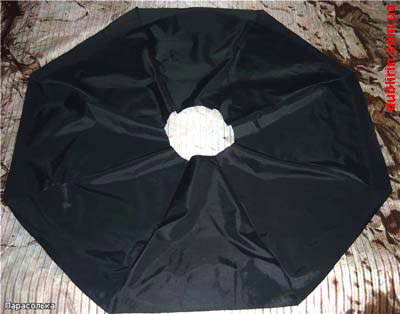 |
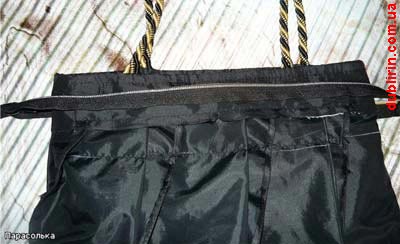
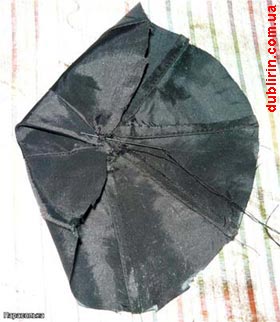
1. First, prepare an umbrella to work. Carefully rip off it from the frame, if necessary, erase and carefully ironed. The seam on the edge of the umbrella vpodgibku neatly cut off just below the seam. Cut from the center of a circle of radius umbrella of 8-10 cm, and the edge of the hood cut away a strip width of 7-8 cm from the circle can then be done for decorating bags. A strip (8 or 10 pieces, depending on the number of wedges umbrella) will be used to manipulate the top bag, zipper processing, of which it is possible to produce and handle. By the way, if preserved case of an umbrella, it too can be useful. |
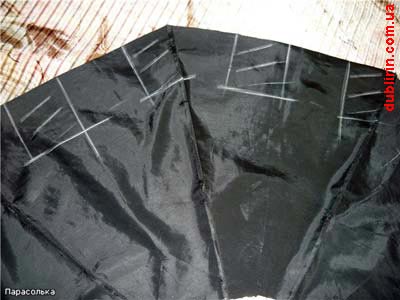 |
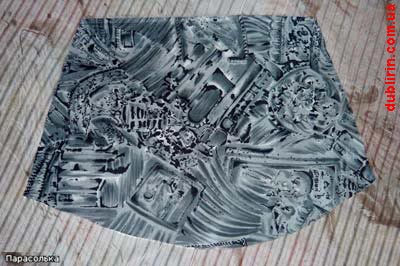
2. Now count and mark up the fold. Folds may be unilateral, colliding, bantovymi. The same can be variety and quantity: 8-10 by the number of wedges or 2 times (two on each wedge). In my model will be 16 folds. Calculation of the width of the folds: 126 cm (length of the edge of the umbrella, folded twice) minus 28 cm (width bags ready for use) and divide by 8 (number of folds in half of the umbrella), we get a little more than 12 cm The picture is shaded half the width of the folds. The length of the folds of 8 cm Folds baste or pin together, we check the width of the bag. At this stage, the width of the bag on top can be adjusted by varying the depth of wrinkles. |
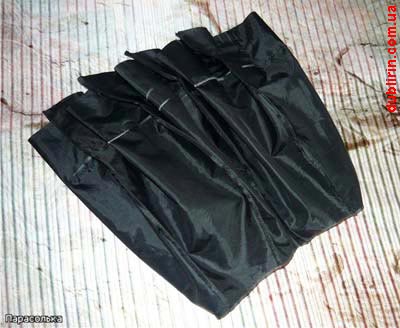 |
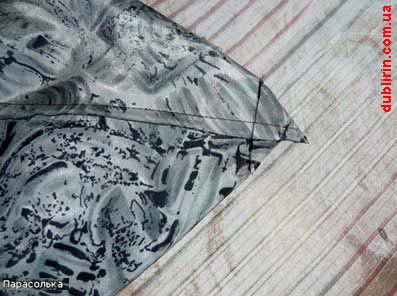
3. Folds grind, press out to one side ... |
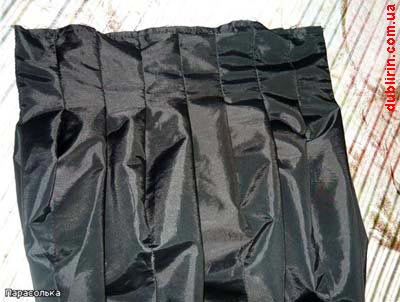 |
4. ... and we fix their machine-stitch along the edge of the bag. |
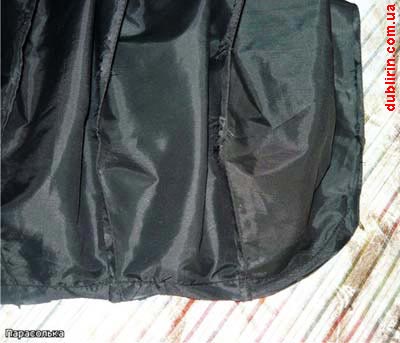 |
5. skive bottom of the bag, rounding the corners. Excess tissue in the corners cut off. |
 |
6. sew handles that can be drawn from the finishing fabric of the cord for curtains, beaded, chain, strap, weave out of cords, from Sew strips which were cut along the edge of the umbrella, etc. In this model the length of the handles 48 cm ( 1 m cable and cut in half by Seam by 1 cm). |
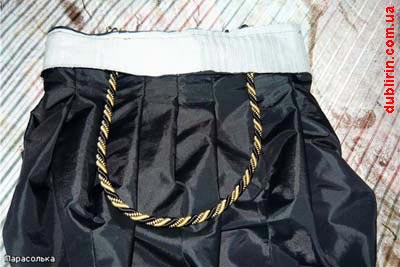 |
7. The top handle bag obtachkoy that grind out first cut strips. Obtachku strengthen dublirinom. Do not forget to wet-heat-treated joints. |
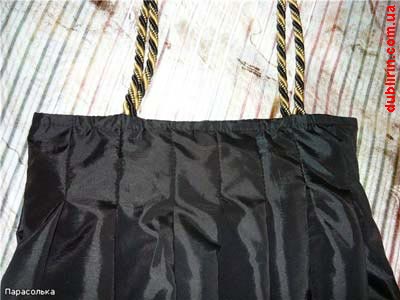 |
8. spawns edge bags, charting finishing line at the top of the bag and iron. |
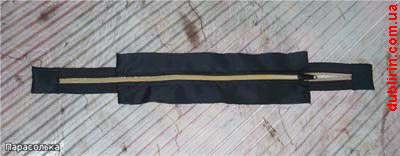 |
9. turn to buckle. clasps can be used to tape "Velcro" (Velcro) or make a loop and sew a nice button. I sew the zipper, while using it, so to speak, a simplified technique. First, handle bars zipper. The length of the shelf brackets 24 cm, so in a cut of about 26 cm length 42 cm zipper ends welt zipper slices of tissue. In detail, how to sew the zipper, but on a different technology, you can still see here . |
 |
10. Trims buckle stitch to obtachke. |
 |
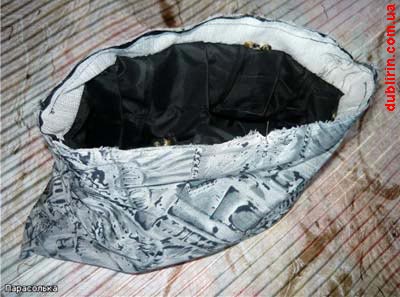
11. proceed to the lining. Lay the bag on the table and smooth hand laid folds, and you'll see what size and shape you need to cut out the lining. cuts out the lining in the form of bags, to the bottom of the expansion a little more, because you want to Sew Corners needed to create the volume. nastrachivaem on lining the pockets (for cell phone, keys, wallet - to whom it is necessary). On the pockets in the bag can still be read here . and here. |
 |
12. skive details lining, leaving a small area for turning the bag. Welds iron. Align the side seam to the bottom, grind angles. |
 |
13. obtachke to tack the lining or shear pins. abrasive seam to seam pritachivaniya paving planks to buckle obtachke. |
|
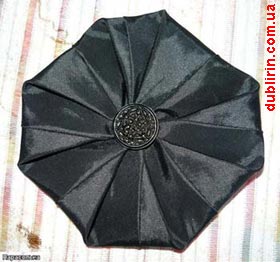
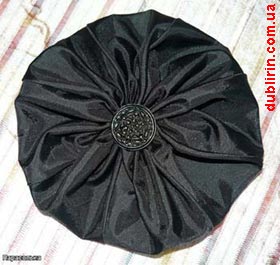
14. Now for a decorative element for which we need a circle cut out at the beginning. Secures thread on one seam stitching wedges and anchoring 2.3 stitches in the center, just next anchoring suture, remove any excess in the crease and so on around the perimeter of the circle. In the center of the resulting parts sew a button or a beautiful bead. finishing detail can be done in another way: on the edge of the circle going through the slanting stitches, thread and fasten contractible.In the center again sew some decoration, for example, the same decorative buttons. |
 |
 |
 |
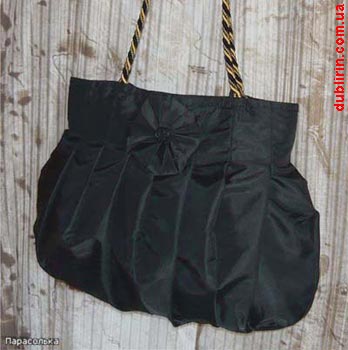 |
17. The bag turns, makes the ultimate moist heat treatment, finishing detail sew and sewed in the seam area, left for turning. That's it! You can walk the new handbag and receive compliments! I think that when your relatives, friends, acquaintances or colleagues know that you have sewn bag with his hands, and even from a broken umbrella, you'll hear a lot of nice words! I wish you success in creativity! By the way, soon autumn rains begin, and then break Umbrellas will be more ... |
| PS: I told him how I sew a bag of individually sewn without the umbrella of the bottom. If you want to make the bottom of this, of course, add the bag volume. But I'll explain another time. |
 |
 |
 |
 |
 |
 |
 |
 |
 |
 |
http://www.dublirin.com.ua/we_sew_zont.html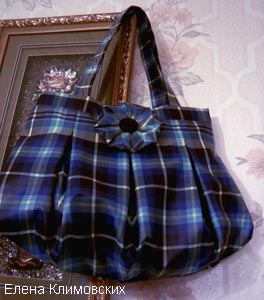 |
 |
Метки: bag |
rose using CD |
 In this article I want to share with you the simple genius idea to found the blog of Olga Koksahrovoy known attentive readers as the author of the master-class on the card with keksikami to March 8 .
On our site already have an idea of how to use needlework unwanted CD's, for example:
But all these ideas served a decorative function drive and be seen. In our case, the drive will only be used as the basis for ...beautiful roses made of cloth!
Make a rose out of tissue is not easy, but very simply, but judge for yourself ...
/www.vsehobby.ru/img/h2.gif" target="_blank">http://www.vsehobby.ru/img/h2.gif); background-attachment: initial; background-origin: initial; background-clip: initial; background-color: initial; height: 34px; line-height: 34px; margin-top: 0px; margin-right: 0px; margin-bottom: 0px; margin-left: 0px; text-transform: uppercase; font-weight: bold; font-size: 11px; font-family: Verdana, sans-serif; color: rgb(0, 0, 0); text-align: center; background-position: initial initial; background-repeat: repeat no-repeat; "> HOW TO MAKE A ROSE OUT OF TISSUEFor the manufacture of roses I needed:
More than anything special, except for the free 15 minutes!
The first thing I tore a piece of fabric from the required 12 cm (there had just been married in the figure, which does not interfere with production of roses, but prevent other use of fabrics).
Then a pair of scissors I have divided this 12-centimeter strip into two parts: a 2 cm wide, the other - 10 cm

First, working with a thin, two-centimeter band.
On the wrong side of the disc leaving a small tip (I left centimeters 5) to hold the strip and at the end of her tie tails.

Then, holding the tail with one hand on the wrong side, add up the fabric in half and start to wind up on the disc.

So you need to do on the front side 7 speed (or another odd number, you can experiment).

Now turn the drive on the wrong side to fasten a strip of fabric.
By the way, I have a band of 150 cm had about 60 cm, so if you pull the strip of stronger and more secure not tying, as well, such as a stapler, a strip may be enough, and on two discs.
Another way to save the fabric - it does not make the fold, wrap the disk stripe width of 1 cm
I did not save fabric and attached it to the wrong side of the most common site.
I have not tried to do too tightly wound and knot tightly to the drive, since then more difficult to smuggle in a second zone of the wound tissue. But on the other hand, the wound should not really hang out right on the disk.

Further work will focus on the front side of the disc.

Take a second, broad band of tissue around one of its ends ties are not too tight knot.

The remaining very short tail puts a hole in the disk and print it on the wrong side. There you can fix it, slipping into one of the bands of cloth, dropping a stick of glue or tape. And you can not fix at all.
Nodule function - to close a hole in the disk.

Now we start to miss the rest of the long ribbon of fabric to form the petals of roses of the future.

Drags the seal at any nearest thin strip, do not drag out, do something like a convex lobe.
Further, a broad band passes over the thin strip, and again under the next dives.

Similarly, continuing and further, over a thin ribbon strips passes, slips beneath another.

As the number of thin strips is odd, then after we go through the circle completely, as would finish it in the next row will alternate.
If we had a striped "dive," now on it will settle petal.
Thus, the thin strips remain virtually invisible to the end of work.

Getting closer to the edge of the disk.

The fabric is also coming to an end, it can be fixed or hidden on the right side under the lobe of the previous row (tuck under a thin ribbon of cloth) or wrapping the inside-out disc and paste it (you can tape) or to fix a stapler to any other section of tissue (but , regular needle and thread has not been canceled, too!).
I consolidated the tip of the fabric on the front side of the disc.

And so my finished fabric rosette looks from the inside.

Rose petals fluff of tissue sections were to be as less visible, and here it is, our rosette!
If you stretch the fabric when working harder, get more flat rosette, if left in longer intervals of fabric and form of these large petals, the rose will be bigger.

Additionally, you can decorate with roses, sewing beads like drops of dew, sewing or paste butterfly, adding the edges of the leaves. You can connect a lot of roses, making one type of decoration wreaths on the door.
I think it is relevant to such roses interior decoration for the wedding (and, incidentally, and other romantic holidays such as February 14).
This rose can be used in the ordinary interior decoration. For example, to attach to pickup the blinds. And you can make roses smaller, making the base out of cardboard or thick felt. Their use is unlimited and does: greeting cards, photo frames, scrapbooking, decorating hats, bags, clothes ...
Similar technology (first pull "rays", and then weave them in flower petals) hold even when the flowers embroidered ribbons. The tape can be taken in our case (instead of fabric).
If the drive you intend to use as a basis of neutral silver (or simply fit the color of the fabric), then we can use and more transparent fabrics, not just cotton.
Can not only use cloth, you can even take a temporary waste scarf suitable size. Only in this case, you will find the right color ribbons (not to scarf cut), a thin strip of fabric or other gum. Well, if nothing is found, you can wind up on the basis of a fishing line. It is not clear, but it keeps the fabric is excellent (well only fix the line, sometimes it can be difficult!)
And when a rosette of scarf bored enough to be cut wound ribbons (gum, fishing line ...) and pull the scarf safe and sound. Perhaps it is only slightly dented ...

Be creative with the dimensions of the foundations, textures of fabrics, materials for bridges - a ray of their number, and additional decorations and overall floristic composition, and you will receive very different, but always beautiful art objects!
Метки: making flower |
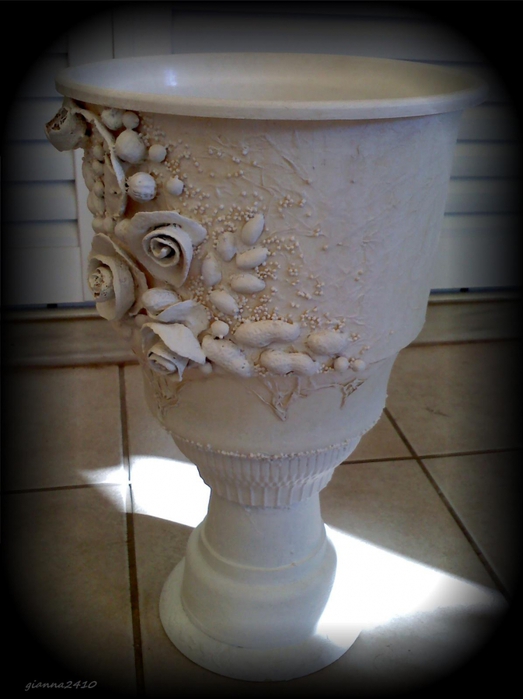
floor vase |
Quote Post Katra_I
Floor vase
Floor vase from Kudesnitsy !

See and read carefully! This beauty is made of absolute garbage. And the result?
Materials:
old burst gorshek plastic, plastic 'bowl' food, a little plastic gorshechek, ceramic bowl from the yogurt, plastic tray from tsv.gorshka,
rice or tissue-paper,
orange roses, pistachio nuts, peanuts, cherry pits, switchgrass,
PVA , velatura, lacquer.

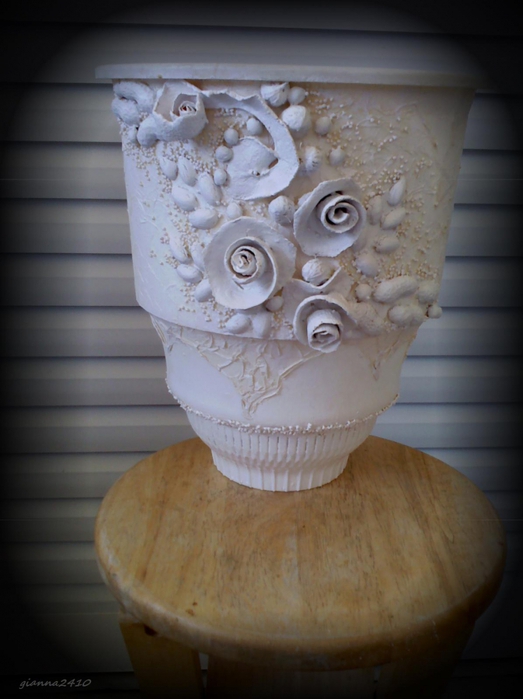
Look at how a stem vase of matching the size of the plastic parts, bowls and jars
Серия сообщений "Vase":
Часть 1 - vase
Часть 2 - carton vase
...
Часть 13 - paper recycle
Часть 14 - candle holder
Часть 15 - floor vase
Часть 16 - thread vase
Часть 17 - flower vase from a tissue box
...
Часть 30 - vase with thread
Часть 31 - vase
Часть 32 - mercury plate
Метки: garden |
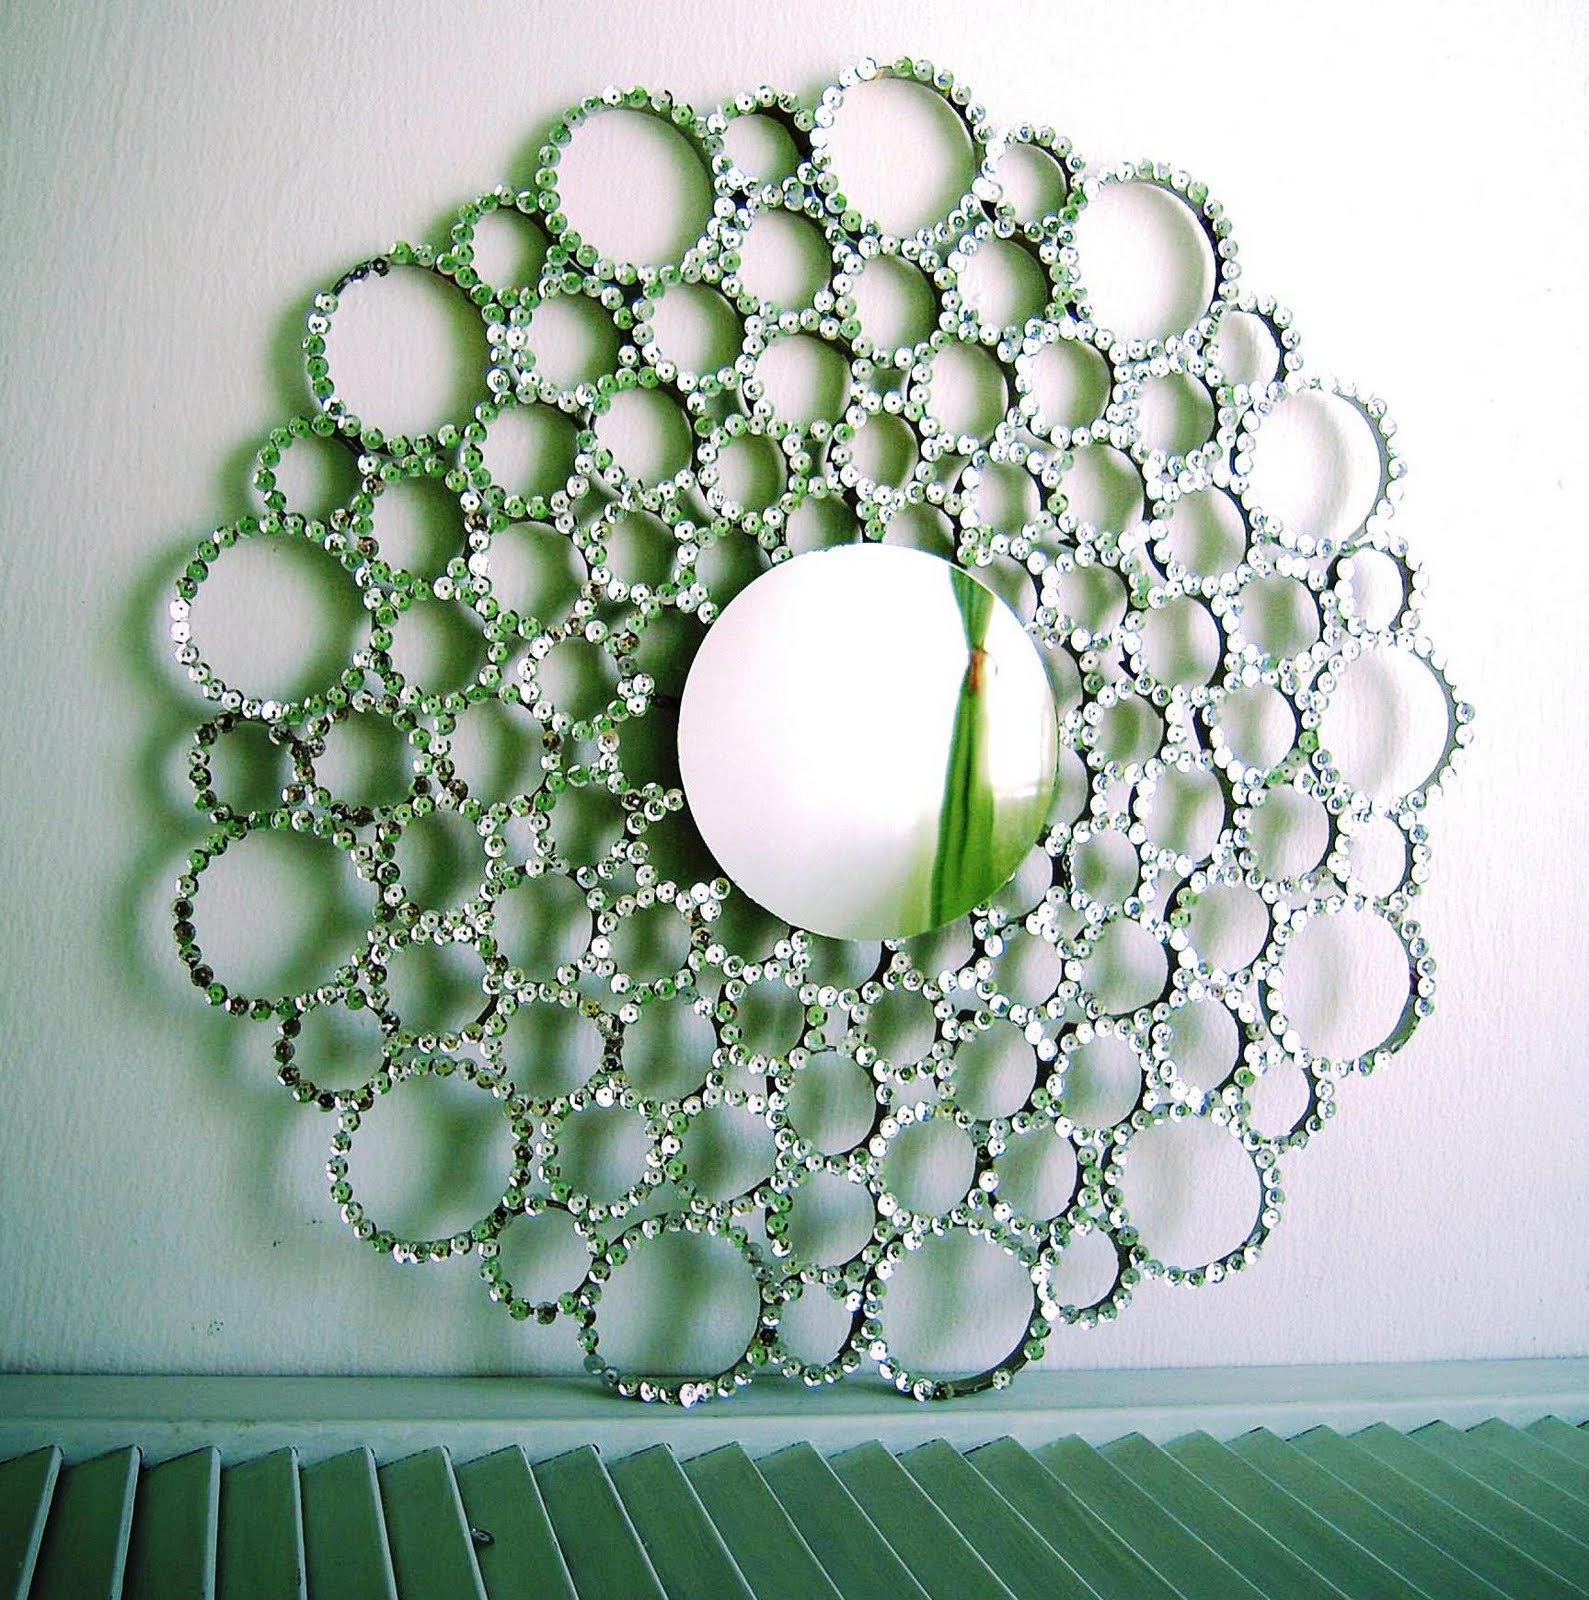
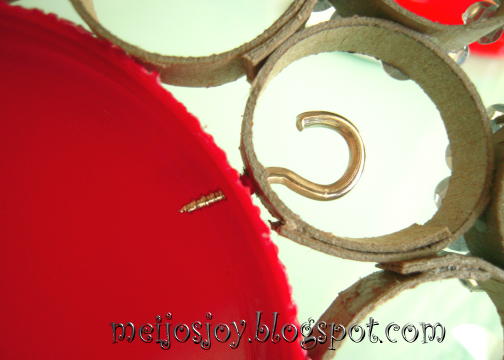
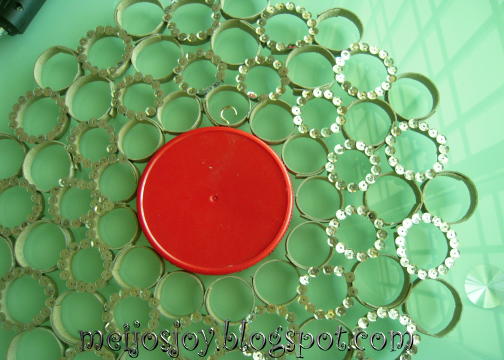
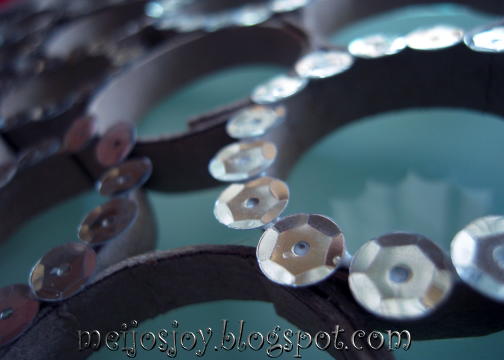
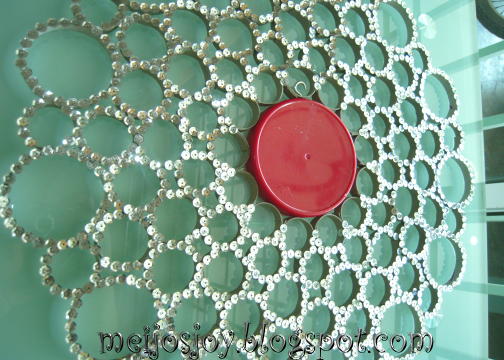
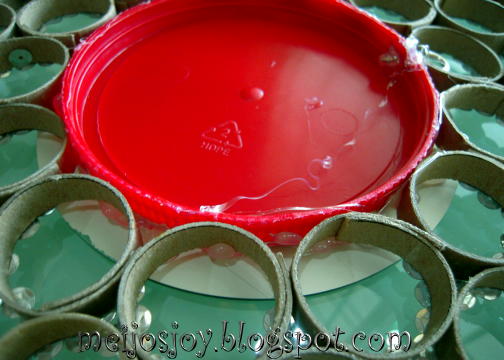
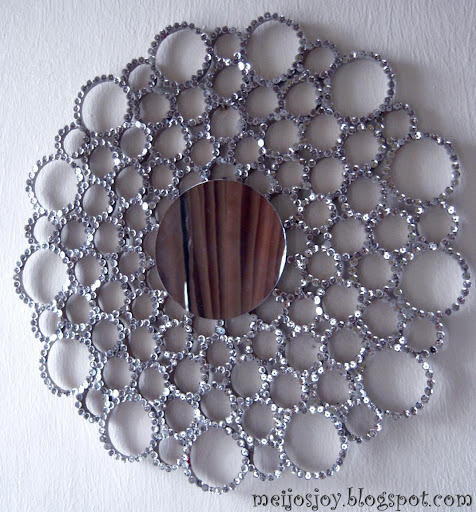
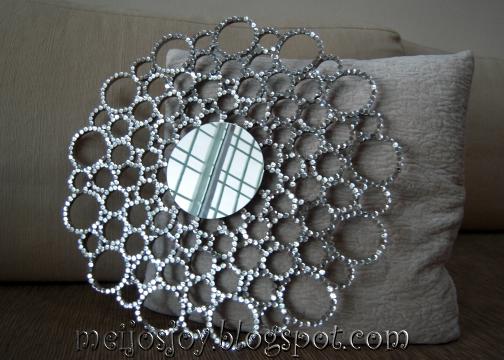
mirror |

Серия сообщений "Pipes & Tubes":
Часть 1 - DIY Bracelet
Часть 2 - Lamp out of PVC pipes
...
Часть 17 - faux metal squares
Часть 18 - faux metal wall hanging
Часть 19 - mirror
Часть 20 - amazing bookshleves
Часть 21 - lamp from rope+plastic tubes
...
Часть 28 - box
Часть 29 - breakfast table
Часть 30 - wall art
Метки: mirror roll |
wire lamp |
Here is the initial drawing I made for inspiration:

And here is how the actual Orb-lando turned out:

Метки: lamp wire |
curtain crown |
Метки: curtains |
repair old flip flop |
Here are the steps in Photos repair broken off slates. Two variants
Of course, if you're in the heart's broken off from the sole, as always out of place ...
Метки: shoes |
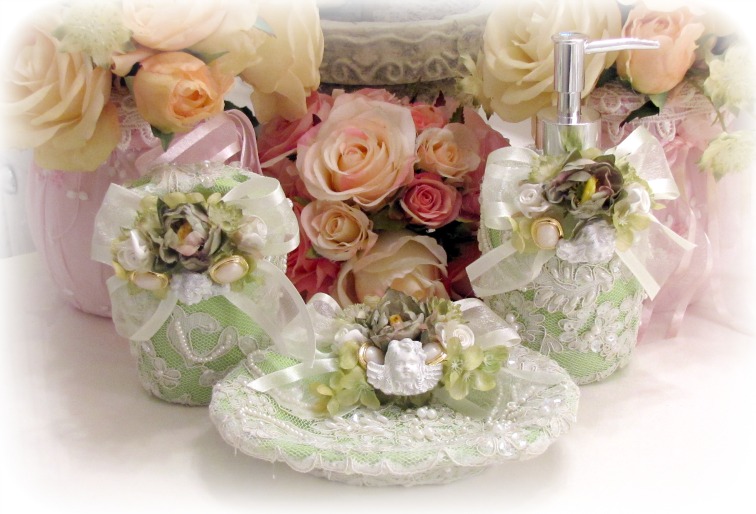
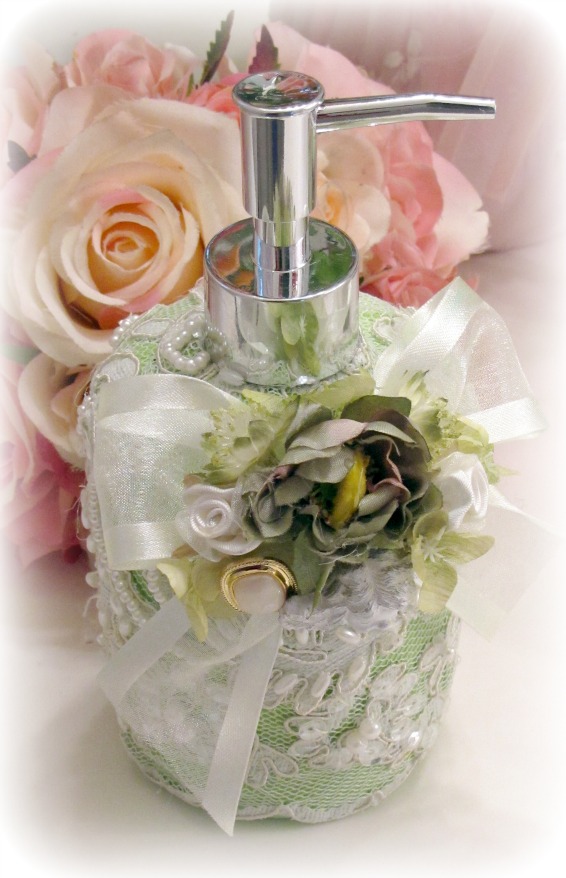
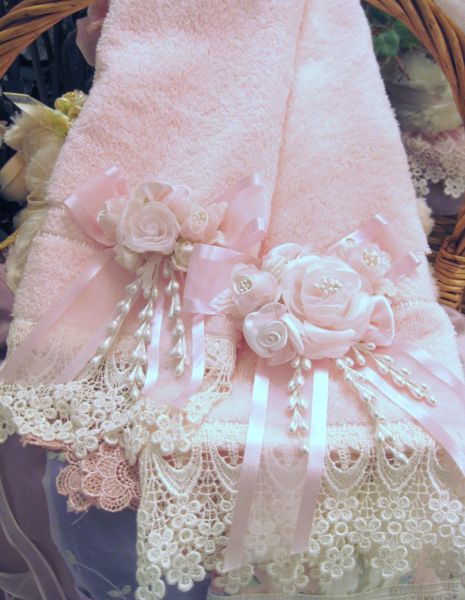
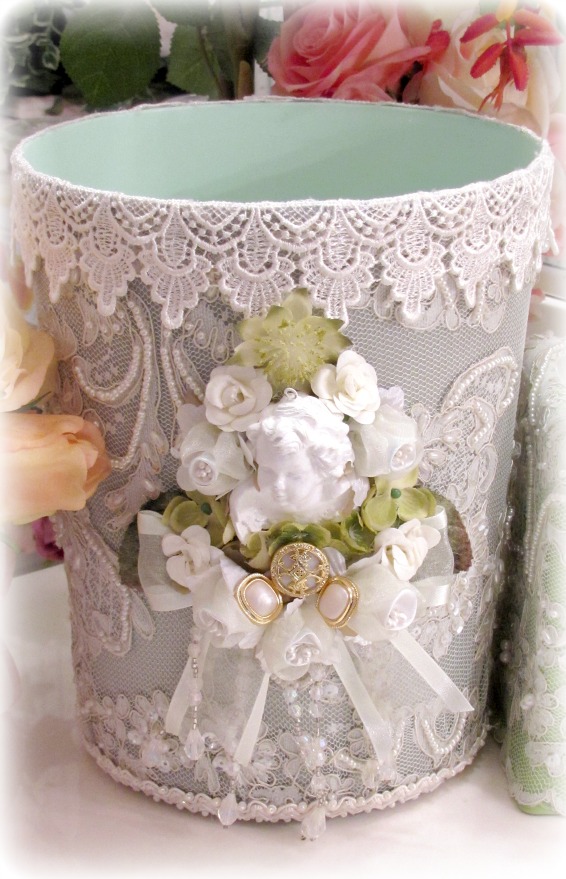
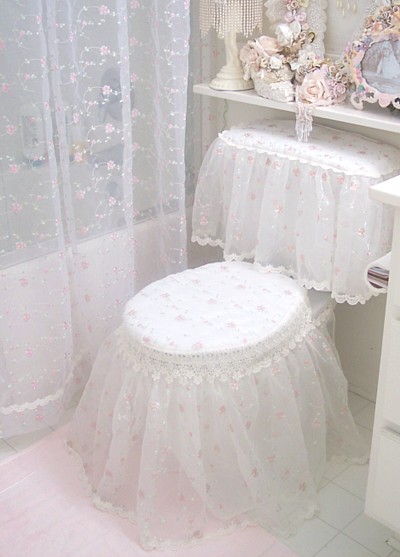
victorian bath items |


Серия сообщений "VICTORIAN":
Часть 1 - Fancy Necklace
Часть 2 - Victorian lamps wowwwwwwwww!!!
...
Часть 13 - victorian items
Часть 14 - victorian wedding album
Часть 15 - victorian bath items
Часть 16 - bejeweled bottles
Часть 17 - faberge
Часть 18 - faberge2
|
Метки: victorian items |
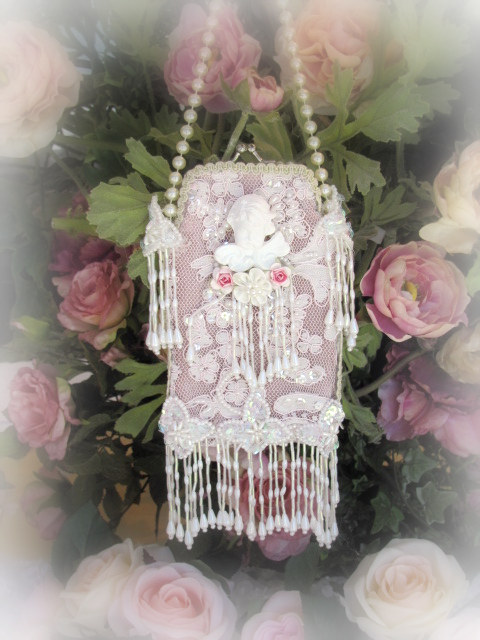
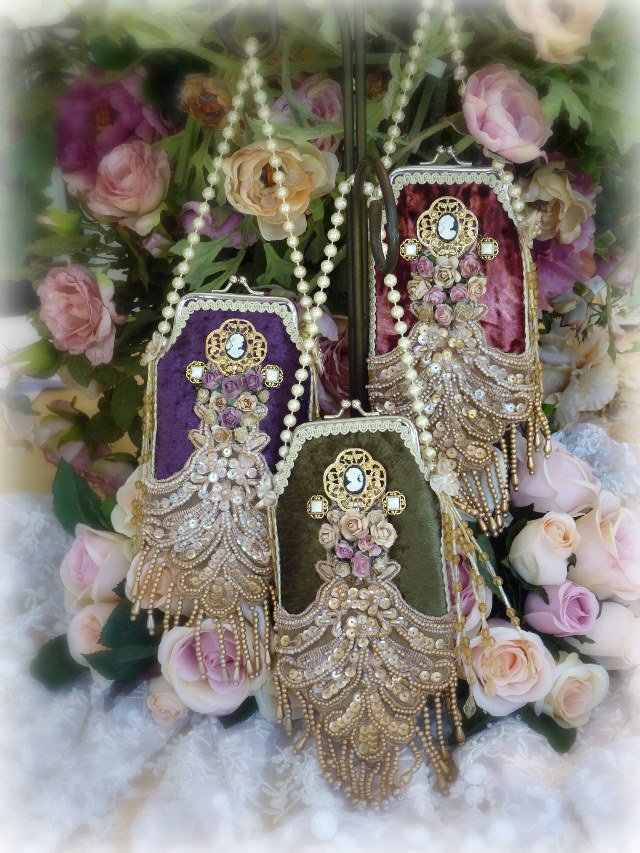
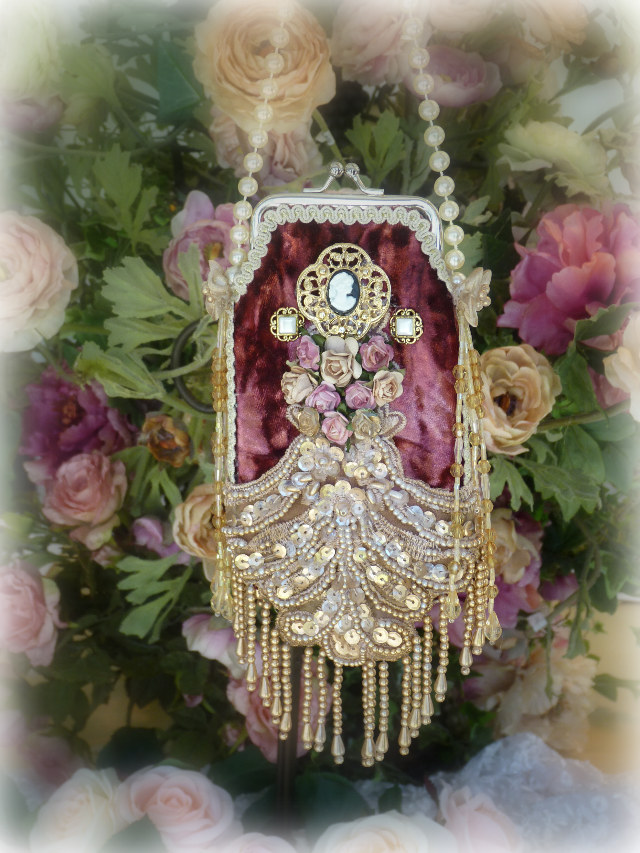
victorian bags |
|
Метки: victorian bag |
decorative bottles |
Метки: decorative bottles |
beaded doll house items |
Метки: miniature beads |
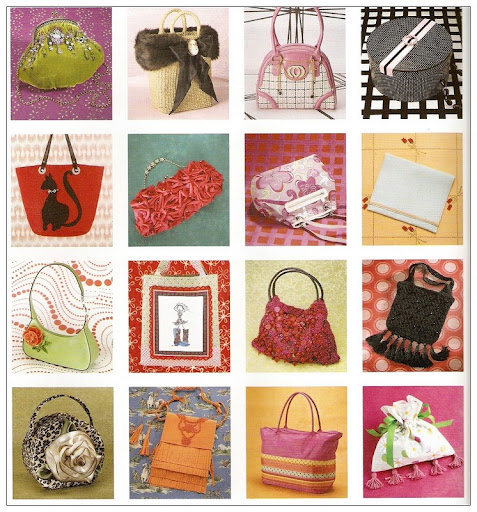
bags |
Метки: bags |