


 Дешевые авиабилетыВыгодные цены, удобный поиск, без комиссии, 24 часа. Бронируй сейчас – плати потом!
 Я - фотографПлагин для публикации фотографий в дневнике пользователя. Минимальные системные требования: Internet Explorer 6, Fire Fox 1.5, Opera 9.5, Safari 3.1.1 со включенным JavaScript. Возможно это будет рабо
 ОткрыткиПерерожденный каталог открыток на все случаи жизни

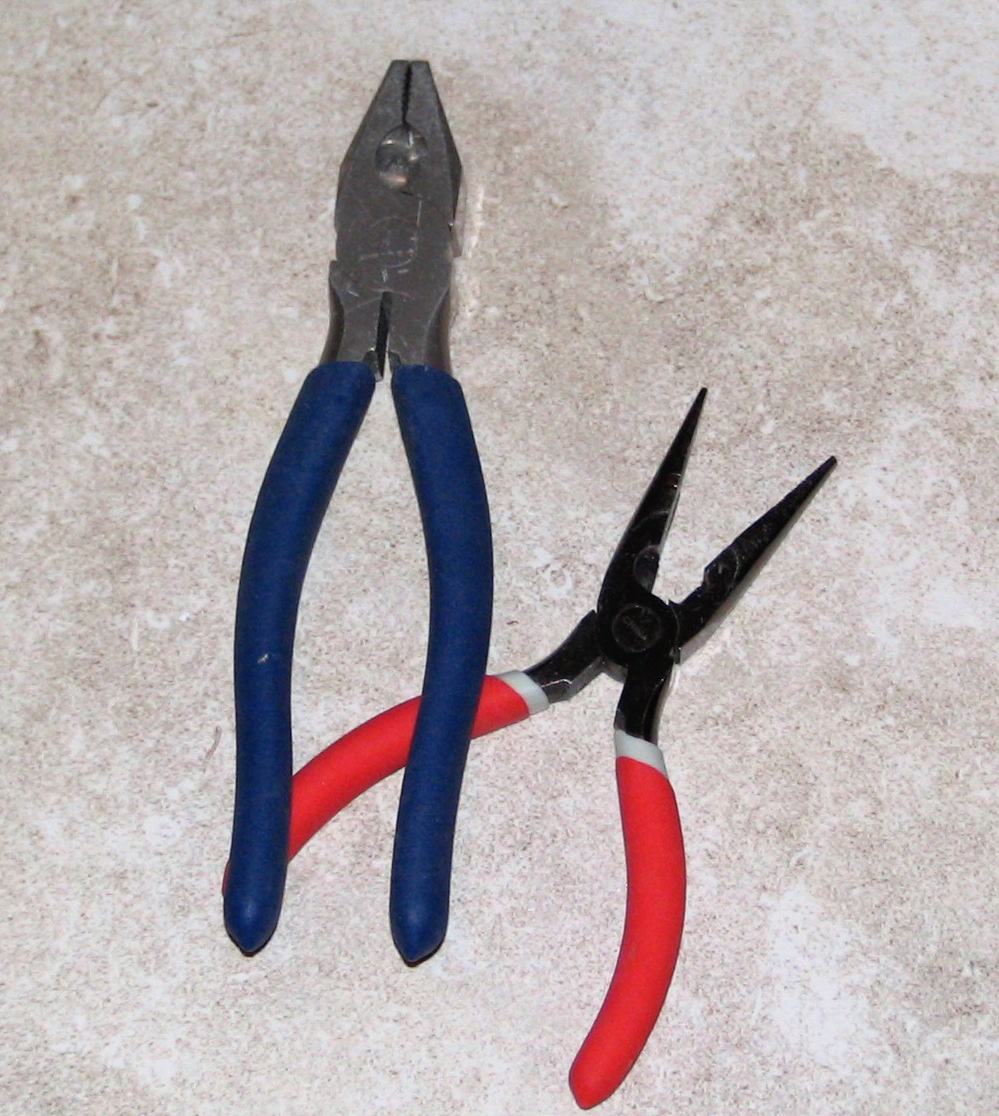
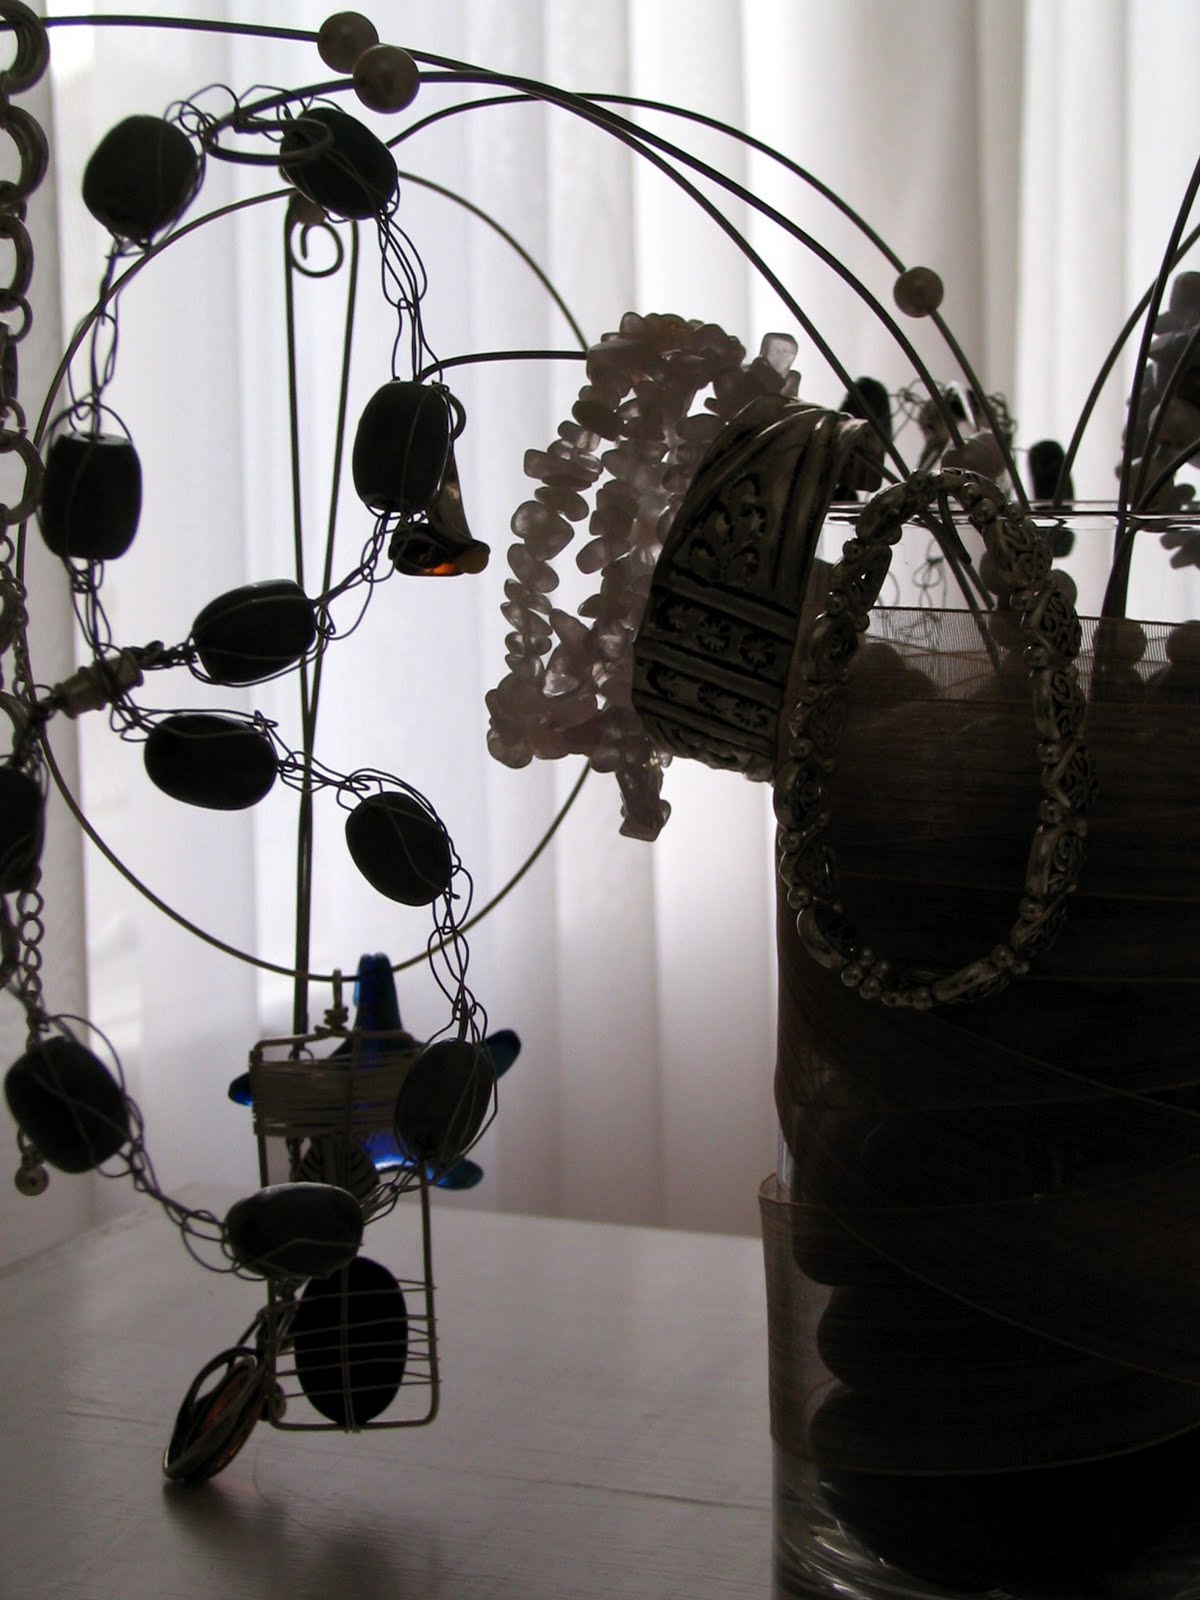
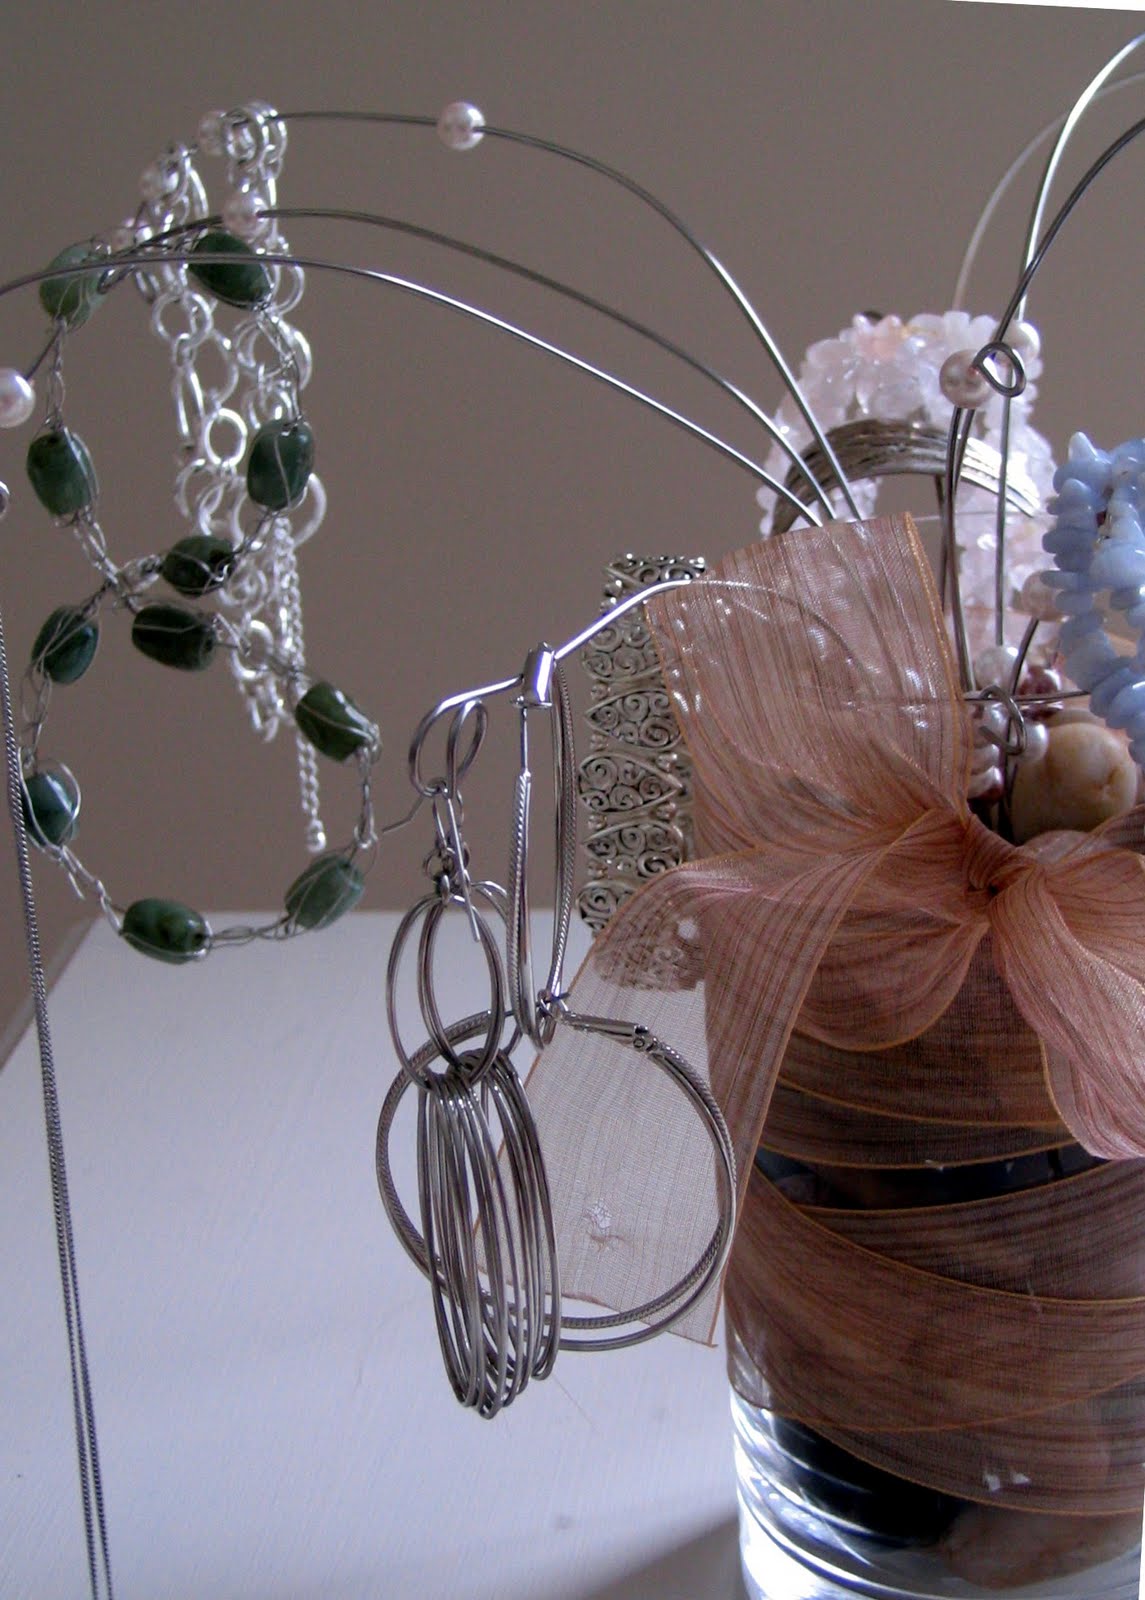
whisk into jewelry holder |


 3) It is time to decorate. I had glass pearls on hand, so I threaded some of those on the wires:
 4) Use your pliers to roll the wire ends so that the beads won't fall off, and so that you won't poke out your eyes when sleepily selecting necklaces. I rolled the wire downwards, but if I were to redo, I'd roll them the other way around so that they hold my jewelery better:
 5) 6) and 7) When done all the "stems", stick the whisk into a vase, fill the jar up with rocks or pretty stones, or even marbles. This will add weight for stability and hide the handle of the whisk. Decorate said vase with ribbons if desired. Hang up jewelery and admire the prettiness:

Серия сообщений "Kitchen Items":
Часть 1 - spoon shade
Часть 2 - Cool lampshade
...
Часть 12 - out of foil
Часть 13 - coffee bean trea
Часть 14 - whisk into jewelry holder
Часть 15 - cinnamon sticks miniatures
Часть 16 - DIY Zip Tie Chandelier
...
Часть 36 - coffeeeeeeeee
Часть 37 - with coffee bean
Часть 38 - kitchen ware
Метки: accessories recycle kitchen items |
sand paper and crayons t-shirt |
by Cindy Hopper
This is a super simple sandpaper printing technique that will keep your kids busy and make one cute shirt! The best part about this fun little craft is that the supplies were bought at the Dollar Store, even the T-shirt! We used crayons we already had so we only spent $2.00 on our new T-shirt.
Supplies for Sandpaper Prints
good quality crayons, a t-shirt, iron and fine sand paper. Our package of sandpaper had a selection and we used the finest. The more coarse sandpaper will provide more texture. Give them all a try!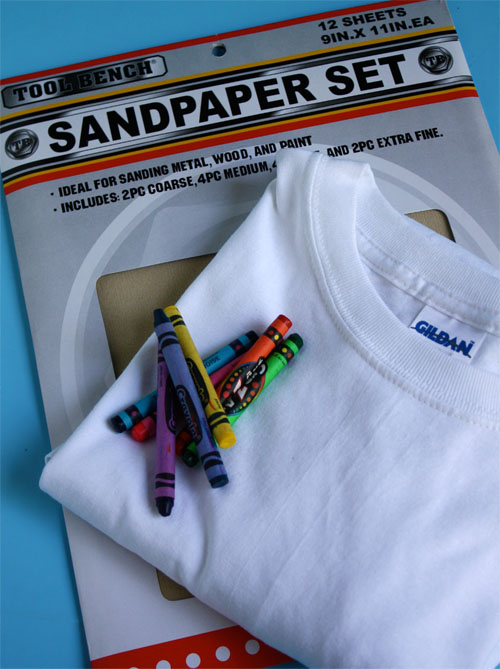
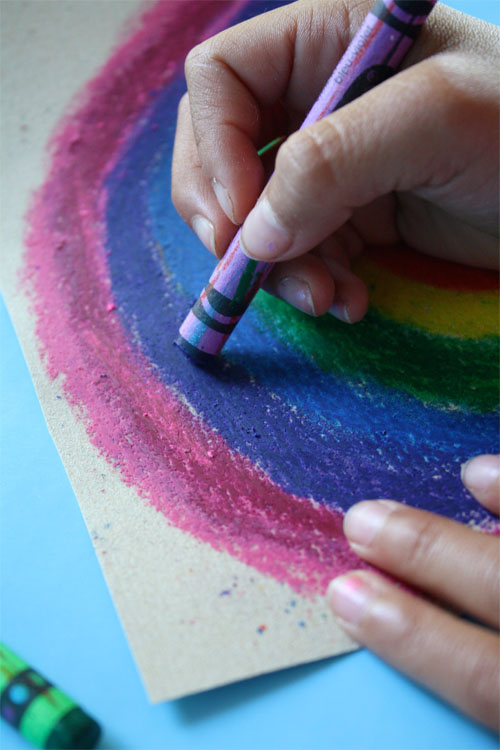
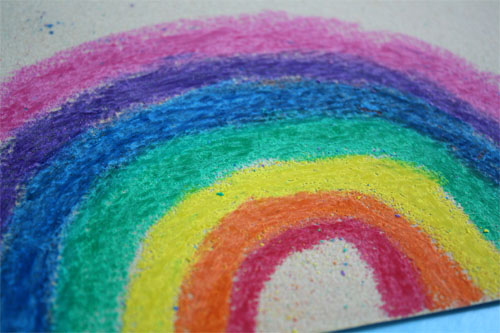
Color a fun design on the sandpaper. Remind children that the image will be reversed. Once the design is colored go back over the design giving the sandpaper an extra thick layer of crayon.
Place a piece of cardboard inside the t-shirt to keep the design from bleeding through to the back of the shirt. Position the sandpaper right side down on the t-shirt.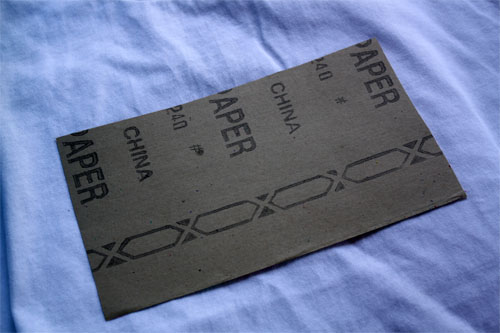
Place a piece of parchment paper or paper towel on top of the sandpaper to protect the iron. Iron, on cotton setting, the sandpaper for about 30 second. Gently lift one edge and make sure you have a good print before totally removing the sandpaper. Iron a bit more if you need to transfer more of the crayon.
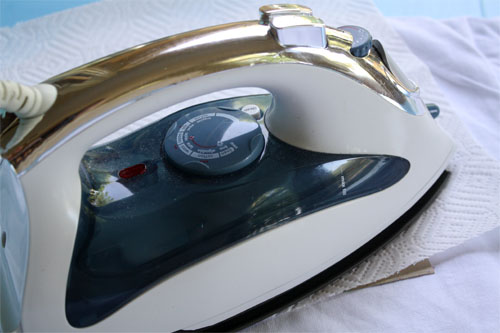
Remove the sandpaper. You’ll have a print with loads of cool texture–not to mention a new darling t-shirt. To set the color, place a couple of paper towels on top of the design and iron. This will remove some of the extra wax. Toss t-shirt in the dryer for about 20 minutes to set the color. Launder by itself the first time.
Метки: t-shirt re-fashion |
t-shirt refashion |


Метки: t-shirt re-fashion |
storing ideas |


Серия сообщений "Storage":
Часть 1 - Wall Pockets
Часть 2 - Creative Shopping Bags
...
Часть 25 - interesting items
Часть 26 - wall storage
Часть 27 - storing ideas
Часть 28 - hanging scarves
Часть 29 - ribbon organizer
...
Часть 44 - storage
Часть 45 - ideas
Часть 46 - useful
|
Метки: storage |
diy duster |
Метки: duster recycle blanket |
lamps out of recycled items |
Серия сообщений "China & Kitchen ware":
Часть 1 - decorative plates
Часть 2 - lamps out of recycled items
Часть 3 - painting easy
Метки: lamps recycled items |
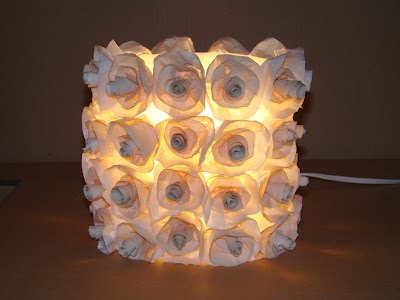
plastic cups into a lamp |
The lamp of disposable cups
 An unusual piece of furniture or decoration for a party can be made of ordinary plastic cups. They're cheap and available to everyone.Glasses come in different sizes and colors, thanks to this you can make a totally unique ball.
 When you mount the next series, make sure that their edges will be behind the edges of the previous series. So light will accept domed.
 With each close must consume less and less glasses. When you're satisfied, attach to the top of the dowels placed a cross, as shown. For these plugs the lamp can be hung from the ceiling.
 Move the lamp to the center of the dome. Lamps shall be energy efficient to keep it heated and melted glasses.
Метки: plastic cups lamps |
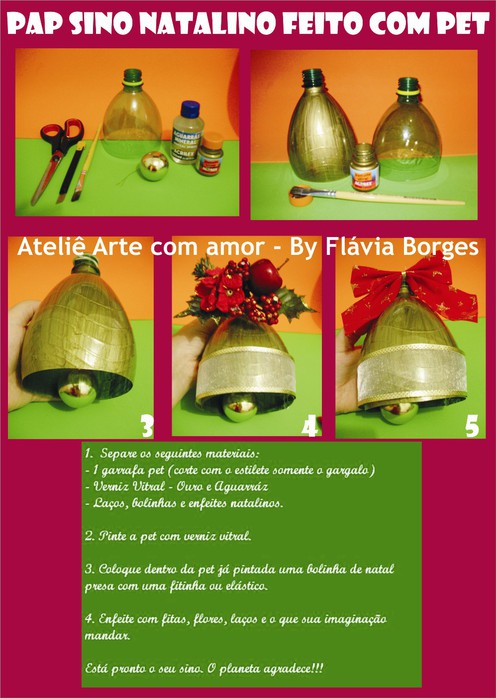
bell out of plastic bottle |
Метки: plastic bottles decor |
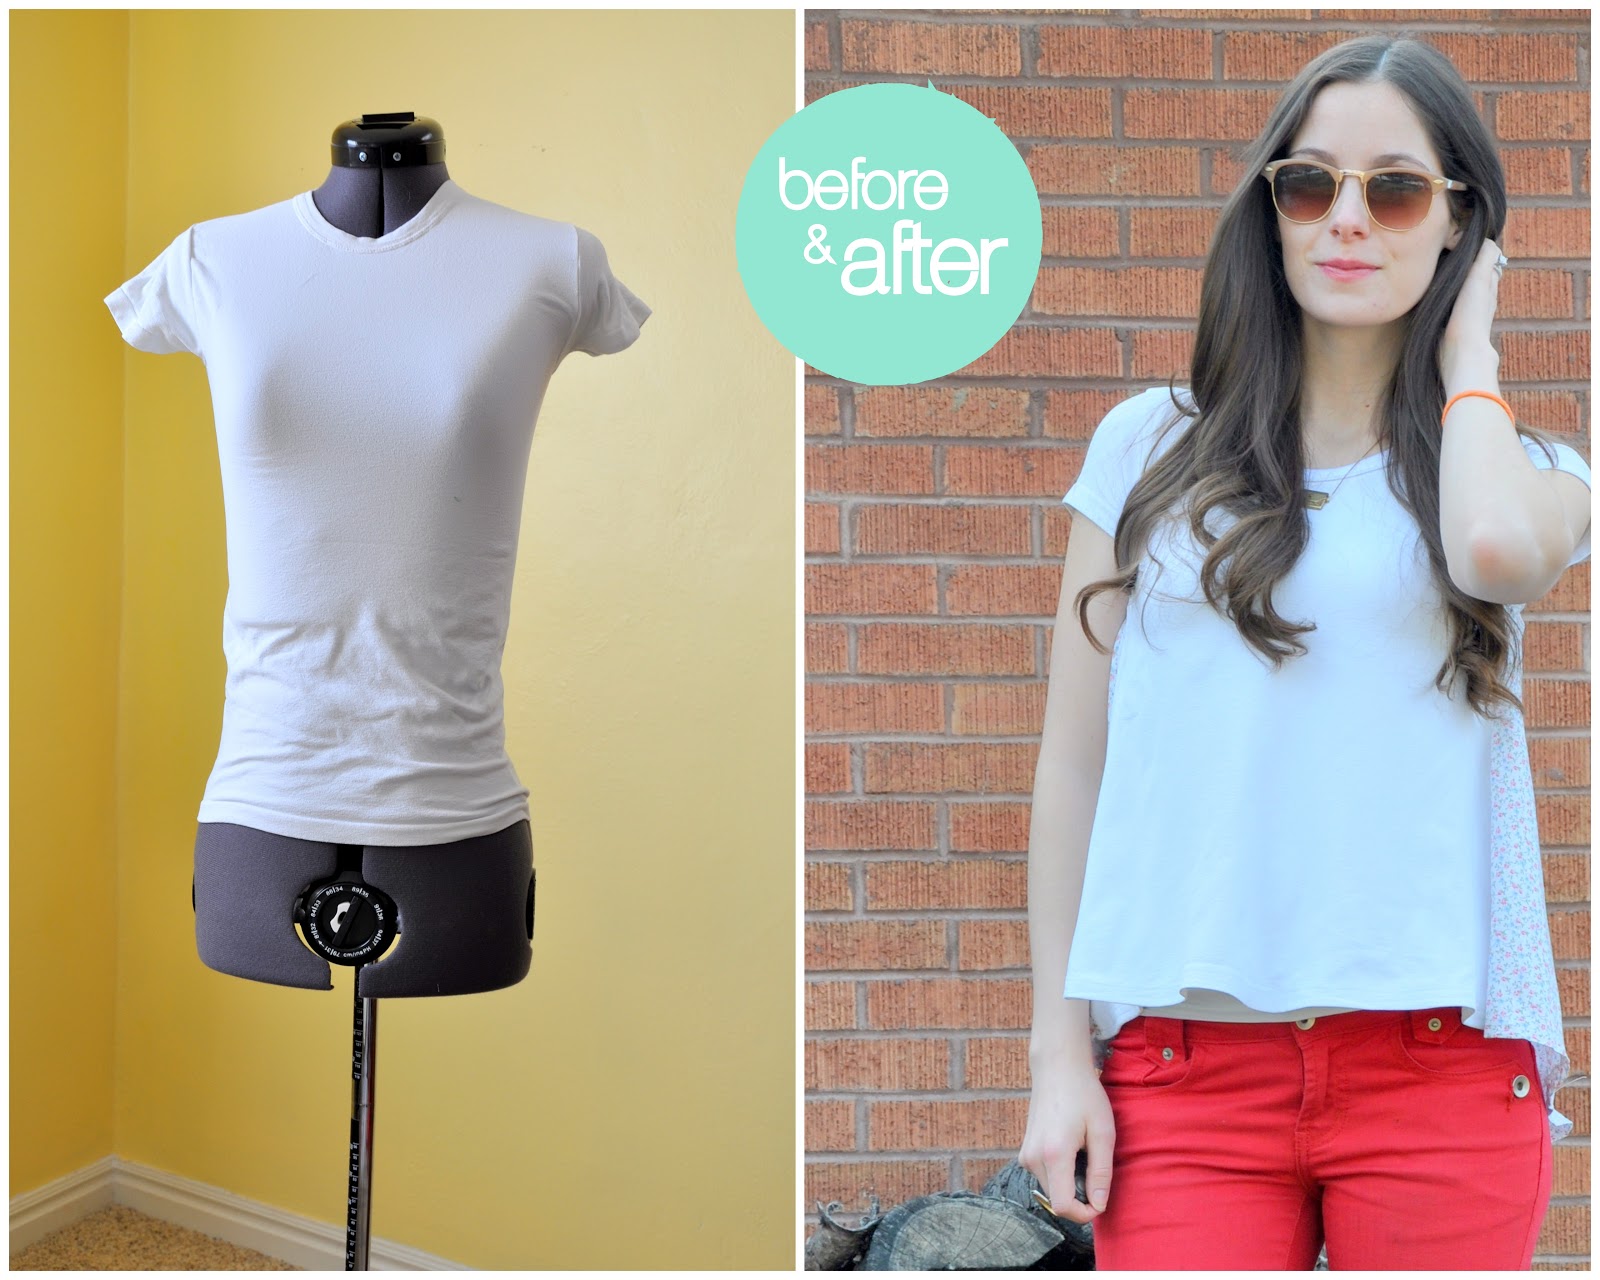
re-fashion a sweater |
Victoria’s Secret is kind of a weird retailer. They don’t bring in a lot of new merchandise and usually have the same items for years on end. This sweater is one example of an item that I know they have sold for at least the past 5 years.

I’ve always admired it and thought it looked really comfortable and cute. However, when it goes on sale it is still
$49 which once shipping and handling is tacked on, makes it about a $60 sweater. I’ve just never been able to justify it.
Doing a DIY of this is so simple I’ve managed to look past it for years. All you need is a sweater a size or two too big, a belt with a leather buckle and a sewing machine.

Step 1: Off to one side of the sweater, cut up to about the chest area, then diagonal to the neck-band, around the neckband and straight down.

Step 2: Hem the seams very carefully with the longest straight stitch that your machine has. Hemming this has to be done in kind of a weird way so that the seams are not noticeable.

Where the white lines are, hem by folding the sweater inside. Where the red lines are, hem by folding the sweater out.
Step 3: Fold the area that you sewed the hems by folding out about 3-4 inches creating a collar. Your hems should be invisible. Tack the collar down with a handful of hand sewn stitches evenly spaced around the edge.
Step 4: The leather belt I used had canvas on it so I used scissors to cut the stitches from the leather removing the canvas part. The same thing can be done to remove a leather strap. You should cut nothing more than the stitches because the leather is meant to remain intact.
Step 5: Fold the sweater over so that the larger flap’s hem sits right at the hip of the opposite side. With a skinny needle and thread and using the same holes that the strap was sewn on with, sew the buckle on to the sweater.

Метки: re-fashion |
milk jug lamp |
.JPG)

.jpg) .
..jpg) .
..jpg) .
..jpg) .
..jpg) .
..jpg) .
.
Метки: plastic bottles lamps |
blanket edging |


 was cutting and either added a little to each 1” fringe or subtracted a little so I wouldn’t have a really skinny or really fat strip at the corners. I did cut through 2 layers at a time and it was no problem to keep my cuts even. The tape really helped and cutting into it a little at times didn’t dull the rotary cutter like hitting the edge of a ruler would. I cut the corners out with a scissors to avoid overcutting into the side strips.

 Step 5 The corners are treated no differently than the sides. As the strips are pulled through and around the corners you will get a rounding of the corner and can keep going along the next side. No fancy stuff just the same thing you have been doing on the sides.


Серия сообщений "No-Sew":
Часть 1 - tie a scarf
Часть 2 - Night dress from a cloth
...
Часть 5 - easy pattern
Часть 6 - scarf vest
Часть 7 - blanket edging
Часть 8 - fun towel
Часть 9 - painted dress
...
Часть 13 - cat house
Часть 14 - no sew
Часть 15 - circle vest
Метки: no-sew embllishment |
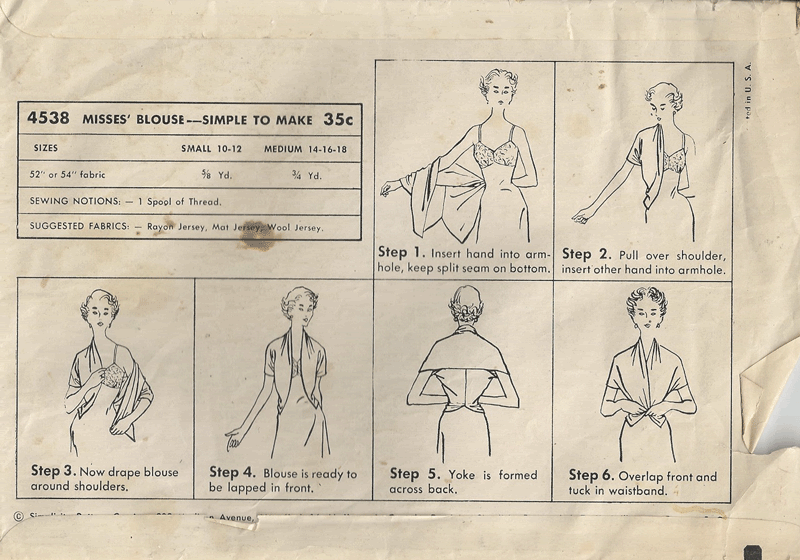
easy top |
Метки: sewing |
2 seams top |

Remember that 50s Simplicity pattern I posted recently? Well, curiosity got the better of me, and I justhad to try it. Don’t mind the fact that it’s really too chilly for a short sleeve top (that’s what sweaters are for, anyway)–the simpliness of the top appealed to me. Would it look a flattering as the envelope illustration?
The pattern piece is just a large rectangle. For a size small you only need 5/8 yard of material, for a medium-large 3/4. The pattern calls for a jersey material, so I opted for a beautiful pink, wool-blend jersey I picked up on a recent fabric shopping trip. I love the drape, although 100% wool jersey is still far superior–though a bit too expensive for my pocket book at the moment!

The only seams on the top make up a T shape along the back. The two short ends of the rectangle are sewn together to about halfway to allow for the waist-split, and the one of the long edges is sewn together, leaving an opening at either fold for the arms to pass through. Super easy! The edges are turned under and hemmed with catchstitches and a hook and eye sewn at the waist. I serged all the raw edges just to keep things neat as well. The top took me less than an evening to complete from start to finish.


Putting the top on and arranging all the fullness that falls around the neckline is a bit tricky, which is why this top won’t go on my list of “favorite blouses I wear all the time”. Because it is a bit fiddly to wear. I could tack down the folds permanently with stitches, but too be honest, I’m on to other projects right now and just don’t feel like dealing with it. lol. It’s a sweet top, but will probably be relegated to occasions that I’m not engaged in a lot of movement (on most days I sprawl and flail about a lot)–so things like dinner out.

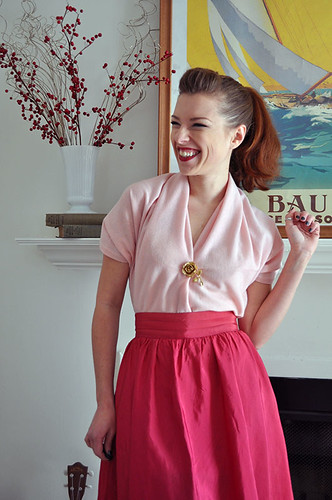
Метки: sewing recycle t-shirt |
houses by night |
Ready for a bit of DIY love? :)
 A little town at night.. isn’t it sweet?!
There are a few tricks to making this DIY a success, all to do with finding the perfect image.
1. What you’re looking for is a picture of a house/castle/building that’s taken front-on (perspective works, but not as well). You could take it from your favourite magazine, an old calendar, or even print some from the internet. Up to you! In fact, you could even print a photo of your house if you have one!
2. The print needs to have a bit of space either side of the house to wrap around to the back of the votive.
3. It’s best to choose a picture that is higher in the middle than at the sides, and sides that are about the same height.
4. Choose a house that has some windows visible.
5. If possible, find a picture that has nothing printed on the back. If you can’t, not to worry – it could add a nice effect (like mine did)!
I was lucky enough to have found some old photo books at a market in Germany that hold some of the coolest black and white photos from the War era.. perfect for a project like this one!
Here’s what you’ll need:

Step 1: You want to start cutting and finish cutting at around the same height on either side of your picture. Use the scissors to cut straight in to where your house begins, cut around the top of the house, and cut straight back out to the edge at around the same height as you cut in. Make sense? Maybe this will help:

Step 2: Trim away any other areas you don’t want, but don’t trim the sides yet.
Step 3: Using your Xacto knife and a cutting mat, carefully cut out any windows you want the light to shine through. I found at this stage (because my paper was a bit fragile) it was easiest to press the knife in, rather than drag it.

 Step 4: Wrap the image into a cylinder (size is up to you) and sticky tape it together. Trim around the top if it doesn’t quite match, as well as any excess where you joined it.
Step 5: Add your battery operated tea light, and wait until it gets dark!
Note: Because paper (of course) is highly flammable, the use of battery operated candles over real ones is imperative. However, if you would rather use real candles, try wrapping the image around the outside of a small glass jar and use that to hold your candle (but still keep an eye on it) :)


Серия сообщений "Candles":
Часть 1 - candles out of baby jars
Часть 2 - candles
...
Часть 28 - thread tealight
Часть 29 - mesh candle holder
Часть 30 - houses by night
Часть 31 - simple candle light
Часть 32 - candles
...
Часть 39 - with coffee bean
Часть 40 - candle holder
Часть 41 - diy candleholder
Метки: candle holder recycle paper cards |
recycled jeans shirt |
Метки: recycle jeans kitchen items shoes |
suitcase shelves |
Серия сообщений "Shelves":
Часть 1 - Ideas for BOOKS
Часть 2 - Ideas from old books
...
Часть 22 - books hidden shelf
Часть 23 - amazing bookshleves
Часть 24 - suitcase shelves
Часть 25 - storing shoes
Часть 26 - more ideas
...
Часть 32 - shoe shelves
Часть 33 - storage
Часть 34 - ideas
Метки: shelves suitcase recycle |
amazing bookshleves |
Серия сообщений "Shelves":
Часть 1 - Ideas for BOOKS
Часть 2 - Ideas from old books
...
Часть 21 - interesting items
Часть 22 - books hidden shelf
Часть 23 - amazing bookshleves
Часть 24 - suitcase shelves
Часть 25 - storing shoes
...
Часть 32 - shoe shelves
Часть 33 - storage
Часть 34 - ideas
Серия сообщений "Pipes & Tubes":
Часть 1 - DIY Bracelet
Часть 2 - Lamp out of PVC pipes
...
Часть 18 - faux metal wall hanging
Часть 19 - mirror
Часть 20 - amazing bookshleves
Часть 21 - lamp from rope+plastic tubes
Часть 22 - glitter mirror
...
Часть 28 - box
Часть 29 - breakfast table
Часть 30 - wall art
|
Метки: bookshelves |
mat from remnant |
Серия сообщений "Rugs & floor":
Часть 1 - Kids Rug
Часть 2 - Bathroom decoration
...
Часть 17 - fix burned carpet
Часть 18 - recycled rugs
Часть 19 - mat from remnant
Часть 20 - carpet of remnants
Часть 21 - diy rug
...
Часть 24 - fluffy rug
Часть 25 - rug
Часть 26 - rug
Метки: rug recycle fabric |


