Анна Москвичева ...
Le Borse di Mirtilla №15 2017 - (0)Издательство: Sprea SPA Язык: итальянский Журнал посвящен созданию сумок: вязание крючком...
РАДУЖНЫЙ ДЖЕМПЕР НА ОСНОВЕ "БАБУШКИНОГО КВАДРАТА" - (0)Inside Crochet №132 2021 - (0)
Издательство: Tailor Made Publishing Ltd Язык: английский Журнал по вязанию крючком из Ве...
Вязание крючком. Брюггское кружево для начинающих. Видео, схемы, описания. Продолжение следует... - (0)Вязание крючком. Брюггское кружево для начинающих. Видео, схемы, описания. Продолжение следует... ...
Силуэтное вырезание. |
 С помощью этой техники можно,
вооружившись ножницами, бумагой
и творческой задумкой, натворить таких чудес!
Посмотреть разные варианты...

|
Ищем фоны и картинки при помощи цвета. |
Ищем фоны и картинки при помощи цвета.
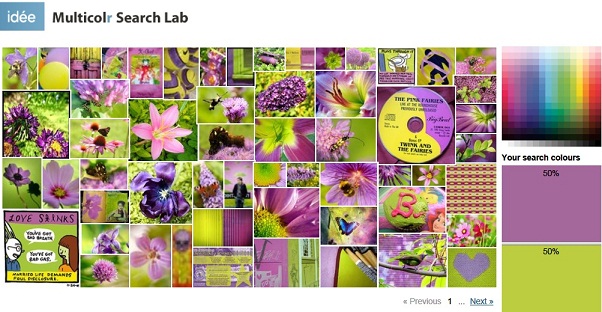
Эти цвета из 10 миллионов самых "интересных" творческих изображений на Flickr.
Используя Piximilar- визуальная технология поиска Вы можете искать коллекцию с помощью цвета. Нужно только сбоку, в Цветовом конструкторе, выбрать нужные вам цвета и нажать их.
Всё остальное сделают за вас, вам останется только выбрать подходящую для вас картинку.
|
Учимся Рисовать в 3Д. |
Учимся Рисовать в 3Д. Я уже сделала дома рисунок.Процесс затягивает.
Делала карандашами,но лучше как показано здесь ,фломастером.
Объём лучше смотрится.Особенно моему младшему сыну понравилось.
Если приглядеться, то в итоге повторить совсем не сложно.
А рисунок выглядит необычно и очень объёмно.
Остаётся теперь только попробовать сделать вам самим.Удивите близких.
ЗДЕСЬ далее...
|
ШТМЛка для начинающих пользователей. |
Перед вами популярный справочник по HTML - языку гипертекстовой размётки документов.
Он часто используется как учебник по HTML, а иногда — как самоучитель.
Нажимаем, выбираем, учимся...

|
Перчатки для использования сенсорных мобильных телефонов |

www.natalme.com/diy-tech-gloves-with-conductive-thread/

|
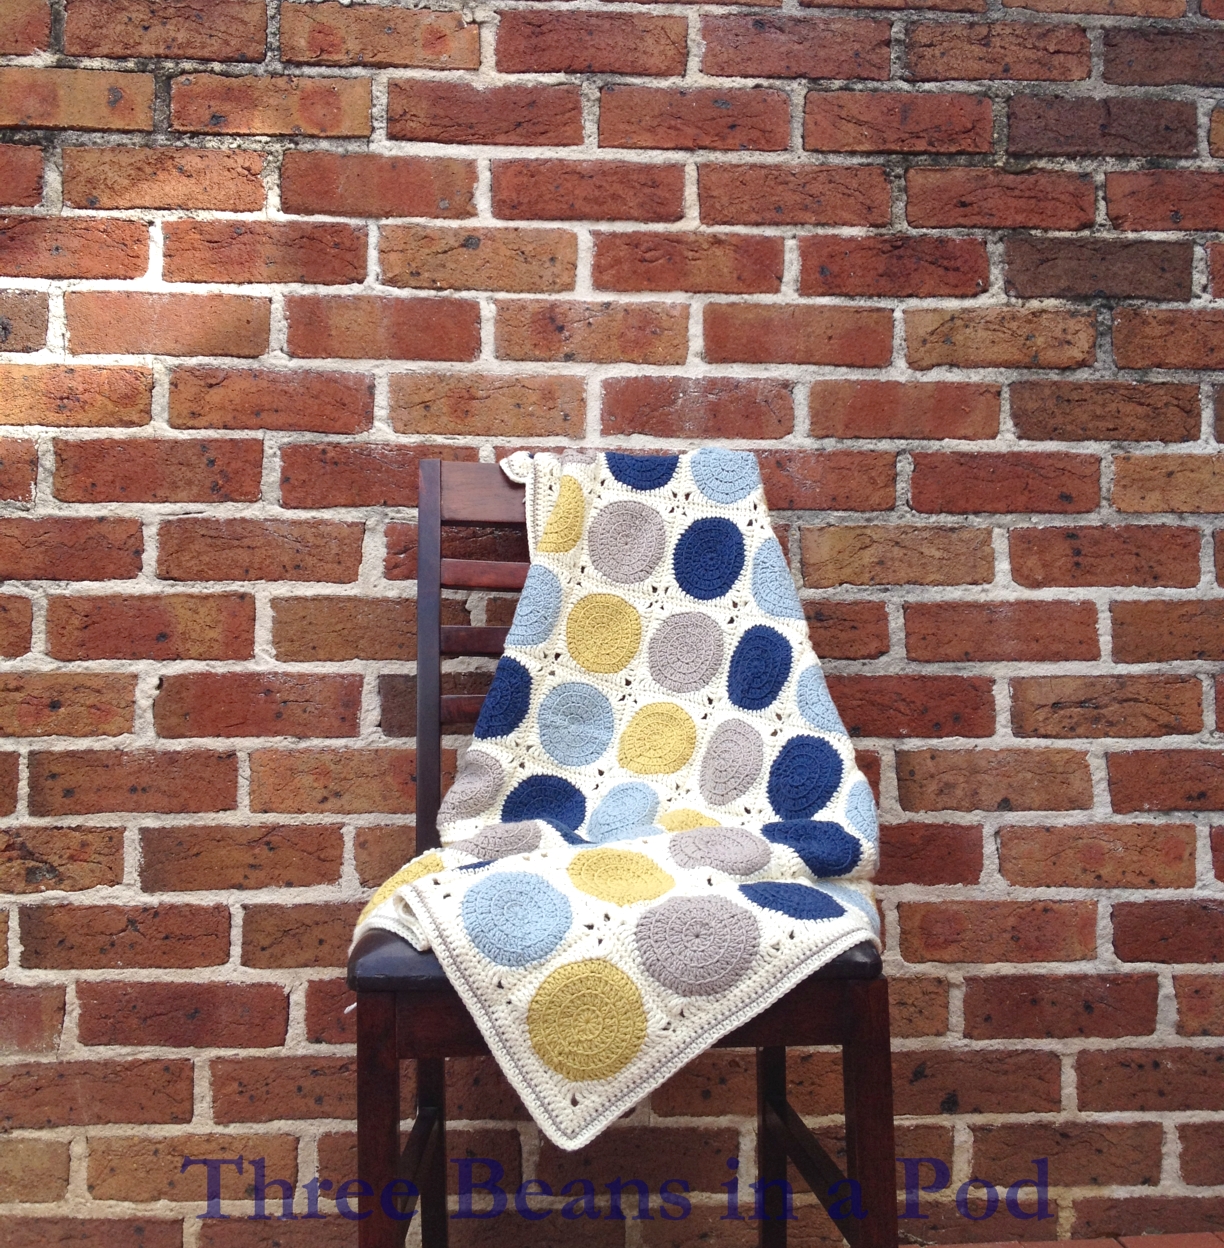
Без заголовка |
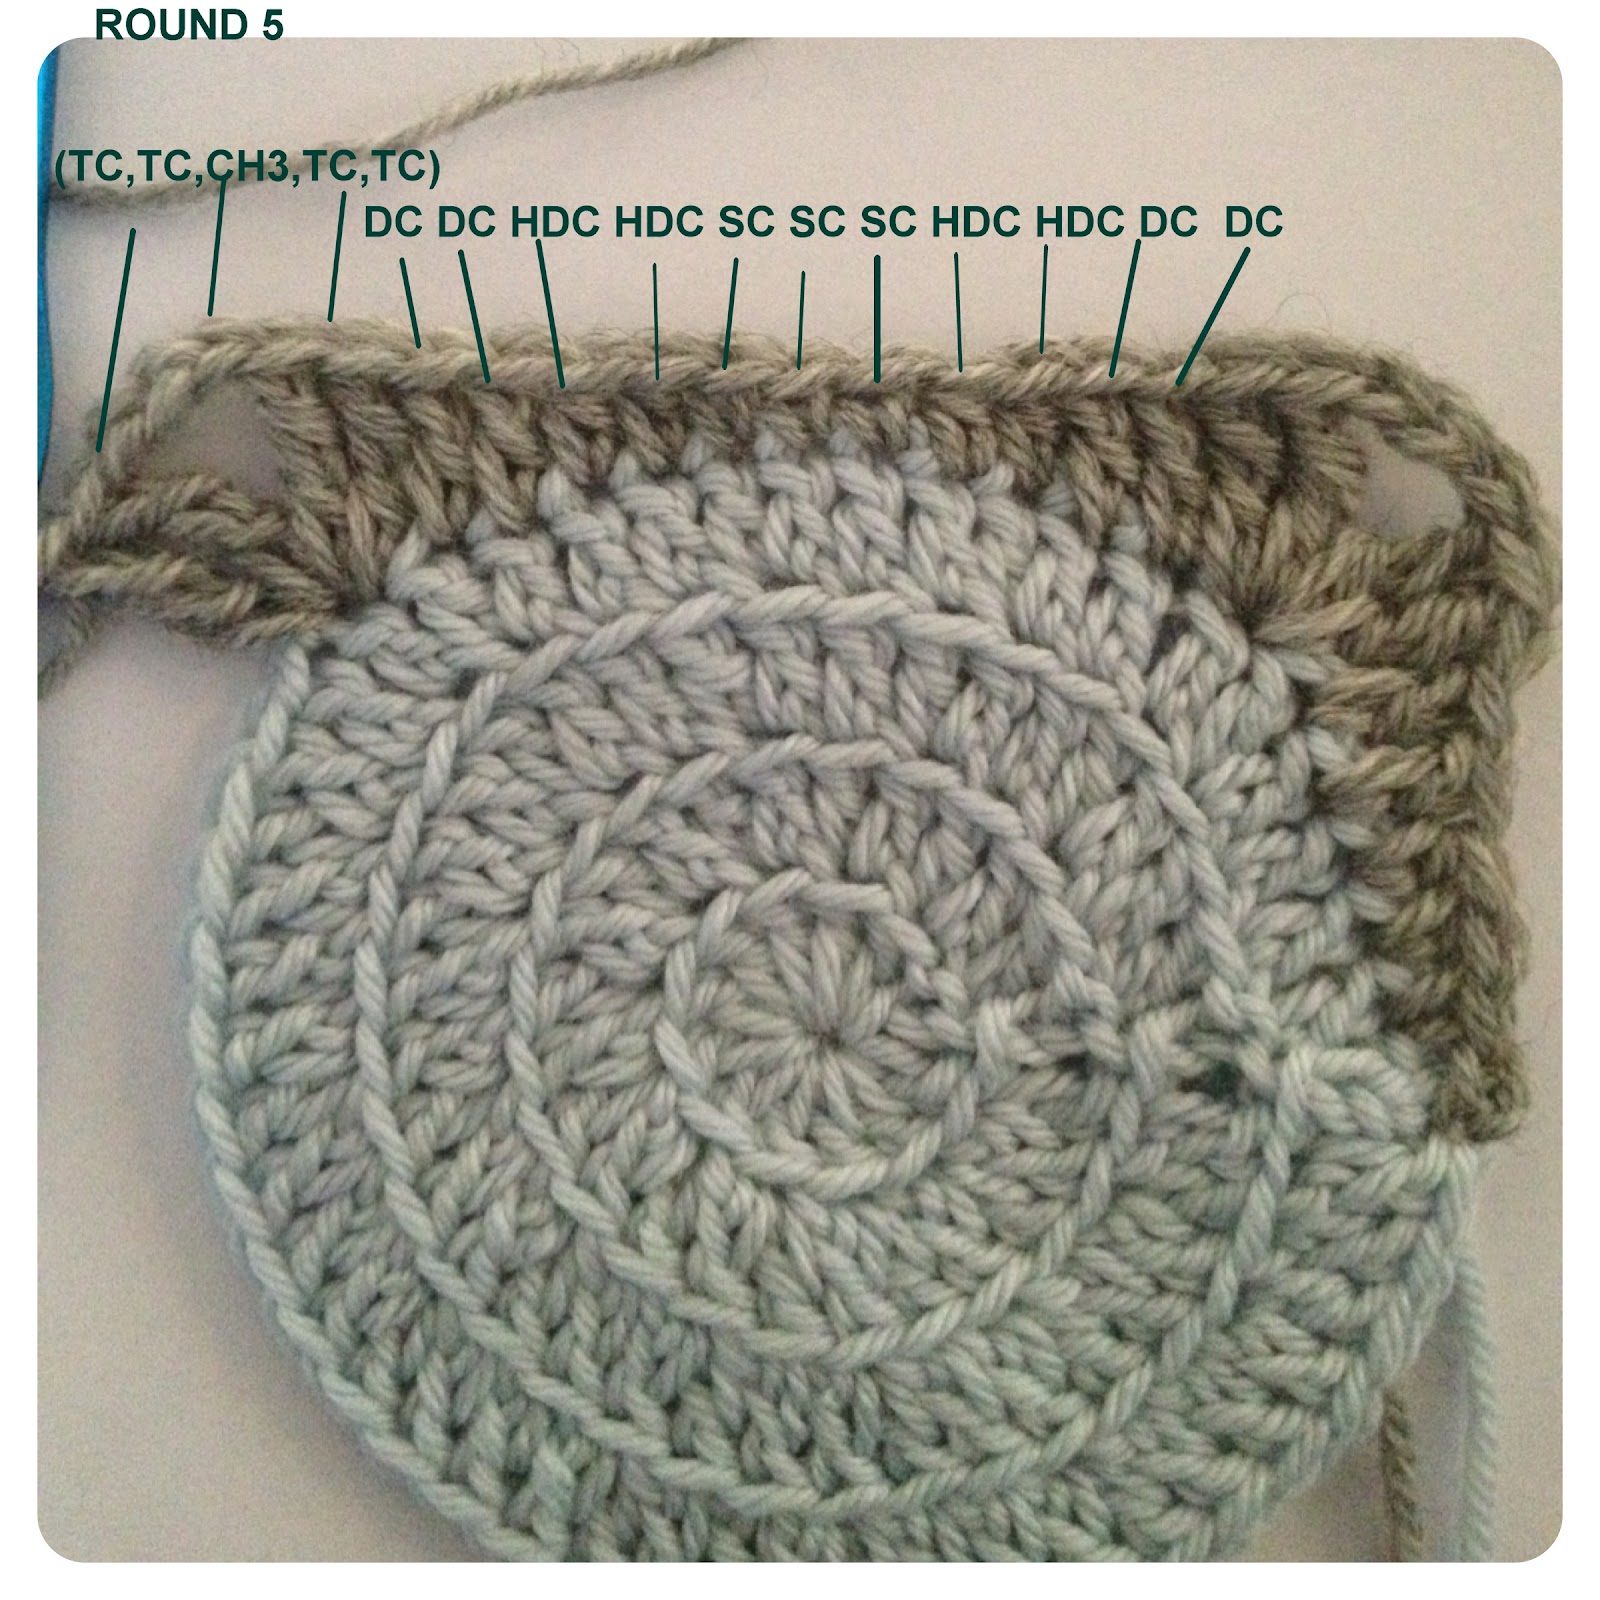
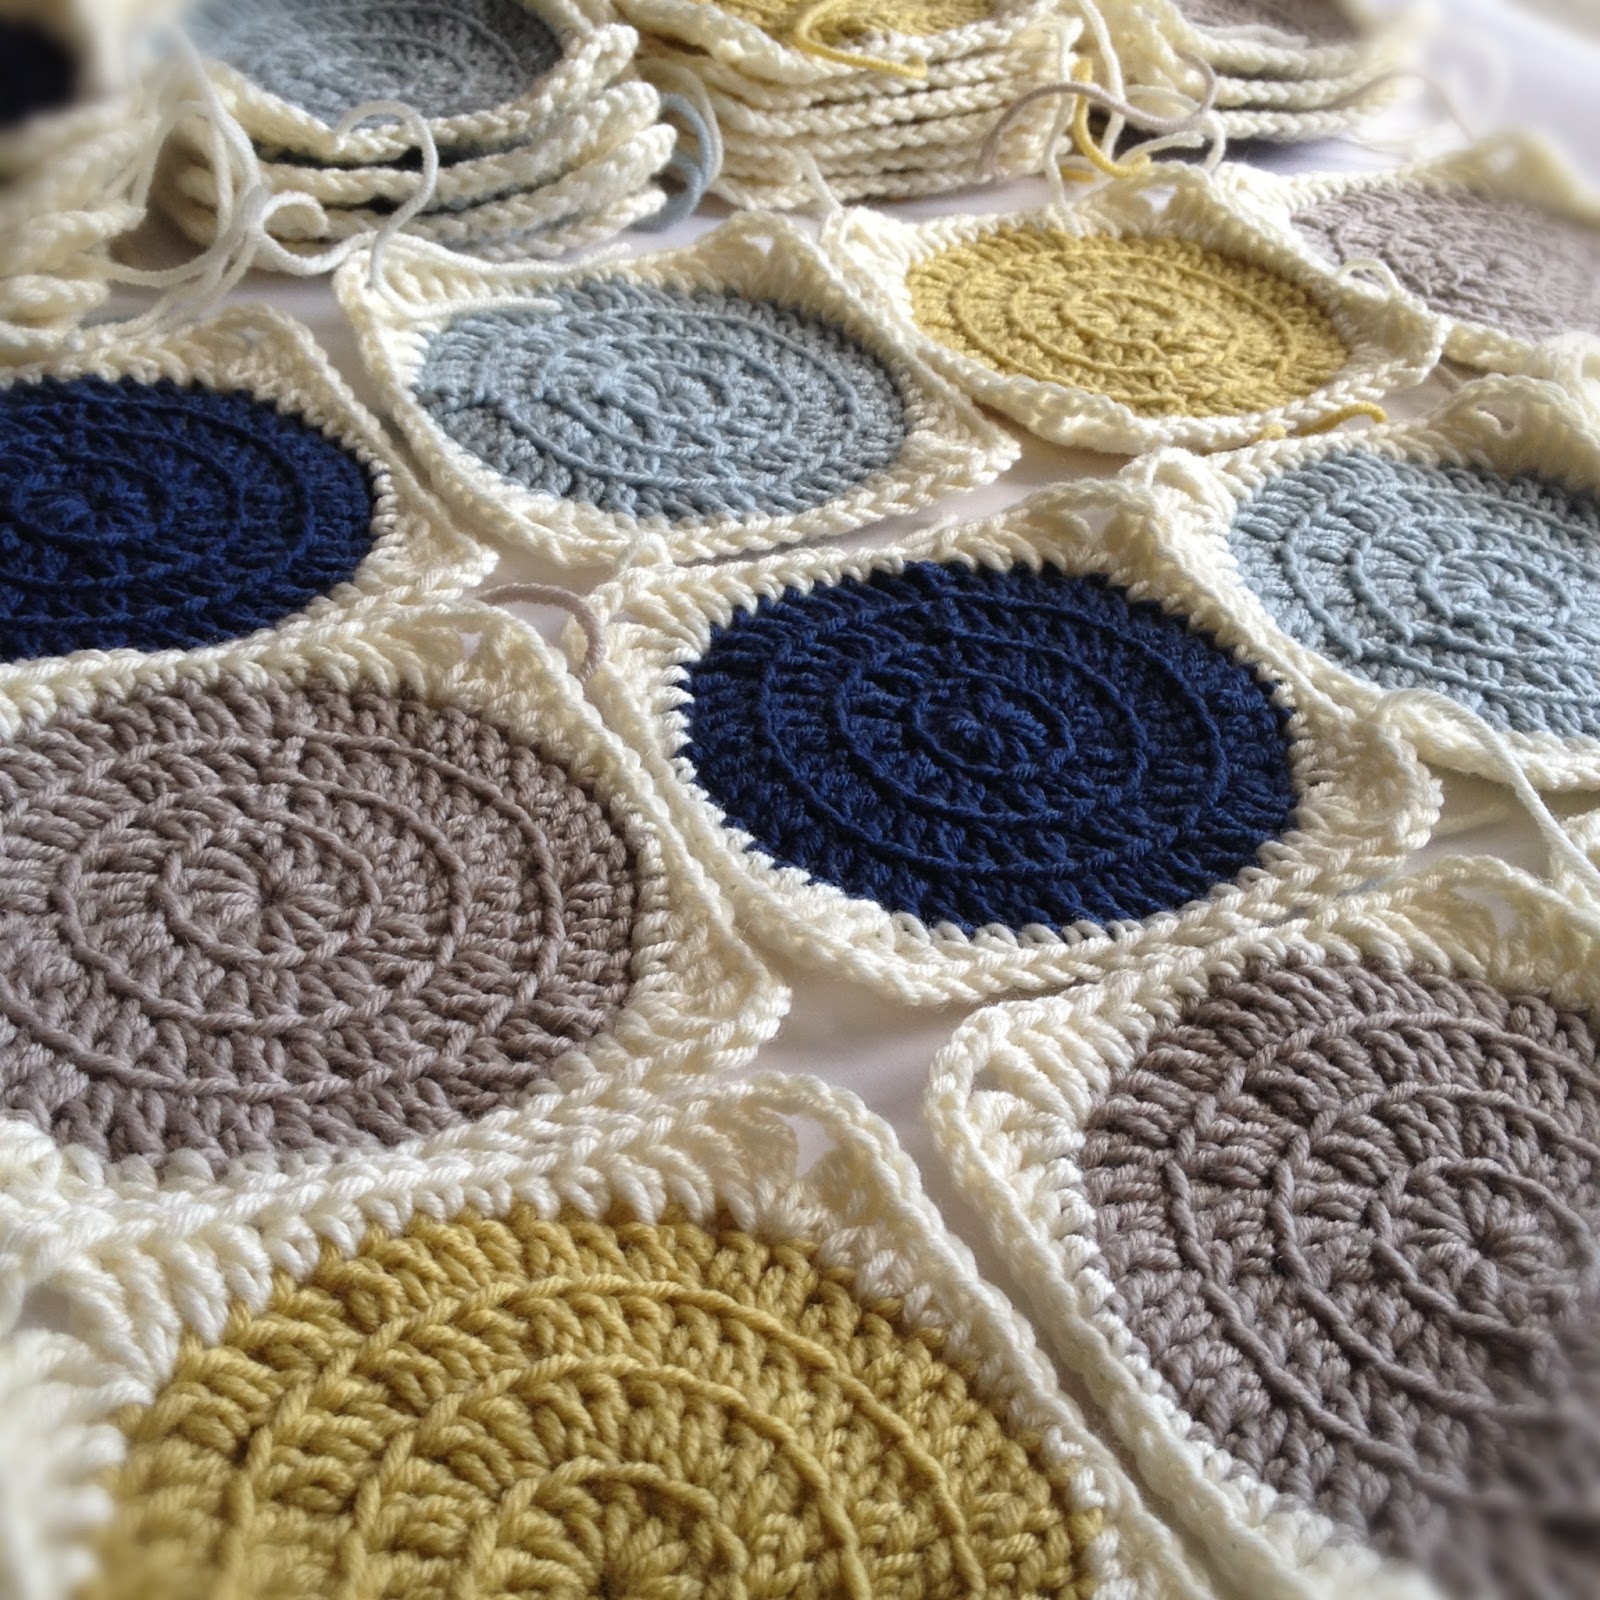
threebeansinapodcrochet.blogspot.com.au/2012/08/retro-circles-tutorial.html


|
Без заголовка |
mcinva-roomontheleft.blogspot.com/2010/01/wigglewiggle.html
.JPG)

.JPG)
.JPG)
.JPG)
.JPG)
.JPG)
.JPG)


|
Круглая винтажная подушка |
источник:
mcinva-roomontheleft.blogspot.com/p/round-vintage-pillow.html
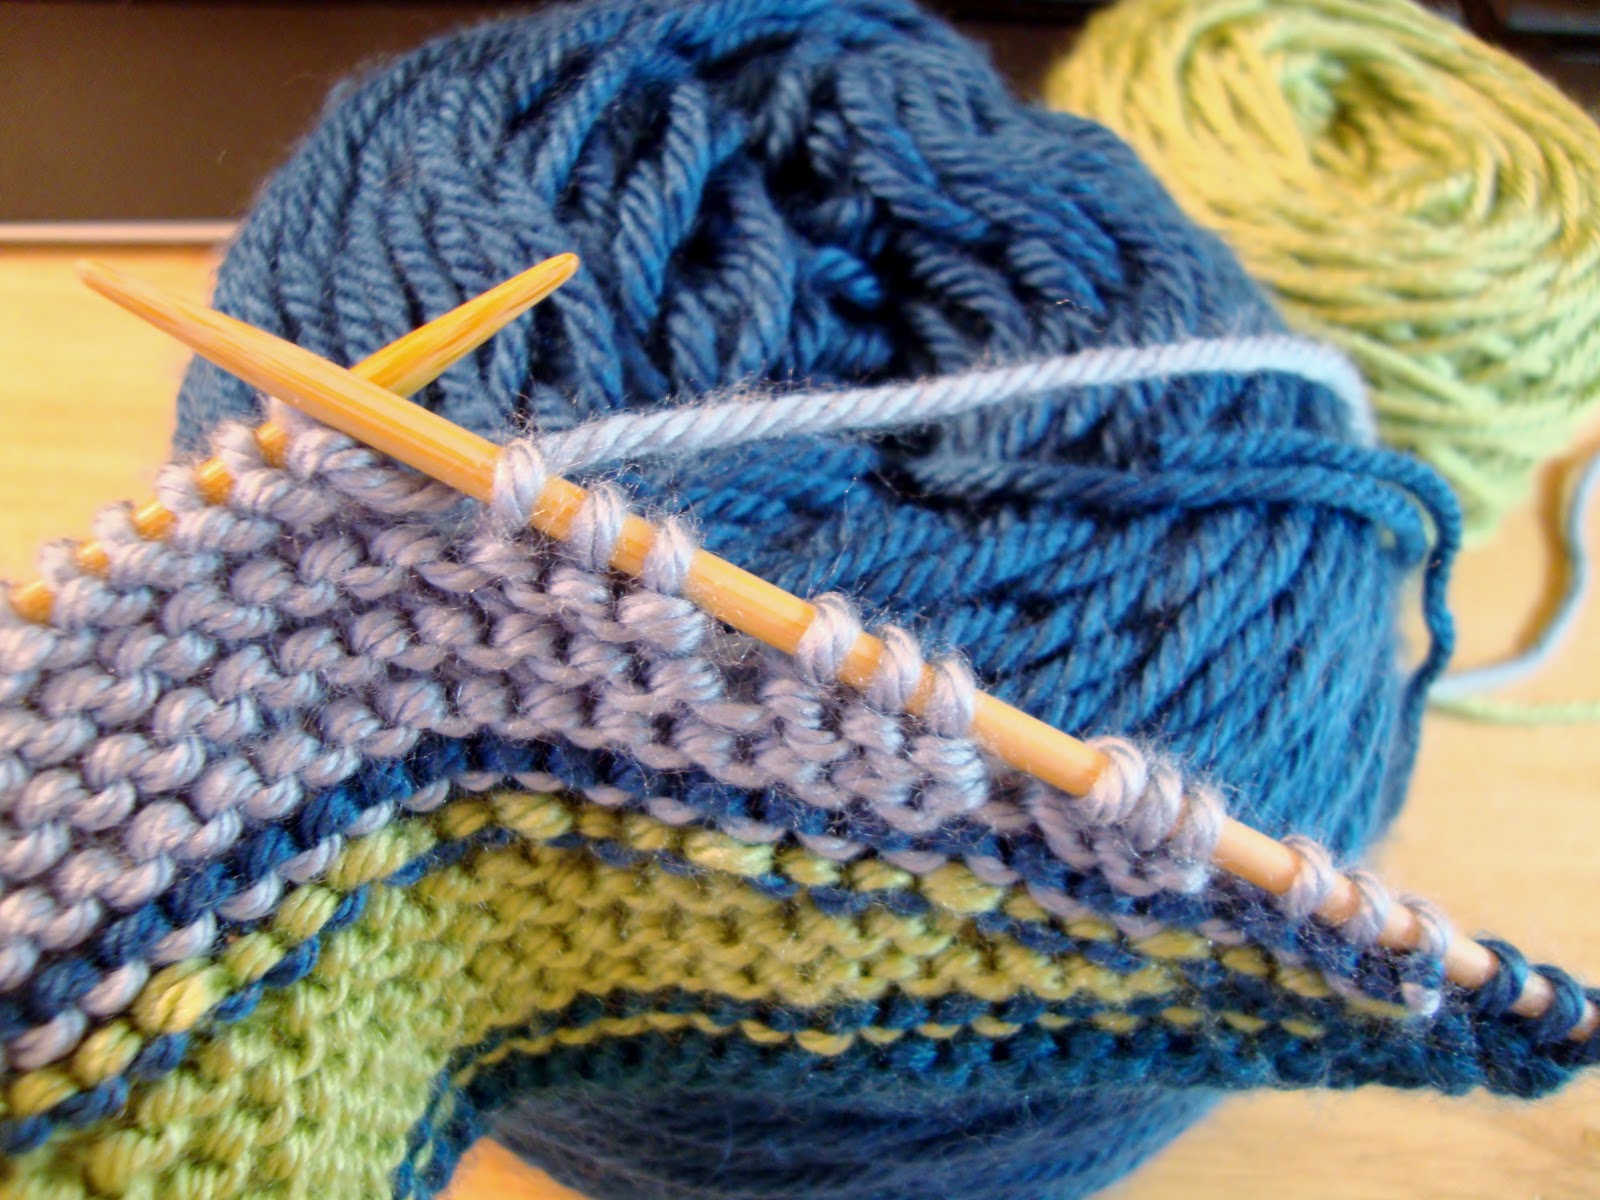
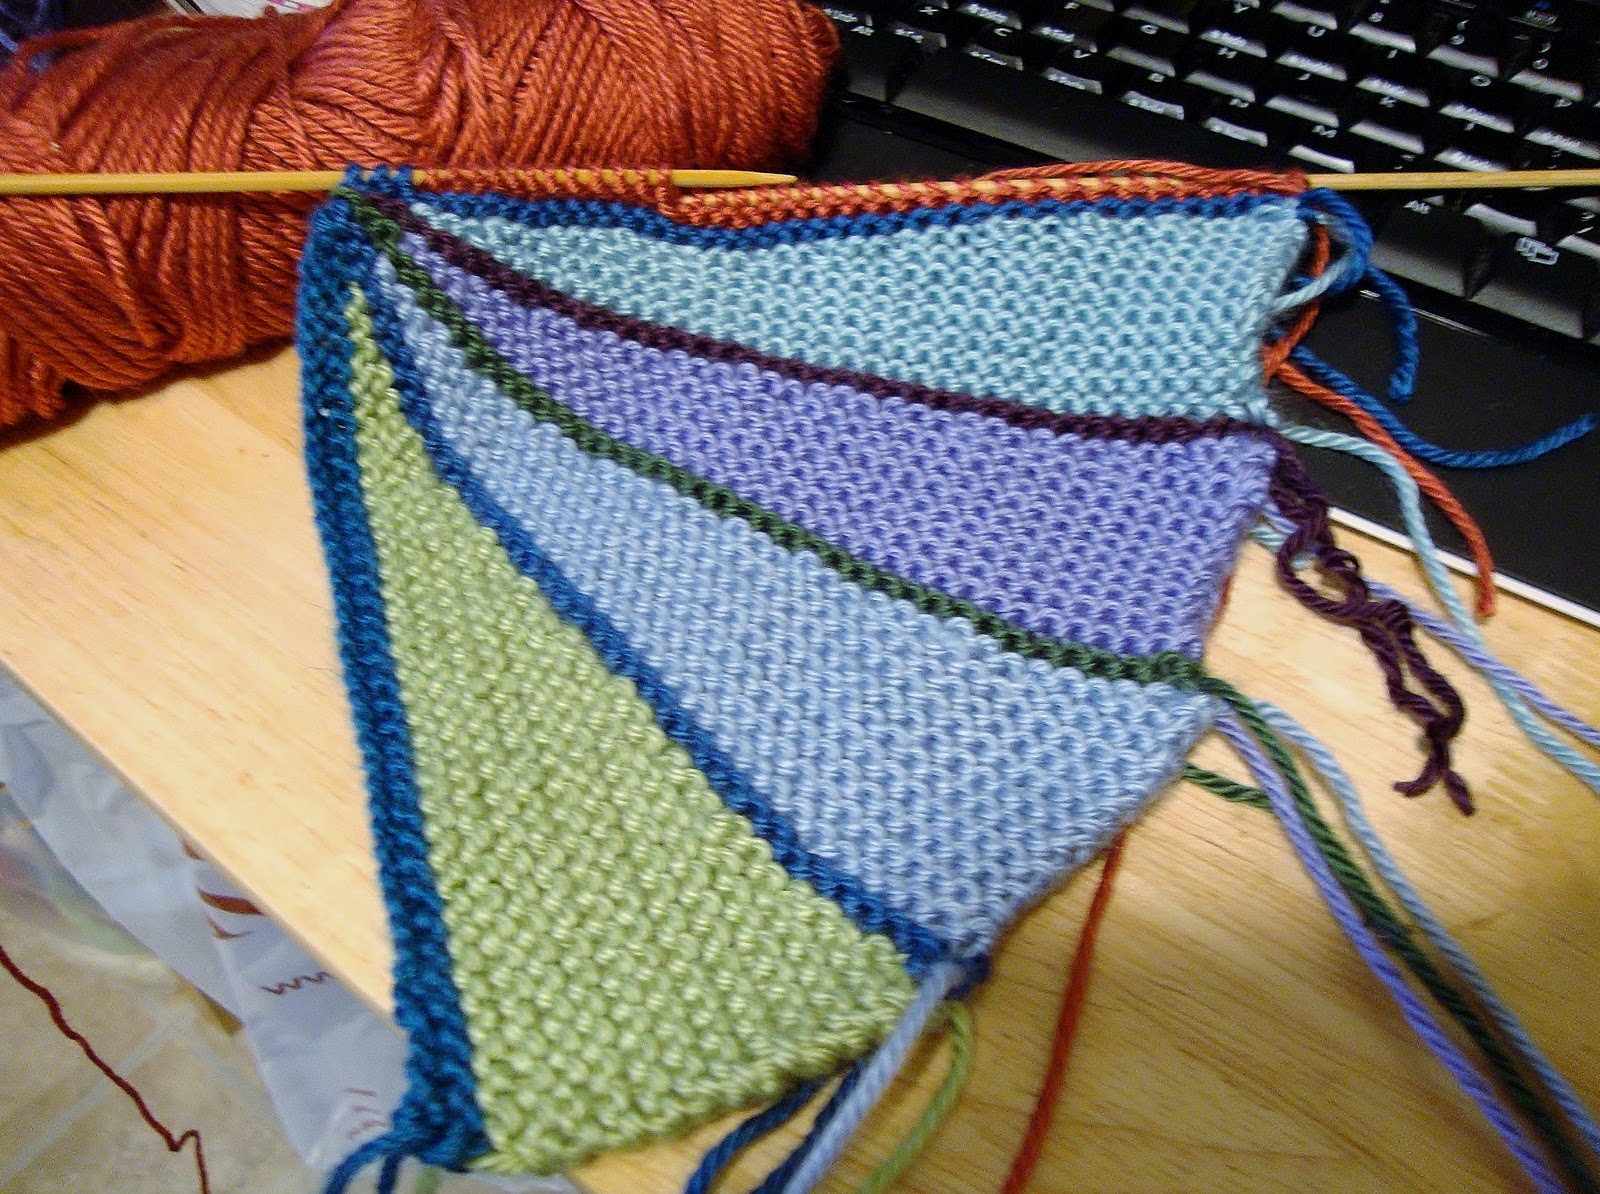
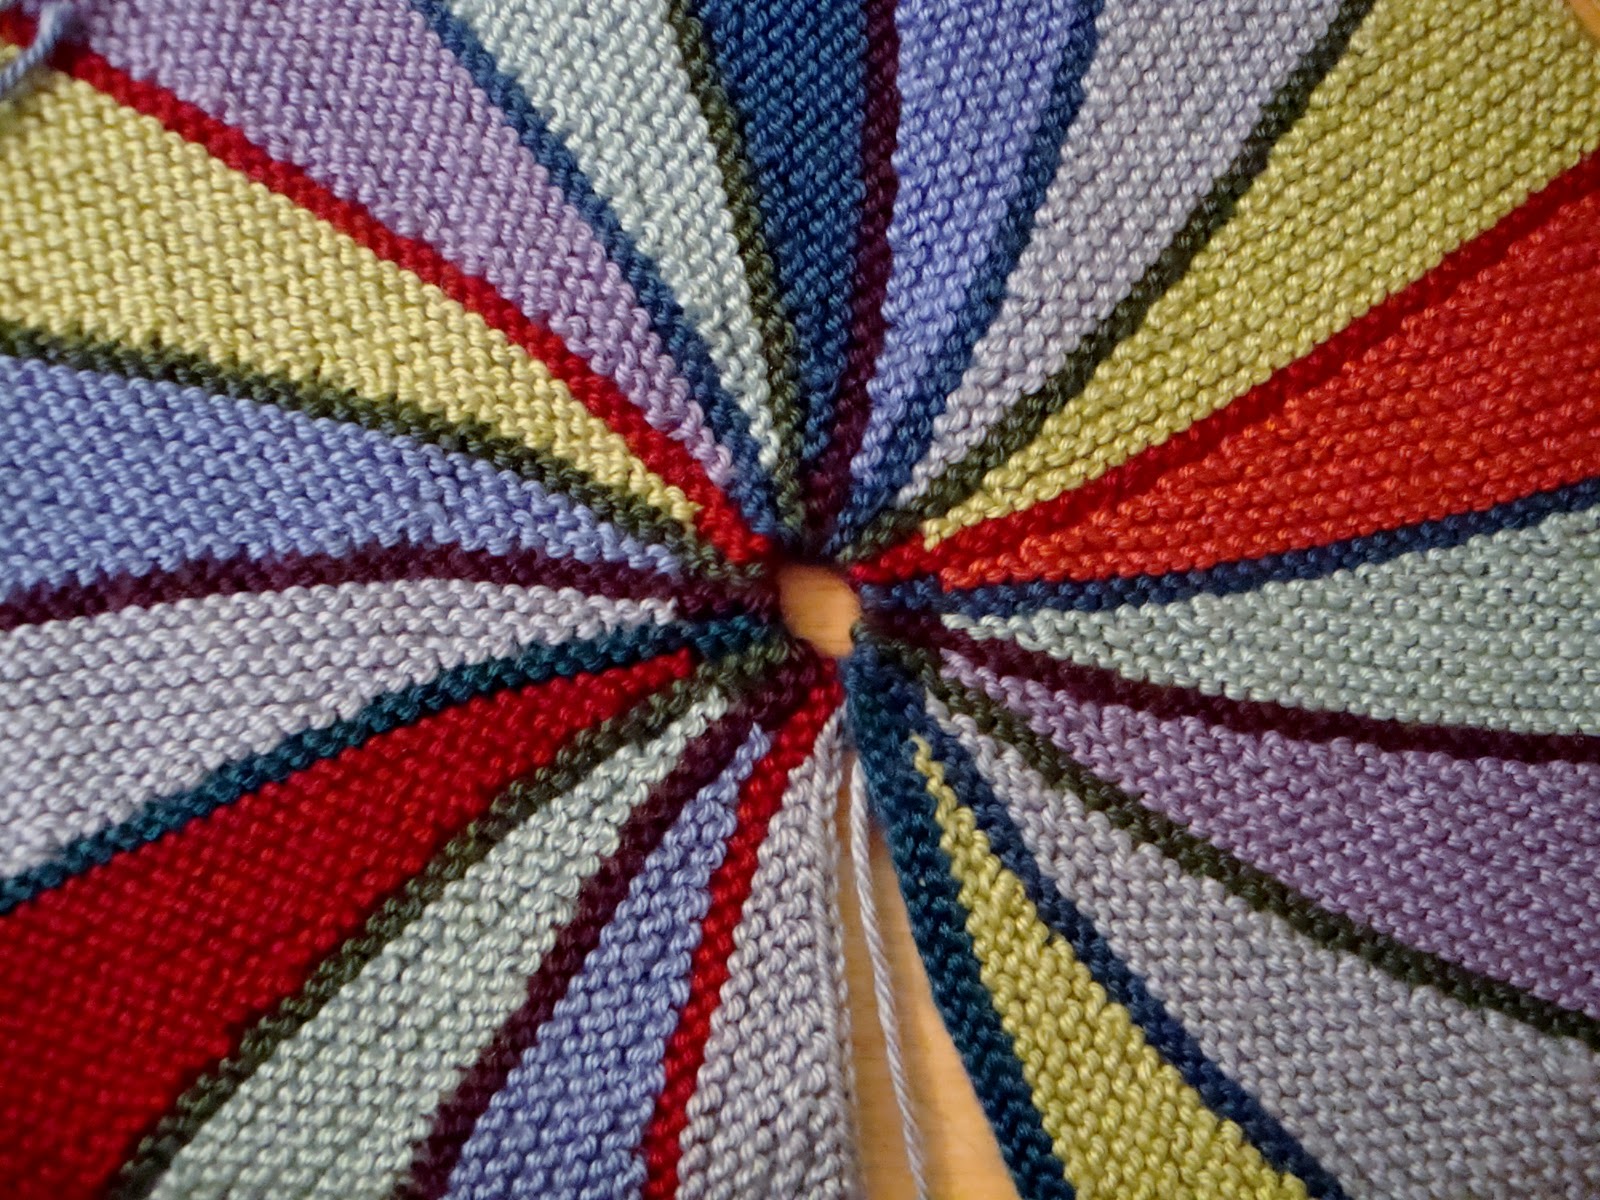
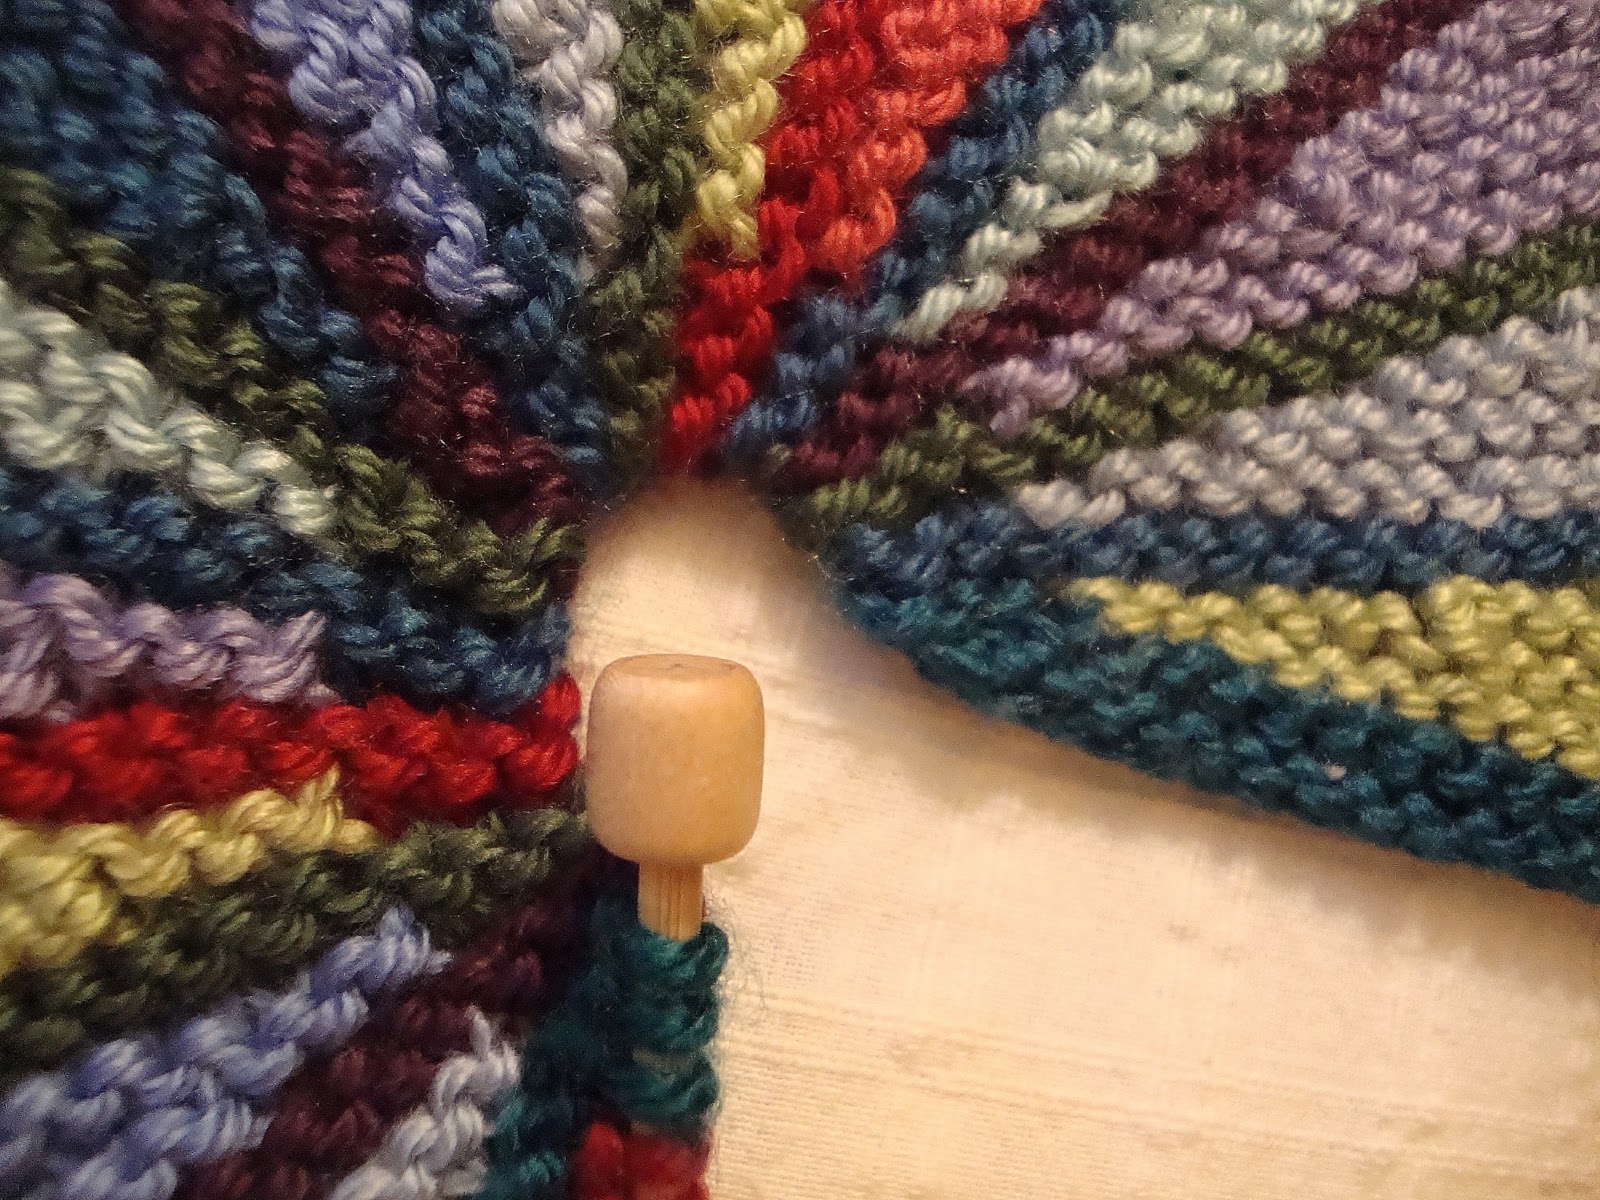
Метки: укороченные ряды круглая подушка круглая подушка укороченными рядами винтажная подушка |
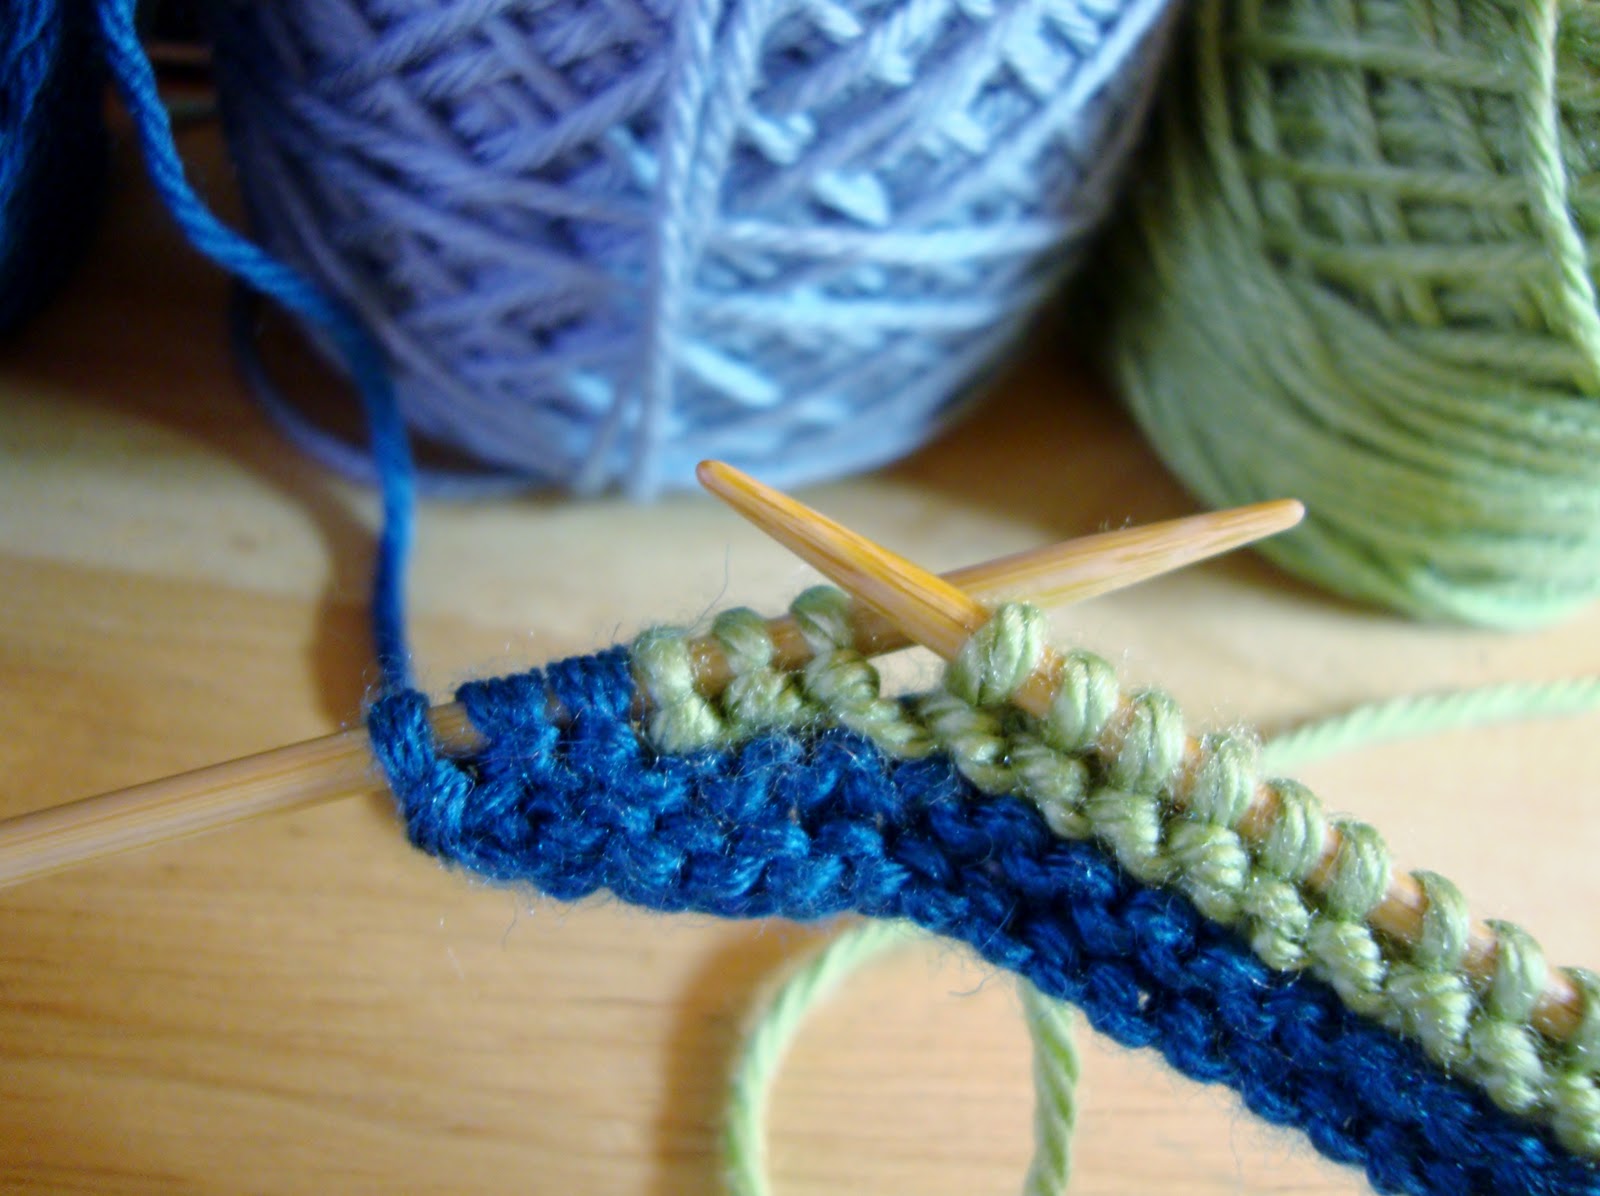
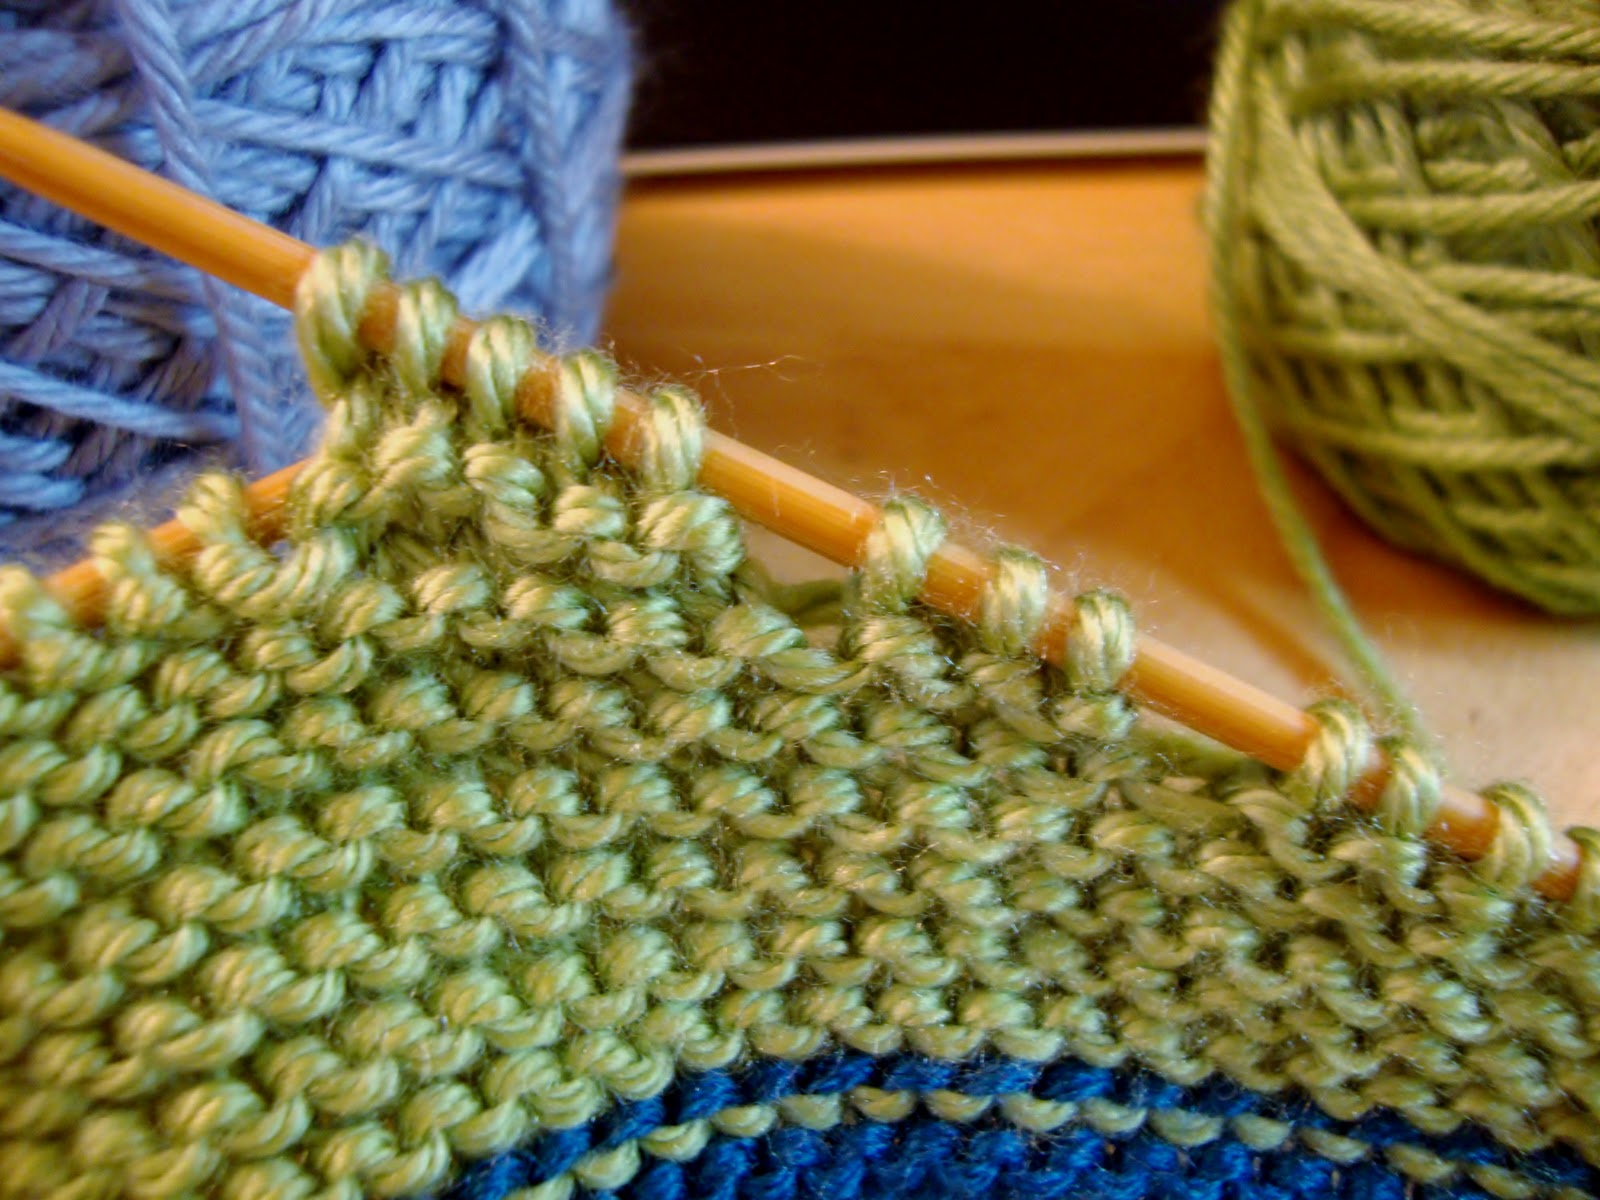
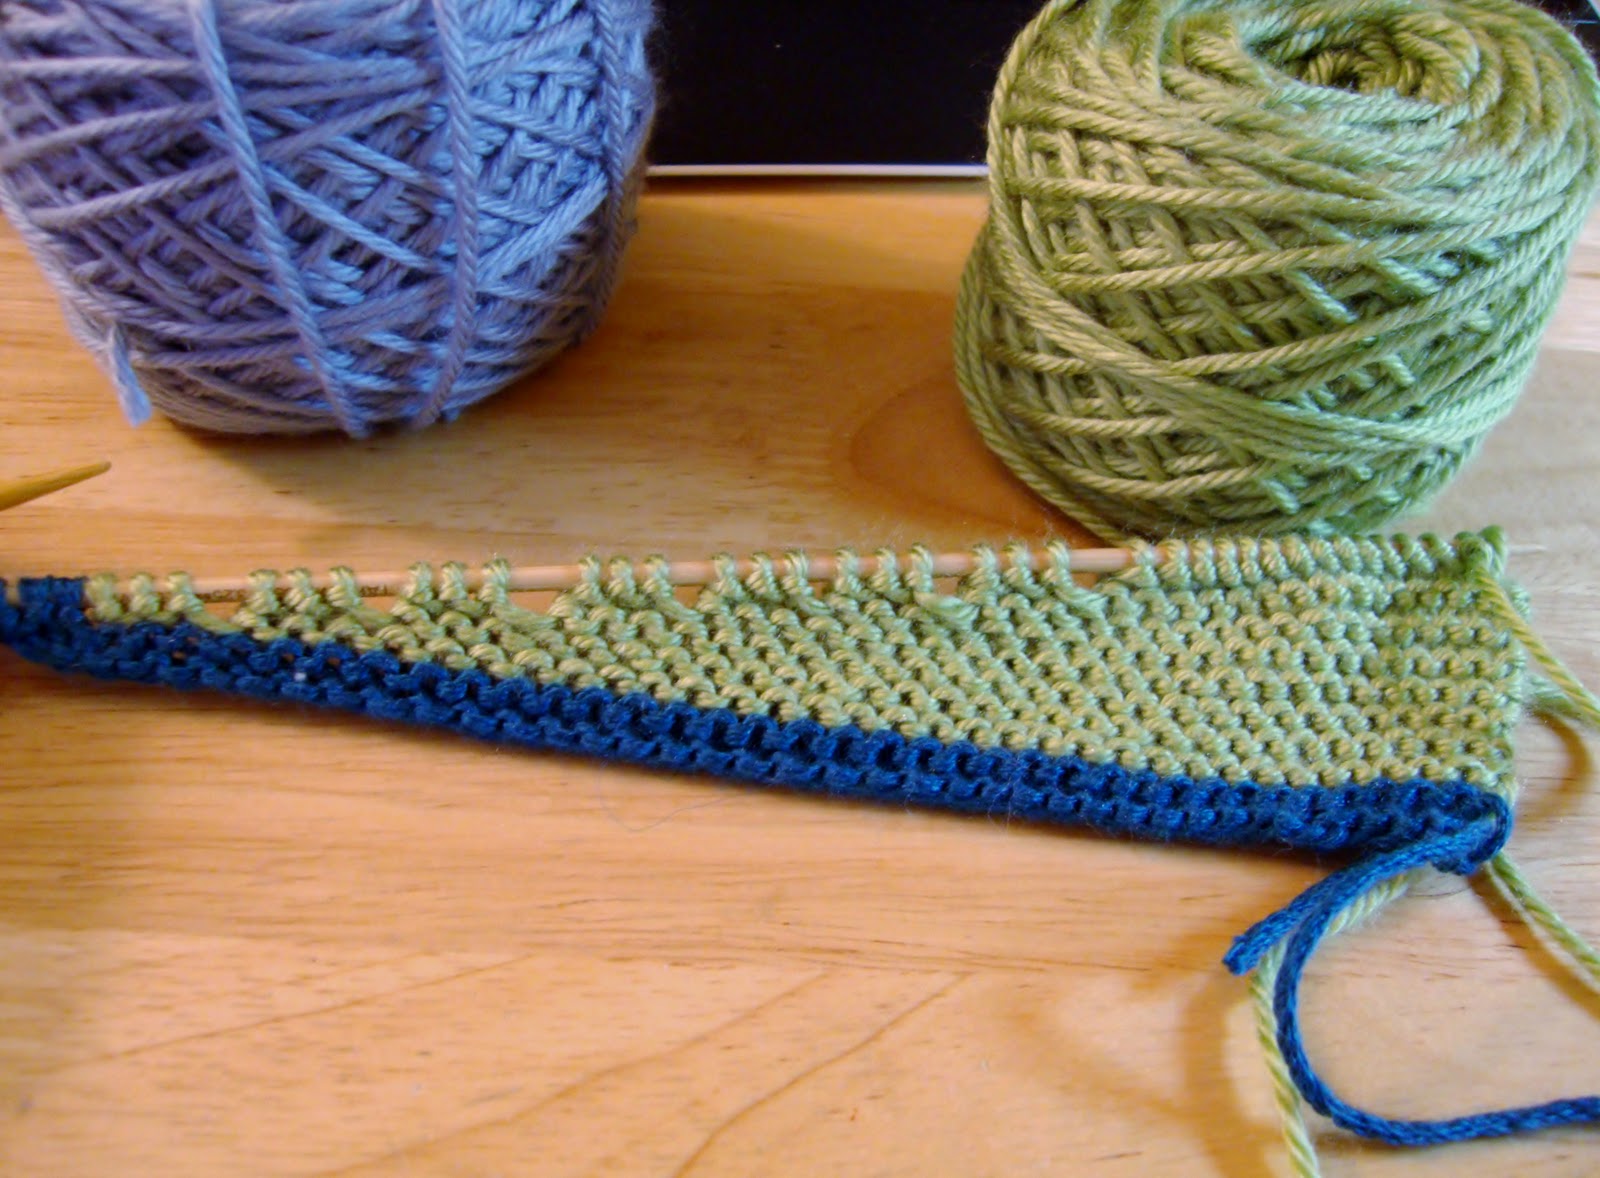
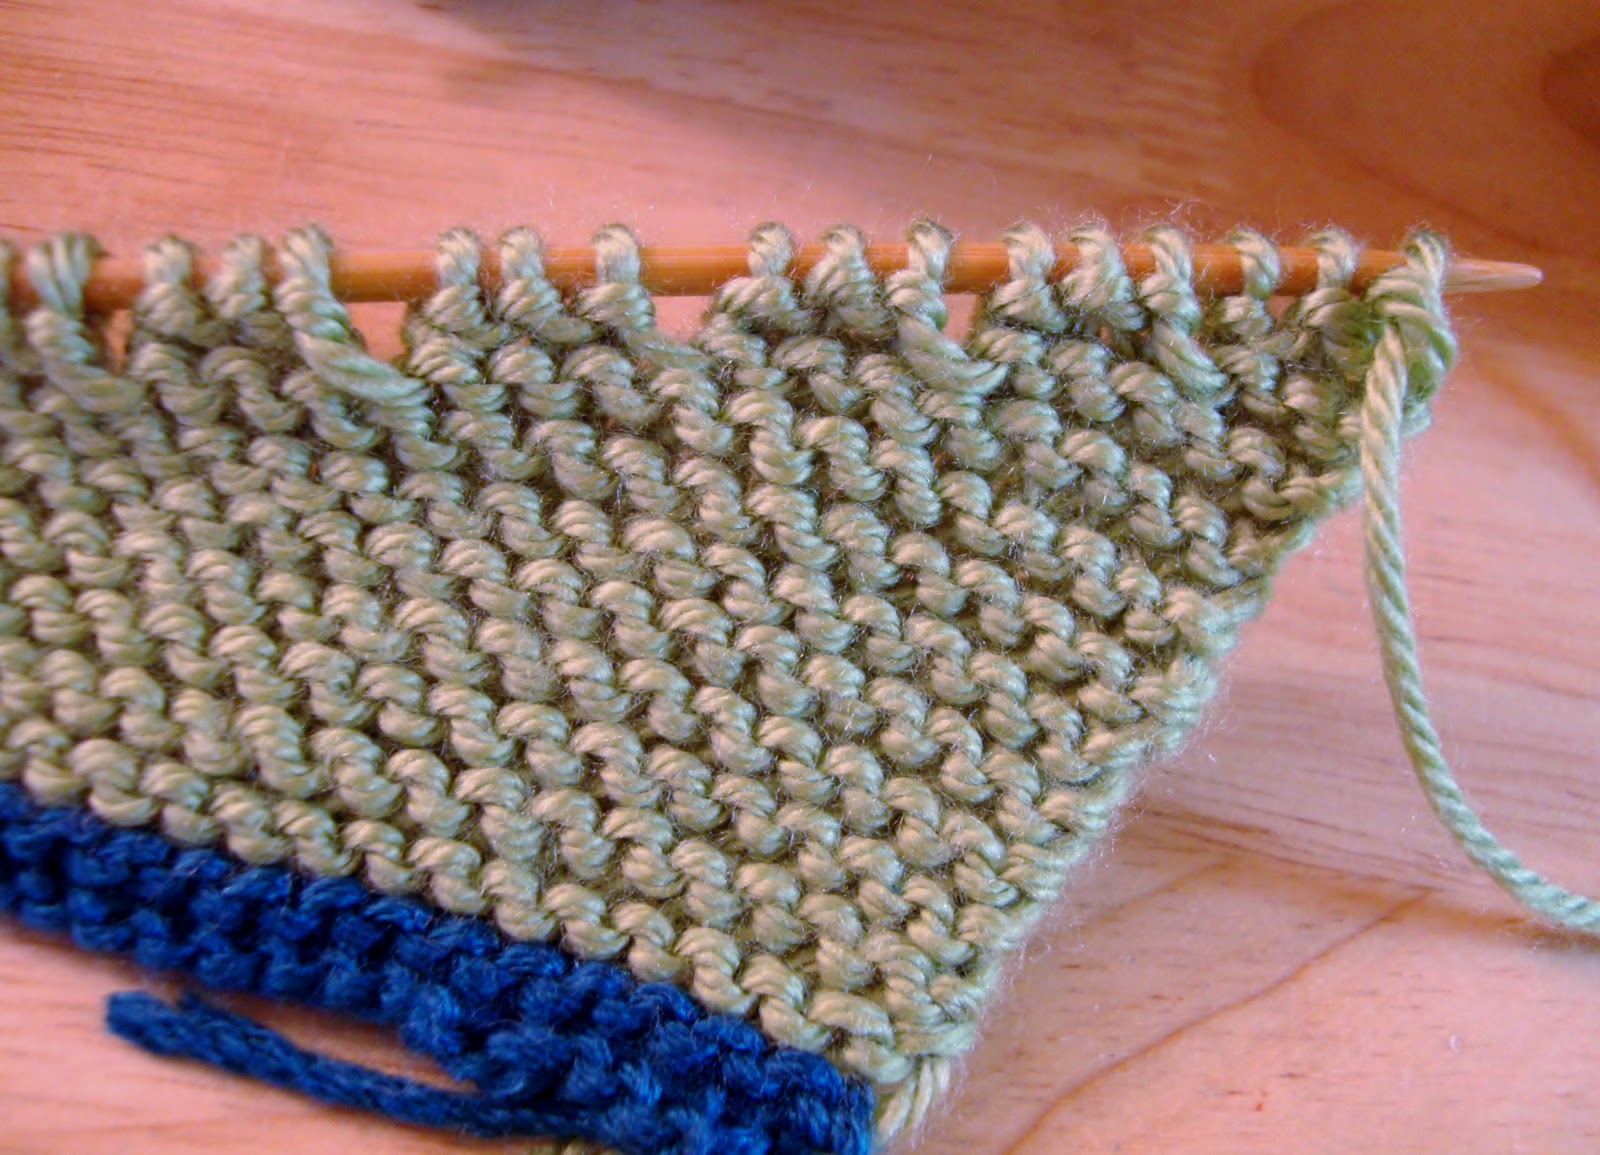
Узор на спицах |
Yarn shown in this swatch: Knitca Lovely 100% superwash merino yarn, color 0464 Bronze.
Needles: US size 6 (4 mm) .
Cast on a multiple of 6 stitches. Add 2 more selvage stitches if you want to make a nice-looking edge.
Row 1 (right side): *knit 3 sts, purl 3 sts*, repeat from * to * as necessary.
Row 2 and every wrong side row: work sts as they present themselves.
Row 3 (right side): *knit 3 sts, purl 3 sts*, repeat from * to * as necessary.
Row 5 (right side): *yarn over; slip 1 st, knit 2 sts tog, pass the slipped st over the decreased st (double left-slanting decrease); yarn over, knit 3 sts*, repeat from * to * as necessary.
Row 7 (right side): *purl 3 sts, knit 3 sts*, repeat from * to * as necessary.
Row 9 (right side): *purl 3 sts, knit 3 sts*, repeat from * to * as necessary.
Row 11 (right side): *knit 3 sts, yarn over; slip 1 st, knit 2 sts tog, pass the slipped st over the decreased st (double left-slanting decrease); yarn over*, repeat from * to * as necessary.
Repeat rows 1-12 as necessary for completing your project.
You can also work according to the chart below. Pattern repeat is marked by red frame.
Note: the chart depicts stitches in right side rows from right to left (that is, your first stitch in right side row will be the first stitch on the right of the chart) and stitches in wrong side row from left to right (that is, your first stitch in wrong side row will be the first stitch on the left of the chart). To make this concept easier the number of each row is shown at the beginning of row (number 1 is on the right side of the chart and number 2 is on the left side). Ignore this note if you knit in circle and start all your rows from the right of the chart.
I’d love to know what you think. Please leave a comment below.


|
Ода крахмальным блинчикам!!! Получаются тонкими и великолепно подходят для того, чтобы в них добавляли всевозможные начинки. |
Оказывается, крахмальные блинчики - самые удачно-подходящие блины для того, чтобы в них добавляли всевозможные начинки. Крахмальные блины получаются тонкими и очень вкусными. Блины из крахмала очень эластичные (чем и обуславливается их пригодность к подаче к столу с начинкой) и поразительно легко пекутся. Здесь несколько рецептов блинов с добавлением крахмала - где-то больше, где-то меньше. Одни кружевные и хрустящие, другие очень "прочные" и великолепны с начинкой.
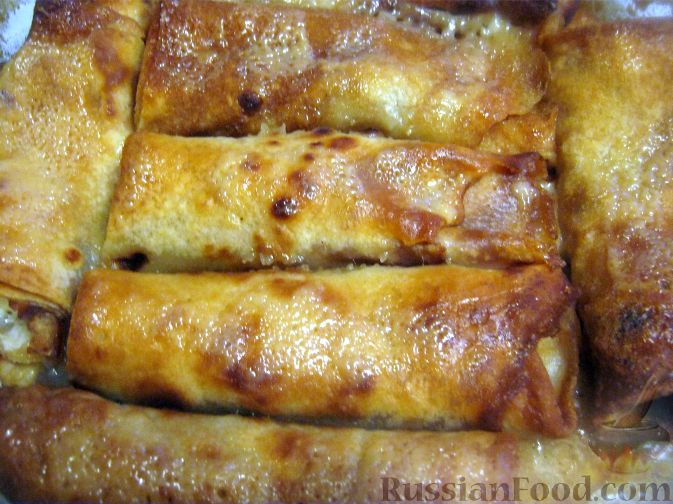 Пошаговый фото рецепт. Полтавские налистники с творогом. ФОТОРЕЦЕПТ. А тесто-то крахмальное, хрустящее.

|
Швейная машина нового поколения |
www.yankodesign.com/2012/08/29/making-make-do-and-mend-fashionable/
As the designer explains, “to simplify threading, a metal guide runs from reel to needle for the user to follow. Speed is controlled by pressing with the fingers through the fabric and the patented force sensor technology in a rubber foot underneath the machine allows the beginner to control speed from whichever hand position they find most comfortable. A flexible drive shaft replaces the traditional pulley system to form Alto’s distinctive arch, increasing room for the fabric and improving visibility of the sewing area.”
Designer: Sarah Dickins


Метки: швейная машина |
4 варианта летних вязаных сережек с декоративными камешками в качестве основы |
4 варианта летних вязаных сережек с декоративными камешками в качестве основы
Сегодня мне хотелось бы показать, как к лету создать целый ряд таких разных вязаных сережек.
Объединяет все эти сережки только одно: в качестве основы мы будем использовать обычные декоративные камешки для аквариума.
Материалы:
• белая и металлическая акриловые краски и кисть,
• камешки для аквариума,
• остатки ниток подходящих цветов,
• фурнитура для сережек (швензы, колечки, пины подходящего цвета),
• инструменты (круглогубцы, бокорезы и маленькие плоскогубцы),
• бесцветный лак для ногтей,
• самый мелкий бисер, иголка для бисера и нитка в тон.
Бронзовые сережки в старинном стиле

Берем кусочек журнальной странички, или любой другой картинки и с помощью ножниц вырезаем подложку под наш камешек (с подложкой цвет камешка останется таким же насыщенным, а фактура станет более интересной, впрочем все зависит от вас, можно ведь оставить и просвечивающееся вязаное полотно).
Используя алгоритм, описанный в этой статье, начинаем обвязывать зеленый камешек.
Связав основу, диаметром равную диаметру камешка, провязываем еще один ряд без добавления петель.
Укладываем на готовую заготовку камешек с подложкой. Заканчиваем обвязывать камешек, сделав только 1 ряд убавлений.

По всему периметру готовой связанной заготовки с помощью бисерной иголки аккуратно нашиваем коричневый бисер.

Берем бронзовую акриловую краску и легкими движениями наносим ее на вязаную часть нашей заготовки (т.е. покрываем нашу заготовку таким образом, чтобы как бы выделить все рельефы вязки).

Финальный шаг: для пущей прочности покрываем нашу заготовку бесцветным лаком для ногтей.
Чтобы продеть колечко, с помощью которого наша сережка будет крепиться к швензе, маникюрными ножницами оттягиваем "верхнюю" петельку.

За сформированную петельку цепляем колечко, еще одно колечко, а затем швензу. Наши сережки готовы.

Бирюзовые сережки с позолотой
Такие бирюзовые сережки сделать еще проще: необходимо полностью обвязать камешек голубыми хлопковыми нитками.
Затем чуть пройтись сухой кистью акриловой краской солнечно-золотого цвета по всем выступающим частям вязки.
И, наконец, покрыть заготовки лаком для ногтей и прикрепить фурнитуру.
Секрет таких сережек в хорошо подобранном цвете основы и тонирующей акриловой краски.

Сережки-ежики
Для того, чтобы у вас получились вот такие колючие сережки, необходимо полностью обвязать камешки хлопковой ниткой с предварительно нанизанными на нее бисеринками (количество бисеринок может быть разным все зависит от "шерстистости" вашего ежика, у меня ушло около 25-30 бисеринок цвета зеленого золота).

Крепить такие сережки можно следующим образом:
под обвязанной частью с плоской стороны камешка продеваем пин,

формируем петельку, за которую крепим швензу с колечком.
Наши сережки готовы.

Летние рельефные сережки-ракушки

Чтобы у вас получились такие вот рельефные сережки сначала необходимо полностью обвязать камешек хлопковыми нитками натурального бежевого цвета.
Обратите внимание, что при обвязывании цеплять столбики без накида надо только за заднюю стенку столбика без накида предыдущего ряда.

Закончив обвязывание, не отрывая нити, продолжайте вязать столбики без накида как бы в обратном порядке, поверх обвязанной заготовки по спирали, вводя крючок в видимую (переднюю) часть столбиков без накида (см. правое фото).

По готовой связанной заготовке чуть-чуть пройдитесь сухой кистью с белой акриловой краской выявляя рельефность.

Прикрепите колечки и швензы. Сережки-ракушки готовы.
|
Без заголовка |
|
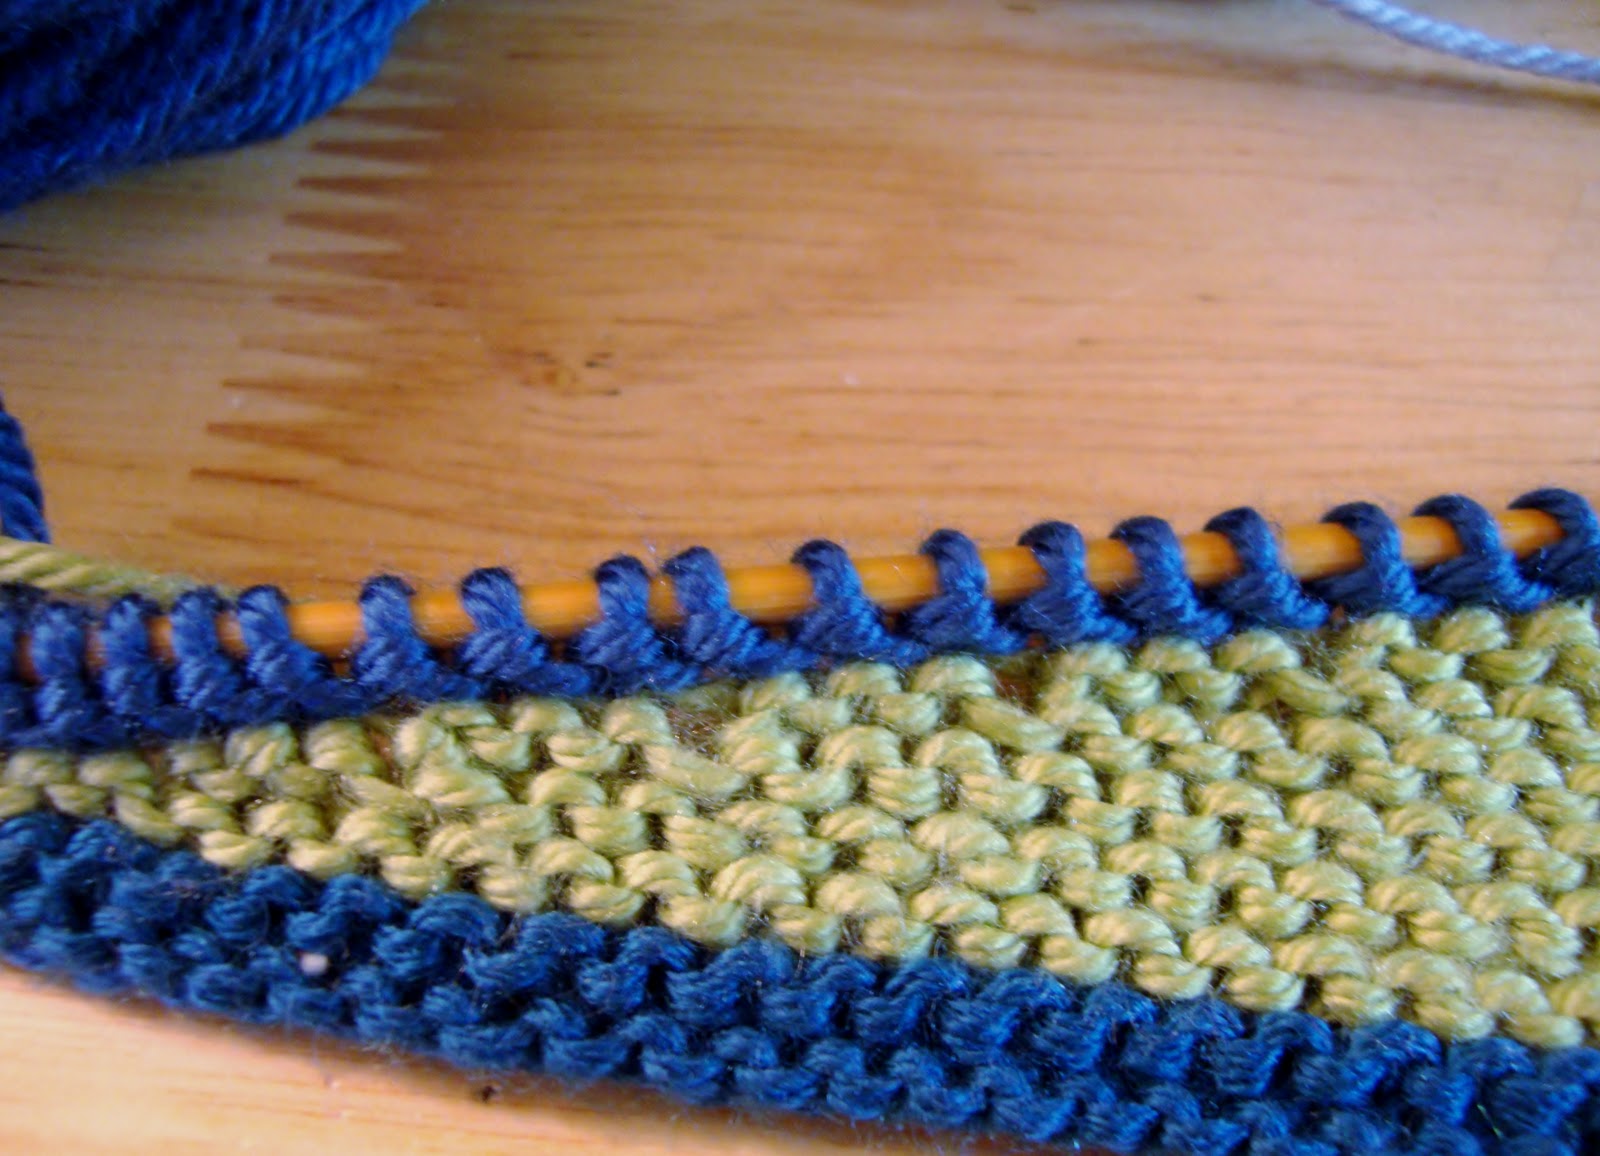
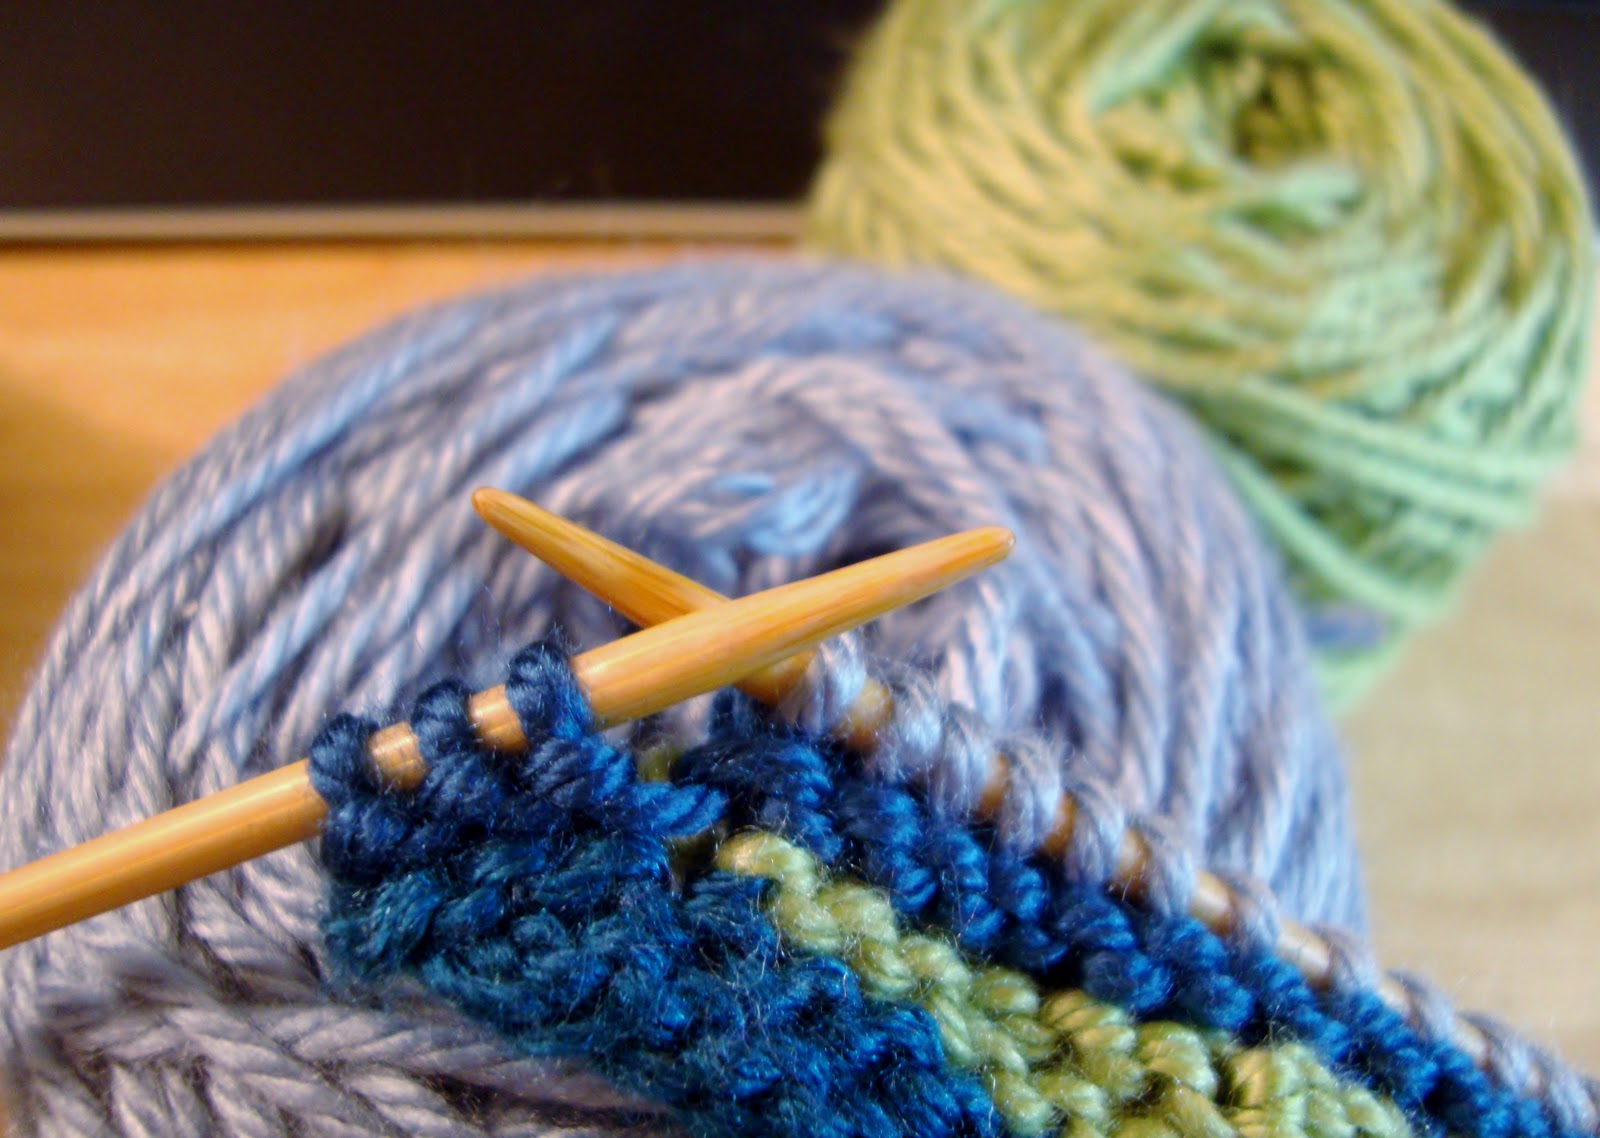
Perfecting the Perpendicular Pickup |
|
|
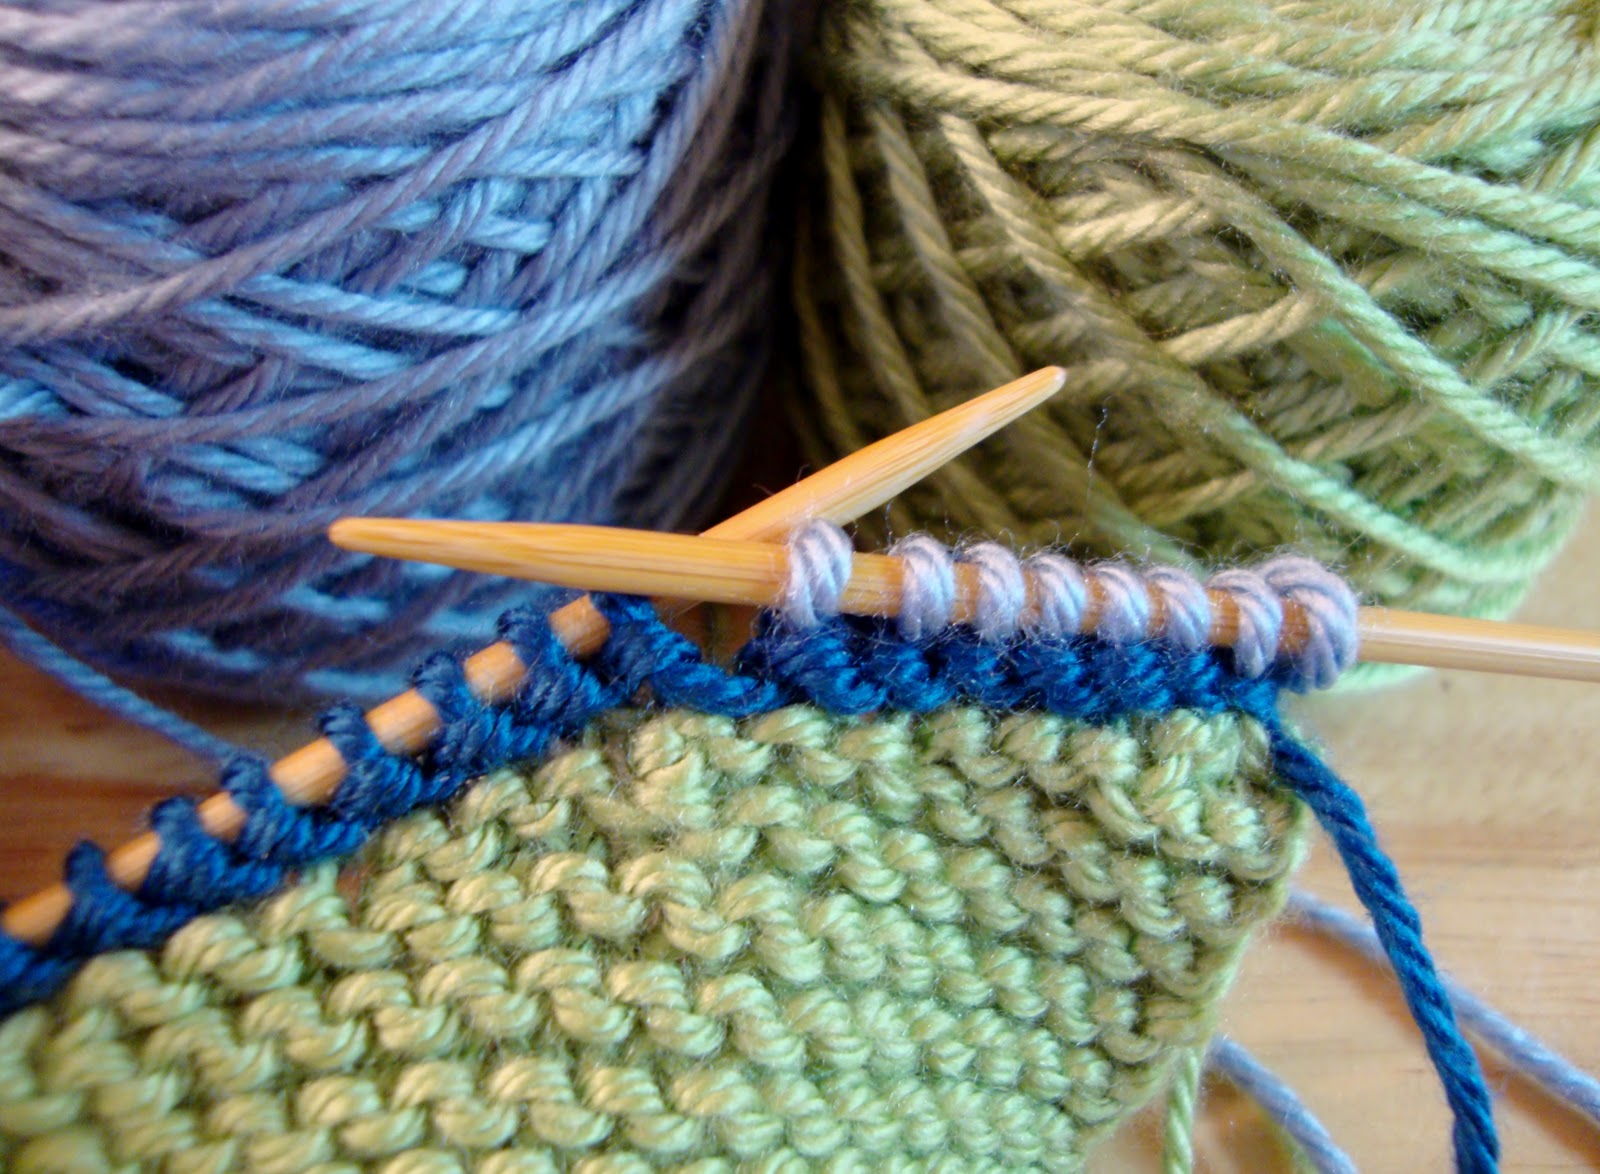
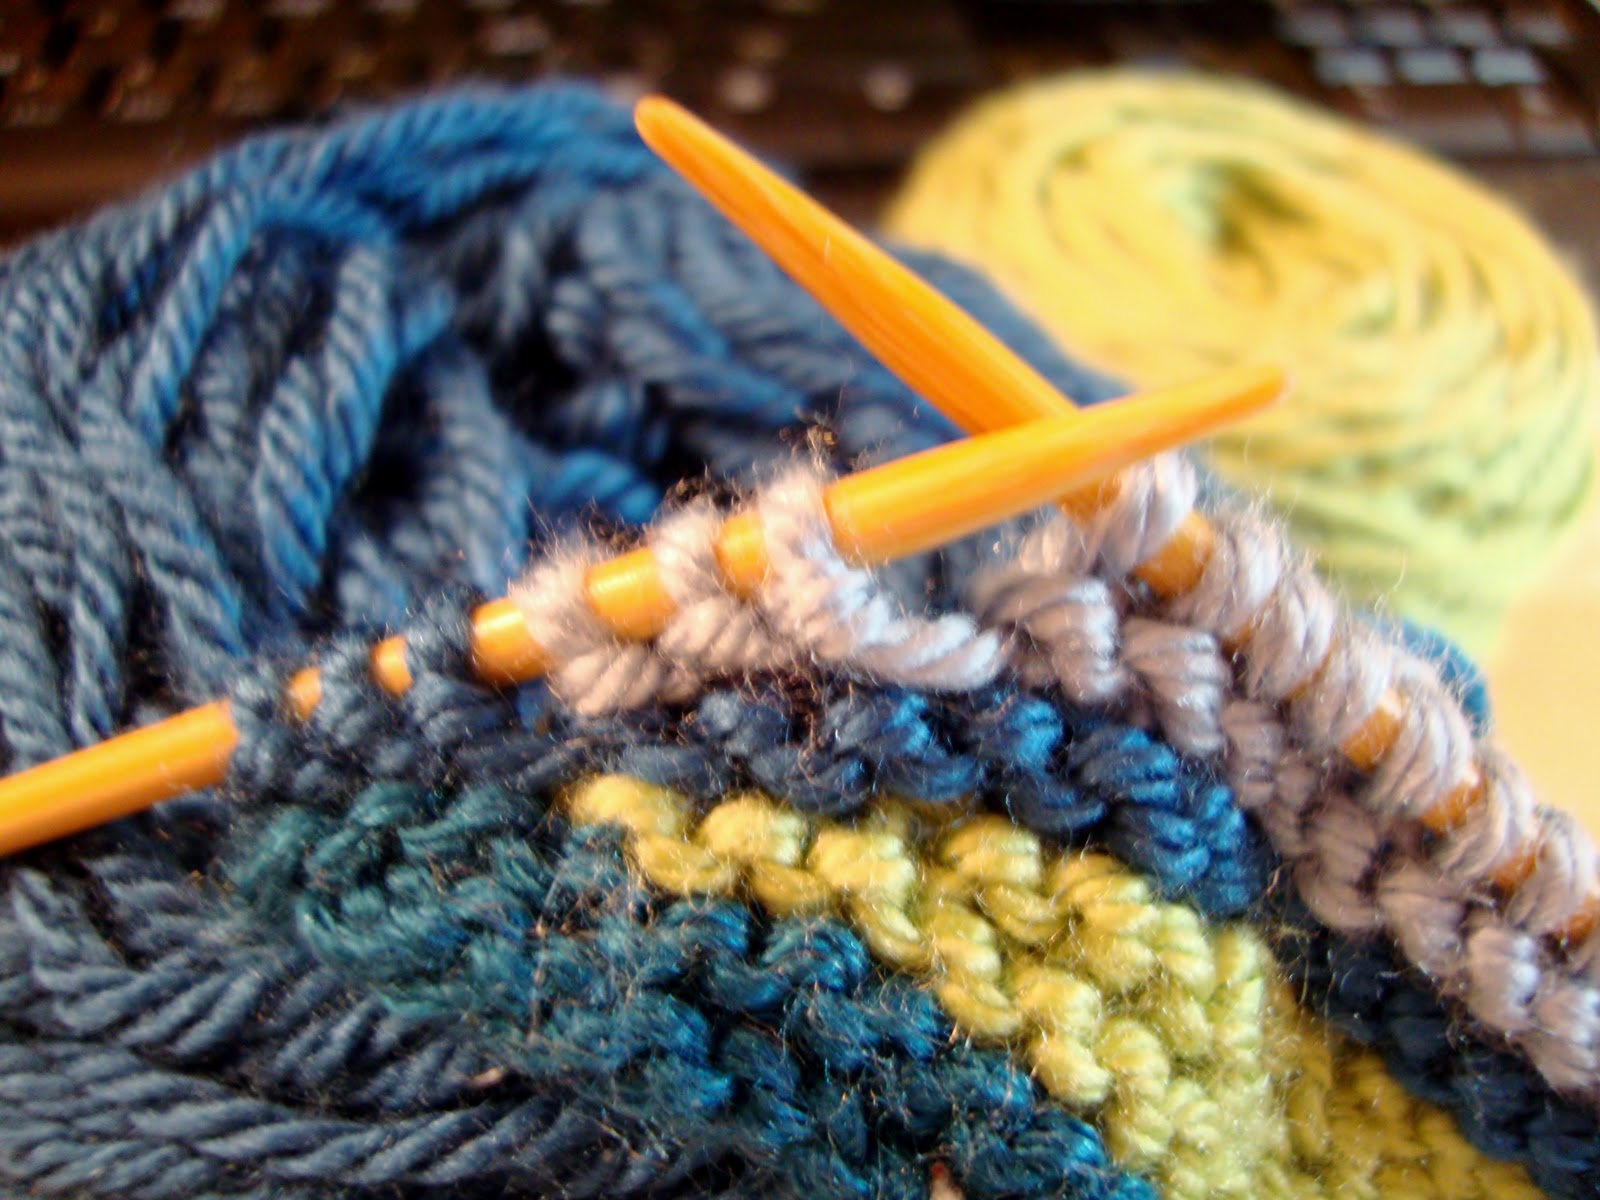
Joining circular knitting--the 3-in-1 TECHjoin! |
techknitting.blogspot.com/2007/01/circular-knitting-3-in-1-techjoin_26.html


|
Как избавиться от живота с помощью самомассажа? |
 Смотрим на себя в зеркало. Радости мало. Животик все больше и больше выпирает, по бокам некрасивые складки. Как в таком виде появится на пляже? На зарядку , йогу и диеты силы воли не хватает. Что делать? Как избавиться от живота?
Есть альтернативный путь самомассаж живота. Он эффективен против складочек на талии, делает плоским животик, оказывает благоприятное, оздоравливающее действие на все внутренние органы. Это один из легких и приятных способов коррекции фигуры.
На протяжении всей нашей жизни вечные труженики желудок и кишечник перерабатывают тонны пищи: 30 тонн продуктов, 50 тысяч литров воды. Не рациональное , и не сбалансированное питание с переизбытком мяса, сдобного и сладкого нарушает наше пищеварение. Результат этого: боли, метеоризм и тяжесть в желудке. Живот раздувается, как шарик, растет. Наше состояние становится плачевным - полный дискомфорт. Избавиться от неприятных ощущений поможет массаж. Уже в первые минуты самомассажа живота вам станет легче, активизируется пищеварение. Делать самомассаж живота можно в любом месте и в любое время: утром, находясь еще в постели, на работе, в автомобиле, коротая время в пробках, вечером, сидя перед телевизором.
1. Рекомендуется проводить на голодный желудок, не менее 2 часа после еды, в течение 15 минут.
2. Нельзя выполнять при различных кожных и грибковых заболеваниях.
3. Не рекомендуется выполнять его при высокой температуре, менструации, заболеваниях почек, грыже, воспалениях желчного пузыря, наличии опухолей, резких болях и беременности.
4.Не касайтесь области лимфатических узлов, а также места с расширением кровеносных сосудов.
5. Необходимо проводить с особой осторожностью, чтобы не повредить внутренние органы.
 1. Самомассаж живота рекомендуется выполнять, расслабившись, лежа на спине, согнув ноги в коленях. Сначала положите обе руки на живот. Глубоко вдохните животом, а затем выдохните 10 раз. Почувствуйте, как поднимаются и опускаются ваши руки .
2. Затем правой рукой 6 раз выполните круговые движения по животу против часовой стрелки. Левая рука остается на месте без движения.
3. Сделайте это же 6 раз за часовой стрелкой левой рукой. Правая рука остается на месте без движения.
4. Далее уже обеими руками, положив их на живот, друг против друга, совершите круговые движения по бокам живота одновременно 6 раз против часовой стрелки, 6 раз за часовой стрелкой. Можно постепенно усилить давление. При имеющихся на животе значительных жировых отложениях, движения должны быть энергичными, но, ни в коем случае, причинять дискомфорта или боли.
5. Делаем подталкивание. Погладив живот двумя руками, надавите его левой рукой, а правой произведите подталкивающее движение. Затем смените руки. Выполняем движение по 6 раз каждой рукой. Это благотворно повлияет на органы пищеварительной системы.
6. Делаем пиление: на живот положите ладони ребром. Растираем поверхность живота ребрами ладоней, сложенными вместе. Одна ладонь, при этом движется вперед, а вторая назад.
7. Затем подхватив пальцами ладони правой и левой руки жировую складку внизу живота, перекатите ее волнообразно по направлению к ребрам. Выполните 6 раз
8. Проведите от низа живота ребром ладони правой и левой руки по брюшной стенке к ребрам. Выполните 6 раз
9. Левую руку опустите вниз живота, большой палец, положив под пупком. Правую руку поднимаете вверх живота к области желудка. Делаете левой рукой 6 раз круговые движениями против часовой стрелки, и 6 раз за часовой стрелкой. Правая рука отдыхает.
10. Теперь такие же кругообразные движения совершаете правой рукой (строго следуя пункту 5), а левая рука отдыхает.
 11. Затем обеими руками совершаете на животе кругообразные легкие движения в противоположных направлениях к друг другу. Время выполнения 1 – 1.5 минуты.
12. Меняем положение рук, не отрывая их от живота. Левую руку направляем вверх. Правую руку вниз и совершаем ею внизу живота кругообразные движения. По 6 раз за часовой стрелкой и против часовой стрелки. Левая рука отдыхает.
13. Теперь левая рука совершает легкие круговые движения в области желудка (по 6 повторов). А правая рука отдыхает.
14. Затем обеими руками совершаете на животе кругообразные легкие движения в противоположных направлениях друг к другу. Время выполнения 1 – 1.5 минуты.
15. Положите руки на живот и закончите массаж. Дышите глубоко, спокойно животом еще пару минут.
 Максимальный эффект самомассаж живота дает при использовании его в парилке, применяя эфирные масла. При этом улучшается циркуляция крови и обменные процессы.
Для этого используют чаще всего апельсиновое масло. Оно усиливает обмен углеводов и жиров, а его аромат успокаивает нервную систему и снижает артериальное давление.
При целлюлите используют лимонное эфирное масло. Оно помогает выводить шлаки из организма, лечит простудные заболевания, укрепляет иммунитет, активизирует работу пищеварительной системы.
Делайте постоянно самомассаж живота и будете иметь плоский живот и отличное здоровье. А вопрос: «Как избавиться от живота?» больше не будет Вас тревожить.
Для большей информации смотрите видеофильм
http://knyagna.ru/new/kak-izbavitsya-ot-zhivota#ixzz2Idf0rvN5
|
Как хозяйке обхитрить кризис? Хитрим с аспирином |

|
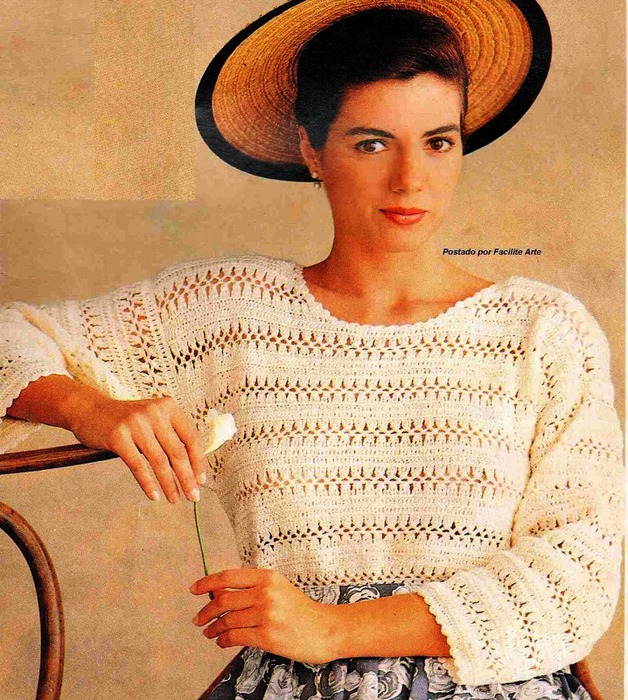
БЕЛЫЙ АЖУРНЫЙ ДЖЕМПЕР |
|