-Рубрики
- ВОКРУГ СВЕТА (3)
- ВЫШИВАНИЕ (88)
- Гладью (7)
- Крестиком (65)
- Лентами (15)
- Советы (6)
- ВЯЗАНИЕ (1212)
- Аксессуары (24)
- Болеро,шраги (3)
- Брюки, шорты (6)
- Варежки,перчатки,митенки (125)
- Для дома (30)
- Жилеты,безрукавки, болеро, жакеты и кардиганы с ко (85)
- Кайма (14)
- Кардиганы,жакеты,кофточки (221)
- Комплекты,костюмы (5)
- Купальники, парео (87)
- Мк,уроки вязания,видеоуроки (81)
- Мужские модели (21)
- Нижнее белье (93)
- Носки, гетры, колготки, вяз. обувь (24)
- Пальто,куртки (10)
- Пелерины,накидки,пончо,воротники,манишк (14)
- Платья,туники,сарафаны (33)
- Пледы,покрывала (25)
- Свитеры,пуловеры, джемперы (117)
- Скатерти,салфетки (33)
- Сумки (30)
- Топы, туники (56)
- Узоры,схемы (74)
- Флора и фауна (23)
- Шали, палантины, бактусы, фишю (31)
- Шапки, береты, аксессуары (163)
- Шарфы,снуды (59)
- Юбки (12)
- ВЯЗАНИЕ ДЛЯ ДЕТЕЙ (1799)
- Брюки, шорты, комбинезоны (76)
- Варежки, перчатки, митенки (17)
- Жилеты,безрукавки (47)
- Кардиганы, жакеты, кофточки (369)
- Комплекты,костюмы (222)
- Конверт, спальный мешок (2)
- Купальники, парео (3)
- Пальто,куртки (58)
- Пинетки,носки,вязаная обувь (205)
- Платья, сарафаны,туники - крючком (194)
- Платья,сарафаны,туники - спицами (264)
- Пледы, покрывала, наволочки (68)
- Размеры (4)
- Свитеры,пуловеры, джемперы (130)
- Топы, майки, кофточки с коротким рукавом (116)
- Шапки, шляпки, береты... (466)
- Шарфы,пелерины,бактусы,пончо,ворот (51)
- Юбки (44)
- ВЯЗАНИЕ_ТЕХНИКИ (66)
- Брюггское кружево (2)
- Ирландское кружево (23)
- Крючком (36)
- Спицы (5)
- Филейное вязание (4)
- Фриформ и пэчворк (1)
- ДАВАЙТЕ УЛЫБАТЬСЯ, ШУТИТЬ и СМЕЯТЬСЯ (4)
- ДЕТИ (106)
- Воспитание (4)
- Игры (35)
- Мастерим с детьми (6)
- Обучаем и развиваем (63)
- Прически (1)
- Раскраски (6)
- Рисование (15)
- Сказки (2)
- Стихи и колыбельные (6)
- ДОМОВОДСТВО (24)
- Идеи, которые упростят вашу жизнь (7)
- Моющие средства (6)
- Стираем (9)
- Уборка квартиры (16)
- ЖЕНЩИНА (139)
- Будем здоровыми (29)
- Косметика (41)
- Красота (35)
- М+Ж (15)
- Полезные советы: как и с чем носить (7)
- Создаем красивую фигуру (25)
- Укладка волос (5)
- Фотошоп (1)
- ЖИВОПИСЬ (14)
- ЖУРНАЛЫ (357)
- Вышивание (37)
- Вязание (245)
- Печем, готовим, парим, варим (1)
- Рукоделие (72)
- Шитье (34)
- ИЛЛЮСТРАЦИИ И КАРТИНКИ (18)
- ИНТЕРЬЕР и ДЕКОР (127)
- Ванная комната (18)
- Рамки (4)
- Детская комната (27)
- Для дома и дачи (57)
- Дом (18)
- Кухня (22)
- Сад (2)
- Спальня (3)
- ИНФОРМАЦИЯ ДЛЯ ДНЕВНИКА (8)
- МОДА (85)
- Вечерняя одежда (2)
- Декор одежды (17)
- Детские модели (33)
- Кружево, тесьма, рюши, воланы (4)
- Нижнее белье (3)
- Переделки (31)
- МЫ - ВОЛШЕБНИКИ (30)
- Астрология (1)
- Заговоры (4)
- Мантра (2)
- Молитвы (24)
- Ритуалы (7)
- ПРАЗДНИКИ (255)
- День всех влюбленных (44)
- Новый год (151)
- Пасха (59)
- Свадьба (9)
- ПРИРОДА (1)
- РЕЦЕПТЫ (182)
- Блины, оладьи (5)
- Блюда из мяса (17)
- Блюда из овощей (13)
- Блюда из птицы (13)
- Блюда из рыбы (12)
- Десерты (11)
- Детское меню (10)
- Заготовки на зиму (13)
- Закуски (18)
- Напитки (3)
- Первые блюда (6)
- Пироги, пирожки, пицца (36)
- Пирожные, печенье, кексики, эклеры (21)
- Салаты (21)
- Советы и полезности (4)
- Соусы (2)
- Торты (22)
- Украшаем блюда (9)
- Украшаем стол (14)
- РУКОДЕЛИЕ (914)
- Бисероплетение (14)
- Валяние (8)
- Декупаж (29)
- Игрушки (69)
- Идеи для творчества (66)
- Идеи для хранения вещей-мелочей (103)
- Из бумаги и картона (43)
- Канзаши (13)
- Квиллинг (5)
- Кинусайг - пэчворк без иглы (2)
- Коробочки, баночки,шкатулочки (62)
- Куклы (115)
- Макраме (3)
- Мелочь приятная (98)
- Оригами (4)
- Плетение из газет (17)
- Поделки из конфет (26)
- Поделки из фетра (42)
- Полезные советы (15)
- Полимерная глина (12)
- Пэчворк - лоскутное шитье (24)
- Роспись по стеклу, дереву и т.п. (1)
- Роспись по ткани (1)
- Скрапбукинг (14)
- Соленое тесто (7)
- Украшаем бокалы и бутылки (6)
- Украшения, заколки, брошки (212)
- Упаковка (20)
- Фарфор. Изделия из фарфора. (10)
- Цветы (114)
- САЙТЫ (4)
- СТИХИ (11)
- ФЕН_ШУЙ (50)
- ШИТЬЕ (551)
- Аппликации (13)
- Ванная комната (9)
- Для дома и сна (4)
- Идеи для хранения вещей-мелочей (46)
- Корсет (3)
- Купальники, парео (3)
- Мебель (21)
- Мелочь приятная (37)
- МК,уроки шитья,видеоуроки (69)
- Мягкие игрушки (25)
- На кухню (103)
- Нижнее белье (32)
- Пальто,куртки (1)
- Платья,туники,сарафаны, юбки (3)
- Подушки (103)
- Покрывала, постельное белье (17)
- Сумки (111)
- Шторы (26)
- ШЬЕМ ДЕТЯМ (218)
- Брюки, шорты, лосины (6)
- В кроватку (37)
- Выкройки (5)
- Идеи для школы (4)
- Коврики, панно, развивалки (12)
- Комплекты,костюмы (2)
- Куртки, пальто (1)
- Майки, футболки, топы (2)
- Мелочь приятная (14)
- Нижнее белье (3)
- Обувь (32)
- Платья,сарафаны, юбки (54)
- Тематические костюмы (1)
- Украшаем вещи (10)
- Украшаем детскую (4)
- Фартуки, халаты, слюнявчики (13)
- Шапки, шляпки, береты... (34)
-Поиск по дневнику
-Подписка по e-mail
-Друзья
-Статистика
Соседние рубрики: Шапки, шляпки, береты...(34), Фартуки, халаты, слюнявчики(13), Украшаем детскую(4), Украшаем вещи(10), Тематические костюмы(1), Платья,сарафаны, юбки(54), Обувь(32), Нижнее белье(3), Мелочь приятная(14), Куртки, пальто(1), Комплекты,костюмы(2), Коврики, панно, развивалки(12), Идеи для школы(4), Выкройки(5), В кроватку(37), Брюки, шорты, лосины(6)
Другие рубрики в этом дневнике: ШЬЕМ ДЕТЯМ(218), ШИТЬЕ(551), ФЕН_ШУЙ(50), СТИХИ(11), САЙТЫ(4), РУКОДЕЛИЕ(914), РЕЦЕПТЫ(182), ПРИРОДА(1), ПРАЗДНИКИ(255), МЫ - ВОЛШЕБНИКИ (30), МОДА(85), ИНФОРМАЦИЯ ДЛЯ ДНЕВНИКА(8), ИНТЕРЬЕР и ДЕКОР(127), ИЛЛЮСТРАЦИИ И КАРТИНКИ(18), ЖУРНАЛЫ(357), ЖИВОПИСЬ(14), ЖЕНЩИНА(139), ДОМОВОДСТВО(24), ДЕТИ(106), ДАВАЙТЕ УЛЫБАТЬСЯ, ШУТИТЬ и СМЕЯТЬСЯ(4), ВЯЗАНИЕ_ТЕХНИКИ(66), ВЯЗАНИЕ ДЛЯ ДЕТЕЙ(1799), ВЯЗАНИЕ(1212), ВЫШИВАНИЕ(88), ВОКРУГ СВЕТА(3)
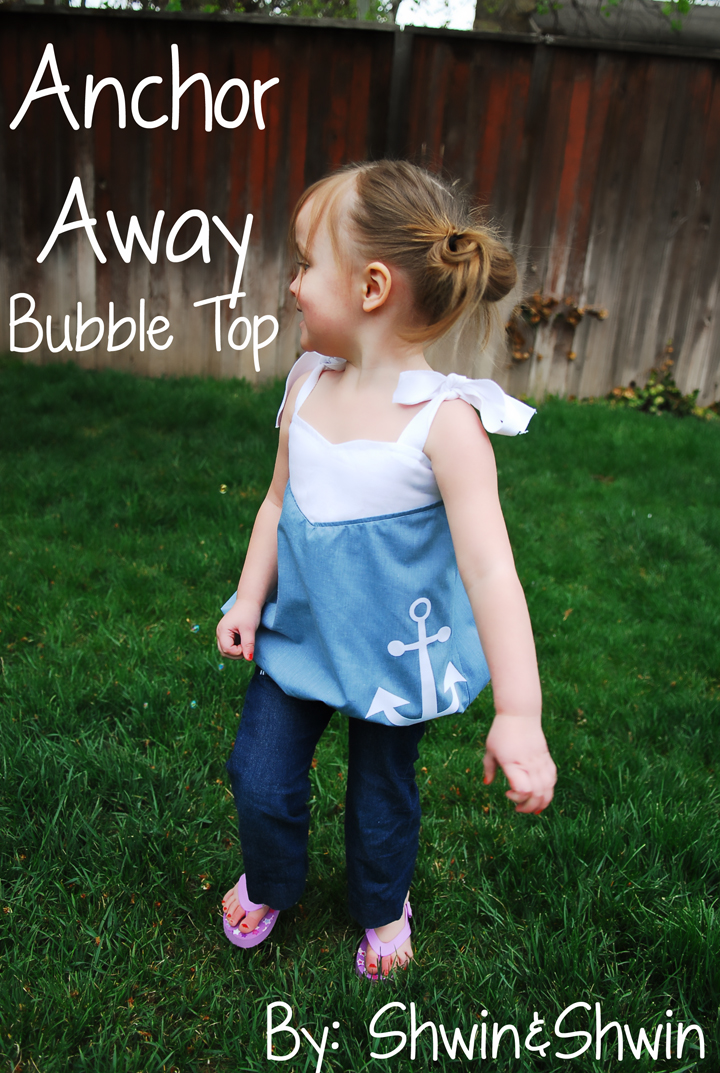
Два чудесных летних топа от Shwin & Shwin для юных красавиц. Мастер-классы |
Это цитата сообщения Глебова_Елена [Прочитать целиком + В свой цитатник или сообщество!]
Доброго времени суток!

Метки: шьем детям топ |
Майка с короткими рукавами бабочк |
Это цитата сообщения Валькирия_скандинавская [Прочитать целиком + В свой цитатник или сообщество!]
Источник тут http://seekatesew.com/butterfly-ruffle-sleeve-tutorial/
butterfly ruffle sleeve tutorial
September 2, 2013
Today’s post was written by Caila of Cailamade. Caila is super nice and has brilliant photography and exquisite sewing skills, I love reading her posts! Today she is sharing a butterfly ruffle sleeve tutorial.
Yay for ruffles! Hey everyone, I’m Caila from over at CailaMade, where I share about sewing for my three blond California babes. As you can tell from these pictures, my daughter is a princess all the way. If she had all the say, we would put ruffles (PINK ruffles) on everything. So, she thanks Kate very much for inviting me to participate in this series.
She will look extra special too, by the way.
Below are my instructions for adding Butterfly Ruffle Sleeves to an ordinary shirt pattern. I think you could also do this with a store bought tee, if you removed the sleeves first. If someone tries that, let me know how it goes!
MATERIALS
- knit fabric for the t-shirt. I used this printed interlock by Heather Ross and LOVE IT.
- long scraps of coordinating knit for the double ruffle sleeves. I used a jersey knit from Michael Levine, scraps from Abby’s crown shirt.
- A t-shirt pattern. You can either trace an existing t-shirt and make your own pattern, or I suggest the Flashback Tee by Made By Rae, which I used for this shirt.
Start by cutting out the shirt front and back. Add an inch to the front if you want to add gathers to the neckline (a sweet touch). To do this, leave an extra 1/2″ between the center line of the pattern and the fold in the fabric.
Sometimes like like to add a curve in the side seams for an extra girly look.
Sew the first shoulder seam.
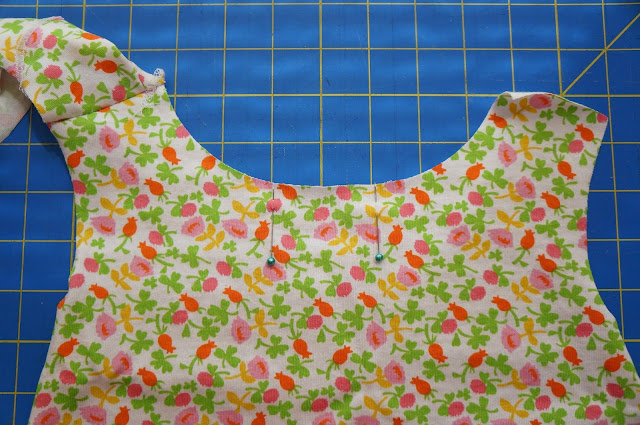
To prepare the neckline gather, mark two points, each 1″ from the center point. I used two pins, but you could also use a pen or tailor chalk.
Set your machine to the longest straight stitch possible and stitch between the two marks. Do not backstitch. Leave a long tail of thread when you remove the shirt from your machine. Tug on the back (bobbin) thread to gather the fabric.
Next, addd the neckline according to the pattern instructions.
Tip: Cut a long 1″ strip of knit fabric and press it in half lengthwise for the neck band. If you’re using rib knit, the neckband should be 2/3 the measurement of the neck opening. Since I was using interlock for the neckband of this shirt (it has less stretch than rib knit), I had to cut the neckband longer than that. I think my neckband piece was only a few inches shorter than the neck opening.
Sew the neckband to the neck opening with a zig zag stitch or serger, and then sew the second shoulder seam. (Refer to the shirt pattern instructions if you need help with this step. FYI, I sew my neckbands in a little differently than specified by Rae in the FST pattern.)
Once your neckband and both side seams are sewn, it’s time to add the ruffle sleeves!
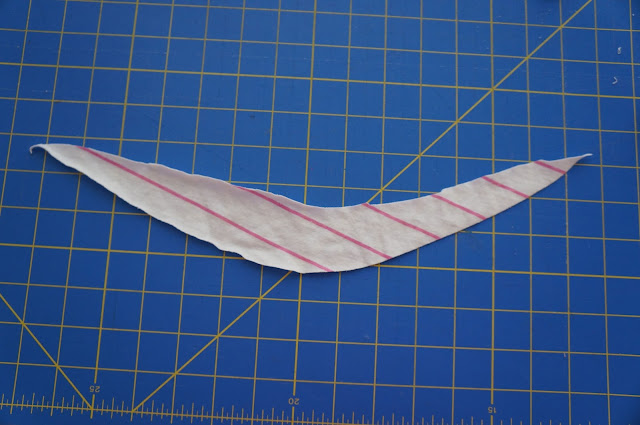
Cut out a piece of knit fabric that looks kind of like this. It can probably be a lot narrower, but this is what I started out with. It should be about 20″-22″ long.
Gather the straight edge.
Pin it to the arm opening with right sides facing and sew it to the shirt using a zig zag stitch and a 1/4″ seam allowance. I set my machine to a zig zag width of 1.0 and a stitch length of 3.5 to give the seam a enough stretch but keep it from looking wavy from the zig zags stitches.
Now cut another piece for the second ruffle, about 17″ long. The top edge of the piece in this picture is actually straight, although it looks curved.
Ruffle the straight edge like you did for the first ruffle.
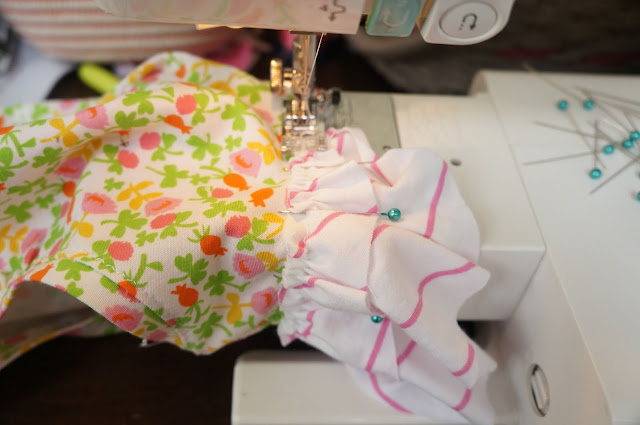
Pin it directly on top of the other ruffle, making sure the gathers are pinned to the fabric of the body of the shirt, not the other ruffle.
Using the same stitch settings as before, stitch the second ruffle to the shirt along the line of gathering stitches. Make sure you are sewing the gathers to the main fabric of the shirt, not the bottom ruffle. Go all the way around, securing your stitches at the beginning and end.
Once you are done sewing the ruffles to the shirt, trim them down if necessary. I found that a smaller ruffle had a lot more oomph than a sleeve that was too long and floppy.
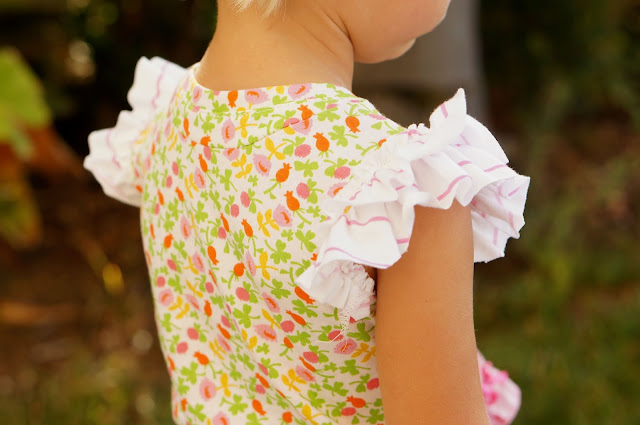
Tada! Stand back and admire your butterfly ruffle sleeves.
Now go put the t-shirt on your princess and watch her spin around.
Thanks so much for reading! Please check out my blog, CailaMade, for more sewing projects, inspiration, tutorials, and free patterns. For even more fun, check out my Facebook page or follow me on Pinterest, Twitter, Instagram, and Bloglovin‘. I’d love to become friends!
Метки: шьем детям мк майка |
| Страницы: | [1] |


