Анна Москвичева ...
Le Borse di Mirtilla №15 2017 - (0)Издательство: Sprea SPA Язык: итальянский Журнал посвящен созданию сумок: вязание крючком...
РАДУЖНЫЙ ДЖЕМПЕР НА ОСНОВЕ "БАБУШКИНОГО КВАДРАТА" - (0)Inside Crochet №132 2021 - (0)
Издательство: Tailor Made Publishing Ltd Язык: английский Журнал по вязанию крючком из Ве...
Вязание крючком. Брюггское кружево для начинающих. Видео, схемы, описания. Продолжение следует... - (0)Вязание крючком. Брюггское кружево для начинающих. Видео, схемы, описания. Продолжение следует... ...
Шарф Dylan от Rike Feurstein который не надо даже вязать |
We love Rike Feurstein. Her hats are sick and her chunky knits are lusciously bold and amazing. And when we saw her Dylan scarf, we thought it was genius. A scarf that didn’t require knitting? Sign me up! We love to knit but it can be time consuming and time is money, right? Here is our attempt at making a no-knit scarf for those cold days ahead.


You’ll start by transforming a skein of yarn into a hank of yarn, which is yarn that is loosely wound into a large ring shape and then twisted. To make a longer scarf that can be doubled up around the neck, set two heavy chairs side by side. Cut a 3 inch piece of yarn and reserve for later. Anchor the yarn to the top of a chair and start wrapping the yarn tightly around the chars (the tighter the wind, the better). Once your done, gently pull the hank off the chars, twist it a few times and lay it flat on table. Tie the start and end pieces around the yarn to keep the hank together. Tie off a 3rd section of the scarf with the small piece of yarn you cut earlier, dividing the hank into thirds. (Click images to enlarge)

Cut 3 pieces of leather at approximately 1.75″ wide and 4″ long. Stick 2 velcro squares to one end of the leather with both layers attached. Tightly roll the other side of the leather towards the velcro, hiding one of the three tied off sections of the hank. Repeat the same steps for the other two sections. Feel free to use a glue gun or leather glue in place of velcro.

Voila! A plush scarf that didn’t involve knitting. Super easy!

(top image from here, rest of images by Honestly…WTF)
Метки: Метки шарф простой DIY |
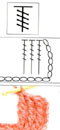
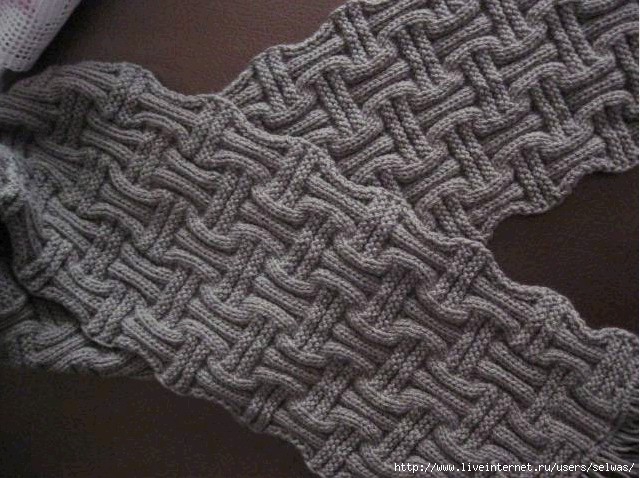
Рельефный шарфик связаный французской резинкой. |
 Французская резинка : 1 ряд-снять краевую петлю, 3лицевых, 1 изнаночная.... 3лицевых, сннять краевую петл ; 2 ряд-снять краевую петлю, 1 лицевая, снять 1 петлю с накидом, 3лицевых,....сннять краевую ; 3 ряд --снять краевую петлю, 1 лицевая, снять 1 петлю с накидом, 1лицевая, петлю c накидом провязать лицевой,1 лицевая, снять 1 петлю с накидом,..... 1 лицевая,1 краевая ; 4 и все последующие ряды вязать по рисунку чередуя 2 и 3 ряды.
Метки: французская резинка рельефный шарфик |
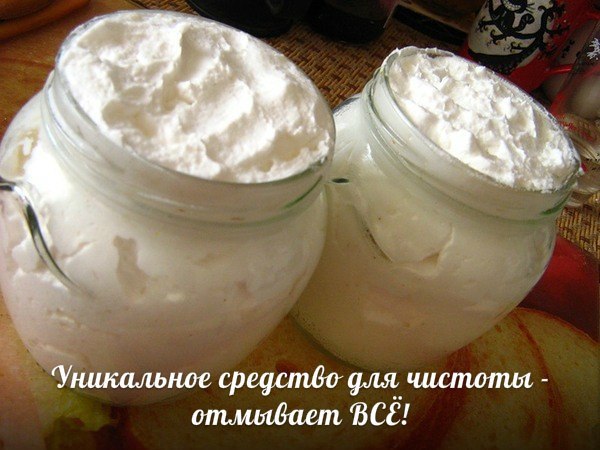
Уникальное средство для чистоты - отмывает ВСЁ!! |
Средство для мытья посуды, раковины, ванны..
Это универсальное моющее средство, годное и для мытья посуды и для мытья сантехники. Хорошо оно тем, что содержит всего 3 компонента, которые не могут в принципе вызвать аллергию, а это значит, что оно экологически чистое. Руки сушит в меру, да сушит, но не больше чем после обычного моющего средства.
|
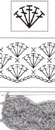
Гипперболический мир кораллов Кристин и Маргарет Вертейм |
Created and curated by Christine Wertheim and Margaret Wertheim of the Institute For Figuring.

"Crochet Coral and Anemone Garden" with sea slug by Marianne Midelburg.
Photos © The IFF by Alyssa Gorelick.
One of the acknowledged wonders of the natural world, the Great Barrier Reef stretches along the coast of Queensland, Australia, in a riotous profusion of color and form unparalleled on our planet. But global warming and pollutants so threaten this fragile monster that scientists now believe the reef will be devastated in coming years. As a homage to the Great One, Margaret and Christine Wertheim of the Institute For Figuring instigated a project to crochet a woolen reef.
The sisters, who grew up in the state of Queensand, began the project in 2005 in their Los Angeles living room, and for the first four years of its life the Reef took over their house, gradually expanding to become the dominant life-form in their home. At the same time the project began to expand into other cities and countries until it has now become a worldwide movement that engages communities across the globe from Chicago, New York and London, to Melbourne, Dublin and Capetown. The Crochet Reef is a unique fusion of art, science, mathematics, handicraft and community practice that may well be the largest community art project in the world. Click here for information about how to start a Satellite Reef.
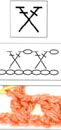
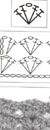
The inspiration for making crochet reef forms begins with the technique of "hyperbolic crochet" discovered in 1997 by Cornell University mathematician Dr. Daina Taimina. The Wertheim sisters adopted Dr Taimina's techniques and elaborated upon them to develop a whole taxonomy of reef-life forms. Loopy "kelps", fringed "anemones", crenelated "sea slugs", and curlicued "corals" have all been modeled with these methods. The basic process for making these forms is a simple pattern or algorithm, which on its own produces a mathematically pure shape, but by varying or mutating this algorithm, endless variations and permutations of shape and form can be produced. The Crochet Reef project thus becomes an on-going evolutionary experiment in which the worldwide community of Reefers brings into being an ever-evolving crochet "tree of life."
As a totality, the Crochet Reef has grown far beyond its original incarnation on the Wertheim's coffee table so that today it is made up of many different “sub-reefs,” each with its own colors and styling. Major sub-reefs include the Bleached Reef, the Beaded Reef, the Branched Anemone Garden, the Kelp Garden, and The Ladies’ Silurian Atoll, a ring-shaped installation with close to 1000 individual pieces made by dozens of our most skilled contributors around the world. In addition to these delicate woolen reefs is also a massive Toxic Reef crocheted from yarn and plastic trash - a part of the project that responds to the escalating problem of plastic trash that is innundating our oceans and choking marine life.

Large scale anemone with brain coral head by Margaret Wertheim.
Each crochet model results from the application of an iterative recipe. Likefractals, such as the Mandelbrot Set, these forms come into being through the process of doing a small set of steps again and again and again. Though experience often serves as a guide, there is no way to know in advance what a specific algorithm will produce and we have many times been surprised when seemingly insignificant changes in the underlying pattern led to fundamentally new results. In a very real sense, this is a kind of experimental mathematics and we invite crocheters everywhere to explore for themselves the possibilities inherent in these techniques.
Information about these techniques and instructions for making specific forms are available in a beautifully produced handbook published by the Institute called A Field Guide to Hyperbolic Space, which may be purchased here: A Field Guide to Hyperbolic Space.

Orange brain coral with urchins.
Getting started on your own hyperbolic models is easy. The basic insight is to understand that these forms result from the simple process of increasing the number of stitches in every row. The more often you increase stitches the faster the model will grow and the more crenellated the finished form will become. Models can begin with a simple line, resulting in a hyperbolic plane; or from a single point with the crochet spiraling around to gradually fan out like a cone, resulting in what is known as a pseudosphere. You may also begin from a circle, which will produce tubular, bell shaped, or trumpeted configurations.

Источник:
Метки: Метки гиперболические кораллы кораллы крючком |
Берет |
|
Нет грубым швам или сшиваем плечики при закрытии последнего ряда! |


|
Катя Грин |
|
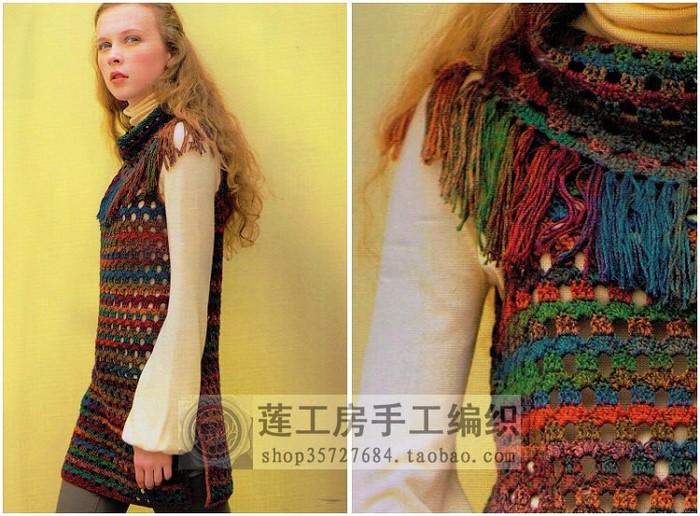
Туники крючком. Подборка 12+1 |
 |
 |
|---|---|
 |
 |
 |
 |
 |
 |
 |
 |
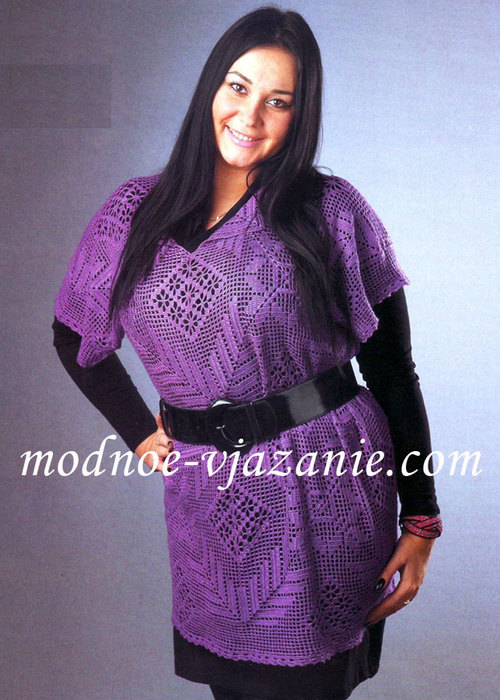
Туники крючком. Подборка 12
|
"Обледенелая роза"... Секреты макияжа... для женщин с опущенными вниз внешними уголками глаз... ПОШАГОВО... |
Этот макияж очень подходящий вариант для женщин с опущенными вниз внешними уголками глаз, поскольку он умело скрывает недостатки.
1. Нанести тени на всё веко. Для этого используем матовые тени цвета слоновой кости.
2. Возьмите черный мягкий карандаш для макияжа. Если внешняя линия разрывается, это не имеет значения, потому что она будет растушевываться. Но внутри контура, с самого начала линии должны быть ровными.
3. Наносим горизонтальные, короткие линии снаружи нашей линии. Мы используем тот же карандаш, что и раньше.
4. Мягкой синтетической кистью растушевываем черные линии на внешнем контуре.
5. На тыльной стороне ладони нанесём немного оранжевых теней, а затем буквально капельку синего и смешай их вместе. В результате цвет будет похож на варенье. Поставь акцент над черным верхним контуром.
6. Чтобы заполнить тональные различия, улучшаем контур с помощью светло-коричневых теней.
7. Растушевываем линию на нижнем веке, используя блестящие, светло-коричневые тени.
8. Черной подводкой для глаз нарисуй линию вдоль верхней линии ресниц и потяни ее на внешний уголок глаза, это придаст контур макияжу.
9. Красим ресницы и добавляем искусственные. Подчеркните брови, и внутреннюю часть нижнего века белым карандашом.


|
Советы Доны Марии Джило... (удивительное фото... смотрю, и не могу оторваться)... |

Дона Мария Джило, дама 92 лет, маленькая и настолько элегантна, что каждый день в 8 утра уже одета, хорошо причесана и со скромным макияжем, несмотря на слабое зрение.
Вот, что она ответила на вопрос "Как оставаться молодым?"
1. Не задумываться над числами, которые являются несущественными. Это включает возраст, вес и рост.
Пусть врачи беспокоятся об этом.
2. Поддерживать отношения только с веселыми друзьями. Недовольные и ворчуны тянут вас вниз...
(Помните, если вы один из этих ворчунов!)
3. Продолжайте учиться.
Узнайте больше о компьютерах, ремеслах, садоводстве, - что угодно. Не позволяйте мозгу лениться. Праздный мозг является мастерской немецкого. И немецкому имя Альцгеймер!
4. Цените каждую мелочь. Больше цените.
5. Чаще смейтесь, громко и долго. Смейтесь, пока дыхание перехватит. И если у вас есть друг, который заставляет вас смеяться, проводите больше времени с ним/с ней!
6. Бывают слезы.
Держись, скорби, и двигайся дальше.
Единственный человек, который с нами всю нашу жизнь - это мы сами. Живи, пока ты жив.
7. Окружите себя всем, что вы любите.
Будь то семья, животные, растения, хобби, - что угодно.
Ваш дом - ваше убежище. Не бросайте его...
8. Позаботьтесь о своем здоровье.
Если оно хорошее, - так держать.
Если оно неустойчиво, - надо его улучшить.
Если вы не можете улучшить его, - обратитесь за помощью.
9. Не возвращайтесь туда, где чувствуете вину.
Съездите в магазин, даже в другую страну, но НЕ туда, где есть вина.
10. Скажите любимым, что вы их любите и что используете любую возможность, чтобы быть с ними.
|
Японский крючок. |

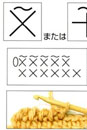

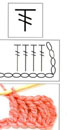
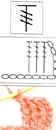


|
шарф-жакет от Andrea Babb |
|
кисики - в японском стиле Амигуруми |
|
платье крючком(идея для вязания) |
|
Совет по заточке ножей "Проще не бывает" |
|
Памятник «Родина-Мать» в Волгограде |
Скульптура-памятник «Родина-Мать» или как ее еще называют «Родина-мать зовёт!» (как правильнее остается догадываться) находится на Мамаевом кургане в Волгограде. Построена в честь героев Сталинградской битвы. Входит в список самых высоких статуй мира и занимает 11 место. Авторы проекта: скульптор Е. В. Вучетич и инженер Н. В. Никитин.

|
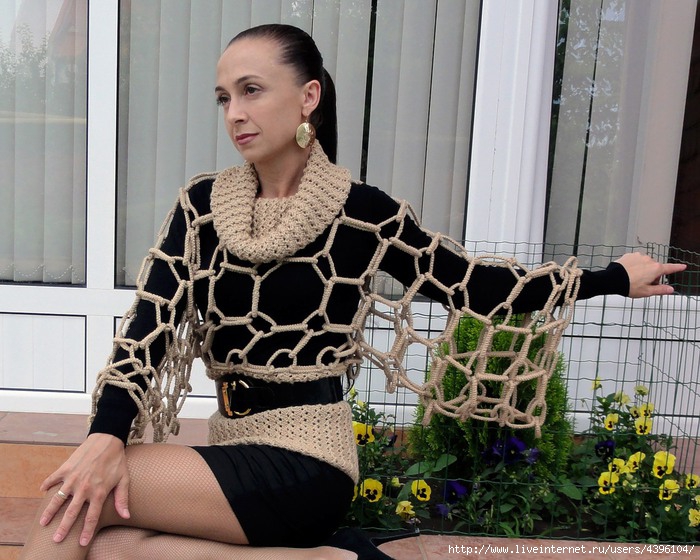
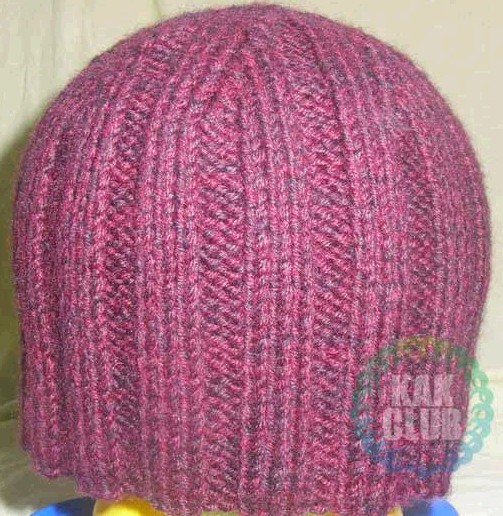
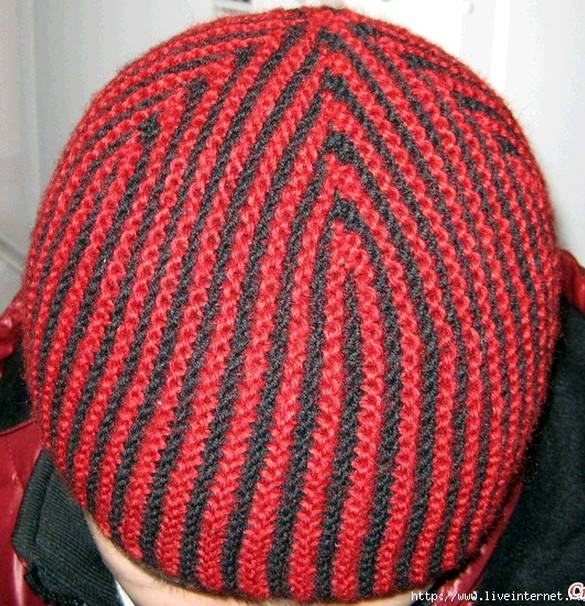
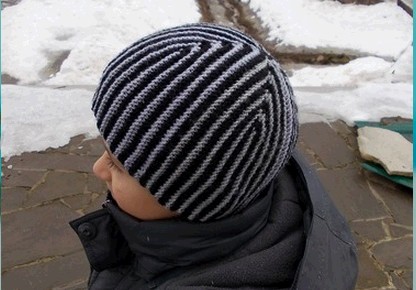
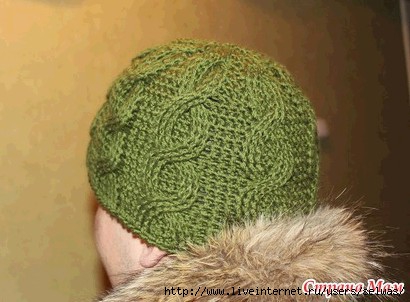
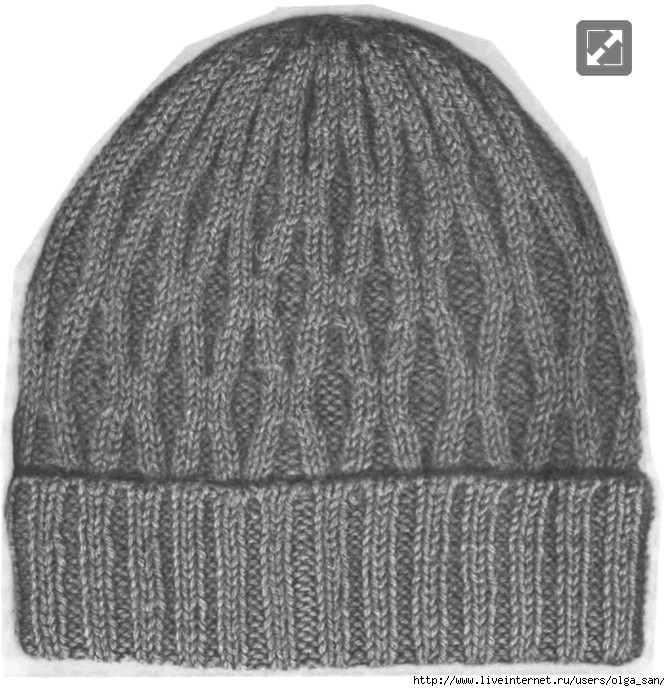
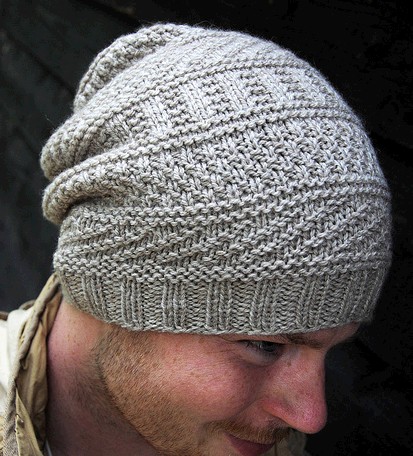
Мужские шапки,аксессуары вязаные,подборка |
|
|
|
|
|
http://liveinternet.ru/users/alisa_80/post256676601/
|
|
|
|
|
|
|
|
|
|
http://liveinternet.ru/users/gelexxx/post196159244/

|
Манишка и шарф из мотивов-медальонов |
|
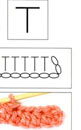
Приспособление для чтения узоров |
 Here’s a silly little hint for working with a pattern repeat, such as in lace knitting. I used this tool when I was knitting my Little Leaf Shawlette.
Make a copy of your instructions onto cardstock. Or you can glue your copy onto cardstock. Cut it just outside the edges of the printing. I like to use my paper-cutter, but scissors will also work.
Measure how tall just one line of print is. Mine was 1/4″ tall. Measure how wide your paper is. Mine was 3″ wide.
Now you are going to make a moveable sleeve to fit over your directions. You can make these in any size or shape for different sized pattern directions.
 Using a contrasting color cardstock that is an inch or so wider than your directions (I used a file folder), draw 2 lines that are your measurement apart (for me I did them 1/4″ apart). Then make a mark on the lines that is the length of your paper width measurement (mine was 3″). Center it as best you can by eye on your paper.
Then using a box cutter knife or exacto blade with a straight edge, cut on both the lines, going just beyond the marks you made. Make sure to protect your table with some cardboard underneath first. You don’t want the sleeve to fit to tightly that it won’t slide, or too sloppy and big so that the sleeve doesn’t stay in place, so cut slowly to your measurements.
Now insert your directions in the slots as shown. Move your window opening up or down to the line you are working on.
 Also, if your directions are 2 lines long, make the window opening big enough to see two lines at a time. If some of your directions are 2 lines long, and some are one line long, just remember to follow the instructions that pertain to the top-most line.
When I finish knitting for the day I hold my place with a paper clip so that it won’t get moved accidentally.
This little home-made tool is helpful in conjunction with a row counter, as sometimes the directions send you back to repeat the stitches on a former row.
primitivespirit.wordpress.com/2012/08/08/hint-for-knitting-a-repeated-pattern/
|
Для себя любимой |
|


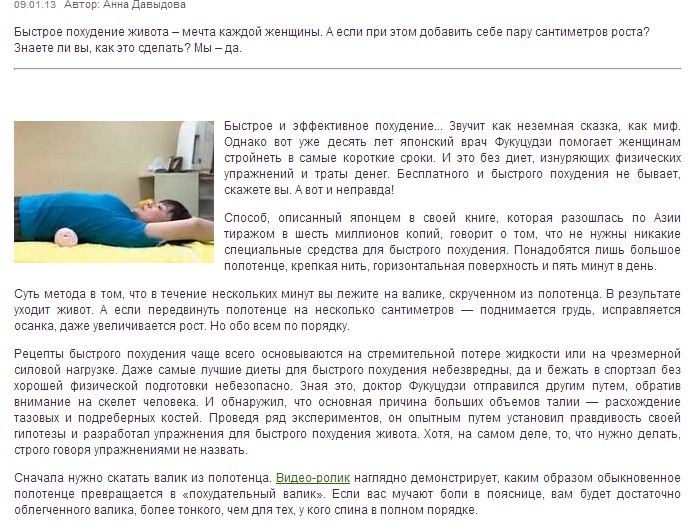
 Быстрое похудение живота