Lady Boutique Series �4845 2019 ������������: Boutique Sha ����: �������� ���������� �...
��� ��������� - (0)���������� ��������� ���� ��������: ������.��. ���� �������. ...
����� �� ����������� ������� - (0)����� �� ����������� ������� &n...
Morgenmuffel - �������� ���������, ������, ����������� - "���, ��� ������ �� �����". - (0)���� �� ������ �����) Morgenmuffel - �������� ���������, ������, ����������� - "���, ��� ������ �...
��� ��������� - (1)����
 � - �������������� ��� ���������� ���������� � �������� ������������. ����������� ��������� ����������: Internet Explorer 6, Fire Fox 1.5, Opera 9.5, Safari 3.1.1 �� ���������� JavaScript. �������� ��� ����� ����
 ��������������������� ������� �������� �� ��� ������ �����

(� ��� 16520 ������� �� ����� ������������ ����� �����)
������ ����� ������������ ↓
hand-made ��� ������� ���� ������� ������� ������� (�����) ������� ������� ������� ������� ������� ���� ��� ���� �������� ��� ��� �������� �������� ������� ������� �� ����������� ������� �������� �������� ��������� �������� ��������� ������� ������� ����������� ������ �������� ���� ����� ������-����� �������� ���� ������ ����� ��� ������ ������������� �������� ���������� ������� ������ ������ ����������� ��������� ������� ������ � ����������� ���� ����������� ���� ����� ���� ��������� ��� ������ ����� ������� ����� � ���� ���� �������� ���������
������ �� ������� |
�����: Hand-made ��������� ��������� |
1000 � ���� ���� ������� ��� �������� �� ��������� |
������� |
��������: �������� "������������ ������: 1000 � ���� ����"
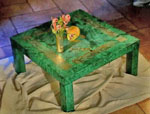
������� ���� � ���� ��� ������, �������� "������� �� ���������" � ������� ��������, ��������� �����������.
����� ������������ � �����, ��������, ��� � �������� ������� � ���������� ������-�����, �� ���� ��� - ���� �� ��������.
����� ����� ������ ��� ������ ��� �������, ������ �� ��� ������� ��� ������, ��������� �������, � ������������ ��� �� �������. �������, ��� �������� ������� ��� ����?
�������� �� ����� ������ ��������� ���������� ����� � �������� ���������, ���� 1 �� �� ������� ���������. ���� �� ������ ������� ������, � ������� ����� ����������� �������� �����, ���������������, �� � ����� �������� ����� ��������� ��� � ��� ������ �������.
�����: hand-made |
��������� ���������-���������� |
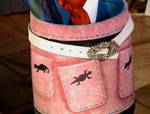
������� |
��������: http://www.craftpassion.com/2012/01/macaron-coin-purse.html

�����: hand-made ������-����� |
������ �� Picasa ���� |
����� ��������� "�������":
����� 1 - Mani di Fata 2004-11
����� 2 - Mani di Fata 2004-12
...
����� 24 - Mani di Fata 2009-06
����� 25 - ������� ����
����� 26 - ������ �� Picasa ����
����� 27 - Pomegranate
����� 28 - ����� �����
...
����� 98 - ����� �������
����� 99 - ����
����� 100 - ����� � ������
�����: hand-made |
���������� ��� ������� |
�����: hand-made |
����������� ������� |
����� ��������� "�������� ������":
����� 1 - ����������
����� 2 - ���������� ����� ���������� �������
...
����� 68 - �������� ��� �����
����� 69 - �������� ��� ����� 2
����� 70 - ����������� �������
����� 71 - ������� ������� ������������
����� 72 - ����� ������������
...
����� 98 - ��������� ���������� ��� ���������� � ��������: ��� ������ ����������
����� 99 - ����� ����� ������ - ���������� (������)
����� 100 - ����� ������� ������ ��������� ����� � Youtube
����� ��������� "���������":
����� 1 - ����������� ������
����� 2 - ����� �� ������ � ���������
...
����� 20 - �������� ������, ����� ������
����� 21 - ���������
����� 22 - ����������� �������
����� 23 - ���������
����� 24 - ������������ �����
...
����� 98 - ����. ������ ��
����� 99 - ��������� ������ ������.
����� 100 - �������)
����� ��������� "���������� ������":
����� 1 -
����� 2 -
����� 3 - ����� ����� �� ������� Quick and crafty �� youtube
����� 4 - ���������
����� 5 - ����������� �������
����� 6 - �� - ������� ��� ����������
����� 7 - ����������� ���������� ����
...
����� 98 - ����� � �������
����� 99 - ������� ��� ���������
����� 100 - ����� � ��������
�����: hand-made |
��������� �� ��������� ���������� |
�����: hand-made |
��� ������ ����� �� ������ ������ |
�����: hand-made |
������ ���� .������������ �������. |
 ������� ����� ������ - ������ ���� (Deborah C. Pope) – ����� � ������� ���� ������ � �������. ��� ����� �������� ������� ����� �������� ������������� ������� ��� ��� ����� (Kay Petal)� ����� ������ (Maggie Iacono).
������� � ��������� � ��������� ����, ��� ������� � ������, ������������ ������ ��� �� �����. �������� � ������������ ��������������� ���������, ��� �������� ������� ��������� ������� �������� � �������� � ���������� ��� ������������� � �������� ���������� �������. �� �� ��������������� �������������� ���� ����������. �������������� ����������� ������� ������ � ���������, ��� ��� ���� �����-�� ����� � ��� ������������� � �� ����� (Ive Subic) – �������� ��������� ����������. � ��������� ����� ������ ������ � ����� � ����� ������ ����� � ����������, ���� ���-����.
������ ������� ������ ����, ����� ������ ������� ��� ���� ������. ��� �������� � ������� ����. ������ ���� �� �� ������-������� �������� �������� ����� ��������� ����� � ������������ �������� � ���� ������������� ����, ����������� ���������������� ��� ��������. ��������� ������-������� � ��������� �����, ��� � ������������ ��� �� ������ � ���������. ��� ������������� ���� ���������� � �������, ����� � �������, �������� �������������� �������, ��������� �����, �������� ������ � ����������.
«�������� ���� ������ ����� �� ������������ ��� ����� � �����������, ��������� ������� ��� ���������. ��������� �������� �� �����������. ������ �� ����������� ��� ����. ������ ����� ����� ��������� � �����������, ���������� ������� ��� � ����� ������� ������������».


����� ������, ����������� � ������������ ���������� – ��� ��������� ���������� ������ � ��������, �������� � ��������, � ���������� ����������. ��������� �� ������ ������� � �� ��������� ���� ������ ��� �������.
«��� ���������� ����������, ��� ������� � ������. � �������� ������ ���� �������� ���������� �������. � �������� ������ ��� �������� ������� �� ���� � ����� � ������ ��������� ����������. � ���������� ����� ����� ����� ����������� ������. � ���� ������� �� �����������, � � ���� �������� ����� ������ � ����� ���� � ������� ����� ����».


"Quixotic" "Good Mourning"
"������������" (��������) "������ �����" (��������)
�������� ����������������� ������������ ������ �������� � ��� � ������, ��, �������� ������� � ��������� ������������� ������������, ��� ����� � �������� ������� ������ �������� � ������� ����������� � ������� �� �����������.
� 2008 ���� �� ��������� ����������� ������ ���� ���� ������� � ������������ �������� ������������ ���������� ����������� (NIADA). � ������� ��� ������ � ���� 2010 ���� ��� ��������� � ���������, ����� �������� ������-����� «���� �����» �� ������� ������ � ��� �������� «����� ����� 5». ��� ����������� ������� ���������� ��� �� ����������, ��� � �� ���������������� ���� ���������� ����������. �������, ��� �� ��������� �������������� ��������� ���� ����� �����, ��������� ��������� ������� ������� � ������������� ������ ������ � ������� � �������� �������.
������ ����������� � ���������� ����� �� ����� �������� �������� ������ - ����� ��������� �����: http://www.firstdoll.ru/forum.html


"Herr Hiram der Hase" "If the Tale Fits..."
"�������� ����� ����" "���� ������ ��������..."
�������� � ���� ��� ������ ����� � ����� ������ ����: http://deborahcpope.typepad.com/
����� ������������ ���������� � ����� NIADA: http://www.niada.org/newmembers.html
...� ������ � ��� � �������" pro�����"3(4)2010,� ������� ������� ��� ��� ������� ����� �����..������� ���������� � ��������.��� ������ ,�� ����������� ���,������������ ������ ��������� � ���������� ����� ���� ��������.����� ������ ���������� �������������(������� ����,������,���������)"��������"����� ��������� ��� ������ ������������ ������,������� ������� ������������ �� ������ � ������������� � ������� ����.��������� �����.����� -���� ����������� ������,������������ ����" ����".�������� ,����� �������,������� ���������� � �������������� ����� � ������� ������� ����� � "����������" ���� �� ����������.����� ����� ����� 10 ����� �������� � ������,���������� � ��������� � ������������� � ������� ��� t 100*.����� ����� �������,�� "�������" ��� ������ ������ .
����� ��������� "�������":
����� 1 - Cocoakoala / Sherry
����� 2 - ������� ������� ��������
����� 3 - ��������� ������� ����� ��������
����� 4 - ������-����� �� ������� ���������� � �����.
����� 5 - ������ ���� .������������ �������.
�����: Hand-made |
����� �� ����� |
������� |
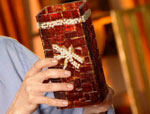
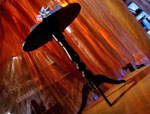
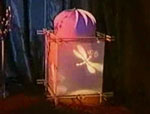
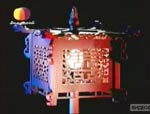
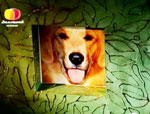
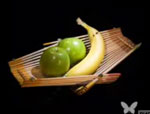
��� ����� ������� ������� �� �����, ����� �������� ��� ������������ ������ Calabarte.

�����: hand-made |
����� �� ����������� ������� |
������� |
�����: hand-made |
������ ������ (Calvin Nicholls) |
������� |

�����: hand-made |
���������� �� ����� |
������� |
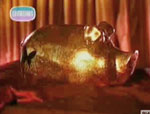
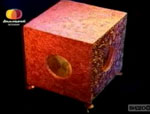
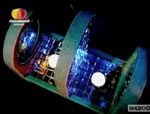
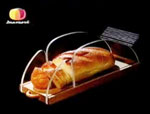
�������� (http://www.kpnemo.ws/other/2011/06/06/vnutrenniy_m...toshi_ito_hirotoshi_itoh/#full)
�����: finfisher555![]() | ����: 06-06-2011 / 16:08 | 92 ���������� | [1 ������������]
| ����: 06-06-2011 / 16:08 | 92 ���������� | [1 ������������]
")
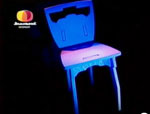
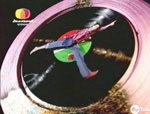
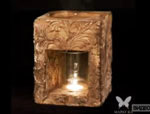
�������, ��� � ���� ���� ���, ��� ������ �� � �������� ������ �� ��������� �����, �� ������� ����������� ����, ������� ������� ��� ���� ���� ���������? ��������, ���� "���������" �������� �������� ��������� �������� ��� (Hirotoshi Itoh), ������� �� ������ ��� �����, ��� ����� ���������� ��� ������ �������� �����, �� � �������� ��� ���� ��� ���, ��� �� � ��������� ������� ����� ��������������.
�����: hand-made |
��� ��� ����� |


�����: hand-made |
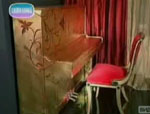
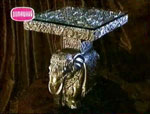
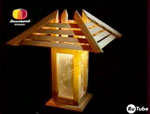
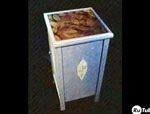
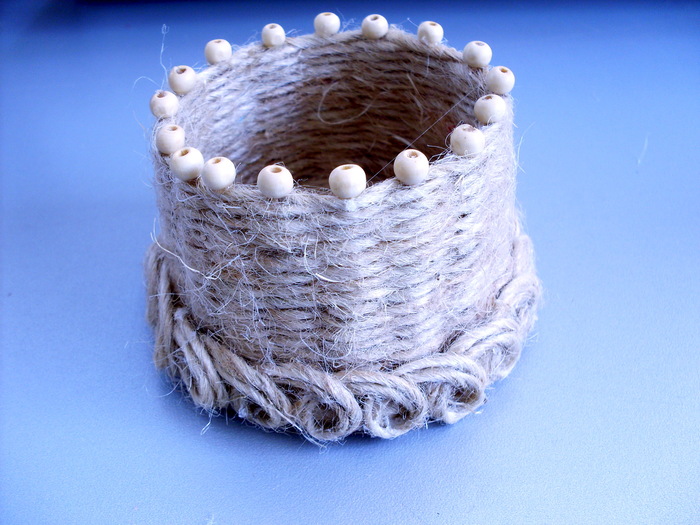
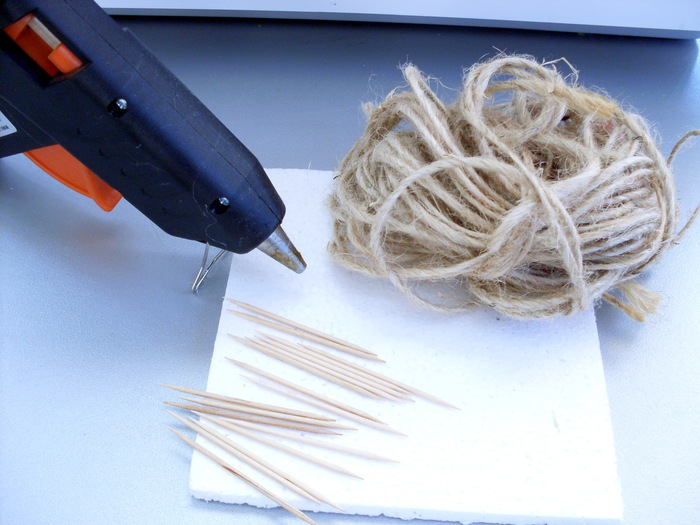
��������� ��� ��������� ������ ������. |
������� |
��������:
http://femeie.ru/rukodelie/1007-podstavka-dlya-bizhuterii-svoimi-rukami.html

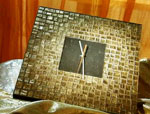
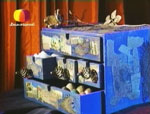
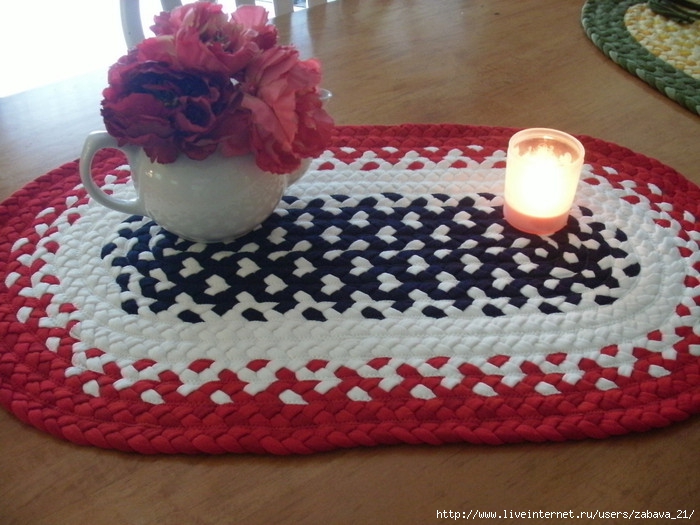
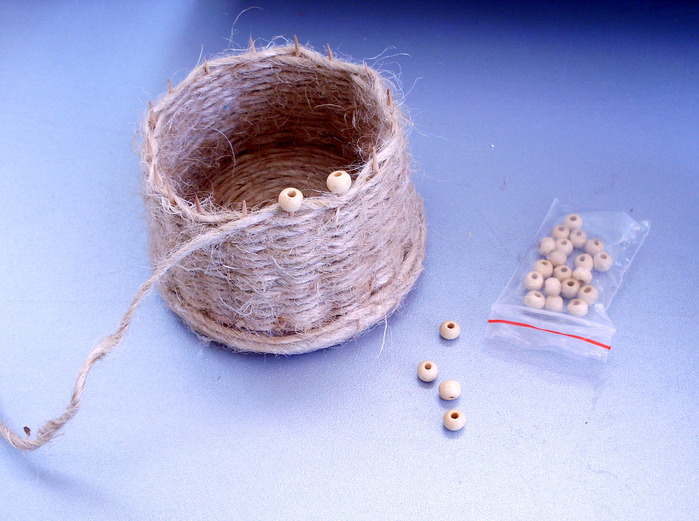
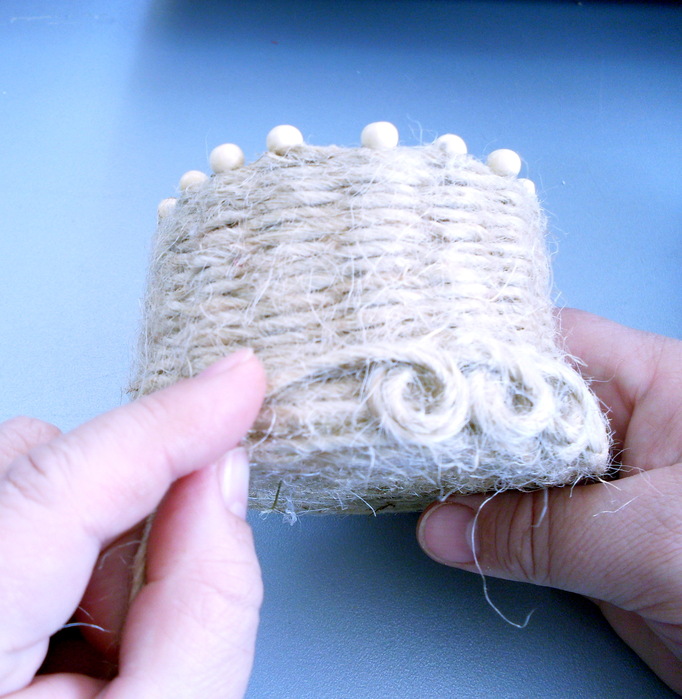
� ����������� ������� ������ ����� ��������� � �������� ��� ������ ������ ����� � ��������. ��������� ���������� �� «�����» � ������� � ������� ������� ������, ����������� ���� ��� ����-�� ��������, � ������ ������ �� �������� ��� ����� �����, ������ ������ : «�� ���?», � �� ��������� ��� ��� �������� �� �������� � ��������� �������� ��� ����� ������. �������� ��������?
����� ��������� "������, ��������":
����� 1 - ������.����.
����� 2 - �������-��������
...
����� 4 - ������.����.
����� 5 - ������ �� �������� ������.
����� 6 - ��������� ��� ��������� ������ ������.
����� 7 - ���������� ������� �� 15 �����
����� 8 - ��������� �� ����� � ����� (��������) / ��������� � ��������� / ������ ���� ������ ����� - �I see it, I like it, I make it!�
����� ��������� "�� CD-������":
����� 1 - �� ������ CD-������ (��)
����� 2 - ����������� ��������
����� 3 - ��������� ��� ��������� ������ ������.
�����: hand-made |
������ �� ������������ ����� |
������� |
�����: hand-made |
������-����� �� ������� ���������� � �����. |


����� ��������� "�������":
����� 1 - Cocoakoala / Sherry
����� 2 - ������� ������� ��������
����� 3 - ��������� ������� ����� ��������
����� 4 - ������-����� �� ������� ���������� � �����.
����� 5 - ������ ���� .������������ �������.
�����: hand-made |
�������� �������� �� ��������� |
������� |
��������: ����������� �������: �������� �������� �� ��������� (http://ravliki.blogspot.com/2011/01/blog-post_16.html?spref=bl)

�����: hand-made |
������ �� ����������� ������� |
������� |
�����: hand-made |
��������� �� �������� |
������� |
�����: hand-made |
�������� �� ��������� |
����� ������-������ galina2008
�������, ��������� ���������� ��� �� ������� ��� ��������.

��� �������� ���������, ��� ���� �� ���

������ �� ��������� ����������, ������� �������� ��� ������ �� ���������
�����: hand-made |
���� ���� ��� ������ ������!!!! |
�����: hand-made |
��� ��������� |
������� |
�����: hand-made |
����� ������-������ � ������� ��... |
������ 1
������ 2
 1. ����� ��� �������� |
 2. ��������� ��� ������� |
 3. ���� � ������� ���������� |
 4. ������� |
 5. �����-������� |
 6. ���������� |
 7. ����� |
 8. �����-������� |
 9. ������ ������ ������ |
 10. ��������� ����� |
���������:
• ������
• �����
• �����������
• ���� � �������
• ����
• ����� � �����������
• ����
• ������, �����
• ����������� ������� � ������
• �� ������ � �������
• �������
• ����������
• ��� �����
• � ������ ����
• ������ �������
• ������ �� ������ ��
�����: hand-made |
��� ������ �� ������ �� ���� ����������� ��������� |


�����: hand-made |
������ �� ����������� ������� |
�����: hand-made |
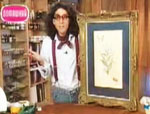
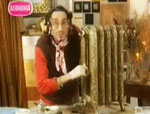
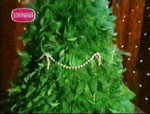
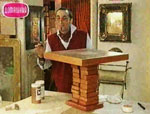
Jason Mecier: �������� ������������� � ����������, ��������� �� �����, ��� ��� ���� ��������� |
������� |
�������� (http://subscribe.ru/group/mir-iskusstva-tvorchestva-i-krasotyi/169687/)
���� ������������ ������� ����� ������� �������� �� ���� ������! ����� ������� ������� ��������� �����, ������ ������ ������������ ������� ���������, ����� �� ��� Marlboro, ���������, ����� � ��� ���� ������� �����! Jason Mecier ����� � ���-���������, � ������ �������� ����� ������� ������������� �� �����, ��� ��� ���� ��������� – �� ������, �������, ��������, ���, �����, ��������, ���������, ������, ����������� ������, ��������� ��������� �������, ������, �������! Jason Mecier � ����� ������������ ������� ���������� ��������� ��, ��� ���������� ��� ����, � ����� ������� �� �����������.


�����: hand-made |
������� �������� ��� |
�����: hand-made |
���, �� �� ��. |
�����: hand-made |
���, �� �� �� |
�����: hand-made |
����� ������������ |
������� ���� ������������ �� ����� Darievna.ru - «����������� �����»����� ������������ ������� �� ����� � ��������, ��� � �������, ��������. �� ����� ������������ ��� �������� ������, ��� � ������ ����������� �����������, � ��� ��� ������������� ������� ���������� �������. ���������� �� ���������� �����, �� �� ��������� ��� �������. �� ������ ������� ����� ������, ������ ����� � ���������� "�������".
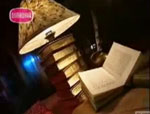
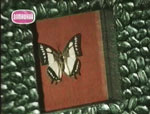
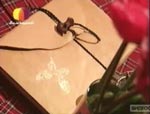
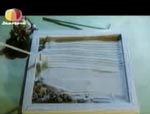
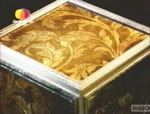
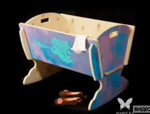
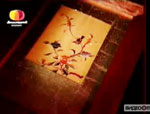
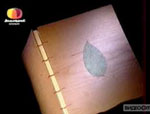
The original idea is French, but as there are no instructions available, we made our own instructions to help in getting started. You can choose the designs to stitch as well as the size of the book and the number of pages. All the numbers given here are an example only, based on the book in the photos.
 |
Even though stitching a Stitcher's book may take some time, it's very easy to finish. Back stitches are sewn around all the pages and covers. Then the pages are sewn and attached to the cover. There's cardboard inside the pages and covers to make them firm.
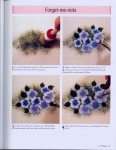
The designs in this book can be found in different De fil en aiguille magazines, as well as Isa Vautier's book Un petit fil rouge m'a dit... We've prepared a detailed list of the designs used, if you want to know where to find the designs. The book was stitched on 30 count natural linen fabric, over two fabric threads with two strands of DMC 815.
Below you'll find instructions for finishing a Stitcher's book. Please note, that it is prohibited to copy or download or distribute these photos or instructions without our permission. Of course you are welcome to share the link to these pages. If you have any questions about the instructions, please send us an e-mail and we will be happy to help.
1. You can stitch the book on any cross stitch fabric, aida or linen. The size of the finished book depends on the fabric and the size of the pages you choose to stitch. If you stitch on linen, you can stitch the designs over one or two fabric threads.
 |
The size of the front cover of the book is approximately 11 x 13 cm (4.3" x 5.1"). In the photo above you'll see the dimensions of the book cover in stitches, stitched over two fabric threads. We have also pictures of other dimensions of this book, if you want to take a look.
2. Below you'll see photos of all the pieces stitched for this book. The pages are numbered so that the front cover is the page number 1 and the back cover number 12. Back stitches are stitched around every page. It is better to stitch all the back stitches first and only then the designs inside. Make sure that you have the same amount of back stitches around each page.
If you want to see how the pages look like in the finished book, you'll find photos of each page in the Photo gallery.
 |
 |
 |
 |
 |
 |
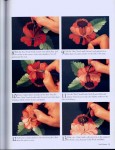
3. When you've finished stitching all the pieces, trim the edges, approximately 1 cm (1/3"-1/2") from the back stitching. Start sewing pages like in the photo below.
 |
Fold the page following the back stitched line in the middle, reverse side facing inwards. Close the upper (or lower) part and the side. When sewing, pass the needle under the back stitches. Don't pierce the fabric, but always pass the needle under the back stitch like in the photo.
Leave the lower (or upper) part open and insert a piece of cardboard inside the page. You can use any cardboard, as thick or thin as you like. Using cardboard makes pages firm. Sew the last side of the page. Sew all pages like this.
 |
 |
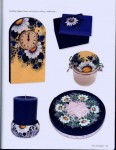
4. Sew the inside and outside covers together (pages 1/12 and 2/11), reverse sides facing inwards. Leave an opening to the lower side. Cardboards will be inserted there. When sewing the short sides, sew cords or ribbons (to close the book) at the same time. Insert three separate pieces of cardboard in between the covers. One to the front cover, one to the back cover and one narrow piece to the back of the book (take a look at the photo below). Close the opening.
Please note! It might be easier to attach the pages to the cover if the third, narrow piece of cardboard is not yet in place. You may want to leave the narrow part of the back of the book open and NOT insert the third piece of cardboard until you've attached the pages of the book.
 |
 |
5. Sew couple of tiny stitches to the back of the book, following the back stitched lines. This will hold the three cardboard pieces in place.
 |
6. Attach the pages to the back stitched lines in the inside cover, between pages 2 and 11. Don't pierce the fabric, but always pass the needle under the back stitches, like when sewing the pages.
 |
6. Voila! It's finished.
 |
�����: hand-made |
��������� |
������� |

�����: hand-made |
�������� |
������� |
�����: hand-made |
ukrasit odejdu |
�����: hand-made |
���� ��� ������������� ������ |
�����: hand-made |
���� ��� ������������� ������ |
�����: hand-made |
��������� |
������� |
�����: hand-made |
����� ���������� |
������� |
�����: hand-made |
������������ �������, ������ ������ |
description
 ������
�����: hand-made |
������� �� �������� |
������� �� ��������****�����������
������� �� ��������

�����: hand-made |
������ =�������= |
������ =�������=
����� ����� �������� ����� �� ���������� �������.
�����: hand-made |
���������� ������ |
�����: hand-made |
������� |
������� |


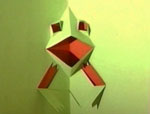
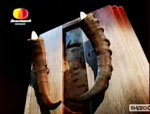
 Some time ago, do you remember sculpting Ollie Owl. Well, when Debie came down and she saw Diagon Alley, it got her creative juices flowing and she made this little nest of baby Owls to go in Eeylops. I've also made a couple of baby Owls, but they are not finished yet. Thanks for Sharing your tips Debie.
�����: hand-made |
�������� |


�����: hand-made |
������� |
������� |
 I did a blog post about my friend Julie, at the beginning of October and shared her work with you all.
 I'm actually waiting for a parcel from Julie, for Eeylops Owl Emporium. If it arrives today, I'll take some pictures and share them.


�����: hand-made |
���������� ������� |
������� |


�����: hand-made |
���������� ���� ��������� ��� �����h |
������� |
��������:
http://svetta-silk.blogspot.com/2010/10/blog-post_3646.html


�����: hand-made |
��������� �� ������� ������� |
������� |
�� Wee Wonderfuls �����: Hillary Lang
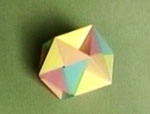
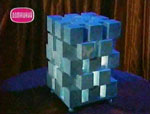
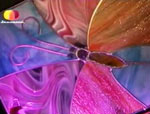
A Psychedelic Prismatic Coaster Project with Lena Corwin
by Lena Corwin
Rain, rain, go away? Not if it means arts and crafts with designer, BLOGGER and regular OC contributor LENA CORWIN !
It's a rainy day in NYC, perfect for breaking out a classic craft project from childhood: fuse beads! This project comes from my friend Caitlin Mociun, who agreed to let me copy her. She and I bought our fuse bead sets at Ikea, but you can also find them here and here.
Instructions:
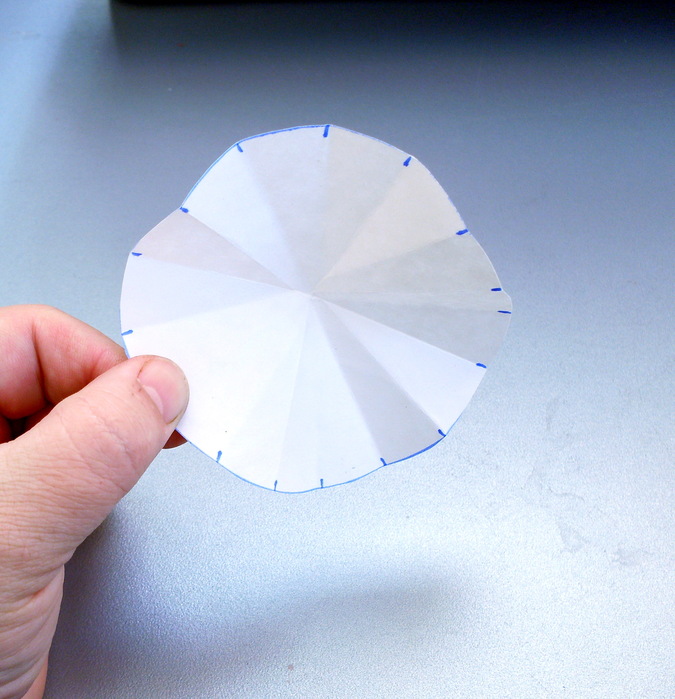
1. Fill the plastic template with beads, placing them one at a time.
2. Carefully move the template filled with beads to an ironing board or towel.
3. Place a piece of parchment paper on top (included in kit).
4. Iron on high heat until the beads start to melt.
5. Let the beads cool and then peel off...
And presto! Fun in the sun becomes fun in the rain.

�����: hand-made |
���������� �� ��������� ������� |
������� |
� ����������� ��������� ��������� ������� ���������� ������������� �������, � ��� ����� � ���������� ��� �������. ����� ���������� �������, �� �������� ��������� ��������, ��������, ������ ��� �������, ���� ����� ��������� ������ ����������� ���������� ������� ��.
������� ��� ����� ��������� ��������� � ��������� ���������� �������-���������� ��������������. ��� ����� �������� � ����� �����? ���-������ ������ � ���������� ������: � �������, ������� �� �����, �������� �� ����������, ��������� ��������… ��� ��� � ����� ������������ ��� ������������ ��������� ����������. ���� �����-������ ��������-��������. � ������ – �������� � ������� ������ ������ ��� ����.
��������, ��� �� ���� �������� ��������� (�������, ��������� ��-��� �����, �����, �������):

� ������� ������������ ��������� ����� “����” � ������ �2 ����� ���������� ��� ����� ���������� “�������”:
�����: hand-made |
������� ������� |


�����: hand-made |


 ...
...