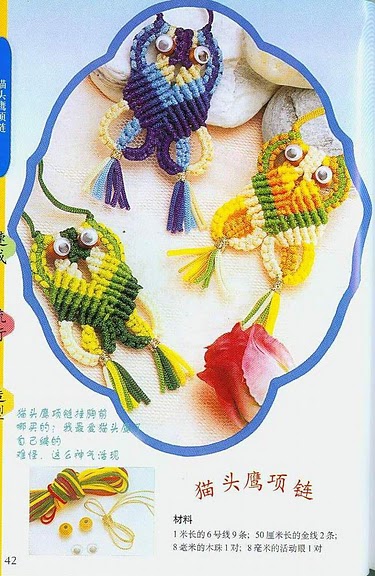
сова макраме3 |
|
Сова макраме 2 - видео |

|
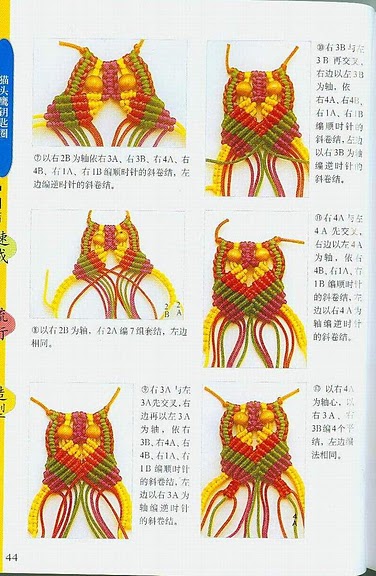
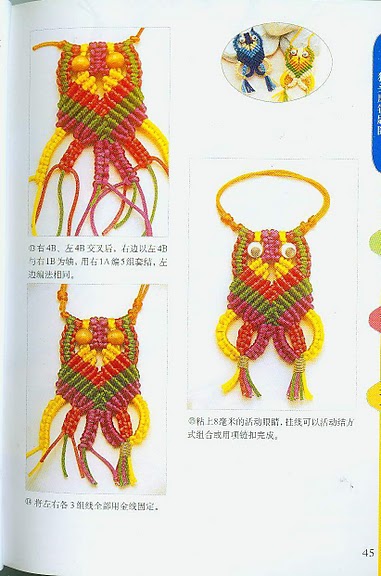
Сова макраме - МК |
|
Куклы из колготок |
|
Идеи для поделок из соленого теста |
       |
|
Уличный арт |
 |
|
Сережки-елочки из проволоки |


|
Миндальная бомба для ванной. |
Вам потребуется:
1/4 чашки соды
2ст. ложки лимонной или аскорбиновой кислоты
1ст. ложка буры
2ст. ложки сахара
2ст.ложки масла сладкого миндаля
1 ч. ложка масляного раствора витамина Е
1/4 ч. ложка эфирного масла или смеси масел
Соедините сухие компоненты и хорошо перемешайте. Добавьте масло миндаля и хорошо перемешайте, потом добавьте витамин Е и эфирное масло и снова перемешайте. Если смесь сухая и рассыпается, добавьте еще витамина Е. С помощью чайной ложки выложите смесь в формы, уплотняя ее, положите формы на лист вощеной бумаги и оставьте на 2-3 часа. Выньте бомбы из форм и оставьте сушиться на воздухе в течении 10 дней. Храните готовые изделия в плотно закрытом контейнере.

|
Ваза из пуговиц. |
|
Ваза из пуговиц.
Она сделана из пластмассовых пуговиц, тщательно склеенных между собой, на поверхности воздушного шара, который потом удаляется.    |
|
Мишка-обаяшка из носка без пары |
|
Мишка-обаяшка из носка без пары
          |
|
Кольцо из ......ложки) |

|
iz bumagi |

|
Учимся рисовать |
|
Lovely Lovebirds |


You will need:
Tools:
Step 1 - Modeling your lovebirds
Using a small amount of cold porcelain, mold it into a pear shape.

Carefully bend your cold porcelain upwards as shown above.

Using your pointer and thumb, pinch the top part of your bird to create a beak.

Pinch the lower part of the bird so it looks like the picture shown above.

Make two small pear shapes and flatten them out as shown above.

Attach the wings on to your bird as shown above. You can use regular glue or crazy glue. Then bring the ends of your wings to a point.

Repeat all the steps to create a slightly smaller second bird and insert the beading pins so that the pin head are under the birds. Set them to dry in a cool, well ventilated area for about three days. You may want to rotate them around every day or so to ensure that they dry completely.
|
Step 2: Making your birdcage
Starting from bottom up, start lining up your masking tape vertically across the glass jar. Make sure that your lines are straight and that you leave an equal amount of space between each tape.

Fold in your tape and make sure that it is very tight so no paint goes in.

Place your jar facing down and spray an even coat on it. Let it dry for at least an hour.

While you wait, go ahead and spray paint your candle holder and glass jar lid. Let everything dry completely. (For the candle holder and lid you might need to flip them and re-spray to make sure you get all the crevices.

When everything is completely dry, carefully remove the masking tape from your jar. Apply the crazy glue to the top part of your candle holder and attach your jar. Hold it in place for one minute.
Step 3: Assembling
When your birds are dry, add detail using acrylic paints and make the hoop at the top by cutting off the excess beading pin and folding it over.

Using hot glue, paste your birds on a toothpick. Using the elastic beading cord, pass it through both hoops and tie a knot at the top. The distance from the knot to the bird should be the distance where you want the birds to fall in the jar. Then, place a dot of hot glue on the inside of your jar lid and hold the elastic knot on there for a minute. You are ready to put it all together! Carefully close the lid on your jar and adorn your piece with ribbons and bows :)
 |
|
подставка под кисточки |
Дорогие мои мастерицы, насмотрелась я на Ваши работы и решила себя побаловать новой подставочкой...
|
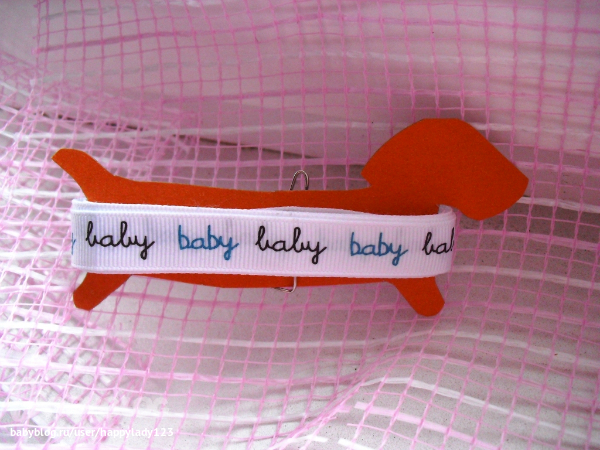
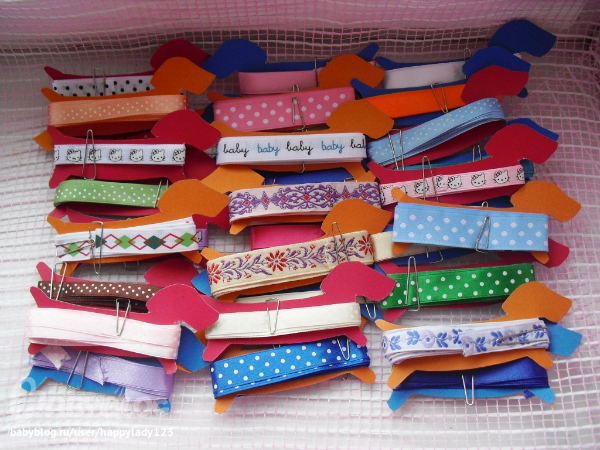
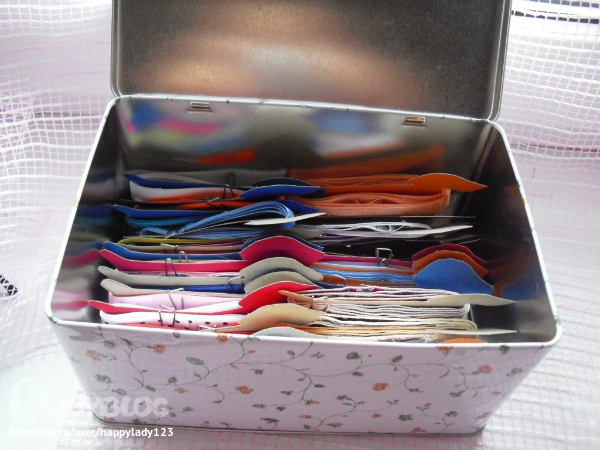
Таксы...А как вы храните ленточки? |
Вот такие симпатичные таксы теперь охраняют порядок в моих ленточках:
http://www.babyblog.ru/community/post/rukodelie/1769937
|
Симпатичный органайзер для девочки |

|
Собачка из носки |

|
Браслетики своими руками-очень легко сделать |

|