-Метки
-Рубрики
- DECOR (1018)
- Frames, wall art, mirror (204)
- Kids Rooms (97)
- Box & basket (95)
- Painting, stamp (85)
- Walls (77)
- Kitchen (70)
- Miniatures (70)
- Cushions (69)
- Curtains (58)
- Baby Stuff (51)
- Storage (46)
- Candles (41)
- Toys & dolls (36)
- Gifts (34)
- Shelves (34)
- Salt Dough, Mold, clay (33)
- Vase (32)
- Furniture (32)
- Bedroom (29)
- Clocks (29)
- Kids Pillows (27)
- Rugs & floor (26)
- Chair Cover (26)
- Bathroom (23)
- pouffe (15)
- Pin Cushions (14)
- Jewelry Display (14)
- Table Setting (14)
- Foil (11)
- Felt & mesh (11)
- Shadow-Box (11)
- Tissue Box (10)
- Table (9)
- Butterfly (8)
- Napkin Folding (5)
- Soap (4)
- Tassels (3)
- FASHION (818)
- Sewing patterns (170)
- Accessories (158)
- Embllishment (150)
- Re-fashion (98)
- Knitting (89)
- Bags (83)
- Beads (71)
- Shoes (65)
- T-shirts transformation (52)
- SRE (52)
- Scarfs (28)
- Buttons (21)
- Zipper (19)
- Shawl (19)
- No-Sew (15)
- Dye, stamp (14)
- Chinese Knots (11)
- Mending (9)
- Zig Zag (9)
- MultiWear & Infiniti Dress (8)
- boho (7)
- girl dress (3)
- Kids (2)
- Beauty (1)
- RECYCLE (694)
- Paper & newspaper (97)
- Plastic Bottles (86)
- Decorative Bottles (79)
- Thread, Rope & Wire (55)
- Blankets, jeans,leather....etc (55)
- Carton (54)
- Kitchen Items (38)
- Branches (32)
- Pipes & Tubes (30)
- Molding (27)
- Tins & Cans (22)
- CDs (19)
- Socks (14)
- Egg Carton (14)
- Sea Shell (14)
- Cloth Pin (14)
- Egg Shells (11)
- Pasta (9)
- Feather (8)
- Tires (8)
- Plastic Spoons (5)
- Towels (5)
- Coat Hangers (5)
- Wooden Spoon (4)
- Drinking Straw (4)
- Books (4)
- Light Bulbs (4)
- Hangers (3)
- China & Kitchen ware (3)
- Dried Flowers (3)
- glass bottles (2)
- IceCeam Sticks (2)
- light bulb (1)
- Corn Husk (1)
- COOKING (310)
- Dessert (140)
- Decorative Serving (111)
- Chocolate (46)
- No-bake (37)
- Egg (33)
- Bread (23)
- Puff Pastry (20)
- Food Decoration (20)
- Potato (18)
- Apple (18)
- Stuffed (17)
- Rolls (17)
- Meat (16)
- Salad (15)
- Sausage (15)
- Chicken (15)
- Marrow (13)
- Ice Cream (12)
- Banana (10)
- Cheese (10)
- Loaf (7)
- Pasta (6)
- Pizza (5)
- Cabbage (5)
- Eggplant (5)
- Fish (5)
- Mushroom (4)
- Rice (4)
- jello (3)
- yogurt (1)
- Toast (1)
- coconut (1)
- Grape Leaves (1)
- Tuna (1)
- LIGHT (148)
- Lamps (107)
- Chandelier (73)
- Baby Lights (8)
- Flower Making (115)
- USEFUL (103)
- health & beauty (67)
- GARDEN (63)
- Vertical Garden (13)
- WEDDING (44)
- Glass (26)
- Pillows (5)
- Baskets (1)
- Backgrounds (42)
- VICTORIAN (35)
- Victorian Lady (10)
- Cushions (7)
- Box (5)
- Bags (2)
- Beautiful Places (32)
- Cats (29)
- LINKS To Crafts (22)
- in minutes (17)
- Computer & internet (12)
- Games (7)
- Alphabet (5)
- PRIVATE (3)
-Приложения
 Дешевые авиабилетыВыгодные цены, удобный поиск, без комиссии, 24 часа. Бронируй сейчас – плати потом!
 Я - фотографПлагин для публикации фотографий в дневнике пользователя. Минимальные системные требования: Internet Explorer 6, Fire Fox 1.5, Opera 9.5, Safari 3.1.1 со включенным JavaScript. Возможно это будет рабо
 ОткрыткиПерерожденный каталог открыток на все случаи жизни
- Настольные игры онлайнМы предлагаем Вам сразиться в любимые настольные игры со своими друзьями, не отходя от компьютера. У нас вы сможете поиграть в дурака, преферанс, тысячу, нарды, шахматы, шашки, крестики-нолики, точки,
-Я - фотограф
-Поиск по дневнику
-Подписка по e-mail
-Друзья
-Постоянные читатели
-Статистика

another tape art work |
Today my sister came over, and we whipped up a painting to hang in her new apartment. Believe it or not it only took us a few hours to complete. You can easily make your own with a canvas, a paint brush, 1/2″ masking tape, and three colors + white acrylic paint. Just tape up your canvas every which way, paint a gradient of each color in the taped segments, remove the tape, and enjoy!
Метки: painting frame |
Процитировано 2 раз
super easy art |
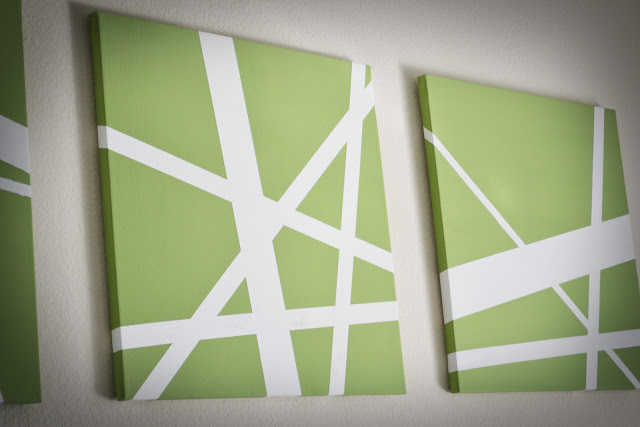
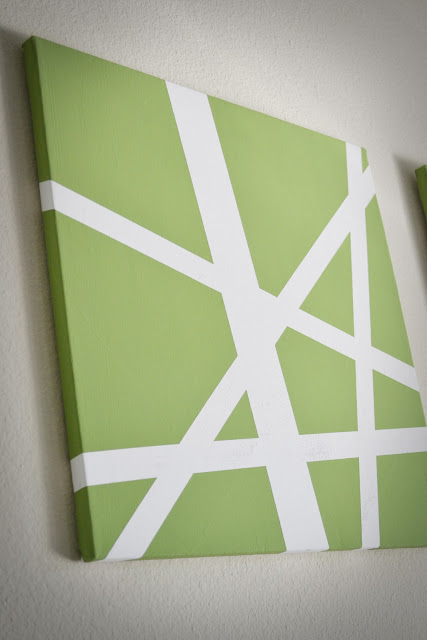
We needed some artwork for over our bed - artwork that wouldn't cost very much. What is a girl to do? Go to Hobby Lobby of course! I picked up three square canvases along with some green paint. Here is the finished result:
Seriously, so easy. To paint all of these canvases and the time to let them dry only took an afternoon.
I also think it would be really cool to do an ombre effect with the canvases - either the same ombre effect on all three canvases or paint each canvas a slightly different shade in the same color. These canvases would also be great to hang in a dorm room. They are super light so they could easily be attached to the wall with some command tape.
Метки: frame painting |
Процитировано 3 раз
shoes makeover |
If you have a favorite pair of shoes that are comfy to wear but have gotten a little scuffed and tired, here are several different ways you can bring them back to life. Try covering them with pretty fabric, re-dyeing, adding glitter and even rhinestones. Lots of ideas in this bunch! I also added several different ideas for flip flops to the bottom of the page. Have fun!

bubblynaturecreations.com
Houndstooth: A pair of pumps are covered with cotton houndstooth print fabric and Mod Podge.

lovemaegan.com

whipstitchsewing.wordpress.com
Custom Insoles: If the insoles of your favorite pair of shoes are a little tired and funky, here’s how to freshen them up using fabric and sticky back foam.

grosgrainfabulous.blogspot.com

patriciaraedesigns.blogspot.com
Embroidered Keds: No step-by-step instructions but easy enough to figure out, plain white tennis shoes are dyed then hand embroidered in a pattern of choice.

madisonavenue2011.blogspot.com

smartnsnazzy.com
DIY Dyeing Leather: Give tired and scuffed leather shoes new life by re-dyeing them (either in a new color or a close match).

crochetclouds.com

starsforstreetlights.com
Sparkle Toes: Add a touch of glitz to a plain pair of pumps with crystal stick-ons.

hitsandfits.com

sayyestohoboken.com
DIY Sparkle Clips: Crystal appliques are attached to shoe clips using E6000 (or other strong glue).

theglitterguide.com

honestlywtf.com
Fabric Covered Sneakers: Make plain shoes fun with fabric and glue, you can also make funky laces to match using contrasting fabric and adhesive interfacing.

marthastewart.com

citified.blogspot.com
Pink Flair: Learn how to make a removable strap cover for Mary Jane pumps using fabric and pink velvet ribbon.

craftsnob.com

whatiwore.tumblr.com
Dyed Canvas: Learn how to dye white canvas sneakers in the color of your choice using liquid fabric dye and salt.

marthastewart.com

etsy.com
Ribbon Bows: Bright taffeta ribbon, thin satin ribbon and a hot-glue gun are needed for this 10 minute project.

countryliving.com

alisaburke.blogspot.com
Embellished Wellies: Here’s how to slit the back of rubber boots (to better fit larger calves) and lace up with ribbon (grommets required).

beachbrights.blogspot.com
Glitter Tutorials: Pumps, Flats, Sneakers, Heels, Bottom of Shoes.
Fun With Flip Flops
*First published April 27, 2011 and moved to this page for better organization

alisaburke.blogspot.com
Embellished: Decorate with seam binding or ribbon and desired embellishments. Wrapping and a bit of fabric glue involved.

marthastewart.com

imperfectlybeautifulms.blogspot.com
Balloons: Wow, so much color, so much fun! Made by tying water balloons in double knots along the thong part (you’ll need 200 balloons per pair of sandals).

oneshetwoshe.com
Метки: shoes |
Процитировано 2 раз
How To Dry Flowers |
Making homemade potpourri is a great way to enjoy flowers from your garden year round but you need to dry them first, here are several ways you can do that. You’ll also find several tips added to the bottom of the page (a flower preservative recipe, working with petals and leaves, hydrangeas and straw flowers). Lots of info here!
First a few tips…

Dried Flowers Are Beautiful On Their Own And Used In Crafts
- Collect flowers first thing in the morning (after the dew is gone) and at least two days after a rain. Handle them carefully so they don’t get bruised.
- Choose blossoms that have reached near peak and haven’t started to fade or turn brown around the edges. If they are too mature, they can drop their petals easily during the drying process. Also select those that have had no chemicals used on them.
- If you cannot proceed with the method of choice as soon as you’ve gathered the blossoms, you can arrange them in a vase with lukewarm water for up to 24 hours.
- Details below that list the amount of time needed are approximates only since each dries differently and the environment in which they are dried also plays a role.
- Remove the stems and leaves (unless otherwise noted) since they retain moisture and prolong the process. If you prefer keeping the leaves on, you can do so but allow for extra time.
- They are done when the petals feel papery, stiff and the stem snaps easily when you bend it, not flexible.
Methods

Dried Buds Also Work Well In Crafts
Air Method:
- Use a window screen, wood frame with thin mesh stretched across or a cookie sheet with a wire rack laid on top. These will provide excellent air circulation.
- Remove the stems about an 1″ from the base of each blossom. Lay them in a single layer across the screen, making sure they aren’t stacked on top of each other and no petals are touching. Set aside in a warm, dark place to dry.
- The process can take 10 to 20 days, you want the flowers to be completely dry and hold no moisture at all.
Petals:
- If you want to preserve loose petals, you can use one of the methods above or line a cookie sheet with paper towels (newspaper works too) and arrange the petals in a single layer. Leave in a warm, dark place until dry.
Hanging:
- Leave the stems on the flowers but remove the leaves. Take 5 to 7 flowers together and align the bottom of the stems evenly. Tie the bunch 2″ from the bottom of the stems with a string or bind together with a rubber band. Have the stems at different lengths so the blossoms aren’t crowded together at the top and rest at different lengths.
- Hang the bunches upside down in a warm, dark place and allow to dry for anywhere from two to four weeks.
- You can also place the bunch in a paper bag and tie the top closed around the stems, this will help keep the environment dark as well as keep dust from accumulating on the blossoms. Make a few holes on the sides of the bag for better air circulation. Do one bundle per bag (about 5 to 7 flowers per bundle).
Dehydrator:
- Use the instructions that came with your dehydrator, or make your own dehydrator.
- You want to place the flowers in a single layer, petals not touching each other and normally set on low.
- It’s preferable to dehydrate them by themselves so they don’t absorb the odors from other food items in the dehydrator (and vice versa). If you plan on making potpourri with your dried blossoms, feel free to include some slices of citrus fruit peel and apple slices on the trays to include in the mix.
Oven:
- Arrange in a single layer on a cookie sheet with a rack and place in a slow oven (180° F).
- Heat for several hours, keeping the oven door open the entire time (to let moisture escape).
- Remove tray from oven and allow to sit overnight to complete the process and ensure there is no more moisture.
Desiccant:
- This method holds the shape and color of the blossoms best. Be careful when removing the flowers from the desiccants after they are dried as they are brittle and can crumble easily. Either tap the mixture off or use a soft craft paintbrush to remove the granules.
- Do not leave them overlong in the mixture as small holes in the petals could develop.
Silica Gel:
- These are crystals that you can purchase bulk in craft stores or online. Layer the flowers and silica gel inside an airtight container, the first bottom layer being about 1″ of Silica and the top layer completely covering the blooms with another 1/2″ of Silica.
- Be careful when covering the blossoms that you don’t squish all the petals together.
- Depending on the flowers used, leave for approximately two to seven days. Store the used Silica Gel in an airtight container, it can be used over and over again.
Borax & Sand:
- Same layering process used above. Sift the Borax first to remove all lumps.
- Use a 2 to 1 mixture of Borax and fine sand (make sure it’s clean).
- Leave for 14 to 17 days with the container uncovered. Can also be used for the microwave method (listed below).
Borax & White Cornmeal:
- Same layering process used above, use a 50/50 ratio. Can add a few tablespoons of Kosher salt to help preserve petal color. Leave the container uncovered.
Kitty Litter:
- Same procedure as the Silica Gel. Can also be used for the microwave method below. Use a plain, dust-free brand and clean kitty litter (of course).
Microwave:
This can be tricky, but once you get the hang of it the process is very fast. Do a few trial runs to determine how much heat and length of time to use for the type of flower you are working with.
- In a microwave-proof dish that you use only for crafts (not cooking), pour a 1″ to 2″ thick layer of silica gel.
- Remove all but 1″ of the the stem.
- Insert them stem first into the silica so they’ll be sticking up.
- Lightly sprinkle Silica into the petals to hold the petal position and carefully cover the blossoms completely.
- Do only a couple flowers at a time and make sure they’re not touching each other.
- Place a small cup of water in the back corner of the microwave (place a wooden toothpick in the water so there’s no danger of superheating).
- Next place the container in the microwave, uncovered, and heat on the defrost setting in one minute increments. Repeat until they are dried.
- Once all moisture is removed and they are completely dried, cover the container and remove it from the microwave. Position the lid so there’s about 1/4″ to 1/2″ air flow into the container and let sit for 24 hours.
- Remove the flowers and gently shake off all the silica gel (you can also brush off with a soft craft paintbrush).
Denser blossoms will take longer to dry, those with thick petals don’t dry well with this method and those with more delicate petals (like a pansy) will dry quickly so be careful to watch. Each microwave heats differently, experiment–you may find that you need to up the heating level.
Water:
- Remove the leaves from the stem and place them stem first in a vase that has 1″ to 2″ of water on the bottom.
- Place in a dark, warm room.
- When all the water is gone from the vase, the flower is dried.
The Hydrangea is one flower that works well with this method (see more details below).
Preservative Recipes & Instructions
*First published October 28, 2006 and moved to this page for better organization
Interested in preserving flowers from your garden? Here are two different recipes & methods you can try.

Preserve The Beauty Of Fresh Flowers With These Simple Tips
Materials Needed:
Fresh Flowers
Floral Wire
Airtight Container
Plastic Bag
Borax
Soft Brush
Works well with: daisies, mums, pansies, roses, sweet peas
Instructions:
- Remove the stems with wire by running it through the throat of the flower and twisting it.
- Take the plastic bag and line the container with it (open side up).
- Pour the borax into the bag, cover the bottom about 1 inch deep.
- Place the blossom face down in the borax; add as many as the container can hold–do not crowd.
- Cover with another layer of borax.
- Twist the plastic bag closed as tightly as possible.
- Seal the container and let sit for at least 5 weeks.
- Remove the blossoms and carefully brush away the borax.
You can now use these dried florals for crafts.
Cornmeal/Borax Floral Preservative
2 parts cornmeal
1 part borax (powdered)
Cardboard box with lid or tin with lid
Directions:
- Start with combining the cornmeal/borax mix to fill half the box or tin you will be using.
- Mix thoroughly.
- Take the freshly cut flowers and place face down in the mix. Partly cover them with the mixture.
- Keep the lid on the container. Let sit for approximately 3 weeks.
After use save the mixture as it can be reused over and over again.
Flat Petals & Leaves
First published March 31, 2009 and moved to this page for better organization
Here’s a goody that was sent in from Sherri Hanley:

Dried Rose Petals Vase
I’m a certified craft junkie and love to do many different kinds of crafts, but my favorite projects are those working with dried flowers. Here’s a trick I picked up along the way to dry rose petals and leaves flat (otherwise, as you know, they shrivel and curl up):
- Lay fresh petals and leaves on a terry cotton towel placing them in a way that they will stay flat. Lay them in a single layer. For those petals with a bit of a curl to the edges, lay them the curling side down but pull out the curl as best you can and sort of pat them into place.
- Cover the petals with another terry cotton towel and gently pat down (don’t run your hand over the towels to smooth in place but pat instead). You should use thicker towels so they will weight the petals down somewhat.
- Leave them alone for a few days and they will dry mostly flat and without much shrinkage.
I use the dried petals in a variety of projects and one of the most frequent questions I get is “where did you find those flat petals”. Well this is my secret and now everyone on tipnut can know how to do it!
Nice tip, thanks very much Sherri for sharing!
Hydrangeas
You can make beautiful arrangements and wreaths with dried hydrangeas and if you’re lucky enough to have them in your garden, preserving them by drying is super easy to do. Here are three easy ways to do it:

Place A Single Stem Of Hydrangea In A Vase And Leave It To Dry
Water Method:
This method works well for hydrangeas and those varieties with long stems.
- Remove the leaves from the stem and place the blossoms stem first in a vase that has 1″ to 2″ of water on the bottom.
- Place in a dark, warm room.
- When all the water is gone from the vase, the flower is dried.
Silica Gel:
This retains much of the color of the blossoms, but the stems are snipped short–not a problem if you’re using them in wreaths, but if you want long stems here’s an easy fix: use floral tape to attach stems to blossoms once dried.
- Fill a plastic ice cream pail or other large container with about a 1/2″ inch of silica gel.
- Snip short the stem of a freshly cut hydrangea and place it gently into the pail (blossoms up).
- Carefully sprinkle silica gel all around, making sure to get underneath the petals and into the center of the blossoms.
- Add more flowers as you have room, covering each with silica gel as noted.
- Seal pail with a lid and leave for four days. Remove from pail and gently tap off and shake out all traces of the silica gel.
Hanging:
- Strip all leaves from the stems then tie bundles of up to six hydrangeas together (you can use rubber bands).
- Hang them upside down in a warm, dark place that is not humid.
- It will take about three weeks until they are ready, the blossoms will be crisp and the stems quite hard.
Tips:
- Snip fresh hydrangeas when there has been no rain or humidity in the air.
- For best results wait until the flowerheads feel a bit papery and have just begun to fade before snipping them.
- Once they have been dried, display in vases or store away sealed in plastic bags until needed.
- Handle the dried flowerhead very gingerly as they are quite delicate.
- To preserve as much color as possible, dry the flowerheads in a dark location since the sun or light can quicken the fading.
- They can last for about a year, just long enough to get a fresh batch from next season’s garden.
Strawflowers
Listed in the catalogs as Helichrysum, it flourishes outdoors in the garden until cold weather comes, and then when it is properly dried and cured, it makes attractive winter bouquets for the house.

Strawflowers Are Easy To Dry & Provide Plenty Of Color
Pick when the flowers first open from the bud to keep them from spreading wide and showing brown at the base. Strip off the leaves and hang the stems upside down in small bunches fastened together with rubber bands. Let them hang in a dry place–in the house is all right–until every trace of moisture is gone from the stems and they are stiff. Then arrange in bouquets.
Since it is impossible to bend the stems after they are dried, it will help the appearance of your arrangements if you dry some in a curved form. Do this by hanging the fresh stems singly over a rounded surface–tack a piece of heavy paper to the edge of a shelf, round it out full and tack the lower edge to the underneath of the shelf. Then lay the tops of the stems down over this curve to dry.
In arranging, stick the stems into dry sand, shredded paper, or sphagnum moss. Many grasses and seed pods can be added for variety in winter bouquets.
The clover-like blossoms of globe-amaranth are also often seen in winter bouquets. These are dried the same way, but they should not be picked until they are full and mature.
Метки: flowers useful |
Процитировано 1 раз
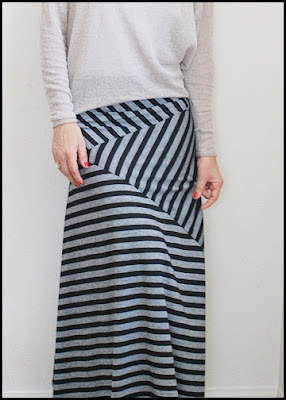
striped maxi skirt |
Метки: sewing patterns |
Процитировано 21 раз
Понравилось: 1 пользователю
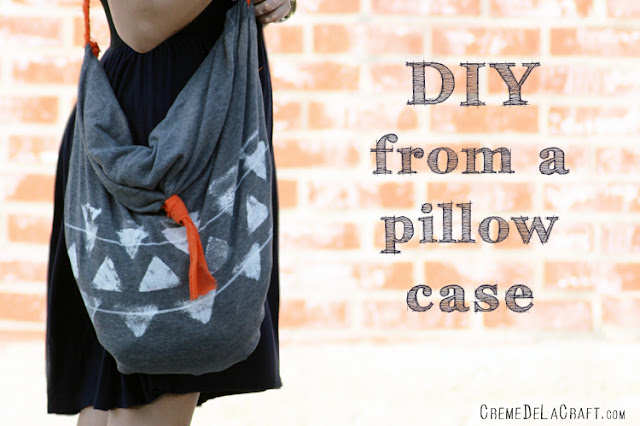
No-Sew Tote Bag From A Pillow Case |
|
Posted: 01 May 2012 07:49 AM PDT
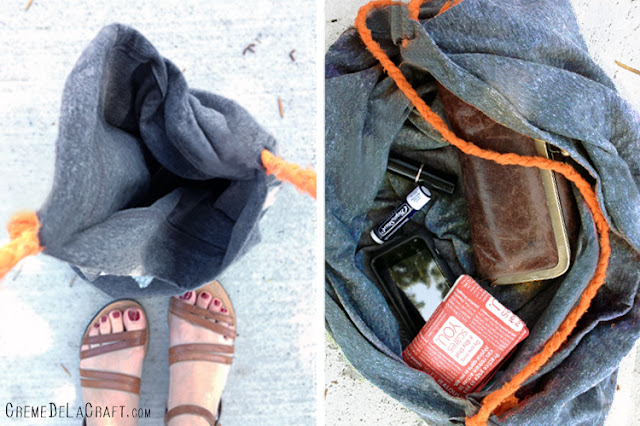
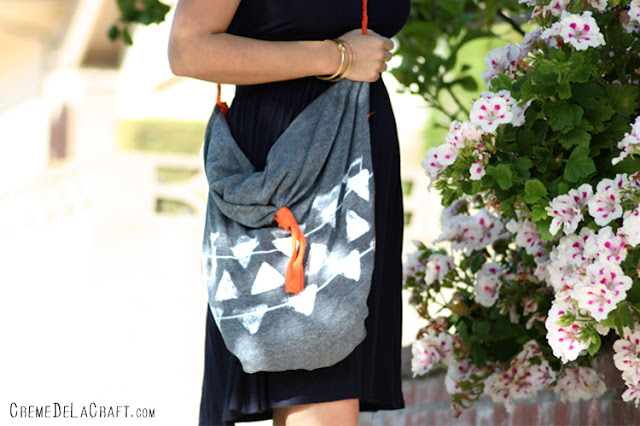
A pillow case already has all the stitching you need to create this easy and stylish tote bag. The cross-body shoulder strap also makes it super comfortable to carry around all day. Just grab a pillow case from your dresser, stamp it, give it a couple snips and you've got a custom carry-all tote for your next trip to the market! Follow the steps below to make your very own.
• King Size Pillow Case (you could also use a standard size, but the bag will be smaller. I used this onewhich measures 41" x 21")
• Acrylic Paint and a Dish Sponge (if you wish to add a pattern to the bag)
• Long Fabric Strip (for the strap)
• Scissors
• Lay the pillow case flat with the open end facing down, then fold it upwards just past the center so that the open end is now facing up. • To add a pattern to the bag, cut out your desired shape from an ordinary sponge and use it as a stamp. • Turn the bag over and connect the two bottom corners by cutting a small hole in each corner and knotting them together with a small piece of fabric. You're done! Enjoy your new bag. Follow along on Facebook and Twitter to see all my weekly DIY project. |
Метки: bag fabric scraps |
Процитировано 4 раз
Понравилось: 1 пользователю
ruffled flip flop |


Метки: shoes |
Процитировано 10 раз
Понравилось: 4 пользователям
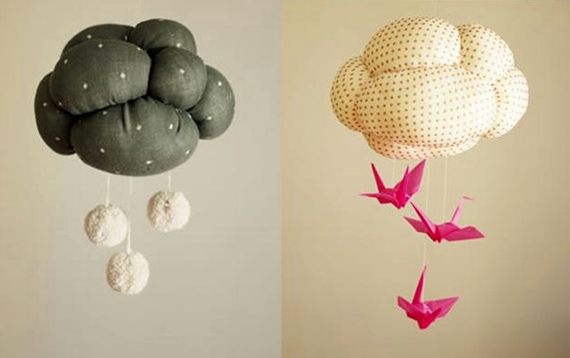
clouds |
|
Posted: 17 Apr 2012 02:53 PM PDT
Um amigo costuma contar uma história. Que há 4 anos não chovia em sua terra natal, Salinas. E então, quando choveu, um menino começou a correr e gritar: ""Mãe!! Tá caindo água do céu!!" Acho que a minha relação com nuvens pode ter explicação nissaí. Eu nasci em Minas, no polígono da seca, aquela região que quase não chove nunca e que nuvem é saudada com sorriso. Por isso tenho uma nuvem na minha sala, que chove numa bonequinha linda, presente da Marina. Já ensinei fazer dela aqui, da nuvem. Essa nuvenzinha, fotograficamente explicada abaixo (clica que cresce) é fofa. Mas é também daqueles projetos que só fazendo, pra ver se fica bom mesmo. Pelo menos não é - muito - trabalhosa. Tutorial do Bloesem Kids. +nuvens aqui. |
dcoracao.com
Метки: baby stuff kids room fabric scraps |
Процитировано 9 раз
Понравилось: 1 пользователю
laced shoes |


Materials
Eyelet setter
Eyelets
Scissors
Ribbon
Directions


Метки: shoes |
Процитировано 2 раз
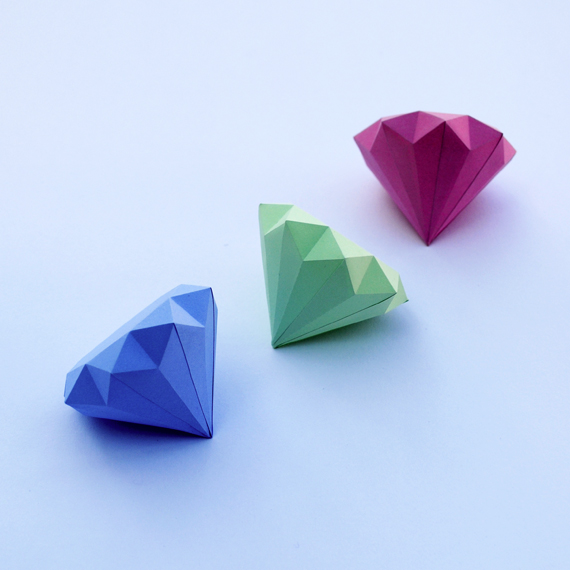
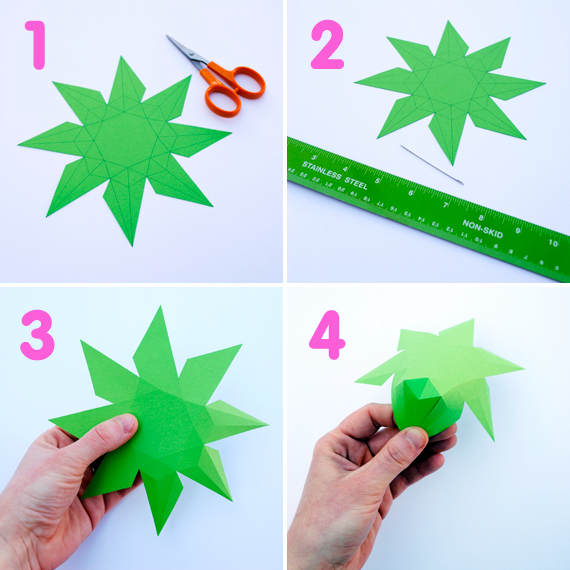
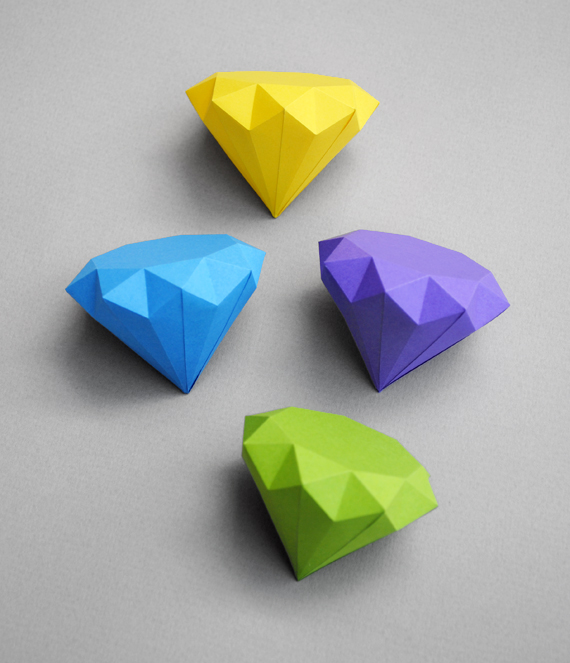
3D paper diamond |
Метки: paper |
Процитировано 1 раз
leather bag |
Вкусненький, шоколадный чехол для телефона у меня получился)))
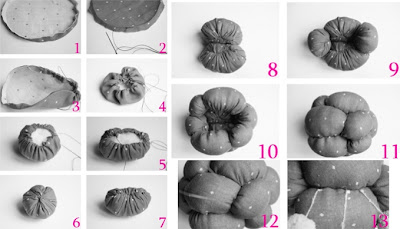
Сделать его легко и просто. Помните буфы “цветочек”? Это они и есть, но только с другой стороны.
Эта схема дает усадку ровно в 2 раза. Исходя из этого, меряем свой телефон, умножаем мерки на два и чертим на ткани прямоугольник. Расчерчиваем на его сеткой 1х1 см и начинаем стягивать.
И вот настал момент истины! Переворачиваем и видим…
Цветочки изготовлены из того же материала и приклеены.
Как изготовить цветочки читайте здесь
Затем сшиваем нижний и боковой шов. Верхний край отворачиваем и аккуратно приметываем.
Выворачиваем на лицевую сторону и радуемся новому чехлу!
Метки: bag embllishement |
Процитировано 4 раз
Понравилось: 1 пользователю
vacuum+pantyhose=find lost items |

Метки: useful |
Процитировано 1 раз
Понравилось: 1 пользователю
hanging a frame |
Have you ever dealt with the frustration of those flush mount hangers usually found on the back of mirrors? The ones that look something like this...
Метки: frame useful |
Процитировано 1 раз
hanging scarves |


This clever bit of thrifty storage was made with only loo paper tubes and a drawer. You easily do the same with a large, low profile basket. The one pictured above is the brain child of Instructables user alialexander.

Серия сообщений "Storage":
Часть 1 - Wall Pockets
Часть 2 - Creative Shopping Bags
...
Часть 26 - wall storage
Часть 27 - storing ideas
Часть 28 - hanging scarves
Часть 29 - ribbon organizer
Часть 30 - useful furniture ideas
...
Часть 44 - storage
Часть 45 - ideas
Часть 46 - useful
Серия сообщений "Scarfs":
Часть 1 - Just tie it on!!!
Часть 2 - All from SCARFS
...
Часть 22 - from scarfs
Часть 23 - scarf with lace
Часть 24 - hanging scarves
Часть 25 - scarfs
Часть 26 - quick tops from scarfs
Часть 27 - blouse from piece of fabric
Часть 28 - coat
|
Метки: storage scarves |
Процитировано 8 раз
Понравилось: 1 пользователю
DIY Zip Tie Chandelier |
DIY Zip Tie Chandelier
- Spraypaint in the colors of your choice
- Zip-ties (we used 200 small ties for this chandelier)
- Clippers and metal wire
Серия сообщений "Kitchen Items":
Часть 1 - spoon shade
Часть 2 - Cool lampshade
...
Часть 14 - whisk into jewelry holder
Часть 15 - cinnamon sticks miniatures
Часть 16 - DIY Zip Tie Chandelier
Часть 17 - jumbo button wall decore
Часть 18 - silverware wall art
...
Часть 36 - coffeeeeeeeee
Часть 37 - with coffee bean
Часть 38 - kitchen ware
Метки: lamp kitchen items |
Понравилось: 1 пользователю
wallpaper lamp |
DIY Wallpaper Lanterns


- Embroidery hoop any size or shape (we used a 6 ½” round hoop)
- Vintage wallpaper—vinyl works best, a large piece 20” by 20” for large.
- Hot glue gun and glue
- Scissors
- 30” by 1 ½” of torn fabric
- Cording or string
View all step-by-step photos
2. If using a larger hoop you would just need to cut more until you have enough to fit around the top. You can make your strips thinner of thicker depending on the look you want, just add more or less strips.
3. Lay your 11 strips out under the hoop and then glue the top of each strip to hang onto the embroidery hoop. Next glue the rest of the 22 strips together to form tear drops.
4. Once they are all glued into a tear drop shape, glue two on each end of the connected loops all the way around.
5. Take out your torn fabric and loop it through the bottom layer. Once you have looped all the way around, pull the fabric tight and tie to hold the chandelier together.
6. You can then glue each bottom corner together until the chandelier holds a firm shape.
7. Now for the cording—Cut three equal lengths of cord. Roughly 14” – 20” depending on the size of your chandelier and one very long piece, 2 – 3 yards long .Tie each one to equal sides of the hoop. Hold your chandelier up by the cords, moving them around until you are centered, then quickly tie a firm knot in the center. Take your glue gun out plus left over ripped fabric and glue fabric around the knot so it will hold firm.
8. Look at your pretty chandelier! You can experiment with different sized strips to get a different look for you chandelier. All you have to remember is too add equal amounts of strips to each layer.
Метки: lamp paper |
Процитировано 1 раз
glitter mirror |
Серия сообщений "Pipes & Tubes":
Часть 1 - DIY Bracelet
Часть 2 - Lamp out of PVC pipes
...
Часть 20 - amazing bookshleves
Часть 21 - lamp from rope+plastic tubes
Часть 22 - glitter mirror
Часть 23 - lamp from tubes
Часть 24 - bed table
...
Часть 28 - box
Часть 29 - breakfast table
Часть 30 - wall art
Метки: mirror frame tubes |
Процитировано 20 раз
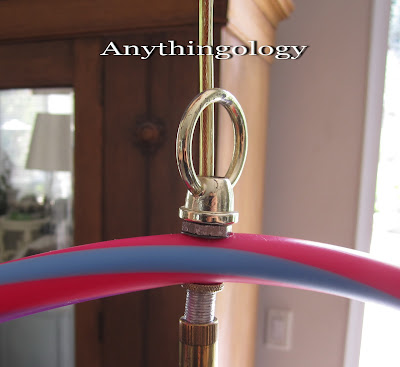
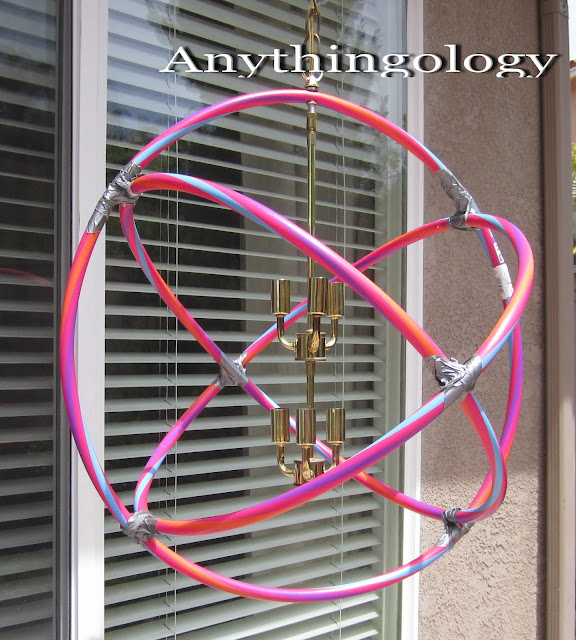
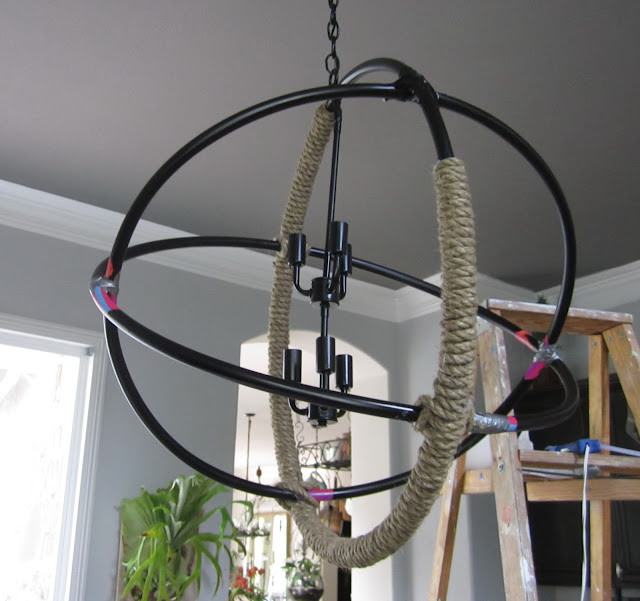
lamp from rope+plastic tubes |
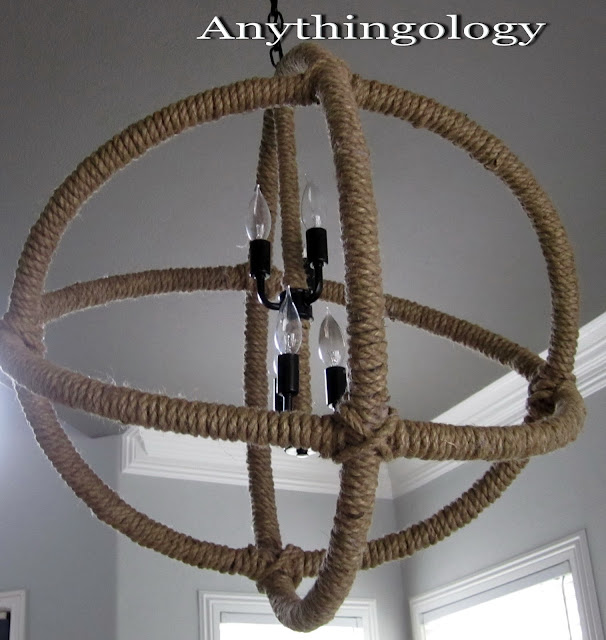
I cut the rope into manageable 6' sections and watched Nate Berkus to pass the time.
I didn't because they are skinny and close together and my fingers needed a break.
Yes, I have a lazy streak.
I predict more burned fingers if I cover the stems.
I can't show you any pictures of my chandelier lit up yet until the electrician comes back to add a J box to the center of the room. He has been ill and I'm not sure when he will be able to come over?
Adding the J box is beyond my electrical capabilities.
Серия сообщений "Pipes & Tubes":
Часть 1 - DIY Bracelet
Часть 2 - Lamp out of PVC pipes
...
Часть 19 - mirror
Часть 20 - amazing bookshleves
Часть 21 - lamp from rope+plastic tubes
Часть 22 - glitter mirror
Часть 23 - lamp from tubes
...
Часть 28 - box
Часть 29 - breakfast table
Часть 30 - wall art
Метки: lamp rope pipes |
Процитировано 2 раз
earring from hair pins |
Метки: accessory |
Процитировано 1 раз
flower vase from a tissue box |
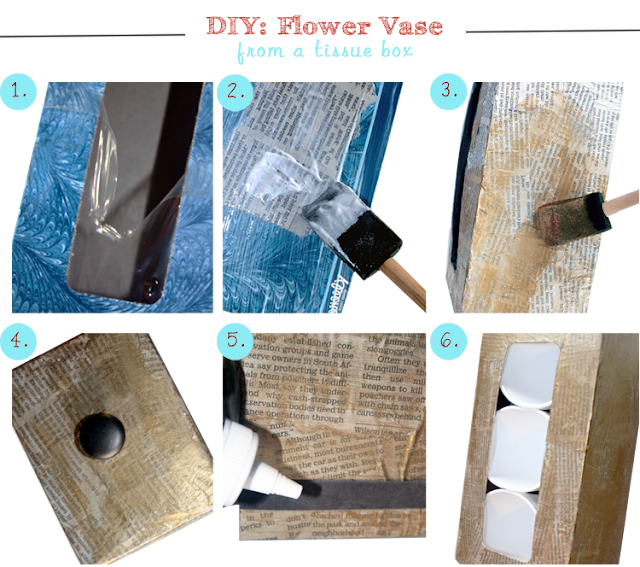
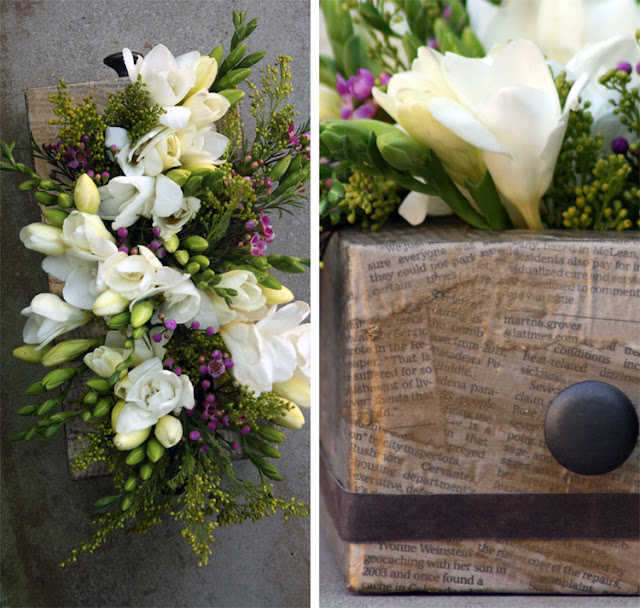
Grab some flowers the next time you're at the market! With this DIY vase upcycled from a tissue box and newspaper strips, you'll always have a reason to display a fresh bouquet. A tissue box is a great alternative to a vase and especially perfect for short-stemmed flowers. If newspaper strips don't give you the look you're going for, get creative and craft your own design using magazine pages, wrapping paper or whatever else you can dig up.
Materials: Tissue Box — Newspaper Strips — 3 Disposable Cups — Glossy Decoupage Medium — Acrylic Paint — Foam Brush — Optional Add-Ons: 2 Small Cabinet Knobs — Ribbon — Tacky Glue (or E6000 glue for heavier knobs)
• Apply a coat of decoupage medium with a foam brush, add a newspaper strip on top of it, and add another coat on top of the strip. Repeat until the entire box is covered.
• Once dry, paint the entire box with acrylic paint.
• Add ribbon around the box with tacky glue.
• Add water to the cups and arrange flowers.
Now, let's see your creations! Join our Facebook community and subscribe here to receive next week's DIY project.
Серия сообщений "Vase":
Часть 1 - vase
Часть 2 - carton vase
...
Часть 15 - floor vase
Часть 16 - thread vase
Часть 17 - flower vase from a tissue box
Часть 18 - papier mache
Часть 19 - vase
...
Часть 30 - vase with thread
Часть 31 - vase
Часть 32 - mercury plate
Метки: vase garden recycled carton |
Процитировано 3 раз
Понравилось: 1 пользователю


