


|
 Дешевые авиабилетыВыгодные цены, удобный поиск, без комиссии, 24 часа. Бронируй сейчас – плати потом!
 Я - фотографПлагин для публикации фотографий в дневнике пользователя. Минимальные системные требования: Internet Explorer 6, Fire Fox 1.5, Opera 9.5, Safari 3.1.1 со включенным JavaScript. Возможно это будет рабо
 ОткрыткиПерерожденный каталог открыток на все случаи жизни

lamp from tubes |

To begin preparing the drawing. This is very important. Strictly according to the drawing, we will cut the tube. Cut pieces of the drawing are responsible for each part of the lamp with tape and glue them to the tubam. These pieces of cut paper tube. And we must have exactly what was on the drawing. hacksaw do slots in each tube. The slots can be done quite chaotic. Just try to keep a distance between the slits. Tying tubes together. To do this, attach them to the wooden beams. One beam do not succeed. handsome in color you like. Fasten Inside each tube light. You can use the LED strip, but you can simple low-power light bulbs. 's all interesting lamp made of cardboard tubes or pipes ready. Enjoy her light. And looks to us for our interesting hand made crafts . Good luck!


Серия сообщений "Pipes & Tubes":
Часть 1 - DIY Bracelet
Часть 2 - Lamp out of PVC pipes
...
Часть 21 - lamp from rope+plastic tubes
Часть 22 - glitter mirror
Часть 23 - lamp from tubes
Часть 24 - bed table
Часть 25 - another vase
...
Часть 28 - box
Часть 29 - breakfast table
Часть 30 - wall art
Метки: lamp pipe |
miniature suitcase |

Метки: miniature |
wire holder |
Метки: clothes hangers wire holder |
cake on the stove |
Серия сообщений "Egg":
Часть 1 - boiled eggs
Часть 2 - puff pastry plates
...
Часть 22 - decorative serving
Часть 23 - serving eggs
Часть 24 - cake on the stove
Часть 25 - potato omelette
Часть 26 - meringue in 5 minutes
...
Часть 31 - decorative serving
Часть 32 - egg white dessert
Часть 33 - meringue in the microwave
Метки: dessert eggs |
Perfume Bottle Necklaces |
b.jpg)
b.jpg)
b.jpg)
b.jpg)

b.jpg)
b.jpg)
b.jpg)
b.jpg)
b.jpg)
b+(3).jpg)
Метки: accessories decorative bottle |
clay pendent |


Метки: accessories clay |
faberge2 |


http://svetta-silk.blogspot.com/
Серия сообщений "VICTORIAN":
Часть 1 - Fancy Necklace
Часть 2 - Victorian lamps wowwwwwwwww!!!
...
Часть 16 - bejeweled bottles
Часть 17 - faberge
Часть 18 - faberge2
Метки: faberge egg |
faberge |


Серия сообщений "VICTORIAN":
Часть 1 - Fancy Necklace
Часть 2 - Victorian lamps wowwwwwwwww!!!
...
Часть 15 - victorian bath items
Часть 16 - bejeweled bottles
Часть 17 - faberge
Часть 18 - faberge2
Метки: faberge egg |
textured painting |


Метки: painting wall |
painting a rose |
How to paint a rose in any color
By secret Anna Artemina | Date: 05/11/2012
 You open another secret. Give your favorite woman, mother, daughter, sister, cousin or just a bunch of blue, purple, green, yellow (all colors as there are fantasy) roses. Make a bunch of very simple: 1.Buy white roses in a day or two before a particular event. 2. Take the high vase with water and diluted it desired color we color. Their whole palette of building materials in the stores. The water should be saturated shade, but not a lot. 3. Cut at an oblique angle stem roses and put them in water. Remove the bowl in a dark and cool place.Bathroom or closet - the perfect place. 4. For a full color roses require 17-20 hours. If you want to keep only the tips of the petals colored - 5-8 hours. You can put in the water 2 slices cubes, staining will intensively. The white roses color looks brighter, but you can try and experiment. Buy a yellow rose and put it in the water with rich red color scheme. Done!
http://prosekrety.ru/104-kak-pokrasit-rozu.html
Метки: flower making |
ring |
Inspiration:

Harrison Ring
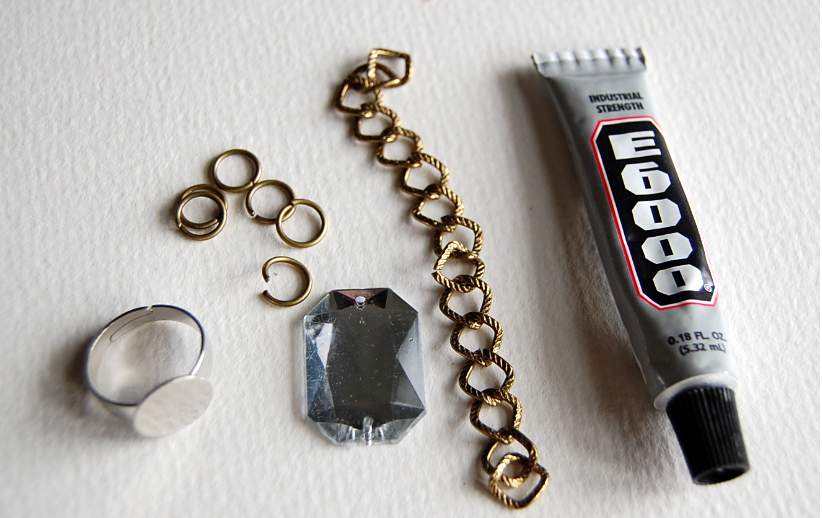
Supplies:
- Rectangle sew-on faceted gems (I got mine at Michael's, 10/pk for $1.99)
- Chain, jump ring, jewelry pliers
- Strong glue, such as E6000
- Ring blank
- Wire (possibly!)
 1) Connect the chain to one of the holes with a jump ring.
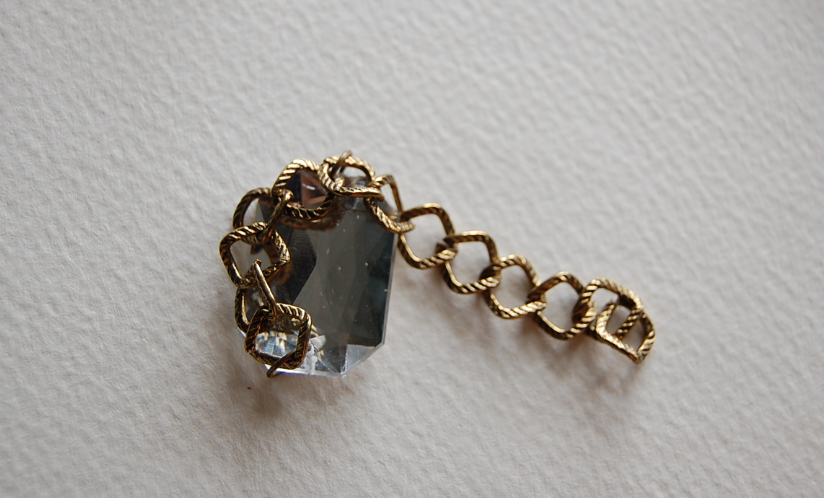 2) Wrap it around and connect a link of the chain to the next hole of the gem, using another jump ring.
 3) Connect the end so that it wraps around the entire gem; trim if needed.
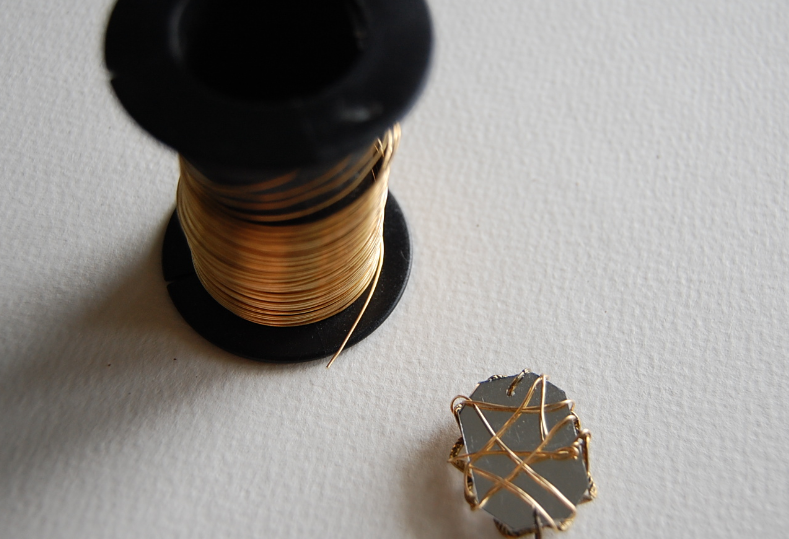 4) If there were multiple holes around the entire gem, more jump rings could be used to keep the chain in place. However, with only 2 holes in most sew-on gems, the chain will most likely be sliding every which way. I used some wire to weave in and out of the links, which kept the chain in place.
 5) Gratned, the chain is ON the gem instead of AROUND it, but I think I like it this way :)
 6) Glue the ring blank to the chained up gem. (If you're using E6000, don't forget to do this in a well-ventilated area & to let it dry for 24 hours!)
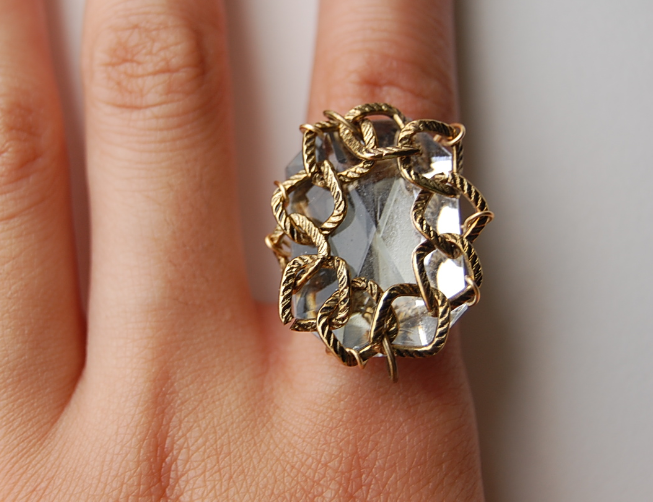
Метки: accessories |
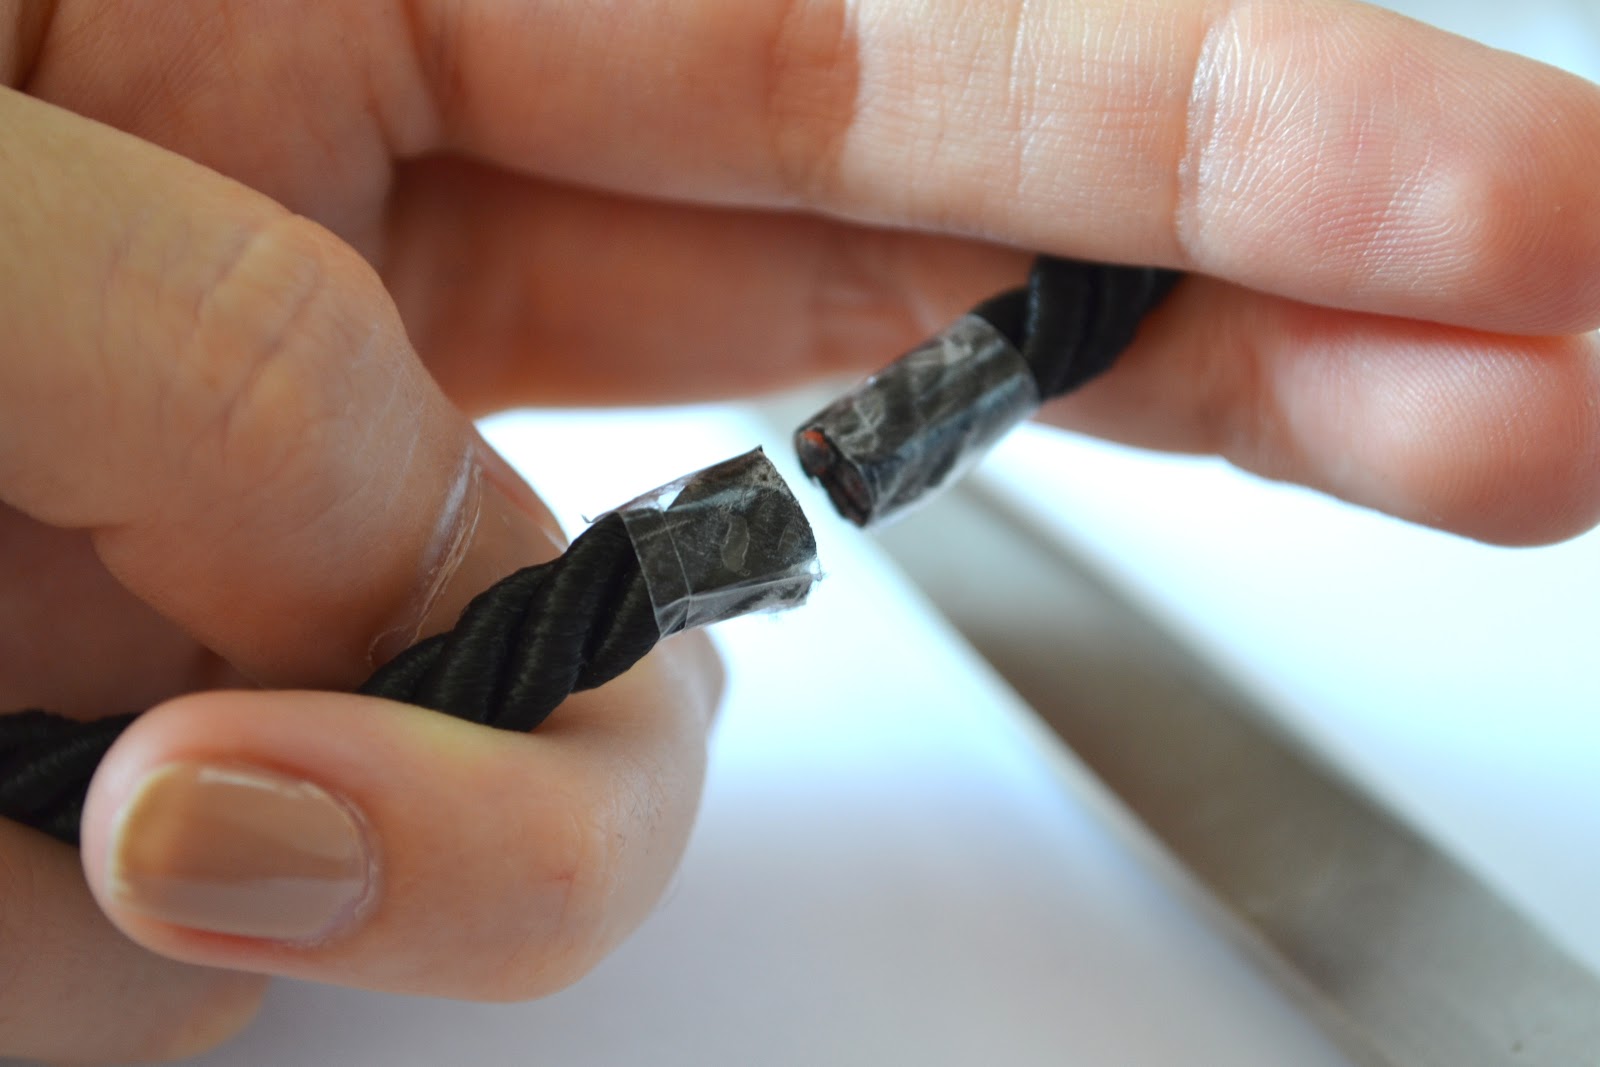
fabric chain necklace |

True rags to couture craft!
What you will need to make this necklace yourself:
Make some sort of pattern so that all your chain links will be the same size. If you want them to be the same size that is!

You can see the measurements I used in the photo. The size of the pattern and how much fabric you will need for each link really depends on what type of fabric you use.
Parts cut out!

The smaller pieces will be used when glueing the links together.
Put glue on one side of the link piece.

Roll it tightly.

Rolling complete.

Close up the links by putting some glue on the small fabric parts and roll them around the openings of the links.

Should look something like this when you are done:

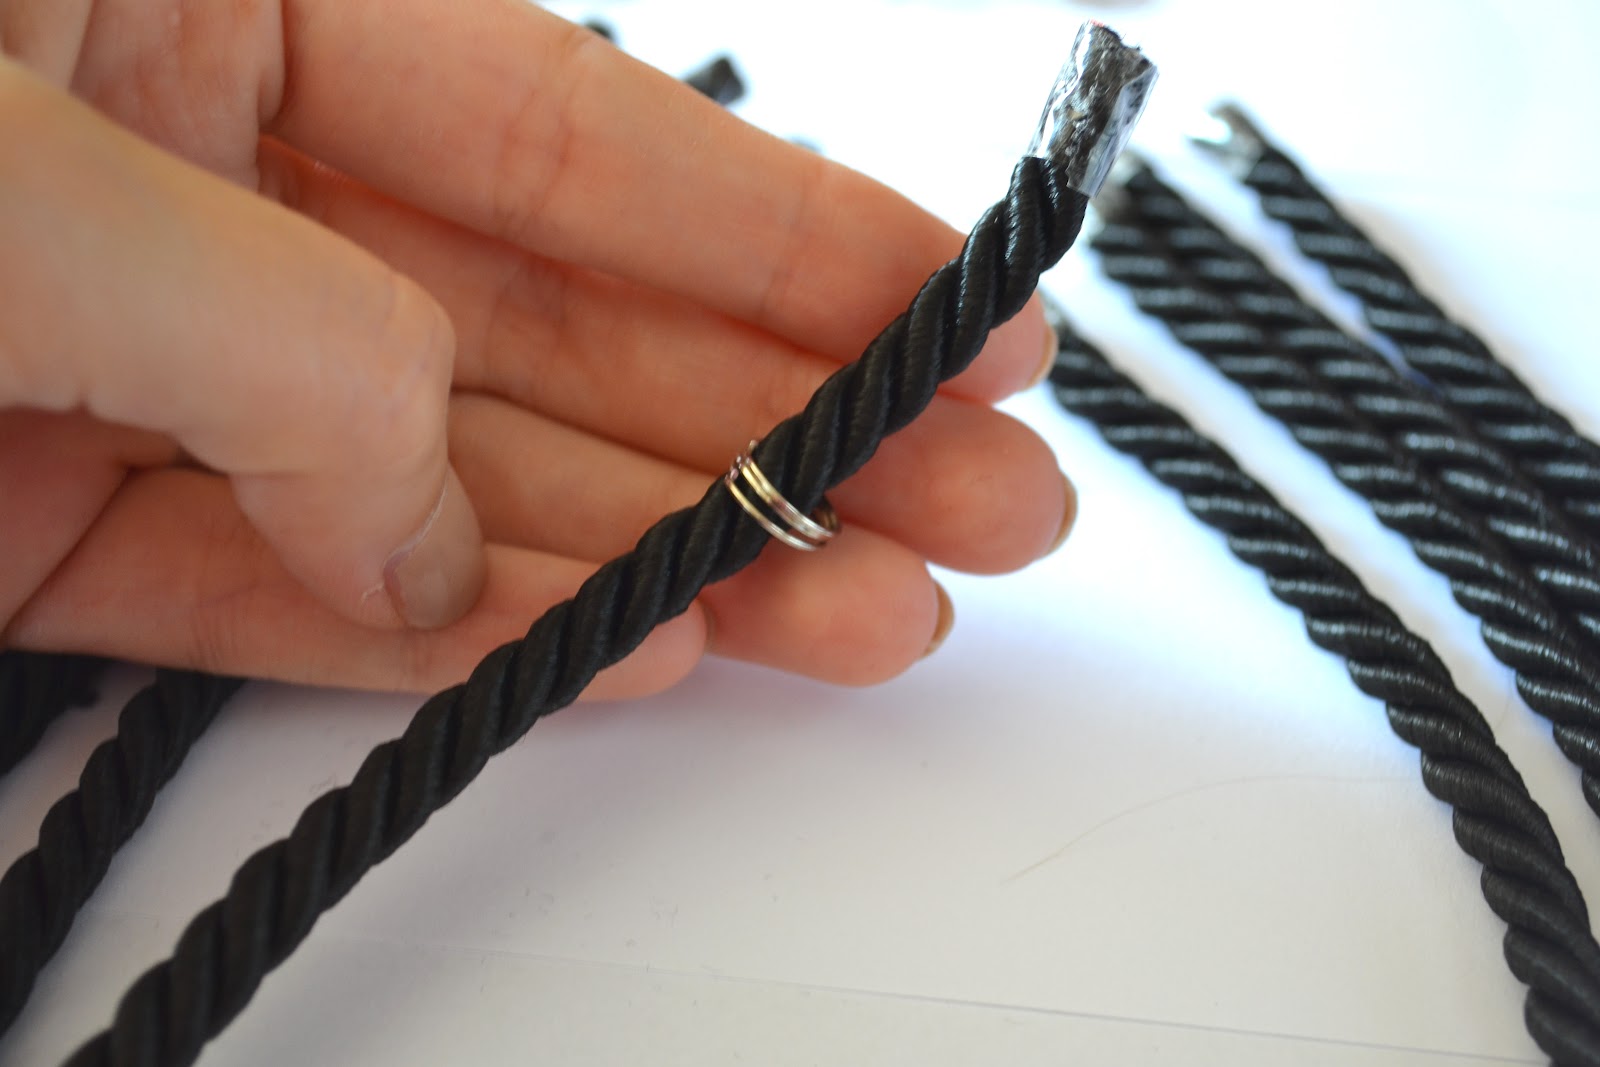
Make a chain by adding new links to it before closing them up.

Repeat process until your chain is long enough.


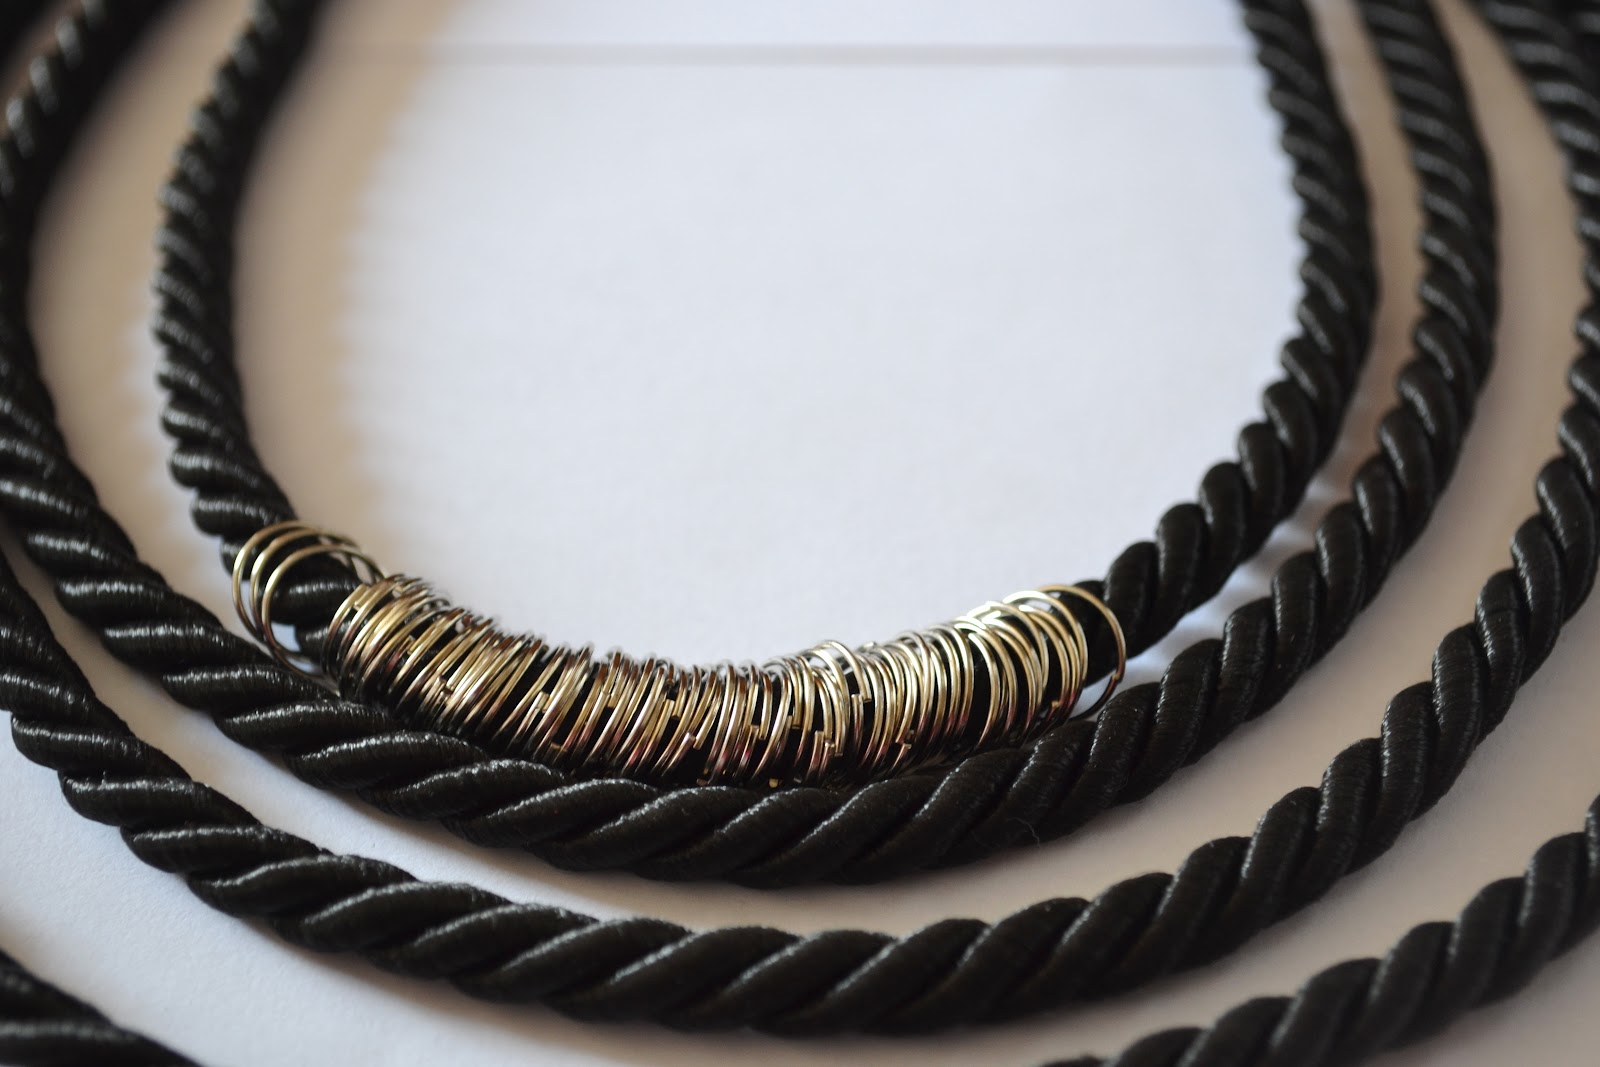
Add a metal chain and your necklace is finished!

I have been thinking of trying to make a necklace that is all fabric chains, that would look pretty cool!
Метки: accessories |
clay necklace |
This idea came to me after watching the entire first season of Game of Thrones in one day. I am not sure if this TV-marathon actually did inspire me to make this necklace or why I choose to even bring it up in this post… Honestly, it only shows how much free time I have and that I like spending the entire day in my couch wearing my pj’s…


Anyway, the jewel stones are made with polymer clay. I shaped them somewhat before baking them in the oven, but used sand paper to sharpen the edges afterwards to get the baguette jewel shape.

The copper plate setting is cut from a copper plate that I bought at a hardware store. You can see my sketch of the necklace in the pictures and also the shape of the setting that I cut out from the copper plate in the photo above.
The chains are from an old broken necklace. I like the result and will call this style Neon – Medieval. Hah.

Another week, another statement necklace!
Polymer clay is among my favourite crafting materials. It is very versatile and can be used to make a lot of different things. What I like the most about it is that it’s possible to continue shaping the clay after it’s been hardened in the oven. The best example of this is using sand paper to get a really smooth shiny (after adding varnish) surface of the clay. This is the technique I used in the tutorial below.
I used black Fimo Soft polymer clay. I also used black chain from a broken necklace, lobster clasp for closure, eye hook screws and nail files.

To get the fimo clay to shine I coated the surface with varnish. I would not recommend using another varnish than one from the same brand as the polymer clay you’re using.
 Polymer clay may react badly to some varnishes and you don’t want your necklace to start disintegrating all of a sudden (It has happened to me!). So do invest in a glaze made for your polymer clay.
If you have been using polymer clay before chances are that you will have some scrap clay and already baked stuff laying around that you have no use for. I took some green clay (I always have green left overs! Not sure why) and some charms I made years ago to use as a base to build the black clay around. Polymer clay can be hardened several times, so don’t be afraid to use baked parts mixed in with the unbaked clay.

The best tool to use to get the shapes I wanted would be some type of flat surface glass thing. I didn’t have that so a little tin box worked pretty well too.

Once your satisfied with the shapes, make little holes at the sides where you want the hook screws to go.
 Remember that you will sharpen and smoothen out the surfaces of the shapes once they are baked, so they don’t have to be perfect at this stage.
Bake the shapes and break out the nail files. To get the sharp “cut stone” type of look you will need to used sandpaper with a flat hard back. That’s why I’m using the nail files, I think they’re perfect for this!
 It can be a little tricky to get sharp edges, make sure you’re holding the nail file at the same angle when you’re working on one of the flat surfaces.
You can see the difference between the sanded, to the left, and unsanded shapes, to the right, in this picture.

Once you’re done with the sanding, add the eye hook screws to the holes and glaze with some shiny varnish!

Once the varnish has dried, it’s time to assemble the necklace. I used a polymer clay necklace I made earlier this year as a reference for the chain length needed. Also note how the varnish transforms the polymer clay into something awesome, from a dusty matte gray-ish tone to a deep shiny black! I love it!

And crap, I really like the color combo of these two necklaces!

This is how it looks on. Not really digging the fact I need to use the flash so often in my pictures now when it’s getting darker outside… It makes the photos look…bleh.
Метки: accessories clay |
simple necklace |


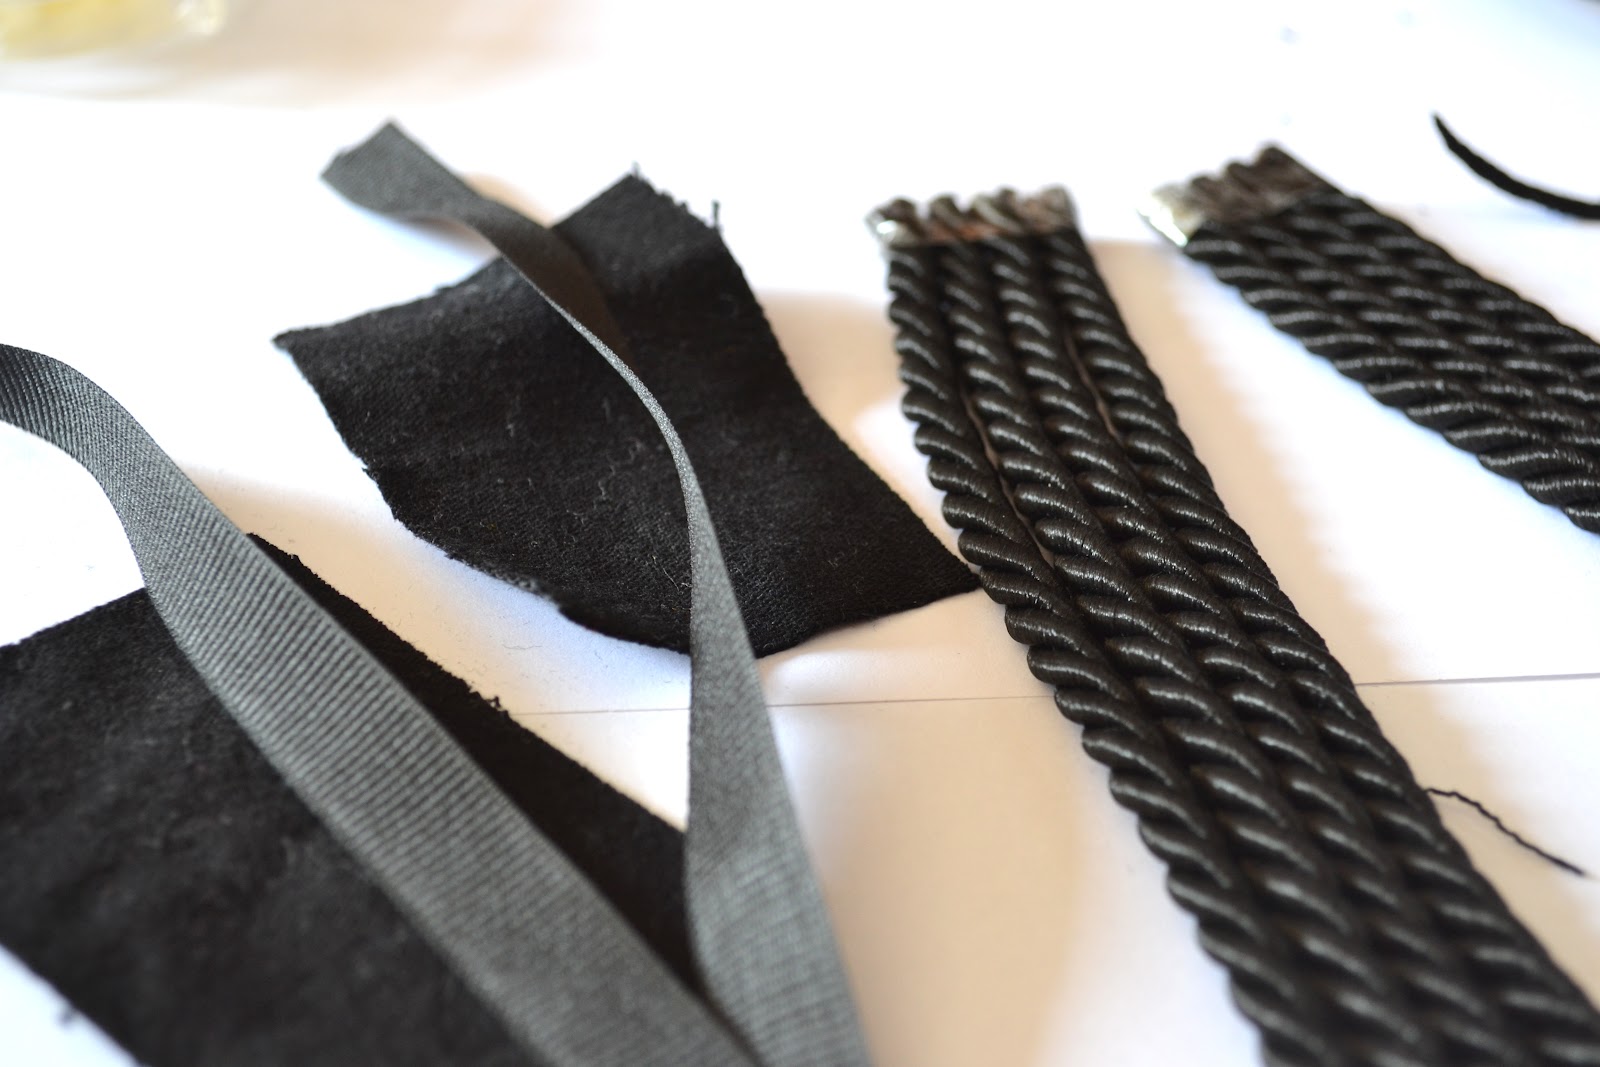
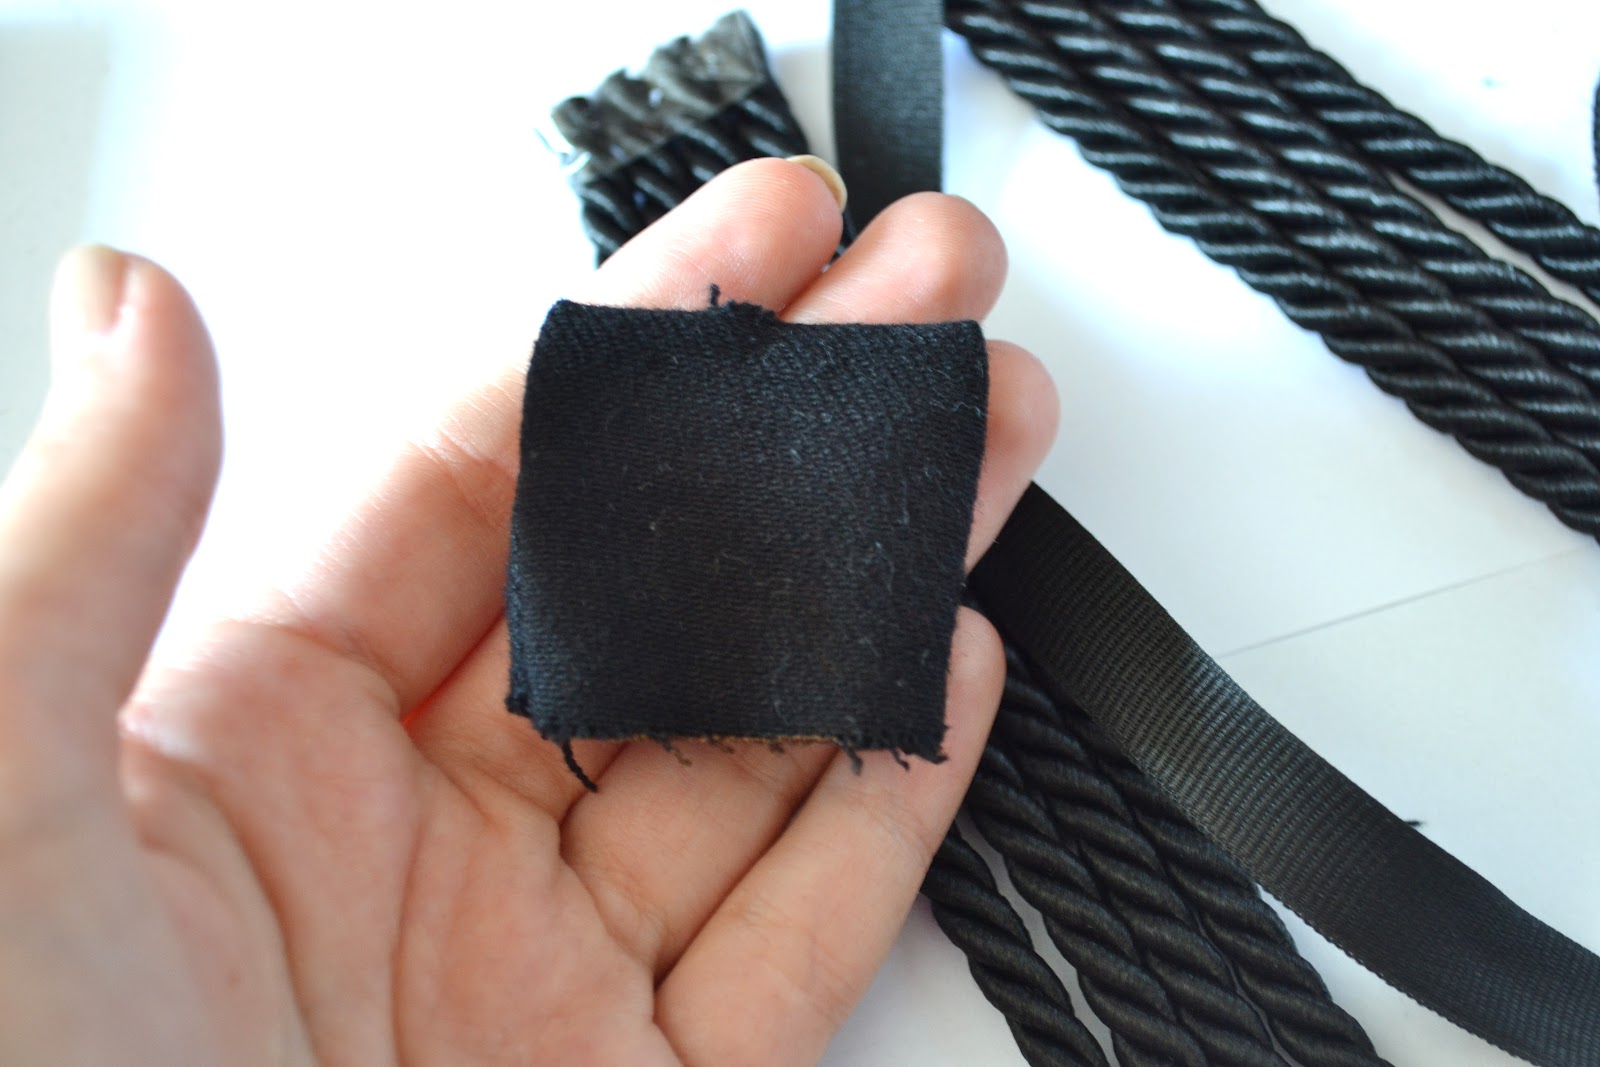
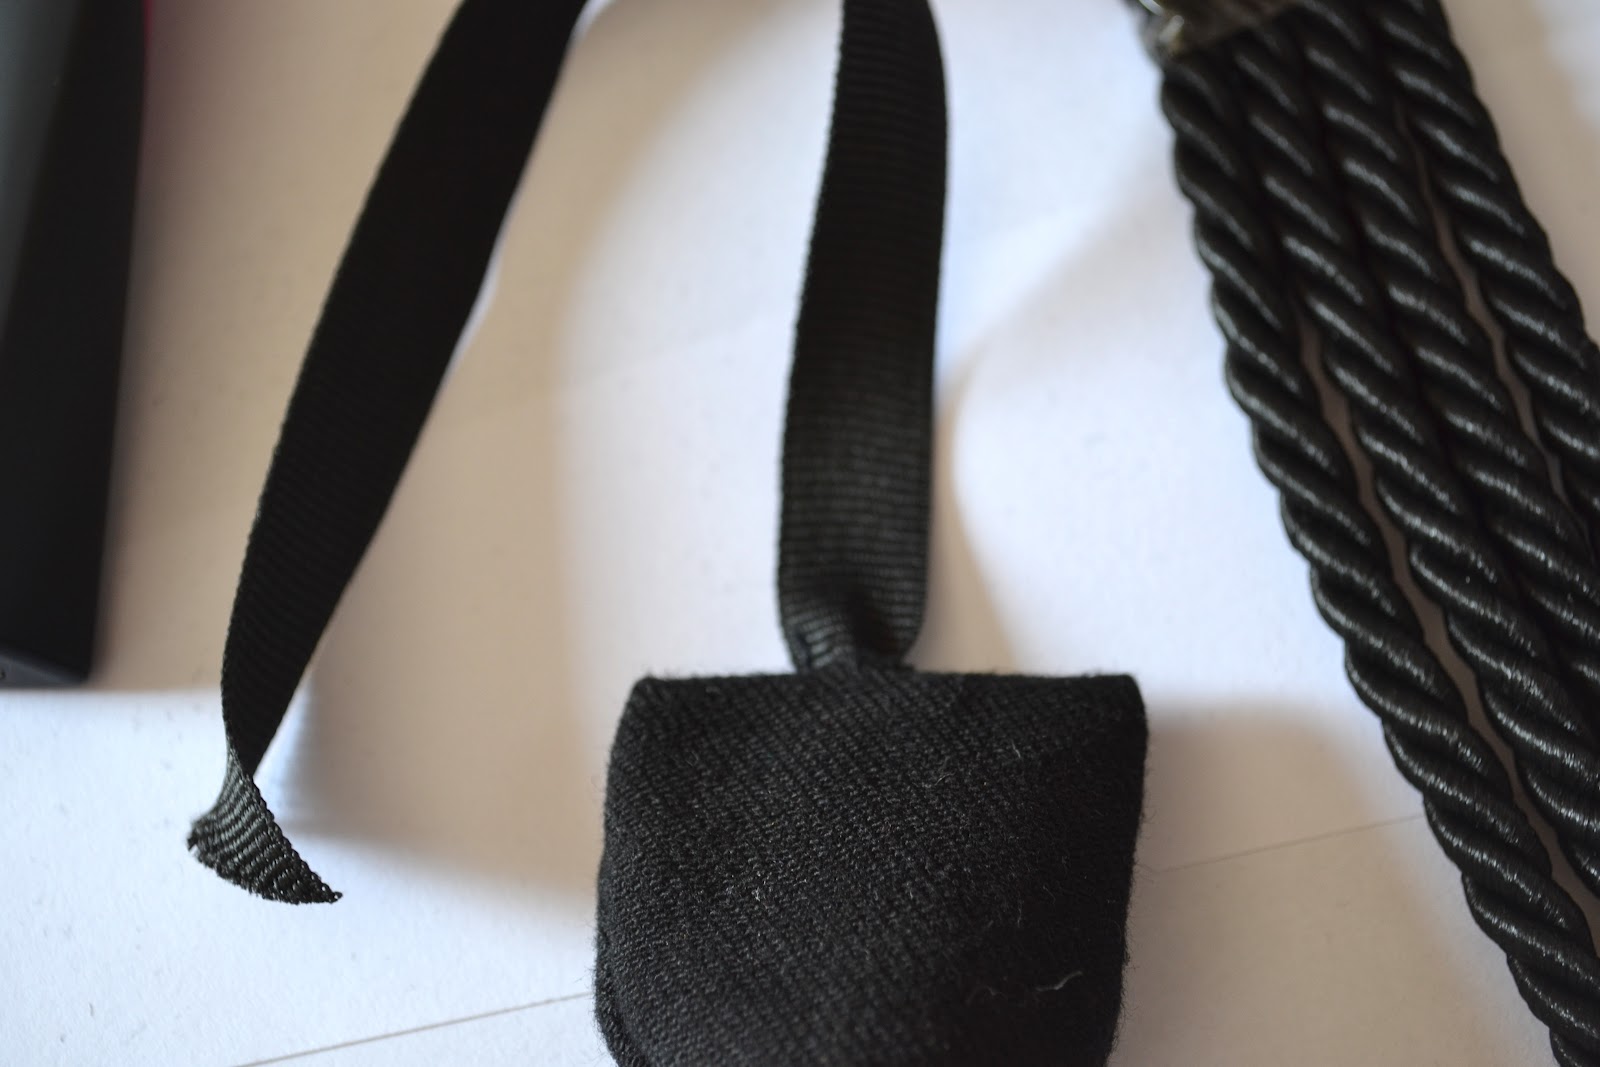

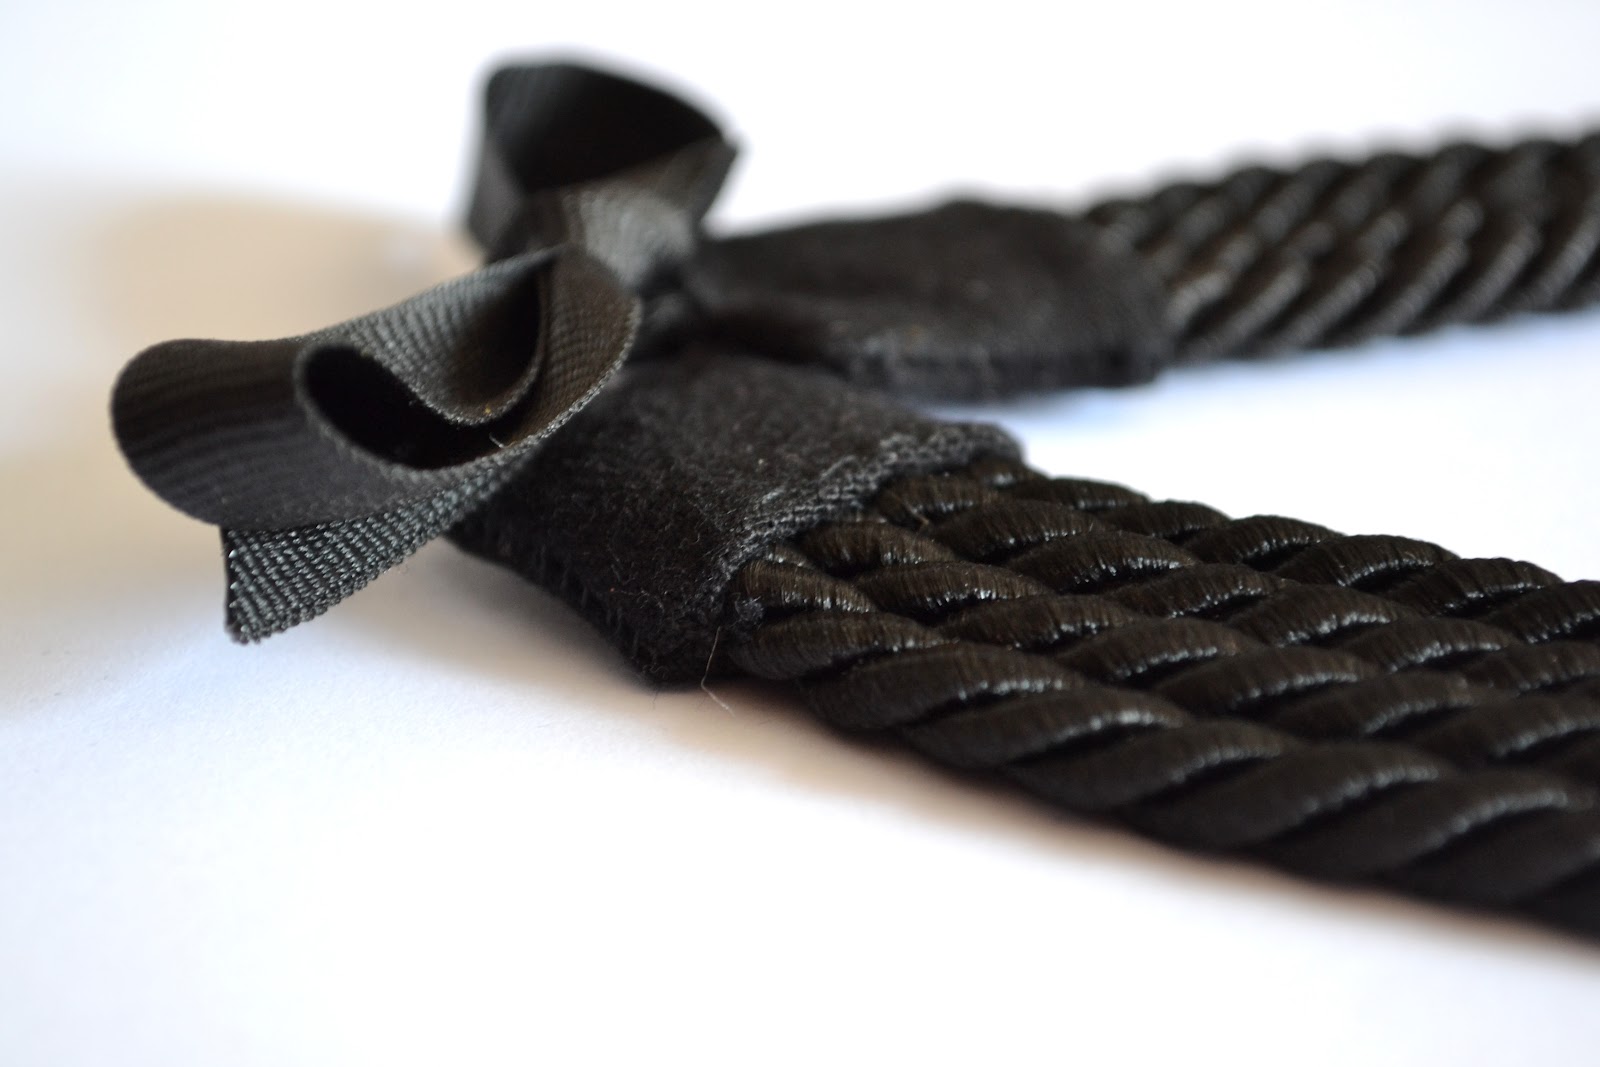
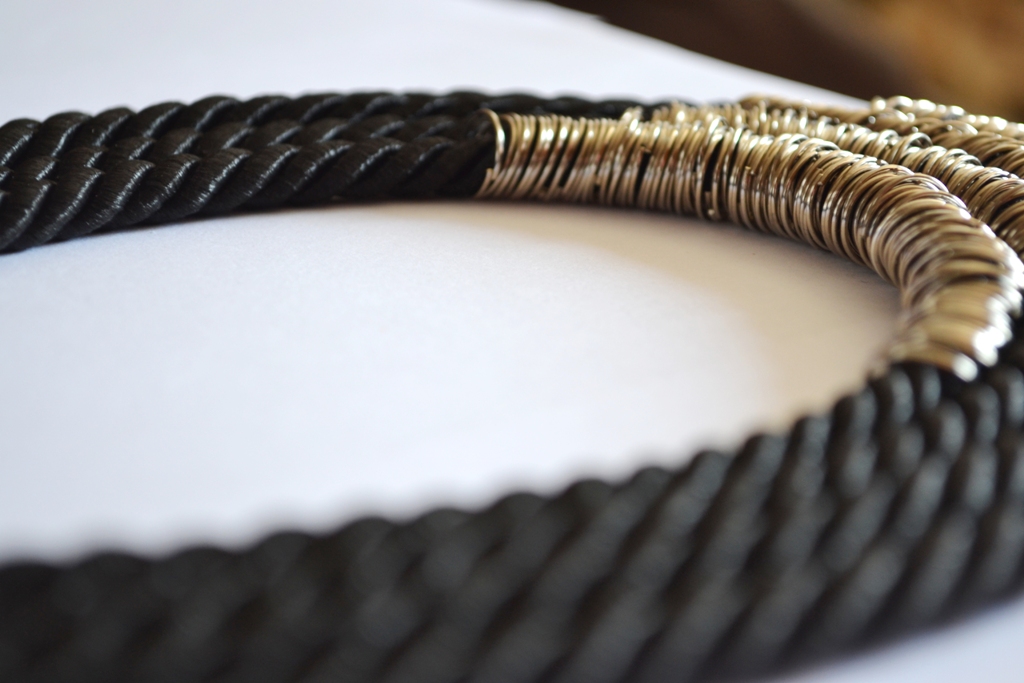

Метки: accessories recycle rope |
ideas for the kitchen |
Отправлено 02.09.2012, 23:52 пользователем Veronica Rebenko
|
Метки: kitchen |
uses for recycled pizza tool |
How about drying supports for craft projects.

Paint something on both side and place it on this support, so it can dry all over at the same time.


Another drying support especially when using glue or Mod Podge. I made these balls with shredded old book pages. Can't let the glue dry right there on the table, because it would glue itself right to the surface. These supports are plastic, so nothing really sticks to the little spikes and the air circulates all around.

How about gluing these to some kind of sewing station and have all your hand sewing thread right there where you are working. You could some how fashion an area for a pincushion, thread and scissor holder, then glue this plastic thingy to that to hold the thread.


This one is a little crazy, but worked great with my iPhone.

Great for watching videos, or having the phone up so that I can see texts or emails coming in without having to tip the phone to see...especially if I'm working at my desk and the phone is flat on the table. This keeps it in plain view.


Серия сообщений "Kitchen Items":
Часть 1 - spoon shade
Часть 2 - Cool lampshade
...
Часть 17 - jumbo button wall decore
Часть 18 - silverware wall art
Часть 19 - uses for recycled pizza tool
Часть 20 - coffee frames
Часть 21 - frames for the kitchen
...
Часть 36 - coffeeeeeeeee
Часть 37 - with coffee bean
Часть 38 - kitchen ware
Метки: useful recycled kitchen items |
silverware wall art |
Pottery Barn had these metal silverware silhouettes a while ago. Some of you might remember them? I've never stopped thinking about them - I'm a sucker for kitchen related art. When I realized we needed something to decorate the wall opposite our hutch, I knew I had to try and recreate these on the cheap.
We went to Lowe's and picked up an $8 piece of 1/4" thick 4x8 birch plywood. We had them cut it into four 1x2 boards.
I sketched out a fork, spoon, and knife on plain paper. Using some carbon paper Matt snagged from work, I transferred them onto the boards. If you don't have carbon paper, you could cut out the shapes and trace them like a stencil, or scribble with a pencil on the back of the sketch to make some makeshift carbon paper. Either way should work great!

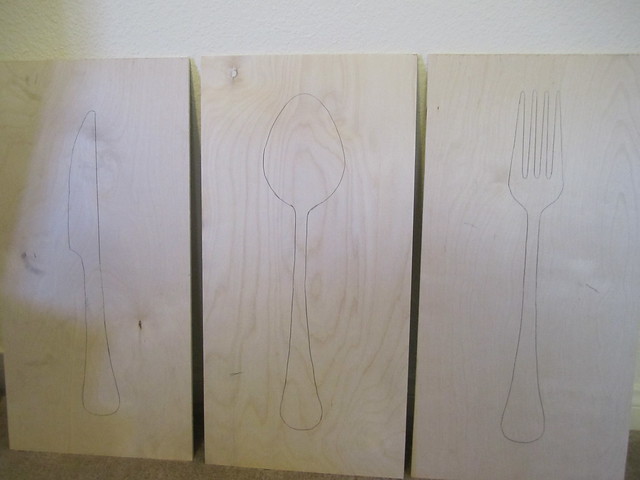
We don't have a jigsaw, but we do have a multisaw attachment for the Dremel, so that's what we used. Matt cut out the shapes of the silverware, and then used a sanding attachment to smooth the edges. I also sanded by hand around the edges of the cut out and the edges of the board for a smooth finish.


I knew I wanted the silhouettes to be black, but I didn't want them to have even a hint of shine. I had some chalkboard paint on hand from another project, so I used that. I love the matte almost metallic finish. It only took one coat and some touch ups.

And the finished product:
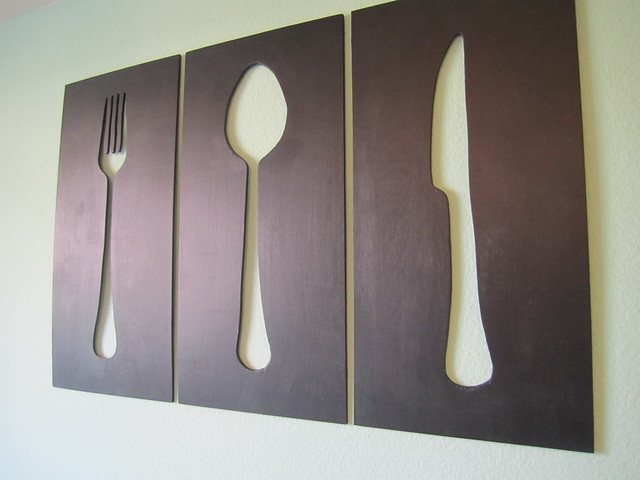

Don't mind how off the fork looks in the last picture - the patio door is right next to the table and is casting a weird shadow in the picture.
Серия сообщений "Kitchen Items":
Часть 1 - spoon shade
Часть 2 - Cool lampshade
...
Часть 16 - DIY Zip Tie Chandelier
Часть 17 - jumbo button wall decore
Часть 18 - silverware wall art
Часть 19 - uses for recycled pizza tool
Часть 20 - coffee frames
...
Часть 36 - coffeeeeeeeee
Часть 37 - with coffee bean
Часть 38 - kitchen ware
Метки: frame recycled kitchen items |
finger print wall decor |
So I just want to say thanks again for all the interest in the fingerprint art! And I'm sorry I made you guys wait so long for the tutorial. Right now Matt is making French toast for dinner so I can take a minute to get this bad boy up.
First off, I think the best way to take a fingerprint is with pencil and tape. So, rub some pencil on a piece of paper. Rub your finger in the graphite. Your fingertip should be fully covered with a thin coat of graphite.


Then you're going to want to stick the tape to white paper and scan the print. Everyone's scanner and software is going to be a little different, but I'll show you how I did mine.
I scanned it, and selected the image:

Once the image was selected, I adjusted the size.

I wanted mine to be about 6x6 to fit into the 5x5 frames I had. So you'll need to adjust the size according to how large you want your image.

This is what it looks like enlarged:

Then, I upload to Picnik.com. I know Picnik gets a lot of flack as not being legit enough, but I don't have Photoshop and it certainly does the trick. If you know Photoshop, you can probably do this a million times better than I'm able to with Picnik.
Once in Picnik, I turn the sharpness all the way up to clean it up a little bit.

Then I up the contrast. If you up the contrast too much, it won't look right, so you'll need to find the right balance for your fingerprint.

Then, you save it and print it and it should look something like the one below. Make sure you print on cheap, flimsy computer paper. You'll see why in just a second.

Then I just traced the fingerprint with a Sharpie.

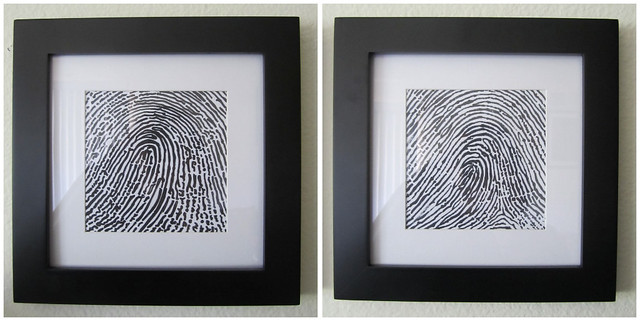
You're probably thinking that it doesn't look all that great. But if you flip the paper over, it looks much cleaner.

Yup, Sharpie bleeds right through cheap paper. To me it's perfect because it looks just like ink on paper.
And once you get the fingerprint all colored in and flip the paper over and put a frame around it, you'll get this:
Метки: frame |
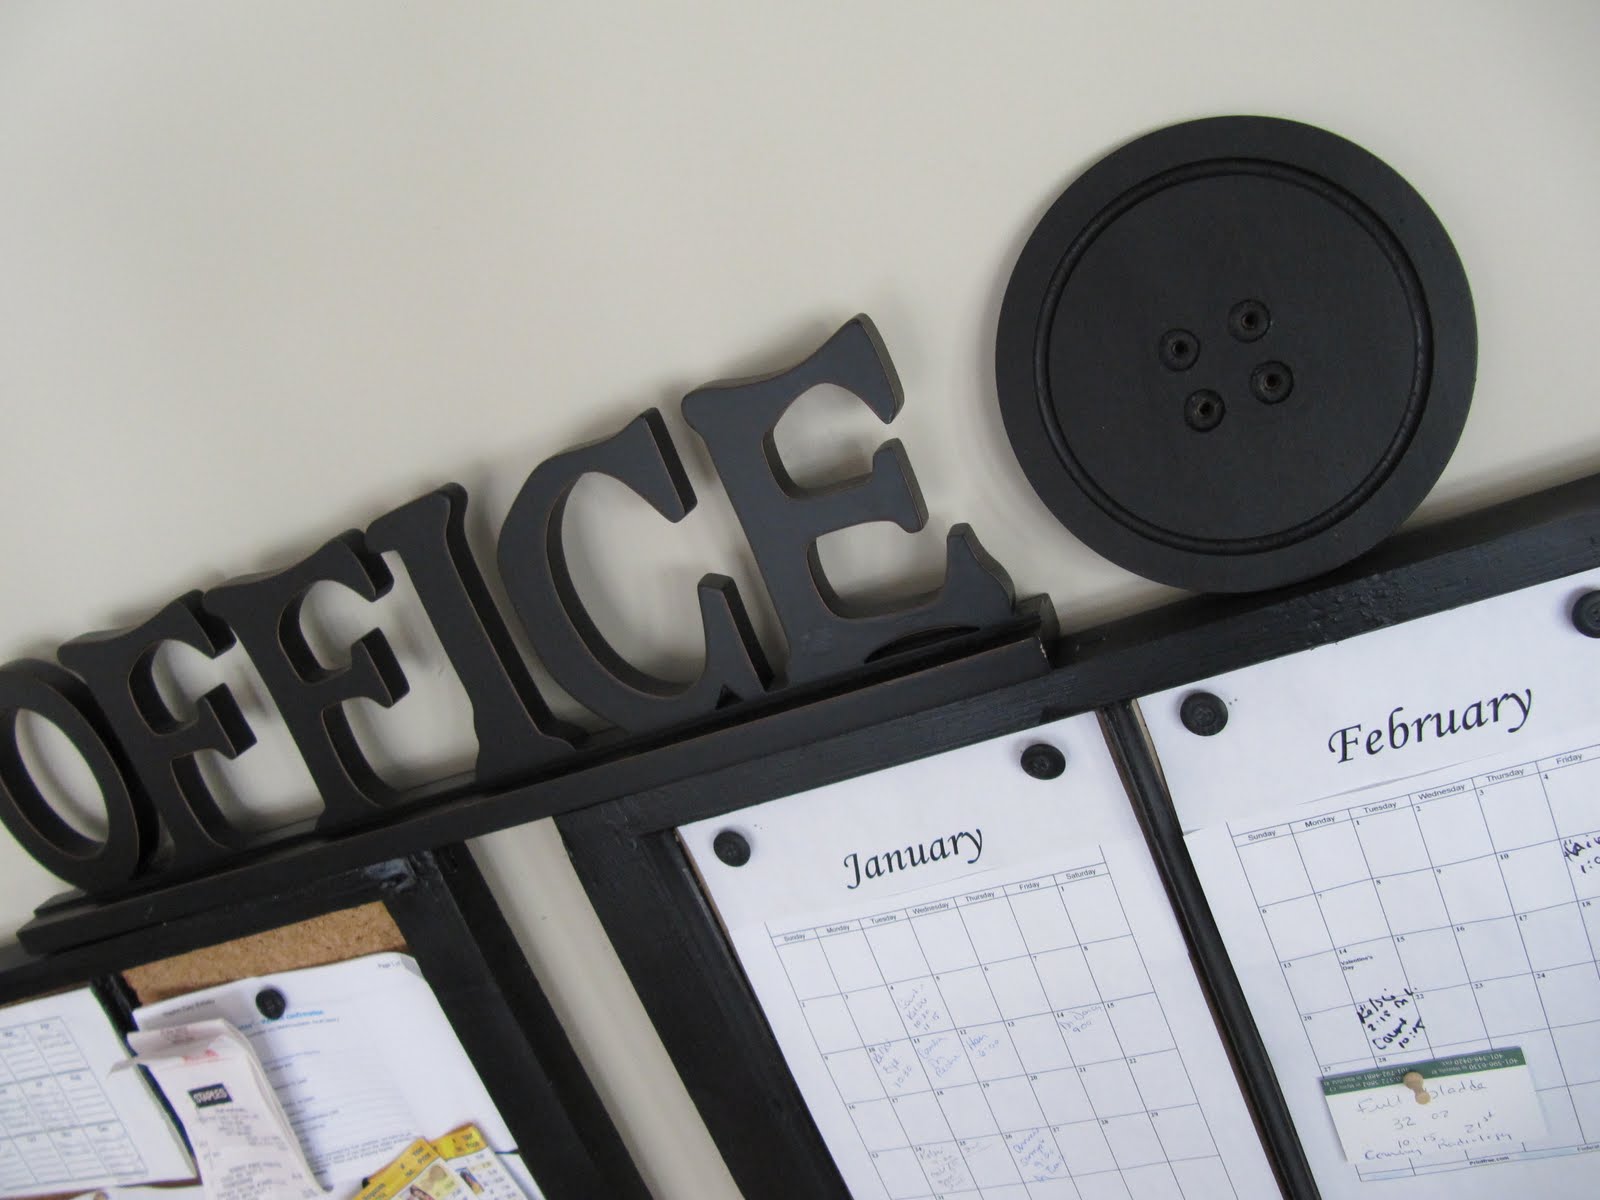
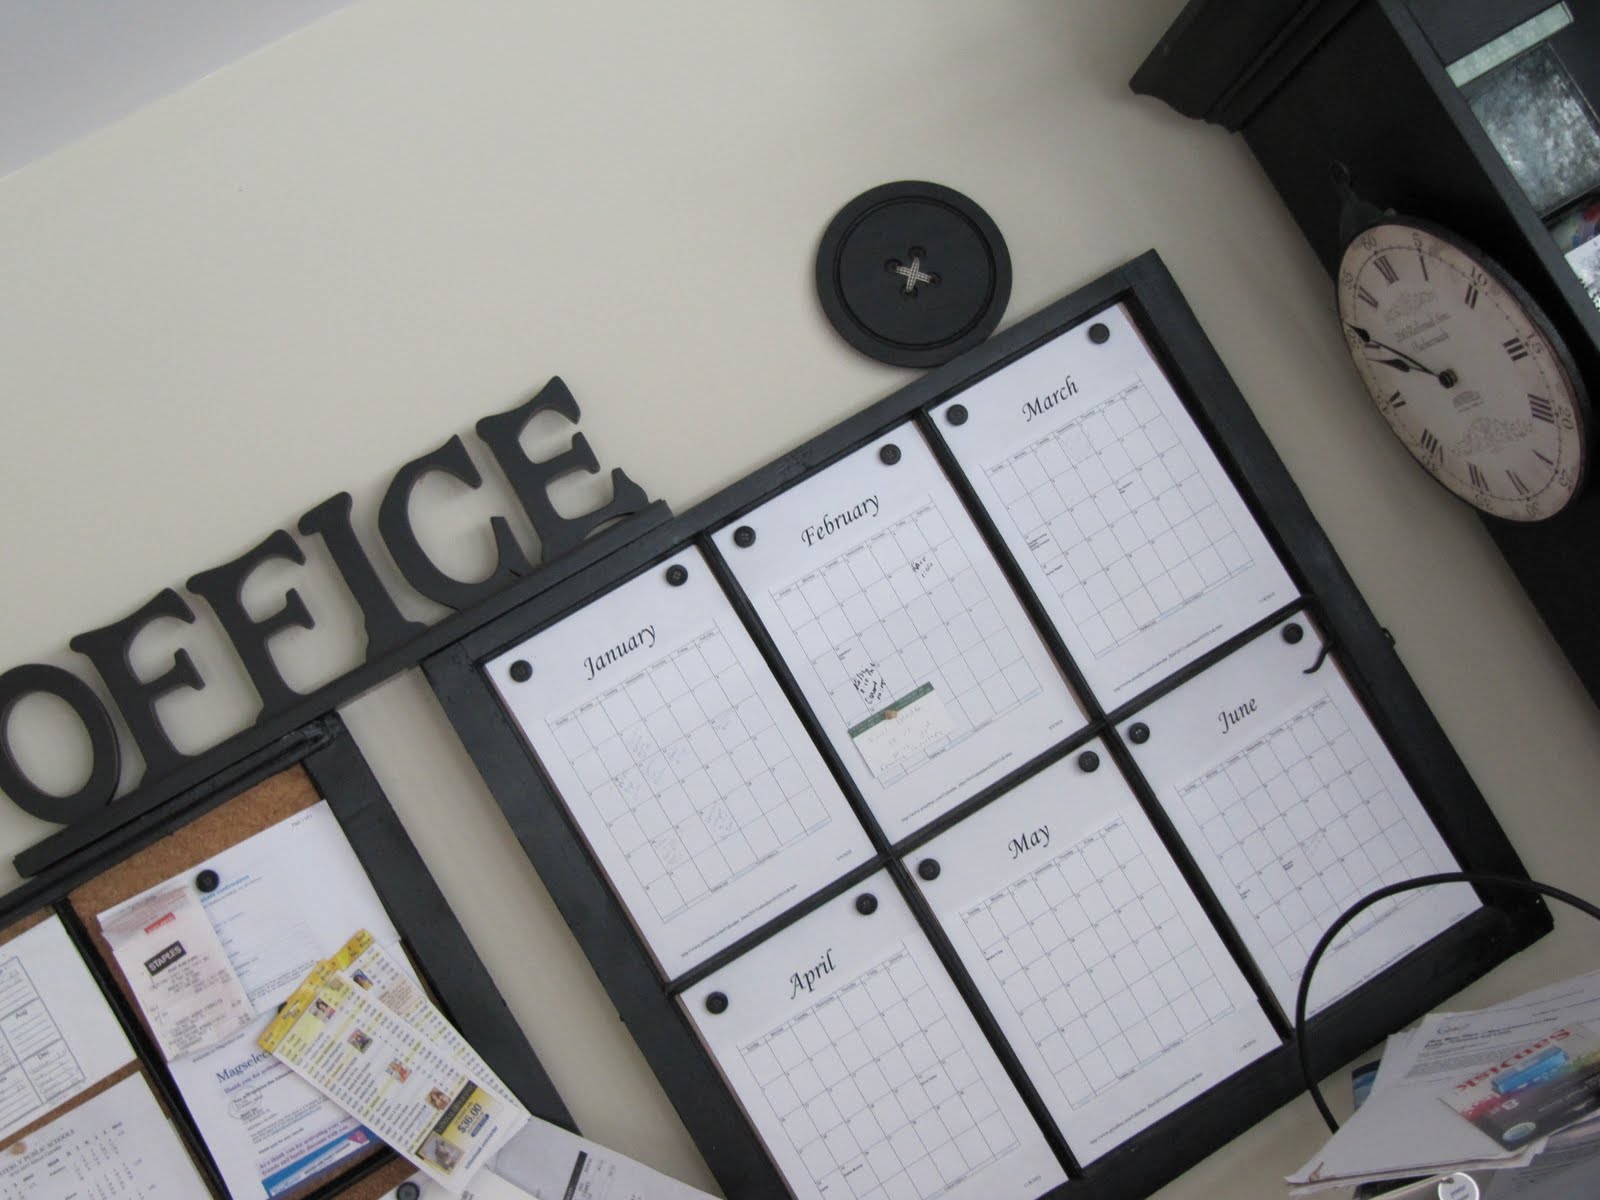
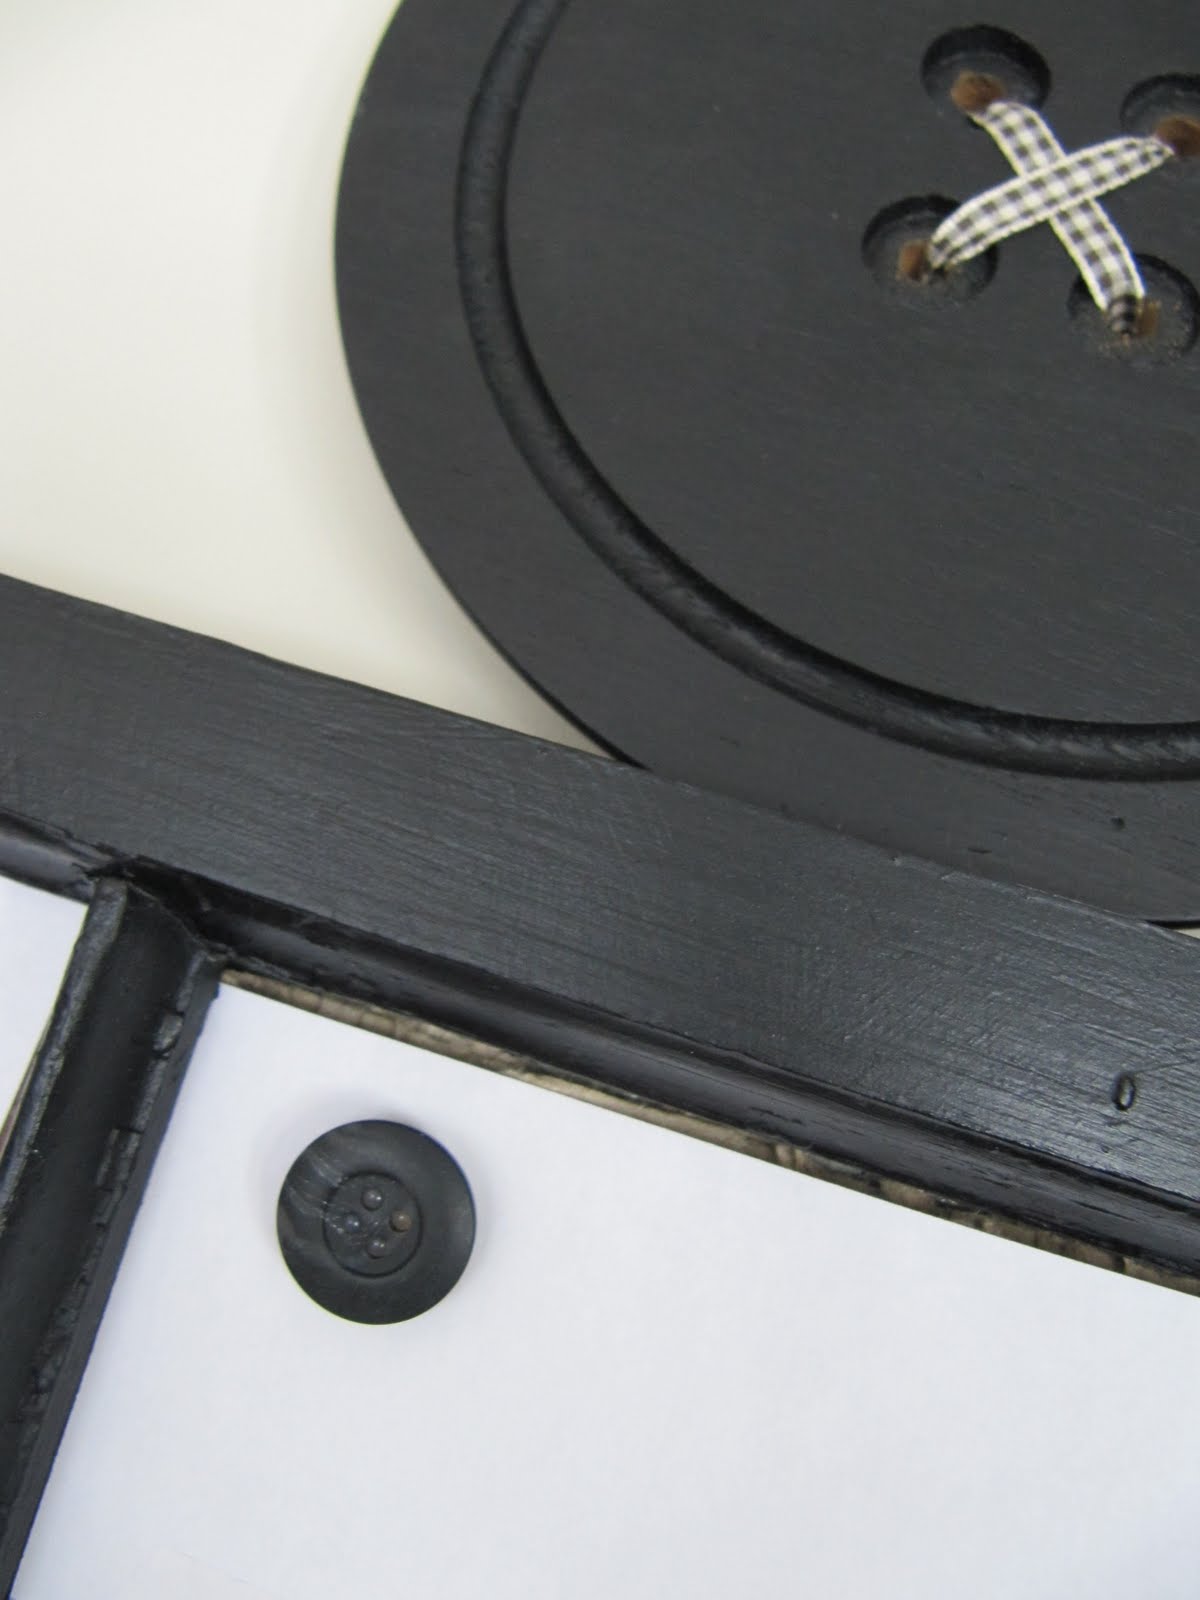
jumbo button wall decore |
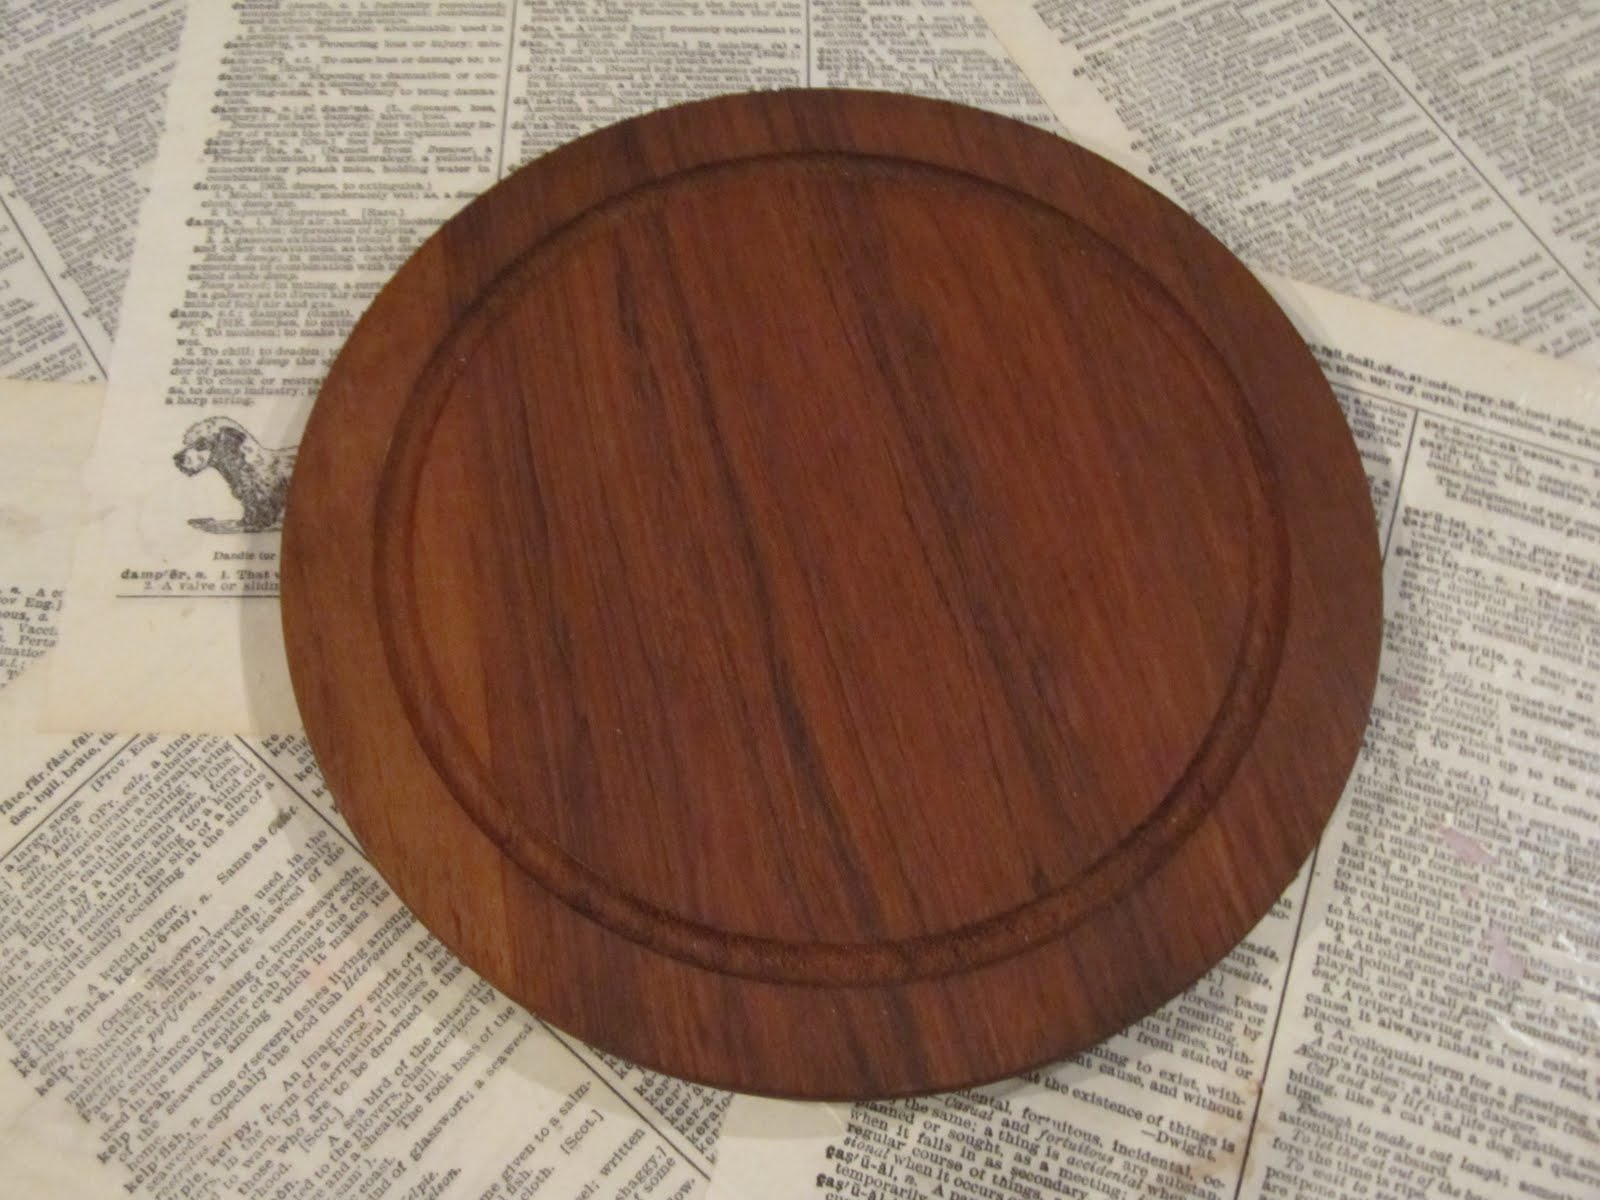
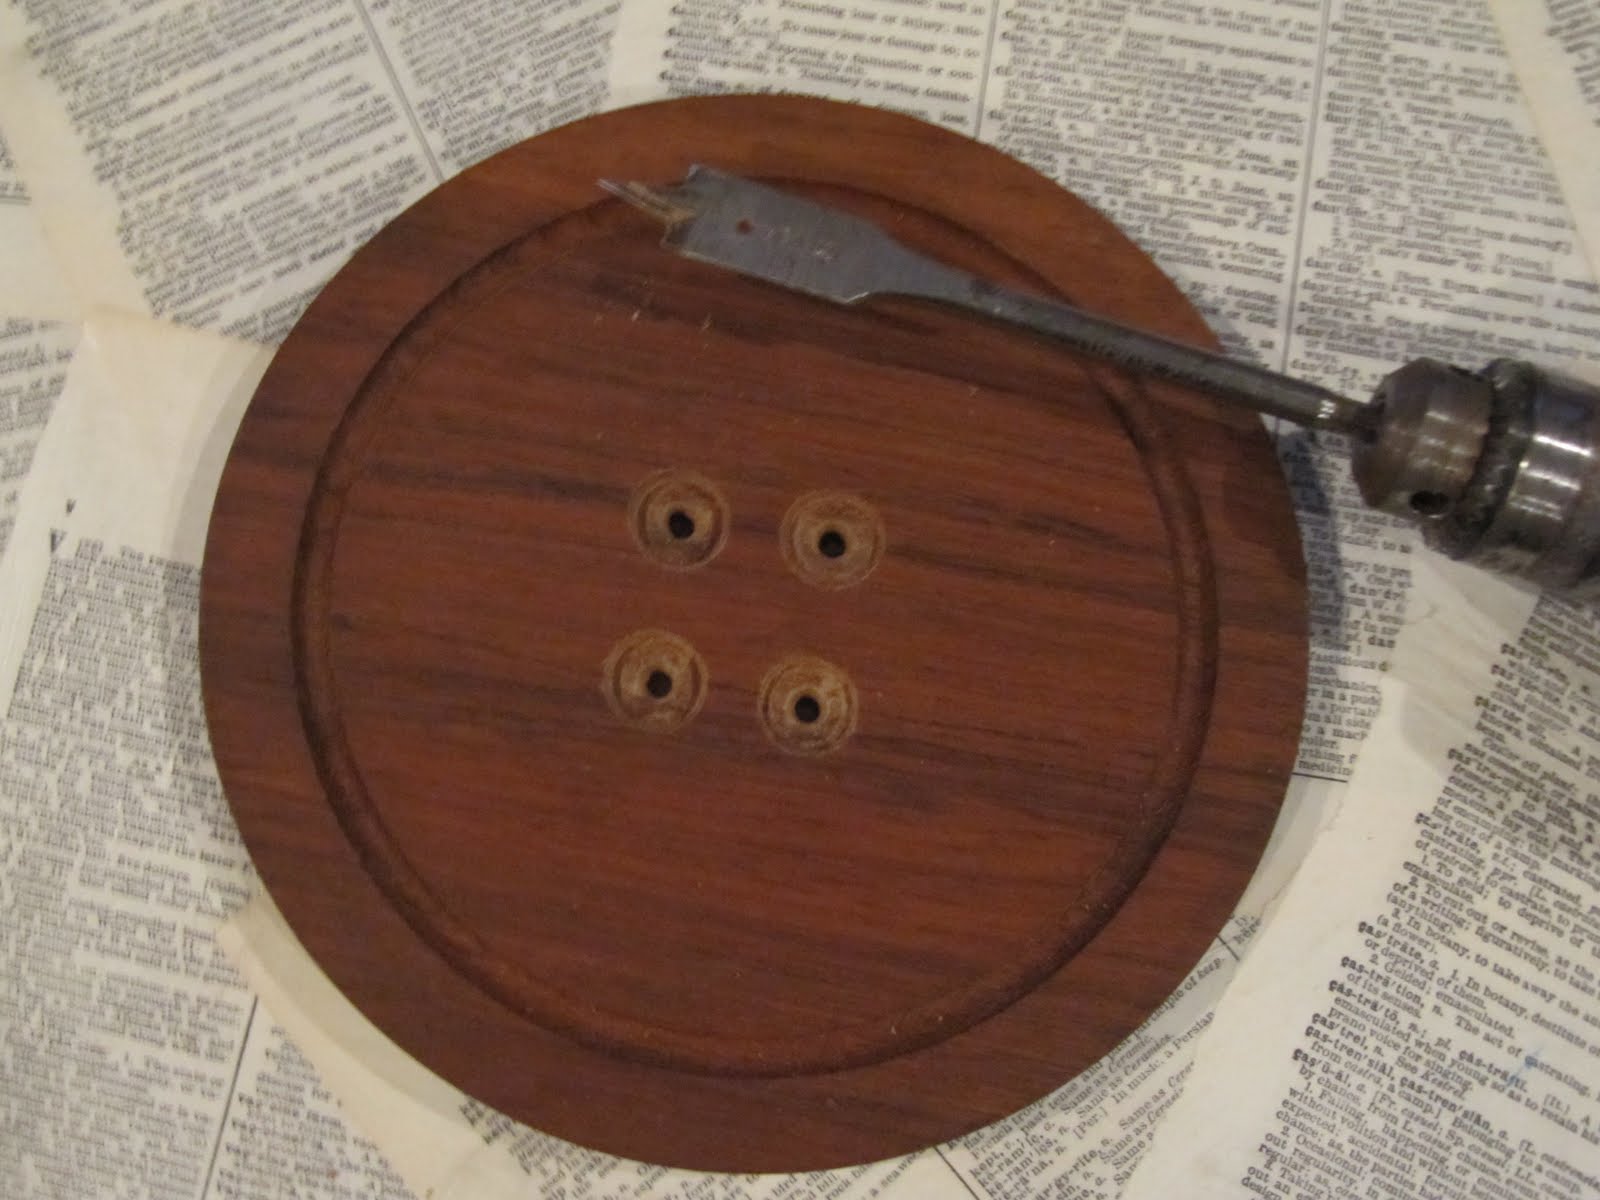
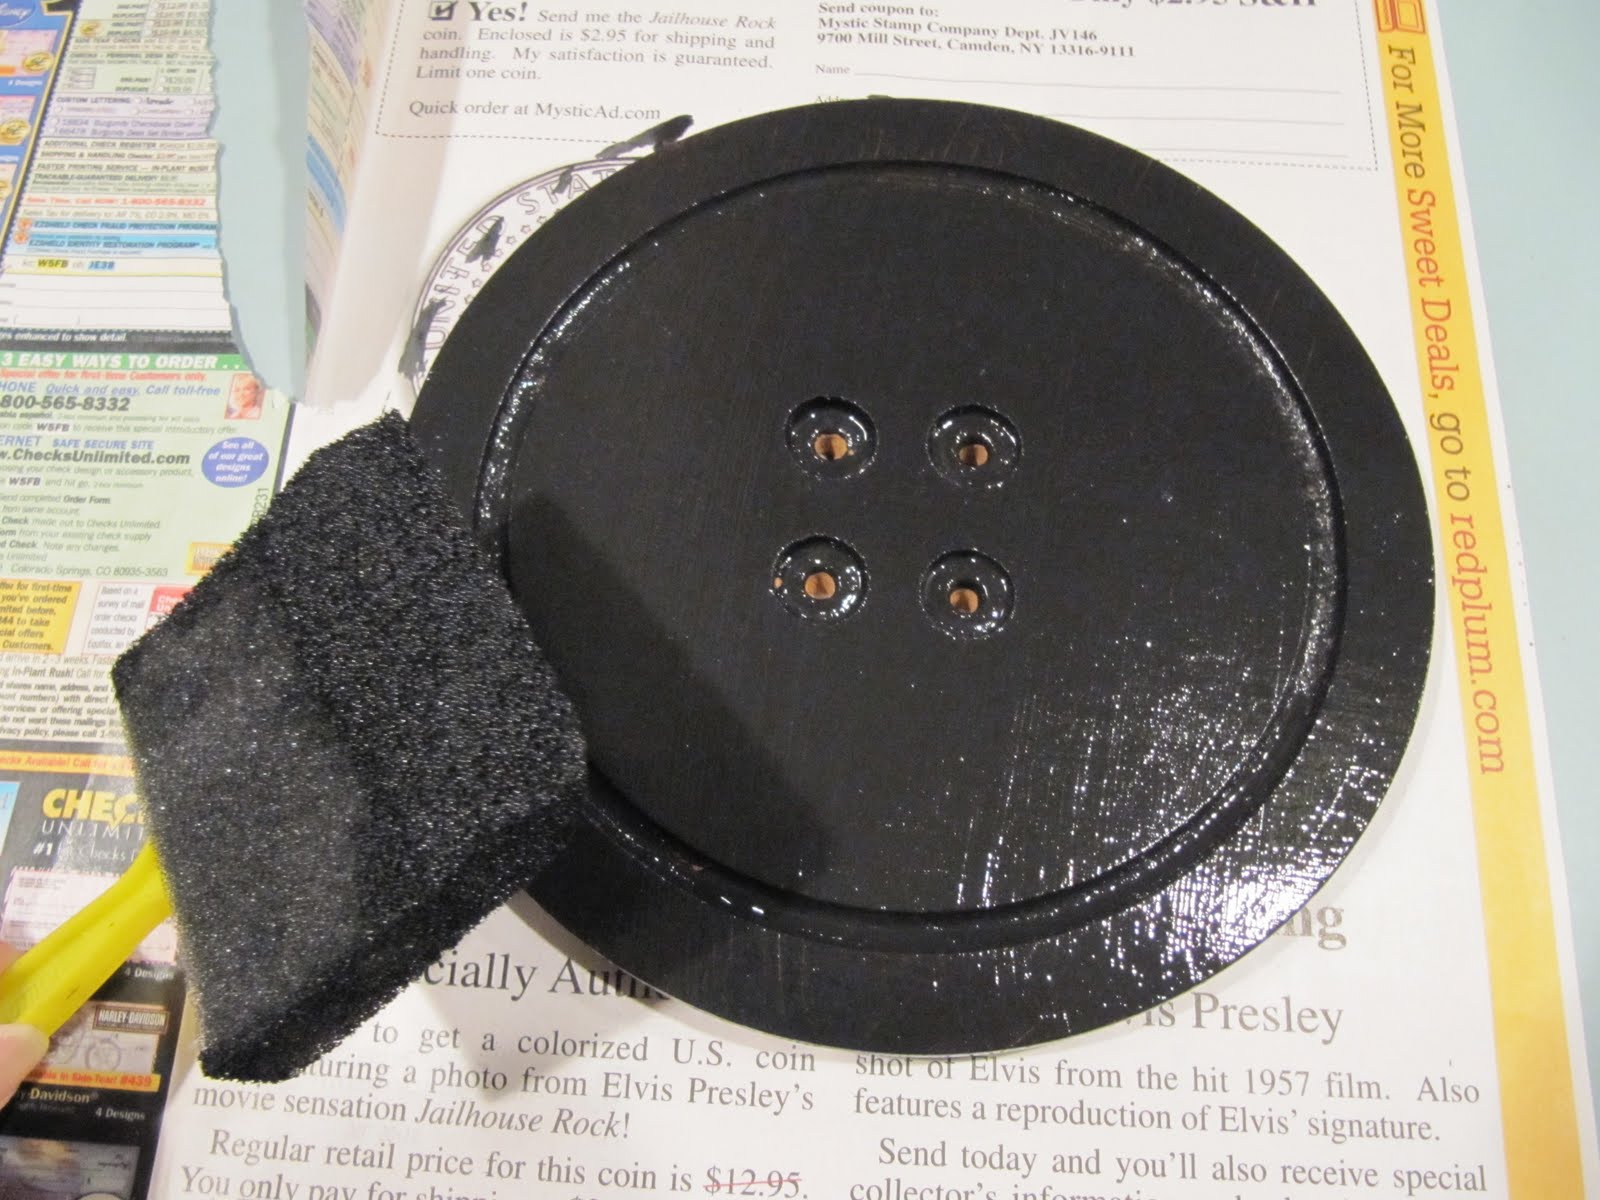
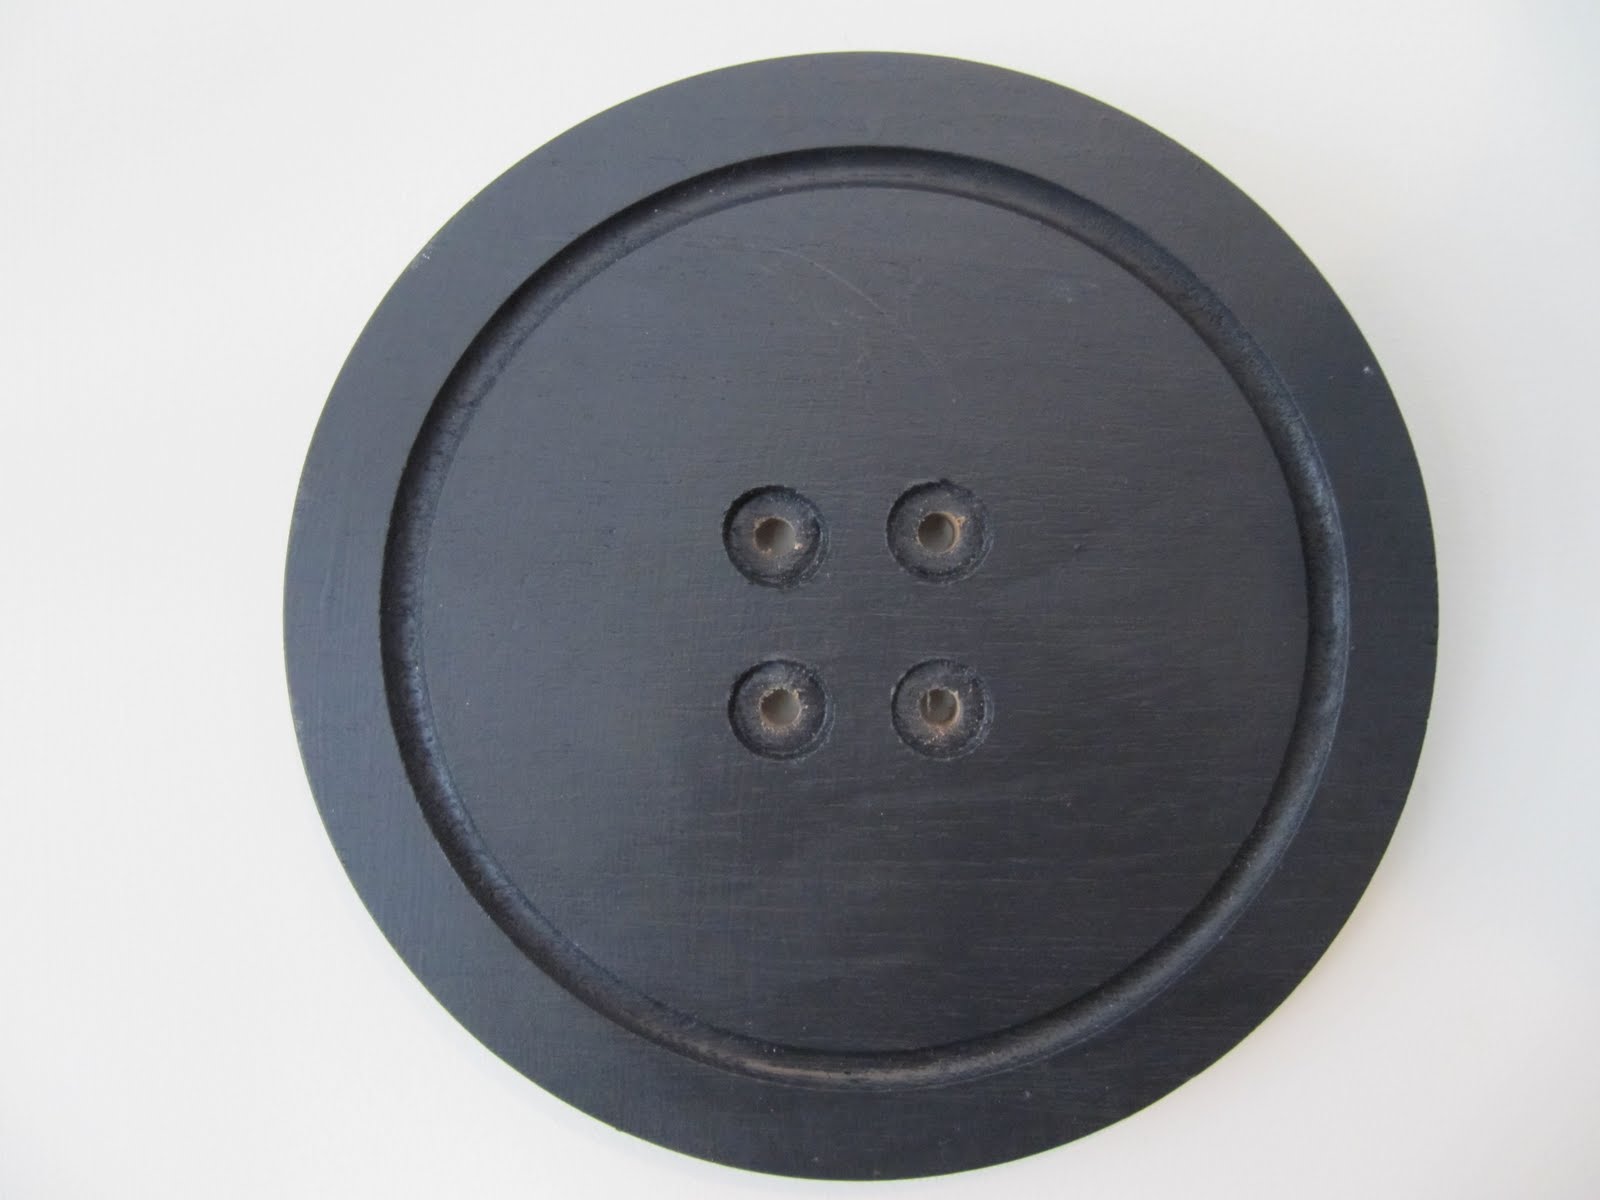
My mom loved teak wood...anything teak wood. She would buy it all in yard sales and thrift stores. Well, I think she cringed a little from up above when I took a drill and a paint brush to one of her pieces. I had one of her cheese boards tucked away in a closet...within minutes, look how darn cute it turned out. I think she's ok with it, because she was the best seamstress ever and would love this button!

If this was the only cheese board she had, I would have thought twice about it, but it is one of many teak trays...many!

Look...don't you see a button in there?


Серия сообщений "Kitchen Items":
Часть 1 - spoon shade
Часть 2 - Cool lampshade
...
Часть 15 - cinnamon sticks miniatures
Часть 16 - DIY Zip Tie Chandelier
Часть 17 - jumbo button wall decore
Часть 18 - silverware wall art
Часть 19 - uses for recycled pizza tool
...
Часть 36 - coffeeeeeeeee
Часть 37 - with coffee bean
Часть 38 - kitchen ware
Метки: frame recycled kitchen items |


