-Метки
-Рубрики
-Музыка
- Garou - Je n'attendais que Vous
- Слушали: 69613 Комментарии: 0
- Garou — Burning
- Слушали: 729 Комментарии: 0
- Ваш папа тоже хотел сына?
- Слушали: 964 Комментарии: 0
- Sting - Shape of my heart
- Слушали: 57823 Комментарии: 0
- Песенка просто супер!!
- Слушали: 64758 Комментарии: 0
-Я - фотограф
Выставка "Формула Рукоделия 2013"
-
пїЅпїЅпїЅпїЅпїЅпїЅпїЅпїЅ пїЅпїЅпїЅпїЅпїЅ пїЅ пїЅпїЅпїЅпїЅ пїЅпїЅпїЅпїЅпїЅпїЅ
В© пїЅпїЅпїЅпїЅпїЅпїЅпїЅпїЅпїЅпїЅпїЅ
-Поиск по дневнику
-Подписка по e-mail
-Статистика
ИГОЛЬНИЦЫ. МК НА АНГЛ.ЯЗЫКЕ |
Очень хороший материал для начинающих лоскутных рукодельниц.
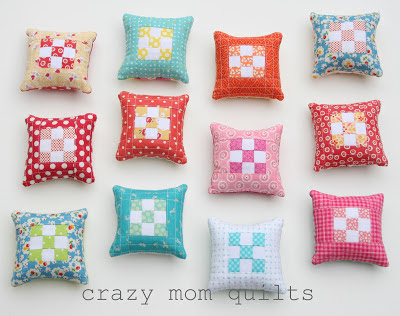
mini 9 patch pin cushion tutorial
Materials Needed:
5 1" squares in a small print or solid for the 9 patch
4 1" squares in white for the 9 patch
2 2" x 1 1/2" strips for the borders
2 4" x 1 1/2" strips for the borders
1 4 1/2" square of batting
1 4" square of light or mid weight interfacing
1 4 1/2" square of fabric for the backing
crushed walnut shells* or poly fiber fill for the filling
*Crushed walnut shells are normally used for lizard bedding. They can be found in larger pet stores. I think I bought mine at Pet Smart in a 11 liter bag. That will make quite a few pin cushions! :)
All seam allowances are 1/4" unless otherwise noted.
Assembly:
Lay out the 1" squares in a 9 patch formation as shown.
Sew the blocks together into 3 rows. Then sew the rows together to make a mini 9 patch. Press well. The middle square finishes at 1/2"!!! (Eeeee!) I'll admit that these are fiddly-but so darn cute-so it's totally worth it!
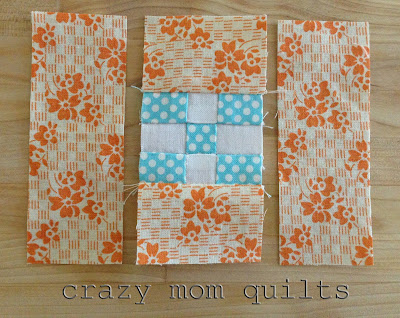
Sew the 2" x 1 1/2" strips to the top and the bottom of the 9 patch block. Press the seams toward the borders.
Sew the 4" x 1 1/2" strips to the sides of the block. Again, press the seams toward the borders.
Layer the block on to a 4 1/2" piece of batting. Quilt with straight lines about 1/4" apart through the borders only. Since this piece is so small, I didn't even bother changing to a walking foot. I used the same foot I used to piece everything together and it worked just fine.
Trim the quilted piece to 4" square.
Following the package directions, fuse the square of interfacing to the square of backing fabric. Trim the piece to 4" square.
Place the quilted piece and the backing piece right sides together. Sew around the perimeter, leaving a small opening for turning. Back stitch at the beginning and ending of the seam. Trim corners close to (but not through) the thread line.
Carefully turn the pin cushion right side out. Use a knitting needle or a blunt end of a scissors to turn out the corners nicely.
Fill with crushed walnut shells or poly fiber fill. If you are using crushed walnut shells (as I did here) I suggest using a piece of scratch paper rolled into a funnel to make filling easier. Hand stitch the opening closed with a ladder stitch and silk thread for a nearly invisible closure.
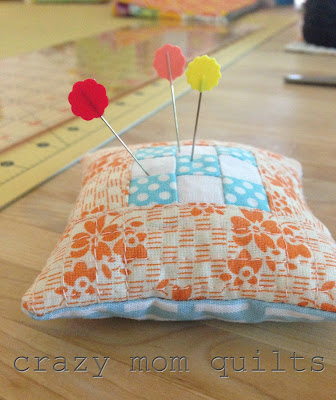
Stick a few pins in and admire your cute little pin cushion!!!
| Рубрики: | шитьё |
| Комментировать | « Пред. запись — К дневнику — След. запись » | Страницы: [1] [Новые] |


