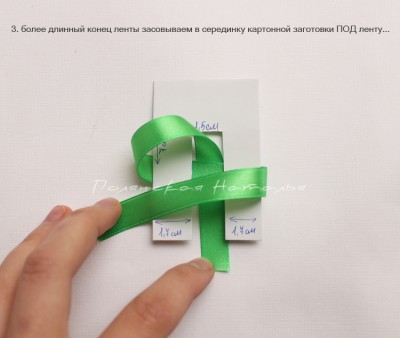
Красивый браслет своими руками. |
|
Головные уборы для праздника |

Turkey? Check!
Stuffing? Check!
Mashed Potatoes? Check!
Pilgrim and Indian hats?
What? No hats?
Well, then, today is your lucky day!
If your kids like to dress up as much as mine do, they’ll love these Thanksgiving hats!
We have made Pilgrim hats and Indian headbands in the past with construction paper.
They’re fun to make and fun to wear, but they rarely make it through the day.
This year I thought it might be a good idea to make the hats out of fabric so they’ll last longer.
I’m going to show you how to make 3 different styles of Thanksgiving hats;
an Indian Headband, a Pilgrim Bonnet, and a Pilgrim Hat.
Fabric American Indian Headband

Supplies:
Fabric in a variety of colors (I used Bella Solids Earth, Bella Solids Yellow, Essential Dots Christmas Red, Essential Dots Tangerine, Essential Dots Christmas Green)
Pellon 20″ Heavy Weight Stabilizer
1 1/2 ” piece of Velcro
Needle
Thread
Pins
Embroidery Floss (optional)
Buttons (optional)
Scissors
Pinking Shears
Rotary Cutter
Cutting Mat
Quilter’s Ruler
Iron
Measuring Tape
Fabric Marker
The first thing you need to do is measure your child’s head with measuring tape.

Using your measurement you’ll need to make patterns for your headband.
Simply cut a strip of paper to match your measurement.
I used manila file folders, because they are sturdy and easy to cut around.
Maggie’s head measures 21″ around.
So, I drew and cut out a 23″ x 3″ strip from my file folder, just to give myself a little leeway.
Trace the 23″ x 3″ piece onto your brown fabric and then cut.
Trace and cut your Pellon slightly smaller than your fabric.

You’ll also need a template for the feathers.
I just drew a feather/leaf shape and cut it out.
I’m sure you could google a feather or leaf shape if you’re nervous about drawing it freehand.
After you’ve drawn and cut out your pattern, fold the Pellon stabilizer so you have 10 layers.
This way you only have to cut once instead of 10 times.

Trace the feather template with your fabric marker onto the top layer of the Pellon stabilizer
and cut through all 10 layers of it.
Cut it slightly smaller than the feather pattern you traced.
Next trace a feather on your colored fabrics.

You’ll need two feathers of each color.

Cut out your feathers with regular sewing scissors (not the pinking shears yet like I did).
You will trim the feathers with your pinking shears after you sew them if you’d like.
After cutting out your feathers, pin them with the wrong sides facing with TWO pieces of your pellon leaves inside.

I used white thread to sew all of the colors together,
but of course you could use coordinating thread.
While we’re on the subject, The Ribbon Retreat carries high quality So Fine! thread in a variety of colors. The spools contain over 500 yards of thread that will outlast most spools that you’ll find at the store. I’m telling you, this thread lasts and lasts.
Then when you think it’s about to run out, it lasts some more!
Using your sewing machine, sew your feathers together with a simple straight stitch
all the way around, removing your pins as you sew.
If you don’t have a sewing machine, you could also do this by hand.

When you finish sewing, press the feathers with an iron.
This next step is completely optional.
I thought it would look cute to add some hand stitching with my embroidery thread.

It turns out I was right!

Now would be the time to trim around your stitches with your pinking shears.

Set your feathers aside for now and move onto the 23″ pieces of Pellon and fabric.
Fold the fabric edges over the Pellon stabilizer around and press with an iron.

Pin all the way around.

Then pin your feathers onto the fabric in the order you would like them.
I alternated my Bella Solids and Essential Dots fabrics, overlapping the feathers.

Sew the fabric, Pellon and feathers together, removing your pins as you sew.

Another fun step that is optional is adding buttons.
Yeah Indians probably didn’t wear buttons on their headbands,
but I thought they’d look darling on my little squaw!
Pin your 1 1/2″ Velcro onto the headband before sewing, making sure that the fuzzy piece of Velcro is on one side of the headband and the prickly piece of Velcro is on the other.
Now your American Indian Headband is complete and ready to wear!
Maggie has been learning about American Indians in kindergarten,
so she is thrilled to be modeling this headband!
She even wore it to bed!

Let’s move on to our next Thanksgiving hat!
Fabric Pilgrim Bonnet


Supplies:
1/2 yard White Fabric (I used Bella Solids White Bleached)
20 ” Heavy Weight Stabilizer
3/8″ White Solid Grosgrain Ribbon
Thread
Pins
Scissors
Rotary Cutter
Cutting Mat
Quilter’s Ruler
Iron
Measuring Tape
Fabric Marker
That Purple Thang
If you ever played a pilgrim in your grade school Thanksgiving program, this shape will look familiar.
Draw a pattern onto a manilla file folder using the picture below as a guide.
It is 15″ along the top, the short side is 11″, the long side is 15″, and the bottom is 3″.
From there you can freehand the curve or place a bowl down and use that as a guide.

You will fold it where it says “fold line” later in the tutorial.

Fold your fabric over and place the shorter part of your pattern on the fold of your fabric.
Trace then cut through both layers of fabric. Do this twice; you need two of these pieces.
Trace and cut the Pellon stabilizer slightly smaller than the fabric.
Iron your fabric. Then pin with the right sides facing.
Leave the bottom unpinned.
Can I take a minute and tell you how much I love these flower head pins?
I know, it’s silly that something so simple could make me so happy!
I love that they’re little, colorful flowers.
I love that the ends are flat and easy to iron with.
Moms, you might want to order some and add them to your own stocking this Christmas!
Sew both layers of your white fabric together, leaving the bottom open.

Using That Purple Thang turn your bonnet inside out.
Press with an iron.
Slip your piece of Pellon into the opening of your bonnet.

Working with a small section at a time, carefully tuck the edge of your fabric under into the opening of the bonnet.
Iron and pin as you go.

Sew along the bottom edge, removing your pins as you sew.

Press with the iron again.
Fold the bonnet in half. With one side overlapping the other, pin the edges together.
If it looks like you’re folding a diaper, you’re doing it right!

Sew those two flaps together, right down the middle.

Press your seam.
Fold the front of the bonnet up in the same way you would a newspaper hat.

Iron on the fold and pin.

Cut two 20″ pieces of 3/8″ White Solid Grosgrain ribbon and pin it inside of the fold of the bonnet.
Pin one ribbon to each side.

Sew a straight stitch down the fold of the fabric, removing the pins as you sew.
When you start and finish at the ends, make sure to sew the ribbon down as well.

Iron one last time.
Try it on your child and tie the ribbon into a bow under her chin.
Trim the ends of your ribbon if needed.
That’s it!
I love how simple, yet elegant it is!

Last, but not least is our Pilgrim Hat.
This one is by far the easiest, not that any of them were super difficult.
Fabric Pilgrim Hat

Supplies:
1/4 yard Black Fabric (I used Essential Dots Jet Black)
1/4 yard Yellow Fabric (I used Bella Solids Yellow)
20″ Heavy Weight Stabilizer
1 1/2″ piece of Velcro
Black Thread
Yellow Embroidery Thread (optional)
Needle
Pins
Iron
Scissors
Rotary Cutter
Cutting Mat
Quilter’s Ruler
Measuring Tape
Fabric Marker
That Purple Thang
Measure your child’s head, just as we did with the headband.
With paper or a manila file folder draw a pilgrim’s hat.
Just like the others, I drew this free hand.
Fold the file folder in half and cut both sides at once to make sure that it is even.
Also cut a long piece from your folder just bigger than the measurement of your child’s head.
Isaac’s head measures 23″ around.
I cut the file folder template to 26″ x 3″.
Trace your 26″ x 3″ piece onto the Pellon stabilizer and onto your yellow fabric, as well.
Cut the Pellon slightly smaller than you do the fabric.
Fold your black fabric in half.
Fold your file folder in half also.
Trace the folder template onto the black fabric, fold on fold, and cut it out.
You will cut two of these.

Trace the folder template onto the Pellon.
Cut it out just slightly smaller than you did the fabric.
You should have two fabric pieces and one piece of Pellon.

Iron your fabric and with the right sides facing, pin all the way around,
leaving an opening at the bottom.

With black thread sew all the way around the black fabric pilgrim hat, removing your pins as you sew,
leaving the bottom open.

Using That Purple Thang, turn the pilgrim hat inside out.
Press with the iron.
Slip the Pellon piece in between the two layers of the hat.

Working in small sections, carefully fold the edges of the fabric under.
Press and pin as you go.

Sew a straight stitch down the bottom of the hat, removing the pins as you sew.
Press with the iron one more time.
Now iron your yellow fabric.
Fold the fabric edges over the pellon all the way around.
Press and pin.

Sew a straight stitch all the way around, removing the pins as you sew.
I used white thread, but Pineapple or Daffodil would have looked nice.

Find the center of your hat and the center of your headband by folding them in half. Pin the middle of the hat to the headband. Don’t pin the “brim” part of the hat. You want it to stick out straight at the sides like a pilgrim hat, not to curve back like an Abe Lincoln hat.

Sew a straight stitch down the center of the hat, removing the pins as you sew.

Pin a 1 1/2″ strip of Velcro to each side of the headband.
Make sure that the prickly piece of Velcro is on one side of the headband and the fuzzy piece of Velcro is on the other. Make sure they are facing the right way before you sew it down.

Now, don’t forget about your buckle!
Cut out a 3″x3″ square of your yellow fabric.
Cut a slightly smaller square of Pellon.
Fold the two pieces in half and cut a smaller square out of the middle.
Find the middle of your hat by folding it in half.
Pin the yellow square “buckle” onto the middle of the hat.
You could sew it on with your sewing machine, but I thought
a hand stitched edge would give it a nice touch.

After your buckle is stitched on your hat is complete!

Now your kids will be ready to eat their Thanksgiving dinner in style!
My kids have been wearing their hats all weekend!
They sure are excited for this coming Thursday!

I love that they love to dress up and when the day comes that they say they’re too old for dress ups I will be a sad mommy! But, these hats seem pretty sturdy, sturdy enough I can save them for my grandkids.
Gasp!
I’m not quite ready to think about that yet!
Happy Thanksgiving!
May your day be filled with family, friends, food and fun!
|
МК по пошиву снеговичка Бррр |
1.Выкраиваем детали. Шапка и рукавицы из трикотажа. Донышко из осн. ткани и из жесткого дублерина.

2. Дублируем флизелином переднюю половинку тушки. Для того, чтобы нам было легче вышивать мордочку и буквы.

3. Пишем исчезающим маркером буквы

4.Вышиваем нитками мулине (в 3 нитки) швом "назад иголку"
 <<
<<
Метки: снеговик |
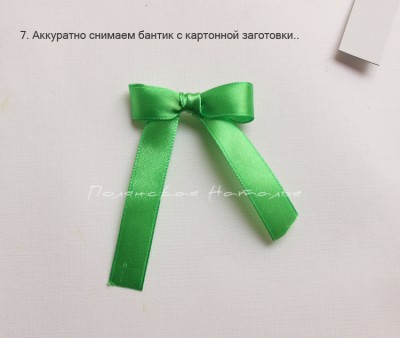
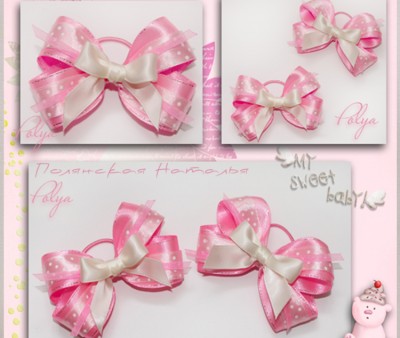
заколки из лент. |


Метки: заколки из лент |
бантики |
Метки: бантики |
Шьем шапку из свитера |
Серия сообщений "Переделки":
Часть 1 - ИЗ ФУТБОЛОК
Часть 2 - Комбинезон из муж. сорочки
...
Часть 10 - Туника\платье из майки для девочки
Часть 11 - Платье из свитера для девочки
Часть 12 - Шьем шапку из свитера
Часть 13 - Майки и воланы
Часть 14 - Еще идеи комбинированных вещей
...
Часть 32 - Шапочка из платка
Часть 33 - Сумки из футболки
Часть 34 - Маечка для девочки (из футболки)
Метки: шапочка шапочка из свитера |
Правильная осанка важна для поддержания здоровья, но ее не так легко достичь. |
|
Митенки из флиса |

Year after year as the weather turns cold, knitted and crocheted hand warmers start popping up all over the city and on the Purl Bee. After years of feeling a little left out, I decided that it was time for us sewists to get in on the action, and so these soft and cozy Felted Wool Wrist Warmers were born!
 Mary Flanagan Felted Wool is the ideal fabric for gorgeous winter accessories. It’s lovely, rustic, and oh-so-warm. In addition to this soft oatmeal color, it comes in a glorious hand-dyed rainbow of colors, from bright turquoise to deep pumpkin orange. For a festive holiday touch, I also used brightly colored cotton embroidery floss accented by a shimmer of metallic thread.
 These are beyond quick to sew, making them an even more last-minute holiday gift than the more traditional knitted and crocheted versions (score one for the sewists!). In fact, if you skipped the embroidery you could make a pair in under 20 minutes. Even with the embroidery you’ll clock in under an hour! These Wrist Warmers are beautiful worn on their own, or wear them over gloves for an extra layer of warmth and style.
Happy Holiday Sewing!-- Molly

To make two 11-inch long women's wrist warmers:

Press one of the wool pieces in half lengthwise. Cut the template shape from the wool as directed on the template.

Unfold the cut piece. Fold over and pin the top and bottom edges a 1/2-inch towards the wrong side. (The wool itself does not have a right or a wrong side you are making this the wrong side by folding the raw edges onto it.)

Edge stitch the folds down using the matching cotton thread.

Fold the hemmed piece back in half lengthwise with the wrong side facing out. Pin it together along the long side marking the thumb gap from the template. Make sure to keep in mind that you have hemmed the top and bottom of the wrist warmer so to mark the thumb gap you will be measuring from inside the dashed hem lines of the template.
 Sew the pinned side together with a 1/2-inch seam allowance in two sections, before and after the thumb gap. Do not sew the thumb gap closed. Make sure to back stitch at the beginning and end of each of these two seams.
 Press the 1/2-inch seam allowance open. Tuck and pin the raw beginnings and ends of the seams under the seam allowance as shown above.
 Turn the wrist warmer right side out. Note the open thumb hole.

Working from the front sew a cross stitch vertically up the right hand side of the seam sewing down the right hand side of pressed open seam on the inside of the wrist warmer in the process. Also make sure to sew down the tucked and pinned beginning and ending edges with these cross stitches.
To make the cross stitch very neat on both the right and wrong sides follow the diagram above. The odd numbers are needle exit points, the even numbers are needle entrance points. The cross of the cross stitch is only on the front of the embroidery, the threads to do not make a cross shape on the back.

Sew along the entire right hand side of the seam making sure to catch the inside of the seam in the process. Be very careful as you sew past the thumb gap.
 Repeat for the left hand side of the seam.
 The inside of the wrist warmer should look like this with the two sides of the open seam sewn down by the neat, non-crossed reverse of the cross stitch embroidery.

Using two strands of the metallic thread, on the right hand side of the seam, embroider a smaller cross over the "X" shape of the first embroidery level and then make a running stitch in between each crossed stitch.

You can follow the diagram above to ensure the embroidery is nice and neat. The odd numbers are needle exit points and the even numbers are needle entrance points.

Repeat this for the left side of the seam.
Repeat all steps for a second wrist warmer and you're all done!
Метки: Митенки из флиса |
Птичка сумочка |
L'année file avec son lot de rituels ! Concevoir un sac pour la récolte de Pâques en fait partie... Mais cette fois, mes petits doigts se sont activés pour les enfants de La Chipie.
Un sac alliant feutre, feutrine et tissu aux couleurs contrastées.
Facile à réaliser, il nécessite peu de moyens et de technique.
Si la machine fait défaut, les coutures peuvent être faites à la main et les anses, réalisées en feutre.


Fournitures :
- 2 plaques de feutre 30x30cm en 1.5mm ou 2mm d'épaisseur couleur turquoise/chocolat.
- chute de feutrine melon ou chair/bleu ciel et marron
- 20cm de ruban satin bleu ciel et marron.
- tissus coordonnés
- Fil à coudre
- Fil coton à canevas.
- Fil coton à broder.
Gabarits :
 Gabarits
Rappel :
Enregistrer l'image ou le fichier sur le bureau et lancer l'impression via l'assistant pour avoir les gabarits au bon format.
Réaliser les 2 faces Poule :

Découper les pièces pour chaque face selon le gabarit et positionner chaque élément à sa place.

Coudre le bec et la crête au point lancé serré.
Appliquer l'aile au point avant, puis clarifier son contour à la machine au point zigzag.
Réduire la largeur du point et dessiner l'ouverture du bec.

Coudre la pupille à l'oeil par un point en croix, puis appliquer l'ensemble sur le corps au point avant.
Assembler les 3 plumes de la queue et les fixer au corps.
Dessiner les contours de chaque poule au fil coton à canevas de la couleur contrastante.
Fixer les pattes au ruban de satin. Dessiner leur contour au point avant , puis coudre l'ensemble au corps.
Confection et assemblage du fond :

Découper 10 rectangle de 6X4cm dans du feutre (5 de chaque couleur).
Les assembler à la machine au point zigzag large et serré.
Assembler cette bande aux 2 faces poulette au point de feston, avec du fil coton à canevas.
Attention ! La couture commence sur la jonction intérieure du bec.

Confection et Assemblage des Anses :

Découper les anses selon le patron dans les 2 tissus en rajoutant un surplus couture de 1cm.
Cranter la partie courbée et rabattre le surplus de tissu des extrémités sur l'intérieur (ourlet).
Assembler les 2 parties des anses endroit contre endroit à la machine.
Il n'est pas nécessaire de laisser une ouverture pour le retournement qui peut s'effectuer par l'une ou l'autre extrémité.
Retourner et donner un coup de fer sur l'ensemble.

Rembourrer généreusement de ouate et refermer les 2 extrémités des anses à la machine à 1cm du bord.
Fixer les anses au panier au fil coton à canevas, par trois point en croix serrés.
|
"Мужской смокинг и галстук". Мастер-класс |

|
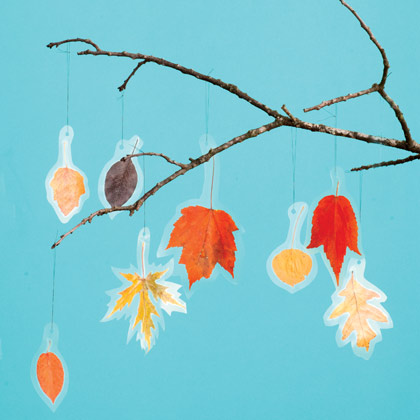
Поделки из листьев |
Метки: Поделки из листьев |
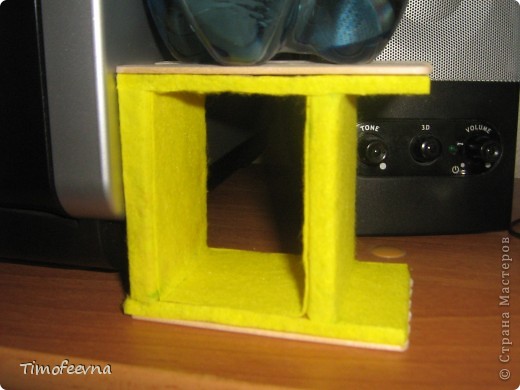
Двухъярусная кроватка для маленьких кукол |

Всё просто. Нам понадобятся:
-коробочный картон
-бумага для шаблонов
-клей "Момент" и ПВА
-проволока
-ножницы
-карандаш
-линейка
-ткань для постельки
-палочки от мороженого 2шт
-спички 7-8шт
Начнём с приготовления до неприличия простых шаблонов :) Два прямоугольника 9 на 5см и 7 на 5см.

Размеры, конечно же, могут быть любые, а у меня вот такие, так как кроватку делаю для своих любимых пупсиков :)
Вырезаем по шаблонам из коробочного картона 4 больших детали и 8 маленьких.
Если вы делаете кровать бОльшего размера, то деталей нужно сделать немного больше.

Склеиваем "Моментом" между собой попарно маленькие детали (ложе), получится четыре штуки.

Поставить сохнуть под пресс, чтоб прочней было.

А в это время отрезаем 4 кусочка проволоки (да-да, не две, как на фото, а четыре:) длиной 15 сантиметров.

Берём одну деталь "ложе", хорошо мажем клеем и кладём сверху проволоку, как на фото.

Сверху на проволоку аккуратно прикладываем ещё одну деталь "ложе", прижимаем и поправляем ровно проволоку. Ставим под пресс.

Когда детали хорошо просохнут, берём деталь "спинка", прикладываем аккуратно к проволоке и помечаем фломастером точки соприкосновения.Это первый ярус.

Теперь немного выше проделываем тоже самое со второй деталью "ложе"- это будет второй ярус.

Проделываем в помеченных местах отверстия шилом (или гвоздиком)

Вставляем в отверстия проволоку (тут главное не перепутать детали), а место стыка полить клеем.

С обратной стороны крепко натягиваем проволоку и завязываем .Тоже самое проделываем с противоположной стороной.

Вот что у нас получается.

Теперь к спинкам приклеиваем оставшиеся детали, очень хорошо прижимаем.

Я делала вот такой пресс - большие канцелярские скрепки, хорошо сжимают, всё склеялось как надо.

Ну всё, в принципе, кровать готова...Осталось её украсить, придать товарный вид. Можно просто покрасить краской, можно обклеять цветной бумагой, тканью или ещё чем.. А я эту кроватку, так же как и кровать для Барби, обклеяла салфеткой для уборки ("Фрекен Бок").
Извиняюсь за такое смазанное фото :( Нужно отмерить расстояние от ложа второго яруса до конца спинки и прибавить ещё миллиметров 5 (толщину спинки), у меня получилось почти 3 см.

Берём шаблончик "ложе", кладём на салфетку и и отмечаем линии отреза, прибавив к "ширине" 3 см (расстояние от второго яруса до конца спинки), а к "длине" толщину ложа плюс 1 сантиметр, у меня получилось 2 см.

Вырезаем салфетку и клеим на ПВА ко второму ярусу, проглаживая места сгиба.

Снова берём деталь "ложе" и отмерям на салфетке теперь только "длину", прибавив столько же, сколько прибавляли на втором ярусе - 2 см. (Совет- не повторяйте моей ошибки и не делайте замеры фломастером, от ПВА он растекается по салфетке)

Вырезаем салфетку и обклеиваем первый ярус.

Измеряем линейкой расстояние от нижнего яруса до верхнего, у меня 5 см.

Берём детальку "ложе" и прибавляем к каждой из сторон "ширина" расстояние от нижнего яруса до верхнего- 5 см.

И аккуратно приклеиваем вырезанную салфетку к внутренним сторонам спинок и нижней стороне верхнего яруса, вот так:

Нарезаем из салфетки 4 полосочки 9 см длина и примерно 5 см ширина (это толщина спинок) и заклеиваем все некрасивые места на спинках кроватки.


Осталось украсить внешнюю часть спинок. Можно обклеять той же салфеткой.

А можно обклеять палочками от мороженого. Всего на мою кроватку понадобилось 12 штук.

Клеила на "Момент"

Приставила к принтеру, чтоб не кренилась кроватка на бок и сверху поставила пресс.
Отлично всё склеялось.

Из тех же палочек и спичек (головки срезала ножницами) сделала лесенку на второй ярус. (клей "Момент")

Шьём матрасики и подушечки.

Вырезаем две тряпочки-одеялка.
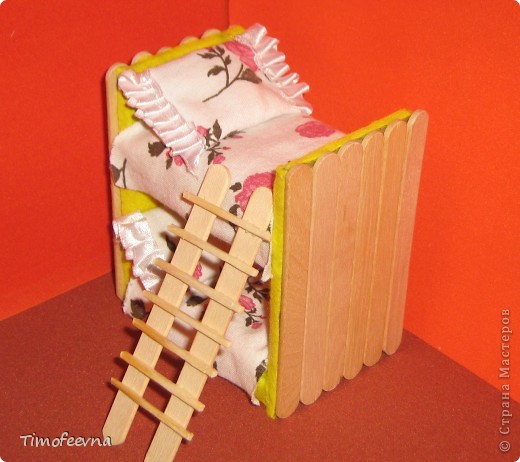
И всё, сладких снов, пупсики :)

Надеюсь, не слишком запутанное было объяснение... спасибо всем за внимание, до новых встреч!!! 
Timofeevna.
Метки: Двухъярусная кроватка для маленьких кукол |
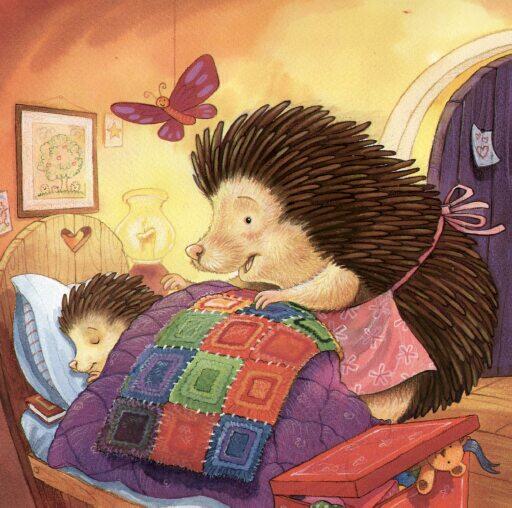
Иллюстратор Daniel Howarth. |
|
КАК Я ДЕЛАЮ БУМАГУ. МК |
Многие делают бумагу при помощи наклеивания салфеток. Я покажу способ как это сделать совсем без проблем. Сразу оговорюсь, что способ с пищевой пленкой мне не нравится. Будем делать листы формата А4


|
Забавные фартучки для девочек.. |
Забавные фартучки для девочек...
Нашла здесь... http://www.etсy.com/shop/wildgsdresses?ref=seller_info
1.

|
Сценарий к Дню рождения дочки! |
|
1. Буквы-значки, как бойцы на парад,
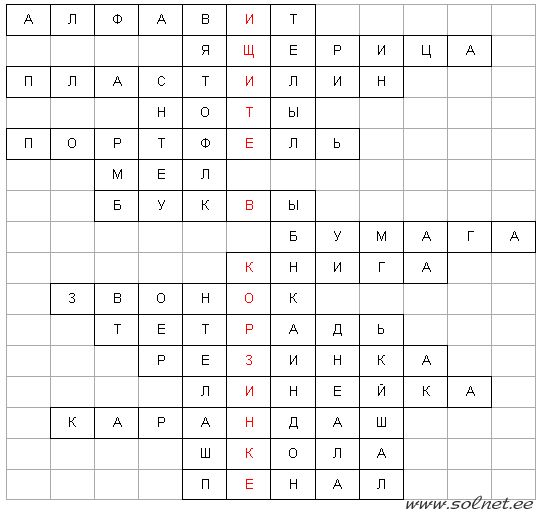
В строгом порядке построены в ряд. Каждый в условленном месте стоит И называется строй ... (алфавит) 2. Бегает среди камней, Не угонишься за ней. Ухватил за хвост, но - ах! Удрала, а хвост в руках. (ящерица) 3. Я весь мир слепить готов - Дом, машину, двух котов. Я сегодня властелин - У меня есть... (пластилин) 4. Пять ступенек - лесенка, На ступеньках - песенка. На пяти проводах Отдыхает стая птах. (ноты) 5. Новый дом несу в руке, Дверца дома на замке, Тут жильцы бумажные, Все ужасно важные. (портфель) 6. Белый камушек растаял, На доске следы оставил. (мел) 7. Черные, кривые, от рожденья все немые. Станут в ряд - вмиг заговорят. (буквы) 8. Склеите корабль, солдата, Паровоз, машину, шпагу. А поможет вам, ребята, Разноцветная... (бумага) |
9. Говорит она беззвучно,
Но понятно и нескучно. Ты беседуй чаще с ней - Станешь вчетверо умней. (книга) 10. Кулик не велик, сотне ребят велит: То сядь да учись, то встань, разойдись. (звонок) 11. То я в клетку, то в линейку. Написать по ним сумей-ка! Можешь и нарисовать. Что такое я?.. (тетрадь) 12. Если ей работу дашь, Зря трудился карандаш. (резинка) 13. Линию прямую, ну-ка, Сам нарисовать сумей-ка! Это сложная наука! Пригодится здесь... (линейка) 14. Если ты его отточишь, Нарисуешь все, что хочешь! Солнце, море, горы, пляж... Что же это?.. (карандаш) 15. Стоит веселый светлый дом, Ребят проворных много в нем Там пишут и считают, Рисуют и читают. (школа) 16. На коробку я похож, Ручки ты в меня кладешь. Школьник, ты меня узнал? Ну, конечно, я -... (пенал) |
|
летит
|
Самолёт, попугай, ворона, корова, гусь, воробей, лягушка, пингвин, утка, вертолёт, пароход, курица, стая, шапка, стрела.
|
|
едет
|
Машина, поезд, пароход, корова, велосипед, санки, мотоцикл, дом, метро, такси, крыша, эскалатор, лыжи, коньки, печка.
|
|
плывет
|
Пароход, портфель, утка, лебедь, топор, крокодил, кит, облако, камень, бревно, льдина, жираф, дельфин, рыба, лодка.
|
|
бежит
|
Заяц, камень, речка, конь, дерево, собака, время, змея, леопард, олень, улитка, спортсмен, рыба, ручей, гепард.
|
|
крулых
|
Блин, серединка у ромашки, снежок, шар, хула-хуп, монетка, батискаф, часы, пенсне, тарелка.
|
|
зеленых
|
Крокодил, лягушка, огурец, киви, трава, гусеница, елка, водоросли, листья на деревьях летом, кактус, зеленка.
|
|
острых и колючих
|
Ежик, иголка, репей, нож, колючка, гвоздь, заноза, шипы, дикобраз, морской еж, кактус.
|


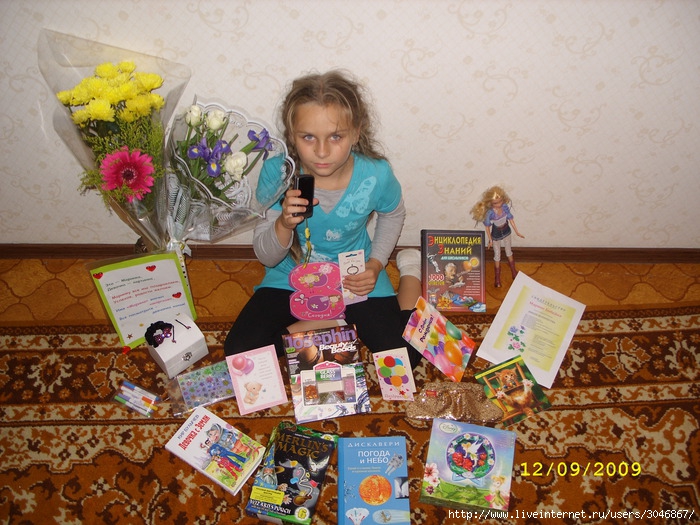
А это дочка после провода гостей, УФ....
|
Делаем сами: снежный шар... |

|
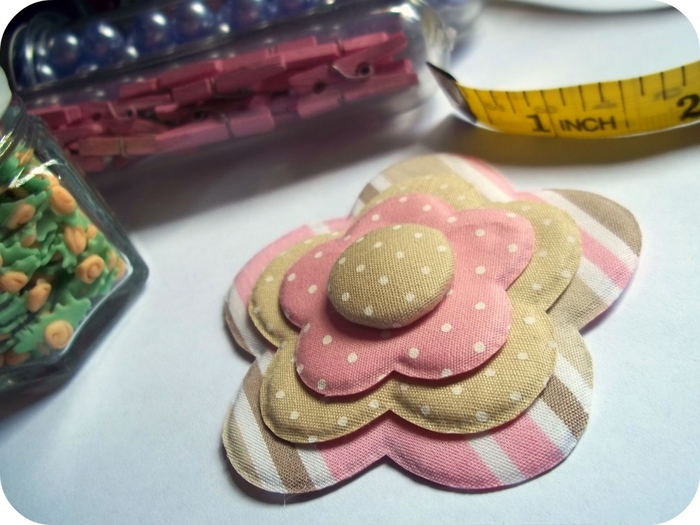
Цветы из ткани. Интересный цветочек с использованием силиконового клея |
Цветы из ткани. Интересный цветочек с использованием силиконового клея
Нашла вот такой интересный способ изготовления цветка из ткани. Лепестки у цветочка двойные, склеенные силиконовым клеем. Внутри лепестков - уплотнитель. Такие цветы - хороший вариант для украшения одежды, сумок и ободков. Смотрим мастер-класс

|
Косыночка |
 I first made a kerchief for little punk when I made THIS outfit. It was super simple and over-the-top adorable and I knew I wanted to make a tutorial for it. So, I got to work and added in one of my favorite trims, pom-poms! The poms make it extra special and adds just the right style to this boutique-esqe accessory. You can easily keep the poms off if you’d like a more simple look, but why, oh why would you do that?


 Cut out your fabric using the kerchief pattern


 On the wrong side, position the pom trim towards the outside edge and sew on close to the edge to create another row of stitches perpendicular to the first one
 Just like that! Sew poms on the other side too!
 Now, take your elastic and measure your child’s head right where the elastic will sit when the kerchief is complete. Our measurement was 19.5”. Cut to 19.5”. Lay it right on top of the raw edge centered across the top, and sew elastic on using a straight stitch.
 Bring the two edges together and use a zig zag stitch to secure together
 Strap on your beauty and let her run free!


|
Мешочек детский |
by Dana on July 6, 2008
 Whether you’re on the road or hanging at home, every hobo needs a bag for his (or her) treasures.

 So load it up,
 hit the road,
 and sit back on the tracks to enjoy a break.
 The hobo sack is one of the easiest things to make. It’s a great project for the beginner sewer and even the advanced! Make one, make two, make ten! Whenever we’re running out the door, I ask each of my kids to load up a sack with their favorite toys and snacks. And the car-ride is often a more pleasant one.
 So here’s what we’re making:
 Easy? You betcha.
Let’s get started…..
NOTE: Info for adding a Liner and/or a Ruffle to your bag is at the end of the tutorial.
Skill Level: Beginner
Needed:
* 1/2 yard or less of Cotton (light-weight, twill, corduroy, seer sucker, etc. I used a lighter weight corduroy here)
* Small amount of contrasting fabric for Drawstring Straps (can be cotton or knit)
* Sewing Machine
* Serger (optional)
Seam Allowance: 1/2 inch
Here is the pattern. I drew mine with a ruler on to a File Folder so that it’s sturdy for repeat uses. You can make it larger or smaller, just make sure the corner cut-outs at the bottom are the same on both sides:
 Just lay it on your fabric and cut two:

 Decide what you’d like to use for straps. To make it super easy, I chose knit because then I don’t have to sew anything! Knit doesn’t fray and if you pull it real tight……
 It sort of curls up in a tube, like this:
 If you’re going to use knit straps like me, cut (2) straps that are 1 yard (36 inches) long and about 1 1/2 to 2 inches wide. If you’d like to use Cotton, use the same dimensions (36×2 inches), sew each one into a long tube, use a safety pin to pull it inside out, iron down and then finish off the ends of each tube/strap.
Okay, on to the sack sewing….
Those little corners down there that are cut out is what gives you “room” in the bottom of your bag. In fact, this is how many purses and bags are made. So now you can whip up all sorts of bags and totes!
 Take those two corners that are cut out and fold them up to each other:
 like this:
 and sew it down. Do this on both sides:
 When you’re done, it should look like this:
 If you have a serger, serge off the seams of each one.
If you don’t have a serger, do a zigzag stitch on your seams. It really is nice to have finished off seams, especially since the inside of the bag will take a beating over time with toys and food. And fraying edges will be a tangled mess:
 Okay, this next step is optional but I think it really polishes off the bag nicely. Serge down each side of your two bag pieces approximately 5 inches (if you don’t have a serger, do a zigzag stitch):
 When you’re done, each bag piece should look like this (this will make more sense when we get to the casing section):
 Now we’re going to sew the two bag pieces together…..
So with right sides together, lay one piece inside of the other; match up the corner seams first:
 Because one piece is inside the other, it may seem hard to get the two pieces completely lined up. But your bag will look much more symmetrical if you do this. So try to get those top corners to match up:
 Like this. See how nice those top pieces came together?
 If you have a side-tag for your bag, insert it now:
 and pin it down:
 Then, this is an important step for your casing and straps. You MUST leave a gap in the seam for the straps to come in and out of (you’re creating a hole in each side seam). So, when you sew down the sides…..first, sew down 1 1/4 inches, then SKIP 1 1/4 inches, and then sew the rest of the way down. What I do (so that I don’t forget to leave the gap) is mark my Start and Stop points with double pins. The area between the two pins is where I do NOT want to sew:
 Pin all the way around your pieces and it should look like this:
 Then start sewing:
 Stop at the double pins (make sure you forward and back stitch to finish off your stitch):
 Then, you don’t even need to cut your threads yet, just pull the fabric down and start stitching again at the next double pins (remember to forward and back stitch to seal off your stitch):
 Continue sewing all the way the around the bag. When you get to the bottom, just curve the fabric around, keeping the same seam allowance the whole time you sew:
 When you’re done, the top part of your bag, should look like this, with the two gaps in your seam:
 Now, Iron out the top portion that you serged and you will now discover your little hole!….
 There it is! That’s where your drawstring straps will come in and out. And since you serged (or zigzagged) the edges, it is less likely to fray with time and stay in great shape!
 Okay, since we don’t want the rest of your bag to fray as well, serge around the rest of the seam (make sure you don’t serge over the top portion where you just made the hole! Simply start where the previous serge left off. If you don’t have a serger, do a zigzag):
 When you’re done, it should look like this (that middle part is where one serge starts and the other ends):
 Now, to reinforce the holes, do a zigzag at the ends of each opening. I chose to use contrasting thread:
 Then (this is also optional) to add a little color and strength to your bag, you may choose to top-stitch all the way around your seam on the OUTside of your fabric. Using the presser foot to guide you in a straight line (line up the left edge of your foot with the seam, or something like that), sew a line about 1/4 inch to the right of the seam:
 Then do the opposite, to the left of the seam, so you have two lines like this (my, that’s not very straight but it’ll work!):
 Finally, make sure that the top of your bag is straight on both sides. If one side happens to be taller, cut it down so everything is even. Then serge all the way around the top (or zigzag):
 Fold the top portion down right where the top of the holes start. This will create your casing. You want to make sure that the Holes are completely backed by the casing, so that the drawstring straps won’t fall out of the casing and Iron down the casing:
 Then, stitch the casing closed. I usually do a double-stitch on this, sewing two lines 1/4 inch apart from each other:
 You’re almost done!
Take a safety pin and connect it to one end of your first strap:
 Insert it into the first Hole and push it all the way around (and PAST the second hole) till it comes back out where it started:
 Tie a knot into each end of your straps to finish them off and to keep them from going through the casing on their own:
 Then, using the same method, insert your other strap into the other hole:
 When you get to the next hole, just push past the strap that’s already there:
 It should look like this on each end:
 And pull the other strap through all the way. Woohoo! You did it!
If you’d like, add a decorative label to the outside:
 Then give your self a pat on the back…..and take a peek inside your totally cool and completed Hobo Sack!
 Think of all the treasures that will go in there….
 and Enjoy!

 ———————————————————————
You can easily add a ruffle or a liner to your Hobo. We’ll show you how below….
Princess Ruffle:


 Lined Citrus Sack:


 It’s easy to add a liner to your Hobo Sack. And once you’re there, throw in a ruffle with no problem! Here are the added steps….
For the Citrus Sack, I chose to make the outer layer multi-colored. If you’re a quilter, you can come up with all sorts of ideas for this. But I kept it simple. 3 colors, 3 horizontal blocks. I marked on my pattern piece where I wanted each color section to start and then added an extra 1/2 inch on each side for seam allowance.
 So I cut the bottom piece to look something like this (and then the other two top colors in rectangular blocks):
 NOTE: I also cut out my liner pieces with solid yellow fabric. Cut your liner from whatever fun fabric you’d like.
Sew all the color blocks together and serge the seams (only serge if you are NOT adding a liner). If you’re adding a liner, you don’t really need to serge because the seams will be hidden inside.
 You get sick of me saying it, but IRON out the seams here. Just as you would with a quilting project, you want the sewn pieces to look like one big seamless piece of fabric:
 Okay, this is where you insert a bunch of the steps in the normal Hobo Sack Tutorial here.
Follow the steps in the tutorial above to create your hobo sack as you normally would and STOP when you get to the part about creating the casing.
Do the same thing for your liner piece. SO, it’s like you’ve created TWO hobo sacks that are going to be sewn together.
Then, with the outer hobo sack turned INSIDE-out and the liner turner RIGHT-side out, stuff them inside of each other. Basically, you want the RIGHT sides of the two sacks facing each other:
 Stuff the liner down inside so that it fits in there like a glove:
 IF you want to add a ruffle, here’s where you would do it. Create a ruffle to go all the way around your sack and sandwich it in-between the two sacks:
 like this:
 and pin it down:
 I chose not to add a ruffle, so we’ll continue without it.
I realized as I was going along that I would NOT be doing a fold-over casing as in the original sack (since we’re adding a lining). This meant that my bag was going to be a bit tall. SO, I cut the sack down an inch or so, about a 1/2 inch above the slit where the pull strings come out. In the future, you can adjust your pattern when cutting so you don’t have to trim later.
 Okay, pin the two sacks together, all the way around.
YOU NEED TO LEAVE AN OPENING at the top of the sack so that you can turn it Right-side out when you’re done. So mark an opening with double-pins so you don’t forget.
 Start sewing at one set of double-pins and continue all the way around to the other set of double pins:
 When you’re done, stick your hand into the opening:
 And pull the whole bag Right-side out:
 Fit the two sacks into each other again, and let’s finish up the pull-string casing. First do a nice top-stitch at the edge of the sack to hold the two sacks together and for decor. I do mine about 1/8 inch from the edge:
 Then, using the silver plate on your machine as a guide, sew another line about 3/4 inch down to create a casing:
 Do a double-line next to it for added decor:
 Create pull-strings for you sack, pull them through the casings, and you’re done!
 The Citrus Sack makes a wonderful gift idea for Mother’s Day, Birthdays, for any occasion.
Gather your favorite citrus fruit into the colorful sack and include a copy of your favorite Citrus recipe.
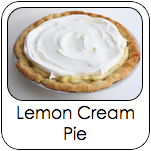
 We recommend the summer fresh Lemon Cream Pie, recently added to our Tutorials Section. You’ll find the complete recipe HERE:
Share a bit of Summer to someone you care about.

|
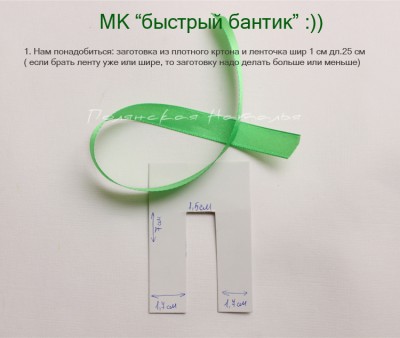
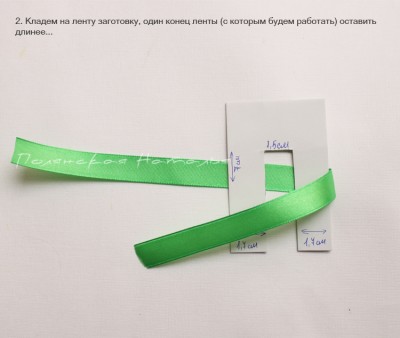
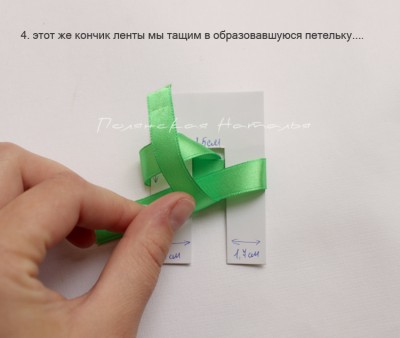
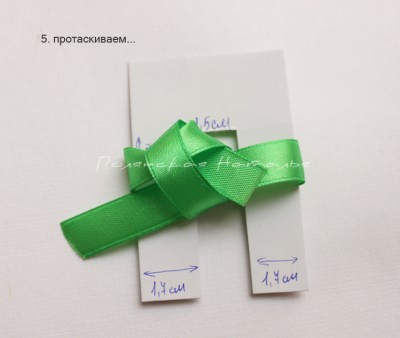
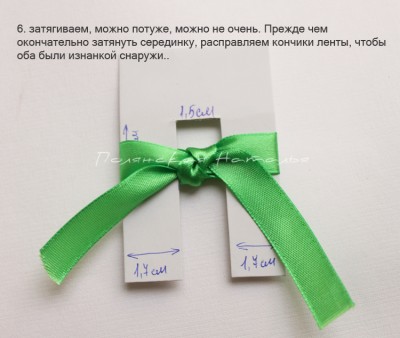
Быстрый бантик |
Метки: Быстрый бантик |
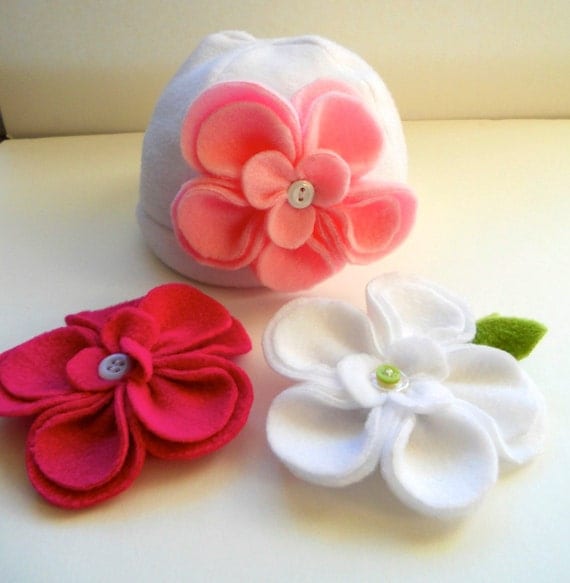
как украсить флисовую шапочку |
Очень понравился вот такой вариант украшения флисовой шапочки. Сделать самим достаточно просто и, если подобрать цвета, то вид шапочки можно менять в зависимости от цвета приколотого цветочка:
|
Новогодние гирлянды своими руками |
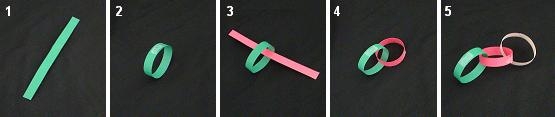
Чтобы создать праздничное настроение себе и своим близким, не пожалейте времение на то, чтобы украсить свой дом к Новому году. Вместе с детьми смастерите новогодние украшения своими руками. Одно из самых привычных новогодних украшений - гирлянды. О том, как изготовить елочные гирлянды своими руками, мы расскажем вам в этой статье.
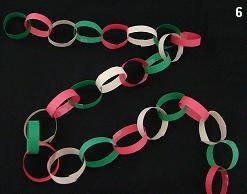
1. Новогодняя гирлянда из бумаги (вариант 1)
Классический вариант новогодней гирлянды - бумажная цепь. Изготовление этой новогодней поделки под силу даже совсем маленьким детям.
|
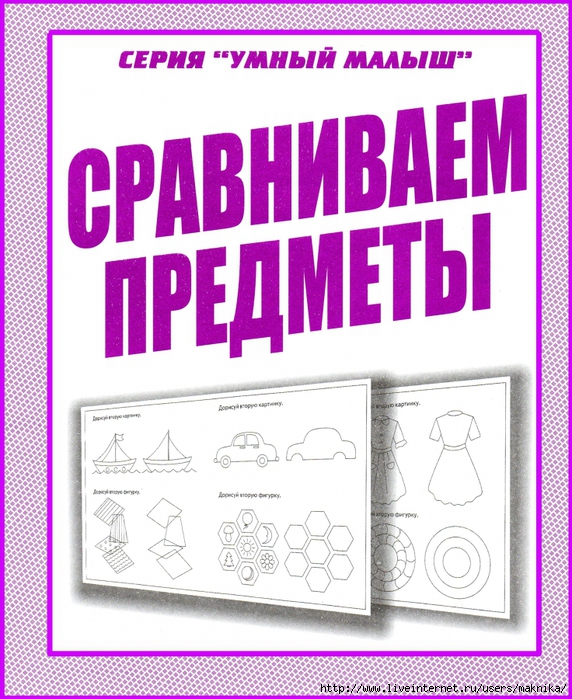
Сравниваем предметы. |
|
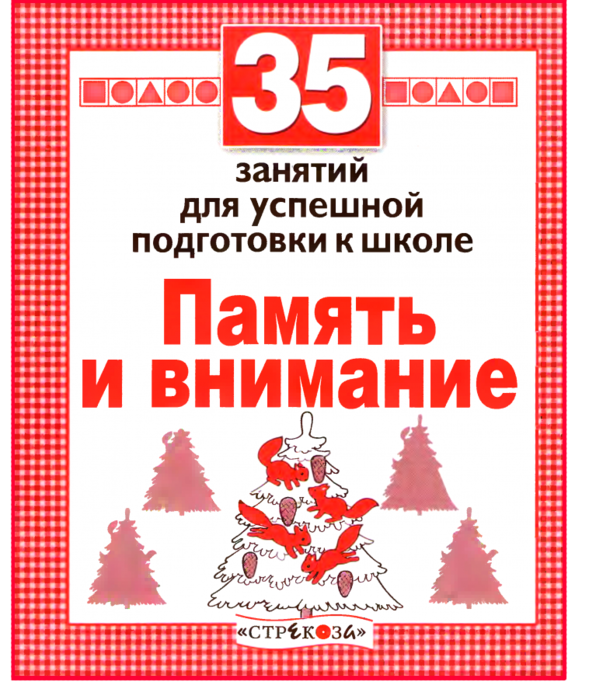
Память и внимание. |
|
Пышная юбочка из фатина |
Эту нарядную юбочку смогут сшить для своих очаровательных дочек даже самые занятые мамочки.Это не займёт много времени,но результат принесёт радость и вам и вашему ребёнку.
Её можно сделать многоярусной и разноцветной. Всё зависит от вашей фантазии и терпения
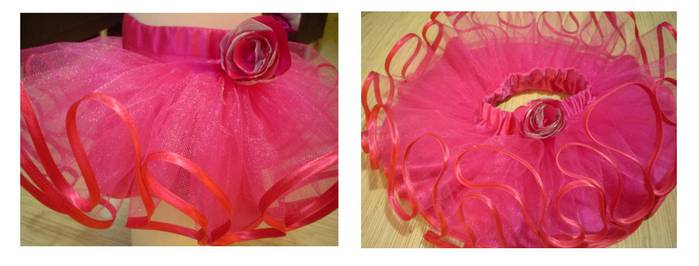
Мастер-класс юбки для девочки объемом талии 55 см, объемом бедер 62 см,
длиной изделия 20 см
( у вас, конечно, же будут свои размеры). Для этого Вам понадобится:
|
Последовательность событий |
|
Развитие речи. |
Метки: Развитие речи прописи |
АПЕЛЬСИНОВЫЕ ПРЯНИКИ |
 Описание: Приближается Новый Год! И все вокруг приобретает новые радостные оттенки и ароматы. Даже простые апельсины становятся более яркими, а уж пряники с апельсиновым вкусом кажутся и вовсе волшебными!!! Рецепт рассчитан на двойную порцию. Получается целая гора ароматных и вкусных пряничков.
|
Летняя повязка для волос с козырьком. |
Доброго времени суток!
Супер! Очень нравится - удобно, стильно, легко в исполнении. Я не знаю, как другие дети переносят всякие панамки-шапочки, моя звезда категорически ничего не хочет носить на голове, исключение составляют только повязки для волос и чтоб цветочков побольше:) И мама-рукодельница к каждому платьицу шьет-режет, крутит и т.д. А вот козырек прицепить ко всей этой красе у меня и в мыслях не было - исправлюсь:) Итак, принимайте - чудесная повязка с козырьком для наших красавиц! Собственно, и красавцам можно нечто подобное сварганить:) Приятного просмотра!


|
Повязочки |


|
Тапочки |


Метки: Тапочки |
Сумочка детская |


Метки: Сумочка детская |
гимнастика врача реабилитолога |

Нашла вот эти ролики, отобрала для себя имеющие отношения к своим болячкам.
Многие из нас хоть какие-то упражнения , но делают. А здесь вроде и не сложно - на стульчике или на полу. И полезно для здоровья. Почему бы не включить их в ежедневный комплекс. Реально. Ни пыхтений с прессом, ни приседаний сто-пятьсот раз...
***
Надо попробовать. Вреда не будет. А БОЛЯЧКИ ПРОСТО ДОСТАААЛИ.![]()
|
УПАКОВКА ПОДАРКА... ЧУДЕСНЫЙ ЦВЕТОК "100 слов пожеланий" |


 1. Безоблачного счастья!
2. Крепкого здоровья!
3. Понимания и тепла!
4. Ясной улыбки!
5. Светлой судьбы!
6. Свежего ветра!
7. Славы и признания!
8. Фантастического везения!
9. Доброты и нежности!
10. Хрустальных надежд!
11. Уверенности в себе!
12. Отличного настроения!
13. Тёплого отношения окружающих!
14. Больших успехов!
15. Оптимизма!
16. Внимания и заботы!
17. Увлекательной жизни!
18. Приятных открытий!
19. Замечательных друзей!
20. Исполнения желаний!
|
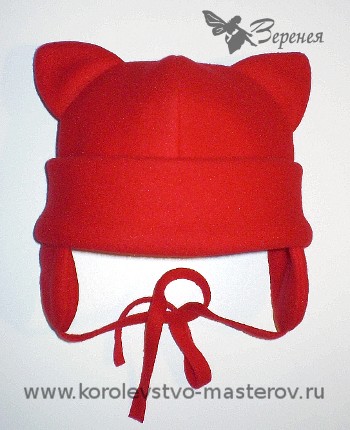
Детская шапка с ушками (из флиса) |
|
Как покрасить бумагу. |
Источник. Далее текст автора.
Сегодня мы поговорим о том, как покрасить бумагу. Я расскажу о тех способах, которыми активно пользуюсь: о покраске чаем, кофе, акварелью и пищевыми красителями.
Какую бумагу взять?
Обычно для своих блокнотов я использую офисную бумагу для принтера, 80 г./кв.м. Можно брать и более тонкую – 65 г./кв.м. – бумагу для письма, ее очень удобно тонировать, т.к. зачастую можно покрасить только одну сторону, а другая пропитается сама. Если нужно сделать скетч-бук или что-то в этом роде, то в дело идет чертежная, акварельная или пастельная бумага.
Как покрасить бумагу кофе?
Метки: Как покрасить бумагу |
Художник Marcel Marlier с Мартиной и ее друзьями |
|
Геометрия 5-6 лет |
|
Шьём каскадную пышную юбочку |
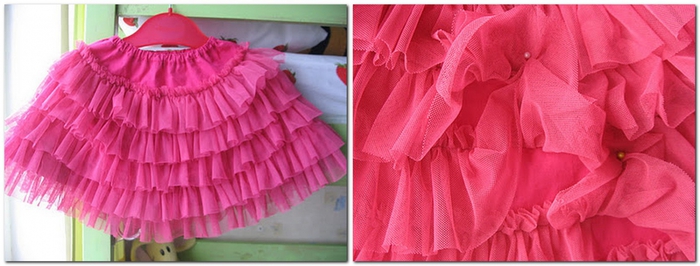
Летняя нарядная юбочка. Фото с Осинки пользователя ната Ли я
Ушло 50см поплина на основу и 1 метр сетки на рюши. Основу юбки - полусолнце, пояс – 3 см и длиной = длине верхнего среза юбочки, внутрь вставлена резинка.
Рюши кроены поперек полотна, шириной 7 см и длиной соответственно = ширине сетки (вроде бы 140см). На ярусы ушло полос сетки : 1й - 2 полосы, 2й - 2 полосы, 3й - 3 полосы, 4й – 3 полосы, 5й -4 полосы (всего получается 14 полос).
После того, как раскроила две детали юбки, стачала их, разутюжила швы, нанесла линии настрачивания полос из сетки. Для этого использовала равномерно разрезанное лекало. 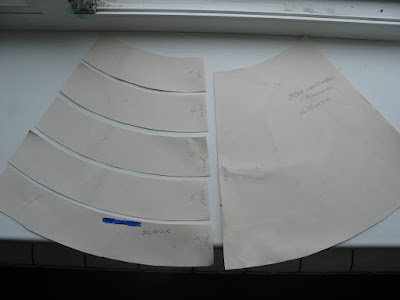

На примере этой юбочки вы легко сможете понять принцип изготовления каскадных юбок:
![]()
Серия сообщений "Шьем детям ":
Часть 1 - Маленькая принцесса
Часть 2 - Конверт для грудничков
...
Часть 26 - Юбка американка Pettiskirt-королева пышных юбок.Формула расчёта расхода ткани
Часть 27 - Ещё один метод шитья юбки ТУТУ
Часть 28 - Шьём каскадную пышную юбочку
Часть 29 - Шьем нарядные комплекты для красавицы дочурки: платья и болеро!
Часть 30 - Шьем пышную юбку для девочки. Два мастер-класса!
...
Часть 42 - Мастер -класс по пошиву нарядного платья для девочки
Часть 43 - ЮБКА-КЕКС
Часть 44 - Юбка-солнце оригинальной конструкции: неровный край.
Серия сообщений "Пышные юбки":
Часть 1 - Мастер - класс по изготовлению многоярусной юбки
Часть 2 - Шьём пышную юбку
...
Часть 8 - Юбка американка Pettiskirt-королева пышных юбок.Формула расчёта расхода ткани
Часть 9 - Ещё один метод шитья юбки ТУТУ
Часть 10 - Шьём каскадную пышную юбочку
Часть 11 - Шьем пышную юбку для девочки. Два мастер-класса!
Часть 12 - Как пользоваться лапкой для сборки рюшей и оборок
...
Часть 21 - Юбка-солнце оригинальной конструкции: неровный край.
Часть 22 - Видео мастер-класс. Нарядная юбка из фатина — «Хризантема»
Часть 23 - Пышная юбочка Tutu. Самый подробный видео мастер-класс
|
Считалочки |

Раз, два, три, четыре.
Жили мышки на квартире.
Чай пили, чашки мыли,
По три денежки платили.
Кто не хочет платить,
тому и водить.
Конь ретивый
Долгогривый
Скачет полем,
Скачет нивой.
Кто коня того поймает,
С нами в салочки играет.
Эй! Иван,
Полезай в стакан,
Отрежь лимон
И выйди вон!
Раз, два, три, четыре, пять,
Будем в прятки мы играть.
Небо, звезды, луг, цветы –
Ты пойди-ка поводи!
На златом крыльце сидели:
Царь, царевич,
Король, королевич,
Сапожник, портной…
Кто ты будешь такой?
Говори поскорей,
Не задерживай
Добрых и честных людей!
Шла машина темным лесом
За каким-то интересом.
Инте-инте-интерес
Выходи на букву "С".
Зайчишка-трусишка
По полю бежал,
В огород забежал,
Морковку нашел,
Капустку нашел,
Сидит, грызет,
Ай, кто-то идет!
Аты-баты, шли солдаты,
Аты-баты, на базар.
Аты-баты, что купили?
Аты-баты, самовар.
Аты-баты, он какой?
Аты-баты, золотой.
Аты-баты, сколько стоит?
Аты-баты, три рубля.
Аты-баты, кто выходит?
Аты-баты, это я.
Эни, бэни, рики, паки
Буль, буль, буль,
Каляки, шмаки,
Эус,беус, космобеус,
бац!
Ехал мужик по дороге,
Сломал колесо на пороге…
Сколько надо гвоздей?
Долго не думай,
Говори поскорей.
Шла кукушка мимо сети,
А за нею малы дети
Все кричали "ку-ку-мак"!
Убирай один кулак!
Раз, два, три, четыре, пять –
Будем в прятки мы играть!
Ты гордиться погоди,
А пойди-ка, поводи!
Серия сообщений "Детские стишки":
Часть 1 - Детские стишки для первого альбома
Часть 2 - Вот так я тебя люблю..... стишок
Часть 3 - Считалочки
Часть 4 - Дети и животные. Гороскоп для детей.
Часть 5 - Детские стишки под каждую фотку.
...
Часть 12 - Магазин-Все-Для-Творчества Фурнитура-Ленты-Бусинки
Часть 13 - Магазин все для творчества " Планета лент"
Часть 14 - ободок в стиле Dolce & Gabbana
Метки: Считалочки |
Украшения на ёлку. |
Метки: Украшения на ёлку |
Вся дошкольная программа: Речь. |
|
Стихи для развития речи. |
|
Внимание, память. |
Метки: Внимание память прописи |
Мышление |
Метки: мышление прописи |
Математика |
Метки: математика прописи |
Письмо |
Метки: письмо прописи |
Гуашь с ПВА как замена масла и акрила |

Акрил - дорогой, масло - дорогое, еще и сохнет долго. Что, если вы хотите только попробовать что-то нарисовать на холсте? Всего одну картинку, ради которой не хочется выкидывать "бешеные тыщи" на краски, которые потом будут просто лежать без дела? Или вы только учитесь, или рисуете с детьми, или просто рисуете для себя. В любом из этих случаев на помощь приходит дуэт гуашь+клей ПВА.
Этому приему меня научили друзья-керамисты, и я долго пользовалась этой смесью и для рисования на холстах, и для росписи фигурок - да для чего угодно это можно использовать. Между прочим, говорят, что такой же смесью расписывают шкатулки с традиционными орнаментами.
|
Капустные драники - вкусно нереально! |

Метки: капуста драники капустные драники |