Дамаская лестница и не очень
|
|
Четверг, 13 Февраля 2014 г. 01:59
+ в цитатник
Method
Click Pictures for a Larger View
|
Condition all the clay colours very thoroughly. Roll all the colours into sheets which are approximately 1/8 inch (Atlas 2 or 3) thick. The sheets are cut into pieces approximately 1 inch x 6 inches. |
Make a stack of the sheets, being careful to align them and try to avoid trapping air between the sheets. |
Roll the stack with a brayer or other roller until each individual layer of colour is about 1/16inch thick. I find that if I place a sheet of polythene beneath and over the stack as I roll it, distortion is minimised - periodically peel and reposition the sheet of polythene as the stack is thinned. |
|
Cut the stack into four similarly sized lengths and stack the pieces. Keep the orientation of colours the same in the pieces within the new stack. Next, press the pieces together - again avoid trapping any air. |
Trim the sides of the stack to remove any distortions that are likely to have formed at the edges during the rolling process. The new stack should be about as high as it is wide and 3 or 4 inches long. The stack is now gently twisted along its length - try to keep the turns as evenly spaced as possible. Aim for 2 complete turns along the length of the block. |
Push the ends of the stack together in order to shorten the cane - keep gently twisting the stack as the shortening proceeds. The final cane should be about 2 or 3 inches long and have 2 or 3 complete turns along its length. Cut off the ends of the stack (probably about 1/4 inch from each end) - this is where most unwanted distortion will have occurred due to handling during the twisting of the clay. Re-form the section of the cane into a square, this will allow easier slicing. |
|
Cool the cane in the fridge or freezer to avoid distortion during the cutting process. Use a long tissue blade to cut the cane in half LENGTHWISE down its middle. |
Take each of the halves of the cane and push them together back-to-back, so that the exposed inside can be sliced. Use a long, inflexible tissue blade. I prefer a Carbon Steel blade for this because they tend not to bend as they slice - but this is obviously a personal preference. Begin to take slices from both long sides of the cane. The slices at the centre (i.e. now at the outside) are usually the best 'Damascus Ladder' pattern. As the cane is sliced, the pattern slowly changes until all the colours are simply alternating stripes. |
Note: The cane can be a little wasteful, because the best 'ladder' pattern is only achieved it its centre, but the peripheral slices can still be attractive. If the later slices aren't particularly good, the remainder of the cane can, of course, be used as bead centres or pendant cores for the good ladder slices from the cane's middle.
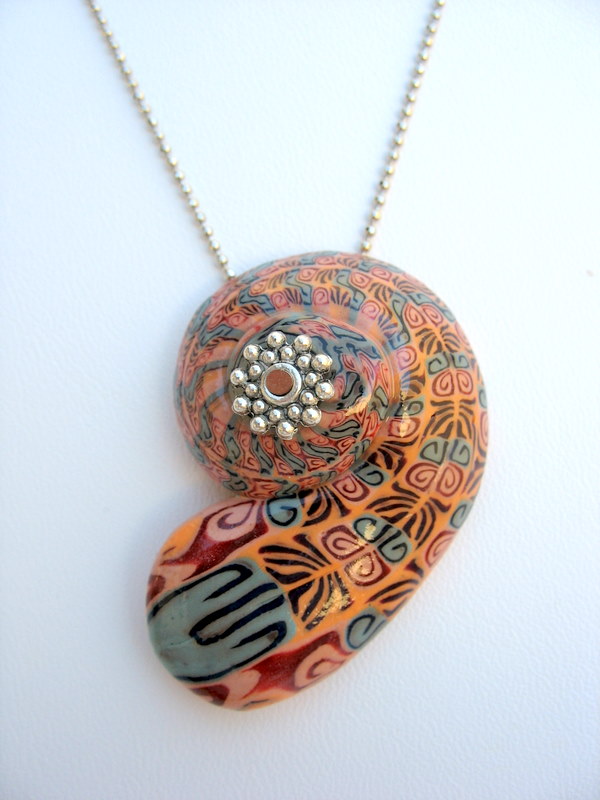
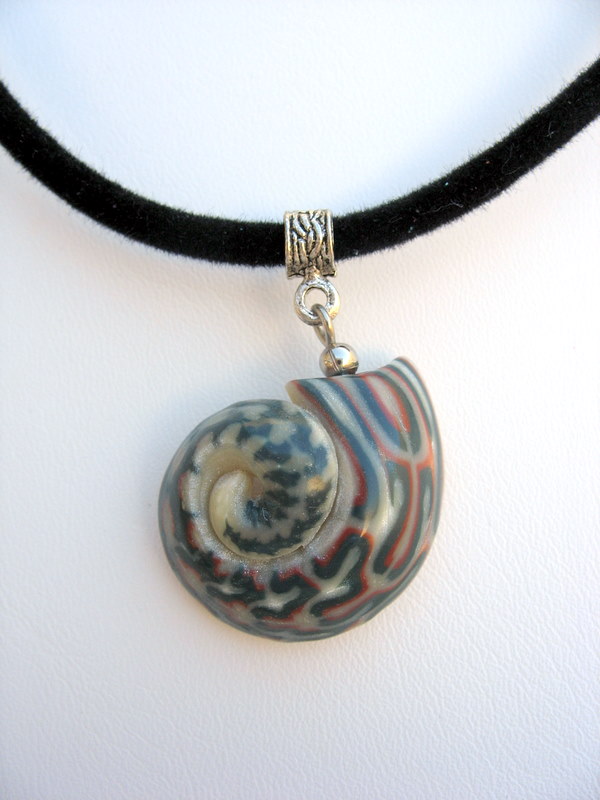
Alan's Examples
Click Linked Pictures for a Larger View

Cabachons |

Doughnuts |

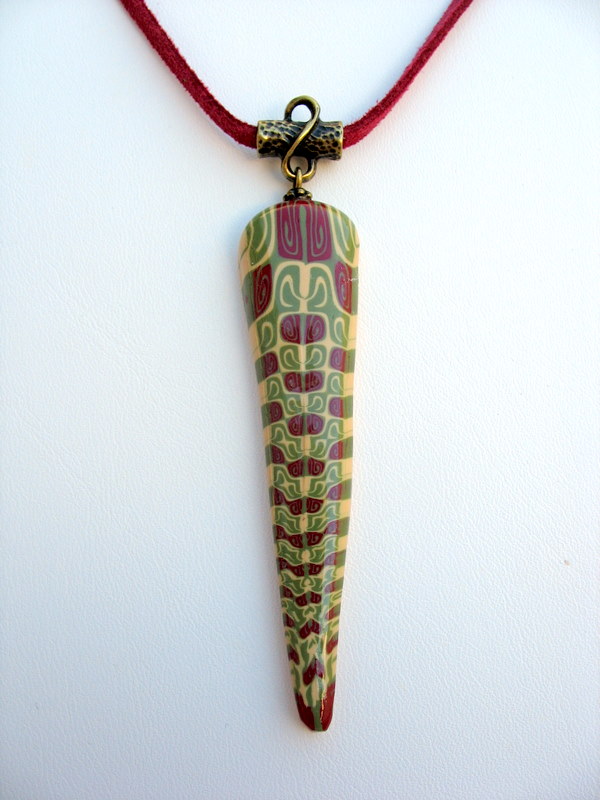
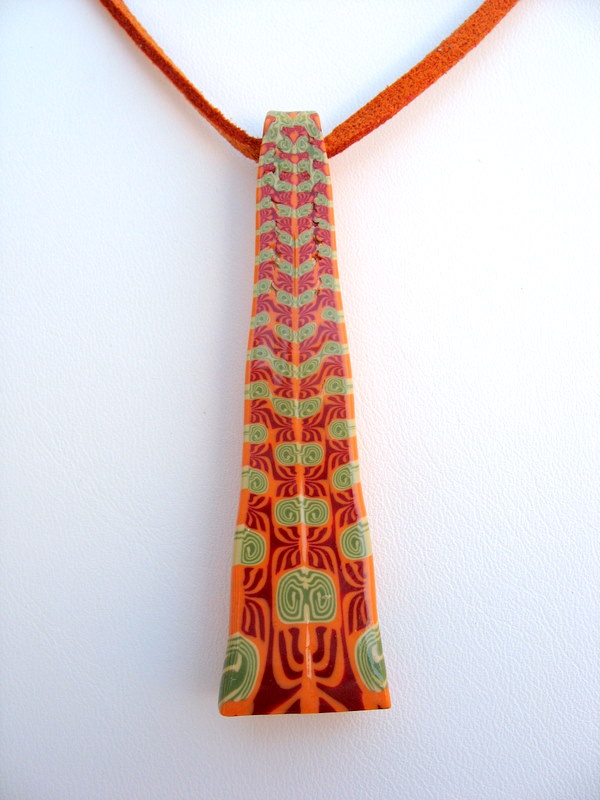
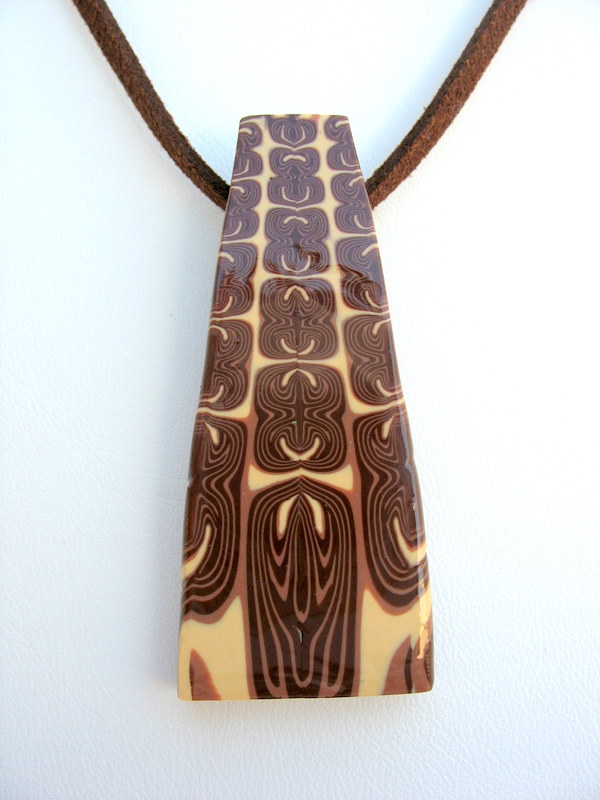
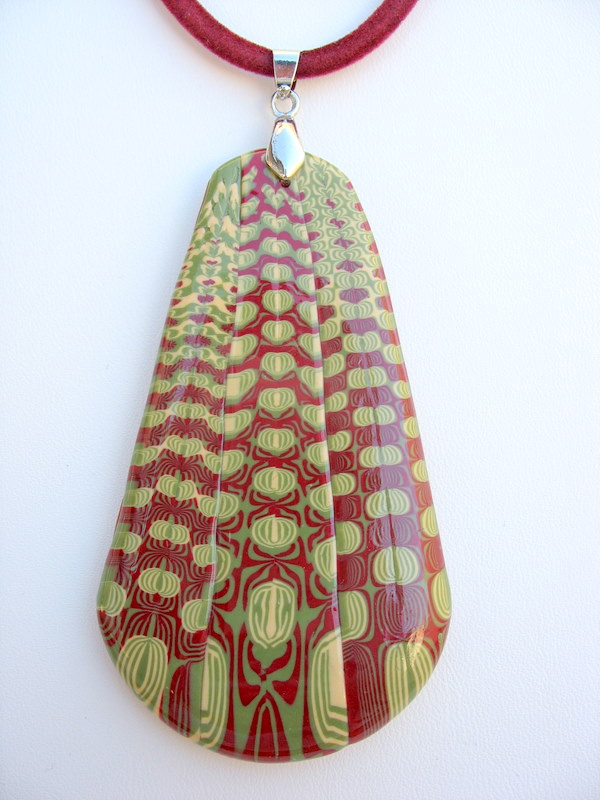
Pendants |

Fish Pendants |

Panels |

Jewelry Assortment |
Процитировано 1 раз
-
Запись понравилась
-
1
Процитировали
-
0
Сохранили
-