� - �������������� ��� ���������� ���������� � �������� ������������. ����������� ��������� ����������: Internet Explorer 6, Fire Fox 1.5, Opera 9.5, Safari 3.1.1 �� ���������� JavaScript. �������� ��� ����� ����
 ��������������������� ������� �������� �� ��� ������ �����
 ����������: ����-�������� �����, ��������� ����������� ������ �������� ��������� ��� ���������.
��� ����, ����� ��������� ��������� � ��� � ������� ���������� ����� �� ���� ����� � ������ ������ "��������
����������: ����-�������� �����, ��������� ����������� ������ �������� ��������� ��� ���������.
��� ����, ����� ��������� ��������� � ��� � ������� ���������� ����� �� ���� ����� � ������ ������ "�������� ������ ��� ������������� ��� ^_^
��������� �������� � ������� ������ � ������������ Html-�����. ����� ���������� ��� ������, �������� � ������
������ ��� ������������� ��� ^_^
��������� �������� � ������� ������ � ������������ Html-�����. ����� ���������� ��� ������, �������� � ������(� ��� 211952 ������� �� ����� ������������ ����� �����)
������ ����� ������������ ↓
����� ���������� ���� ��������� ������� ������� ������� ��� ����� ������� ��� ������ ������� ��� ������ ��������� ������� ����� ������� ����� ���������� ������� ����� �������� ����� ��������������� ������� ������� �������� ������� ������ ������ ������� ������ ����� ������ ������� ���� ���������� ��������� �������� ������ ������ ������� ������� ������ ������� ������ ������ ������� ������ ����� ����� ������� ��� �������� ������ ���� ������� ����� ������� ����� ������� �������� ����� ����� ������� ���� ����
������� ������� - �������������� � ������������� ����� ��� ���� ������� |
��� �������� � ����, ��� ��� ����� ����������� ��� ��� ������.
���� ����� (������), ���� ����� ����� ����� ��. ���� ���� ������� (��� �������!). ��, ��� ������, ������� (������ � �����) ����� ������, �� � ������ ������� ������� �� ��������� � ���, ������� � ���� ������, ������� ��� ����� ��������� �������� ������. ������� ������ ������������� � ������ �������� ��� ����������� "������" ��� "�����" ������� � ������� ���, ������� ������ ����� ����������. ���, ��� � ����, ��������, �������� ��, ��� ����� ��������������� ���������. �������, ������ ��� ������ ���-�� ������, ������ �������� � ������ ������� ���������� �������� ��� ������� ���� �����. ������ �� ������ � ������ ������� ������ ������� ������, ��� �� ���� �������.
�����: ���� |
���� "����" |
�����: ���� ���� |
37 ���� ��� ���� � ����� ����� |

�������, ��� ������ ����� ����������� � ��������������� � ����������� ����, ��� ����� «����».
��������� � ����� ���������� ������, �� ������������ ������� �������� ������ ������ ����� ������ ���������, ���������� � ���� ������������. � ��� ����� ����������, �� ���� ���� ��� ����������.
����������, �����������, ��������� � ����� ������������, ��, ��� �� �����, �������� ��� ����� ����������, ������ � ������� ����. � ��� �������� ������� ���������� ����� ������������ ���� ����� �����, ����� � �������.
���������, �������� �� �� ��������� � ��������, �� �������� ���������� � ��-������ ����������. ������� ������������ ��� ������� �� ���� ����������� ��������� ������, ������ ������ � ������� ���� ��������� � ����������. �� ��� ��������� ����������� � ��������� ���� ����� � ����� ������?
�������, ������� ������� ���. ���� ������ ����������� ��������� �� ���, ��� ������� ��� ���������, � ������� ����� ������� ���� �����. ���� ���� �������, ��� �������� ��� ����� �������� �������� �����, ����������� ���������, �������� � ������� ��������.
������� � ���� ���������� ��� ������������ � ���������� ���� � ����� ����. �������, ��� ��� ��������� ��� ����������.
�����: ���� ���� |
����-����������������� |

�����: ���� ������� |
���� ���� ����� � �������� �������� - ������ ��� |
�����: ���� ���� |
����_������� |
�����: ���� |
��� ������ �� ������� ����������� ������ �� Patrizia Pepe |


�����: ����� ���� ������� ��� ������ |
���� �� ������� � �������� |

�����: ���� ������� ��� ������ |
�����. ���� �� |
|
|


�����: ����� ���� |
����� � ������ |
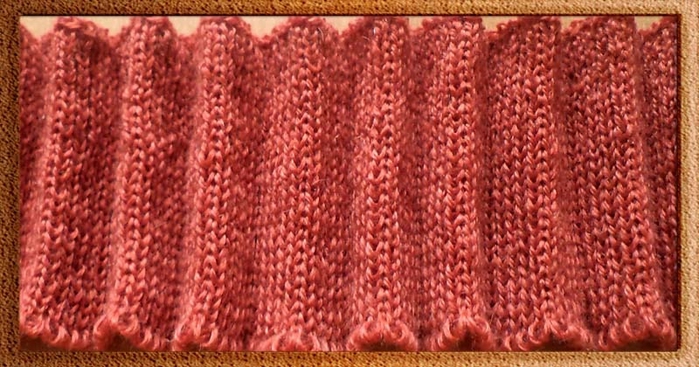
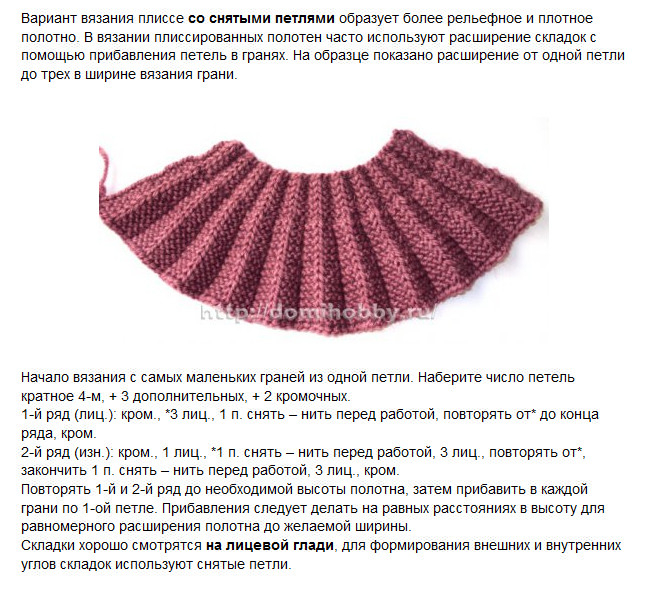
��� ������ ������ �������� ���� ������� �������� ��������� ������ � �������. ��������� �������������� ����� � ������ ����� �������� ��� (�� �������� ������ �� ������ �����).


��������� ������� ���, ����������� ��� ���������. �� �� ����� ������ � ���������� (����� �� ������� ����������� � �������� ������).


������� ��� ������� ������������ (�� ������ �����), ����� ����������� ������� ����� �������� ����� ��� �����. �������� ��������� ������� ��� �������� � "����", ����� �������� ����� ������� ���� � ������.

�������� �������, � ���������� ��������� ���� ����� �������� �� ������ ����� "����". ����� ����� "����" � �������� ������ ���������. ������ ����� �� "����" �� ���� ����� ����� ����������� �������, ����� ��������� �� ��� ������ �����.

����� �� �������� �������� �������������� ����� "����". �� ���� ����� ����� ���������� 0.5-0.7 �� ( ������� ��� ������������), �� ��� ����������� ��� 0.5-0.7�� (������� �� ��� ������������). �� ����� ��� ������������� ������� ��� (���� �����) ����������� 0.7-1.0 ��, (���������� "�����" ), ��������� �����������-��� ������� ��������.

������� ��������� ������� (��, ��� ��������� ������� ��� �������� � ���� �� �������) �������� ������, �� ���� ����� ����������� 0.5-0.7 �� , �� ��� ��� 0.5-0.7��(��� ������������) , ������ 0.5 �� �������, � ����� ������� ������ �������� ���, ����� � ����������� ����������� �������� �� ����� ����.


�����: ����� ���� |
����� |
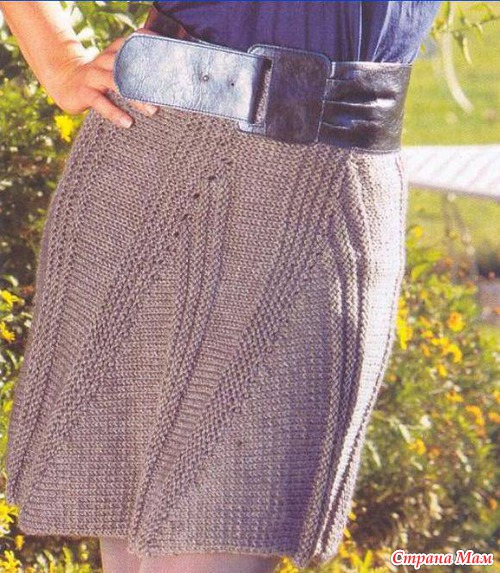
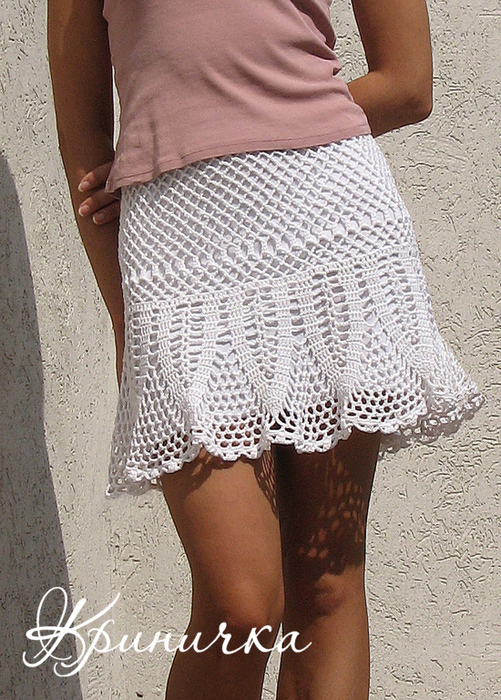
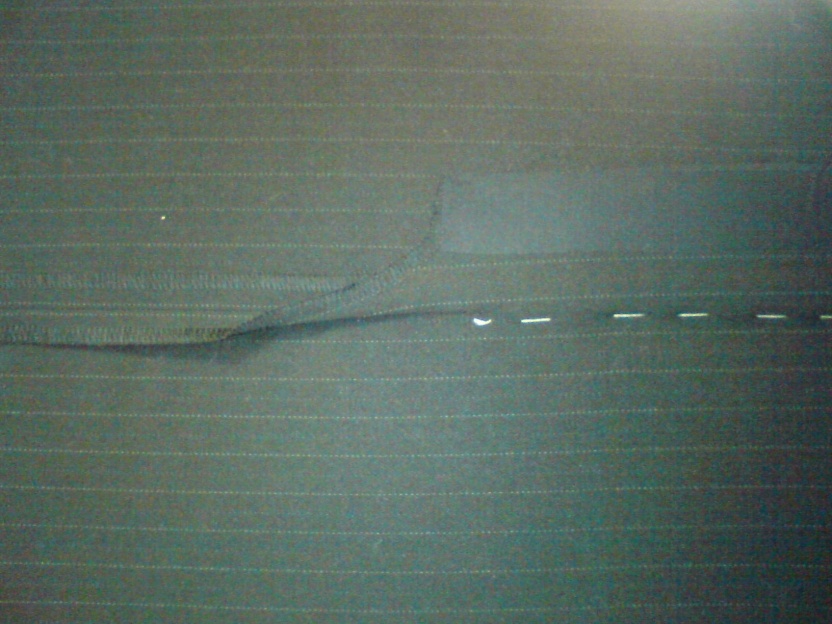
Here is the second post on the skirt vent, you can read the first one here.
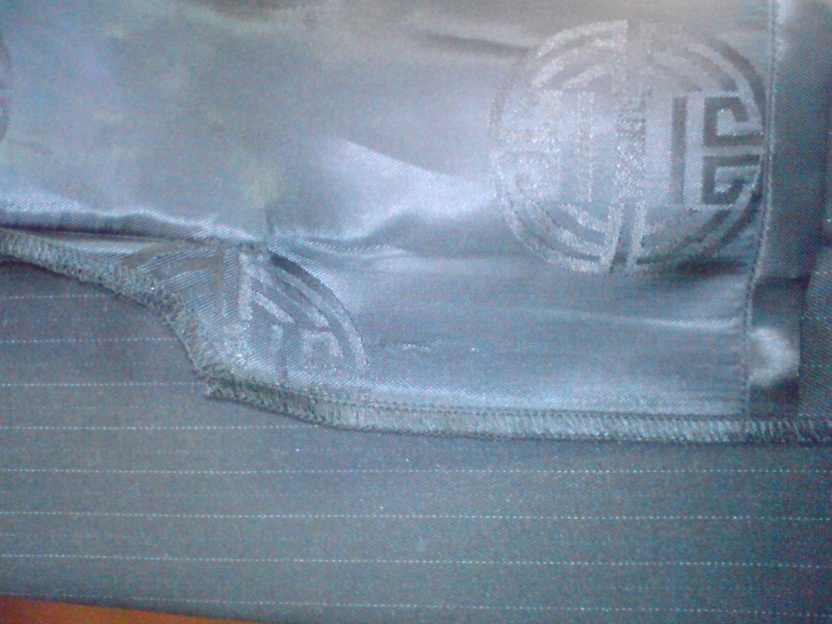
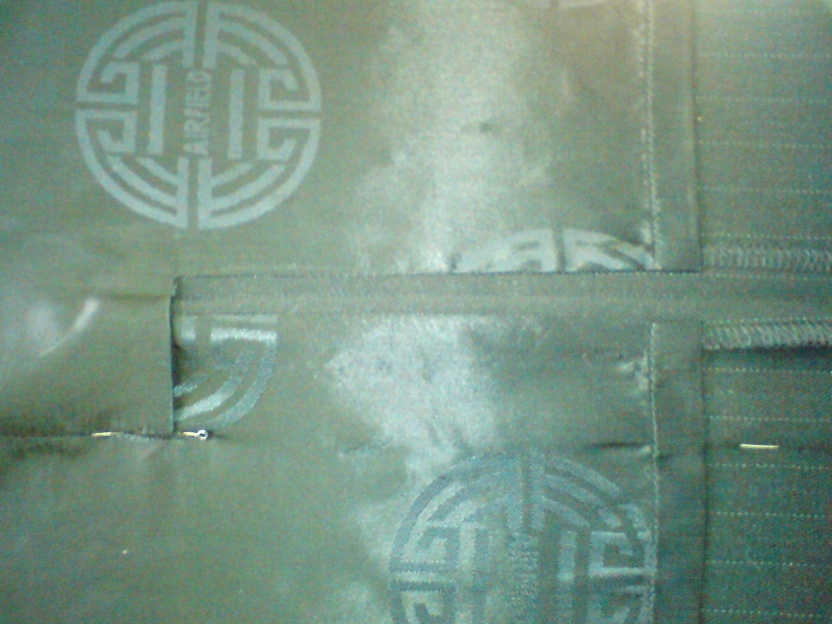
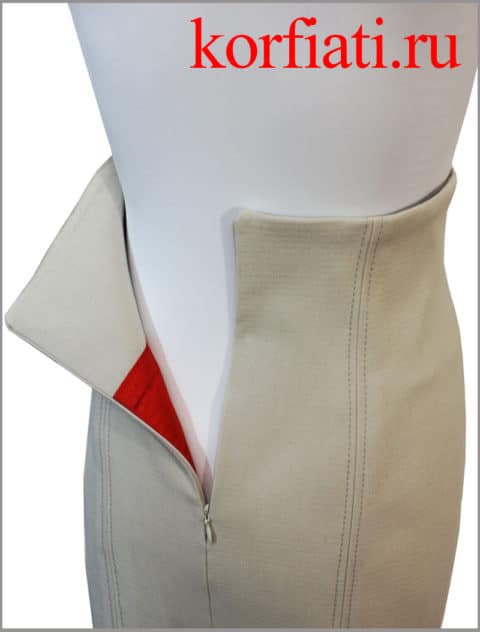
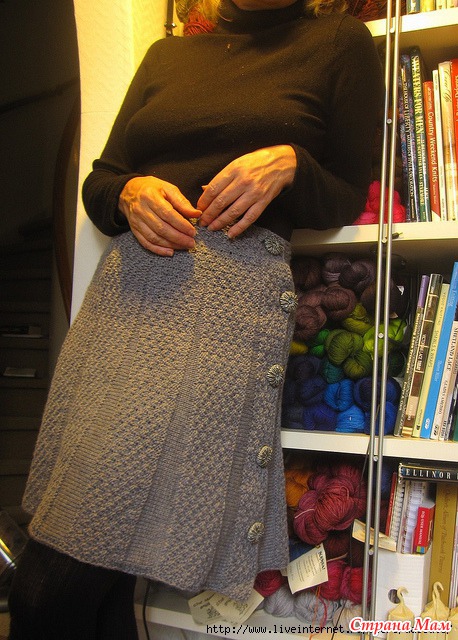
So let’s sew that skirt vent. First of all, a little drawing (click for a large view). Green lines show where to cut. The small diagonal cut on the Right side shouldn’t go all the way to the stitching, and light fabrics are not cut at all.

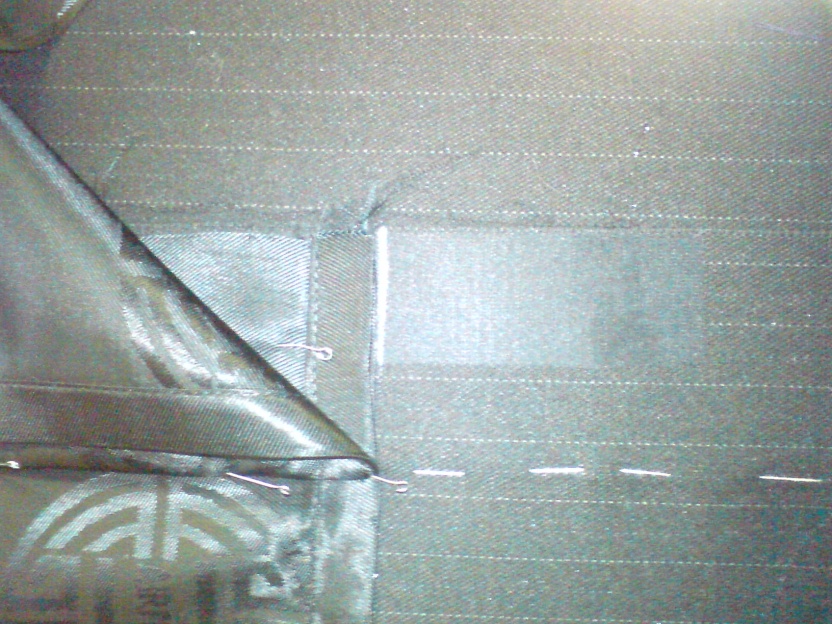
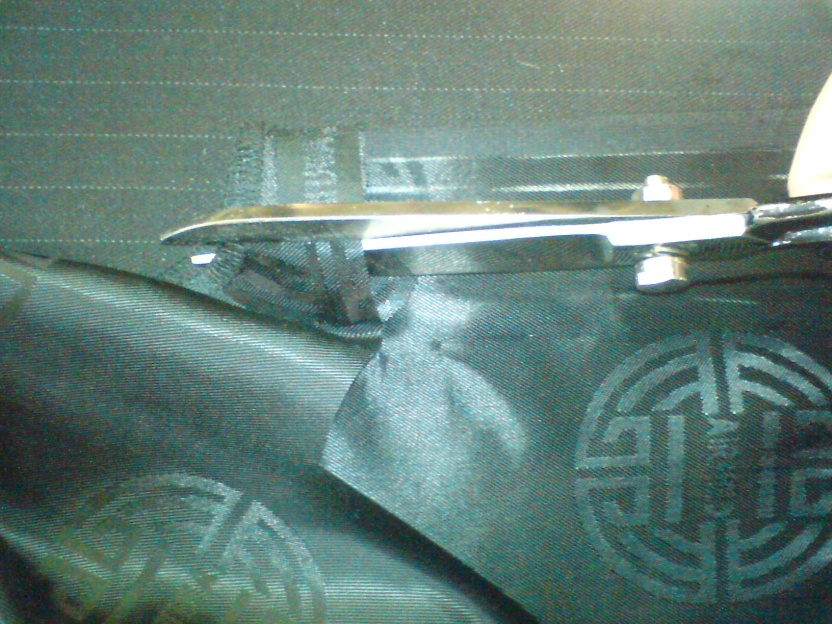
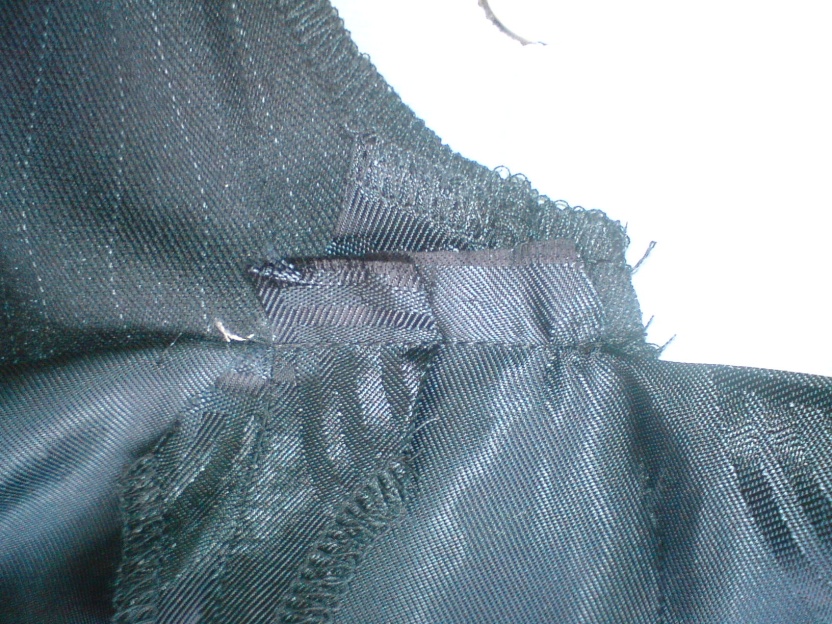
So here is the prepared sample.

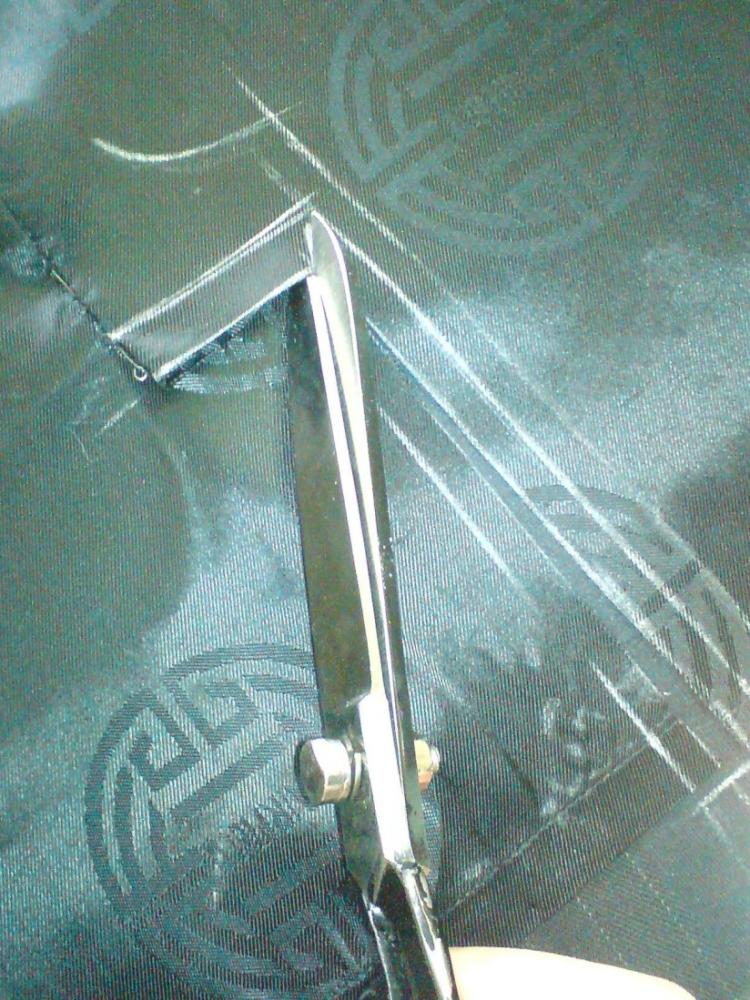
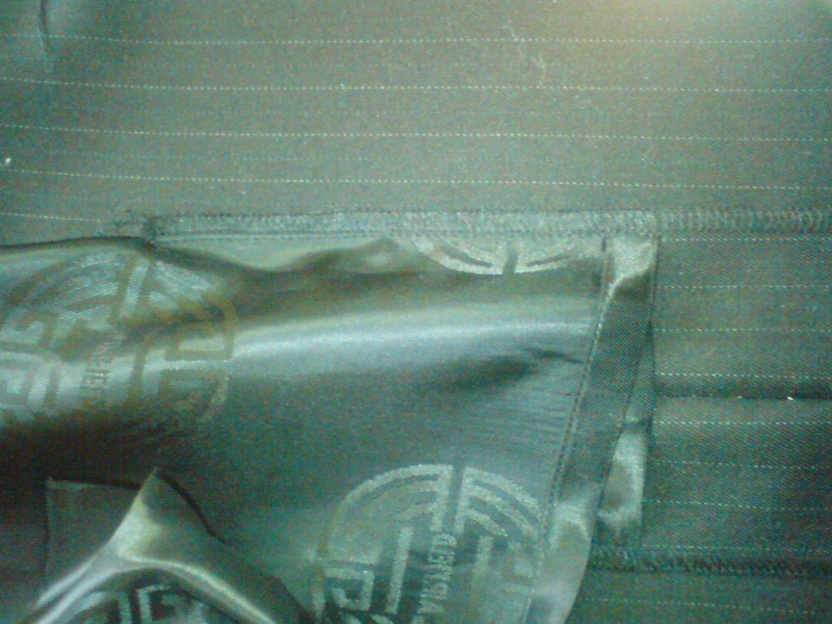
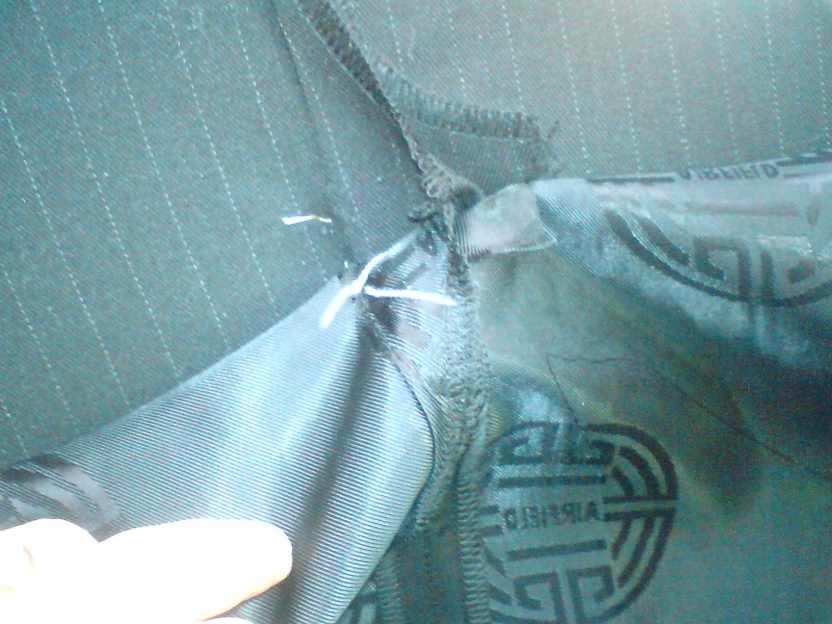
Stitch CB seam and then continue to the vent. Do not stop and pivot at the corner, because the vent will be ripped open at the first opportunity. The curved seam makes the vent much stronger. Pin the rest of the seam dow to the hem.

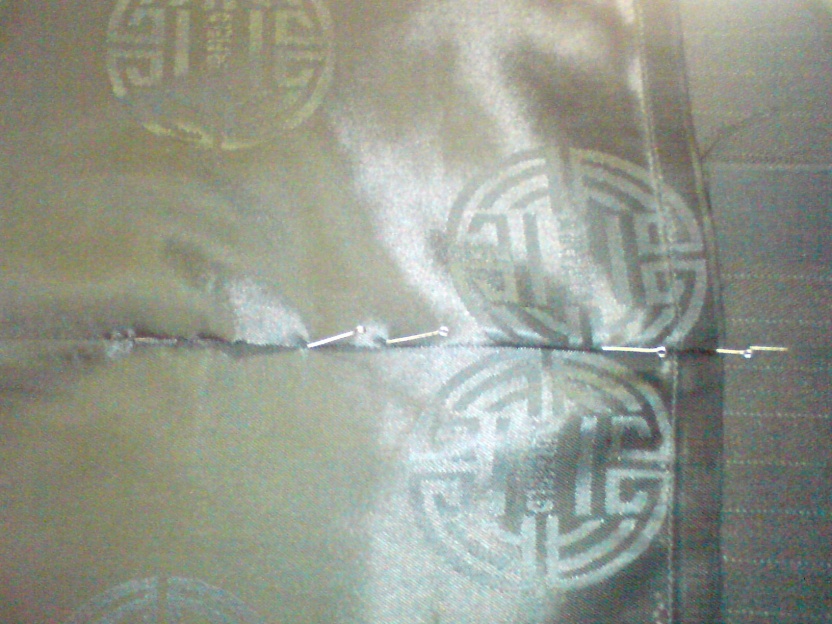
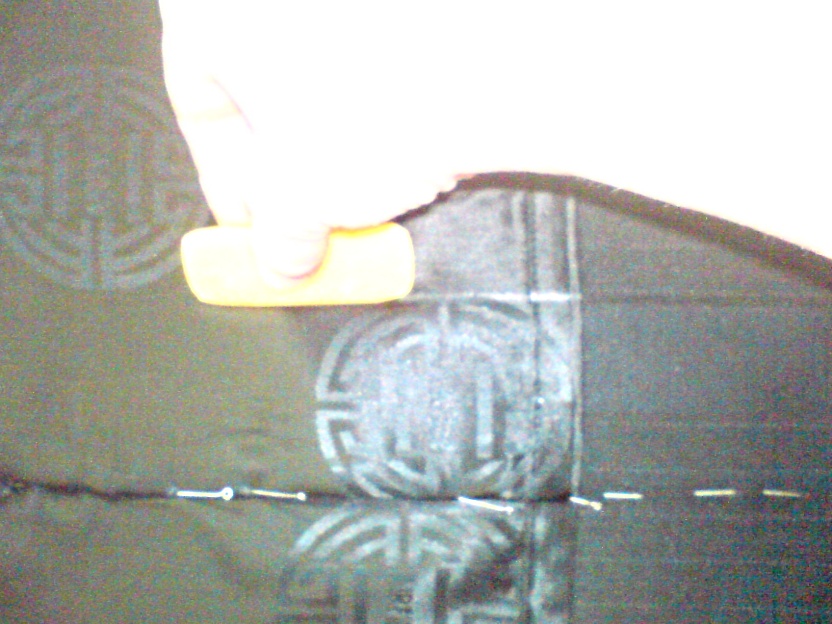
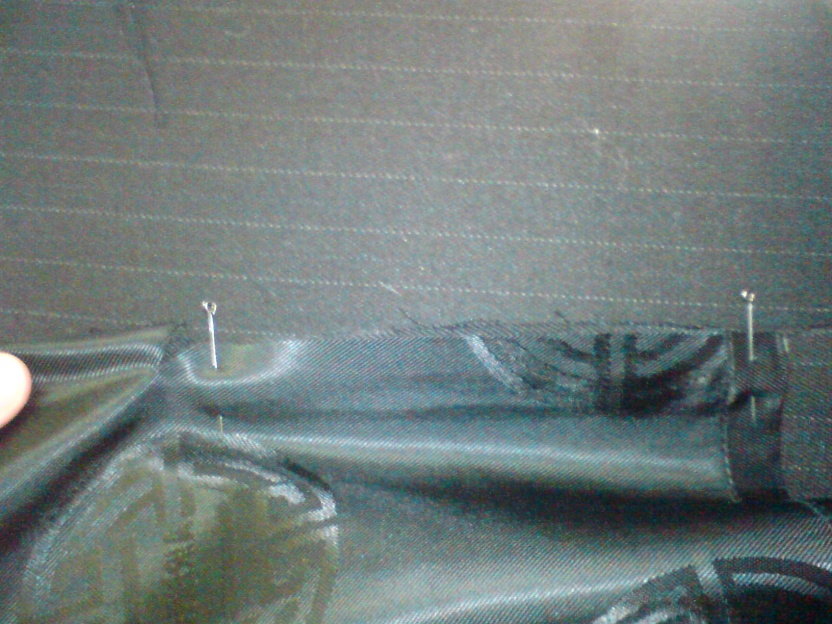
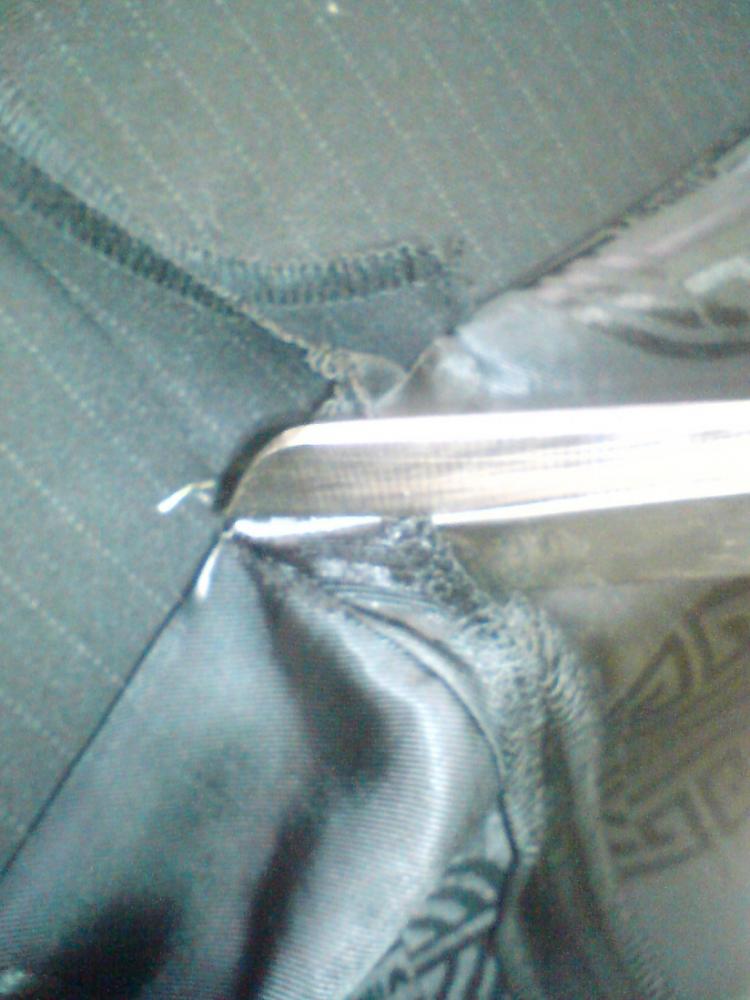
I could overlock all edges separately, but then it would mean 3 layers of overlocking. I want to reduce it as much as possible, so I finish both edges of the right side together.


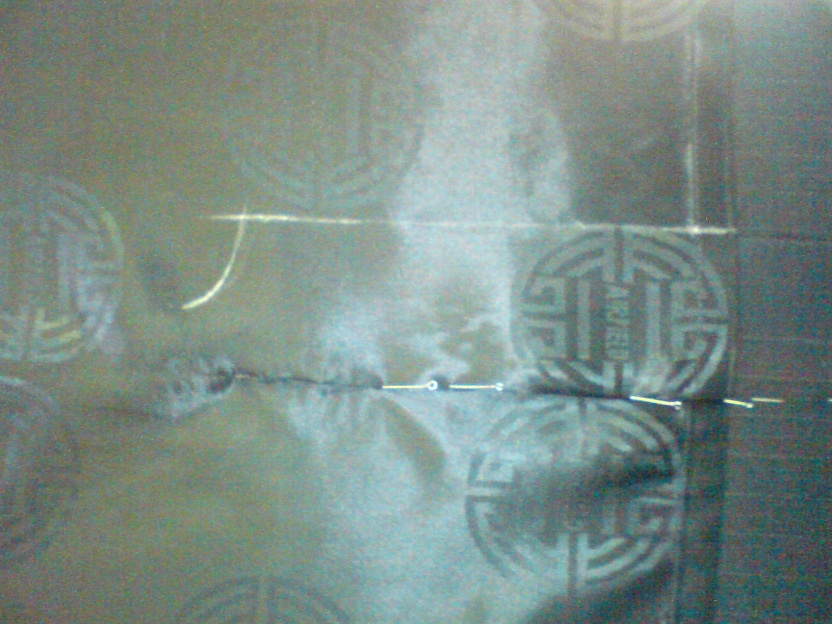
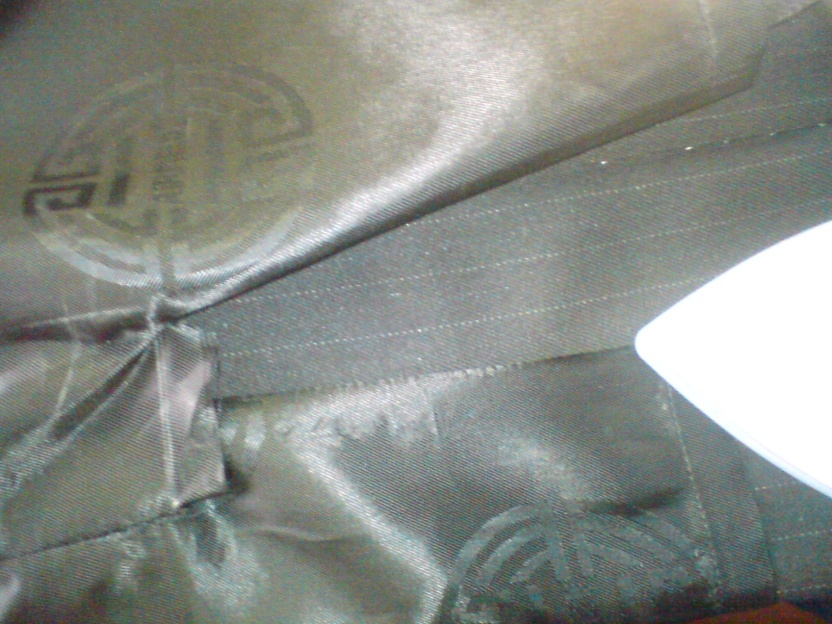
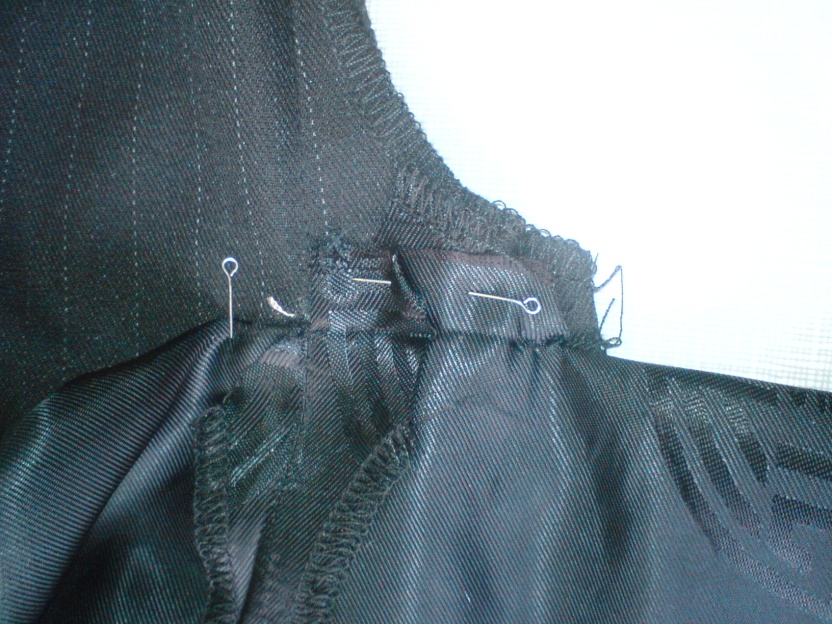
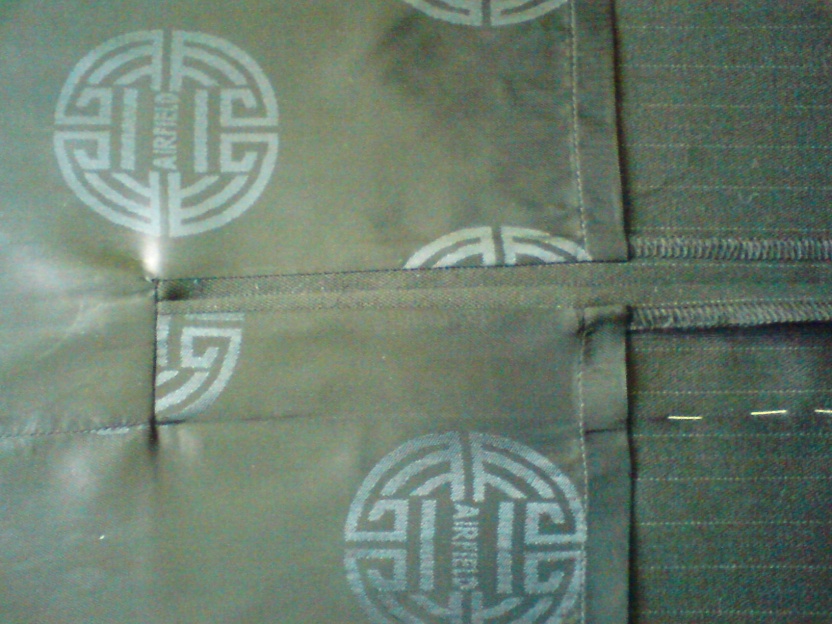
Press the seams

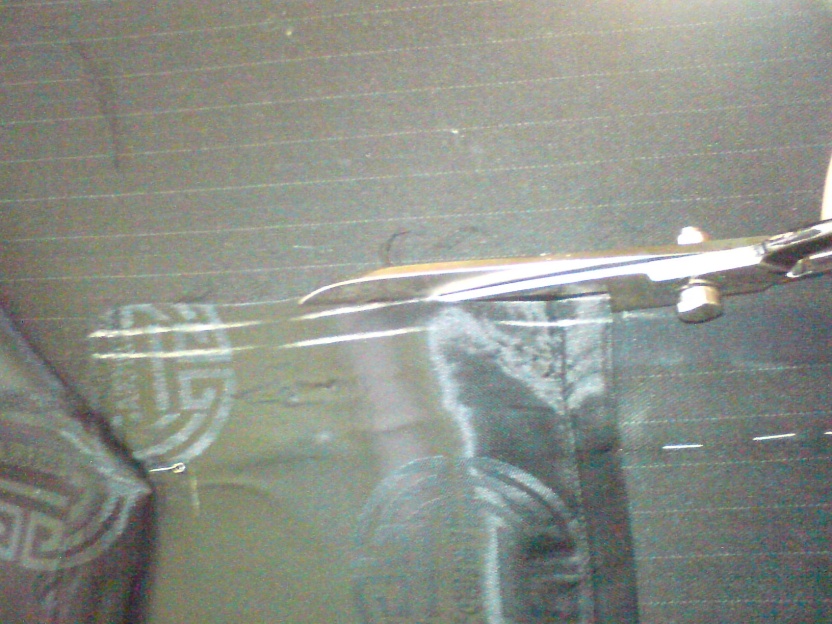
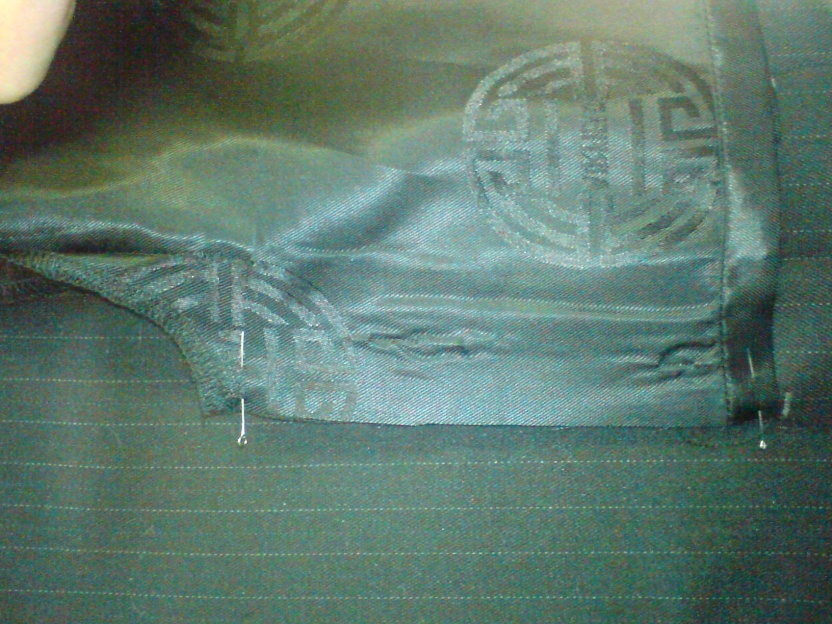
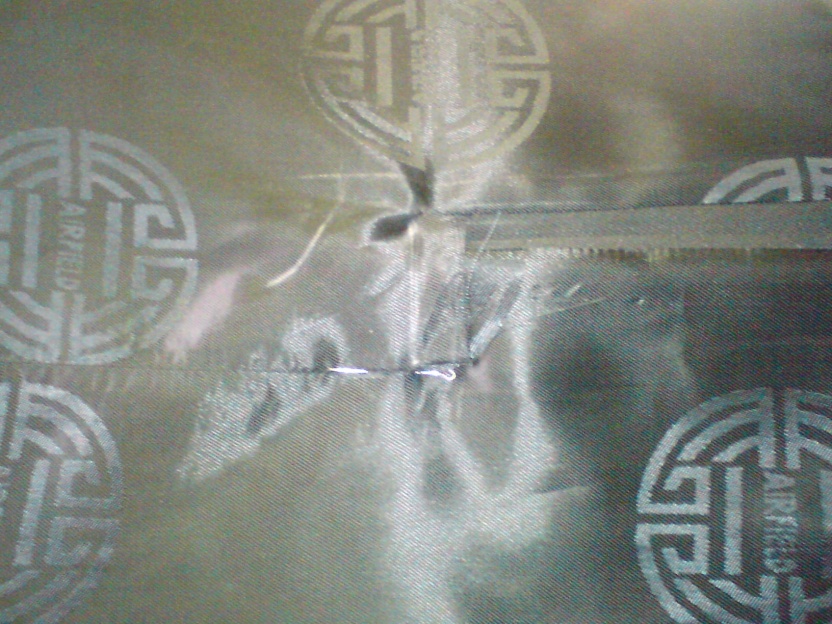
And the final touch

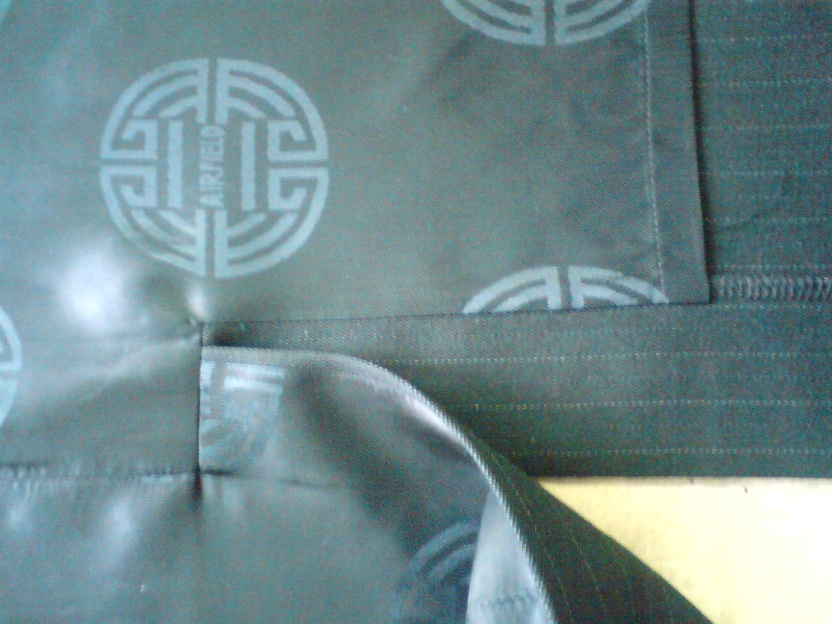
Ready and pretty

�����: ����� ���� |
������������� ���� ���� |
��� ����� �������� ����� ���� � ������������� ������. �� �������� ������? ������� ���� ��������� ���������� ������, ����� ���� ��������, � ����� ������.�� ������ ��� ������� ���� ��������� ���������� ������, ����� ���� ��������, � ����� ������. � ��� ���� ������������ �������� � ������ �������������� ����� – ��� ����� ����� ����������. ���� ���� �� ������� � �����, � ����� ������ �� ���������� �� “����”! �� ����������� ������-����� �� ��������� �������������� �����, ������� ������� ��� �� ��������� ������.
�����: ���� |
���� � �������� |

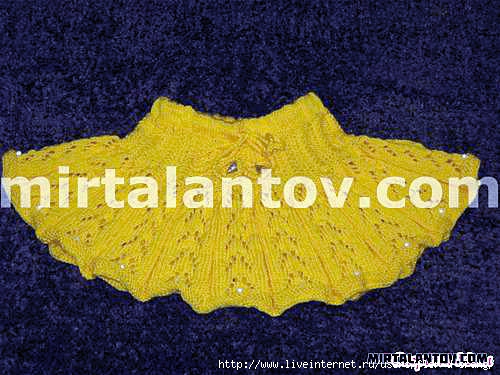
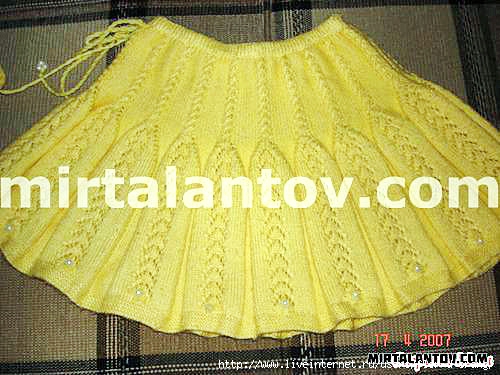
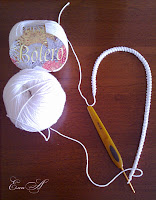
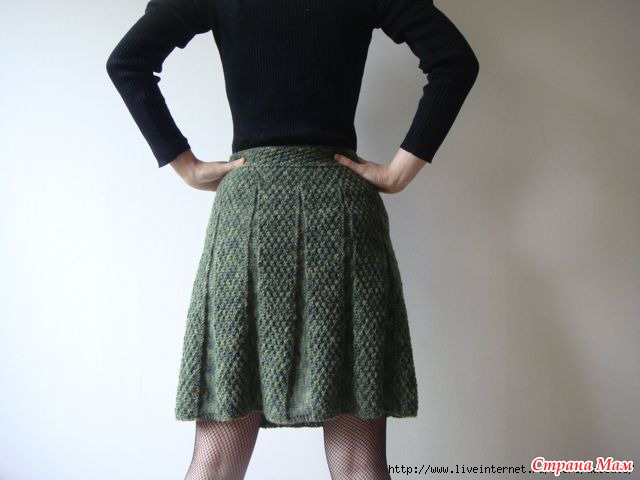
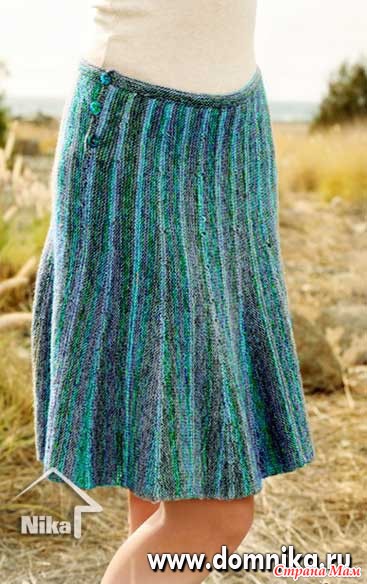
������ ������� ����: 36.
��� �����������:
����� (50% ������, 50% �����, 350 �/100 �) - 50 � �����-������
� 200 � ������� ������,
����� � 3,
� 2,5,
60 �� �������.
����� ��������� "������� ���� �������":����� ������� ���� ������������ 1 - ���� �� �����
����� 2 - �������� ����� � ���� ����
...
����� 14 - ���������� ������ �������
����� 15 - ������� ������� ����
����� 16 - ���� � ��������
����� 17 - ���� �������
����� 18 - ��������� ���� � ����������
�����: ���� ������� ��� ������ |
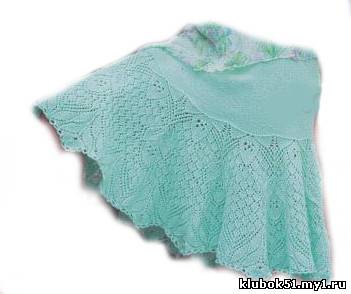
��������� ���� � �������� �����, �� ��������� Kristin Omdahl. ����� |

�����: ���� ������� ��� ������ |
��� ���� ����� |
�����: ���� ������� |
�������� - 13�"��������� ��� ����������"/234 ����/ |
�����: ���� ������� ��� ������ |
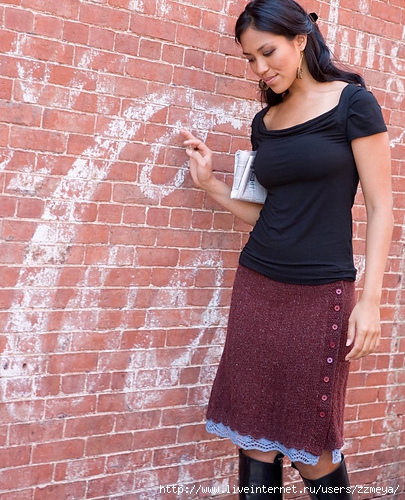
���� CHELSEA �� Cecily Glowic MacDonald |

�����: ���� ������� ��� ������ |
�� - ��! Chelsea Skirt �� Cecily Glowik MacDonald. �������� � ����� |
�����: ���� ������� ��� ������ |
������ ������������ ������ |
�����: ������� ��� ������ ���� |
������� ���� "������������" |
�����: ���� ������� ��� ������ |
������ ������� |
������: 44
���������: ����� ���������� ����� (95% ������, 5% �������, 370 »//100�)400 �,
�������� ����� �3, ������ �2,5, ��� ����� 70 �� ������� ������� 2 ��.

�����: ���� ������� ��� ������ |
������ ��� ������� ������� |
�����: ���� ������� ��� ����� |
������ �� ����� |
�����: ���� ������� ��� ������ |
�������� ������� |
�����: �������� ������� ���� ������� ��� ������ |
������� ����� |
�����: ���� ����� ������� ��� ������ |
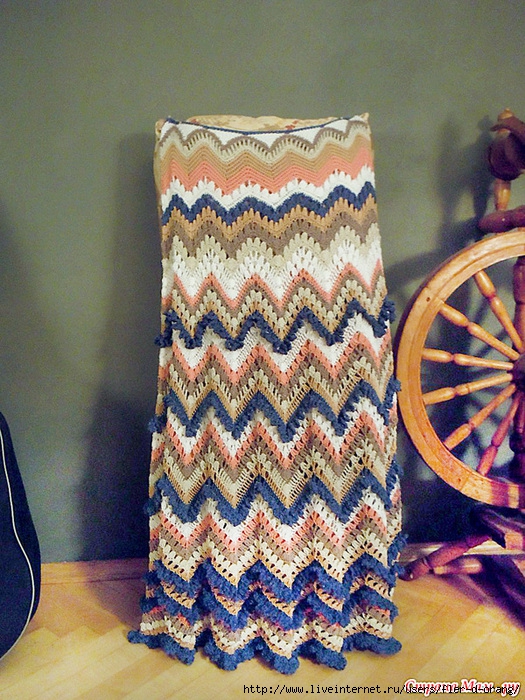
���� � ������� ����� |

������ 42
��� �����������:
300 � ����� (100 � � 1613 �, 100 % ������) ������ �����;
200 � ����� (100 � � 1613 �, 100 % ������) �����-������ �����;
100 � ����� (100 �� 1613 �, 100 % ������) ������� �����;
������ � 1,5;
������;
����� ��� ������ ����;
�������� ������ � ��� ����� ������ 15 ��.
�����: ���� ������� ��� ������ |
�������,���� �������. �������� 54 |
�����: ������ ���� ������� ��� ������ |
����������� ������� ������ ���� ������������ ������ |
����� ���������� � ����! �������� ������ ���� ������������ ������! ��� ��� �����������? ����� ����� �������, ������� �� �������, �������������� 400� � 100��, ���������� ������, ����� �2,5 ��� 3 � �������, ���������� ����������!
��� ���� � ��������, ����� �������:
�����: ���� ������� ��� ������ |
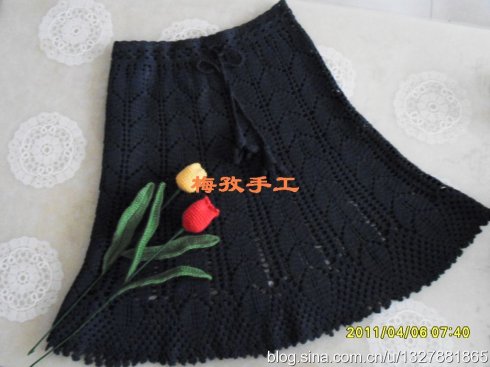
������� ���! ������ ���� �� ������� � � ��������. ����� |
������� ���! ������ ���� �� ������� � � ��������. �����


������: 36
��� �����������: ����� (50% ������, 50% �����, 350 �/100 �) - 50 � �����-������ � 200 � ������� ������, ����� �3 � � 2,5, 60 �� �������.
������� �������: ������� �����, ���������� �����, ������� 1x1, ���� «�������».
���� ������� ������ ����.
�����: ���� ������� ��� ������ |
������� ������,�������,������ |
�����: ������ ������� ���� ������ |


 /informcatalog.ru/wp-content/uploads/2015/07/0_bbc36_68c784c3_XL-428x560.jpg" target="_blank">http://informcatalog.ru/wp-content/uploads/2015/07/0_bbc36_68c784c3_XL-428x560.jpg
 /informcatalog.ru/wp-content/uploads/2015/07/0_bbc37_7a408737_XL-426x560.jpg" target="_blank">http://informcatalog.ru/wp-content/uploads/2015/07/0_bbc37_7a408737_XL-426x560.jpg