Узор крючком "Бабочка" |
|
For this Meladora’s Butterfly Stitch project I used: HOOK: 5.5 mm / I hook for the US YARN: worsted weight yarn, 4 ply US, 10 ply AU This stitch is worked in sets of two. So if your making a hat or afghan or anything, just keep this in mind. You will need to add a plus 1 if working in a back and forth row, but no need if your working in a round. To learn how to do this stitch in rows, rounds and to increase and decrease using this stitch, see video tutorial below. THE TUTORIALS: RIGHT HANDED VERSION
In second chain from hook pull up a loop, ch 1 using the loop you just pulled up, now you should have 2 loops on your hook,
go into next stitch and pull up another loop, ch 1 and repeat for rest of row or round.
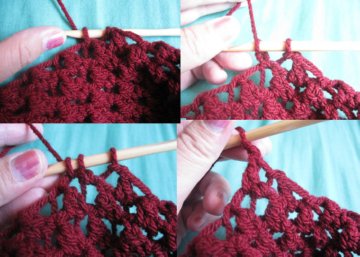
Now the next row or round you will be working in the wings of the butterfly. Go through first wing and pull up a loop Now chain that first loop you pulled up Now go into the next stitch (the other butterfly wing) and pull up a loop Now double crochet
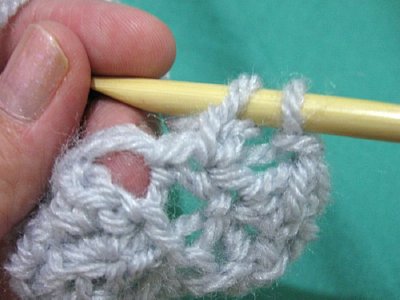
Now chain one and that completes the stitch. Continue to the end. If your working in a row, then when you get to the last stitch of the row you will have just one big stitch, you want to whole butterfly stitch into that same stitch. Chain 1 and turn. And repeat to make as many rows as you wish. See video tutorial to show you how to work in a round and also how to increase and decrease this stitch. If your working in a round then you will want to end the round by starting the stitch as normal in the last stitch of the round, but the second part of the stitch you will want to use the little hole space, right at end of round. See picture below to see what I mean
See the small hole by my thumb? See how I used it to complete my stitch? Once done just sl st into first stitch of round. To do an increase using this stitch, you just put one butterfly stitch in each of the wings like shown in the picture below
TO DECREASE And to decrease with this stitch, all you have to do is just not chain 1 after the stitch, though if you do this leaves you with only the triangle and without a piece of yarn like you usually see in between that gives the BFS look. And the next row you can treat each of these stitches as only 1 wing. So when making a normal BFS the next round. You will be using 2 stitches for 1 BFS as normal.
|
| Комментировать | « Пред. запись — К дневнику — След. запись » | Страницы: [1] [Новые] |