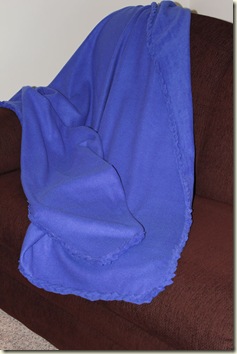
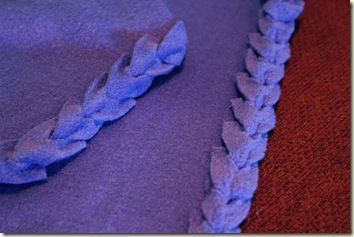
Since I don't have a bias tape maker...so, I just sort of 'make' one.... This is how I do it...
Material : Craft cutting blade, some fabric straps, hair straightener (yup...)
реативные идеи по раскраске ткани
Ѕез заголовка - (0)√игантские цветы Е из бумаги Ч 2 мастер-класса √игантские цветы … из бумаги — 2 м...
√»√јЌ“— »≈ –ќ—“ќ¬џ≈ ÷¬≈“џ. - (0)√»√јЌ“— »≈ –ќ—“ќ¬џ≈ ÷¬≈“џ. √»√јЌ“— »≈ –ќ—“ќ¬џ≈ ÷¬≈“џ. ќдуванчик (часть I) https://youtu.be/MV1u...
Ѕез заголовка - (0)÷веты из туалетной бумаги https://youtu.be/iPyeWME1x9g https://youtu.be/iu7l59nz1UQ https://you...
Ѕез заголовка - (0)Honey Doo Crafts - Vellum Flowers Honey Doo Crafts - Vellum Flowers https://youtu.be/VrWUD_zfYgQ
(и еще 294327 запис€м на сайте сопоставлена така€ метка)
ƒругие метки пользовател€ ↓
английский аудиокнига аюверда биографи€ бохо видео винтаж волосы восток дело тонкое........ вс€ка€ вс€чина в€зание в€зание и ткань декор декорируем одежду дизайн здоровье идеи интерьер йога киев кино косметологи€ красота кулинари€ маки€ж мантры мода мудры мужчины мужчины и женщины музыка ногтевой дизайн одежда переделка похудение при€тного просмотра психологи€ ритуал ритуалы рукоделие руны стихи танец трафареты факты фотографии читать шитьЄ шитье эзотерика
Ўить и кроить |
|
ћетки: шитьЄ |
“оп своими руками |
|
ћетки: шитьЄ |
ќбработка кра€ |


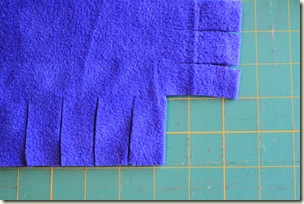
 was cutting and either added a little to each 1” fringe or subtracted a little so I wouldn’t have a really skinny or really fat strip at the corners. I did cut through 2 layers at a time and it was no problem to keep my cuts even. The tape really helped and cutting into it a little at times didn’t dull the rotary cutter like hitting the edge of a ruler would. I cut the corners out with a scissors to avoid overcutting into the side strips.
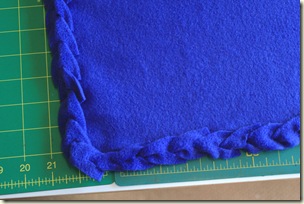
 Step 5 The corners are treated no differently than the sides. As the strips are pulled through and around the corners you will get a rounding of the corner and can keep going along the next side. No fancy stuff just the same thing you have been doing on the sides.
—ери€ сообщений "No-Sew":
„асть 1 - tie a scarf
„асть 2 - Night dress from a cloth
...
„асть 5 - easy pattern
„асть 6 - scarf vest
„асть 7 - blanket edging
„асть 8 - fun towel
„асть 9 - painted dress
„асть 10 - very simple pattern
|
ћетки: шитьЄ переделка |
“рансформируем надоевший джемпер |
|
Posted: 26 Jan 2012 07:49 PM PST
I shared this sweater refashion at Me Sew Crazy last week. I am posting this here today just in case you missed it! {You will need} Sweater Fabric Laces, Ribbons and buttons Matching thread {How to} 1. Wear the sweater and decided how high you want the triangles to go. For example, just below the bust line or a few inches below the bust line. Also, mark the center with a pin. 2. I made a triangle template out of a cereal box and cut 8 triangles out of the fabric. The size of the triangles all depend on how long you cut into the sweater. If you want a more flared look, make sure that the triangle has a wide bottom. If you want a subtle flare, the triangle needs to have a narrow bottom. 3. Start making the cuts to the sweater. I made 8 cuts in all. In the center on the front and back, just to either side to those center cuts, and the sides of the sweater. They are about 4" apart, but you need to adjust that according to the width of the sweater. Just make sure that they are equal and well balanced. 4. Fold the bottom of the triangles and sew. 5. Sew the triangles to the sweater using a Serger or zigzag stitches. 6. Since the sweater was one size bigger than my size, I cut off some fabric from the sides and under the arm. 7. Pin, and sew the side. Make sure to sew in the fabric triangle to the sides at this step. 8. Make sure to mark the center of the neckline. I wanted the neckline to be slightly lower, so I drew the line and made the cut around the neck. 9. Make bias tape for the neckline. I cut mine 1 3/4" wide. 10. Sew the bias tape around the neck with zigzag stitches. 11. Start adding lace & ribbons between the triangles. Cut them to random lengths and seal the ends with fray check. Pin them in the desired places to check the balance and sew. 12. I didn't care for the long sleeves, so I cut them... I made the cut at the ribbed part, and took 6" off. 13. Sew the ribbed part back to the sleeves. I made it into 3/4 sleeves. 14. I thought it was a little bare around the neck, so I decided to decorate a little. I made some yo-yo's, leaves, and flowers out of lace. Pinned all the embellishments onto the sweater to decide where I wanted everything. * Sizing for the embellishments * Yo-yo's: (S) cut 1 1/2"circles, (L) 2 1/2" circles (here is the link to how to make yo-yo's) * Leaves: use 3/8" wide velvet ribbon. Cut 2" and fold it in half and lay both ends together and sew. * Lace flowers: (I used 5/8" wide lace.) Cut a piece 5" long and gather the top and make a flower. 15. I wanted a little something at the back of the neck too. So, I added a tag with ribbon. It is all done. All I needed to do was to try it on... LOOVE it! |
|
ћетки: шитьЄ переделка |
ќбработка кра€ издели€ |
Hems (rolled hem by machine)
 7).- Aspecto del dobladillo enrollado, cosido a máquina.
7.- Appearance of the rolled hem sewn by machine.
 8).- Para realizar este tipo de dobladillos, solamente tenemos que doblar el margen del mismo y, en primer lugar, pasar un pespunte a 1 mm. del borde. Podemos utilizar un prensatelas compensado para pespuntes al canto, que nos facilitará esta labor.
8.-To get this kind of hem, you only have to fold over the seam
allowance, and in the first step sew 1 mm from the folded edge.
We can use a special presser foot that facilitates the work.
 9).- Siguiente paso: Recortamos el margen doblado hasta el pespunte, procurando no dañar el mismo.
9.- Next step:  Cut the seam allowance next to the stitch, making sure
not to cut the fabric or stitch.
 10).- Por último, doblamos de nuevo el canto recortado hacia el interior y pasamos otro pespunte por el borde, utilizando el prensatelas compensado.
10.- Finally, we fold the fabric over again toward the inside, and pass
another line of stitching along the edge, again using the special
foot.
Dobladillos (Dobladillo con punto zig-zag).-
Hems (Hem with zigzag stitch).-
 11).- Este es un tipo de dobladillo muy utilizado en los tejidos de gasa, chifón, etc. Es muy fácil de realizar y óptimo para dobladillos al biés en faldas, vestidos...
11.- This is a type of hem that is often used in fabrics like gauze,
chiffon, etc.  It is very easy to do and optimal for hems on the bias
in skirts, dresses...
 12).- Solamente hay un paso a seguir para realizar este dobladillo: Entornar el margen de costura hacia el interior, pasar un pespunte zig-zag tupido y recortar el sobrante.
12.- It only takes one step to finish this hem:  Turn the hem allowance
to the inside, run a zigzag stitch along the folded edge, and recut the
seam allowance next to the stitch.
http://pacoperaltarovira.blogspot.com/
|
ћетки: шитьЄ |
Ѕез заголовка |


|
ћетки: шитьЄ |
»нтересное приспособление дл€ формировани€ бейки |
—ери€ сообщений "USEFUL ":
„асть 1 - massage for thinner legs
„асть 2 - 5 minutes to be thinner
...
„асть 5 - Six points of acupressure for good sleep
„асть 6 - Printable Bias Tape Maker
„асть 7 - Bias Tape Maker from a cutter
„асть 8 - vacuum+pantyhose=find lost items
„асть 9 - How To Dry Flowers
„асть 10 - uses for recycled pizza tool
|
ћетки: шитьЄ |