��� �������� ���� �������� � ����� ��������� ��������� � �����������:
�������� ������� ������ ������: Pale Plum, Regal Rose, Pretty in Pink and Blush Blossom (Stampin� Up!)
������������ ������
���� �������
������� ��� ������ � ������ (Stampin� Up!)
��������� ������� (Stampin� Up!)
������� ������� (Stampin� Up!)
������� ���������� ���� (Stampin� Up!, ���� � ��-��)
����� �Happy Birthday to You�
����� �� ������ �Easter Blossoms� (Stampin� Up!)
���������� ��������� Pale Plum (Stampin� Up!, ����� � ��-��)
������������� �Basic Pearls� (Stampin� Up!)
3/8� ����� �� ����� (���� Pretty in Pink, Stampin� Up!)
����� (� �������� ��� ����� � �����)
�������� ������� �Beautiful Wings� (Stampin� Up!)
�������
����-��������
������� �����
������� �������� ���������
Step 1: Print out and cut out templates.
��� 1: ������������ ������� ����� � ��������.
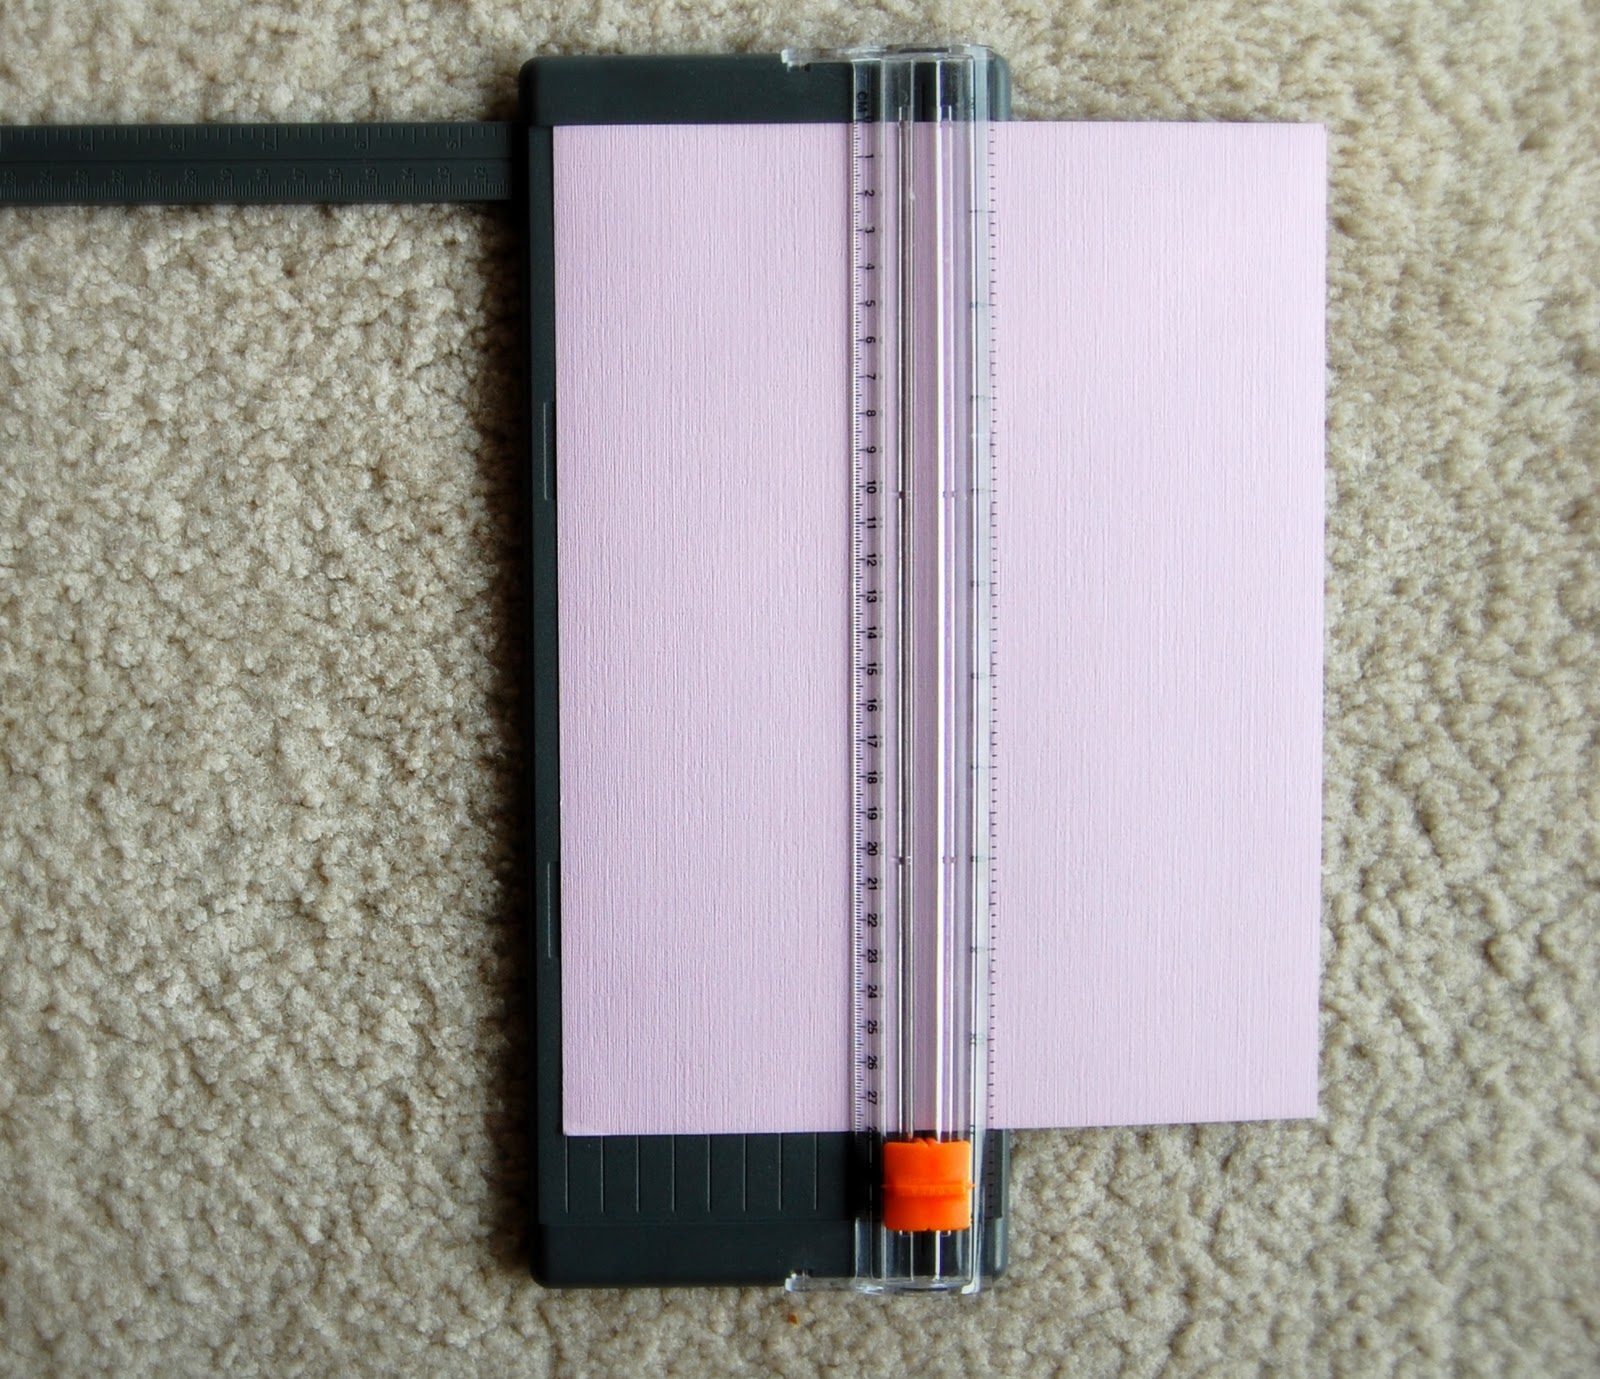
Step 2: �ut card base.
��� 2: �������� ������ ��� ��������.
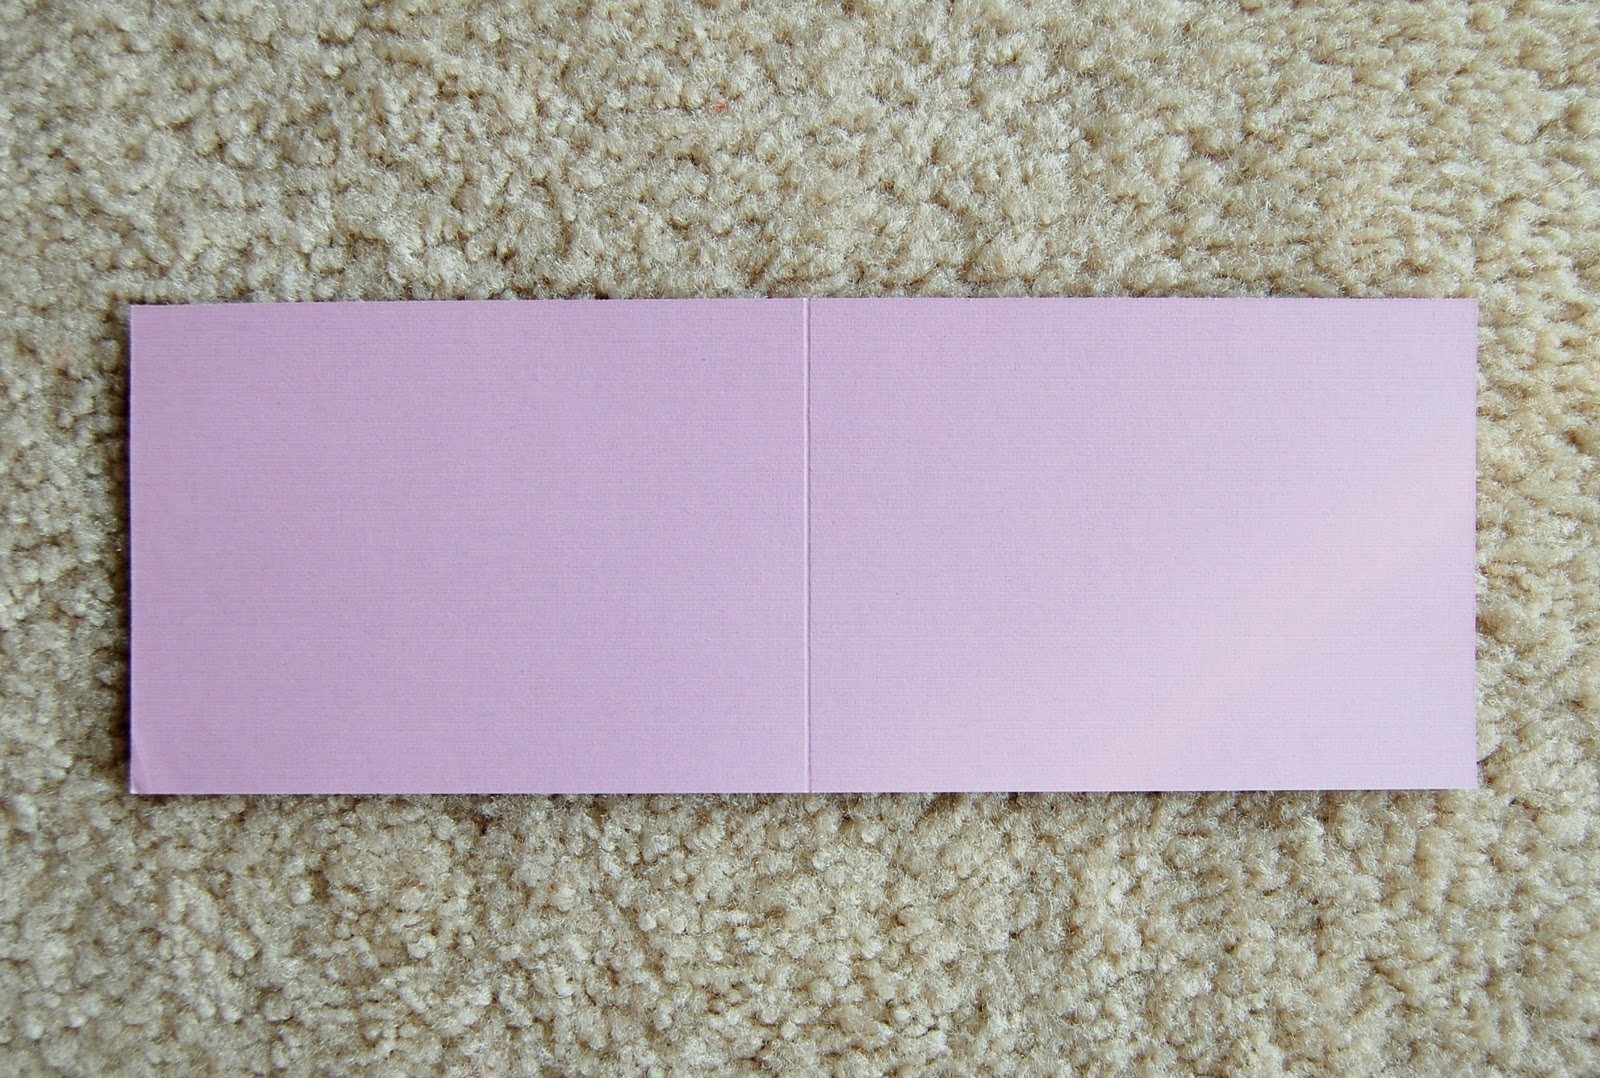
Step 3: Score and crease.
��� 3: �������� ���� � �������.
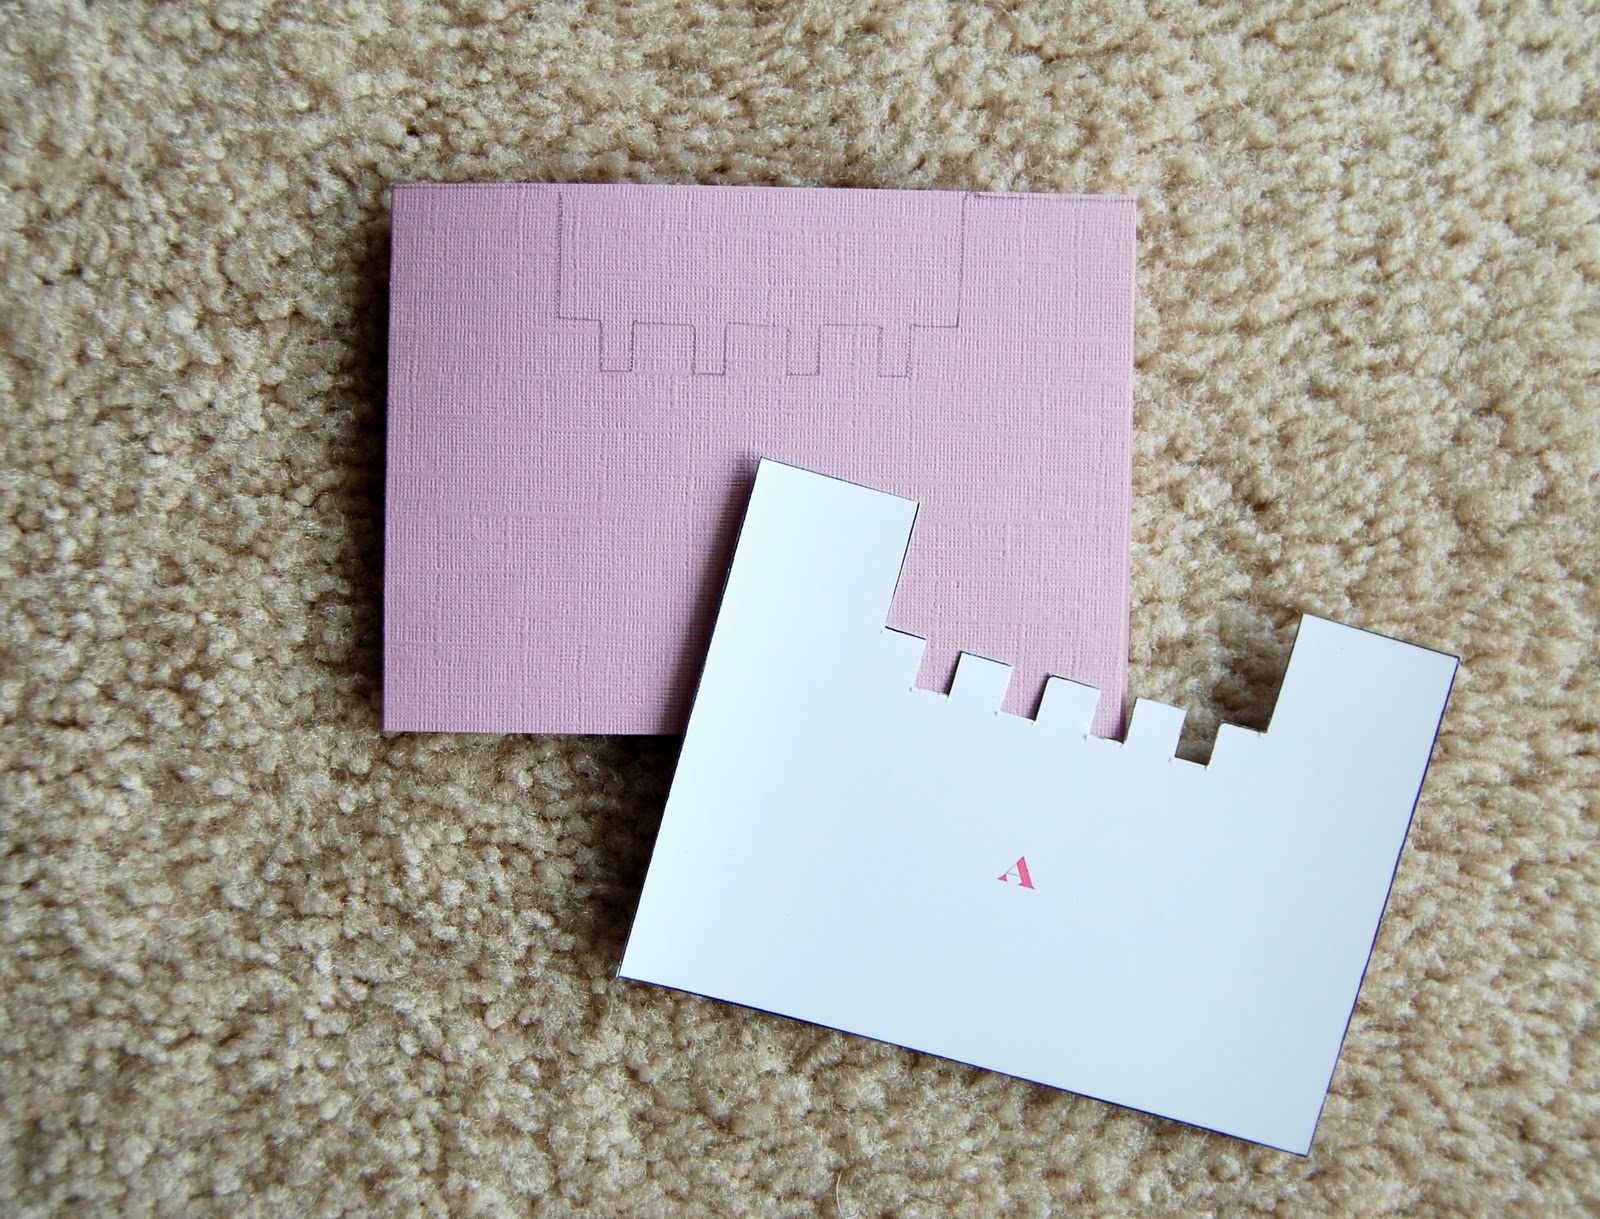
Step 4: Trace template A onto cardstock.
��� 4: �������� ������ � � �������� ��� �� ���������.
Step 5: Cut along drawn line.
��� 5: ��������.
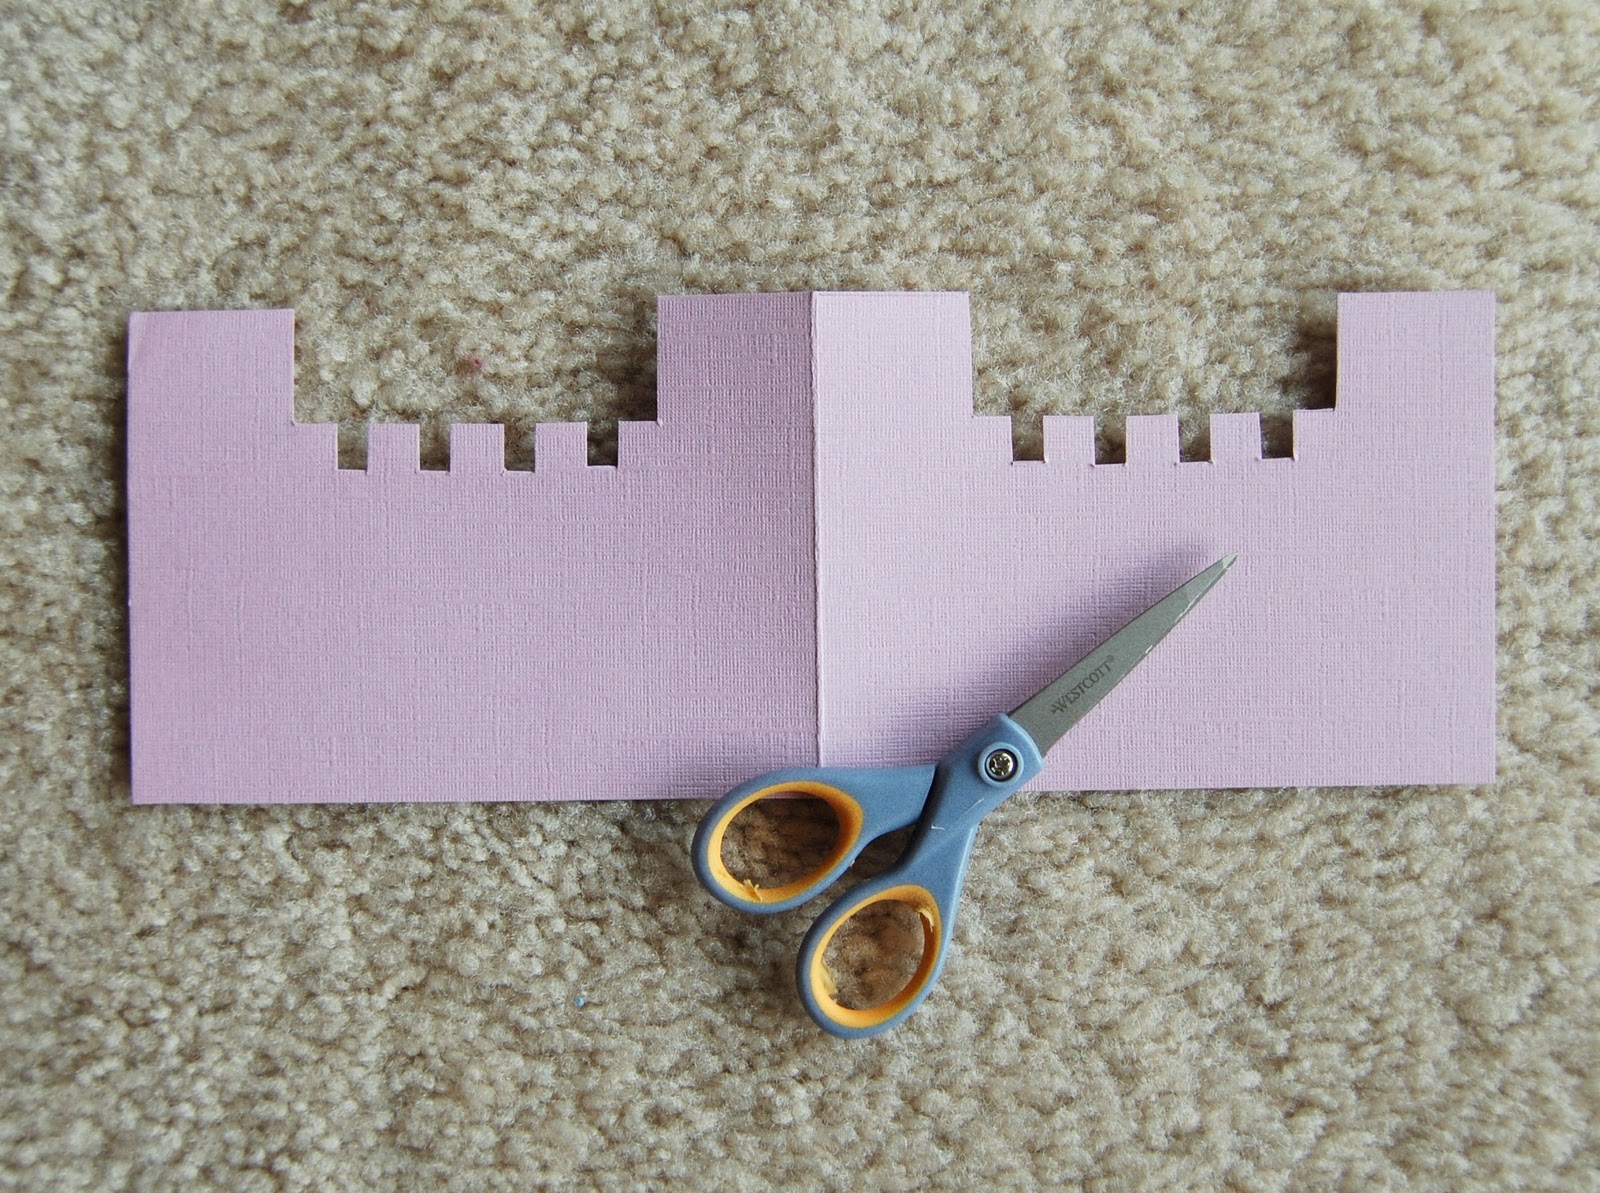
Step 6: Trace template B onto cardstock.
��� 6: �������� ������ B � �������� ��� �� ���������.
Step 7: Cut out.
��� 7: ��������.
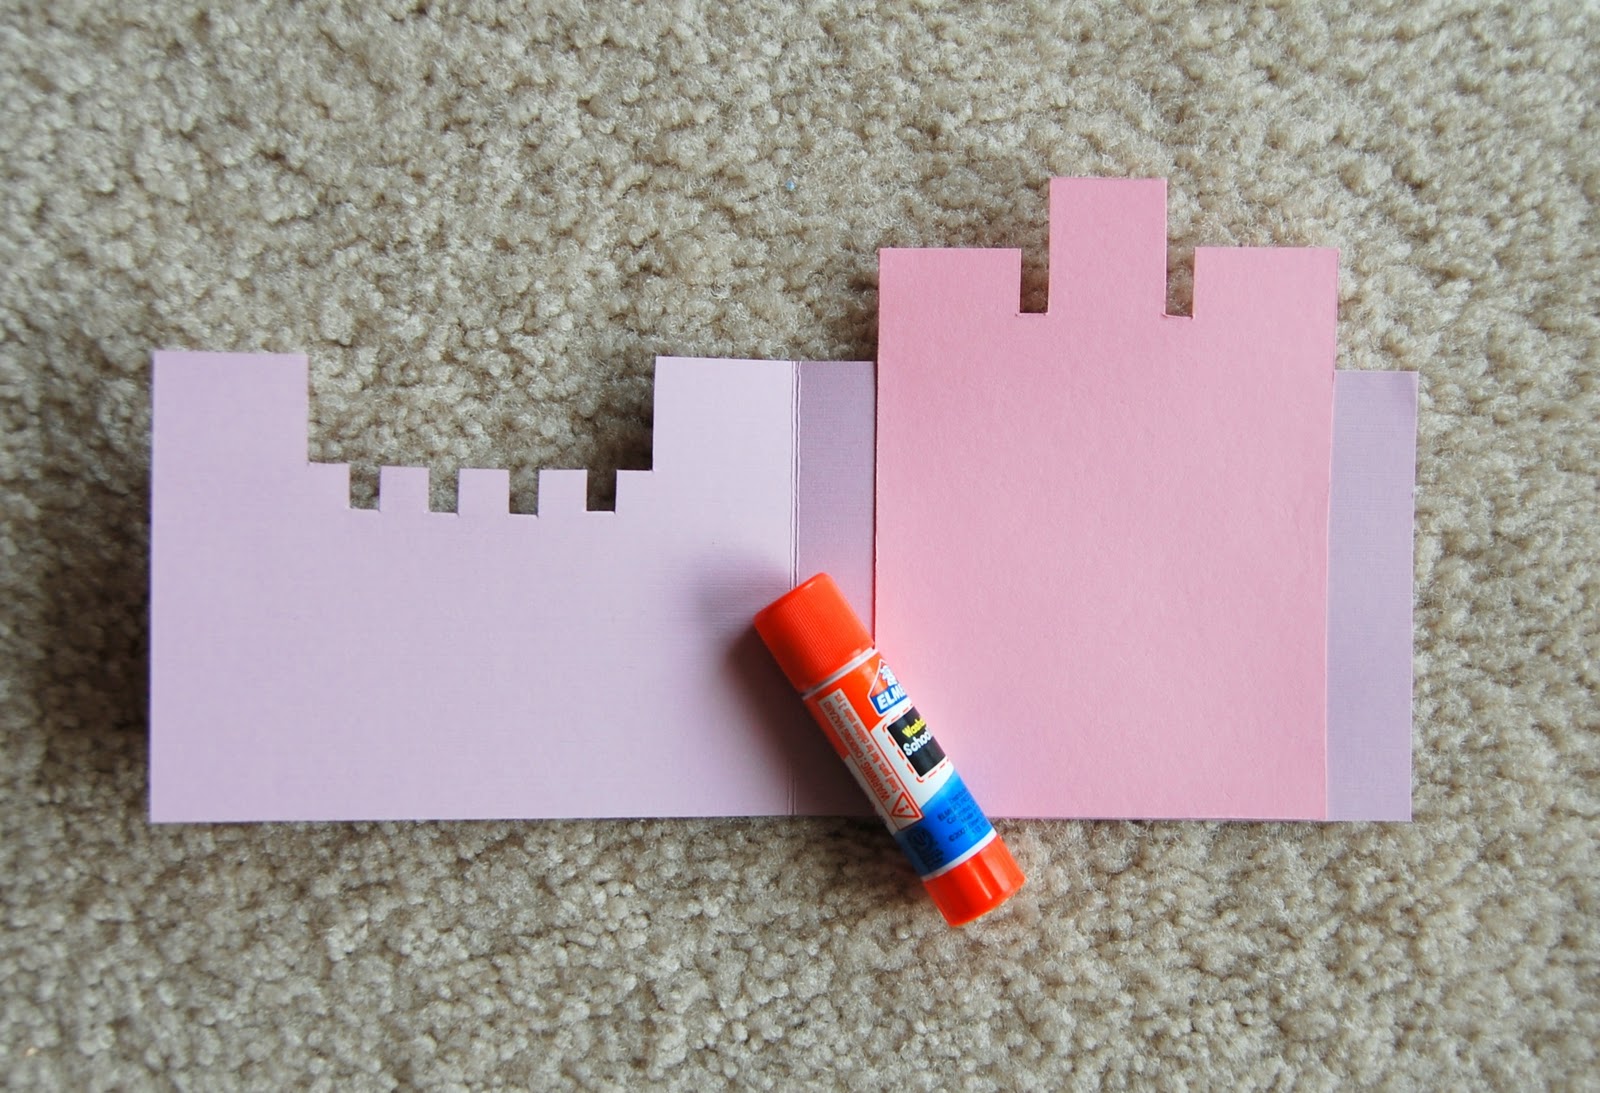
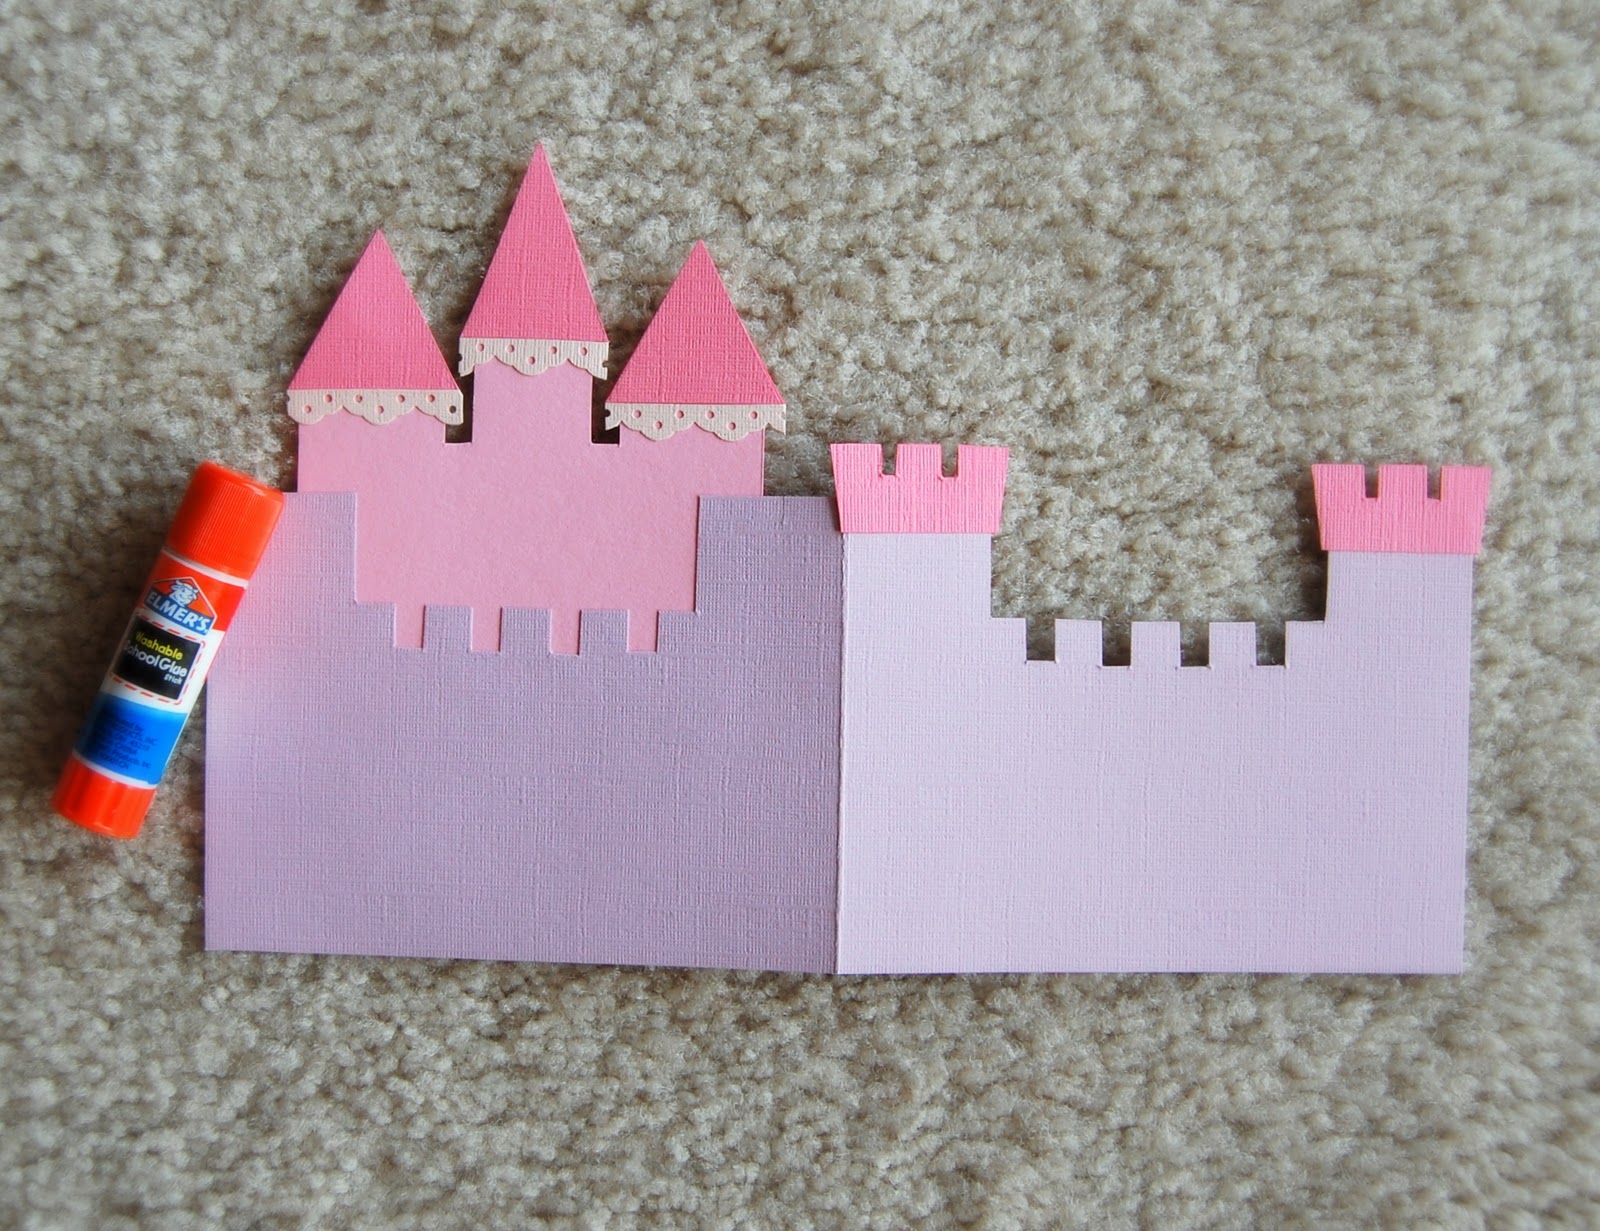
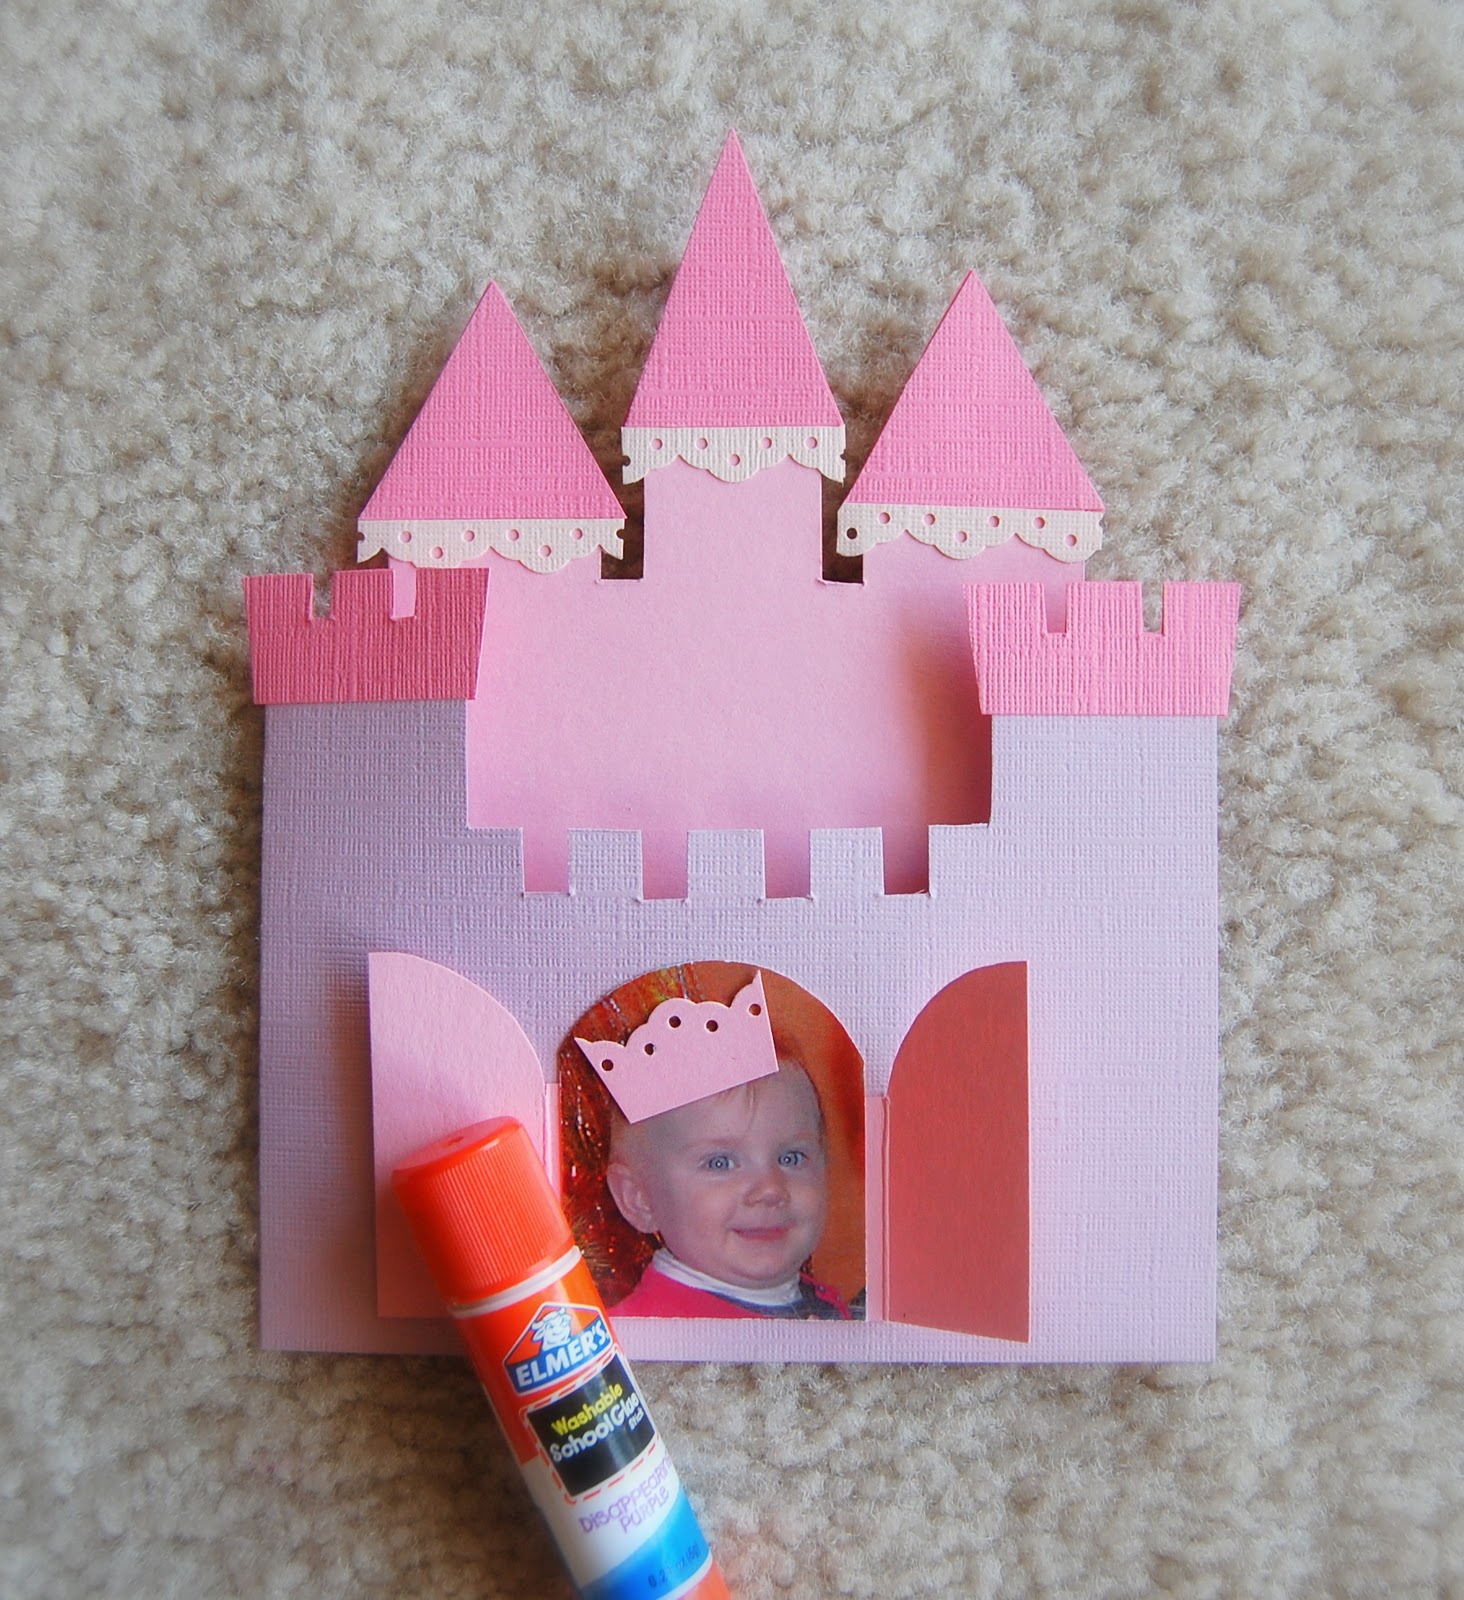
Step 8: Adhere wall piece back of card.
��� 8: ��������� ���������� ����� � ������ ������� ��������.
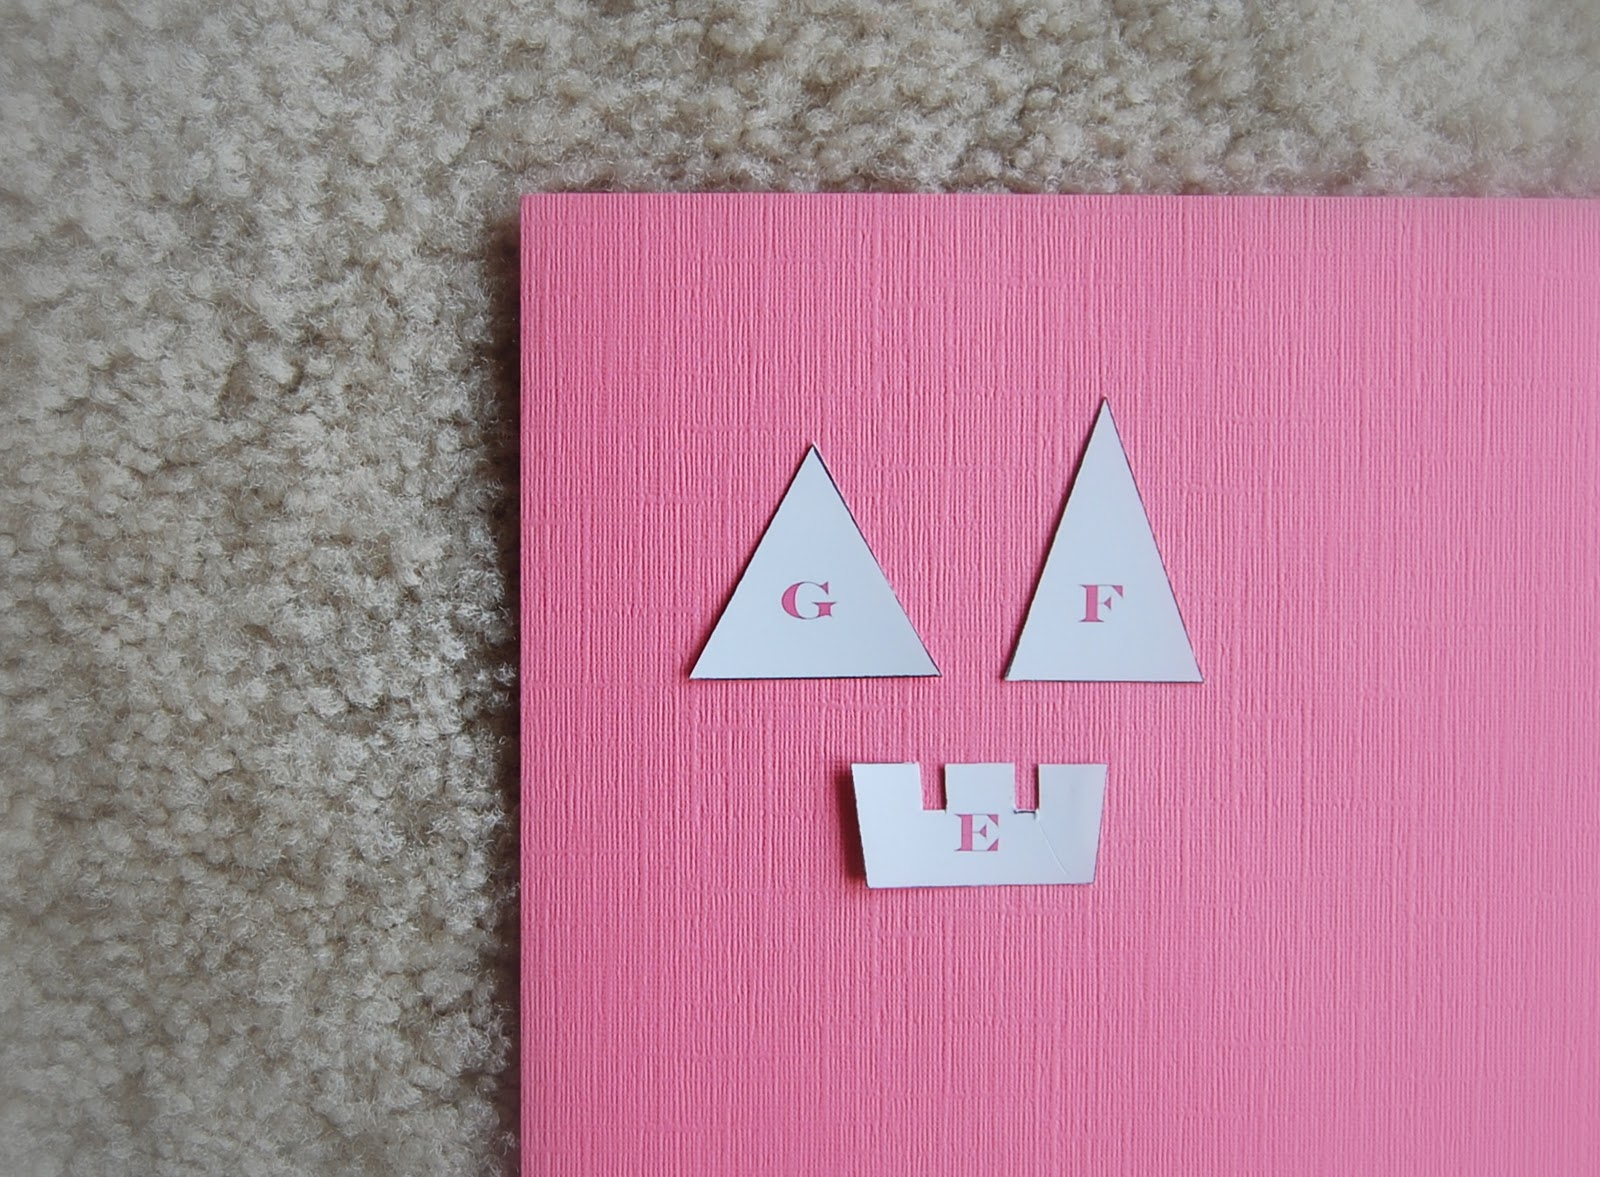
Step 9: Trace templates G, F and E onto cardstock .
��� 9: �������� ������� G, F � � � �������� �� �� ���������.
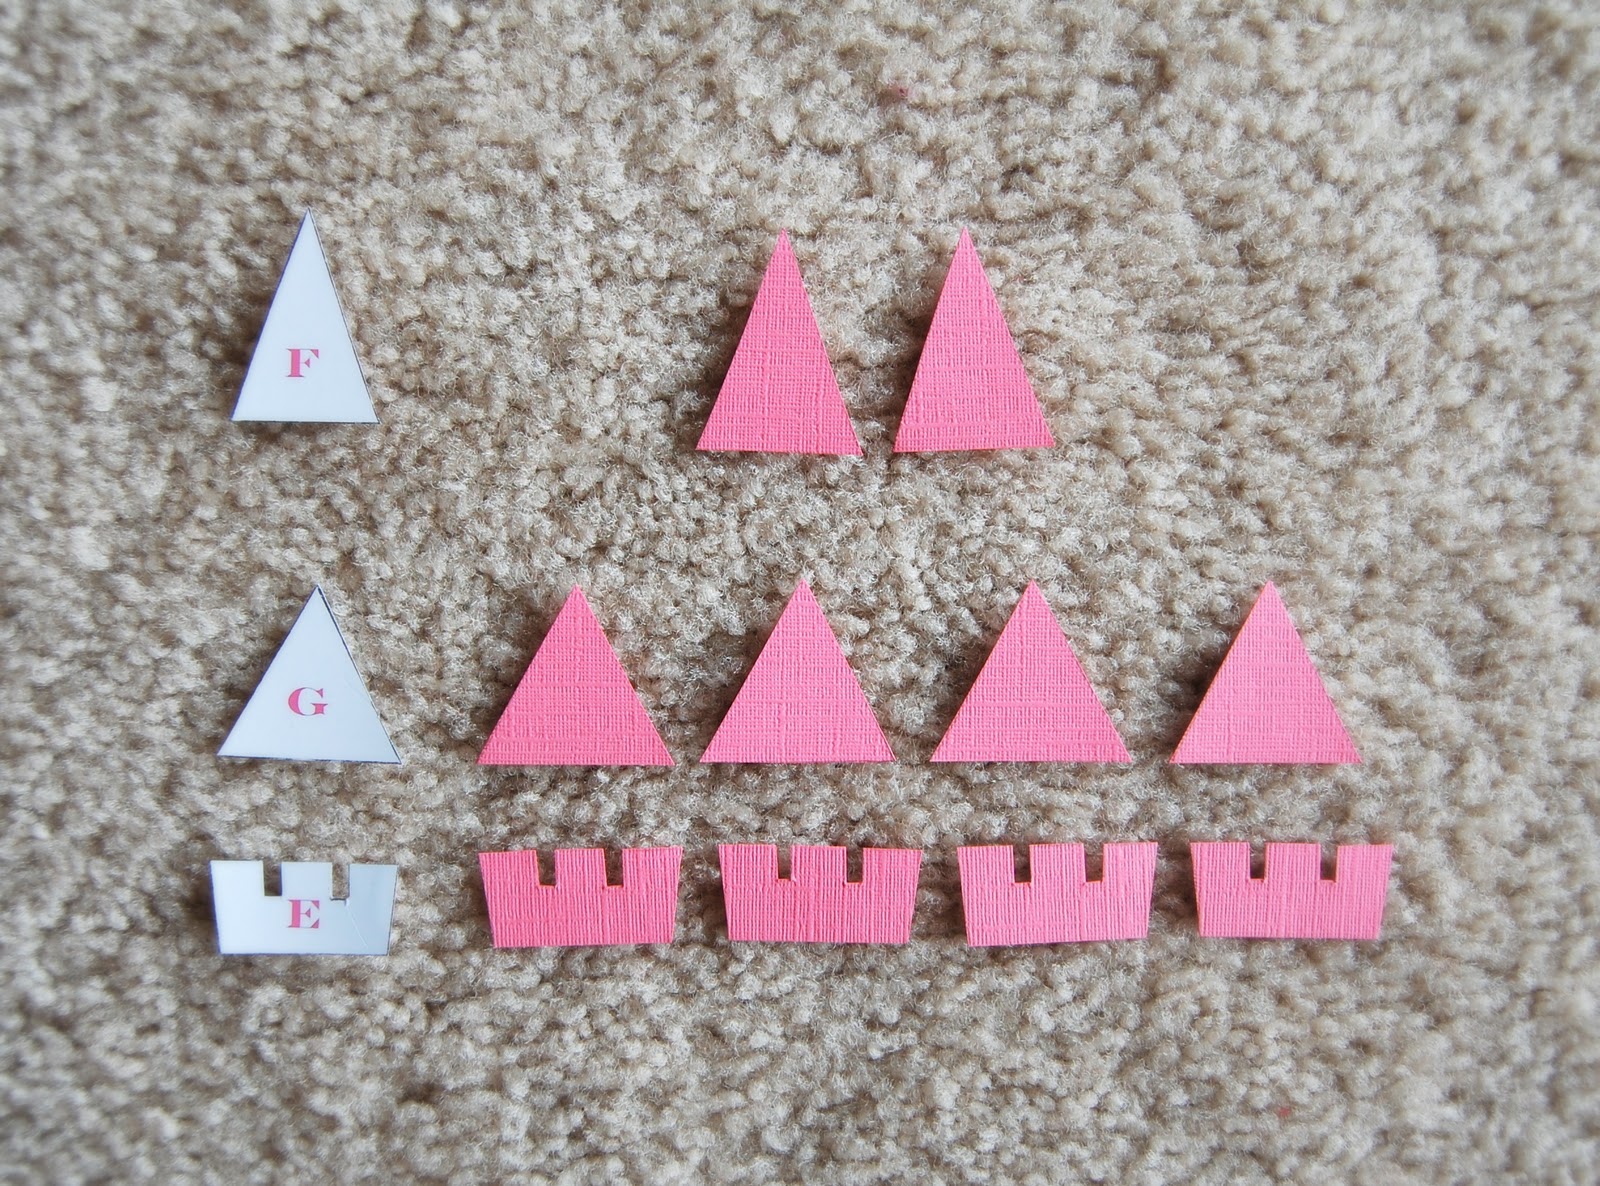
Step 10: Cut out shapes.
��� 10: ���������� ������ ��������.
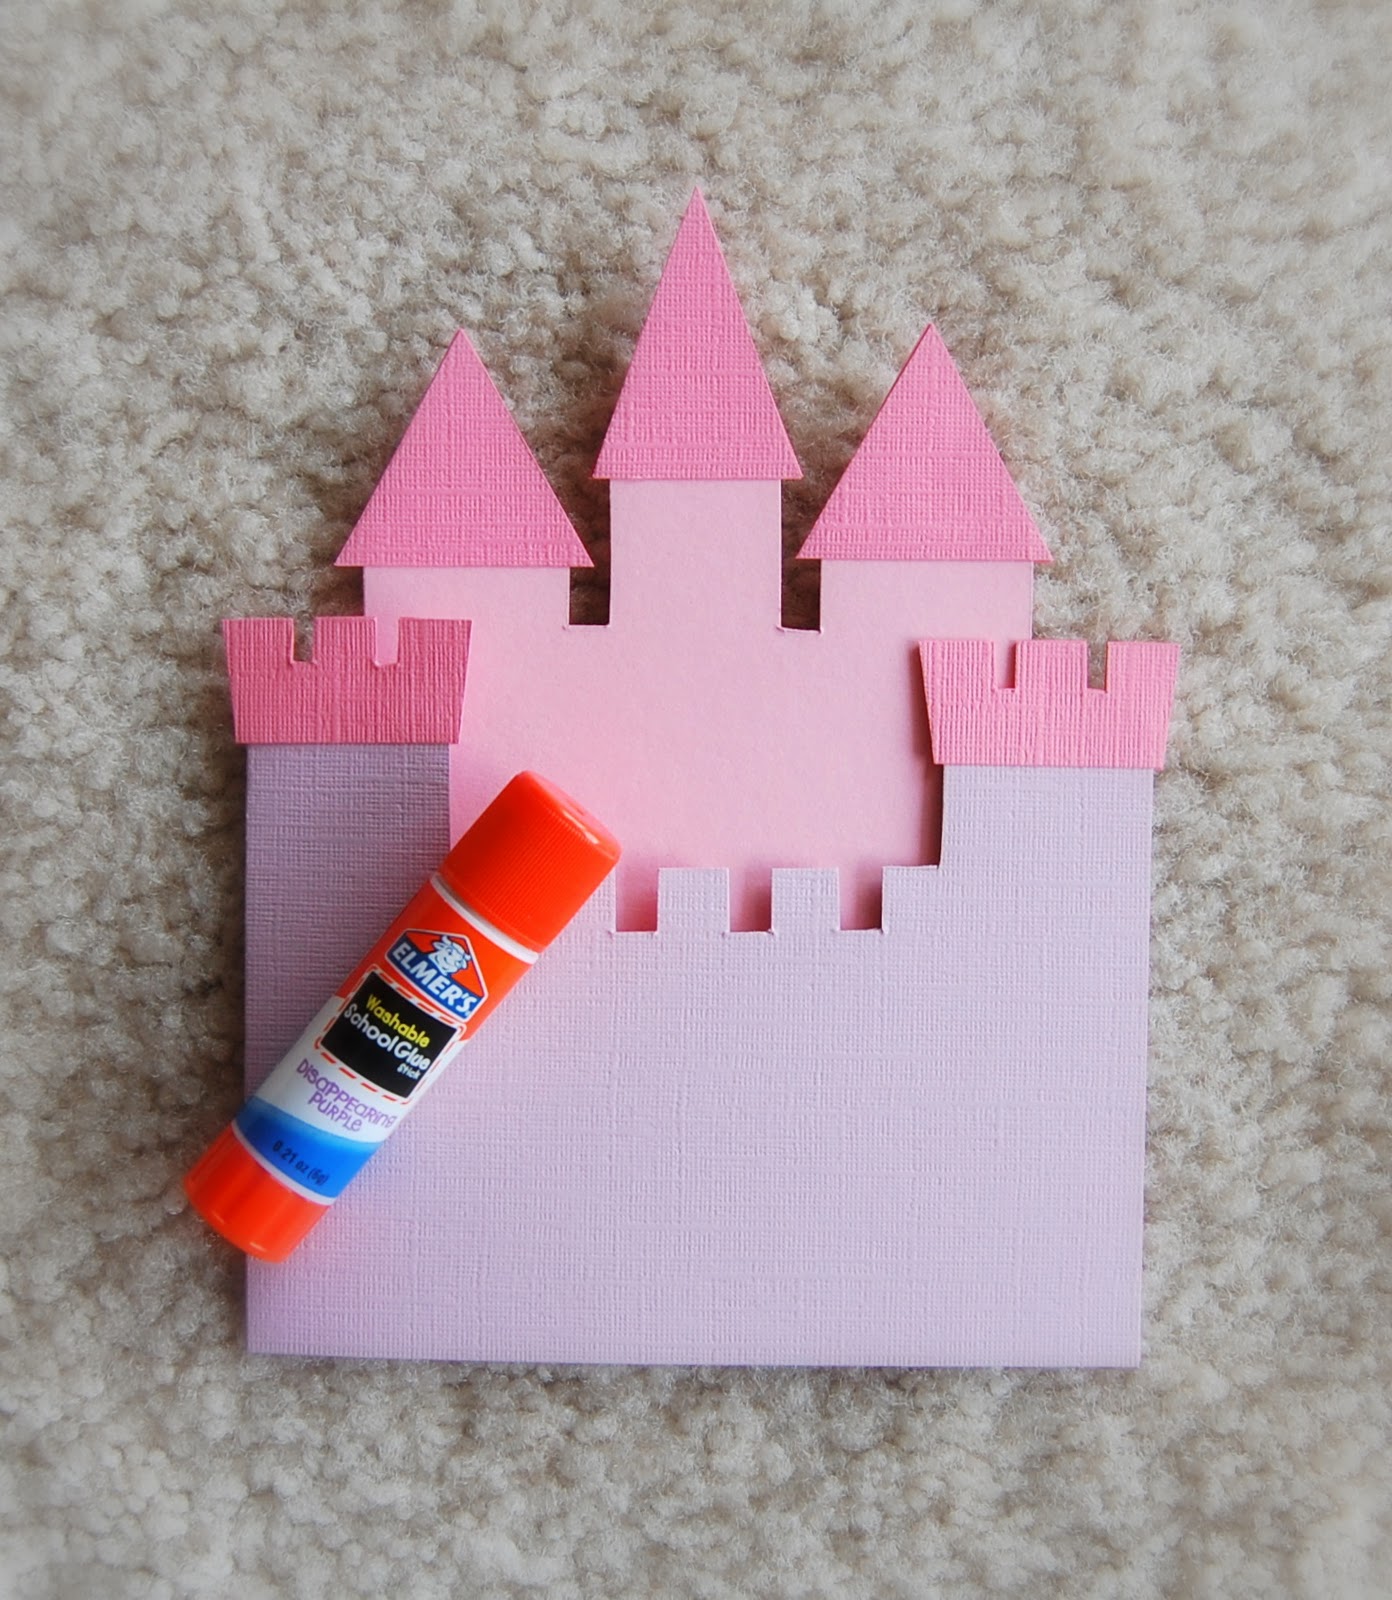
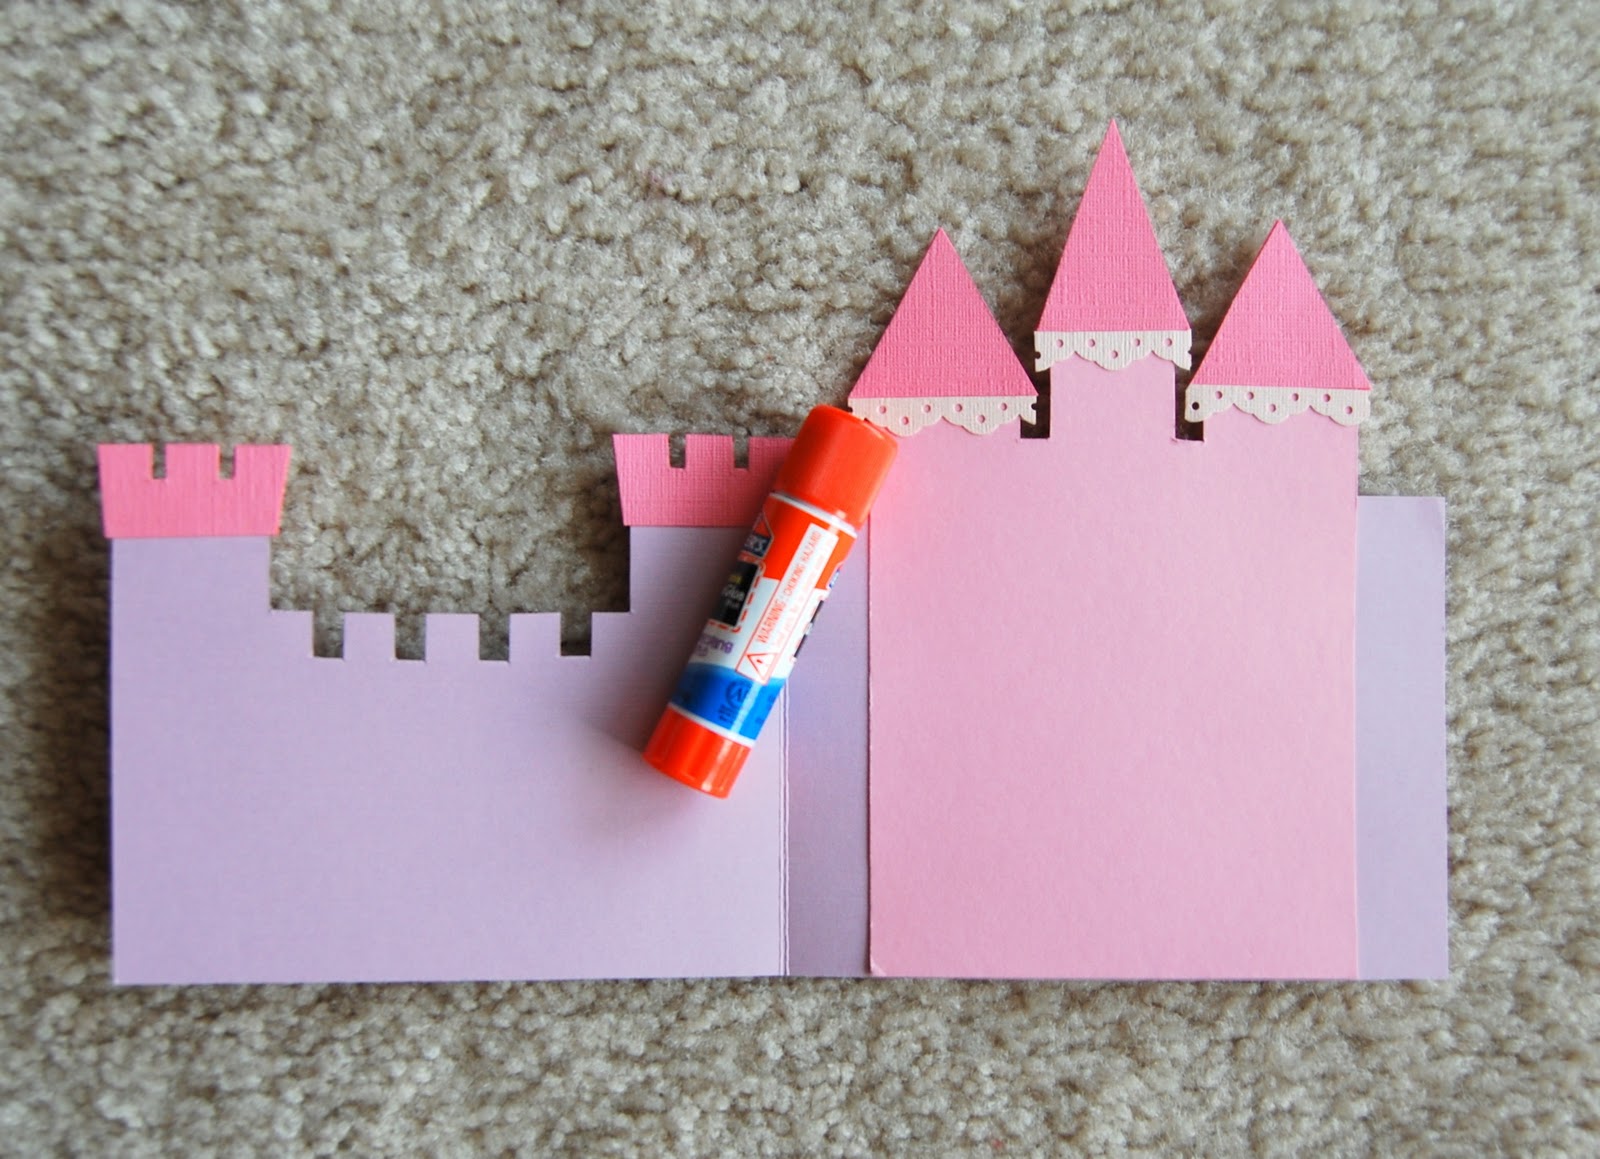
Step 9: Adhere shapes to castle.
��� 9: ��������� ������ � �����.
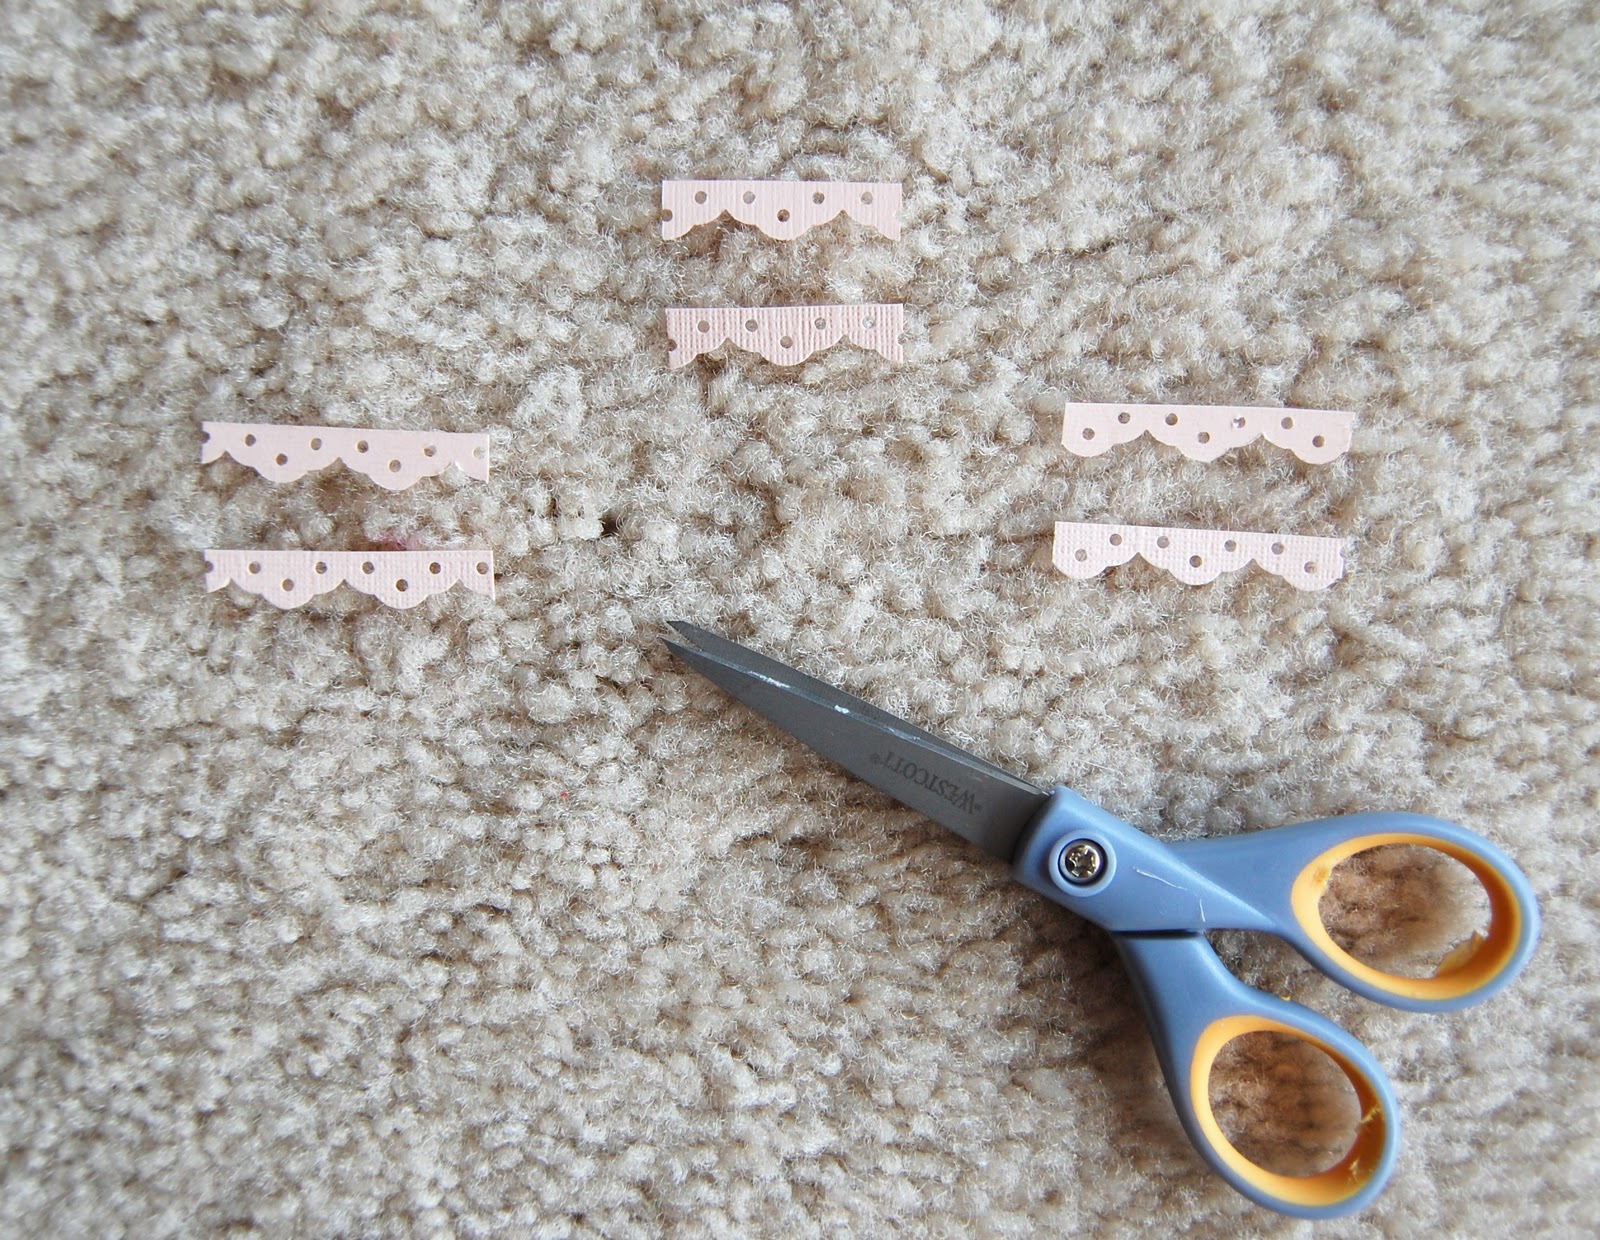
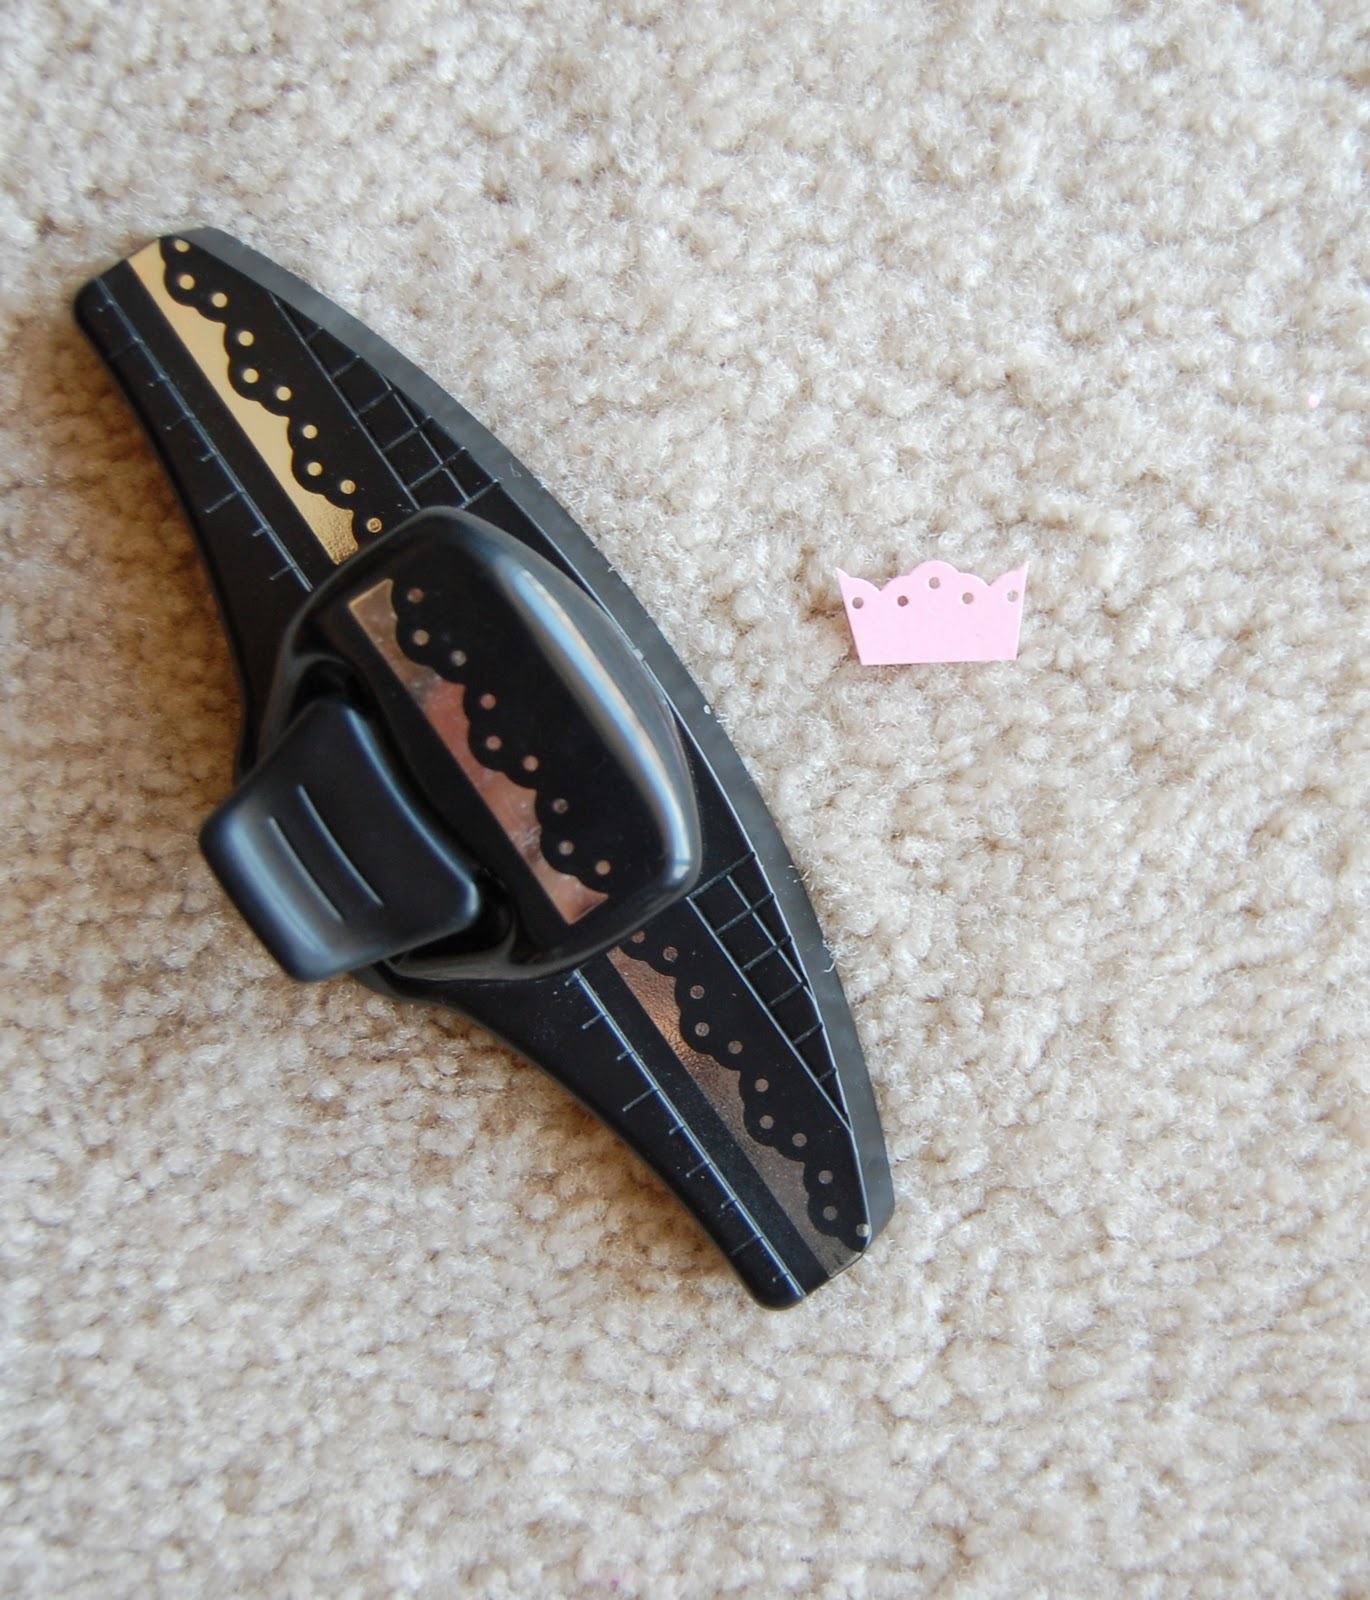
Step 12: Make decorative strip using border punch.
��� 12: �������� ������� � � ������� ���������� �������� �������� �� ��� ������� ����.
Step 13: Cut strip into pieces.
��� 13: ����� ������� �� ��������.
Step 14: Adhere decorative pieces to castle towers.
��� 14: ��������� ��������� �������� � ������ �����.
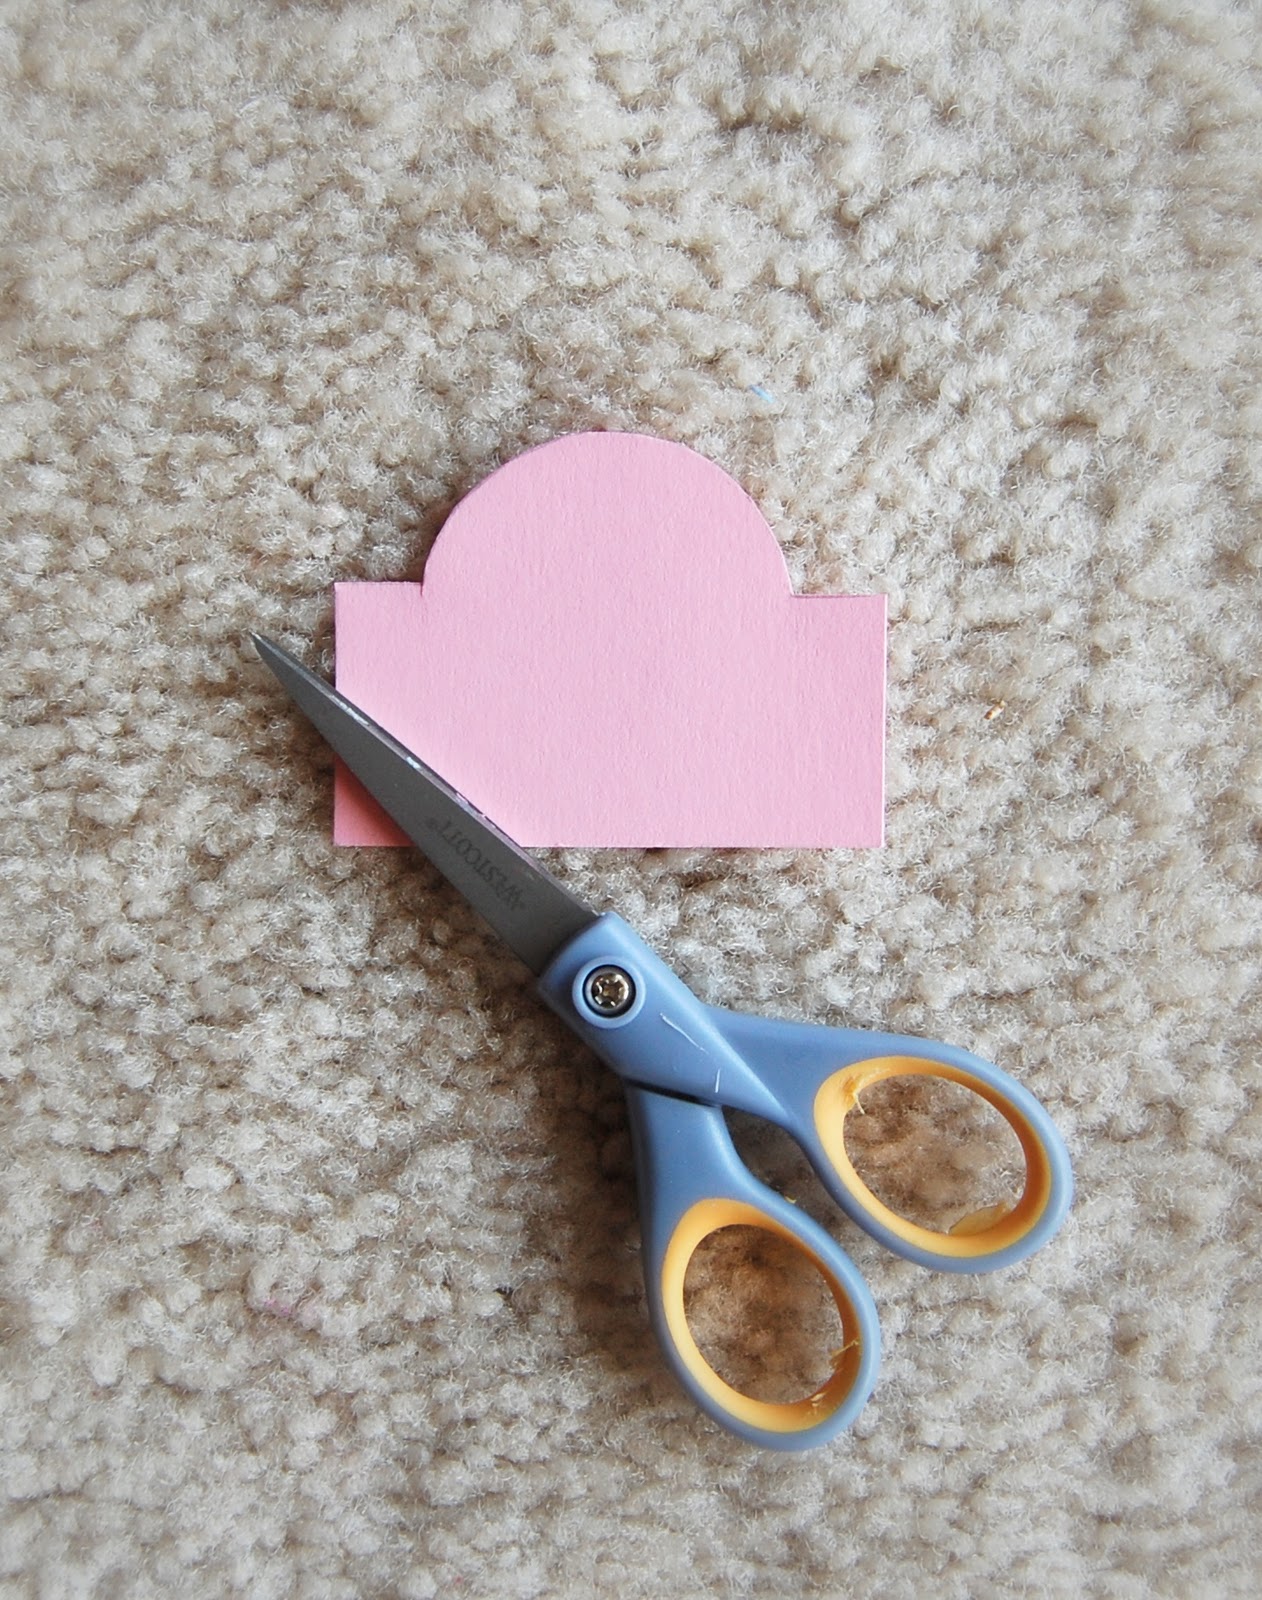
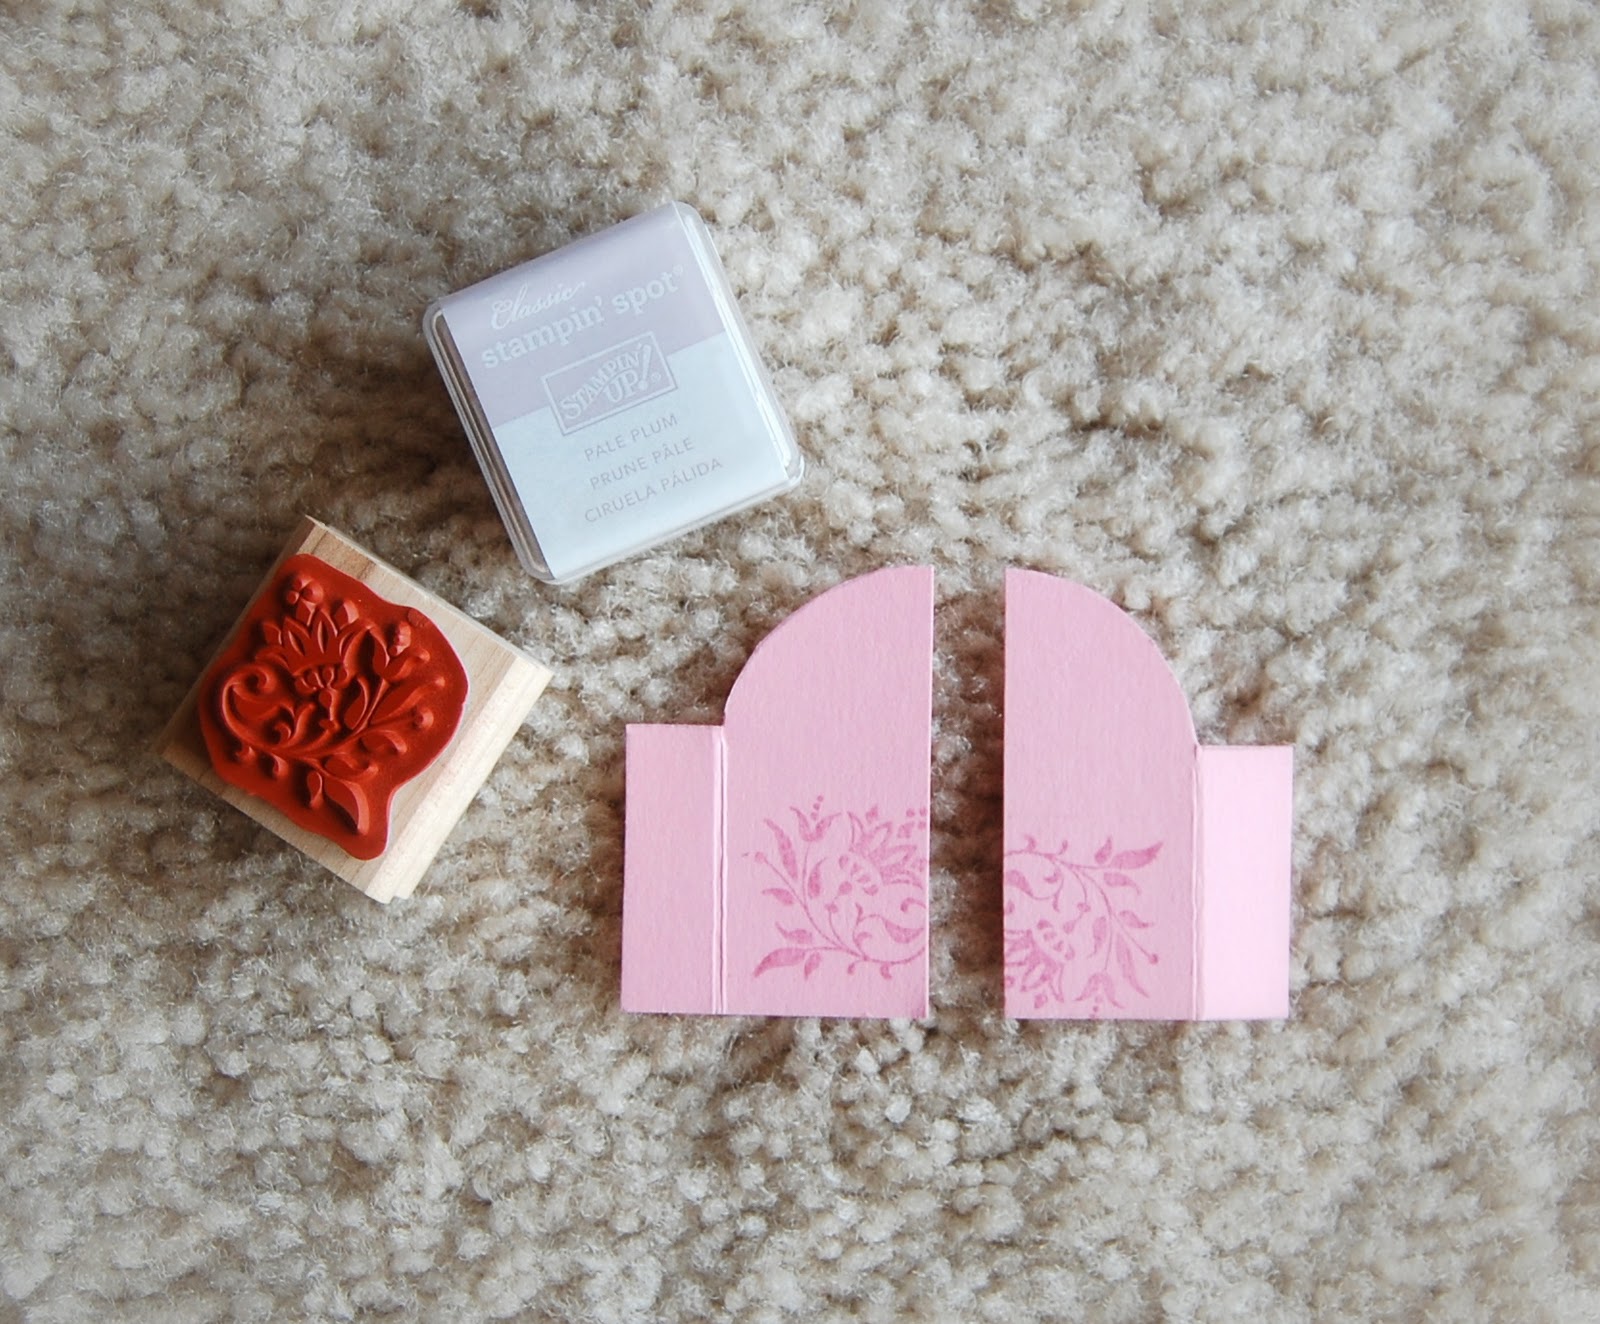
Step 15: Trace template D (gate) onto cardstock.
��� 15: �� ��������� �������� ������ D (������).
Step 16: Cut it out.
��� 16: ��������.
Step 17: �ut in half.
��� 17: ��������� �� ����.
Step 18: Stamp decorative pattern.
��� 18: ����������� ����.
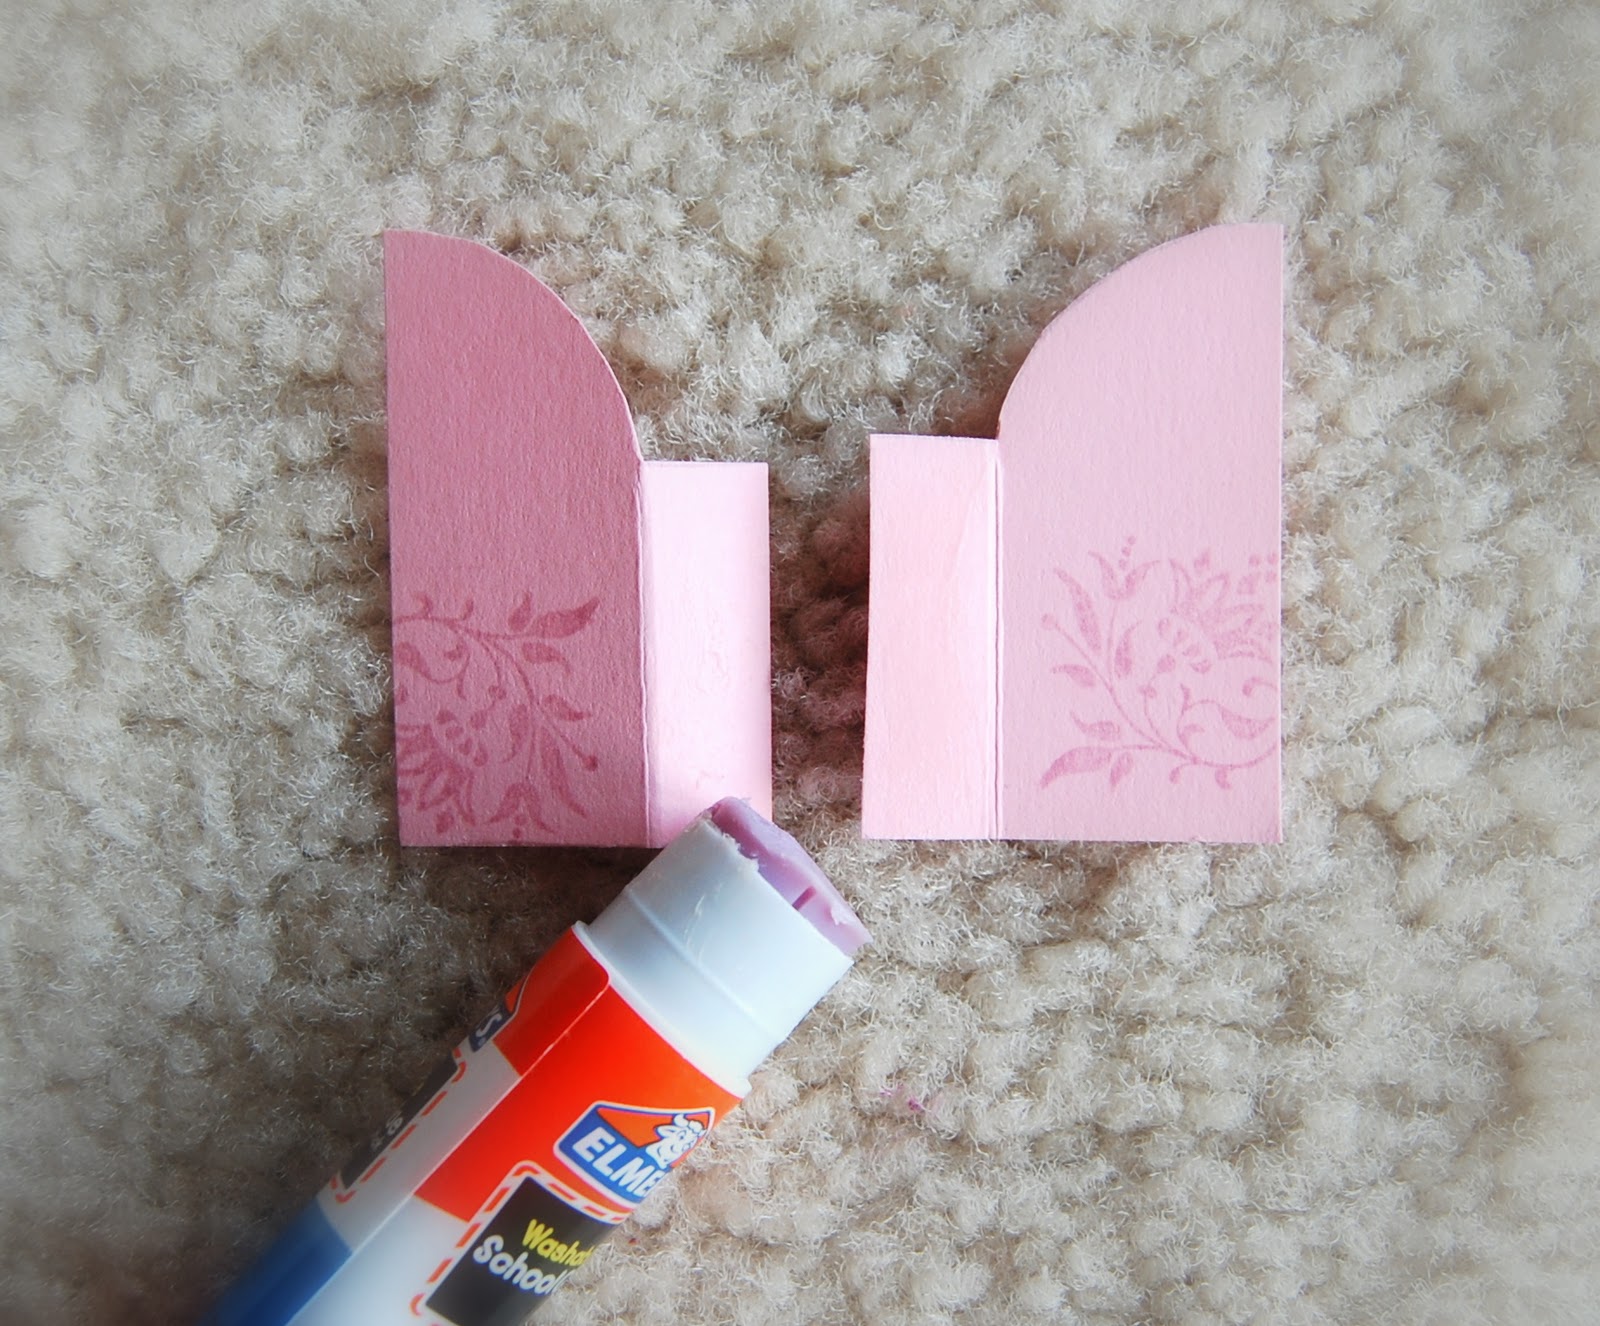
Step 19: Adhere gate doors to castle.
��� 19: ��������� ������ � �����.
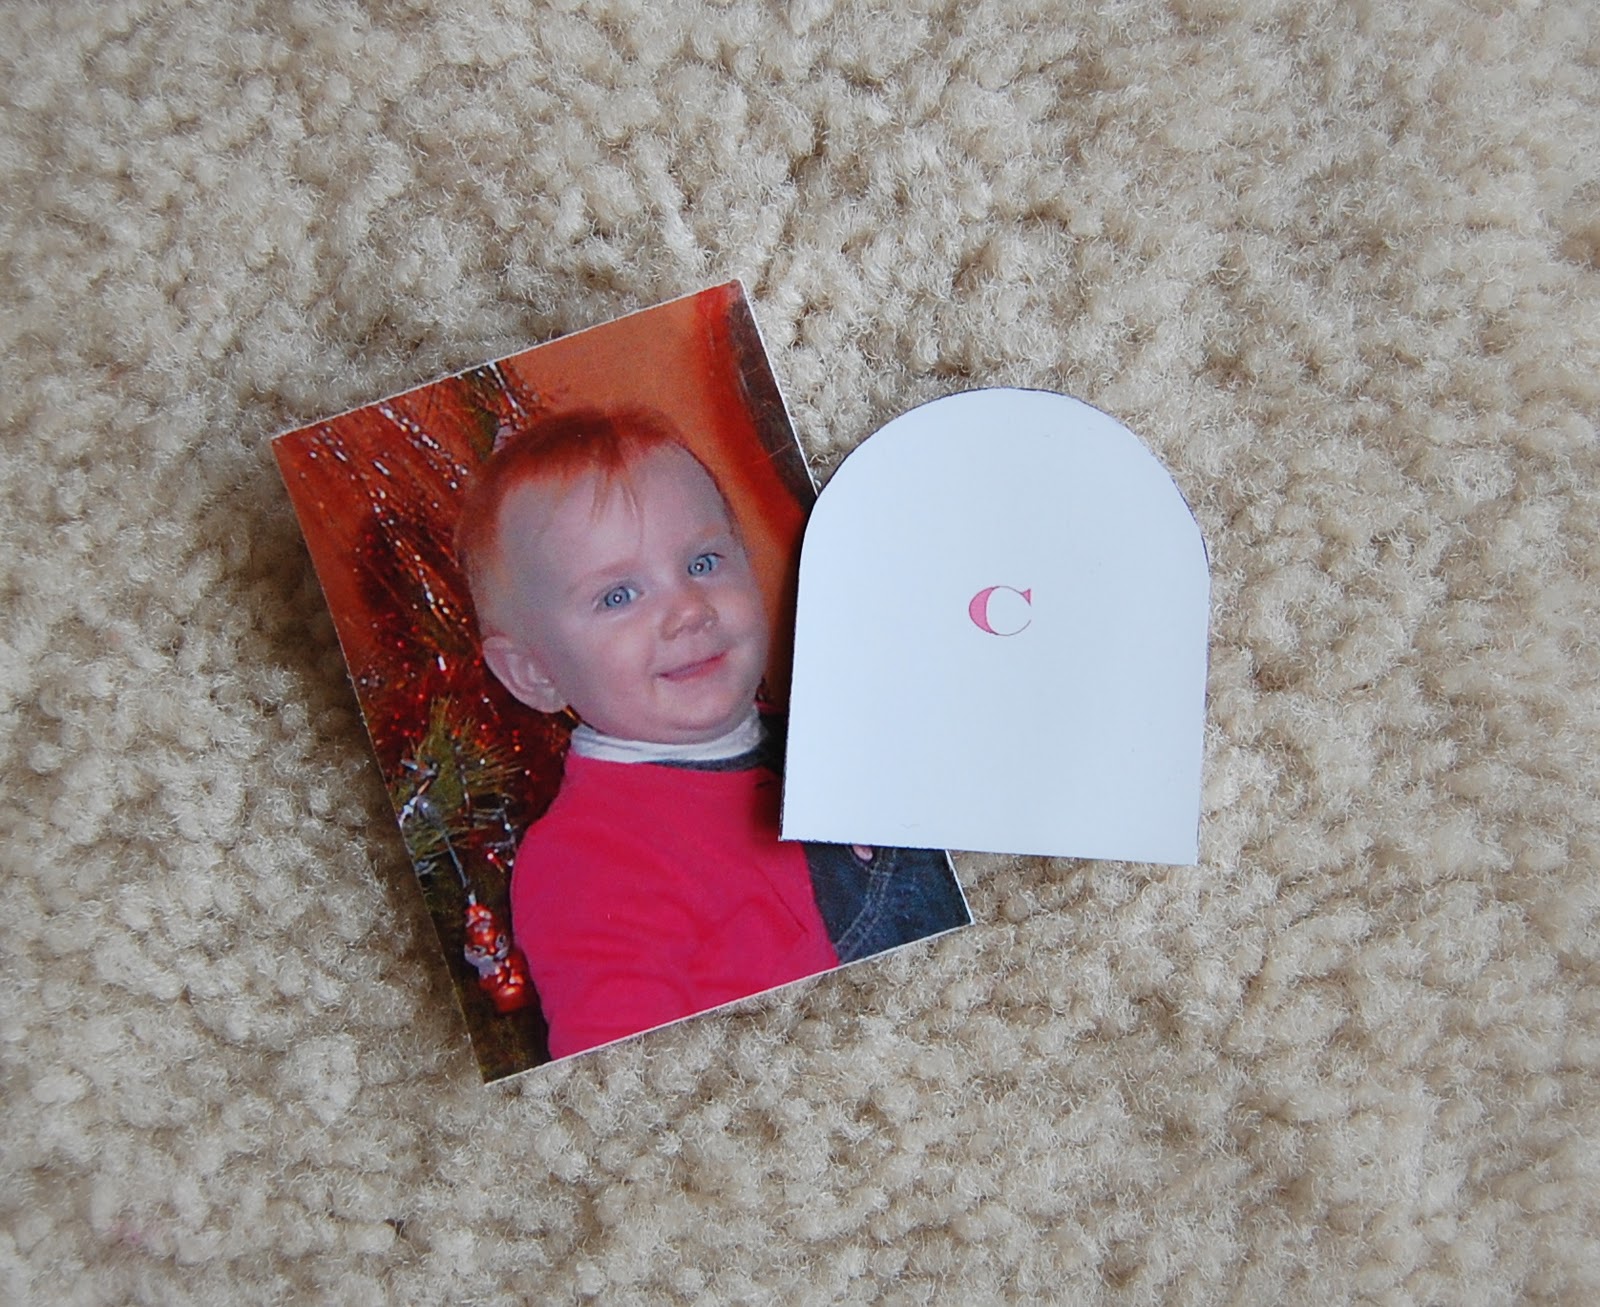
Step 20: Trace template C onto child�s photograph.
��� 20: �������� ������ � �� ������������ �������.
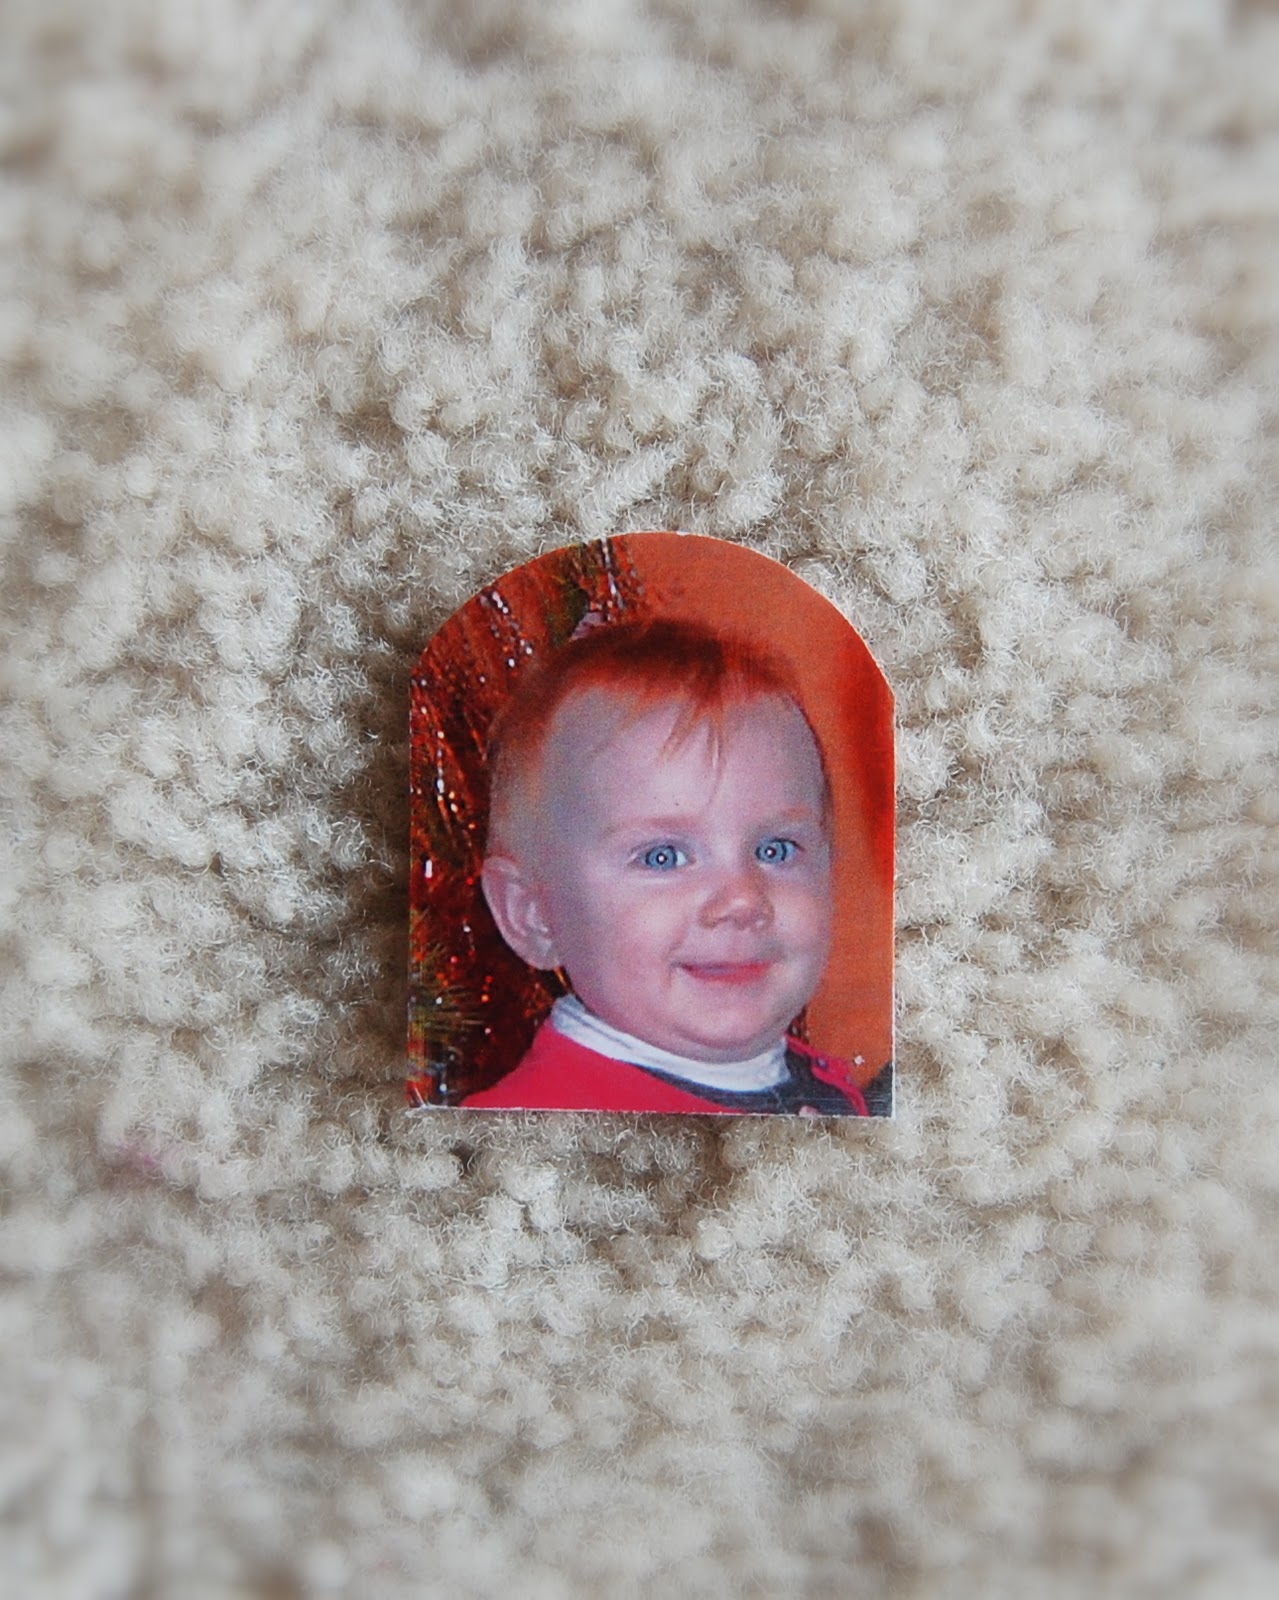
Step 21: Cut it out.
��� 21: ��������.
Step 22: Using border punch, make crown.
��� 22: C������� ������, ��������� ��������� �������.
Step 23: Adhere.
��� 23: ���������.
Step 24: Cut two pieces of ribbon.