Итак, нам понадобится для работы: обычная бумага для ксерокса (если найдете что-то потоньше, то будет лучше), ножницы, нитки, акриловая золотая краска, Pearl Ex (перламутровая пудра, но это уже не обязательно), элементы декора ( я брала ленточки и бусины), кисточка (желательно щетинка). Шаг 1:
Для начала подготовим рабочее место. Для этого постелите на стол газетку, чтобы не перепачкать стол, на нее положите полиэтиленовый пакет, это для того, чтобы наша бумага не прилипла к газете. Затем на пакет положите обычный лист белой бумаги.
Для работы нам потребуется:
1. Основа (мыльная белая или прозрачная и диоксид титана), если нет мыльной основы, то можно сделать сырочек из детского мылка.
2. Форма круглая (у меня пластиковый контейнер для орехов).
3. Краситель для мыла "Желтый".
4. По желанию: облепиховое масло (отлично красит основу в желтый цвет).
5. Эфирное масло или отдушка.
6. Масло зародышей пшеницы, в котором развести диоксид титана.
Здравствуйте, уважаемые посетители группы "Рукоделие". В прошлый раз я на сайте публиковала замечательные работы по декупажу Елены Бусыгиной. Сегодня Елена согласилась дать свой мастер-класс по декорированию вот такой ключницы.
Для работы Вам понадобятся деревянная заготовка, краска белая, клей ПВА, салфетка трехслойная, кисти, краски, манка, лак акриловый. 1. На предварительно загрунтованную заготовку клеем ПВА нанесите белую краску. Я использовала латексную, купленную в обычном строительном магазине.
Нашла вот еще МК по лепке розы, думаю, что по фото понятно что и как..... :))
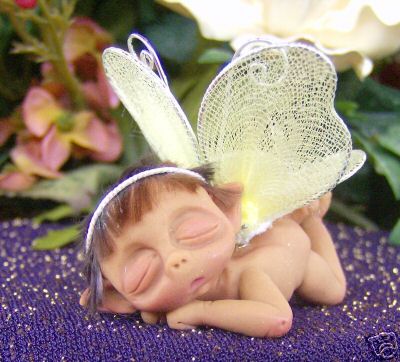
No I haven't vanished. Again. I've been busying myself making sugar paste roses, hydrangeas and leaves for a small wedding cake that I had agreed to make. I have to say I've lost a little bit of the passion I had had once....a few years ago. I wonder why, myself. But I think it has a lot to do with cleaning up after. Sleepless nights. And stress. I guess.
So it was very timely that I visited Cake Connection a few days ago to get some supplies. Cake Connection is located at Jaya One and has a beautiful supply of gum paste flowers and cake decorating ingredients and tools. As I was paying for my electric and apple green food colours I was introduced to A World of Roses sugar paste class. I felt a flutter of excitement. So I enrolled almost immediately. My first sugar paste class ever!
With the class coming up I had a feeling that all I had taught myself was going going going down the drain. I know that I had probably picked up some wrong techniques, some weird habits and have made wrong conclusions from the various sugar paste books and instructions that I have collected over the years. Now it's time for a total sugar paste roses make over. I was totally ready.
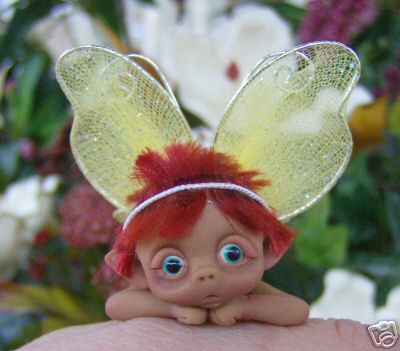
This class taught us to make 4 kinds of roses. Intricate wired roses, un-wired roses, ribbon roses and miniature roses. Oh the miniatures were so adorable! And the wired ones were gorgeous. It also taught us how to use petal dust, how to make rose leaves and to colour them. . Lynette was our talented instructor throughout the four hour class. Thank you Lynette. It was very enjoyable and enlightening.
I was glad it was a small class because I was quite the klutz. Stress was written all over some of our faces because we were told to hurry otherwise we would be short of time to make the other roses.
First off we were taught to make wired petals so that it had time to dry and harden by the time we finished with other roses. We used spoons to cradle them and to give them shape. Why didn't I ever think of that!
This was how it started out. Rolling out the gum paste with wire inserted and cutting out the shape.
After some thinning of the edges and some cupping of the petal and curling of the edges we then had a finished petal ready to be rested on a spoon and air-dried.....
We made 5 of them and air dried them while we proceeded to make the bud and inner petals of the rose.
The half rose ready and standing. Mine in the forefront.
Then we attached the 5 wired rose petals that we had made earlier to make a full blown rose. We then made and attached the calyx and ovaries (yes.. Lynette said ovaries and we all had a good long giggle) at the base of the rose. And finally we dusted them with pink petal dust.......
The finished rose. Gorgeous no?
We made and coloured some rose leaves.....steamed them over a kettle to deepen the colour......
And we made gorgeous ribbon roses.....so easy and fluffy....YUM..
The cool and cozy Cake Connection kitchen....I'd love another class...Inspiration has found me again...
Lynette the instructor in striped blouse. Me, behind the camera.
Внутрь приклеим клеем ПВА полоску картона на 1 см выше края коробки, чтобы она стала поглубже
Снаружи также приклеить картонные полосочки для того, чтобы укрепить и выровнять по уровню боковую поверхность.Просушить 1 час.
Обклеить виниловыми обоями с выпуклой текстурой все внутренние и внешние поверхности коробочки и крышки,просушить. Причем снаружи на боковой поверхности приклеить полоску картона так, чтобы она не доходила до верха на 6-7мм, чтобы крышка закрывалась.
На верхнюю поверхность крышки клеем ПВА(жиденьким) приклеить верхний слой ( с рисунком) бумажной, 3-х слойной салфетки. Наносить клей плоской кистью от центра к краям, выдавливая воздух из-под салфетки. Просушить 2-3 часа.
Покрыть верхнюю поверхность акриловым лаком несколько слоев. У меня лак в аэрозольной упаковке.
После 4-5 часов просушки ,приклеить атласную ленточку с бантиком к боковой поверхности крышечки.Клеила только на концах суперклеем,натянув туго ленту, а в середине промазала клеящим карандашом, он не оставляет следов.
Боковую поверхность самой коробочки покрасить золотой акриловой краской, просушить.


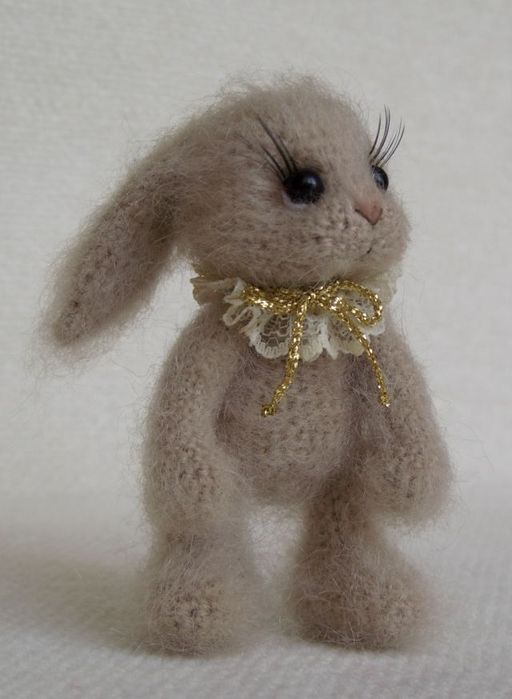
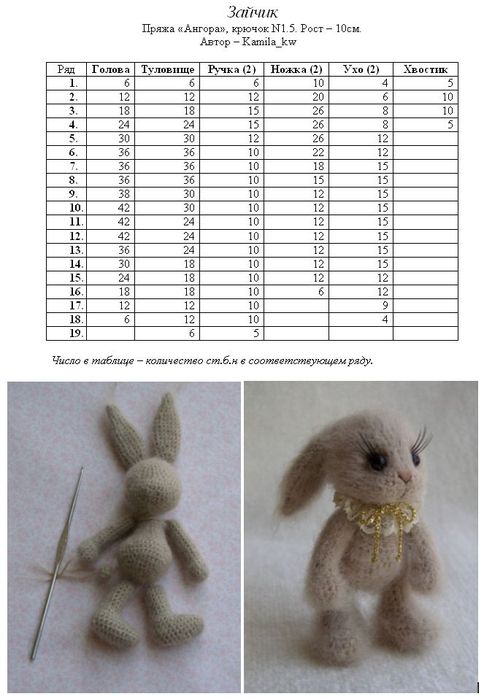


 1. Раскраиваем детали с небольшими припусками на швы. Из бежевого флиса: спинка - 2 детали, лапки - 4 детали, голова - 2 детали, уши - 2 детали, из белого флиса: животик - 1 деталь, хвостик - 2 детали, из ситца: уши - 2 детали: