Без заголовка |

Yarn: Patons Classic Wool (100% Pure New Wool; 210 yards [192 meters]/100 grams); #202 (Cream) - one skein
Needles: 16" circular needle in size US 5, 16" circular needle in size US 8, one set of double pointed needles, also in size US 8
Notions: Tapestry needle, stitch marker
Gauge: 20 stitches = 4 inches on size 7 needles
So let's get started! First, using your size 5 needle, cast on 104 stitches, place marker, and join in round. Then, knit 1.5" in the following ribbing:
Ribbing Row: k1, * p2, k2; rep from *; end p2, k1
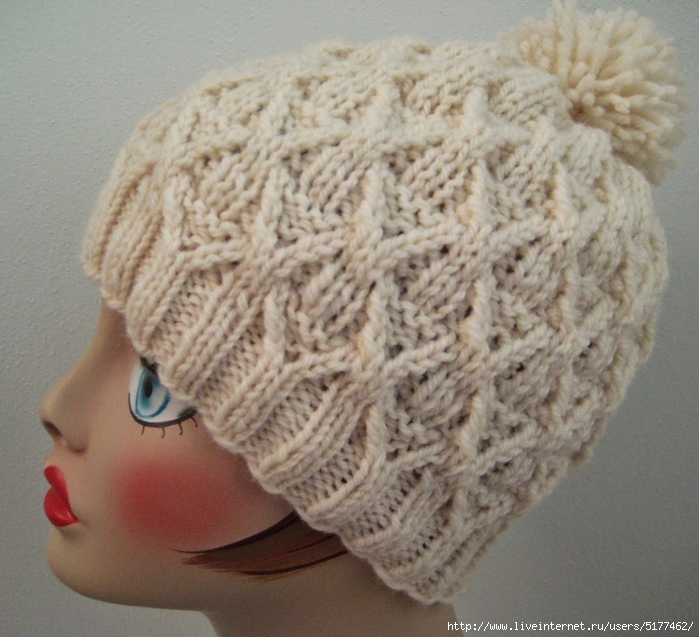
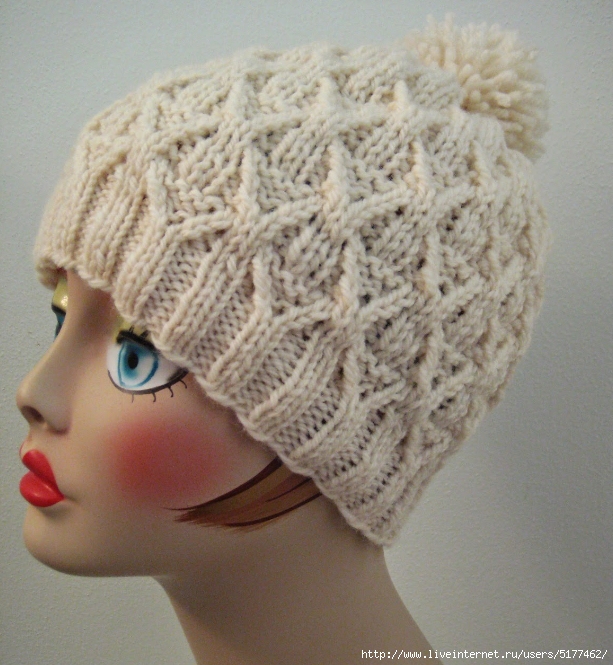
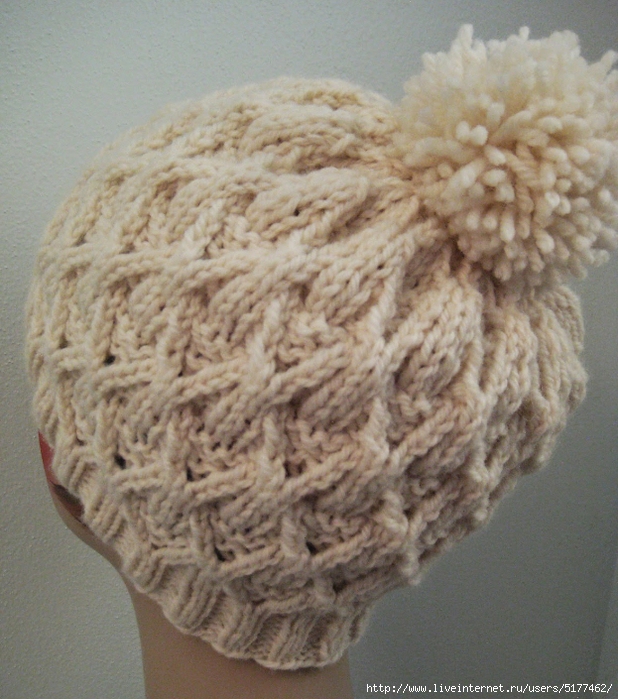
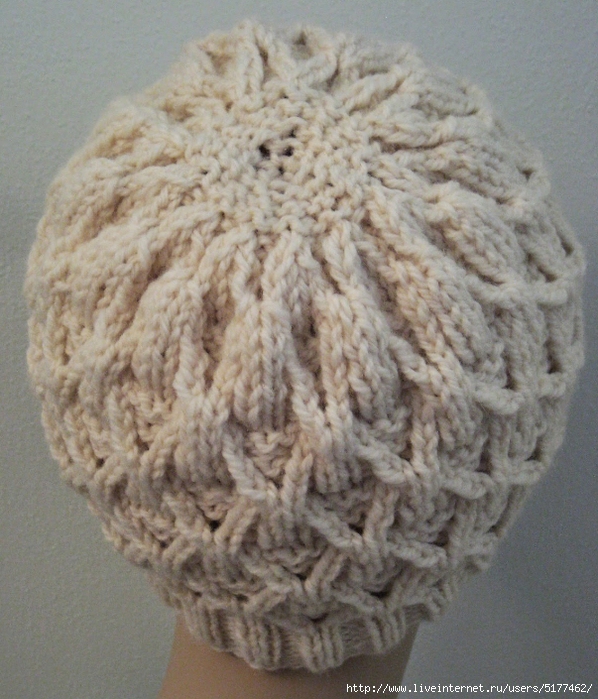
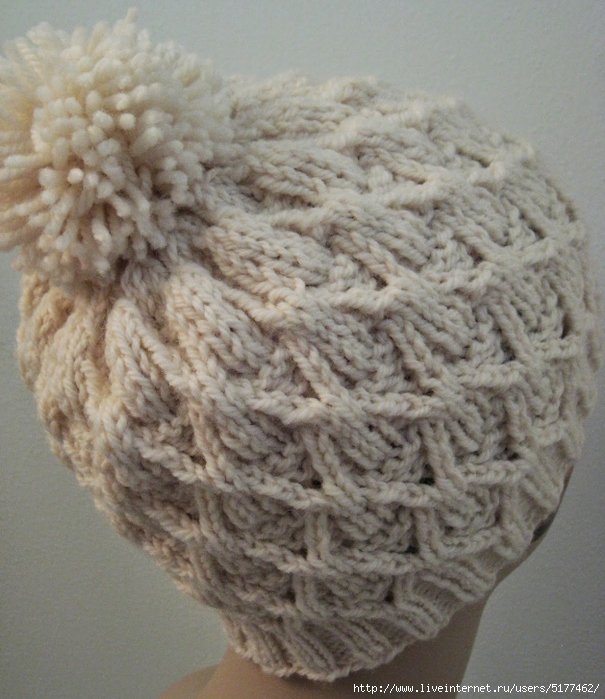
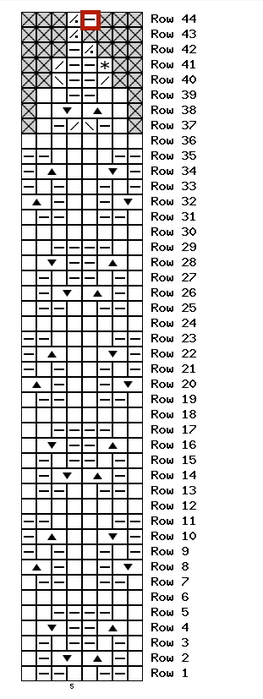
And once that's done, we'll switch to our size 8 needles and our main pattern, which is Wickerwork Pattern from page 146 of Barbara G. Walker's A Second Treasury of Knitting Patterns. For this pattern, we'll need the following notation:
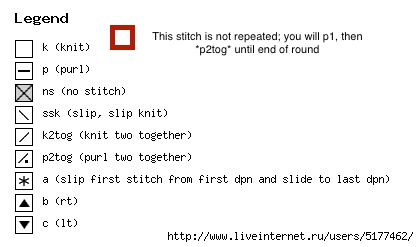
rt (right twist): knit two together, leaving stitches on left-hand needle; next, insert right-hand needle from the front between the two stitches just knitted together, and knit the first stitch again. Finally, slip both stitches from left-hand needle together
lt (left twist): with right-hand needle behind left-hand needle, skip one stitch and knit the second stitch in back loop; then insert right-hand needle into the backs of both stitches and k2tog-b (knit two together through back loops, inserting right needle from the right)
And we'll proceed like so:
Row 1: k1, * p2, k2 *; end p2, k1
Row 2: * k1, p1, rt, lt, p1, k1 *
Row 3: * k1, p1, k1, p2, k1, p1, k1 *
Row 4: * k1, rt, p2, lt, k1 *
Row 5: k2, * p4, k4 *; end p4, k2
Row 6: knit
Row 7: same as row 1
Row 8: * lt, p1, k2, p1, rt *
Row 9: * p1, k1, p1, k2, p1, k1, p1 *
Row 10: * p1, lt, k2, rt, p1 *
Row 11: p2, * k4, p4 *; end k4, p2
Row 12: knit
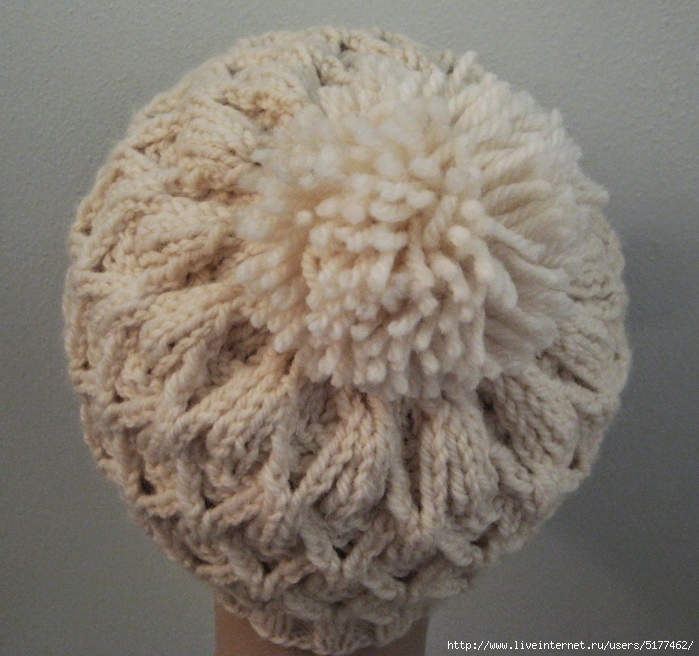
Knit rows 1 - 12 three times, and then it's time to begin our decreases. So let's proceed as follows:
Decrease Row 1: * k1, p1, ssk, k2tog, p1, k1*
Decrease Row 2: * k1, rt, lt, k1 *
Decrease Row 3: * k2, p2, k2 *
You'll want to switch to your dpns now, if you haven't already
Decrease Row 4: * k2tog, p2, ssk *
Decrease Row 5: slip first stitch from first dpn and slide to last dpn; then, * p2, k2tog *
Decrease Row 6: * p2tog, p1 *
Decrease Row 7: purl
Decrease Row 8: * p2tog *
Decrease Row 9: p1, * p2tog *
Clip tail and, using tapestry needle, thread through final 7 stitches. Pull tight, thread to inside of hat, and knot. Tuck in ends. If desired, make pompom and affix to hat. Put on and twirl happily.
| Рубрики: | шапки |
| Комментировать | « Пред. запись — К дневнику — След. запись » | Страницы: [1] [Новые] |


