������� ������������������ ����, ������� �����, ��� ��������, 24 ����. �������� ������ � ����� �����!
 � - �������������� ��� ���������� ���������� � �������� ������������. ����������� ��������� ����������: Internet Explorer 6, Fire Fox 1.5, Opera 9.5, Safari 3.1.1 �� ���������� JavaScript. �������� ��� ����� ����
 ��������������������� ������� �������� �� ��� ������ �����
����� ��������� "Cloth Pin":������� ������� Cloth Pin.
����� 1 - Recycle ice cream sticks - links to picasaweb
����� 2 - Miniature cloth pin chair
����� 3 - ��� ���������
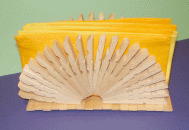
����� 4 - napkin holder
����� 5 - recycled clothpins
����� 6 - clothpin crafts
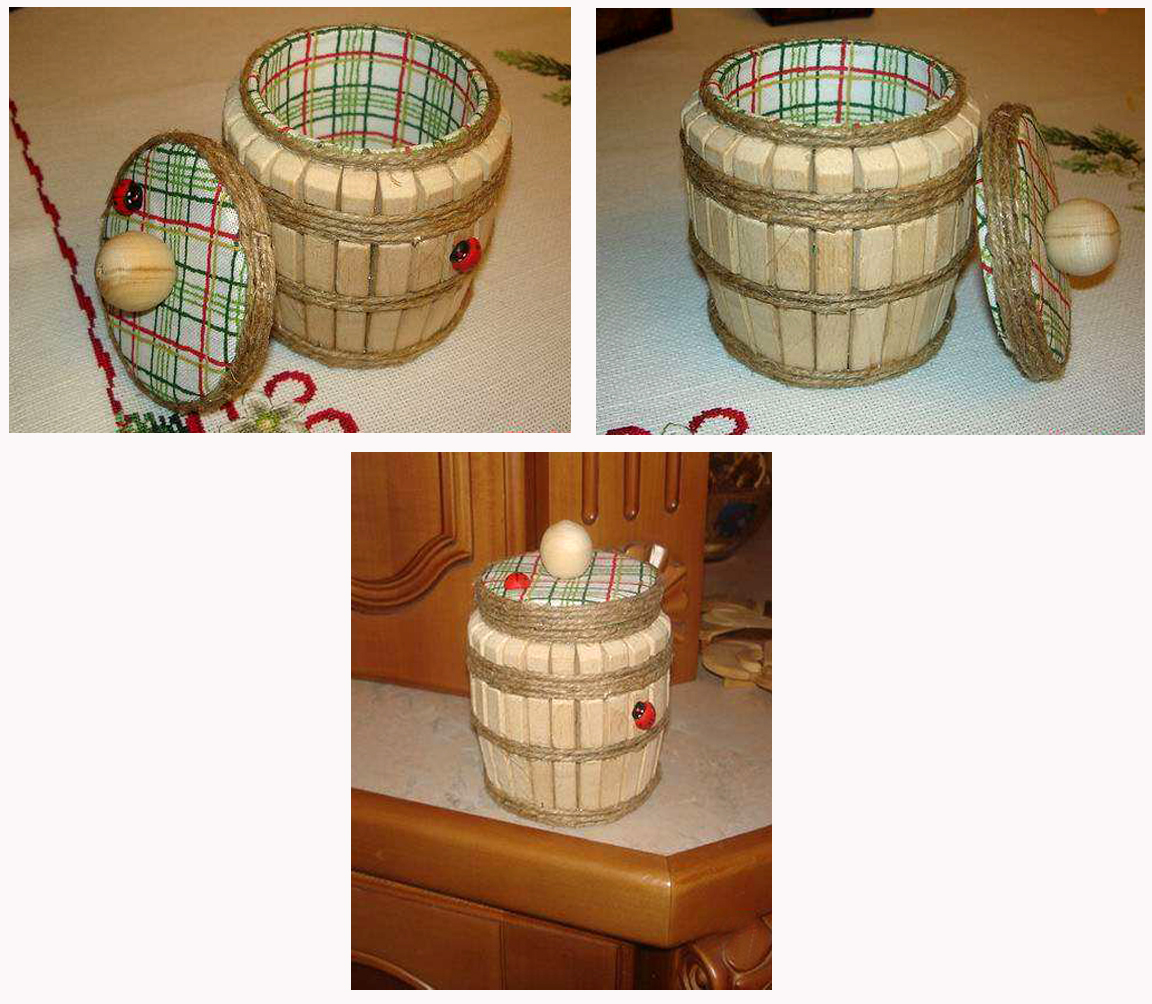
����� 7 - jar covered with cloth pins
����� 8 - miniature furniture
����� 9 - box with cloth pins
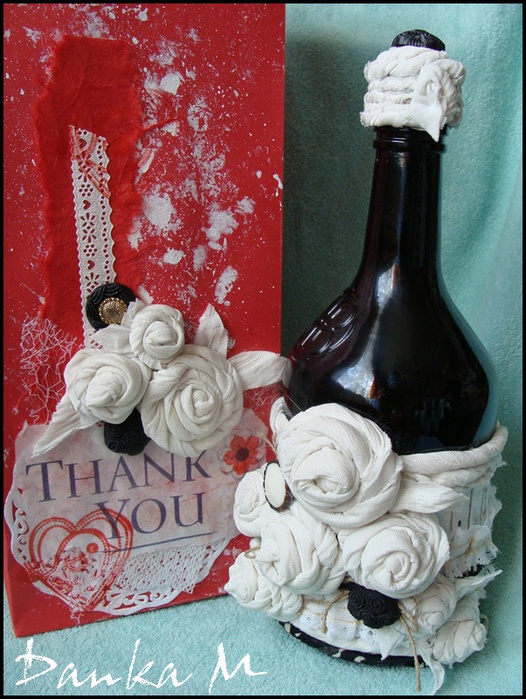
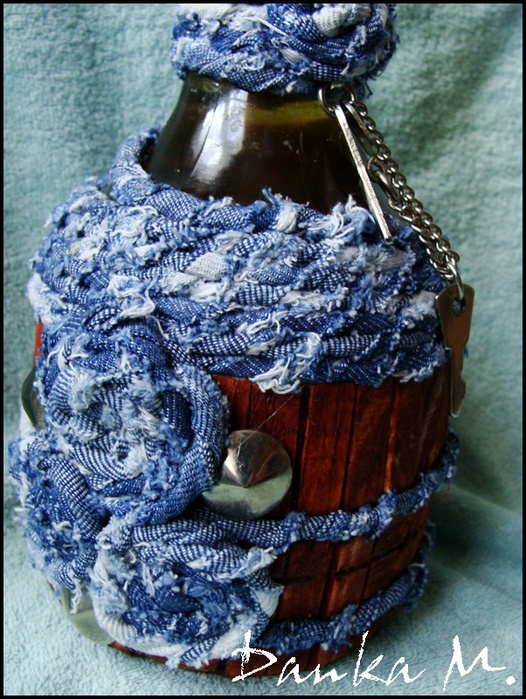
����� 10 - decorative bottles
����� 11 - lamp of cloth pins
����� 12 - frame with cloth pins
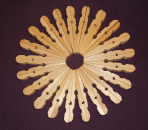
����� 13 - cloth pin decoration
����� 14 - clothpin chair
Recycle ice cream sticks - links to picasaweb |
|
�����: links toys decor recycle ice cream sticks |
Miniature cloth pin chair |
������� |
�����: decor miniature recycle cloth pins rocking chair |
��� ��������� |
|
�����: recycle clothpins |
napkin holder |
|
�����: table setting recycle clothpins |
recycled clothpins |
|
�����: clothpins |
clothpin crafts |
������� |
�����: cloth pins |
jar covered with cloth pins |

����� ��������� "�����":
����� 1 - ��������� ������
����� 2 - ���������� �����. swet1603
����� 3 - ������� ������ ��� ���������+���� ������
����� 4 - ����������� ����
����� 5 - ��������� �����
�����: decorative bottles cloth pin |
miniature furniture |
����� �����, ��� ������ ������ ��� ����� �� �������� - ����� ����� ����
http://www.forum.dollplanet.ru/viewtopic.php?f=4&t=6261


������ ������ ����������:
http://www.santaspostbag.co.uk/peg-art-rockingchair.shtml
http://www.thriftyfun.com/tf711919.tip.html
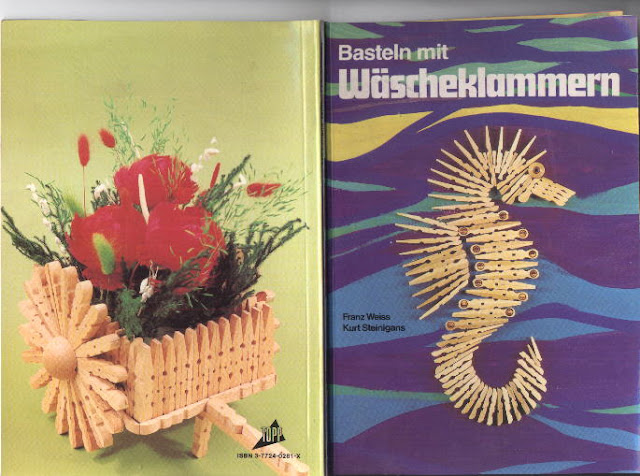
������: http://www.kikisweb.de/crafting/clothespegs/clothespins.htm
�������

����: http://picasaweb.google.com/Kasjo.xxx.Bastelmix/ToppBastelnMitWScheklammern#


�����: miniature |
box with cloth pins |
������� |
�����: box cloth pins |
decorative bottles |
������ ����) ���� ��� ��������, ��� ����� ������������ ��� ������� �������, ��������� �������� � ����� ��� �������. ������ ��������� ���� � ��������� �� ����� - ��� ����������� ������ �����. ����� ���� ���� � ������-������� - Danka M. ������! ������ ������ ���! � ��� ��������� ���� � ��� �� ���� � ������ ���� �� ���� ������- http://www.liveinternet.ru/users/dankam/post237986516/. ������� �����!


�����: decorative bottles clothpins |
lamp of cloth pins |

�����: lamp cloth pins |
frame with cloth pins |
�����: frame cloth pin |
cloth pin decoration |
���-�� ����� ����� ���������� � ���� ����� ��������� ��� �������� ��������. ��� �� ������ �������� ��, ��� �� ��������� �������, �� ��������� ��������� ��������� ����� ������� ������������ ���� ��� ��������� �� ��� ������. ���, � �������, ��������. �� ���������� �� ��� ������ ��� ���������. ��� � ���� �� �����, �������� ��������, �������, � ���������, �� ������ ������� ������-�� ����� ���������)
���� ���������� ����������� �����, ����������� ����� ������ ����������. � ��� ����� �����, ��� �������! ����� ������� � � ����� ����� �� ����������, ��� ��� �� ��������. ���� ��� ����� ������������ ���, ��� ������, ���� �� ��������)


� ��� ������������ ������� �� �������� � ���� - ���������, ������� ����� � ���� ������������ - �_�������


�����: frame wall cloth pin |
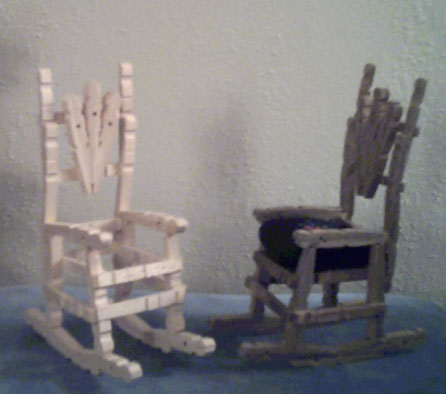
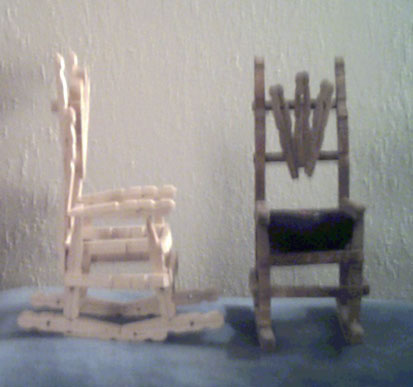
clothpin chair |
������� |
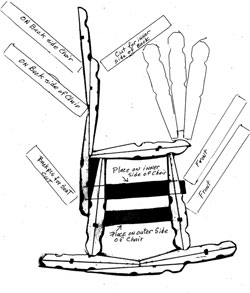
Supplies Needed
17 Spring-Type Clothespins
Tacky Glue
Small Saw (to cut clothespins)
Paint or Varnish (as desired)
Tip: Always allow glue to dry completely. If you attempt to go on to the next step without allowing the glue to dry,
everything will fall apart in your hands and make you say some bad words that young Hittys should not hear.
Remove the wire springs from the 17 clothespins. From now on, each half will be referred to as a 'stick'.
1. Take 12 sticks, and glue them into pairs, as shown, flat side to flat side. Make sure you glue them end-for-end (like a 96).
Make 6 pairs. Set aside to glue.
When the glue has dried, take two of the pairs, and cut off 1" from one end. These will be the 'wings' referred to later.
2. Take 2 of the pairs, and lay them out as shown. Make sure the flat narrow ends face each other at the top. Glue a support stick across the bottom, just at the top of the curve. Make sure you keep these level. Now, glue one on the other side of the support, at exactly the same height.
Make two sets. Allow to dry completely.
3. Set the sides upright, and glue a back and front support stick in place, as shown. I made sure that the 'fat' ends were both on the same side. Let glue dry completely.
4. Take five sticks, and glue in seat. Make sure that the fat ends of the sticks are all on one side. This will be the back of the chair.
Allow glue to dry completely.
6. Now, get the shortened sets from step one.
Glue one stick on the front edge of the back post, flat side in. Glue the shortened set to the back, as shown. Allow to dry completely.
7. Glue two pins across the back, as shown. Allow to dry.
8. Lay the chair on its back and glue in the sticks for the back. Space carefully. The picture shown shows the sticks raised slightly above the side supports. You can also set them in lower, as shown in Chris' pictures at the top of the page.
Add the arms, as shown. There is a line in the side supports that the arm will slide right 'into', and a curve on the bottom of the arm that fits just right on the leg posts. If this is confusing, just hold your stick up to the chair and check it out. It will come clear!
Finish your chair with stain or paint.
http://www.julieoldcrow.com/
�����: miniature |
| ��������: | [1] |