 Дешевые авиабилетыВыгодные цены, удобный поиск, без комиссии, 24 часа. Бронируй сейчас – плати потом!
 Я - фотографПлагин для публикации фотографий в дневнике пользователя. Минимальные системные требования: Internet Explorer 6, Fire Fox 1.5, Opera 9.5, Safari 3.1.1 со включенным JavaScript. Возможно это будет рабо
 ОткрыткиПерерожденный каталог открыток на все случаи жизни
Hanging Placemat Pendant |
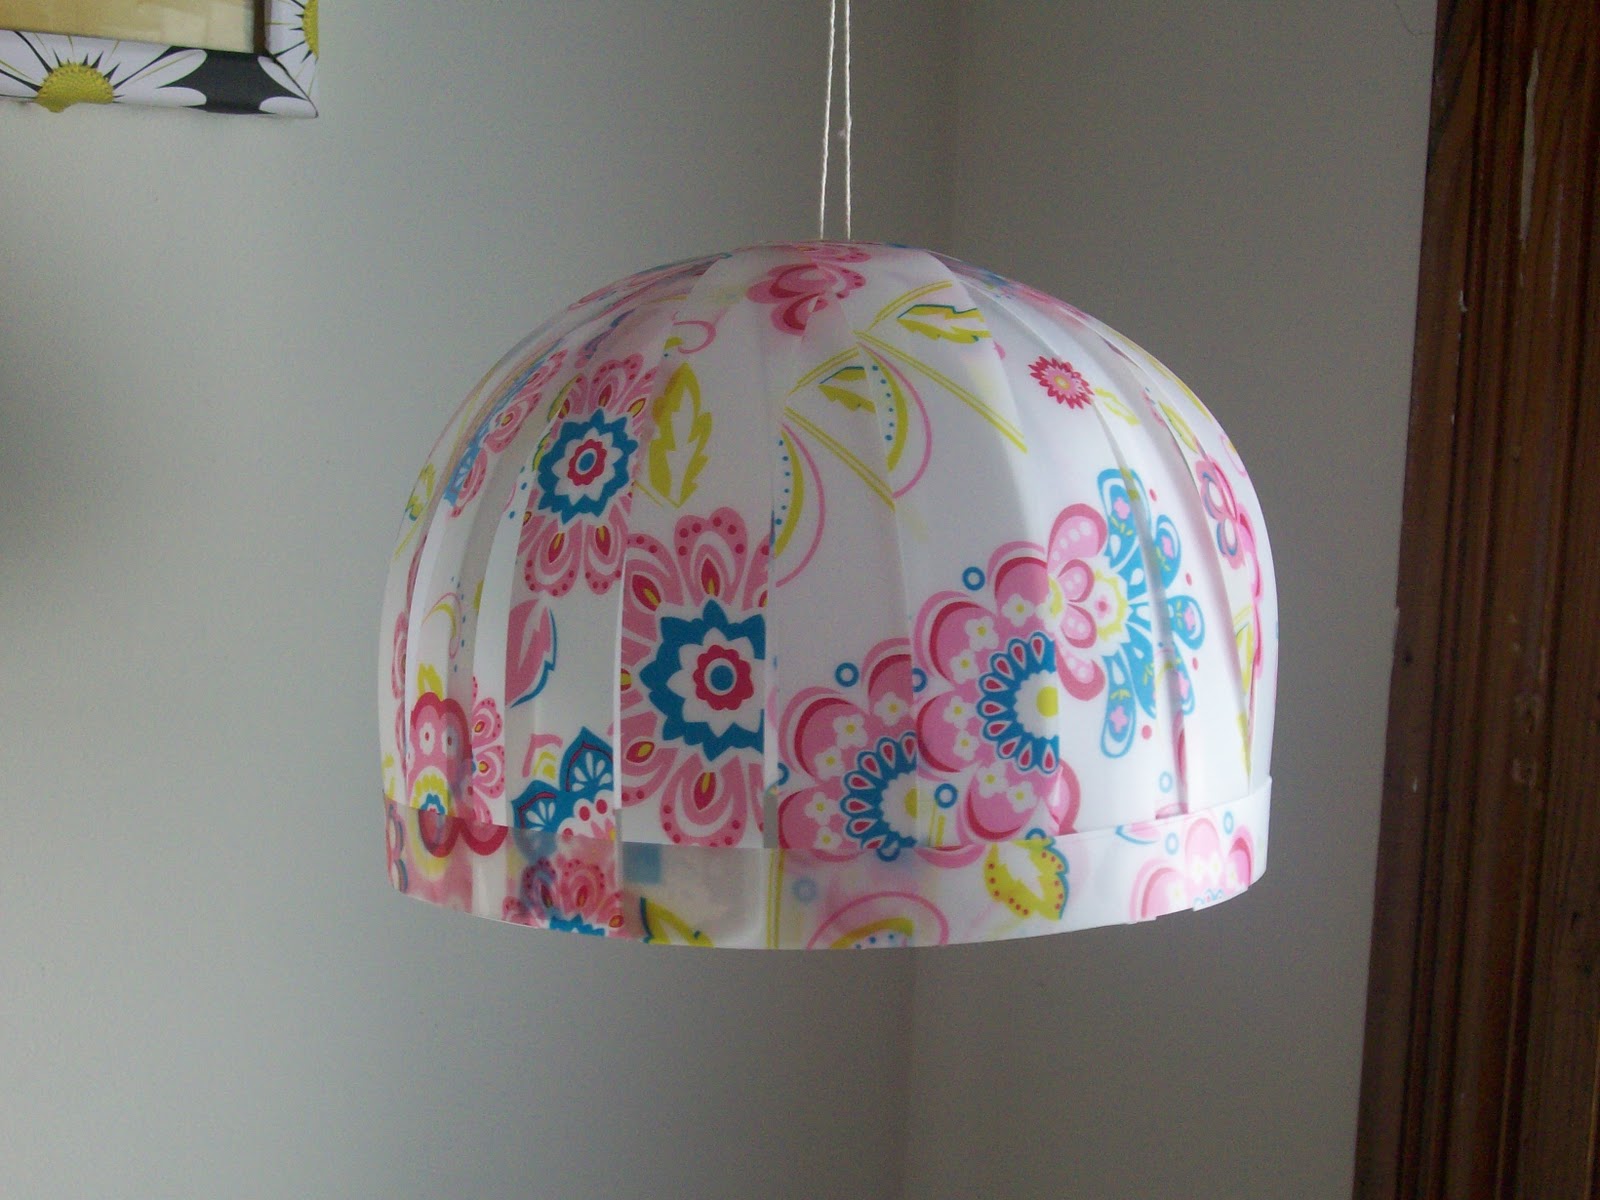
It's made completely from those cheap vinyl placemats from the dollar store, and hot glue. That's it! My tutorial doesn't call for any lighting, but that could definitely be done somehow. I don't live close enough to an Ikea (gasp!) to get one of those super cheap hanging lamp kits, so that's pretty much why I went light-less. No big deal, considering I put this over a little table in my kids' room. They couldn't care less. :)
Enough yapping, lets get down to it!
To make this pendant, you'll need:


Keep adding strips in the same way, always placing a strip halfway between the others, until you've used eight strips:

Now add strips to each side of the strips that are in place, like this:

Once all of your strips are glued on and in place, all that's left to do is drill a couple of holes in the top for the string. Drill a couple of holes through the top (make sure that they are centered, so your pendant won't be crooked),

string your hanging material of choice,

hang and enjoy! I had to hang mine a little higher than I wanted, just out of reach of curious little fingers :)


http://www.steppingthrucrazy.com/
| Рубрики: | RECYCLE/Plastic Bottles LIGHT/Lamps RECYCLE/Paper & newspaper LIGHT/Chandelier DECOR |
| Комментировать | « Пред. запись — К дневнику — След. запись » | Страницы: [1] [Новые] |


