Понедельник, 09 Февраля 2015 г. 04:20
+ в цитатник
Crochet Basic Crown of a Beanie / hat Tutorial
Crochet Basic DC Crown
The basic dc crown can be used for the beginning of many hat designs.
The measurements given are an approximate as many yarns will differ from brand to brand.
I am using an AU 8 ply yarn (US 4 ply) and a 4.00mm hook (US G/6)
The crochet terms I use are US
I will be giving instructions for a small adult and medium to large adult, both reflecting woman's sizes.
Stitches used are:
chain
DC= double crochet
Sl st= slip stitch
Tension: see pictures below for measurements
Notes: the beginning ch 3 is counted as a dc.
To begin: Ch 4 or make a magic ring
Row 1.Work 11 dc into 4th chain from hook, sl st to join in top of ch 3. (12 dc)...(or work ch 3 and 11 dc into the magic ring)
Row 2. Ch 3, work 1 dc in same place as ch 3, work 2 dc in each dc around, sl st to join in top of ch 3 (24 dc)
Row3. Ch 3, work 2 dc in next dc, *work 1 dc in next dc, work 2 dc in next dc,* repeat from *to* to end, sl st to join in top of ch 3 (36 dc)
Row 4. Ch 3, work 1 dc in next dc, work 2 dc in next dc, *work 1 dc in each of next 2 dc, work 2 dc in next dc,* repeat from *to* to end, sl st to join in top of ch 3 (48 dc)
Row 5. Ch 3, work 1 dc in each of next 2 dc, work 2 dc in next dc, *work 1 dc in each of next 3 dc, work 2 dc in next dc,* repeat from *to* to end, sl st to join in top of ch 3 (60 dc)
Stop increasing here for a small adult hat.
Row 6. Ch 3, work 1 dc in next 3 dc, work 2 dc in next dc, *work 1 dc in each of next 4 dc, work 2 dc in next dc,* repeat from *to* to end, sl st to join in top of ch 3 (72 dc)
Stop increasing here for a medium to large adult hat
You are now ready to work with out increasing.
Work 1 dc in each st around, sl st to join in top of ch3.
Repeat above round with out increasing for hat height desired.
You also have the option to use a stitch pattern in the hat, once the crown has been established.
If you choose to do this you will need a stitch pattern that is dividable by the amount of st's you already have.
Keeping in mind that you will be joining the pattern round.
It will not matter too much if you need to increase/decrease a stitch or 2 for this to happen.
The average hat height is about 9 inches or 11 inches with a folded brim.
1.
2.
We can also work the crown rounds in multiples of 10 dc's, this is particularly useful for the in between sizes and varied tensions.
Using the instructions above begin with 10 dc, increasing in rows to 20, 30, 40, 50, 60, 70.
Понедельник, 09 Февраля 2015 г. 04:12
+ в цитатник
Crochet With Love Hat Tutorial - Baby to Adult
http://www.myhobbyiscrochet.com/2014/12/a-hat-with-love-free-crochet-pattern.html
Materials used:
- Caron Simply Soft yarn in 2 colors (approx. 100 g )
- 5 mm crochet hook
- tapestry needle to weave in the ends.
Gauge: 15 fpdc x 12 rounds = 10cm X 10 cm Size: Hat circumference: 47 cm
Hat length: 17.5 cm
The hat will fit children age 3-5 years.
For smaller/ bigger sizes work less/more rounds with increases for the crown of the hat and adjust the length.
Another way to change the size is to use a different yarn weight and hook size.
If you will make larger sizes, you might like to place the hearts a few rounds below, by working a few more rounds in main color before starting with the hearts.
Stitches, terms (US) and abbreviations used:
ch: chain
st: stitch
dc: double crochet
fpdc: front post double crochet
fphdc: front post half double crochet
sl st: slip stitch
MC: main color
CC: contrasting color
Special stitch: standing double crochet: see this tutorial by Moogly.
Notes:
The hat is worked in rounds top down.
Each round begins with ch2, that will not be counted as a stitch.
Work the LAST fpdc of each round around BOTH the beginning ch2 and the first fpdc of the previous round! This will make the seam less visible.
Each round ends with a sl st into the top of the first stitch of the round, not into the top of the ch2.
UPDATE February 2015:
I have exciting news for you! Now you can watch the Video Tutorial by Clare of Bobwilson123 to learn how to make this hat! Even if you haven't worked with graph patterns before, you will learn now! There are so many great tips and tricks in this awesome video! Don't miss it! Watch it below! Thank you Clare! :)
- See more at: http://www.myhobbyiscrochet.com/2014/12/a-hat-with-love-free-crochet-pattern.html#sthash.yz6wiuvr.dpuf
Hat Pattern:
1) The crown of the hat:
Begin with a magic ring.
Round 1: work a standing dc and 9 dc into ring, join with sl st to top of standing dc. (10 sts)
(Alternative: ch2, work 10 dc into ring, sl st to top of first dc.)
Round 2: ch2, 2fpdc around each st around, sl st to top of first dc. (20 sts)
Round 3: ch2, *2fpdc around next st, 1fpdc around next st*, repeat around from * to*, sl st to top of first fpdc. (30 sts)
(Remember to work the last fpdc around both ch2 and first fpdc of previous round, here and throughout the pattern.)
Round 4: ch2, * 2fpdc around next st, 1fpdc around each of next 2sts*, repeat around from * to*, sl st to top of first fpdc. (40 sts)
Round 5: ch2, * 2fpdc around next st, 1fpdc around each of next 3sts*, repeat around from * to*, sl st to top of first fpdc. (50 sts)
Round 6: ch2, * 2fpdc around next st, 1fpdc around each of next 4sts*, repeat around from * to*, sl st to top of first fpdc. (60 sts)
Round 7: ch2, * 2fpdc around next st, 1fpdc around each of next 5sts*, repeat around from * to*, sl st to top of first fpdc. (70 sts)
2) The sides:
Round 8: ch2, 1fpdc around each st, sl st to top of first fpdc. (70 sts)
Rounds 9 – 16, will be worked the same as round 8, but with color changes to form the hearts. (70 sts)
Use the heart chart below. Each little square represents 1 stitch!
Start reading the chart from top to bottom, right to left.
Note: the top row in the chart stands for round 8 (the round before starting the hearts) and the bottom row in the chart stands for the round 17 (first round after finishing the hearts).
Please read the tips below before starting!
The heart pattern is a multiple of 10. This hat has 7 hearts around. If you will make the crown smaller/bigger, you will have less/more hearts in the round!
Important Tips:
1) How to change colors:
Work the last st before changing colors till half; having 2 loops on hook, pick the new color yarn and end the stitch, pulling the new color yarn through the 2 loops on hook.
You can watch this Video Tutorial by Happy Berry Crochet, for an example how to change colors when working dc stitches. For front post stitches, you'll change colors in the same manner, only doing fpdc stitches instead of dc sts.
2) Stranding the yarn on the wrong side of the hat:
You will not cut the yarns when changing colors, you will not work over the yarn not in use, you will carry the unworked yarns across the back.
Watch this Video Tutorial by Stacy from Fresh Stitches to learn what stranding is.
Very important! Keep the tension of the strand not in use a little loose, so that the hat keeps the elasticity!!
!!! To avoid long floats of yarn, when you are going to have to carry the yarn more than 5 sts at the back of the work, you need to catch the yarn not in use!
For example, when you have to change colors after 7 sts made with CC, pick the MC yarn (the yarn not in use) in the middle of those 7 stitches this way: work 3sts in CC, while you're working the 4th st, pick the MC yarn, then work the next 3 sts in CC.
How to pick the unworked yarn was the most challenging part, because for the fpdc, we are working inserting the hook around the posts of stitches!
This is my way:
Wrap yarn (here CC) around hook, while with the left hand hold both strands of yarn (MC and CC) as in picture 1 from photo collage below. Insert your hook from front to back between the posts of the first and second double crochet of the row below, picking the unworked yarn under the hook and then insert the hook from back to front again between the posts of the second and third stitches.
- See more at: http://www.myhobbyiscrochet.com/2014/12/a-hat-with-love-free-crochet-pattern.html#sthash.yz6wiuvr.dpuf
3) How to prevent yarn strands from tangling: always place MC strand to your right and CC strand to your left.
For more great tips regarding Fair Isle Crochet, check out these great crochet classes on Craftsy:
•Fair Isle Crochet: Demystifying Colorwork, with Karen Whooley
•Crocheting in the Round: Mix & Match Hats (w/ Stacey Trock)
Round 17- 18: same as round 8 using MC. (70 sts)
Dots Pattern (round 19- 22): made using a variation of the stitch pattern used in my Gumdrops Earflap Hat. Check out my Step by Step Picture Tutorial. Note that for the Gumdrops Hat are used front post triple crochet stitches and in this pattern front post double crochet).
Round 19: continue with MC, ch3 (will not count as a st here and in the next rounds), skip next st, *1fpdc around next st, ch1, skip next st *, repeat around from * to*, sl st with CC to top of first fpdc. (70 sts)
Round 20: With CC, ch3, sk next fpdc of previous round, *work 1fpdc around next unworked fpdc 2 rounds below, ch1, sk next fpdc*, repeat around from * to*, sl st with MC to top of first fpdc. (70 sts)
Round 21- 22: With MC, work as round 20, sl st to top of first fpdc. (70 sts)
Round 23: With MC, ch2, sk next fpdc of previous round, *work 1fphdc around unworked fpdc 2 rounds below, ch1, sk next fpdc*, repeat around from * to*, sl st to top of first fphdc.
Cut yarn. Fasten off. Weave in the ends.
I hope you have enjoyed this pattern and had fun working the Hat with Love!
- See more at: http://www.myhobbyiscrochet.com/2014/12/a-hat-with-love-free-crochet-pattern.html#sthash.yz6wiuvr.dpuf
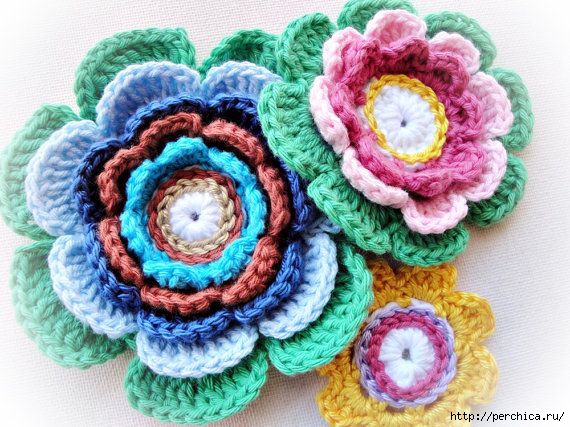
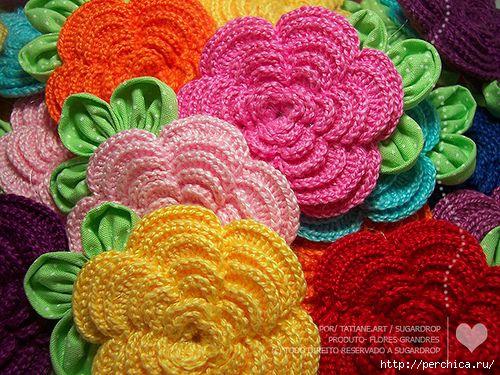
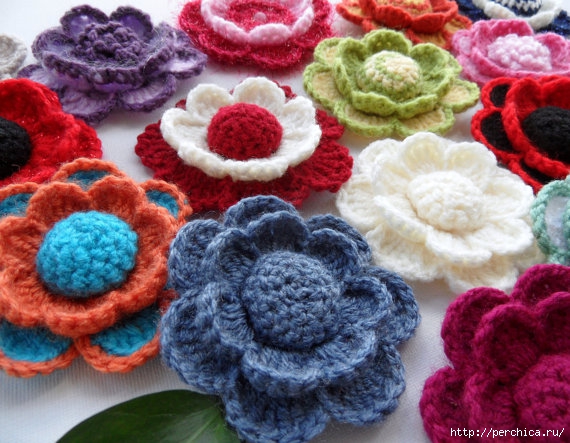
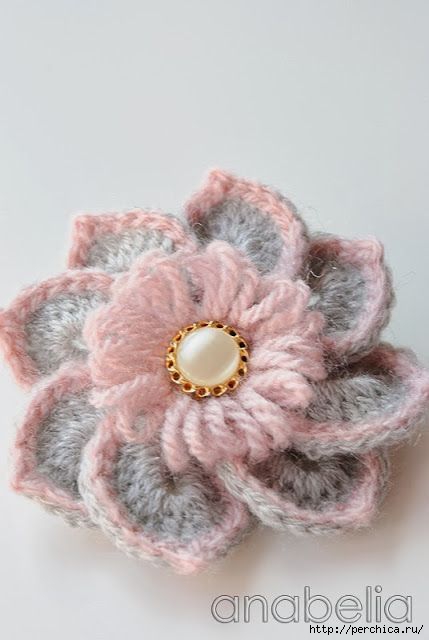
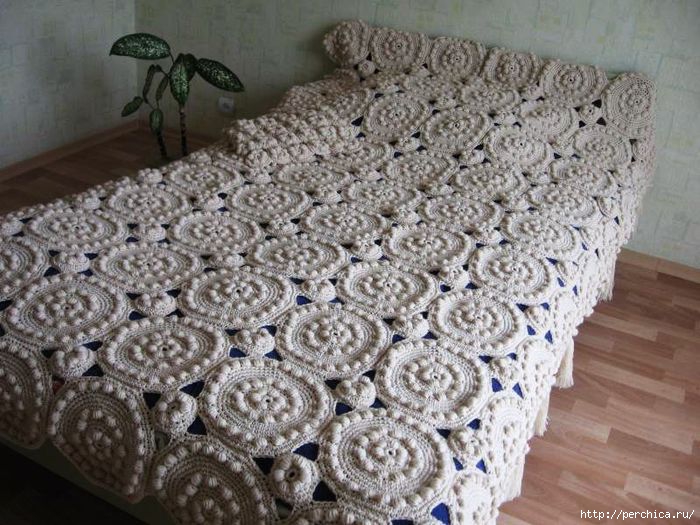
Разные варинаты многослойного цветка связанного крючком - идеи и мастер-классы
Вязаных крючком цветочков не счесть и всех разновидностей не описать, но есть одна схема, что является основой, для вариаций над над весьма распространенными многоярусными цветками.
Вот именно такие цветы встречаются бесчисленное количество раз. А ведь не так уж они и приелись, как может надоесть то, что не использовалось в полном объеме. Такой вязаный цветочек полезен как часть полнометражного букета, необязательно вязаного или как центр одной, но очень разнокалиберной в сборке салфетки. В целом, он не эффектен сам по себе, не уникален и не привлекателен в одиночку.
С ним должен быть какое либо окружение, следовательно, при вязании стоит учитывать все компоненты состава природного цветка. Подобный цветочек вяжущийся на стебле может содержать равноудаленные листья, а перед основной частью вмещать около цветник, это подчеркнет объемность изделия и придаст вид естественности. В случае, если цветочек без стебля, в его основе должны располагаться внушительного размера листики, возможно с затейным орнаментом.
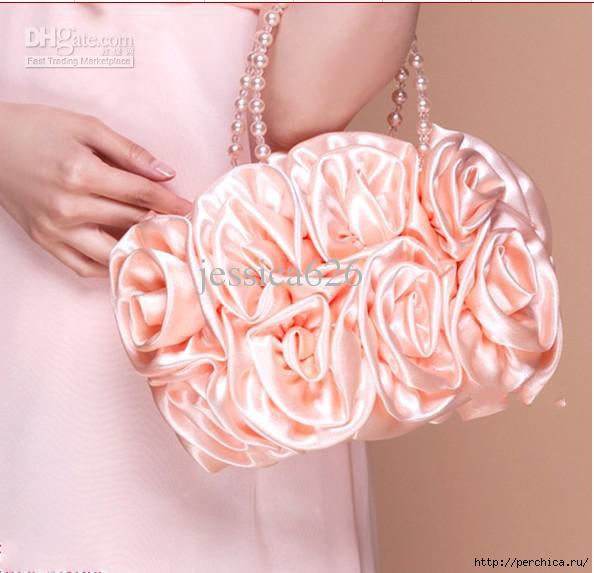
Люблю такие сумочки,недорогие,женственные,но жаль цвета не всегда можно подобрать к своему наряду.И вот я задумалась,а почему бы не пошить самому такую сумочку.С легкостью подбираем цвет ткани одного или несколько оттенков .Покупаем фурнитуру ,материал на ручки ,это могут быть и бусинки ,и цепи .Тут уж как вам больше захочется. Так что желающих присоединиться- милости прошу.Нашла все что смогла и даже больше.
Сколько много мы делаем ошибок в обустройстве дачи,о которых потом жалеем.Вспомним, как начинается обустройство садовых участков. Пилят оставшиеся деревья, корчуют пни, вырубают кустарник... Все вывозят за территорию и сжигают.
А разумно ли? Ведь остатки пусть даже неказистых стволов, крупные сучья, корневища, пни - все это добротный материал в глазах настоящего хозяина. Немного фантазии, терпения, и вот уже ваш сад обрел уют и удобства - появились лавочки, столы, скамейки, можно соорудить даже беседку,а интересные и веселые поделки сразу делают вашу усадьбу неповторимой.
Одни домики для еи чего стоят.Сказочно и уютно становится на таком участке.И вдвойне приятней,потому что все сделано своими руками.Предлагаю вам несколько идеи ,которые вы с легкостью можете воплотить в жизнь.И помните- старые пни не вырубаем.а бережем,чтоб не пришлось их тащить с чужого участка или леса.
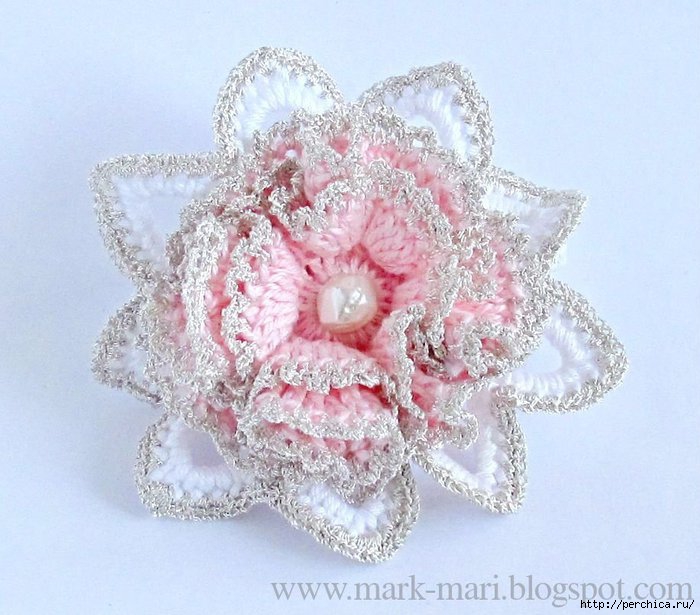
Сегодня покажу вам вот такой вот цветочек с бусинами и лентами.Из него можно сделать заколку,брошь или как украшение к шляпке.Для вязания приготовьте толстый белый хлопок, розовую и серебристую пряжу, крючки (толстый и тонкий для серебристого "Ириса").