-Ссылки
-Метки
wedding Браслет анкарс бабочка бисер бисероплетение браслеты брошь брошь букет брошь-букеты букет букет из брошей букет из конфет букет невесты бутоньерка буфы валяние венок винтаж выкройка выкройки вышивка вышивка бисером вышивка камнями вышивка лентами вязание вязание крючком декор декорирование декупаж десерт жгут жеода жеода симбирцита зайка игрушка игрушки интересное канзаши картинки квиллинг клатч колье кольцо корзинка коробка коробочка кошелёк кружево кукла кулинария кулон лепка мастер-класс мишка мишка тедди мишки тедди новый год обложка ободок обувь для игрушек одежда для игрушек одежда для кукол органайзер открытка открытки пасха плетение плетение из газет подушка пэчворк рукоделие свадебная флористика свадебные аксессуары свадебный декор свадьба сердце серьги симбирцитовая жеода скрапбукинг сумка сутаж схемы текстильная кукла тильда украшение украшение для волос украшения украшения для волос упаковка подарка фриволите цветы цветы из бисера цветы из бумаги цветы из лент цветы из ткани шаблон шаблоны шитьё шкатулка
-Рубрики
- Рукоделие (3335)
- Украшения (596)
- Свадьба (499)
- Бисероплетение (492)
- Игрушки (431)
- Вышивка (399)
- Цветы из ткани (389)
- Всё для дома/сада (369)
- Личное (229)
- Мои работы (217)
- Скрапбукинг (156)
- Декупаж (141)
- Интересное (132)
- Кулинария (122)
- Букет из конфет (120)
- Новый год (109)
- Цветы из бумаги (80)
- Канзаши (76)
- Плетение из газет (75)
- Пасха (67)
- Лепка (64)
- Квиллинг (64)
- Одежда (61)
- Мода и стиль (48)
- Красота/здоровье (29)
- Анкарс, фриволите (27)
- Пергамано (23)
- Сутаж (21)
- Твистинг (18)
- Торт из подгузников (18)
- Цветы из кожи (17)
- Видео (15)
- Ганутель (15)
- Мои натуральные и драгоценные камни (13)
- Самые интересные места на планете (11)
- Отдых и туризм (8)
- Животные (3)
- Мыловарение (2)
- Пресса/публикации (1)
- Юридическая помощь (1)
-Я - фотограф
Пряжка. Вышивка бисером
-Поиск по дневнику
-Подписка по e-mail
-Статистика
Создан: 22.01.2012
Записей: 3635
Комментариев: 1350
Написано: 5051
Записей: 3635
Комментариев: 1350
Написано: 5051
МК мужской рубахи для куклы |
МК мужской рубахи для куклы
Shirt for Iplehouse EID Guys
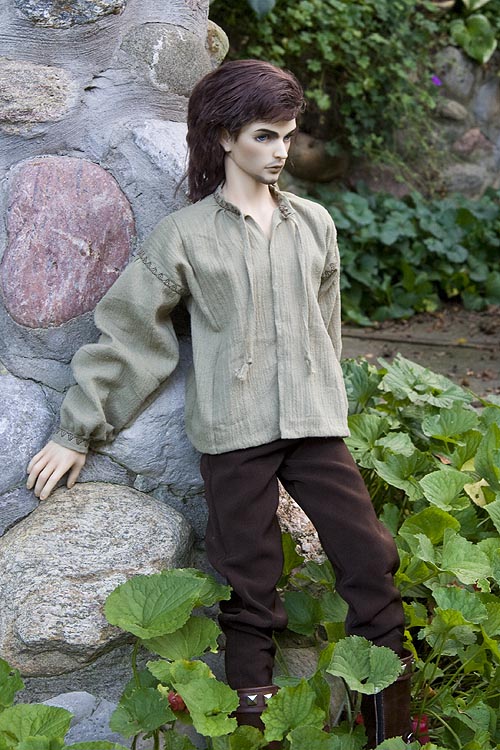
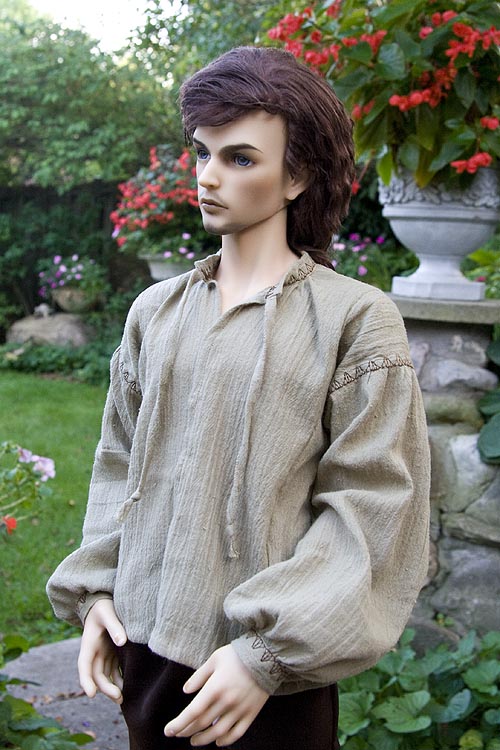
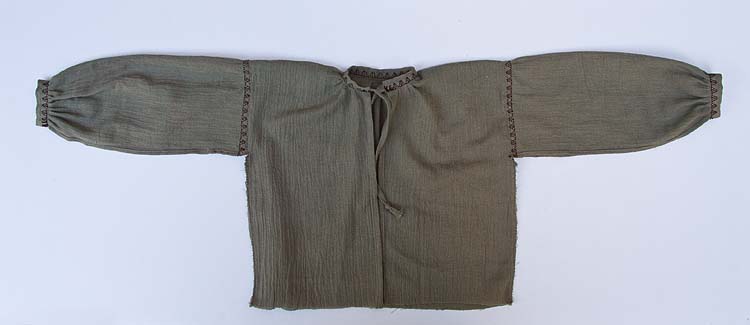
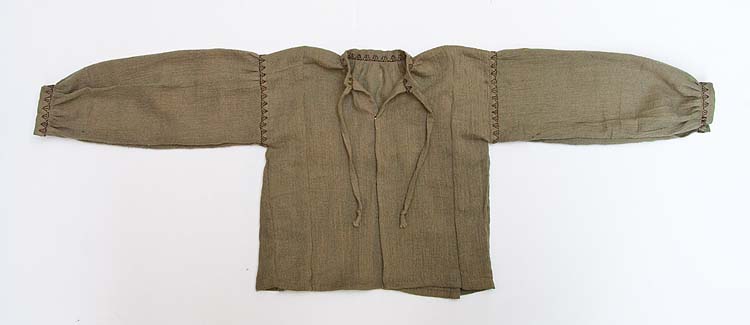
This pattern is for a simple, traditional, one-size-fits-all "pirate-style" shirt, made of basic rectangles with off-the shoulder, gathered sleeves and a gathered neckline. It would traditionally have not been open all the way down the front, but I made it that way to make it easier to put on and take off.
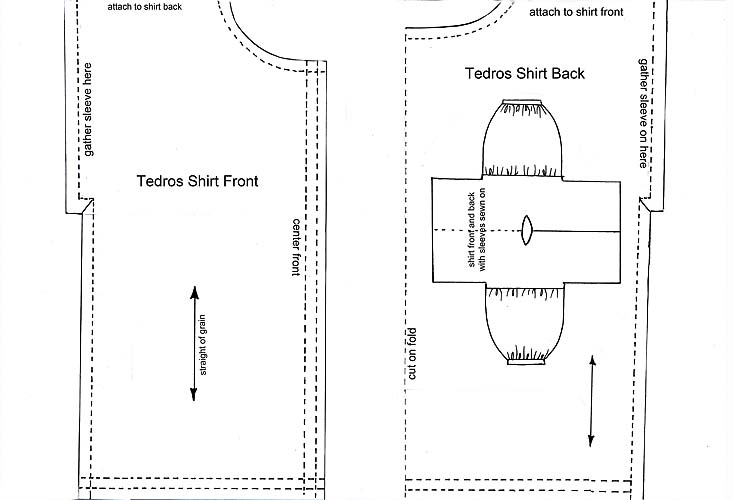
Shirt Patterns
Click on pattern image below to download pdf with full-size patterns
Materials
- 2/3 yard cotton crinkle gauze or other soft woven fabric
- matching coloured thread for sewing, and contrasting thread for embroidery
- scissors, pins, needles
- snap fasteners
- matching coloured thread for sewing, and contrasting thread for embroidery
- scissors, pins, needles
- snap fasteners
Instructions
1. Download pdf and print out patterns. The patterns are too big for a single sheet of paper, so they've been drawn in parts and need to be re-attached. Cut out the patterns, then using strips of scrap paper glue shirt front and back pieces together at shoulder. Also glue two parts of sleeve pattern together butting paper edges (do not overlap)
2. Pin patterns onto fabric paying attention to straight of grain and folds. Cut out.
3. Sew a rolled hem along both side edges of sleeves. *to make a rolled hem fold the raw edge in 1/4", then fold that over again so raw edge is folded inside. Then stitch.
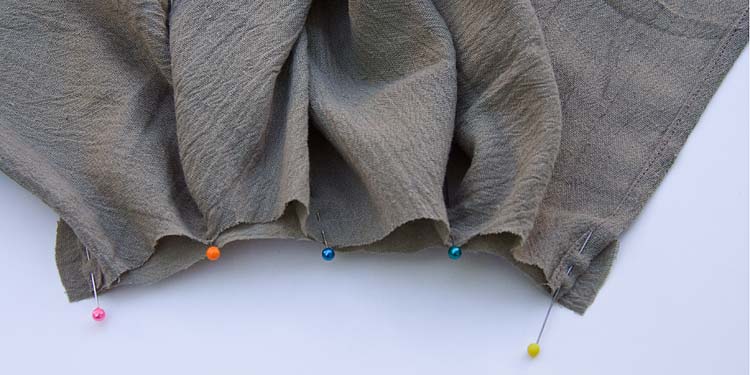
4. Gather sleeves onto cuffs. *tip for more even gathering - divide width of sleeve end and cuff fabric into quarters, marking with pins, then match up the pins.
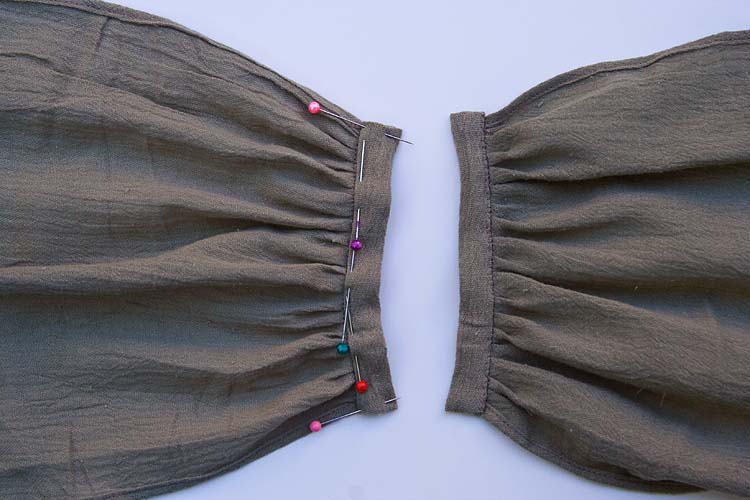
5. Finish sleeve cuffs, by folding seam allowances in, folding cuff fabric back, and pinning in place as shown. Hand-stitch neatly with small stitches.
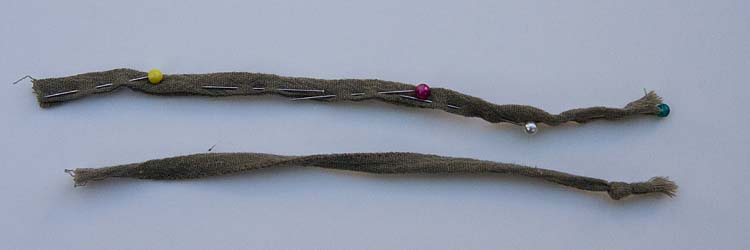
6. Make shirt ties. You can either fold the ties right-sides together, sew along the edge by machine and turn it right-side-out, or, if like me you find it too difficult to turn something so narrow, fold the seam edges in, then fold the ties lengthwise in half and hand-sew. Tie knot in tie at one end.
7. Sew rolled seams along center front edges of shirt.
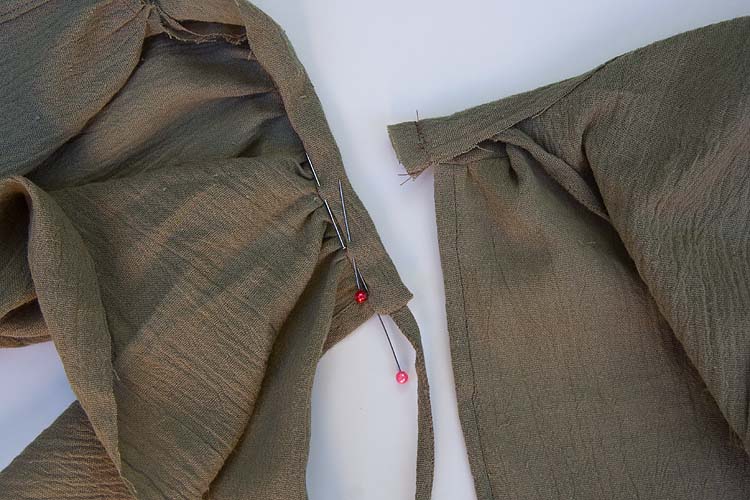
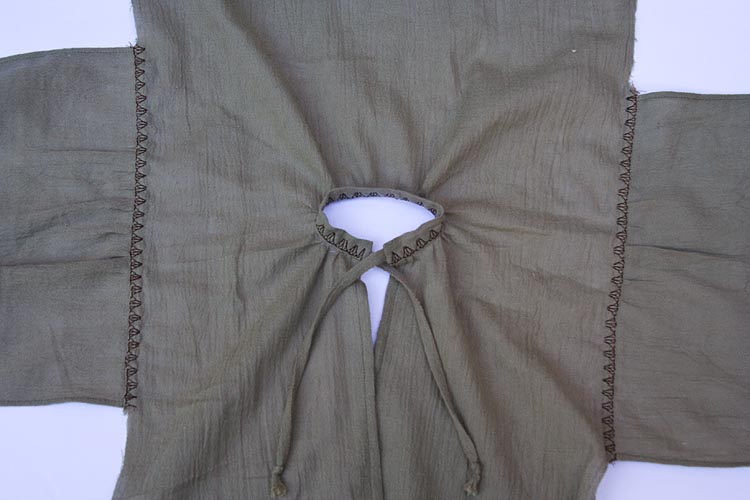
Gather shirt neckline onto collar using same technique as gathering sleeves in step 4. Fold collar in half lengthwise, right sides together, and insert non-knotted end of tie, then sew end of collar.
Turn right side out, fold inside collar edge under and pin into place. Hand-sew with tiny stitches.
Gather shirt neckline onto collar using same technique as gathering sleeves in step 4. Fold collar in half lengthwise, right sides together, and insert non-knotted end of tie, then sew end of collar.
Turn right side out, fold inside collar edge under and pin into place. Hand-sew with tiny stitches.
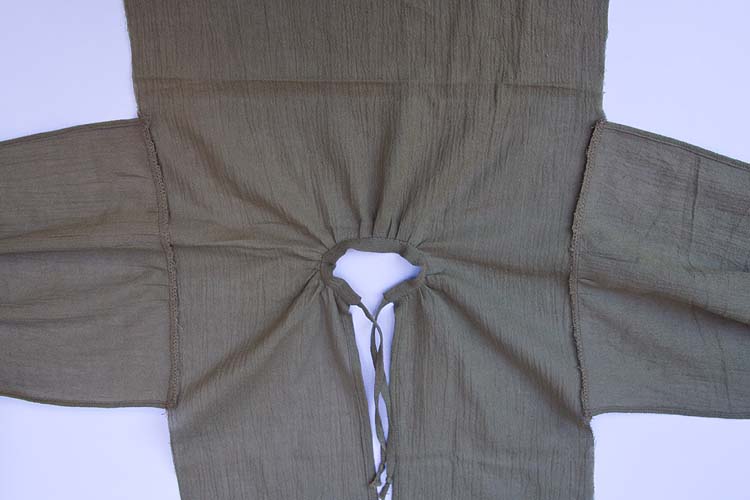
8. Sew sleeves onto shirt easing to fit ( just a few small gathers needed) Zig-zag raw edges.
9. Optional embroidered edges. If your sewing machine has fancy stitches, top-stitch sleeve seams on right side, collar and cuffs with a contrasting coloured thread.
10. Fold shirt at shoulders with right side inside, and sew side and underarm seams, leaving 2" at sleeve end open. Clip armpit, and zig-zag raw edges along side.
11. Make rolled hem at bottom of shirt - sew by hand. Sew snap fasteners on cuffs and along front. You can also add buttons, but I chose not to.
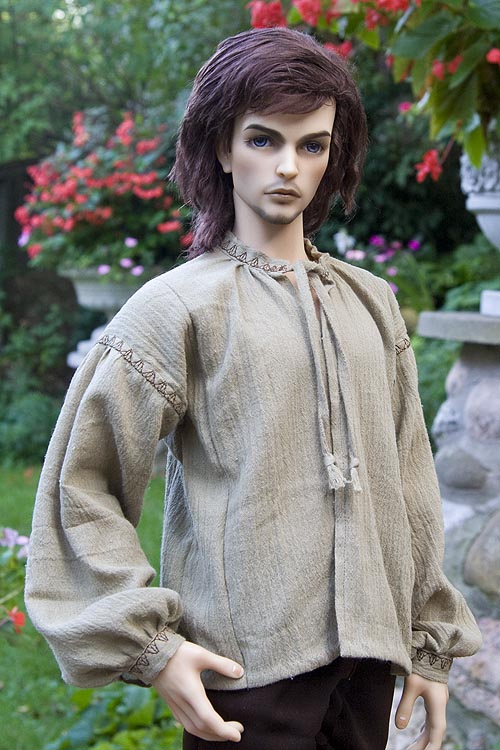
Finished Shirt
*Note - when the sample shirt was finished it was way too wide, and I discovered I'd accidentally made the pattern too wide at the shoulder. So, instead of starting over from scratch, I just sewed a tuck on both sides to make the shirt the right width. You won't need to do this, as I have reworked the patterns so they are the correct width. Your shirt will look like this, but without the two tucks sewn up the main shirt body.
| Рубрики: | Рукоделие Игрушки |
Процитировано 107 раз
Понравилось: 11 пользователям
| Комментировать | « Пред. запись — К дневнику — След. запись » | Страницы: [1] [Новые] |
Пожалуйста)


