how to make pinwheels without a special tool
|
|
Среда, 19 Сентября 2012 г. 09:06
+ в цитатник
http://www.conniekresin.com/2012/03/river-whirl-tutorial.html
Would you like to make a quilt like this? It is so simple.
You will need:
15 pairs of 5 inch blocks (total of 30 blocks)
30 - 5 inch blocks of muslin
1 yard of muslin for borders
1/2 yd of stripe for binding
1.

Grab a charm pack or cut up some of your stash into 5 inch squares. I used 2 charm packs of Spirograph by Benartex which only had 22 blocks - one of each print. I needed 2 blocks of each print.
Cut your blocks at the angle shown above. Take your ruler and measure over 2 inches on the bottom and 3 inches on the top, then cut all of your blocks. (in the photo above I removed the muslin off the left side so you could see the cutting line better.
1.

2.
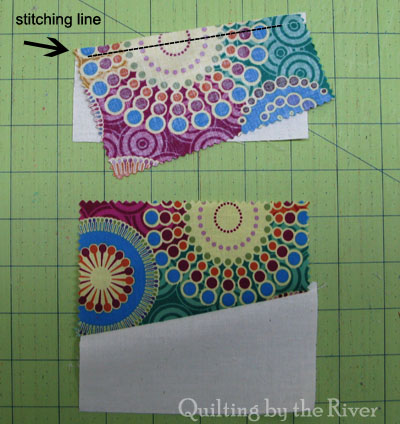
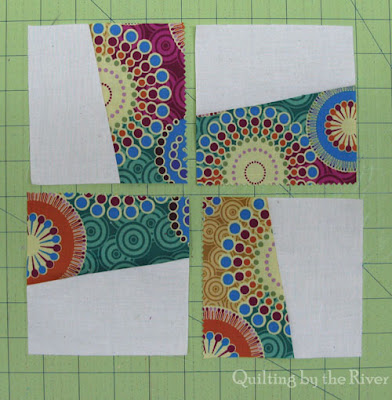
Sew your pieces together as shown using a 1/4 inch seam allowance.
3.

Press your block and then trim it to a 4.5 inch square.
4.
5.

6.

I made 4 rows of 3 blocks then added a 2.5 inch strip and then the last row.
Then I added 4 inch borders doing the long sides first.
The quilt finished at 30 x 46.
7.

Метки:
блок
техники
мк
вертушка
Процитировано 2 раз
Понравилось: 2 пользователям
-
2
Запись понравилась
-
2
Процитировали
-
0
Сохранили
-


