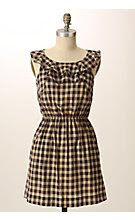
This is what I found at the thrift store for $2. Don’t worry if it has pockets. Just remove it with a seam ripper.

The first thing you need to do is to create the pattern for your shirt. The way I do it is to measure my shoulder width, under arm width, chest width then how long I want it. From there I can figure out how I want my neckline. You can make it as low or as high as you want. (Disappearing ink is my best friend) Another way to do it is to trace another shirt you have, or use a shirt pattern you have laying around. Once you do your first one, then the patterns from the on get easy.

Next, cut out your pattern. Keep the sleeves!! Then turn it inside out.

We’re going to do a belt on this shirt so mark where you want your belt loops to go.

Now, cut two belt loops, 4inches by 1 inch. Fold them in half and stitch along the seam to close. They will look like this: Fold your belt loops in half and place them in the shirt where you want them. You will see the ends sticking out of the shirt. Pin the shirt together because next is sewing it.
 Sew the shirt together at the shoulders and the sides. After you sew it- CHECK YOUR FIT! Does it need to be smaller in any area? Do the armholes need to be bigger? Do you like the placement of the neckline? Check it ALL here!

Sew down the front seam to keep the shirt together, which makes it unable to button. It will keep it in place while you’re sewing it, too.

Get your sleeves and cut them open at the seam, then iron them flat to get out the creases.

Now we are going to use the sleeves to cut out the ruffle strips that we will be using along the neckline, and the belt. I used my rotary cutter to help me cut straight strips, but feel free to use scissors! Cut the strips 3 inches wide and cut as many as you can.
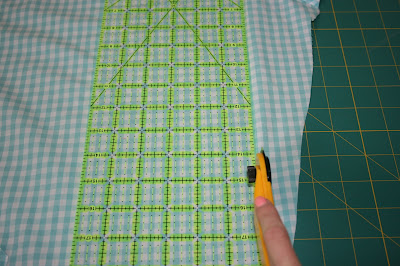
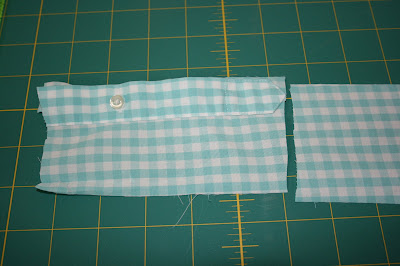
Here’s, roughly, what you should have.

Cut off the button pieces because they won’t look so great amidst all our ruffles.
Serge or sew all your strips together to get one, long piece.
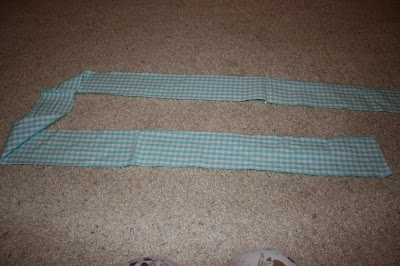
Measure out about double the length of the how long you want your ruffle. My ruffle ended past my shoulders, but you may want to go all the way around. We will also be doing a second layer of ruffles under the collar ruffle so measure for all that, too. (For example, your neckline is 15 inches, the underneath where you want your second ruffle is 11 inches. Cut 52 inches of strips to ruffle) Leave the remainder for the belt.
At this point we want to edgestitch along the bottom of our long ruffle. Serge or sew along the bottom of the long strip to create a hem. Then it’s time to ruffle. I love ruffling! It’s like watching magic

If you don’t know how to ruffle, refer to my other tutorial for instructions
here. This is what it should look like after.

It’s time to pin the ruffle to the collar.First off, decide if you want the ruffle to go all the way around or just around the shoulders, like I did.
There are 2 ways you can do this. The first is pin the ruffle directly on top of the shirt and stitch away. You can leave it like that or add hem tape. I wanted to try a different way so here is how I did it with this shirt. I pinned the ruffle
inside out to the
inside of the collar. So that way after it is stitched, you flip it over to the right side and it is perfect. Here’s what it looks like before it’s sewn.(remember to pin it where you want it then cut off the extra for the second ruffle layer)
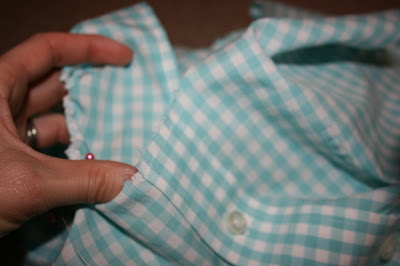
And here is the outside of the shirt. You can see it is inside the collar.

Another shot of that. Now sew or serge your ruffle to the shirt.

Once you turn it right side out, here’s what it looks like.

And the back…

Sew the end of the back ruffles down.

Now take your leftover ruffle and pin it underneath your top ruffle on the front. You can make it as wide as you want. After pinning it, sew it in place.

Since I didn’t sew the ruffles all the way around, I now need to hem the middle of the back and also my arm holes. At this point I also do my bottom hem. So I use my serger and serge the seams then fold it under, then stitch it. If you don’t have a serger you can just stitch it over or use hem tape. First pin it down…

…then stitch it. Do the same for the arm holes and the bottom hem of the top.

We’re almost there!! Time to make the belt! You can use the same fabric ,as I did, or use a contrasting fabric. I used the remainder of the fabric that I had from my sleeves. Get the strips and fold them in half, sewing them inside out.

After sewing, turn the belt rightside out. (Does ANYONE have a special trick for this? A tool? It took me FOREVER to do it!!) Then sew the end of the belt seam shut and iron.
Here’s what it looks like!
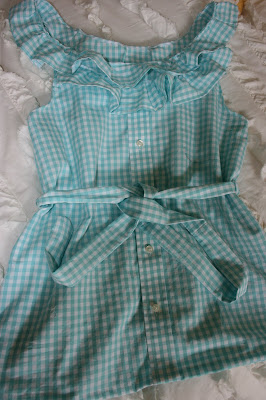
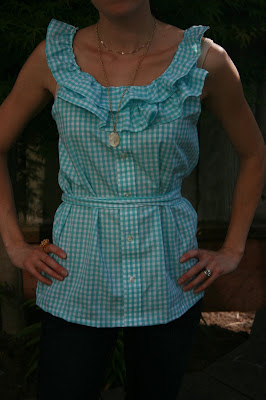
I tied mine around the back, but it looked really cute tied in a bow in the front, too.

I’m really happy with the way it came out. Let me know if I can clarify anything or what you think of the tutorial. Send my pictures of any other pictures you’d like to see replicated!!


 Fold your belt loops in half and place them in the shirt where you want them. You will see the ends sticking out of the shirt. Pin the shirt together because next is sewing it.
 Sew the shirt together at the shoulders and the sides. After you sew it- CHECK YOUR FIT! Does it need to be smaller in any area? Do the armholes need to be bigger? Do you like the placement of the neckline? Check it ALL here!

 Now we are going to use the sleeves to cut out the ruffle strips that we will be using along the neckline, and the belt. I used my rotary cutter to help me cut straight strips, but feel free to use scissors! Cut the strips 3 inches wide and cut as many as you can.


