-Поиск по дневнику

Поиск сообщений в sprinkdavis

 -Подписка по e-mail


 -Статистика

Статистика LiveInternet.ru: показано количество хитов и посетителей
Создан: 27.04.2023
Записей:
Комментариев:
Написано: 10


How to fix QuickBooks error code 267 - Rebuild Not Working

Среда, 17 Января 2024 г. 08:57 + в цитатник

When users open an older customer invoice in QuickBooks and try to view it, they may encounter Error Code 267 when rebuild is not working. If they try to close the invoice, a dialog box will appear asking for credentials for modification before the closing date. This error also appear when users open the balance sheet after performing other tasks in QuickBooks.

This article will provide solutions for Steps to troubleshoot the QuickBooks Error Code 267 specifically in cases where the balance sheet is unbalanced. Thus, keep reading..!

Causes of QuickBooks Error Code 267

This error code indicates that the QuickBooks company file is either damaged or corrupted. Check out the following possible causes related to such errors:

  • There was an imbalance in the balance sheet.
  • If there is a missing sales tax code in Target, token headers pertaining to the user may refer to NULL.
  • If there is a missing sales tax code, discrepancies can arise in reports such as invoices.
  • Bills have been recorded with negative values.
  • There are accounts that are not displayed in the balance sheet reports.

DIY Methods to Troubleshoot QuickBooks Error Code 267

To resolve this error, you can try the following solutions:

Step 1: Verify the Data

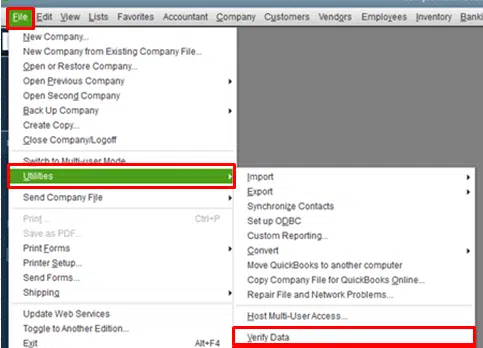
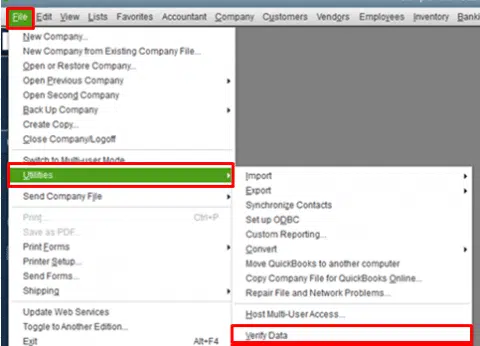
To verify data, first close all windows, go to the File menu, and select Utilities. Then, click on Verify Data. The following messages may appear:

  • If there are no issues with the data, no action is required.
  • If there is a specific issue, a message will explain the cause.
  • If the message reads "Your data has lost integrity", it means there is data damage in the file.
  • If there is an issue, proceed to the next step to rebuild the data.


Step 2: Rebuilding the Data

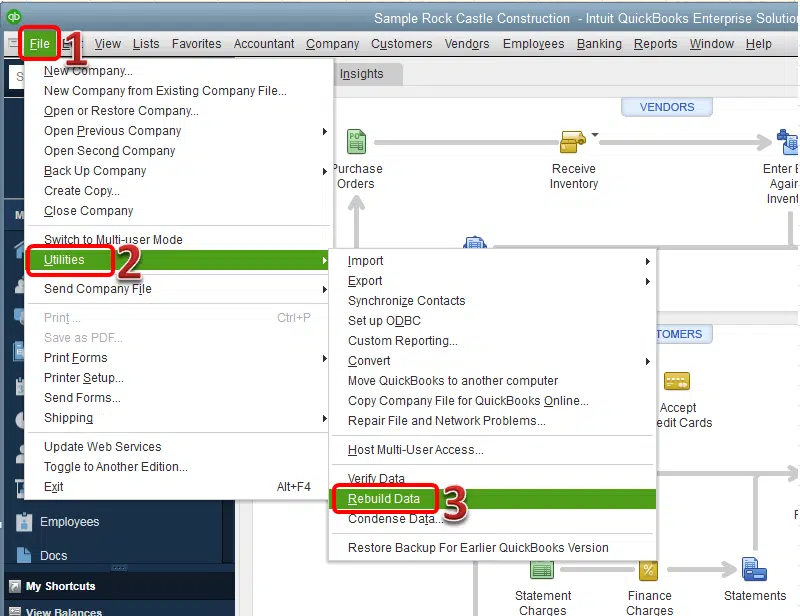
Rebuilding the data will fix the integrity concerns identified during the data verification. To rebuild the data, follow these steps:

  • Open the File menu, select Utilities, and choose Rebuild Data.

  • A warning message will appear, reminding you to back up the company file before rebuilding, as the process may involve deleting transactions, invoices, or list entries to resolve the issue.
  • Select the location to save the backup file, and click OK.
  • If prompted to replace another backup file, select No and enter a new name for the backup file.
  • If the backup fails, you can choose to cancel the rebuild or seek help from the payroll help desk support.
  • Once the backup is complete, click OK when you receive the message that the rebuild is finished.


Method 3: Verify the remaining data damage

Verifying the remaining data damage is crucial to ensure that the data is error-free. Here are the steps to follow:

  • Open the File menu and select Utilities.
  • Then, click on Verify Data to check for any remaining damage.

  • If any additional damage is found, it will need manual correction.
  • Locate the issue within the qbwin.log file and find a solution from the QuickBooks Desktop official support website.
  • If no error is detected, restore a backup that was previously created.
  • To do this, go to the File menu and select Restore.
  • While restoring, make sure not to overwrite the existing company file. After completing the restore process, you may need to manually re-enter the entries.


Method 4: Use the QuickBooks Auto Data Recovery feature

The QuickBooks Auto Data Recovery feature is a built-in tool that can help recover lost or damaged data in your QuickBooks company file. It creates a duplicate copy of the QuickBooks company file and saves it in a separate folder. Here are the steps to use the Auto Data Recovery feature:

  • Locate the folder where QuickBooks stores the Auto Data Recovery files. This folder is usually located in the same folder as your company file, with the suffix "AutoRecovery" added to the end of the file name.
  • Look for the two files with the extensions .QBW.adr and .TLG.adr. These files are the Auto Data Recovery files.
  • Copy both files and paste them into a new folder on your desktop or in another location on your computer.
  • Rename the .QBW.adr file to .QBW and the .TLG.adr file to .TLG.

  • Open QuickBooks and open the company file from the new folder you created.
  • Verify that all of your data is intact and that the error has been resolved.

Note that the Auto Data Recovery feature is not always successful in recovering data, and it can take some time to complete the process. If the Auto Data Recovery feature is not able to recover your data, you may need to restore a backup copy of your company file.


Wind Up!

We hope the above steps have been helpful in resolving QuickBooks Error Code 267. However, if you encounter any further difficulties or require additional assistance, please don't hesitate to reach out to us at 1-800-615-2347. Our QuickBooks error support team will be more happy to help you.

You may also see: How to Troubleshoot Most Common QuickBooks Payroll Errors?


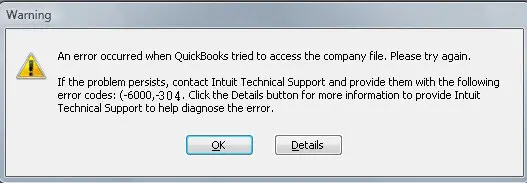
Rectify QuickBooks Error Code 6000 304 (Company File Issue)

Вторник, 16 Января 2024 г. 09:01 + в цитатник

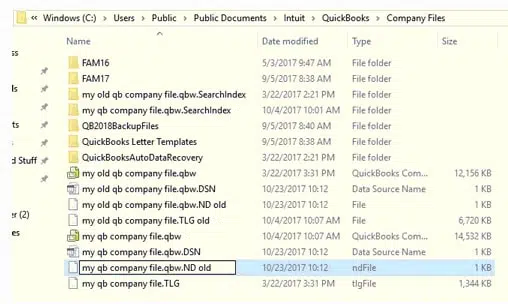
QuickBooks error 6144 304 can occur due to incorrect network setup while trying to run QuickBooks Desktop or open a company file. Renaming the .ND and .TLG files, which contain important transaction and configuration information, can help resolve the error.

These files will be created automatically when you rescan the company file using QuickBooks Database Server Manager. Refer to the complete guide for more information on the causes of the QuickBooks error code 6144 304 and quick solutions to fix it and quick solutions to fix it.

What Causes the QuickBooks Error 6144 82?

QuickBooks Error message 6144 304 can occur due to:

  • Damage in the QuickBooks installation files, such as .ND Network Data and .TLG Transaction Log files
  • An excessively long company file name (over 65 characters)
  • A company file that has been moved to a different folder location.
  • General company file corruption and connectivity issues.

DIY Steps to Troubleshoot QuickBooks Error 6144 304

In order to rectify the QuickBooks error message 6144 304, here the steps you need to follow:

Method 1: Rename the .ND and .TLG files

  • To do this, first open the QuickBooks Desktop software.
  • Then press the F2 key to get to the Product Information window.

  • See the location of the company file under the File Information section.
  • Use Windows file explorer to find the company file folder.
  • Locate the files with the same name as the company file and extensions .ND and .TLG, for example: company_file.qbw.nd / company_file.qbw.tlg.
  • If you cannot see the file extensions, change the Windows Files and Folder settings.
  • To do this for Windows 7/8 users, click Organize from the top-left and choose Folder and Search Options.
  • Then go to the View tab and uncheck "Hide extensions for known file type".
  • For Windows 10 users, click the View tab and tick a checkmark next to the "File name extensions".
  • Rename each file by right-clicking the file and selecting ‘Rename’. Write OLD at the end of the file name. For example, company_file.qbw.nd.OLD.
  • Open QuickBooks again and try signing into your company file.


Method 2: Rename the Company File

  • Using Windows Explorer, navigate to the QuickBooks company file folder typically located at C:\Users\Public\Public Documents\Intuit\QuickBooks\Company Files.

  • Right-click the company file with extension .QBW and select Rename.
  • Make the necessary changes to the file name and try to open the company file again.

Method 3: Moving the Company File to Its Original Folder

  • Open the QuickBooks Product Information window by pressing the F2 key on your keyboard.
  • Note down the location of the company file shown under the File Information section.
  • Go to the original company file folder location and check if the company file is still saved there.
  • If you can't find the company file, use the Windows search field to search for files with .QBW extension and copy the one you want to open.
  • Paste the company file in the original company file folder.
  • Try to access the company file again to check if the error is resolved.

Method 4: Control User Permissions

  • Open the QuickBooks desktop and navigate to the Company tab to find the Users option.
  • Click on Set up Users and Roles and enter your password to access the data.
  • Select a username from the list of users and modify their role according to your prefessrences.

Summing Up!

The above steps can help you fix QuickBooks error 6144 304 quickly. If the error still persists, you can try restoring the backup of the company file. If you need assistance with implementing the troubleshooting steps mentioned in this article, you can reach out to our QuickBooks error support experts by calling us on 1-800-615-2347.


Also Read : How to Troubleshoot QuickBooks Payroll Internal Error 30102?


5 simple steps to fix QuickBooks couldn’t cannot to email server error

Понедельник, 15 Января 2024 г. 08:48 + в цитатник

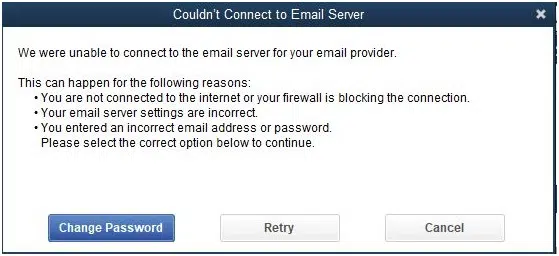
Are you trying to fix Could not connect to the email server issue in your QuickBooks? Well, QB users have been facing some issues when trying to connect to email server through QuickBooks. This type issue can appear on your desktop screen due to a wrong configuration in the Webmail. This error also can occur due to outdated QuickBooks, outdated QuickBooks copy or poor internet connectivity. To know the DIY methods to How to Fix QuickBooks could not connect to email server error, keep reading the article till the end.

Major reasons behind QuickBooks could not connect to the email server

The primary causes behind this issue are:

  • The user can also experience this issue if Internet configuration is wrong or the webmail settings have been incorrectly set.
  • Another possible trigger can be wrong login information.
  • Another trigger can be if the user is using out-to-date QuickBooks version.
  • Poor internet connection can also be another reason behind this error.


Working fixes for the error QuickBooks could not connect to the email server error

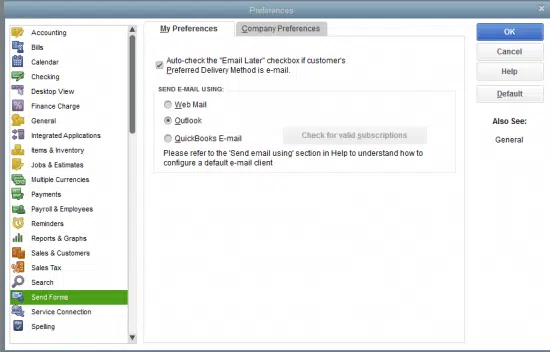
The QuickBooks Could Not Connect to Email Server Issue can be rooted out by conforming to the following solutions:

Fix 1: Setting up the Webmail Preferences

  • You need to first launch QuickBooks Desktop as admin.
  • And then, go for the Edit menu, followed by clicking on Preferences.

  • Later head towards, hit on Send Forms and opt for My Settings. Here you need to choose the email account.
  • Once done with that, click on the Edit option.
  • Now hit on Edit Email Information and head to SMTP Server Information.
  • Fill in the required fields with the correct server’s name and port number.
  • Moving ahead, check the most used email server addresses for further details (POP3, IMAP, SMTP).
  • In the next step, you need to resend an invoice using QuickBooks Webmail after making the foregoing modifications to confirm that such issue got effectively resolved.


Fix 2:  Change the I.E. settings

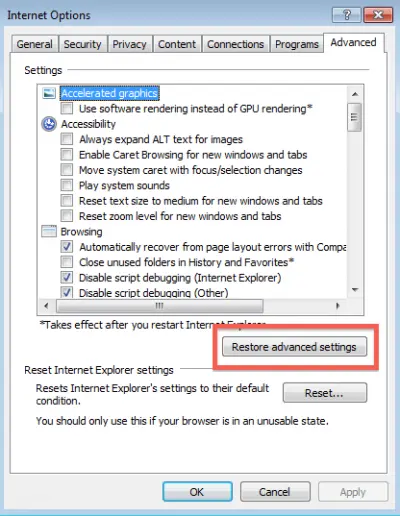
You need to make the following settings in the Internet Explorer settings.

  • Start with, opening Internet Explorer, then hit on gear icon, followed by clicking on Internet Settings.
  • After that, hit a click on Advanced and then choose the opt to Restore Advanced Settings.

  • And then, hit a click on Ok. Run QuickBooks now.
  • Try to send an email using the webmail.


Fix 3: Go for QuickBooks updates

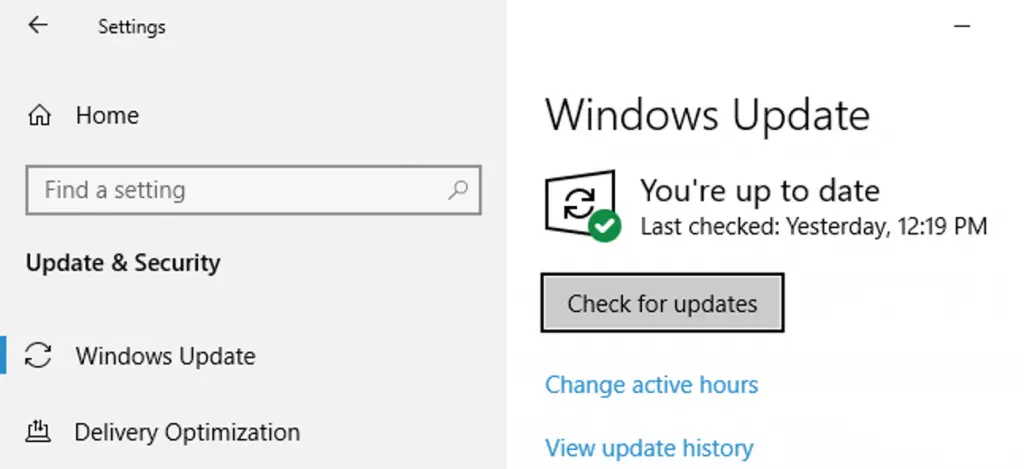
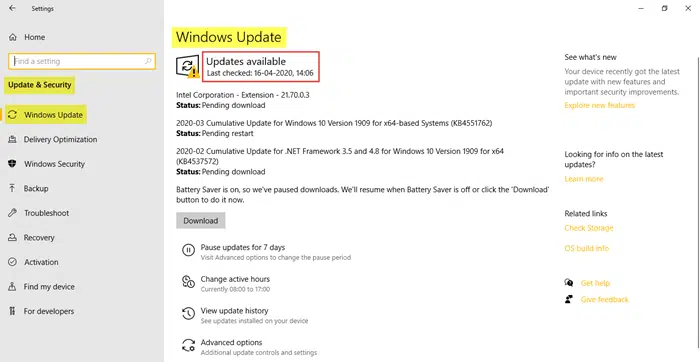
By updating QuickBooks desktop to latest can also fix this issue which prevents users from connecting to the email server. Follow the updation steps:

  • Kick start the process by running QuickBooks Desktop and go to Help tab.
  • Followed by, hit a click on Update QuickBooks option.

  • Moreover, tap on Reset update option.
  • Later head towards, hit a click on Get updates.
  • And then tap on Update Now. This action will start downloading the updates.


Sum Up!

In the scope of this discussion, we covered different fixes to tackle a situation when QuickBooks could not connect to the Email server. This issue is mostly fixed by configuring the email settings and the Internet Explorer settings, but if you are still getting problems, you can immediately contact our QuickBooks error support expert team at the helpline i.e., 1-800-615-2347.

Read Also: How to Troubleshoot QuickBooks Payroll Error Code 30159?


Метки:  

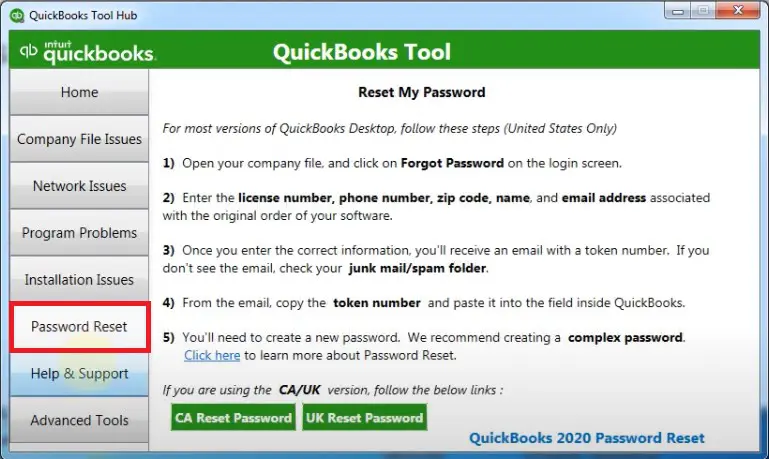
QuickBooks tool hub download and install to repair errors

Вторник, 09 Января 2024 г. 09:13 + в цитатник

QuickBooks desktop can be affected due to different types of issues. Some issues can be sorted out manually with the help of various party tools, while some critical errors need tools offered by Intuit Inc. QuickBooks Tool Hub is one of the top-notched tools provide by Intuit in recent days.

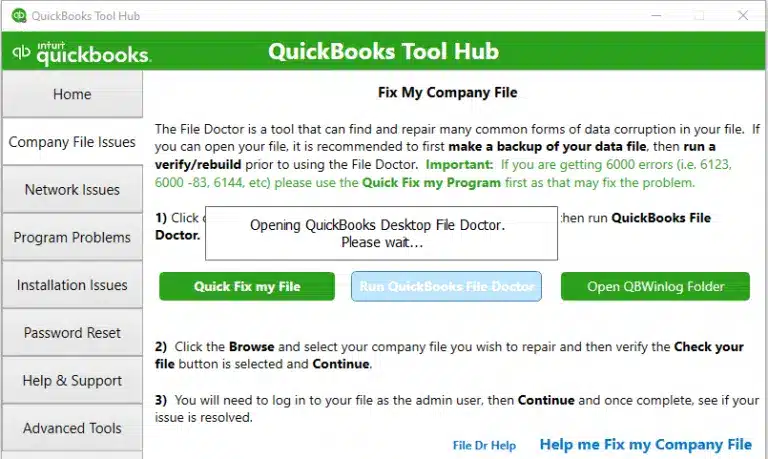
This powerful tool contains different types of utilities that can fix issues ranging from installation issues to company file errors. QuickBooks File Doctor, Install Diagnostic Tool, Quick Fix My Program, and other tools are given in this tool. To know more A Comprehensive Guide on How to Download QuickBooks Tool Hub program, you may read the post ahead and fix different issues that can be appear while using the software.


Different types of issues that can be fixed by QuickBooks Tool Hub

QuickBooks Tool Hubis a potential tool that can rectify the following types of technical issues:

Company file corruption

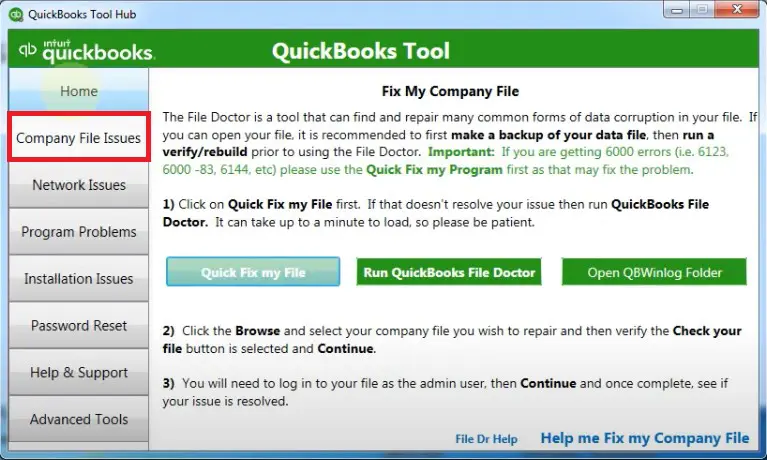
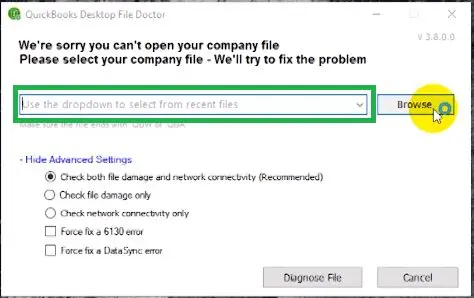
If you are not able to open your Company files or are facing errors during the process of opening or modifying the Company files, File Doctor tool can be used in such cases.

Fixing Network issues

Network related problems can be effectively resolved by using QuickBooks File Doctor.

QuickBooks Install Issues

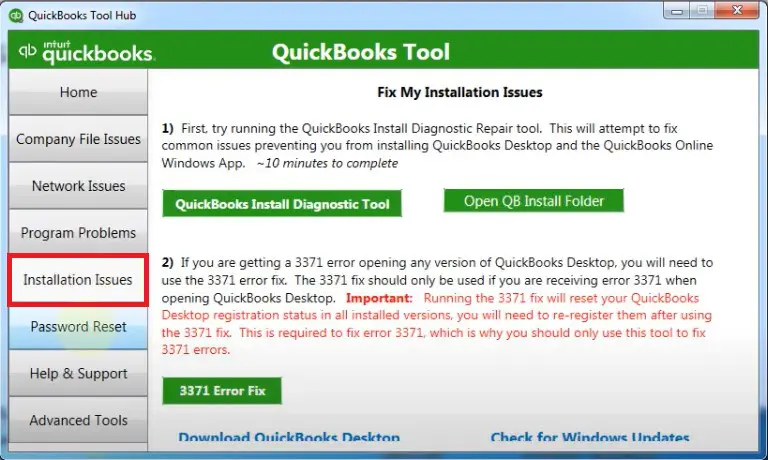
If you are encountering installation issues, you can use the QuickBooks Install Diagnostic Tool. It can offer instant solutions to your QuickBooks installation issues.

Errors related to PDF and printing

QuickBooks Tool Hub can also be used to fix PDF and printing issues.

QuickBooks Tool Hub System Requirements

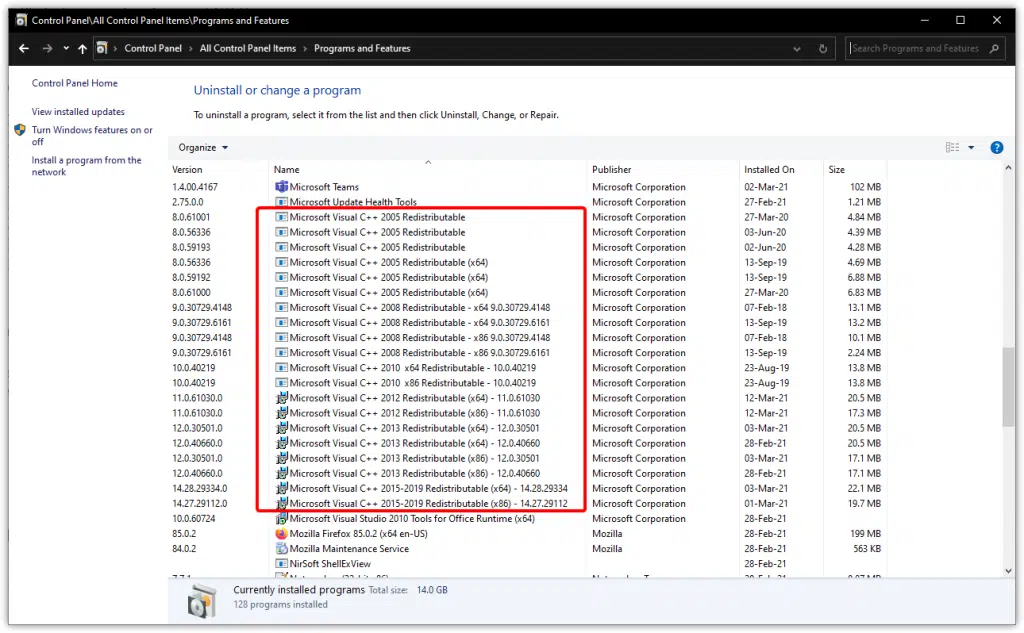
The system requirements for Tool Hub include compatible version of Microsoft .NET Framework and Compatible version of Microsoft C++ redistributable package.

Walkthrough to Download and Install QuickBooks Tool Hub

An uninterrupted internet connection is a necessary prerequisite. After ensuring that, proceed as follows:

  • Go to the Intuit website and Download QuickBooks Tool Hub.
  • Don’t use third-party websites to install the QuickBooks products including QuickBooks Tool Hub.
  • Now, go to the download folder and open the file “QuickBooksToolHub.exe”

  • This will start the installation
  • Now, click on Next.
  • Pick the destination drive/folder and then click on Next.
  • Hit on Install. The process will take time to finish.
  • Finally, run the “QuickBooks Tool Hub" after the installation is complete.


Utilities Available in QuickBooks Tool Hub

The different tools in QB Tool Hub are:

  • QuickBooks File Doctor Tool: fixes Network issues and Company file errors.

  • QuickBooks Install Diagnostic Tool: It fixes windows components issues that can lead to installation error in QuickBooks.

  • QuickBooks Print and PDF Repair Tool to fix PDF and printing errors.

  • Password Reset Tool: Helps users recover forgotten passwords or resolve password-related issues when logging into QuickBooks Desktop software.

  • QuickBooks Clean Install Tool – To uninstall and reinstall QuickBooks Desktop.


Summing Up!

This blog enumerated the utilities within the QuickBooks Tool Hub program and also discussed the different types of errors that can be fixed by using this holistic tool.  If you ace any issues, you can get in contact with our QuickBooks desktop support experts at the helpline i.e., 1-800-615-2347.

Also read: How to set up QuickBooks Desktop to work from home?


Метки:  

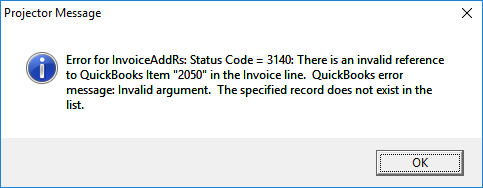
Resolve QuickBooks error code 3140 (An Installation Error)

Пятница, 05 Января 2024 г. 13:18 + в цитатник

Did the status code 3140 in QuickBooks POS interrupting you when running financial exchange. Don’t worry then, this post will help you in fixing this issue. Downloading the QuickBooks Desktop is an easy process but sometimes this process might encounter some multifarious error codes.

how to rectify QuickBooks error 3140? (mapped issue) is one such error which can have serious ramifications. This issue can also occur when modifying the invoice or when Running Financial Exchange. Learn the causes of this error and the techniques to get such error permanently rectified on your system.

Why does QuickBooks Error Code 3140 occur?

This issue can occur due to the following reasons:

  • If the sales tax is disabled in QuickBooks.
  • IF you are using special characters ($, percent, *, @) in the invoice and product names.
  • Also, incorrect tax code in QuickBooks My Works settings can also result in this error.
  • Malware infecting the system and QuickBooks files.


Multiple solutions for rooting out QuickBooks Error Code 3140

Go through the following solutions to get this issue exterminated on your system.

Solution 1: Full Malware Scan

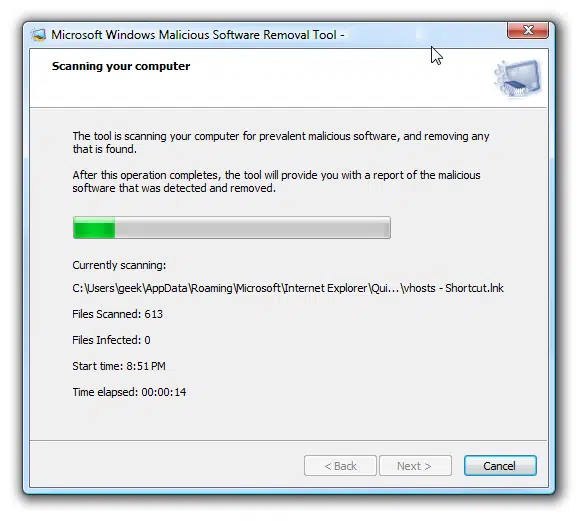
The first working step is taken to go for a full-fledged malware scan. You can use any malware scanner for the same. Also, you need to run a full anti-virus scan check on your system and quarantine the QB files that are infected. After it, you should repair your QuickBooks desktop or go for a Clean Installation process for it.


Solution 2: Use the Disk Cleanup

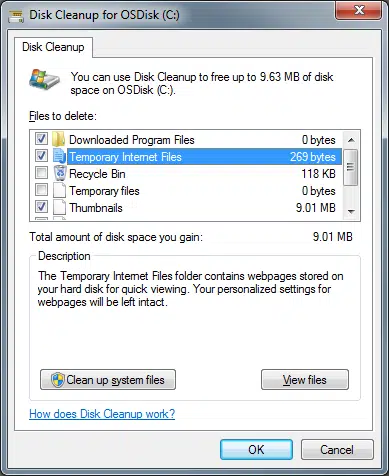
The Disc Cleanup process involves the following:

  • The very first step is to go to Start menu and then open Command Prompt.
  • Later on, you need to type cleanmgr and hit Enter key.

  • It will open the Disk Cleanup tool and then select the C drive and subsequently mark the Temporary file checkbox.
  • Once done with that, you need to click on Ok button to start the cleanup process.
  • As the process concludes, run QuickBooks again and check error code 3140 should be dealt with.


Solution 3: Remove Special characters from the file name of items

You first need to open the product list and check if there is any item with special characters in the file name. If you identify any such item, then you should edit the file name and remove the empty spaces and special characters from the file name.


Solution 4: Run QuickBooks Verify and Rebuild Data Tool

  • The very first step is to open QuickBooks and go to File menu.
  • Then, go to Utilities and Verify tab.

  • You first need to create a backup. When that is done, run the Rebuild process.
  • After its completion, run the Verify tool in the Utilities section.
  • It will double check for any further issues in the Company file.
  • Then, try accessing your invoice again.


Solution 5: Re-install Runtime Libraries

It is better to uninstall and reinstall the Runtime libraries. The easy steps to do this are:

  • You need to first, click on the Start menu and then open the Control Panel.
  • Moving ahead, move to Programs and Features option.
  • Here, you are supposed to choose Microsoft Visual C++ Redistributable Package and other such libraries.

  • Once done with that, hit a click on the opt to uninstall the program.
  • Now, finish the uninstallation.
  • Heading forward, you need to visit to the official website of Microsoft and get the latest versions of these libraries reinstalled on the system.
  • And then confirm whether the process proves effective in resolving the ongoing error.


Summing Up!

I hope the above given different techniques are effective in solving the QuickBooks Error code 3140 without any hassle. However, if you face any difficulty while performing the troubleshooting steps, then you can reach out to our technical QuickBooks error support experts through the helpline number 1-800-615-2347. Our support team will offer unwavering support to make your software experience seamless.

You may also see: How to Fix QuickBooks Payroll Error PS077?


Метки:  

Learn all about QuickBooks Error Code C=184 and how to fix it

Среда, 03 Января 2024 г. 09:36 + в цитатник

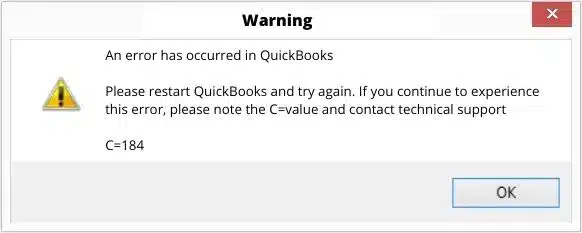
Error Code C=184 is another company file related issue in QuickBooks Desktop that is reported by multiple users in recent days. This error can be caused by a damaged Network file or corrupted company files. There might be various factors behind to this error occurrence. Thus, the current article will unfold all the causes and troubleshoot QuickBooks error code C=184 Using 6 DIY Methods permanently. So, continue reading.

What are the factors that can cause QuickBooks Error Code C=184?

This company file error can be caused by the following:

  • .ND and TLG files are damaged.
  • Incorrect date and time set on the system may also lead to this error.
  • QuickBooks is not installed correctly.
  • One of the basic reasons behind to this error is the Company file is corrupted.


Different Solutions for QuickBooks Error Code C=184

The various fixes for this QuickBooks error C=184 are discussed in detail in this section. So, continue carefully and implement the solutions one by one to check if the problem gets sorted out.

Solution 1: Rename ND and TLG files

  • Initially, the user need to go to the QuickBooks folder, and there look for'.TLG' and '.ND' files. These are the file extensions of the files with the same name.

  • Moving ahead, hit a right-click the files one by one and click on Rename.
  • And then add '.old' at the end of the file name.

Solution 2: Open Reboot.bat file

  • Under this solution, the user firstly go to the QuickBooks folder.
  • And then search for the file named “reboot.bat”.

  • And further, run it as an admin.
  • Once done with its operations, follow up by opening QuickBooks.
  • Now try to open the company file once again.


Solution 3: Move the Company file to Desktop

  • Initially, go to the QB Company folder first.
  • After that you need to search for the Company file facing the error. Copy it from the folder.
  • And then create a new folder on the desktop and name it QBTEST.
  • Now paste the file in this folder.
  • And lastly, run QuickBooks and open the Company file copied to the QBTEST folder.

Solution 4: Update Windows

  • To begin, first you need to go to Start menu, and then type “update”.
  • After that open Windows update and after that, click on Check for updates.

  • Heading forward, now mark the important updates and download them.

  • Also restart the computer and let the updates get installed automatically.
  • Once done, run QuickBooks and open the Company file(s) again. Error code C184 should be rectified.


Solution 5: Conform to QuickBooks File Doctor

  • Later on, hit a click on browse and click on the Company file.

  • Now opt for “Both file damage and network connectivity”.
  • Also hit a click on Next and start the scan.
  • It will take some time for the diagnosis to finish. When it is done, run QuickBooks and open the Company file.

Solution 6: Go for System Restore

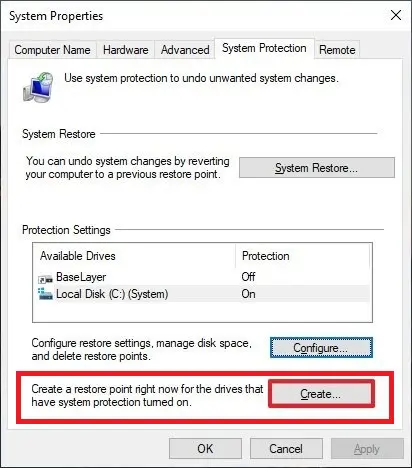
If the above strategies fail, try restoring to an earlier state. The steps are:

  • At first, go to the start tab and in there, search for “Restore”.
  • Thereafter, open System Restore.
  • Now click on a Restore point and then proceed with the System Restore.
  • The process may take a while. When it is successfully done, restart the computer.
  • Now, run QuickBooks as an administrator.
  • Open the same Company file which was previously facing QuickBooks error C=184. The file should open fine this time around.

Last lines!

This discussion elaborated about QuickBooks Error code C=184, its causes and the different strategies to fix it. If you need any more assistance from our QuickBooks error support experts, feel free to call us at the helpline 1-800-615-2347. We are always there to help you.

You may also see: View My Paycheck is Not Working Issue – How to Fix It?


Метки:  

How to Get Rid of QuickBooks Error Code 6130, 0?

Вторник, 30 Мая 2023 г. 14:27 + в цитатник

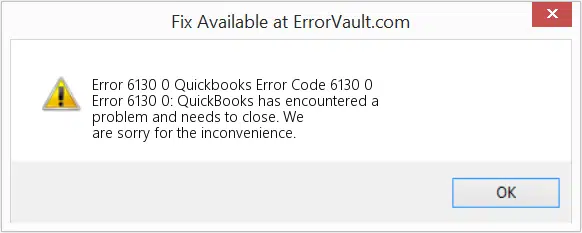
The QuickBooks 6130 Error occurs when attempting to open the company file, preventing access to it. This error can have a negative impact on the performance of your system. If not resolved correctly, it could result in the loss of important data in your QuickBooks company file. In this article, we’ll look at causes as well as troubleshooting methods to fix this error.


A brief review of QuickBooks Error 6130

QuickBooks has a multi-user mode, allowing hosting of the company file on a server for network access by multiple users. If a workstation on the network attempts to access the company file but it is either unavailable or corrupt on the server, it triggers QuickBooks error code 6130.

QuickBooks displays an error message stating that it is unable to contact the database server while attempting to access the company file.


What are the Causes of QuickBooks Error 6130?

QuickBooks error message 6130 can be caused by a corrupt company file that the user is attempting to access.

  • If the client's workstation is using an outdated version of QuickBooks Desktop while the company file was created with an upgraded version, it can also trigger this error.
  • Errors in network configuration can also result in the appearance of Error Code 6130 on the user's screen.
  • The Windows firewall can prevent QuickBooks Desktop from accessing the necessary network ports, leading to this error.
  • Outdated Windows features.
  • If the QuickBooks Database service, which is essential for running QB in Multi-User mode, is not running on the server, it can cause this error.
  • Damaged network data and transaction log files can also trigger such error.

Methods to Rectify the QuickBooks Error 6130

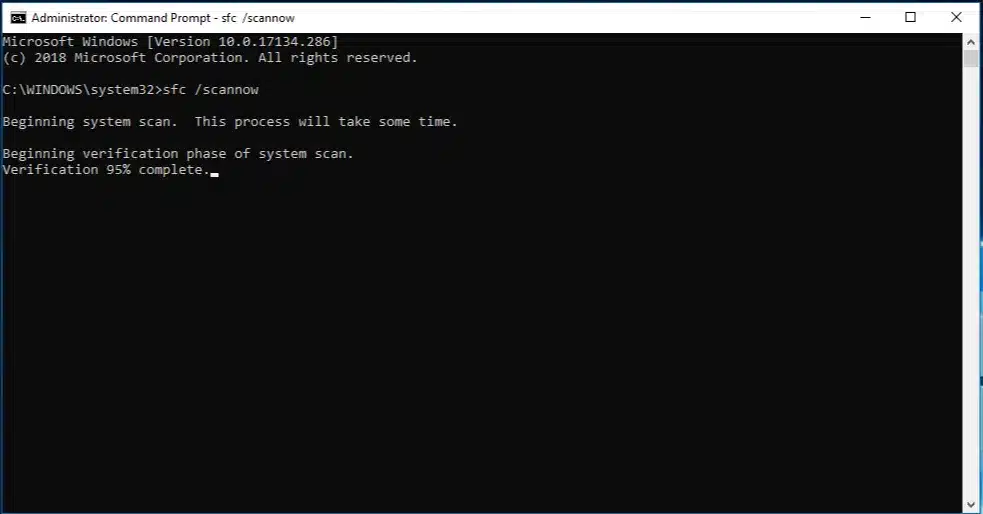
If you are encountering issues with QuickBooks error code 6130, there are several things you can do to try and resolve the issue. Here are some steps you can follow:

Method 1: Resolve Damaged Company File

  • To use QuickBooks File Doctor, first download and install QuickBooks Tool Hub and launch it using the desktop shortcut icon.
  • Then, go to the Company File Issues tab and select the Run QuickBooks File Doctor option.

Winding up!

If you have experience with Windows troubleshooting, you can easily fix error 6130 from QuickBooks by following the troubleshooting steps outlined in the article. However, if you are having trouble applying the solution and need expert assistance to fix such an error, you can contact our QuickBooks error support helpline i.e., 1-800-615-2347 for immediate support.


You may also see: Guide to Troubleshoot QuickBooks Error Code 6176


Fix QuickBooks POS Error 176109 - Invalid Product Code

Четверг, 25 Мая 2023 г. 14:13 + в цитатник

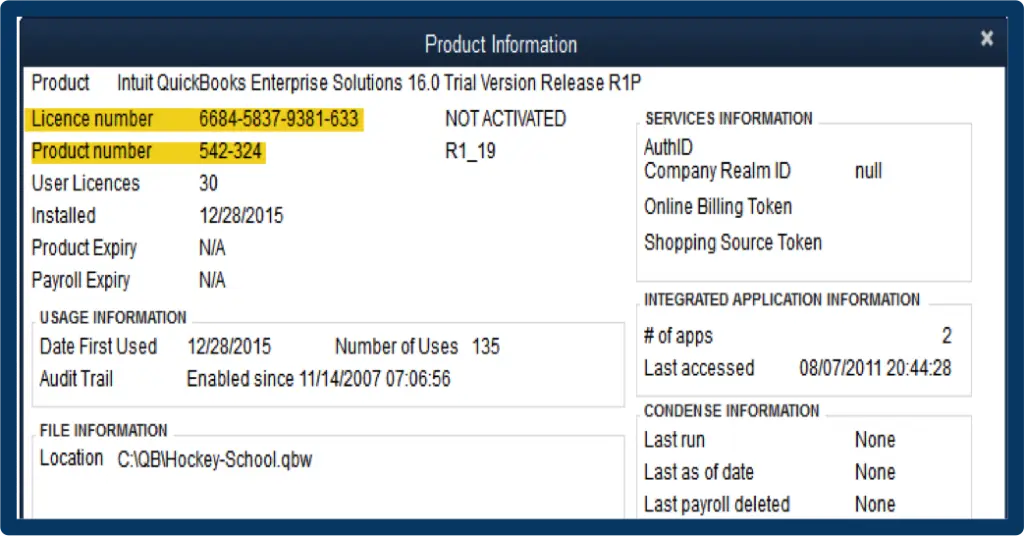
Error 176109 is a commonly occurring issue for QuickBooks POS users when attempting to sign up or launch POS. The error message "Invalid Product Code / Invalid Product Number QuickBooks" appears on the user's computer screen. To address the problem, it is necessary to investigate each potential cause of the error in Point of Sale. The article provides causes and troubleshooting solutions to fix this error.


Overview of QuickBooks Error 176109

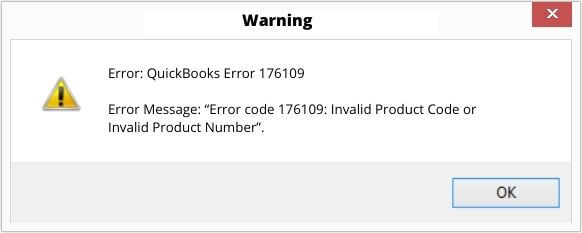
QuickBooks Error 176109shows up when an invalid product number is entered. This error typically appears when you try to register or launch QuickBooks Desktop POS after installation. Besides using an incorrect product activation key, other factors can lead to QuickBooks POS invalid product numbers, which you can learn about in the following section of this article.

Identifying the Reasons for QuickBooks Error 176109

These are the potential reasons for Error 176109:

  • For QuickBooks Point of Sale, the Entitlement Folder is either inaccurate or corrupt.
  • Incorrect product code causes failure during point-of-sale installation.
  • The computer's administrative features are inaccessible to the user.

Points to be noted:

  • It's crucial to make a backup of your company data file before attempting to correct an erroneous product number error in QuickBooks Point of Sale.
  • You must have QuickBooks Point of Sale's most recent version installed on the computer in order to fix the problem.
  • To delete the hidden entitlement folder from your operating system and resolve the problem, you must first modify the Windows settings to display hidden files.


Troubleshooting Techniques to Fix QuickBooks Invalid Product Code 176109

Check the following steps in order to resolve the QuickBooks error 176109:

Method 1: Try deleting all the items from the Entitlement Client folder

  • This folder can sometimes become corrupt, leading to multiple instances of QuickBooks and POS being activated.
  • To delete the files in this folder, navigate to the path C:\ProgramData\Intuit\Entitlement Client\v8 and select all the files by pressing Control + A keys.
  • Hit Delete and confirm with Yes.
  • Open QuickBooks POS and try registering the application again.
  • If the "QBPOS Invalid Product Number" issue persists, move on to the next solution.


Method 2: Try renaming the WS Activity File

  • Navigate to the path C:\ProgramData\Intuit\QuickBooks Point of Sale\Ini folder.
  • Right-click the WSActivity file and select "Rename", adding "OLD" to the beginning of the name.
  • Close the window and remove the Entitlement folder.
  • Open QuickBooks POS again and see if the invalid product code error persists.


Method 3: Reinstall the QuickBooks Desktop POS

  • Hit the Windows Start button and choose Control Panel.
  • Find Programs and Features and select "Uninstall a Software".
  • Within the list, double-click on QuickBooks POS and choose "Uninstall/Change".

  • Let the uninstallation process finish after clicking "Uninstall".
  • Additionally, move the POS data folder to your desktop and add ".OLD" to the end of the folder name.
  • QuickBooks POS won't recognize this folder anymore, so a new one will be created to replace it.
  • Install a fresh copy of QuickBooks Desktop POSto finish, then check to see if the problem has been fixed.


QuickBooks POS Windows 10 invalid product number can be fixed by:

  • Select Control Panel from the Windows Start menu by clicking on it.
  • Find and select the "User Accounts" option.
  • Select "Manage another account" and click "Proceed" in the new window.
  • Click on the QBPOSDBSrvUSER account you see in the list.
  • Select "Delete Account" to get rid of it.
  • Remove the folder, then restart your computer to fix the QuickBooks alter product number issue.


Conclusion

If you need further help with fixing QuickBooks Error 176109, don't hesitate to seek professional assistance. You can reach out to highly qualified QuickBooks error support specialists by contacting us at 1-800-615-2347 right away.


You may also see: How to Troubleshoot QuickBooks Error Code 6094, 0


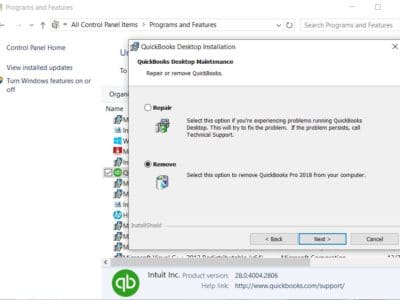
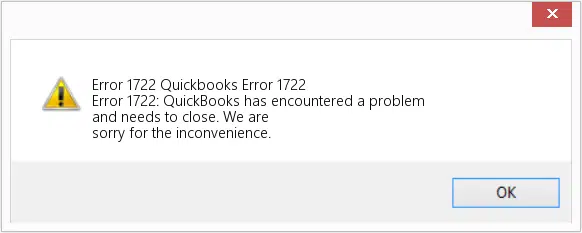
Fix QuickBooks Install Error Code 1722 Using Latest Methods

Понедельник, 01 Мая 2023 г. 13:35 + в цитатник

Installer Error 1722 commonly occurs during payroll update downloads. The error is caused by damaged or missing Microsoft .Net Framework components on Windows systems, and it can also cause related errors 1603, 1903, and 1904. The article provides detailed instructions on causes and how to fix the issue.

A brief review of QuickBooks Error 1722

QuickBooks error code 1722indicates problems with the organization of the software, which implies that the Microsoft components are no longer compatible with QB software.

This error arises due to problematic Microsoft components, Windows Installer package, and other reasons, causing hindrances in QuickBooks installation and causing the program not to complete as expected.


What Causes the QuickBooks Error 1722?

Here the possible causes behind to this error:

  • This error can disrupt QuickBooks installation, but only if certain conditions exist.
  • The error may occur if the Microsoft .Net Framework is outdated, corrupt, or missing.
  • Outdated Windows components like MSMXL and C++ can also cause the error.
  • Damaged Windows registry entries resulting from recent software changes can be another cause.
  • Accidental or malicious deletion of QuickBooks files can lead to this error.
  • The installation process itself may be damaged or improper.
  • A malware or virus attack on the system is another possible cause of the error.


Latest Methods to Fix QuickBooks Error 1722

Checkout the latest methods in order to rectify the QuickBooks install error code 1722:

Method 1: Use QuickBooks Install Diagnostic Tool

  • Download the Tool Hub installation file from the official download page of QuickBooks Tool Hub and save it on your desktop.
  • Double-click the downloaded file and follow the instructions provided by the program installer to complete the installation.
  • After the installation, run the Tool Hub and select QuickBooks Install Diagnostic Tool from the Installation Issues tab.

  • The tool will automatically scan and repair any installation errors that may occur. This process may take some time, depending on the computer's performance.
  • Once the tool has completed repairing QuickBooks installation errors, restart your Windows and attempt to install QuickBooks again.


Method 2: Install the latest update on Microsoft Windows

  • Press Windows + R and type "Control Panel" in the Run Windows text box.
  • Press Enter and type "Windows Update" in the search bar at the top.
  • Select Windows Update and click on "Check for Updates."

  • Once Windows has found updates to be installed, click on "Update Now."
  • Restart Windows when prompted.
  • Windows will install all the latest updates available for Microsoft .NET Framework, C++, and MSMXL.
  • Once all updates are installed, restart your computer and try installing QuickBooksagain.


Method 3: Use System Restore to reverse the recent changes made on your system

  • Click on the Start menu and type "System Restore" in the search box, then press Enter.

  • Enter your admin credentials to log in, including your username and password.
  • Follow the prompts on the wizard box that opens up, and select a restore point that you want to use.
  • Restore your computer to the selected restore point, and then try launching your QuickBooks application again.


Method 4: Use the Windows System File Checker tool

  • Open the Run window by pressing the Windows icon and R keys together or go to the Start menu.
  • Type "cmd" in the search bar and press Ctrl + Shift simultaneously. Alternatively, you can type "cmd" in the search bar and press Enter, then right-click the Command prompt window and select "Run as Administrator."
  • A black window with a blinking cursor will appear. Type "SFC/Scannow" and press Enter.

  • The System File Checker tool will scan the system files and detect any errors or problems. Follow the on-screen instructions and let the tool complete the ongoing error fix.


Winding up!

If you are still encountering QuickBooks Error 1722 while trying to install software, we recommend you contact the QuickBooks Error support team by calling at 1-800-615-2347. They specialize in dealing with such errors and can offer you a prompt solution to resolve the issue.

You may also see: How to resolve QuickBooks Error 108


How to Easily Resolve QuickBooks error code 15271?

Четверг, 27 Апреля 2023 г. 11:56 + в цитатник

Payroll Error 15271 is a common occurrence that arises when updating QuickBooks Payroll. This error can occur when QuickBooks fails to validate the download file. In this article, we provide the causes of QuickBooks Error 15271and troubleshooting steps to address this issue.

A brief review of QuickBooks Error 15271


When attempting to install the latest payroll updates, Windows checks the downloaded file for errors. If an error is detected, it can result in the "A File Cannot Be Validated" error, which is a common problem with updating Windows applications, including QuickBooks Pro. When this error occurs, QuickBooks displays an error message stating that the update did not complete successfully due to a file that cannot be validated. Intuit suggests disabling the User Account Control on Windows as a solution, but this may not always be effective, and additional solutions may need to be applied.

What are the Causes of QuickBooks Error 15271?

The QuickBooks Error 15271 can occur due to various reasons, some of which are:

  • An outdated version of QuickBooks Desktop can trigger this error.
  • Incomplete or corrupt installation of QuickBooks software.
  • Damaged Windows Registry entries related to QuickBooks.
  • Malware or virus infection that has corrupted Windows system files or QuickBooks program files.
  • Windows security applications may interrupt QuickBooks Desktop background processes, leading to the error.
  • A recent change in QuickBooks or Windows settings that has caused a conflict with the software.
  • Outdated payroll tax tablescan be another possible cause of Payroll error code 15271.
  • The error can also occur due to incorrect configuration of the User Account Control (UAC) settings on Windows.

DIY Methods to Rectify the QuickBooks Payroll Error 15271

To fix this error, you can try the following solutions:

Method 1: Install payroll updates in Windows Safe Mode

  • Start by clicking the Start button and selecting Restart from the Shutdown menu.
  • During the reboot process, press the F8 key on your keyboard repeatedly to access the Advanced Boot Options screen.
  • Select Safe Mode from the options using the navigation keys on your keyboard and press Enter.


  • Once Windows starts up in Safe Mode, try to install the payroll updates again.
  • If you can successfully install the updates in Safe Mode, it may indicate that other applications on your computer are interfering with the installation process.

Method 2: Install the latest Payroll Tax Table

  • Open QuickBooks and go to the Employees section.
  • After that hit a click on the option for downloading Payroll Updates.
  • In the window that appears, choose the option to download the entire payroll update.
  • Select the option to download the latest update.
  • Wait for QuickBooks to finish downloading the updates, and you will be notified when it's done.

Method 3: Change system registry

  • Start by using a tool designed to repair damaged registry entries for QuickBooks.
  • Open the Start menu and type "CMD" in the search bar, but do not press enter.
  • Instead, hold down the Ctrl and Shift keys together, and then press Enter.
  • When a permission dialog box appears, select "Yes."
  • A black window with a blinking cursor will appear. Type "regedit" into this window and press Enter.

  • In the registry editor window, select the option for "Failure 15271."
  • Next, click on the Export option under the main File menu.
  • Choose the folder where you want to save the backup and click on the Save option.
  • Take note of the Branch code from the Export range.
  • Use a reliable malware removal system to conduct a complete scan and remove any malicious files.
  • Finally, delete all unwanted and unnecessary files, including temporary files and folders, from your system.

Sum Up!

If none of these solutions work for you, you may need to contact QuickBooks error support for further assistance.

See Also: Resolve QuickBooks error code 15271


Метки:  

Дневник sprinkdavis

Четверг, 27 Апреля 2023 г. 10:48 + в цитатник
Sprink Davis is a seasoned accounting professional with over 15 years of experience in the industry. he has worked with a variety of clients ranging from small startups to large multinational corporations, providing them with expert financial advice and guidance.


Поиск сообщений в sprinkdavis
Страницы: [1] Календарь