-Метки
fitness foto handmade house video Коврик аватары аудиокниги аюрведа бактус береста бисер блог валентинка валентинки войлок вышивка вязалочки вязание дача деткам дизайн для детей для красоты еда животные здоровье игрушки интерьер йога картинки кино клип книги кошачье крючок люди магия_психологии мода мода 2014 мода 2015 мои волосы мои мысли мои поделки мои средства ухода мои шедевры мотиваторы музыка мульт новый год оскар плед притчи прически психогигиена разное резиновый коврик из шланга (diy) рецепт салфетки собачки стих сумки тест ткачество уличная мода фенечки фильм цитаты цитаты+картинки шитьё эзотерика эмоции юмор
-Музыка
- Карла Бруни
- Слушали: 324 Комментарии: 0
- Alain Delon & Dalida. Paroles Paroles
- Слушали: 166948 Комментарии: 0
- amatory-дыши со мной
- Слушали: 866 Комментарии: 0
- неплохая песенка
- Слушали: 494 Комментарии: 0
- Алина feat. Deema - Видела его
- Слушали: 107 Комментарии: 0
-Поиск по дневнику
-Подписка по e-mail
-Постоянные читатели
-ХомАня- _АПРЕЛЬСКАЯ_ШТУЧКА_ Dolli_Dolli Hata1978 Il_fiore Jana73 LUSISTANTE Lujdmila MariRich Mirajnka Natali1989 Natali_Zaz Nataliyka Ona_Ziya Polly1605 Puppy777 SVETLANA413 Tascha_T alonsso armavirochka frogi ijkelmrj myworld7 nadezhda_65 ssvetlaa tettis voks33 y-Elenka ytenoc75 Акади Альбинаа Апатитчанка Валерия67 Величкевич_Наташа Грешный-Ангел Ева_Мелент ЕлешаШ Зоя0601 Ирина_Пермь Кошка_Рукодельница Лисбет Ломотока Люсёк_Сорокин Марьяша_Кудинова Ольга_Коро Пчелл Сана145 Светуля-ля-ля-ля красавицаумница тавла
-Сообщества
Читатель сообществ
(Всего в списке: 7)
design_club
АРТ_АРТель
АртИнформБюро
Умелые_ручки
Art_by_ER
Cine-Cinema
Photoshopinka
-Трансляции
-Статистика
Чудесные зайки |
|
Метки: игрушки |
Процитировано 1 раз
Понравилось: 2 пользователям
Очень простой узор для летнего детского пледа:) |


|
Метки: крючок для детей |
Процитировано 1 раз
Квадрат для романтического пледа:) |


|
Метки: крючок |
Процитировано 2 раз
Понравилось: 2 пользователям
Большая сова в детскую комнату:) |

|
Метки: крючок игрушки для детей |
Процитировано 2 раз
Когда хочется немножко согреться холодными осенними вечерами...:) |


|
Метки: крючок |
Сквалан (Squalane) |
Сквалан и сквален в косметике
Для чего нужен сквалан в косметике? Какой сквалан лучше для кожи — оливковый, акулий или из сахарного тростника? А в чем разница между скваленом и скваланом? На эти вопросы мы всегда найдем правильные ответы! ))

Что такое сквален
Сквален (Squalene) — это натуральное вещество, которое содержится в растительных маслах (оливковое, масло рисовых отрубей, масло зародышей пшеницы), а также в печени акулы. Сквален является частью кожного сала и по данным ученых, наши сальные железы вырабатывают примерно 10-14% сквалена, который находится вблизи поверхности кожи, обеспечивая ее барьерные свойства и способность защиты.
Поэтому сквален можно назвать «чрезвычайно совместимым компонентом», кожа «распознает» его как своего и хорошо впитывает. Он быстро проникает в кожу, смягчая и увлажняя ее, и особенно подходит для сухой, потрескавшейся и шелушащейся кожи.

Но не все так легко и просто, если посмотреть на химическую формулу сквалена!
Молекула сквалена крайне нестабильна, поскольку обладает двойными связями, и добытый из природных источников сквален начинает медленно окисляться, постепенно переходя в сквалан. Поэтому в косметике сквален почти не используют, так как он может реагировать с другими компонентами.
Какая разница между скваланом и скваленом
Для косметики используют сквалан (Squalane), гидрированную версию сквалена без двойных связей, который стабилен и может храниться больше 2 лет, не окисляясь и не прогоркая. Сквалан получают процессом гидрирования (гидрогенизации), который изменяет форму вещества и все же лишает его некоторых полезных свойств. Но в случае со скваланом это оправданно, поскольку продукт получает высокую стабильность.
По ощущениям на коже никакой особой разницы между скваленом и скваланом не будет, хотя сквален все-таки более ближе к коже. Вот его новая формула:

Какой сквалан выбрать
Для косметики используют два основные вида сквалана — сквалан из оливок (оливковый сквалан) и из печени акулы (акулий сквалан). Оливковый сквалан самый популярный, именно его используют в косметике. Недавно на рынок вышел новый сквалан, полученный методом ферментации сахарного тростника.
Акулий сквалан выпускают в Японии, и японцы же первыми начали использовать его в кремах. Сейчас его можно встретить редко, поскольку он дорогой, выпускается маленькими партиями и для внутреннего рынка. В Европе и Америке акулий сквалан долго считался спорным компонентом из-за его неэтичной экстракции, а недавно его и вовсе забанили.
Принципиальной разницы в сырье нет, поскольку чистый сквалан имеет одинаковую формулу, но оливковый сквалан считается более этичным продуктом и подходит для натуральной косметики!
squalane oil iherb

100% чистый оливковый сквалан
Где купить оливковый сквалан
Оливковый сквалан в чистом виде не так легко купить, поскольку это дорогой тип масла, который выпускает не каждая марка отдельно, чтобы улучшать свои же кремы )) Кстати, скваланом можно действительно улучшить каждый крем, сделав его более активным и омолаживающим, но можно также наносить его и в виде сыворотки под крем.
Я могу порекомендовать два вида оливкового сквалана, которые есть на iherb и имеют отличный состав (о том, как сделать заказ в этом магазине читайте в инструкции).
Первое средство — оливковый сквалан Life Flo в 100% чистом виде, второе средство — увлажнитель от Olivella, которые содержит оливковое масло, сквалан, витамины и эфирные масла апельсина, лаванды и иланга. Такой увлажнитель идеально подойдет для сухой и возрастной кожи, поскольку сквалан обладает омолаживающим действием и уменьшает морщинки.
Life Flo Health, Pure Olive Squalane Oil, Skin Care 60 ml — $ 15.84
Olivella, Moisturizer, 50 ml — $ 17.07

squalane oil olivella
омолаживающий увлажнитель для кожи
Косметические свойства сквалана
Знаете ли вы, что сквален, который естественным образом присутствуют в коже и который вырабатывают наши сальные железы, снижается со временем? Увеличение выработки сквалена идет до 23 лет, и после начинает падать. И к 50 годам количество сквалена в кожного сале обычно на уровне не больше 5%.
Поэтому начиная с 23-25 лет идеально дополнять уход за кожей маслами или кремами, которые содержат сквалан.
Как сквалан в косметике влияет на кожу?
смягчает шероховатую кожу и удерживает влагу
уменьшает появление морщин
лечит и восстанавливает потрескавшуюся кожу
приносит облегчение обезвоженной и ультра-чувствительной коже
быстро впитывается в кожу, не оставляя маслянистости
обладает легким антибактериальным эффектом
помогает предотвратить возрастные пятна и УФ повреждения кожи
Многие компании также пишут что сквалан при нанесении на кожу якобы восстанавливает клеточное дыхание кожи — таких данных нет, но он действительно улучшает насыщение кожи и клеток кислородом, правда при использовании сквалана внутрь, в виде капсул. Это кстати хорошая тема для применения сквалана в качестве ″витаминок красоты″.
Сквалан и как его использовать в косметике
В концентрации 100% оливковый сквалан продается как сыворотка и используется несколько капель под крем, чтобы максимально улучшить действие увлажняющего крема. Это прозрачное масло по виду, его также называют «масло без масла», потому что обладает высокой проникающей способностью.
В готовой косметике сквалан используется в концентрации 1-10%, обычно в увлажняющих кремах для лица и тела, масках для чувствительной и сухой кожи. здесь нужно смотреть по этикетке — чем ближе сквалан к первым местам, тем его больше в составе.
Оригинал: http://simply4joy.ru/skvalan-v-kosmetike.html
Для чего нужен сквалан в косметике? Какой сквалан лучше для кожи — оливковый, акулий или из сахарного тростника? А в чем разница между скваленом и скваланом? На эти вопросы мы всегда найдем правильные ответы! ))

Что такое сквален
Сквален (Squalene) — это натуральное вещество, которое содержится в растительных маслах (оливковое, масло рисовых отрубей, масло зародышей пшеницы), а также в печени акулы. Сквален является частью кожного сала и по данным ученых, наши сальные железы вырабатывают примерно 10-14% сквалена, который находится вблизи поверхности кожи, обеспечивая ее барьерные свойства и способность защиты.
Поэтому сквален можно назвать «чрезвычайно совместимым компонентом», кожа «распознает» его как своего и хорошо впитывает. Он быстро проникает в кожу, смягчая и увлажняя ее, и особенно подходит для сухой, потрескавшейся и шелушащейся кожи.

Но не все так легко и просто, если посмотреть на химическую формулу сквалена!
Молекула сквалена крайне нестабильна, поскольку обладает двойными связями, и добытый из природных источников сквален начинает медленно окисляться, постепенно переходя в сквалан. Поэтому в косметике сквален почти не используют, так как он может реагировать с другими компонентами.
Какая разница между скваланом и скваленом
Для косметики используют сквалан (Squalane), гидрированную версию сквалена без двойных связей, который стабилен и может храниться больше 2 лет, не окисляясь и не прогоркая. Сквалан получают процессом гидрирования (гидрогенизации), который изменяет форму вещества и все же лишает его некоторых полезных свойств. Но в случае со скваланом это оправданно, поскольку продукт получает высокую стабильность.
По ощущениям на коже никакой особой разницы между скваленом и скваланом не будет, хотя сквален все-таки более ближе к коже. Вот его новая формула:

Какой сквалан выбрать
Для косметики используют два основные вида сквалана — сквалан из оливок (оливковый сквалан) и из печени акулы (акулий сквалан). Оливковый сквалан самый популярный, именно его используют в косметике. Недавно на рынок вышел новый сквалан, полученный методом ферментации сахарного тростника.
Акулий сквалан выпускают в Японии, и японцы же первыми начали использовать его в кремах. Сейчас его можно встретить редко, поскольку он дорогой, выпускается маленькими партиями и для внутреннего рынка. В Европе и Америке акулий сквалан долго считался спорным компонентом из-за его неэтичной экстракции, а недавно его и вовсе забанили.
Принципиальной разницы в сырье нет, поскольку чистый сквалан имеет одинаковую формулу, но оливковый сквалан считается более этичным продуктом и подходит для натуральной косметики!
squalane oil iherb

100% чистый оливковый сквалан
Где купить оливковый сквалан
Оливковый сквалан в чистом виде не так легко купить, поскольку это дорогой тип масла, который выпускает не каждая марка отдельно, чтобы улучшать свои же кремы )) Кстати, скваланом можно действительно улучшить каждый крем, сделав его более активным и омолаживающим, но можно также наносить его и в виде сыворотки под крем.
Я могу порекомендовать два вида оливкового сквалана, которые есть на iherb и имеют отличный состав (о том, как сделать заказ в этом магазине читайте в инструкции).
Первое средство — оливковый сквалан Life Flo в 100% чистом виде, второе средство — увлажнитель от Olivella, которые содержит оливковое масло, сквалан, витамины и эфирные масла апельсина, лаванды и иланга. Такой увлажнитель идеально подойдет для сухой и возрастной кожи, поскольку сквалан обладает омолаживающим действием и уменьшает морщинки.
Life Flo Health, Pure Olive Squalane Oil, Skin Care 60 ml — $ 15.84
Olivella, Moisturizer, 50 ml — $ 17.07

squalane oil olivella
омолаживающий увлажнитель для кожи
Косметические свойства сквалана
Знаете ли вы, что сквален, который естественным образом присутствуют в коже и который вырабатывают наши сальные железы, снижается со временем? Увеличение выработки сквалена идет до 23 лет, и после начинает падать. И к 50 годам количество сквалена в кожного сале обычно на уровне не больше 5%.
Поэтому начиная с 23-25 лет идеально дополнять уход за кожей маслами или кремами, которые содержат сквалан.
Как сквалан в косметике влияет на кожу?
смягчает шероховатую кожу и удерживает влагу
уменьшает появление морщин
лечит и восстанавливает потрескавшуюся кожу
приносит облегчение обезвоженной и ультра-чувствительной коже
быстро впитывается в кожу, не оставляя маслянистости
обладает легким антибактериальным эффектом
помогает предотвратить возрастные пятна и УФ повреждения кожи
Многие компании также пишут что сквалан при нанесении на кожу якобы восстанавливает клеточное дыхание кожи — таких данных нет, но он действительно улучшает насыщение кожи и клеток кислородом, правда при использовании сквалана внутрь, в виде капсул. Это кстати хорошая тема для применения сквалана в качестве ″витаминок красоты″.
Сквалан и как его использовать в косметике
В концентрации 100% оливковый сквалан продается как сыворотка и используется несколько капель под крем, чтобы максимально улучшить действие увлажняющего крема. Это прозрачное масло по виду, его также называют «масло без масла», потому что обладает высокой проникающей способностью.
В готовой косметике сквалан используется в концентрации 1-10%, обычно в увлажняющих кремах для лица и тела, масках для чувствительной и сухой кожи. здесь нужно смотреть по этикетке — чем ближе сквалан к первым местам, тем его больше в составе.
Оригинал: http://simply4joy.ru/skvalan-v-kosmetike.html
|
Метки: для красоты |
Женские секреты: высокий пышный хвост |
|
Метки: для красоты |
Понравилось: 1 пользователю
Корзинка Сова |


|
Метки: игрушки крючок интерьер |
Понравилось: 1 пользователю
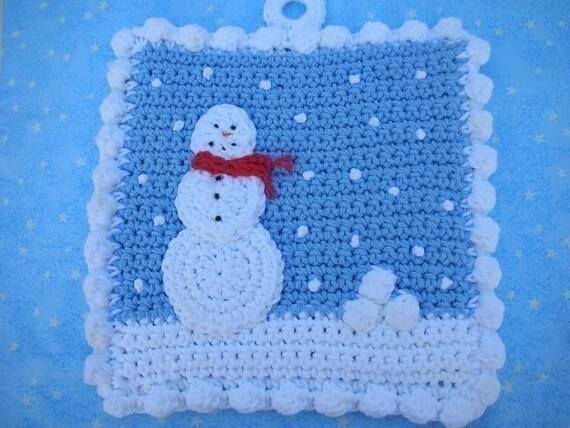
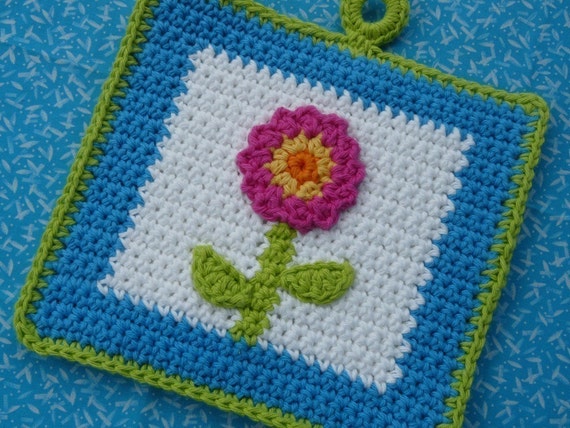
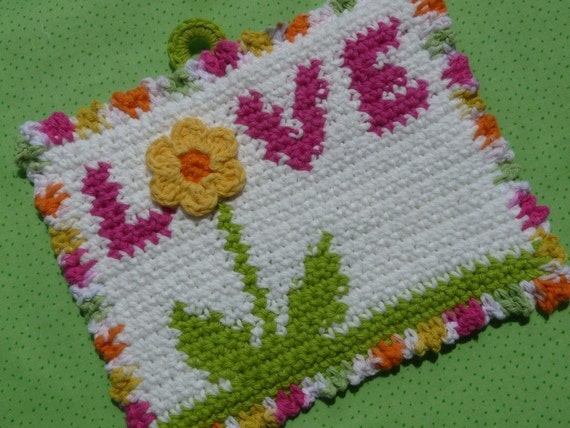
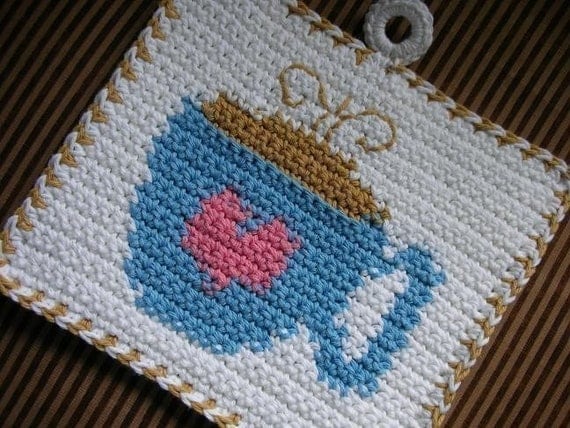
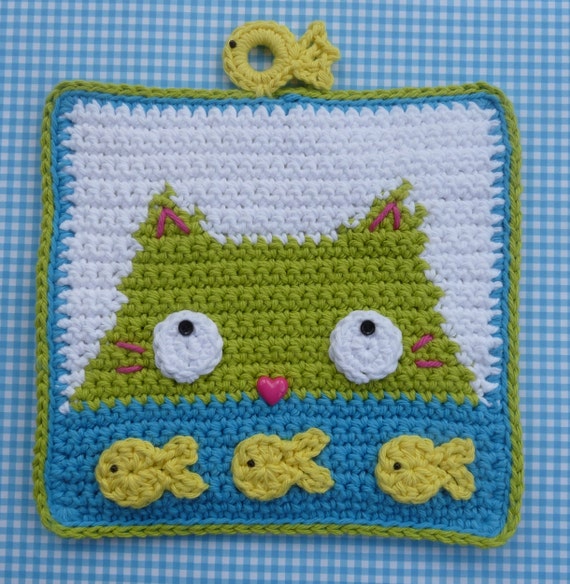
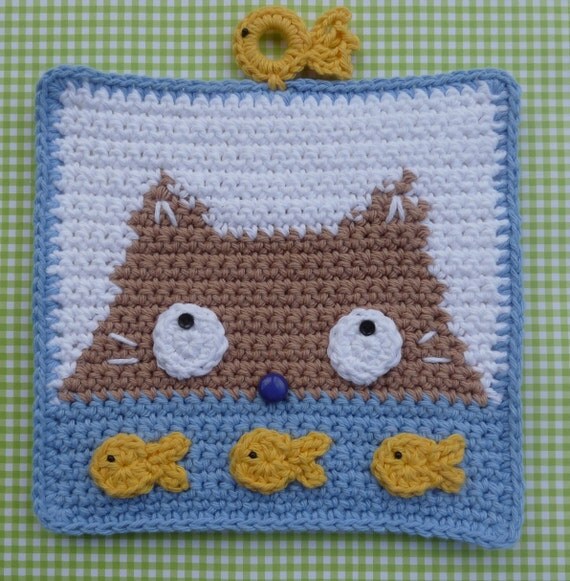
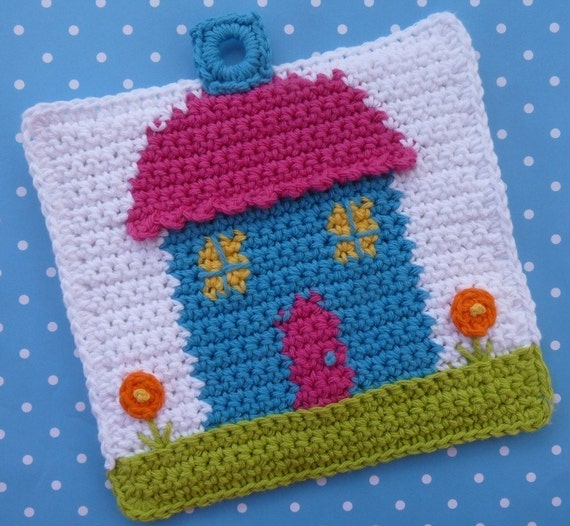
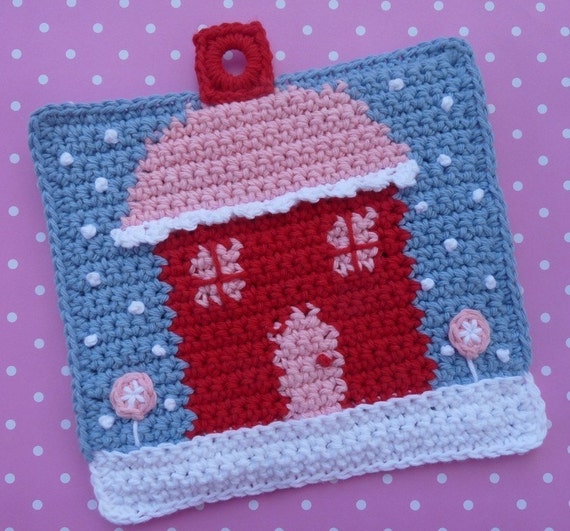
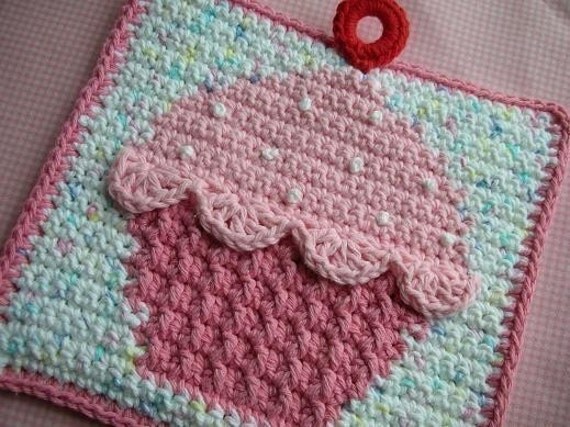
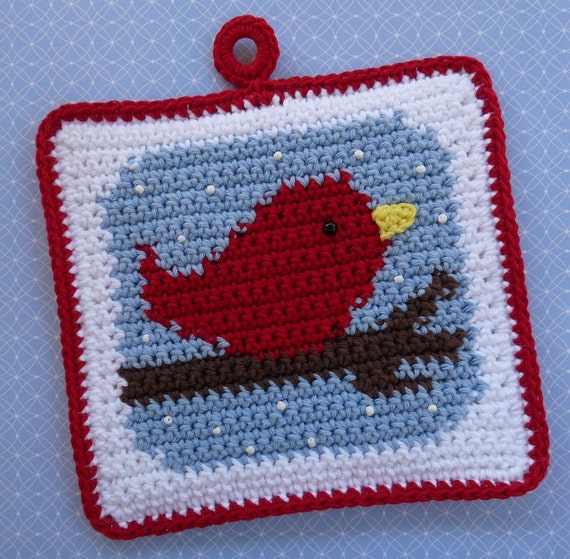
Прихватки |
|
Метки: крючок игрушки новый год |
Процитировано 3 раз
Понравилось: 3 пользователям
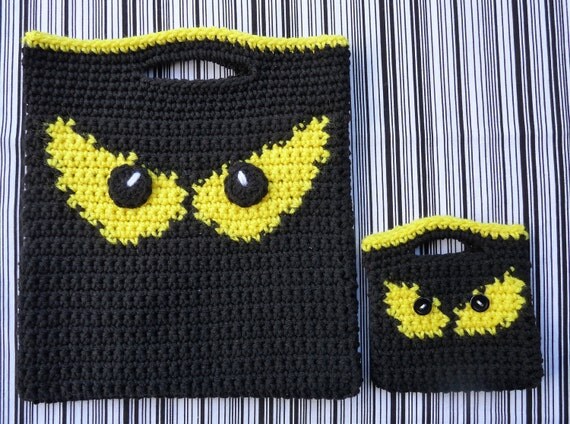
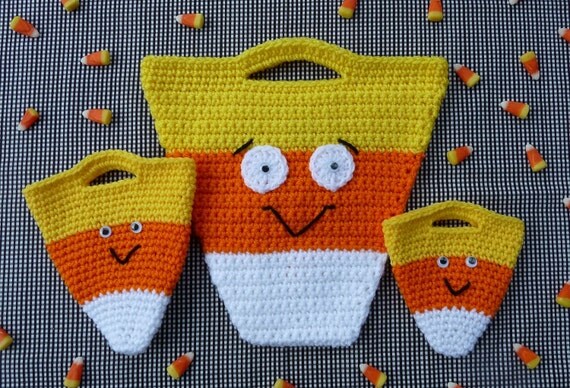
Сумки приколы |


|
Метки: крючок сумки игрушки |
Процитировано 1 раз
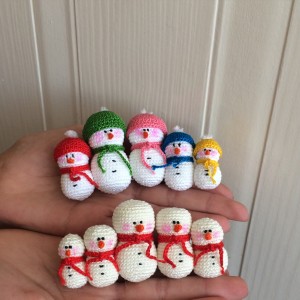
Снеговики |
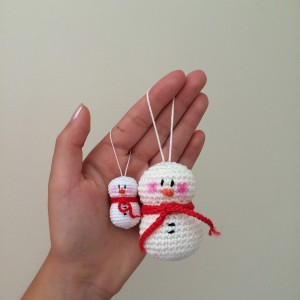
instructions: work in continuous spiral, start with magic ring
1. 6sc into magic ring (6)
2. 2sc in each st around (12)
3. *sc, 2sc* repeat around (18)
4. *sc, 2sc, sc* repeat around (24)
5. *2sc, sc, sc, sc* repeat around (30)
6.-10. sc in each st (30)
11. *dec, sc, sc, sc* repeat around (24)
12. *dec, sc, sc* repeat around (18)
13. sc in each st (18)
14. *sc, 2sc, sc* repeat around (24)
15. *2sc, sc, sc, sc* repeat around (30)
16.-18. sc in each st (30)
19. *dec, sc, sc, sc* repeat around (24)
20. *dec, sc, sc* repeat around (18)
21. *dec, sc* repeat around (12)
22. dec around (6)
fasten off, using a needle, weave a tail through the front loops of the last 6 sts, pull tightly and close the opening
nose: chain 3, ss in 2nd st from hook and sc in the last chain
scarf: chain 85, fasten off
blush cheeks with soft pastel
Make other family members, following stitch count below (1st round – 6sts, 2nd round – 12sts, 3rd round – 18sts…)
baby: 6-12-18-24-24-24-24-24-18-12-12-24-24-24-21-18-12-6
mummy: 6-12-18-24-30-36-36-36-36-36-36-36-36-30-24-18-18-36-36-36-36-36-33-30-24-18-12-6
daddy: 6-12-18-24-30-36-36-36-36-36-36-36-36-33-30-24-18-18-36-36-36-36-36-36-33-30-24-18-12-6
I hope, you will enjoy making your own Snowman Family
Оригинал: http://doubletrebletrinkets.co.uk/2014/12/14/christmas-ornament-snowman/
|
Метки: игрушки новый год |
Понравилось: 1 пользователю
Санта |
|
Метки: игрушки новый год |
Процитировано 1 раз
Понравилось: 1 пользователю
Пчелки |
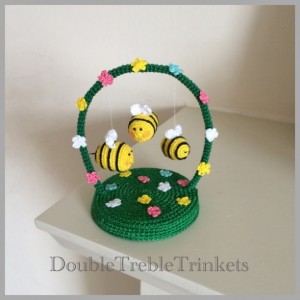
Please, meet my crocheted buzzing bees. I hope, this loving family will make you buzzzzzzz with happiness :)
Enjoy this video
small bee: 6-12-18-24-24-24-24-24-24-24-24-18-12-6 (1st round 6sc, 2nd round 12sc….)
medium bee: 6-12-18-24-27-27-27-27-27-27-27-27-27-24-18-12-6
big bee: 6-12-18-24-30-30-30-30-30-30-30-30-30-30-24-18-12-6
Black lines are embroidered after
Using DMC Petra size 8 and 0.75mm hook
Оригинал: http://doubletrebletrinkets.co.uk/2015/07/17/buzzing-bees/
|
Метки: игрушки для детей |
Процитировано 1 раз
Совы |
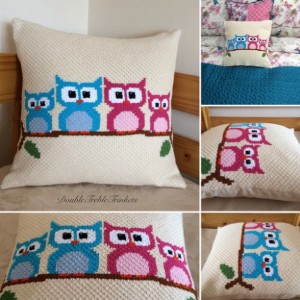
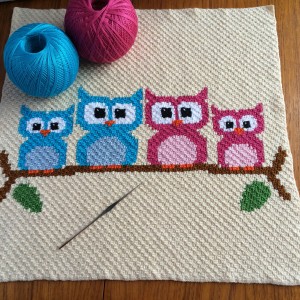
My owl family cushion cover is finally finished!!
I used my favorite ‘invisible’ 0.75mm hook and DMC Petra size 8 for this project.
This is c2c (corner to corner) method using hdc’s. More information about this method you can find here: on repeatcrafterme blog :)
Оригинал: http://doubletrebletrinkets.co.uk/2015/12/17/owl-cushion-cover/
|
Метки: игрушки крючок вязание вязалочки |
Процитировано 1 раз
Понравилось: 1 пользователю
Angels |
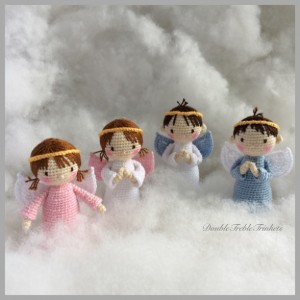
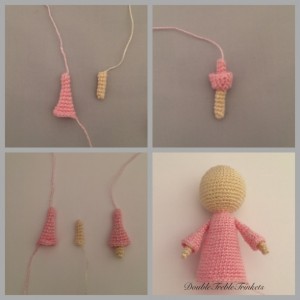
ANGEL
DMC Petra size 8 and 0.75mm hook (ecru, pink, white) approx. size 7cm
Abbreviations:
ch=chain, ss=slip stitch, sc=single crochet, 2sc=inc=increase (2sc in the same st), dec=decrease
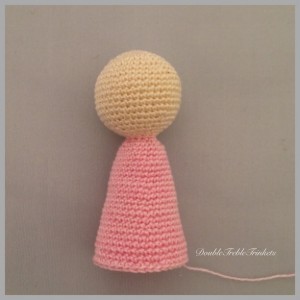
Head/body: with ecru, make a magic ring, work in rounds, close off each round with ss
1. 6sc into magic ring, join with ss (6)
2. ch1, 2sc in each st around, join with ss (12)
3. ch1, *sc, inc* repeat around, join with ss (18)
4. ch1, *sc, inc, sc* repeat around, join with ss (24)
5. ch1, *inc, sc, sc, sc* repeat around, join with ss (30)
6. ch1, *sc, sc, sc, inc, sc* repeat around, join with ss (36)
7. ch1, sc in each st around, joi with ss (36)
IMG_5242 (1)8. ch1, *inc, sc, sc, sc, sc, sc* repeat around, join with ss (42)
9. ch1, sc in each st around, join with ss (42)
10.-15. repeat round 9.
16. ch1, *dec, sc in each of next 5sts* repeat around, join with ss (36)
17. ch1, *sc, sc , sc, dec, sc* repeat around, join with ss (30)
18. ch1, *dec, sc, sc, sc* repeat around, join with ss (24)
Start stuffing
19. ch1, *sc, sc, dec* repeat around, join with ss (18)
20. ch1, *dec, sc* repeat around, join with ss (12)
Change colour (pink)
21. ch1, sc in each st around, join with ss (12)
22. ch1, *sc, inc* repeat around, join with ss (18)
23. ch1, *sc, inc, sc* repeat around, join with ss (24)
24.-26. ch1, sc in each st around, join with ss (24)
Stuff the head firmly
27. ch1, *sc in each of next 7sts, inc* repeat around, join wth ss (27)
28.-30. ch1, sc in each st around, join with ss (27)
31. ch1, *sc in each of next 8sts, inc* repeat around, join wth ss (30)
32.-34. ch1, sc in each st around, join with ss (30)
35. ch1, *sc in each of next 9sts, inc* repeat around, join wth ss (33)
36.-38. ch1, sc in each st around, join with ss (33)
39. ch1, *sc in each of next 10sts, inc* repeat around, join wth ss (36)
40.-44. ch1, sc in each st around, join with ss (36)
Fasten off, leaving a long tail for sewing
Arm (make 2): sleeves and hands are crocheted separately
Sleeve (make 2): with pink, make a magic ring ( leave a long tail for sewing in the beginning), work in rounds, close off each round with ss
1. 6sc into magic ring, join with ss (6)
2.-4. ch1, sc in each st around, join with ss (6)
5. ch1, *sc, sc, inc* repeat around, join with ss (8)
6. ch1, sc in each st around, join with ss (8)
7. ch1, *sc, sc, sc, inc* repeat around, join with ss (10)
8. ch1, sc in each st around, join with ss (10)
9. ch1, *sc, sc, sc, sc, inc* repeat around, join with ss (12)
10. ch1, sc in each st around, join with ss (12)
11. ch1, *sc, sc, sc, inc* repeat around, join with ss (15)
Fasten off, leaving a tail for sewing
Hand (make 2): with ecru, make a magic ring, work in rounds, close off each round with a ss
1. 6sc into magic rind, join with ss (6)
2.-7. ch1, sc in each st around, join with ss (6)
Fasten off
Оригинал: http://doubletrebletrinkets.co.uk/2016/01/25/angels-boys-and-girls/
|
Метки: игрушки новый год |
Процитировано 1 раз
Пальчиковые игрушки |
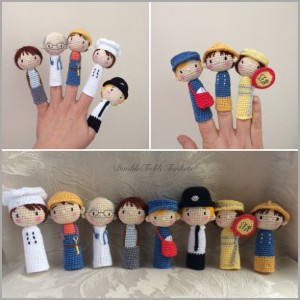
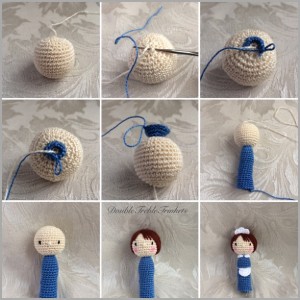
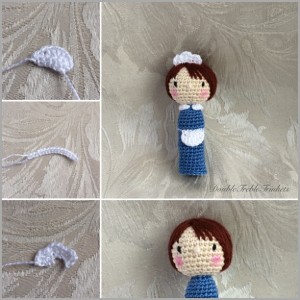
Finger Puppets
This same pattern can be used to make any of the finger puppets, all you need to do is alter the colour of your thread and add various accessories of your choice (hats, bags, glasses…)
DMC Petra size 5 and 1.0mm hook (ecru, blue, white)
Abbreviations:
ch=chain, ss=slip stitch, sc=single crochet, 2sc=inc=increase (2sc in the same st), dec=decrease, hdc=half double crochet, dc=double crochet
Head: with ecru, make a magic ring, work in rounds, close off each round with ss
1. 6sc into magic ring, join with ss (6)
2. ch1, 2sc in each st around, join with ss (12)
3. ch1, *sc, inc* repeat around, join with ss (18)
4. ch1, *sc, inc, sc* repeat around, join with ss (24)
5. ch1, *inc, sc, sc, sc* repeat around, join with ss (30)
6. ch1, sc in each st around, join with ss (30)
7. ch1, *sc, sc, sc, sc, inc* repeat around, join with ss (36)
8. ch1, sc in each st around, join with ss (36)
9.-13. repeat round 8.
14. ch1, *dec, sc in each of next 4sts* repeat around, join with ss (30)
17. ch1, *sc, sc, dec, sc* repeat around, join with ss (24)
18. ch1, *dec, sc, sc* repeat around, join with ss (18)
Start stuffing
19. ch1, *sc, dec* repeat around, join with ss (12)
20. ch1, dec around, join with ss (6)
Fasten off, stuff more if needed
Body: with blue, work on head, crochet in rounds, close off each round with ss
1. make 12 sc around the last round of head, join with ss (12)
2. ch1, *sc, inc* repeat around, join with ss (18)
3. ch1, sc in each st around, join with ss (18)
4.-21. repeat round 3.
22. ss in each st around (18)
Fasten off, weave in loose ends
Apron: with white
Ch6
1. sc in 2nd ch from hook and in ch across, ch1 and turn
2. (sc, hdc) in 1st st, dc in next st, 2dc in next st, dc in next and (hdc, sc) in last st
Fasten off, leaving a tail for sewing
Collar: with white
Ch16
Sc in 2nd ch from hook and in each ch across
Fasten off, leaving a tail for sewing
Headdress: with white
Ch8
Sc in 2nd ch from hook, *3dc in next ch, sc in next* 3 times
Fasten off, leaving a tail for sewing
nose: between round 6 and 7, counting from neck
eyes: on round 7, counting from neck and 6-7 sts apart
Оригинал: http://doubletrebletrinkets.co.uk/2016/02/13/finger-puppets/
|
Метки: игрушки |
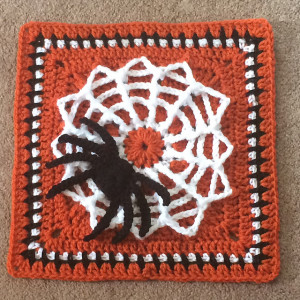
Мотив для Хеллуина |
|
Метки: крючок игрушки |
Понравилось: 1 пользователю
Christmas owls |
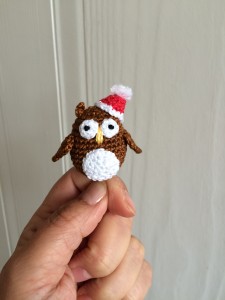
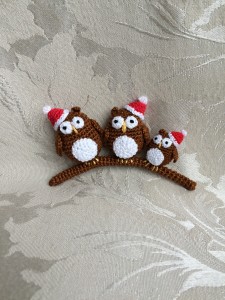
Christmas Owls
big owl DMC Petra size 5 with 1.0mm hook
small owl DMC Petra size 8 with 0.75mm hook
ch=chain, ss=slip stitch, sc=single crochet, st=stitch
Body: with brown, make a magic ring
1. 6sc into magic ring, join with ss (6)
2. ch1, 2sc in each st around, join with ss (12)
3. ch1, *sc, 2sc* repeat around, join with ss (18)
4. ch1, *sc, 2sc, sc* repeat around, join with ss (24)
5. ch1, *2sc, sc, sc, sc* repeat around, join with ss (30)
6.-8. ch1, sc in each st around, join with ss (30)
9. ch1, *dec, sc, sc, sc* repeat around, join with ss (24)
10.-11. ch1, sc in each st around, join with ss (24)
12. ch1, *dec, sc, sc* repeat around, join with ss (18)
13. ch1, sc in each st around, join with ss (18)
stuff the body
14. ch1, *dec, sc* repeat around, join with ss (12)
15. ch1, dec around, join with ss (6)
Stuff more if needed.
Fasten off, leaving a long tail (use it for making ears). Using a needle, weave the tail through the front loops of the last 6 st(s), pull tightly and close the opening.
Make ears (ch3, ss in 2nd from hook, sc in next)
Eye (make 2): with white, make a magic ring
8sc into magic ring, join with ss
Fasten off, leaving a tail for sewing
Wing (make 2): with brown, make a magic ring
1. 6sc into magic ring, join with ss (6)
2. ch1, 2sc in each of next 3st(s), ch2, ss in 2nd from hook, 2sc in each of next 3st(s), join with ss
fasten off, leaving a tail for sewing
Belly: with white, make a magic ring
1. 6sc into magic ring, join with ss (6)
2. ch1, 2sc in each st around, join with ss (12)
3. ch1, *sc, 2sc* repeat around, join with ss (18)
fasten off, leaving a tail for sewing
Hat: with red, make a magic ring
1. 6sc into magic ring, join with ss (6)
2. ch1, *sc, 2sc* repeat around, join with ss (9)
3. ch1, *sc, 2sc, sc* repeat around, join with ss (12)
4. ch1, *2sc, sc, sc, sc* repeat around, join with ss (15)
change colour (white)
5. ch1, *sc, sc, sc, 2sc, sc* repeat around, join with ss (18)
fasten off, leaving a tail for sewing and attach a pompom
Оригинал: http://doubletrebletrinkets.co.uk/2015/07/15/christmas-owls/
|
Метки: игрушки |
Процитировано 1 раз
Понравилось: 1 пользователю
Мотив "Овечка" |


After finishing my Bobble Stitch Blanket, I started getting ideas of other projects I could do with the bobble stitch. The bobbles reminded me of sheep wool and so the idea of a sheep granny square was born! Little did I know this small project would require so much math. I swear I mapped out that grid dozens of times.
Finally I think I have it right! Each square in the graph equals one single crochet with exception to the “o”… those represent the places where you will make the bobbles. You can also see where you need to make the color changes. Feel free to back the background any color you want (I chose green).
Here is a video tutorial on how to make a bobble:
Finished sheep square with border measures approximately 10.5×10.5
Materials:
-Size H Crochet Hook
-Worsted weight yarn. I used Lion Brand Vanna’s choose in white, charcoal grey, and fern.
-Tapestry needle
Abbreviations:
SC = Single Crochet
DC = Double Crochet
Bobble Stitch video tutorial above
Pattern:
Starting with green (background color)
Chain 29, SC in second chain from hook and the rest of the way down chain, chain 1, turn (28 SC)
Row 2-4: SC in each stitch across, chain 1, turn
Row 5: SC in first 19, change to white and make your first bobble, SC in next, bobble, SC, change back to green and SC in the last 5 stitches, chain 1, turn
Row 6: SC in first 5 with green, SC in next 4 with white, SC in last 19 stitches with green, chain 1, turn
Row 7: SC in first 17 with green, with white yarn bobble, SC, bobble, SC, bobble, SC, bobble, SC, change to green and SC in last 4 stitches, chain 1, turn
Row 8: SC in first 4 with green, SC in next 7 with gray yarn, change back to green and SC in last 17 stitches, chain 1, turn
Row 9: SC in first 16 with green, change to white and bobble in next, SC in next 7 with gray, bobble in next with white, change to green and SC in last 3 stitches, chain 1, turn
Row 10: SC in first 3 with green, SC in next 9 with gray, change to green and SC in last 16 stitches, chain 1, turn
Row 11: SC in first 6 with green, change to white and *bobble, SC over next 10 stitches, SC in next 10 with gray, SC in last 2 with green, chain 1, turn
Row 12: SC in first 2 with green, SC in next 10 with gray, SC in next 10 with white, SC in last 6 with green, chain 1, turn
Row 13: SC in first 5 with green, change to white and *bobble, SC over next 10 stitch THEN make one more bobble with white, SC in next two with gray, bobble in next stitch with white, SC in next 4 with gray, SC in next stitch with green, SC in next two with gray, SC in last two with green, chain 1, turn
Row 14: SC in first 5 with green, SC in next 4 with gray, SC in next 14 with white, SC in last 5 with green, chain 1, turn
Row 15: SC in first 2 with green, SC in next two with gray, with white *bobble, SC over next 14 stitches THEN make one more bobble with white, SC in next 3 with gray, SC in next 6 with green, chain 1, turn
Row 16: SC in first 9 with green, SC in next 15 with white, SC in next 2 with gray, SC in last 2 with green, chain 1, turn
Row 17: SC in first 2 with green, SC in next with gray, with white *bobble, SC over next 16 stitches and then make on more bobble with white, SC in last 8 with green, chain 1, turn
Row 18: SC in first 8 with green, SC in next 17 with white, SC in last 3 with green, chain 1, turn
Row 19: SC in first 4 with green, with white *bobble, SC over next 14 and then make one more bobble with white, SC in last 9 with green, chain 1, turn
Row 20: SC in first 9 with green, SC in next 15 with white, SC in last 4 with green, chain 1, turn
Row 21: SC in first 5 with green, with white *bobble, SC over next 12 then make one more bobble with white, SC in last 10 with green, chain 1, turn
Row 22: SC in first 10 with green, SC in next 13 with white, SC in last 5 with green, chain 1, turn
Row 23: SC in first 6 with green, with white bobble, SC in next, SC in next two with gray, with white *bobble, SC over next 6, SC in next two with gray, SC in last 10 with green, chain 1, turn
Row 24: SC in first 9 with green, SC in next 2 with gray, SC in next 6 with green, SC in next two with gray, SC over last 8 with green, chain 1, turn
Row 25: SC in first 8 with green, SC in next 2 with gray, SC in next 6 with green, SC in next two with gray, SC over last 10 with green, chain 1, turn
Row 26-28: SC in each stitch across with green, chain 1, turn
SC around edges with green.
To make picket fence border:
Row 1: SC with green, Spike Stitch with white around endure edge making SC + chain 2 in each corner with just green
Row 2: Alternate DC in green and white matching up color to the spike stitches in previous row. Make DC + chain 1 + DC with just green in each corner.
slip stitch along bottom edge with white and slip stitch again right under the spike stitches all the way around to finish off the fence.
Refer to my PICKET FENCE HAT BORDER video tutorials if you need more help!
Here is what the back looks like
These squares are large (10.5×10.5). 4 of them together would make a great lovey blanket. 6-8 sewn together with a border would make a nice blanket! I would love to make multiple squares with different color sheep or maybe use it in a farm themed afghan. Can’t wait to see what you do with them!
Оригинал: http://www.repeatcrafterme.com/2015/07/crochet-bobble-stitch-sheep-square.html
|
Метки: крючок для детей |
Процитировано 1 раз
Плед-игрушка "Машинки" |


I know a little boy who isn’t feeling so well and is in need of some cheering up this week. That is when the idea of the “Playnket” hit me! It’s a crochet play mat and lovey blanket all in one! Snuggle with it or lay it flat on the floor and race the cars on the track. Perfect for sick days on the couch but also a soft activity toy that is a great size to take on the go! Of course you could alway double, triple, or quadruple the pattern to make an even larger blanket. The one I made measures about 23 inches long by 19 inches wide. The small size works up extremely quickly making it an easy gift idea. I’ve already decided that this will be the first of many “playnket” designs so stay tuned!
Materials:
– Worsted weight yarn. I used Lion Brand Vanna’s Choice in Lime, Mustard, Charcoal Grey, and Silver Grey.
I used 2 skeins of Lime, 1 skein of Charcoal Grey and less than a half skein of Mustard and Silver.
The cars are made using Lion Brand Vanna’s Choice in Scarlet, Colonial Blue, and Mustard.
– Size I (5.5mm) crochet hook
– Tapestry needle
– Poly-fil stuffing (for cars)
– Large black buttons (for cars)
Abbreviations:
SC = Single Crochet
Ch = Chain
Note about pattern: The pattern is very simple! SC + chain 1, skip a stitch, SC + chain 1, repeat. But here is the catch… You need to make sure you start and end each row with a SC stitch. On the odd number rows, this happens naturally. You will see that you SC + chain 1, skip a stitch and then you are able to end with a SC in the last stitch. BUT in the even number rows (starting with row 2), you will notice you have one extra stitch left on the end and so you will end up with two single crochets next to each other.
Same goes for the beginning of the rows. The odd number rows you can begin as usual (SC + chain 1, skip a stitch, SC in next space)… but on the even number rows you need to make a SC in the first stitch and then begin your SC + chain, skip a stitch, SC in next space)
Don’t let this confuse you. You will see this happen naturally when you begin the pattern.
I really love this stitch. It looks the same from the front and back gives a great texture. It’s the same stitch I used in my Crochet “I love You” Blanket.
Race Track Blanket
with green yarn…
Chain 70, SC in second chain from hook, chain 1, skip a chain, SC in next, repeat down chain, chain 1 , turn
Row 2: SC in first, SC in chain space + chain 1, skip a stitch, SC + chain 1 in next chain space, repeat until end, SC in last, chain 1, turn
Row 3: SC + chain 1 in first, skip stitch, SC + chain 1 in next chain space, repeat, chain 1, turn
Row 4-14: repeat rows 2-3 (alternating).. remember it’s the same pattern, you just need to start and end with an “extra” SC on the even rows.
change to dark gray yarn
Row 15-18: continue repeating pattern where you left off
change to yellow yarn
Row 19: continue repeating pattern where you left off
change to dark gray yarn
Row 19-22: continue repeating pattern where you left off
Repeat entire pattern until you have 3 race tracks and 4 patches of green. Each block of green is 14 rows. Each race track has 4 rows of gray + one row of yellow + 4 rows of gray.
Of course you can make to the blanket as long and wide as you’d like! When you are finished, fasten off and weave in ends before starting on border.
Border: Starting at any point on the blankets edge, attach light gray yarn and use the same pattern on the border as you did in the blanket: SC + chain 1, skip a stitch, SC all the way around. On the first round of the border make 2 SC + Chain 1 the corners. Make 3 rounds of the border before fastening off and weaving in ends.
Crochet Cars: I made the cars by using a size G hook and following THIS TINY CROCHET CARS PATTERN by the talented Dedri of Look What I Made. I love her version of these cute little cars, but in order to simplify it, I stopped after round 11 of her pattern and began making SC Decreases until closed. The remaining rounds will look like this:
Round 12: SC Decrease, SC in next 3, repeat around
Round 13: SC Decrease, SC in next 2, repeat around
Round 14: SC Decrease, SC in next, repeat around
Round 15: SC Decrease until closed.
Be sure to stuff the car and weave in ends before sewing shut!!
Оригинал: http://www.repeatcrafterme.com/2015/02/crochet-race-car-playnket-play-mat-and.html
|
Метки: крючок игрушки для детей |
Понравилось: 1 пользователю
Аппликация "Кит" |

I have a feeling you will be able to use this whale on multiple projects! Whales seem to be popular and trendy among kids decor. In fact, my kids have a whale-themed bathroom! I look forward to seeing all the places you use this appliqué.
Materials:
– Worsted weight yarn. I used Lion Brand Vanna’s Choice in Aqua (it’s one of their baby yarns) and a little black for the eye and mouth.
– Size G Crochet Hook (the bigger the hook the bigger the appliqué and vice versa)
– Tapestry needle
Abbreviations:
Magic Ring Tutorial
Sl St = Slip Stitch
SC = Single Crochet
SC Decrease = Single Crochet Decrease
HDC = Half Double Crochet
DC = Double Crochet
Whale Applique Pattern:
Magic ring, chain 1 and make 8 SC in ring, join, chain 1
Round 2: 2 SC in first, SC in next, repeat around, join, chain 2
Round 3: 2 DC in first 4, 2 HDC in next, 2 SC in next, 2 HDC in next, DC in last 5, chain 1, turn
Row 4: SC in next 5, ch 1, turn
Row 5: SC decrease, SC, SC Decrease, chain 1, turn
Row 6: SC in each stitch across, chain 1, turn (3 SC)
Row 7: SC in first, SC Decrease, chain 1, turn
Row 8: SC in first, chain 6, SC in 2nd chain from hook, HDC in last 4 chains… Chain 6 again, SC in 2nd chain from hook, HDC in last 4 chains, join to second stitch from row 8,
Continue to sC around whale body, fasten off when you get back around to tail.
Stich on a small smile with black yarn.
Make a french knot for the eye.
Оригинал: http://www.repeatcrafterme.com/2014/10/w-is-for-whale-crochet-whale-applique.html
|
Метки: крючок игрушки для детей |
Процитировано 1 раз
Аппликация "Котенок" |


C is for Cat
This friendly feline can be made in any colors you choose! How about an orange tabby or a white persian or a siamese?! I used to have a gray cat named Smoki (before my black cat, Romeo) so this little gray appliqué reminded me of her :) Remember that I also have a Crochet Cat Hat Pattern that is purrrrfect for cat lovers!
Materials:
– Worsted weight yarn in any color! I used Lion Brand Vanna’s Choice in Silver Grey and Pink.
– Size G Crochet Hook (the bigger the hook the bigger the appliqué and vice versa)
– Tapestry needle
Abbreviations:
SC = Single Crochet
HDC = Half Double Crochet
DC = Double Crochet
TC = Triple Crochet
Crochet Cat Applique Pattern:
Magic ring, chain 1 and make 10 SC in ring, join to first SC, chain 1
Round 2: 2 SC in each stitch around, join, chain 1 (20 SC)
Round 3: 2 SC in first stitch, SC in next, repeat around, join, chain 1 (30 SC)
Round 4: SC in first 10 stitches, DC in next 5, SC in next 10, DC in next 5, join to first SC.
Round 5: Chain 4, * HDC in 2nd chain from hook, DC in next, TC in last chain, skip one stitch in round and join with a slip stitch to next stitch. Slip stitch in next 4, chain 4 and repeat from * to make other ear. Fasten off leaving long tail.
Use tapestry needle to stitch on inside of ears, nose, whiskers and mouth.
I made a french knot for each eye. HERE is a tutorial on how to make a french knot.
Оригинал: http://www.repeatcrafterme.com/2014/10/c-is-for-cat-crochet-cat-applique.html
|
Метки: крючок игрушки для детей |
Процитировано 1 раз
Понравилось: 1 пользователю
Слюнявчик-монстр |


I am having a lot of fun with this new Lion Brand Modern Baby Yarn! The colors are bright, cheerful, and the perfect palette for these fun Crochet Monster Baby Bibs! The yarn is washable so bibs can be worn and washed. Although I would recommend using them for drools instead of foods :)
Materials:
– Lion Brand Modern Baby Yarn. I used Purple, Turquoise, Chartreuse, and Yellow. Keep in mind this is a light worsted weight yarn. You can purchase and read more about this yarn HERE. I did use a bit of worsted weight white and black yarn for face embellishments.
– Size H Crochet Hook
– Button or velcro depending how which closure you choose
– Tapestry needle
Abbreviations:
Magic Ring Tutorial
Ch = Chain
SC = Single Crochet
SC Decrease = Single Crochet Decrease
HDC = Half Double Crochet
DC = Double Crochet
TC = Triple Crochet
Bib Pattern:
Starting with color 1 (example: yellow)
Chain 21, SC in 2nd chain from hook and in each chain across, ch 1, turn (20 SC)
Row 2: 2 SC in first stitch, SC in next 18, 2 SC in last, ch 1, turn (22 SC)
Row 3: SC in each stitch, ch 1, turn (22 SC)
Row 4: 2 SC in first, SC in next 20, 2 SC in last, ch 1, turn (24 SC)
Row 5-10: SC in each stitch, ch 1, turn (24 SC)
change to white yarn
Row 10-11: SC in each stitch, ch 1, turn (24 SC)
change to color 2 (example: blue)
Row 12-29: SC in each stitch, ch 1, turn (24 SC)
Row 30 (a): SC in first 10, ch 1, turn (10 SC) – this is the start of your first bib strap
Row 31 (a): SC Decrease, SC in next 6, SC Decrease, ch 1, turn
Row 32 (a): SC in each stitch, ch 1, turn (8 SC)
Row 33 (a): SC Decrease, SC in next 4, SC Decrease, ch 1, turn
Row 34-37 (a): SC in each stitch, ch 1, turn (6 SC)
Row 38 (a): SC Decrease, SC in next 2, SC Decrease, ch 1, turn
Row 39 (a): SC in each stitch, ch 1, turn, (4 SC)
Row 40 (a): SC Decrease over last 2, fasten off leaving long tail.
Row 30 (b): Skip 4 SC after your first bib strap in Row 30. Attach yarn and SC over last 10, ch 1, turn (10 SC)
Row 31 (b): SC Decrease, SC in next 6, SC Decrease, ch 1, turn
Row 32 (b): SC in each stitch, ch 1, turn (8 SC)
Row 33 (b): SC Decrease, SC in next 4, SC Decrease, ch 1, turn
Row 34-37 (b): SC in each stitch, ch 1, turn (6 SC)
Row 38 (b): SC Decrease, SC in next 2, SC Decrease, ch 1, turn
Row 39 (b): SC in each stitch, ch 1, turn, (4 SC)
Row 40 (b): SC Decrease over last 2, continue to SC around bib. when you get to color 1 at the bottom, you will want to switch to that color and continue to SC around the edge, switch back to color 2 when you reach the other side.
If making a button closure: Chain 8 when you get to the top of the first bib strap (to create a loop), join back to the top of bib strap and continue finishing your SC around the edge.
Sew button on other bib strap for chain loop to connect to.
OR you can sew on velcro pieces. The ones you see in the picture are stick-ons. I will have to find a better solution if I am going to wash it!
Monster Teeth: (make as many as you want!)
Chain 5, SC in second chain from hook, HDC in next, DC in next, TC in last. Fasten off leaving long tail and sew along white row.
Monster Eyes:
Large Eye:
with white…
Magic Ring, ch 1 and make 6 SC in ring, join, ch 1 (6 SC)
Round 2: 2 SC in each stitch around, join, ch 1 (12 SC)
Round 3: 2 SC in first stitch, SC in next, repeat around, join, ch 1 (18 SC)
Round 4: 2 SC in first, SC in next 2, repeat around, join (24 SC)
Fasten off leaving long tail to sew onto bib.
Use a black button for eye ball OR using black yarn Magic Ring, Make 6 SC in ring, pull tight and join. Sew onto large eye.
Small Eye:
with white…
Magic Ring, ch 1 and make 5 SC in ring, join, ch 1 (5 SC)
Round 2: 2 SC in each stitch around, join, ch 1 (10 SC)
Round 3: 2 SC in first stitch, SC in next, repeat around, join (15 SC)
Fasten off leaving long tail to sew onto bib.
Use a black button for eye ball OR using black yarn Magic Ring, Make 5 SC in ring, pull tight and join. Sew onto large eye.
Оригинал: http://www.repeatcrafterme.com/2014/08/crochet-monster-baby-bibs.html
|
Метки: крючок для детей |
Процитировано 1 раз
Аппликация "Радуга с тучкой" |


My son was invited to a Rainbow themed birthday party yesterday and as I was wrapping the gift I quickly realized I didn’t have a card. No problem for this crafter! A crochet rainbow appliqué was easy to make and made for a pretty embellishment for the top of a plain note card!
Materials:
– Worsted weight yarn in red, orange, yellow, green, blue, purple and white
– Size H or G Crochet Hook
– Tapestry Needle
Abbreviations:
Magic Ring Tutorial
SC = Single Crochet
HDC = Half Double Crochet
Rainbow Pattern:
starting with purple yarn
Magic Ring, chain 1 and make 8 SC inside ring. Pull tight but do not join. You should have a half circle.
attach blue yarn, chain 1, turn
Row 2: SC in each stitch, (8 SC)
attach green yarn, chain 1, turn
Row 3: 2 SC in first stitch, SC in next, repeat until end of row (12 SC)
attach yellow yarn, chain 1, turn
Row 4: SC in each a stitch (12 SC)
attach orange yarn, chain 1, turn
Row 5: 2 SC in first stitch, SC in next (18 SC)
attach red yarn, chain 1, tun
Row 6: SC in each stitch across (18 SC)
Fasten off and weave in all ends.
Cloud Pattern:
Chain 13, 4 HDC in 3rd chain from hook, *skip a stitch and join to next stitch with a slip stitch, skip a stitch and make 4 HDC in the next stitch, continue from * all the way down chain. You should have 3 cloud humps. Make 4 HDC in the last stitch, join to stitch on the other side of chain. Make 4 HDC in the next stitch, skip a stitch and join with a slip stitch to next stitch, continue same pattern along the other side of chain to make another 3 cloud humps. Make 4 HDC in the last chain to complete your clouds! Fasten off leaving a long tail to sew onto edge of rainbow.
Оригинал: http://www.repeatcrafterme.com/2014/06/crochet-rainbow-applique.html
|
Метки: игрушки для детей |
Zombie doll |


If you are a fan of The Walking Dead TV show or you just happen to like zombies then I think you might like this crocheted zombie! Unlike typical zombies who are mindless, reanimated corpses with a hunger for human flesh, this little guy is very friendly and likes to snuggle :) Mark your calendars for Feb. 9, 2014 for the Season 5 Premiere of The Walking Dead on AMC!
Materials:
-Green worsted weight yarn (I used Lion Brand Vanna’s Choice Dusty Green), you will also need a little bit of white, black and red yarn as well.
-Size G crochet hook
-Poly-fil stuffing
-Stitch marker
-Tapestry needle
-One small safety eye or button
Abbreviations:
Magic Ring Tutorial
SC = Single Crochet
SC Decrease = Single Crochet Decrease
HDC = Half Double Crochet
DC = Double Crochet
Finished Doll measures 6.5 x 6.5 (from head to toe and arm to arm)
Zombie Head/Body: Make 2
Chain 13, SC in second chain from hook and the rest of the way down chain, chain 1, turn (12 SC)
Row 2-14: SC in each stitch across, chain 1, turn (12 SC)
Fasten off leaving a long tail on one of the pieces.
After you have attached the eyes (pattern below) and mouth (stitch on with tapestry needle and black yarn) to one of the head pieces, sew the two pieces together. Stuff lightly with poly-fil before you close it up.
Surface slip stitch (tutorial HERE) the red blood on the mouth if you want. Do this before you sew the two head pieces together as well.
Zombie Eyes:
Large Eye:
Magic ring, chain 1 and make 5 SC in ring, join, chain 1
Round 2: 2 SC in each stitch around, join, chain 1 (10 SC)
Round 3: S SC in first, SC in next stitch, repeat around, join (15 SC)
Fasten off leaving long tail to sew on to head.
Small Eye:
Magic ring, chain 1 and make 6 SC in ring, join, chain 1
Round 2: 2 SC in each stitch around, join (12 SC)
Fasten off leaving long tail to sew on to head.
With your tapestry needle, sew both eyes onto one piece of the head. Use a small button or a safety eye in the middle of the bigger eye. Make and “X” with black yarn in the smaller eye.
Zombie Arms: Make 2
Magic ring, make 6 SC in ring, do not join, continue to SC in rounds
Round 2: 2 SC in first stitch, SC in next 2, repeat around (8 SC)
Round 3-6: SC in each stitch around (8 SC)
(feel free to make arms as long or short as you like)
Fasten off, stuff lightly with poly-fil and sew shut with tapestry needle.
Leave a long tail so you can sew it onto the body.
Zombie Legs: Make 2
Magic ring, 8 SC in ring, do not join, continue to SC in rounds
Round 2: 2 SC in first stitch, SC in next, repeat around (12 SC)
Round 3-6: SC in each stitch around (12 SC)
Round 7: SC Decrease, SC in next, repeat around (8 SC)
Round 8-9: SC in each stitch around (8 SC)
(feel free to make legs longer if you’d like)
Fasten off, stuff lightly with poly-fil and sew shut with tapestry needle.
Leave a long tail so you can sew it onto the body.
Don’t forget to tie on a couple strands of black yarn at the top for some spiky hair!
Оригинал: http://www.repeatcrafterme.com/2014/01/friendly-crochet-zombie-doll.html
|
Метки: игрушки |
Шапка "Божья коровка" |
|
Метки: крючок для детей |
Понравилось: 1 пользователю
Плед из мотивов "Пироженка" |
Оригинал и частичное описание: http://www.repeatcrafterme.com/2015/05/crochet-cupcake-pixel-blanket.html
|
Метки: крючок для детей |
Процитировано 1 раз
Понравилось: 1 пользователю
Плед Сова |


Описание и источник: http://www.repeatcrafterme.com/2015/11/crochet-owl...nket-with-lion-brand-yarn.html
|
Метки: крючок для детей |
Процитировано 1 раз
Понравилось: 1 пользователю
Плед из мотивов "Смайлики" |
|
Метки: крючок для детей |
Процитировано 4 раз
Понравилось: 2 пользователям
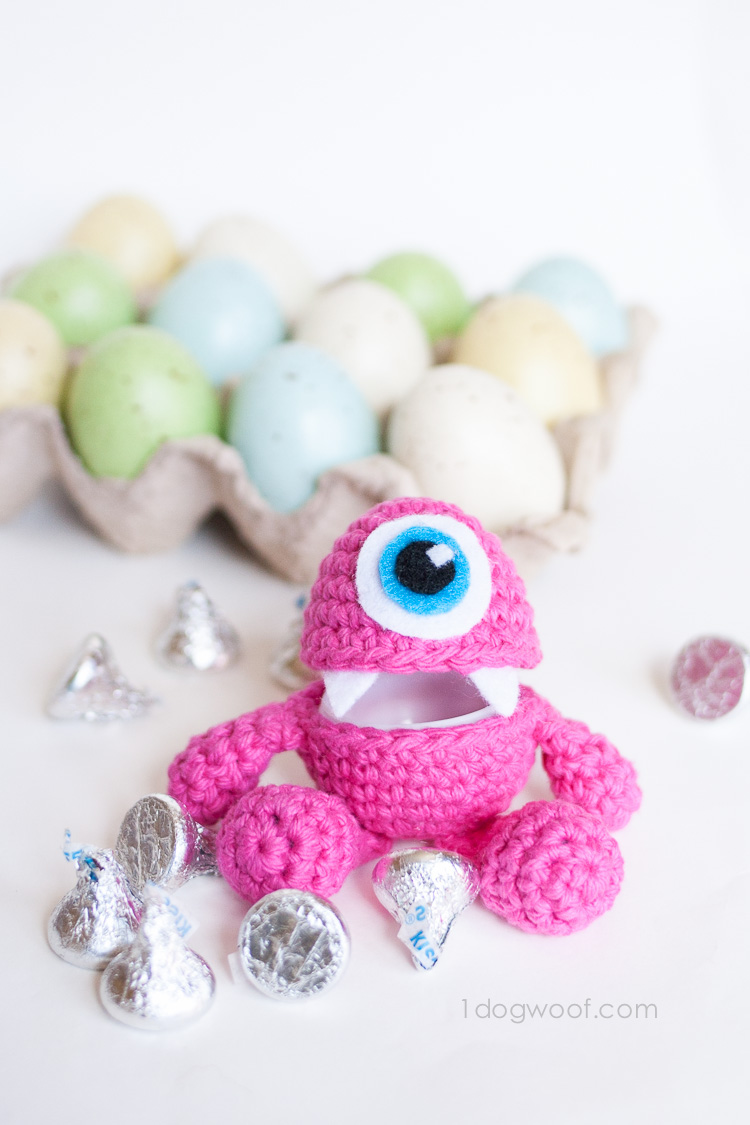
Little Monster |
|
Метки: игрушки |
Процитировано 1 раз
Понравилось: 1 пользователю
Незаметная смена нити при "полосатом" вязании |


Источник и описание: http://www.1dogwoof.com/2015/05/perfect-crochet-stripes-without-cutting-yarn.html
|
Метки: крючок игрушки |
Процитировано 1 раз
Понравилось: 1 пользователю
митенки с лисами |

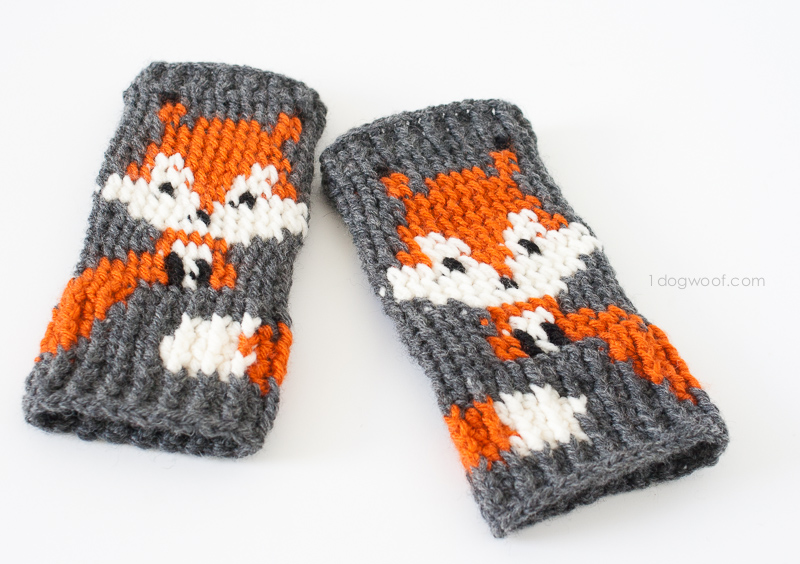
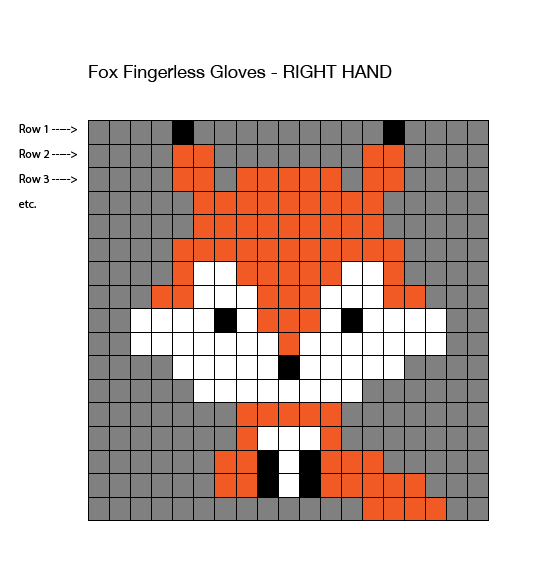
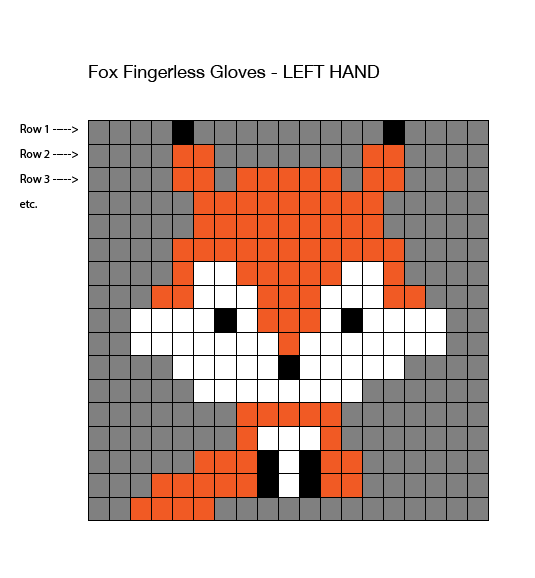
Источник и описание: http://www.1dogwoof.com/2016/02/fox-fingerless-gloves-handwarmer-crochet-pattern.html
|
Метки: крючок для детей |
Процитировано 1 раз
Узор крючком Шахматы |
Источник и описание: http://www.niftynnifer.com/2013/02/basket-weave-free-crochet-pattern-by.html#more
|
Метки: крючок |
Полосатый узор |
Описание и источник: http://www.niftynnifer.com/2014/07/understanding-single-crochet-stitch.html#more
|
Метки: крючок |
Фартук крючком |
Описание и источник: http://www.niftynnifer.com/2014/09/free-crochet-pattern-my-little-helper.html#more
|
Метки: крючок для детей |
Варежка с подстаканником )))))))))))) |
Источник и описание: http://www.niftynnifer.com/2014/12/free-crochet-pattern-beverage-cozy-mitt.html
|
Метки: вязание крючок |
Процитировано 1 раз
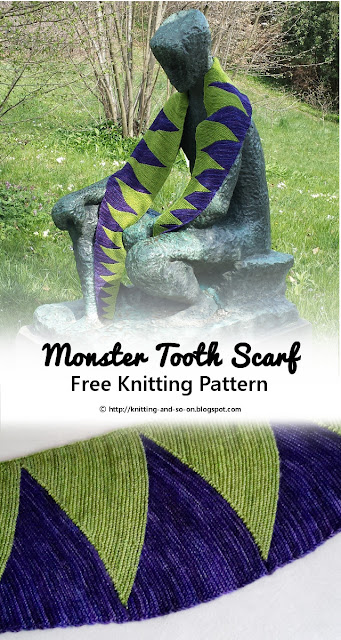
Креативно спицами |
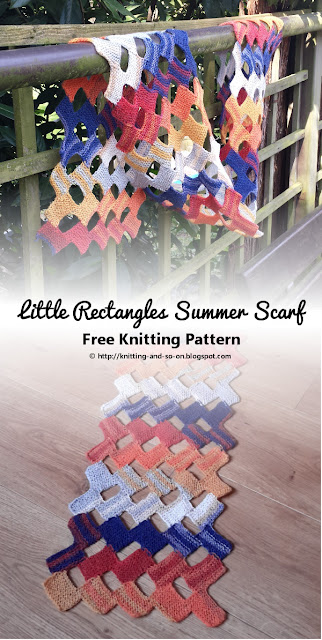
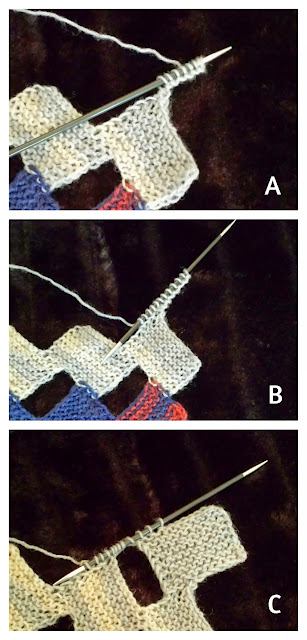

Описание в источнике: ссылка1: http://knitting-and-so-on.blogspot.ru/2015/04/little-rectangles-summer-scarf.html
ссылка2: http://knitting-and-so-on.blogspot.ru/2015/04/kleine-rechtecke-schal.html
|
Метки: вязалочки |
Необычные митенки |
для тех, кто не боится сложностей ))))))))))))
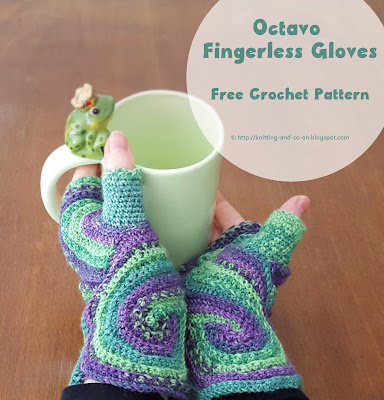


Описание в источнике: http://knitting-and-so-on.blogspot.ru/2015/11/octavo.html


Описание в источнике: http://knitting-and-so-on.blogspot.ru/2015/11/octavo.html
|
Метки: крючок |
Понравилось: 1 пользователю
Интересный узор |


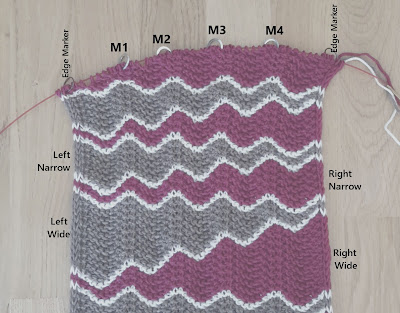
Jolly Waves Cowl
With an eye-catching design and beautiful colors this cowl will keep your spirits up this winter. The gorgeous graphical effect is achieved by the combination of short rows with a feather and fan pattern.
Creative Commons License
This work by Knitting and so on is licensed under a Creative Commons Attribution-NonCommercial-ShareAlike 4.0 International License.
796
Materials
about 220 grams of DK weight yarn in 3 colors, 100 grams of the main colors each (beige and maroon in the photos - called MC1 and MC2) and 20 grams of the contrast color (off-white in the photos - called CC) - this will yield a double length cowl, i.e. about 125 cm in circumference.
3.75 mm knitting needles (straight or circular)
6 stitch markers (2 stitch markers to mark the edges and 4 markers to mark the ends of the short rows - these 4 markers will be called M1 to M4)
Techniques
Provisional CO: My favorite method for a provision CO is the crochet provisional CO - it is shown in this Youtube video by New Stitch a Day.
Short Rows with Wrap and Turn (w+t): The technique is shown in this YouTube video by Very Pink Knits. For this cowl, I didn't pick up the wraps because with garter stitch the wraps hardly show.
Grafting Garter Stitch: Shown in this YouTube video by New Stitch a Day. If you want to know all about grafting, please read the brilliant "Grafting Myths" series on Joni Coniglio's blog on knittingdaily.com.
Carrying yarn up: If you want to avoid cutting your yarn with every color change (and subsequently to have to weave in too many ends), you will carry up the yarn on the side of your work - this technique is shown in this YouTube video by Knit Purl Hunter.
Short Row Sections
The pattern consists of different short row sections that are divided by a garter stitch ridge in the neutral color.
There are four types of section - as shown in the picture above.
Right Narrow Section
Left Narrow Section
Right Wide Section and
Left Wide Section.
The diagram below shows how the short rows stack up for each section type. Both the photo and the diagram show the RS of the cowl.
Basically, you knit 4 narrow sections (right-left-right-left) and 4 wide sections (also right-left-right-left) with a rigde in a neutral color inbetween. All "right"-sections (i.e. right narrow and right wide section) are knitted in color 1 (MC1), all "left"-sections (i.e. left narrow and left wide section) are knitted in color 2 (MC2) - and all contrast ridges are knitted with the contrast color CC.
Instructions
Provisionally CO 66 stitches and knit one row with CC - leaving a tail long enough to graft these 66 stitches in the end and placing the markers as follows: k3 pm (edge marker) k12 pm (=M1) k12 pm (=M2) k12 pm (=M3) k12 pm (=M4) k12 pm (edge marker) k3
Knit a right narrow section as follows:
With MC1
R1 (RS): k all stitches
R2 (WS): sl3wyif, * kfb kfb ssk ssk ssk ssk kfb kfb repeat from * until there are only 3 sts left, sl3wyif
R3, R4 (RS, WS): k up to M1, w+t, * kfb kfb ssk ssk ssk ssk kfb kfb repeat from * until there are only 3 sts left, sl3wyif
R5, R6 (RS, WS): k up to M2, w+t, * kfb kfb ssk ssk ssk ssk kfb kfb repeat from * until there are only 3 sts left, sl3wyif
R7, R8 (RS, WS): k up to M3, w+t, * kfb kfb ssk ssk ssk ssk kfb kfb repeat from * until there are only 3 sts left, sl3wyif
R9, R10 (RS, WS): k up to M4, w+t, * kfb kfb ssk ssk ssk ssk kfb kfb repeat from * until there are only 3 sts left, sl3wyif
Knit a contrast ridge as follows
With CC
R1 (RS): k all stitches
R2 (WS): sl3wyif, * kfb kfb ssk ssk ssk ssk kfb kfb repeat from * until there are only 3 sts left, sl3wyif
Knit a left narow section as follows
With MC2
R1 (RS): k all stitches
R2, R3 (WS, RS): sl3wyif, kfb kfb ssk ssk ssk ssk kfb kfb (you're now at M1), w+t, k all stitches
R4, R5 (WS, RS): sl3wyif, * kfb kfb ssk ssk ssk ssk kfb kfb repeat from * until you are at M2, w+t, k all stitches
R6, R7 (WS, RS): sl3wyif, * kfb kfb ssk ssk ssk ssk kfb kfb repeat from * until you are at M3, w+t, k all stitches
R8, R9 (WS, RS): sl3wyif, * kfb kfb ssk ssk ssk ssk kfb kfb repeat from * until you are at M4, w+t, k all stitches
R10 (WS): sl3wyif, * kfb kfb ssk ssk ssk ssk kfb kfb repeat from * until there are only 3 sts left, sl3wyif
Knit a contrast ridge.
Knit a right narrow section.
Knit a contrast ridge.
Knit a left narrow section.
Knit a contrast ridge.
Knit a right wide section as follows
With MC1
R1 (RS): k all stitches
R2 (WS): sl3wyif, * kfb kfb ssk ssk ssk ssk kfb kfb repeat from * until there are only 3 sts left, sl3wyif
R3, R4 (RS, WS): k up to M1, k6, w+t, ssk ssk kfb kfb, * kfb kfb ssk ssk ssk ssk kfb kfb repeat from * until there are only 3 sts left, sl3wyif
R5, R6 (RS, WS): k up to M1, w+t, * kfb kfb ssk ssk ssk ssk kfb kfb repeat from * until there are only 3 sts left, sl3wyif
R7, R8 (RS, WS): k up to M2, k6, w+t, ssk ssk kfb kfb, * kfb kfb ssk ssk ssk ssk kfb kfb repeat from * until there are only 3 sts left, sl3wyif
R9, R10 (RS, WS): k up to M2, w+t, * kfb kfb ssk ssk ssk ssk kfb kfb repeat from * until there are only 3 sts left, sl3wyif
R11, R12 (RS, WS): k up to M3, k6, w+t, ssk ssk kfb kfb,* kfb kfb ssk ssk ssk ssk kfb kfb repeat from * until there are only 3 sts left, sl3wyif
R13, R14 (RS, WS): k up to M3, w+t, * kfb kfb ssk ssk ssk ssk kfb kfb repeat from * until there are only 3 sts left, sl3wyif
R15, R16 (RS, WS): k up to M4, k6, w+t, ssk ssk kfb kfb, * kfb kfb ssk ssk ssk ssk kfb kfb repeat from * until there are only 3 sts left, sl3wyif
R17, R18 (RS, WS): k up to M4, w+t, * kfb kfb ssk ssk ssk ssk kfb kfb repeat from * until there are only 3 sts left, sl3wyif
R19, R20 (RS, WS), k3, k6, w+t, ssk ssk kfb kfb, sl3wyif
Knit a contrast ridge.
Knit a left wide section as follows
With MC2
R1 (RS): k all stitches
R2, R3 (WS, RS): sl3wyif, kfb kfb ssk ssk, w+t, k all stitches
R4, R5 (WS, RS): sl3wyif, kfb kfb ssk ssk ssk ssk kfb kfb (you're now at M1), w+t, k all stitches
R6, R7 (WS, RS): sl3wyif, kfb kfb ssk ssk ssk ssk kfb kfb (you're now at M1), kfb kfb ssk ssk, w+t, k all stitches
R8, R9 (WS, RS): sl3wyif, * kfb kfb ssk ssk ssk ssk kfb kfb repeat from * until you are at M2, w+t, k all stitches
R10, R11 (WS, RS): sl3wyif, * kfb kfb ssk ssk ssk ssk kfb kfb repeat from * until you are at M2, kfb kfb ssk ssk. w+t, k all stitches
R12, R13 (WS, RS): sl3wyif, * kfb kfb ssk ssk ssk ssk kfb kfb repeat from * until you are at M3, w+t, k all stitches
R14, R15 (WS, RS): sl3wyif, * kfb kfb ssk ssk ssk ssk kfb kfb repeat from * until you are at M3, kfb kfb ssk ssk. w+t, k all stitches
R16, R17 (WS, RS): sl3wyif, * kfb kfb ssk ssk ssk ssk kfb kfb repeat from * until you are at M4, w+t, k all stitches
R18, R19 (WS, RS): sl3wyif, * kfb kfb ssk ssk ssk ssk kfb kfb repeat from * until you are at M4, kfb kfb ssk ssk. w+t, k all stitches
R20 (WS): sl3wyif, * kfb kfb ssk ssk ssk ssk kfb kfb repeat from * until there are only 3 sts left, sl3wyif
Knit a contrast ridge.
Knit a right wide section.
Knit a contrast ridge
Knit a left wide section.
Repeat this series of sections (right narrow, left narrow, right narrow, left narrow and right wide, left wide, right wide, left wide) - always divided by a ridge in the neutral color - until the cowl is long enough for you. End with a left wide section.
Put the stitches from your provisional cast-on on a needle and graft both ends together - 3 sts in stockinette, then 60 sts in garter stitch and the last 3 again in stockinette stitch. (If you need more detailed instructions for the grafting part, it's the same that has been used for the Mixed Wave Cowl on this blog. Follow the link and you'll find detailed instructions written by Joni Coniglio.
Weave in ends and block.
This pattern was featured at the Hookin' up on Humpday #111 Link Party, the Knitting Love Link Party #5 and at the Link and Share Wednesday Link Party No. 122 by Oombawka Design - thank you!
Источник: http://knitting-and-so-on.blogspot.ru/2015/11/jolly-waves-cowl.html
|
Метки: крючок |
Процитировано 1 раз
Пенал крючком |
Быстро и просто ))))))))))


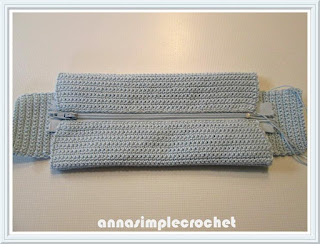
Trousse à crayon
À faire soi-même...
Matériels : 50 gr. de coton nº6, une aiguille nº 1,75 et une fermeture-éclair de 16 cm.
Maille serrée (ms) = single (sc) = ponto baixo ( pb )
Maille en l'air (ml) = chain (ch) = correntinha (corr)
Monter 61 mailles en l'air +2 pour tourner et crocheter 60 mailles serrées = 61 ms
Continuer sur 54 rangs. couper le fil.
Au 20ème rang et sur le côté faire 18 ms jusqu'à 20 rangs de la fin et continuer à crocheter pour obtenir 13 rangs. I dem de l'autre côté.
Coudre la fermeture-éclair.
Et les côtés.
J'ai crocheté 6 mailles au milieu des côtés pour faire des petites anses mais on peut les faire à part et les coudre ensuite.
Bonne journée à toutes !!!
Источник: http://annasimplecrochet.blogspot.ru/2016/01/trousse-crayon.html
|
Метки: крючок игрушки |
Понравилось: 1 пользователю
Салфетка Сердечная |
|
Метки: крючок |
Процитировано 1 раз
Crochet Teddy Hand Puppet Pattern |
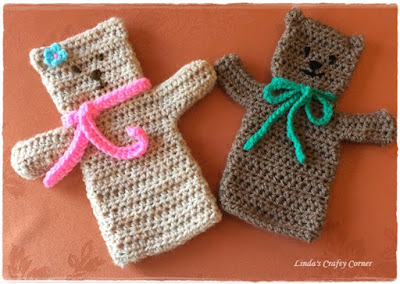

Crochet Teddy Puppet Pattern
Materials
Double knit Yarn approximately 25 grams in main colour
4 mm crochet hook
Abbreviations
UK Terminology
htr = half treble (US hdc)
ch = chain
inc = increase
sts = stitches
Front
Make a 16 ch,
htr in 3rd ch from hook and in each ch to end = 14 htr, 2ch turn
Continue until work measures 3 1/2 inches, break yarn.
Arms
Ch 9 and htr across body of bear,
ch 11 at the end of the row.
Htr in 2nd ch from hook and across all stitches, you should have 9 stitches for each arm and 14 for the body. 2ch turn.
Continue until arms measure 1 inch, break yarn.
Neck
Rejoin yarn to 11th htr 2ch (counts as 1st st) and work 11 htr for neck, 2ch turn
Head
inc in 1st and last st = 14 sts, continue until head measures 2 1/2 inches from the beginning of neck.
So there you have it one side of your Ted is done, now you can just continue down the back of your puppet reversing shapings or break your yarn and make another piece exactly the same.
Make your bears features before you sew the two sides together it's much easier that way.
To make the ears just back stitch across the two corners of the head.
Then decorate any way you wish, have fun!
These Teds are great fun to make and be warned they are quite addictive too, make some and send them for this great cause, or for a cute little child in your life.
Источник: http://lindacraftycorner.blogspot.ru/2015/08/crochet-teddy-puppet-pattern.html
|
Метки: игрушки крючок |
Процитировано 1 раз
Не о прекрасном. |
В косметических, парфюмерных магазинах и магазинах нарядов дамы приобщаются к прекрасному, но есть некие моменты, которые "портят" процесс многим.
Итак,
Продавцы назойливо здороваются и предлагают помочь, хотя помочь не в состоянии?
Охрана следует за вами по пятам и шипит рацией, распугивая остатки хорошего настроения?
Купили дорогую тушь, а тюбик безвозвратно испакощен липким стикером?
Сейчас объясню, почему.
Воруют.
Чтобы вы немного поняли, о чём я: недовольные покупательницы, у которых верещат сумки при выходе - для магазина неизбежное зло.
Мы можем выступать и ругаться, сколько влезет: никто ничего менять не будет.
Потому что наши "объявим бойкот РГ!" и "больше я туда ни ногой" ничтожная потеря для магазина по сравнению с тем, что будет, если магазин не будет дышать в затылок всем, кто может вызвать подозрения.
Дело в том, что "воруют" косметику и парфюмерию вовсе не так как обычный, не в теме, человек себе воображает.
В частности, упереть тюбик помады со стенда - это не воровство. Если бы этим ограничивалось, поверьте- охрана бы себя не окупала.
Если человек приходит магазин обнести, то он не останавливается на одной вещи.
Несут по три платья, по нескольку ремней, набивают сумки и карманы мелочью вроде серёг и браслетов.
Унос одного флакона парфюма дела не решает: краденое сбывается не более 50% от цены, что не соответствует риску.
Потому тащат десятками.
А теперь посчитайте, во что вылетит тому же Рив Гошу минус 10-50 флаконов парфюма ежедневно?
Я сейчас не говорю про т.н. "колхозников" и "адреналинщиков".
Этих как раз обычно ловят и шумно стыдят.
Профессионалы берут много и не боятся попасться: опытные шоплифтеры несут не от бедности и имеют при себе сумму чтобы оплатить украденное, если их схватят за руку (иногда - в двойном или тройном размере, если потребует магазин).
Это к вопросу о том, "почему они за мной ходят, разве я плохо одета?"
Хорошо, может быть , даже слишком хорошо.
Более того, если профессионал "работает", то он часто проходит по 3-4-5 магазинам в торговом центре.
Больше опасно, меньше - невыгодно.
Поэтому наличие в руках вещей из соседней лавочки отнюдь не снимает с вас подозрений.
Именно поэтому равно бесятся и охранники, обнаруживая у вас в сумке нечто пищащее из соседнего магазина, и покупатель - "Ну какого же чёрта - это вообще не их продукция!"
Если кто-то"пищит" неразмагниченной книжкой, сумкой, диском, курткой - для нас это "магазин виноват", для охраны - "этот товар, возможно, ранее украли в другом месте".
Поэтому следите, чтобы при покупке вашу добычу размагничивали хорошо: меньше будет неприятностей потом.
Если охрана гуляет именно за вами, то,скорее всего, вы подходите по профайлу.
Что уж - лично я , увы, подхожу.
Ведь в магазинах косметики, парфюмерии и среднего класса одежды воруют женщины.
Типичный вариант - молодая (до 40), хорошо одетая женщина, с большой или среднего размера сумкой, и особенно(!) с фирменным бумажным пакетом одного из близлежащих магазинов.
Вот клянусь - я была уверена, что наличие при себе здорового пакета с только что совершённой покупкой - это практически вывеска "я пришла покупать! я выгодный клиент! у меня есть деньги!"
Как бы не так.
Существует техника унесения вещей из магазина, c помощью так называемого booster bag'а. Это вкладка из фольги, которая экранирует сигнал помещённых в неё датчиков. Вкладку вшивают(!!!) в сумки, но поскольку штука хрупкая, то гарантированный вариант - вклейки "брони" в позаимствованные по соседству бумажные пакеты и маскировка далее ватманским листом. Пакет выглядит тонким, бумажным, слегка шуршит. Кинь в него вещь, духи - и можно проносить через ворота охраны.
Любой тип датчиков. Сколько бы их ни было. Сунул в сумку - и пошёл.
Однако - вот сюрприз-то!- охрана этот приём знает отлично ( в крупных супермаркетах и торговых центрах целые выставки разнообразных "сумок с секретом").
Сейчас многие ворота оборудованы металлоискателями, и стоит кому-то внести booster bag в магазин, звона будет много. В приличных местах ора не будет, зато будет сигнал охране по внутренней связи.
Потому если у вас есть привычка гулять по магазинам с металлическими предметами большой площади поверхности - готовимся хорошенько понервировать охранников. И себя за компанию.
Потому даже пустая звенящая сумка для охраны - подозрительна.
Потому многие охранники тянутся шаловливыми-то руками в направлении нашего багажа: металлические приспособления можно только прощупать.
Если вы носите тёмные очки (особенно в холодное время года) - на вас будет внимание.
Дело в том, что для того, чтобы эффективно спереть вещь, нужно отслеживать работу камер, продавцов и охраны, но не встречаться взглядом ни с чем(кем) из вышеперечисленного. Поэтому если вы, как и я , не переносите лампы дневного света - то не удивляемся, что рядом может нарисоваться не самая располагающая компания.
Далее, по профайлу, воруют мелкие предметы, вынимая несколько с полки или стеллажа, и возвращая обратно не всё из вынутого. Потому, если вы - опять же как одна ваша знакомая;))) - любите пострадать и повыбирать из 7-ми лаков для ногтей, прикладывая пузырьки к пальцам, рассматривая флаконы на свет и зажимая в кулаке "на эргономичность, энергетику и хорошую карму", то для окружающих это выглядит подозрительно.
Если у вас есть манера держать руки в карманах....то ой. Да, и это тоже, увы,увы.
Дело в том, что можно пронести некоторые виды защиты через ворота, включив устройство, заглушающее радиосигнал охранной ситемы. А устройство...правильно, лежит в кармане, пальцем нажимают кнопку и тянут из магазина практически мешками. Потому если в кармане переключаем плеер, то и это тоже выглядит подозрительно!
Пристально вертите ценник? Это неспроста!
Вот мне всегда было любопытно - почему когда ценник уже в руках, непременно кто-то подойдёт и прицепится начнёт светскую и только отлвекающую от процесса выбора беседу "давайте я вам помогу".
Оказывается, сама пластиковая полоска с кодом - штука хрупкая, и опытный народ может её повредить голыми руками, особым образом пережав и надломив.
После чего остаётся только вынести вещь.
Если в магазине вы открываете упаковку с тушью, чтобы убедиться, что сам флакон не вскрыт - это практически немедленный аврал и ахтунг: дело не в том, что вы, оборони боже, можете отодрать гнусную липучку на самом флаконе. Это как раз сделать сложно - даже дома и даже с опытом.
Но хитрые специалисты освобождения (да-да, на сленге "освободить" или лучше "спасти" нечто - унести это из магазина, не заплатив) барахла носят с собой размагничивающие устройства. Эта ерунда (обычно небольшой, но мощный магнит) вешается на резинке в рукав, и всё происходит молниеносно: размагничиваются несколько упаковок, потом что-то из этих упаковок исчезает за пазухой или в кармане, или в том же рукаве.
А, распахнутые пальто или куртки - это тоже хорошая заявка на почётное сопровождение по магазину.
В более приличных магазинах ( Иль Де Ботэ, Дуглас Риволи) охрана за посетителями не гуляет.
Выход найден иной: команду "сторожить добро!" выполняет тот, кого вы считаете консультантом. Приветственная радушная фраза "Добрый день" не просто дань политесу, но заявление по протоколу (это часто есть в должностной инструкции). С вами не просто так стремятся встретиться взглядом, сопровождают до стендов. Вам навязывают общество не из скудоумия, а из опасений, что вы что-то унесёте.
Далее, я всегда думала, что если покупаем в этом магазине, то уж точно никто не должен нас подозревать. Ага. Сейчас.
Оказывается, по статистике большинство краж совершается "вдогонку" к покупке (?!)
И более того - то, что вас в этом магазине знают, что вы общаетесь с продавцами, что вы их в свою очередь знаете - тоже ничего не значит. Ибо большинство воров спокойно ходят на "прикормленные" точки нет, не месяцами. Годами(!)
Нелишне добавить, что в последнее время число краж возросло (кризис), а финансирование охранных систем и персонала - упало (кризис, говорю!), потому невроз вместо приобщения к прекрасному, увы, закончится едва ли.
Что делать?
Не воровать.
Серьёзно. Даже по мелочи и на спор. Это ухудшает карму. Это делает взгляд быстрым, движения -нервными, и избавиться от этого очень сложно.
Не обращать внимания на то, как другие выполняют свою работу.
В конце концов, по закону они почти ничего не могут вам сделать.
Например, охрана может порекомендовать вам сдать пакеты и сумки в камеру хранения, но не может на этом настаивать.
(Я обычно говорю, что у меня нет товаров, представленных в магазине и что предъявлю сумку на выходе по требованию. Эта фраза не может быть произнесена вором, потому что так или иначе товар у него будет, а чек нет, де факто- никто ни разу ничего предъявить не просил)
По своей инициативе обыскивать сумки и пакеты (просить показать) охрана может только после фразы "у вас нет неоплаченных товаров?" и уточнения "Вы уверены?"
При этом вы должны явно покинуть магазин или заявить, что будете это делать.
Только чёткое "нет, я всё оплатил, что хотел" и наличие свидетеля, камеры и других веских причин - повод попросить вас показать покупки и чек.
Чего воры практически никогда не делают - не требуют вызвать милицию. Законодательство у нас достаточно строгое, если украл более чем на 1000 рр, это уже уголовная ответственность. Поэтому если к вам прицепились, а у вас много свободного времени и хочется поругаться - требуйте понятых, милицию и прочее.
Универсальный же совет...не брать всё это в голову. Потому что ни крадуны ("вор" - это совсем другая...хм...специализация), ни те, кто их ловит, не должны омрачать процесс выбора лучшего лака для ногтей из семи...нет, лучше восьми оттенков.
Disclaimer: вся информация взята из открытых источников; автор ставил себе целью объяснить феномен "хождения охраны по пятам за честной гражданкой" хотя бы для самой себя. Объяснила.
Очки носить не перестану, перестану шарахаться от охранников.
Кстати, а если вы увидите, что кто-то пытается "спасти" что-то из магазина, сломать защиту - что вы сделаете?
Сообщите охране и продавцам?
Или нет?
Или...?
Автор: beautys_doom
Источник: http://beautys-doom.livejournal.com/37082.html
|
Метки: разное |
Большая игрушка — кит своими руками |


На этот мастер класс меня вдохновила оригинальная большая игрушка кит вязанная спицами своими руками. Этот гигант весьма эффектно смотрится под потолком как украшение интерьера в стиле подводного мира.
Таинственный мир океана и его замечательные обитатели становятся ближе к нам, благодаря большим океанариумам, где мы можем наблюдать за морскими жителями. Особенное внимание, конечно, привлекают гигантские киты и самые необычные из них, это белые киты – белухи. Задумка сделать необычный декор для мастерской или детской комнаты в морском стиле и заселить собственный океан оригинальными игрушками, связанными своими руками, весьма интересна.
Оригинал масетр-класса
Читать далее
|
Метки: игрушки интерьер дизайн |


