-ћетки
-–убрики
- Burda magazine (2)
- Boho sewing (1)
- Christmas makes (0)
- How to understand Japanese patterns & pattern (0)
- Japanese pattern books/magazines for children. (4)
- Japanese pattern books/magazines for ladies. (3)
- Mum and Baby gift idea's (4)
- sewing for children (17)
- Sewing for ladies (9)
- Sewing,handmade. (23)
- Toy patterns/tutorialls (3)
-5 друзей
-ѕоиск по дневнику
-ѕодписка по e-mail
-ƒрузь€
-—татистика
«аписи с меткой tutorial
(и еще 4741 запис€м на сайте сопоставлена така€ метка)
ƒругие метки пользовател€ ↓
Girl baby blouse boho book boy boys celebrations child children christmas clothes clothing craft crafts crochet decorations design diy dress dress's dressТs fabric fashion felt flowers gift girl's girls handmade handmade clothes handsewn instructions jacket japanese japanese style japanese style clothes japaneses sewing ladies ladies tops lagenlook lilies master class masterclass pant's pants patter pattern patterns sewing sewing patterns shirts skirts sock style t-shirts top topТs toy trousers tunic tunics tutorial tutorials
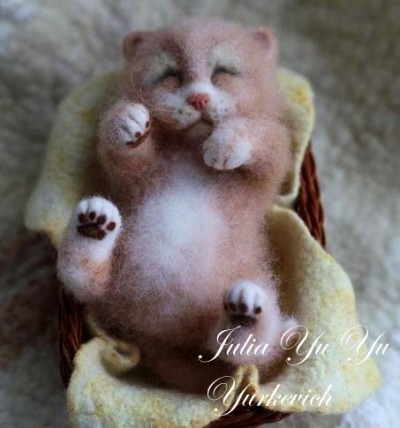
Master class on needle felted kitten |
Ёто цитата сообщени€ svetlyachoKK [ѕрочитать целиком + ¬ свой цитатник или сообщество!]
“олько посмотрите на этот маленький комочек! ¬от такого милого котенка предлагает вам свал€ть ёркевич ёли€ , следу€ ее пошаговому мастер классу.

»так, начнем…
|
ћетки: Felting needle kitten masterclass tutorial |
Lovely blouse tutorial and pattern. |
Ёто цитата сообщени€ Dushka_li [ѕрочитать целиком + ¬ свой цитатник или сообщество!]
|
ћетки: pattern tutorial sewing blouse |
Empire style tunic sewing tutorial |
Ёто цитата сообщени€ Dushka_li [ѕрочитать целиком + ¬ свой цитатник или сообщество!]
ћетки: tunic sewing tutorial simplicity ladies |
Lovely Drape Top Tutorial |
Ёто цитата сообщени€ adelaidaivi [ѕрочитать целиком + ¬ свой цитатник или сообщество!]
јсимметрична€ “оп - это любовь ...
ќгромное спасибо! я обнаружил, что все ваши комментарии по моему последнему сообщению столь обнадеживающими, красивые и большой повышение уверенности Mwah!.
»так, без дальнейших церемоний, вот мой второй проект ѕелерина ѕелерина ...
ќбразец є 4: One Piece Scoop шеи јсимметрична€ “оп
я полностью уверен в этом ... это может быть мой любимый футболку когда-либо. √ромоздка€ сумка, сексуальна€, свободна€, совок шею - и привет рукава без установки в рукаве - да, это чиста€ маги€!
я думаю, что это превосходный громоздка€ сексуальные футболки. я люблю изворотливый рукав подол на громоздка€ стороне. ћне нравитс€, как он шторы и оборачиваетс€ вокруг моего тела. Ёто просто прекрасно. я мог бы сделать млн. из них.
—троительные мысли
я сделал малый / средний размер.
ќп€ть же, просто, как пирог, чтобы построить после того как € изучал фотографии. я на самом деле не обратитесь к инструкци€м, как только € начал. Ёто довольно просто и логично, как только вы собираетесь.
Ёто неверо€тно прекрасно черный / серебристый люрекс полосатый в€зать. Ёто не было весело, чтобы шить, это свернувшись и полосы было трудно - оно того стоило, хот€! я думаю, что рубашка будет выгл€деть совсем иначе снова в более т€желом в€зать (или даже нормальным весом!) Ќо € действительно люблю м€гкость это и как это падает по всему телу.
я прикрепил декольте так же, как € сделал дл€ No.2 платье и фактически скольжени€ сшитые св€зывание над неправильный широкий на overlocked кра€ вручную. ћашина была определена съесть декольте и € был полон решимости не должно было случитьс€ - как unpicking это было бы невозможно. ќверлок шов дл€ удвоенной над об€зательного полосы предоставил некоторую стабильность и твердость, что не хватало с любым другим покрытием декольте.
¬€зать так прекрасно € выбрал носить ремешками бак под ним - если вы будете следовать за мной на Instagram вы будете знать, почему! LOL.
» только потому, что € люблю его так и часто носить его на моих фотографи€х - мой любимый браслет ...
ћетки: drape top ladies style sewng pattern tutorial |
Beautiful little fur jacket tutorial for your princess |
Ёто цитата сообщени€ orhideya6868 [ѕрочитать целиком + ¬ свой цитатник или сообщество!]
ћетки: fur jacket tutorial sewing fashion handmade child clothes |
Sweet child's jacket to sew |
Ёто цитата сообщени€ Dushka_li [ѕрочитать целиком + ¬ свой цитатник или сообщество!]

јвтор: alina keris
—егодн€ представл€ю вашему вниманию мастер-класс по пошиву чудесной курточки дл€ дочурки!
ћетки: child clothes jacket sewing master class tutorial pattern handmade |
Another easy re fashion tunic from a T-shirt |
Ёто цитата сообщени€ Katra_I [ѕрочитать целиком + ¬ свой цитатник или сообщество!]
“рудно придумать более удобный и практичный вариант домашней одежды чем трикотаж, особенно если он изготовлен из м€гких и экологичных натуральных материалов. ¬озможно у кого-то другие предпочтени€, но согласитесь, наиболее универсальными представл€ютс€ трикотажные туники - хотите носите их с юбкой, а можно и с шортами, леггинсами и джинсами. ¬ любом случае вам будет удобно и комфортно. » ходить за ними далеко не надо, вот, например, ивановские туники от «јнриа» выпускаютс€ дл€ женщин любой комплекции и отличаютс€ более чем приемлемой ценой и широким ассортиментом.
ј сейчас переходим от слов к делу, вот вам информаци€ дл€ желающих сшить такую удобную вещь своими собственными золотыми ручками. ≈е можно назвать как угодно и туникой, и романтическим топом, но главное что шьетс€ эта штука легко и просто, а понадобитс€ всего лишь обычна€ футболка. Ќу только очень больша€! “акую у своего половина всегда можно экспроприировать, верно?
Ќеобходимые материалы :
-‘утболка размера XL
-Ёластична€ лента
¬рем€ необходимое : 1-2 часа
Ўаг 1: ƒостаем футболку
Ўаг 2: ћелом отмечаем дугу в верхней части и отрезаем
Ўаг 3: ќтрезаем кра€ рукавов
Ўаг 4: ѕристрачиваем в верхней части топа кулиску дл€ ленты
Ўаг 5: ра€ рукавов и подол прошиваем зигзагом и немного раст€гиваем, чтобы они были слегка волнистыми
Ўаг 6: ¬деваем в кулиску эластичную ленту (резинку)
ј теперь смотрим на фото и повтор€ем!
ћетки: tunic sewing sewing patterns tutorial t-shirts ladies tops handmade handmade clothes |
for the beach or with leggings |
Ёто цитата сообщени€ Veh07 [ѕрочитать целиком + ¬ свой цитатник или сообщество!]

Ќеоспоримым можно считать тот факт, что туника – сама€ практична€, удобна€ и из€щна€ вещь в любом дамском гардеробе. ¬ыкройка пл€жной туники не представл€ет особой сложности дл€ женщины знакомой с иголкой и ножницами.
Ћетом просто необходимо демонстрировать все то, чем щедро наградила ¬ас природа, ни в коем случае не пр€ча все это великолепие от взгл€дов прохожих. ƒл€ того чтобы сшить пл€жную тунику ¬ы можете выбрать абсолютно любую ткань, одно условное требование – он об€зательно должен быть легким и стру€щимс€.
ѕри выборе материала дл€ будущей пл€жной туники предпочтительнее использование натуральных однослойных материалов. “кань по своей структуре должна быть не только визуально привлекательной, но и практичной, так как, следу€ из названи€, така€ туника будет подвержена гораздо большему вли€нию окружающей среды нежели обычные вещи из ¬ашей коллекции, а следовательно и стиратьс€ она тоже будет чаще. Ёто лето, вновь возвращает моду на пл€жные туники с максимальной длиной, исполненных в ткан€х насыщенных глубоких цветов.
ћетки: tunic sewing ladies tutorial master class clothes handmade |
Lovely young girls dress |
Ёто цитата сообщени€ ќльга_—ан [ѕрочитать целиком + ¬ свой цитатник или сообщество!]
ћетки: girls dress sewing tutorial pattern |
A lovely dress with pattern |
Ёто цитата сообщени€ Dama_Madama [ѕрочитать целиком + ¬ свой цитатник или сообщество!]
ћетки: dress ladies sewing tutorial pattern handmade |
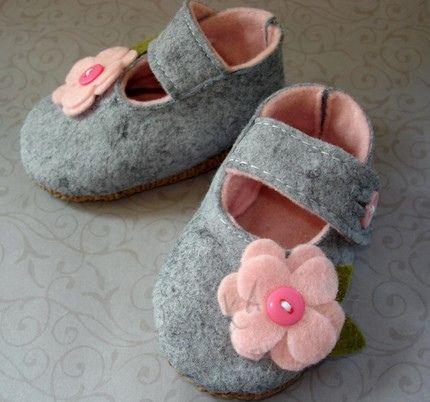
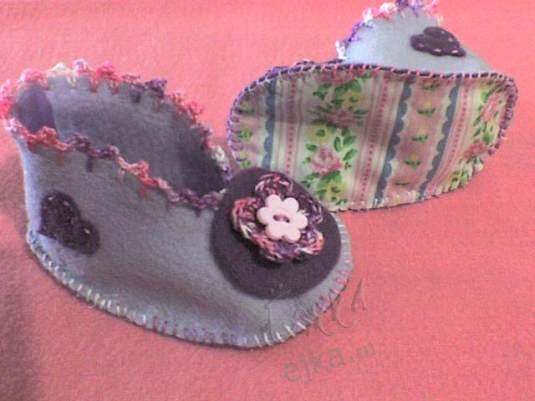
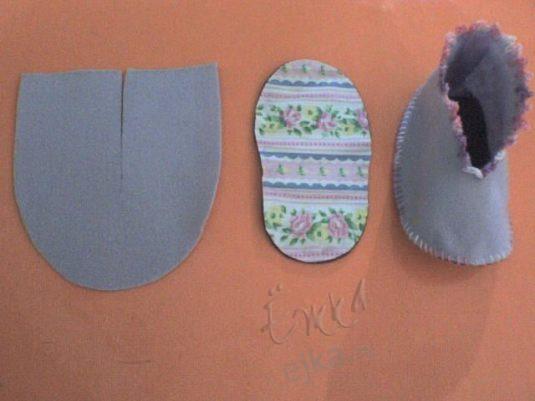
A few fabric shoe desingn's to sew shoes for little ones |
Ёто цитата сообщени€ Nikash [ѕрочитать целиком + ¬ свой цитатник или сообщество!]
ƒетские ножки можно обуть своими руками. ¬оспользуйтесь какой-нибудь из выкроек предложенных ниже и у ¬ас будет неповторимые единственные в своем роде деткие пинеточки  ”дачи вам в вашем творчестве.


—ери€ сообщений "ƒетское":
„асть 1 - “акой кульный костюм на "’еллоуин" дл€ девочки, что не могу не притащить)
„асть 2 - ак сшить шорты. ƒл€ кого - то может и смешно, но дл€ начинающих портних отличный ћ !
„асть 3 - ƒетские пинетки своими руками - несколько выкроек
„асть 4 - выкройка шапки-шарфа а -л€ капюшон (ёли€ wolfj)
„асть 5 - ¬ыкройка и описание пошива ведьминской шл€пы на ’эллоуин)
...
„асть 21 - Ѕермуды на зав€зках. ћ
„асть 22 - —арафанчик из футболки (мастер-класс)
„асть 23 - √отова€ выкройка детской курточки
ћетки: felt fabric handmade shoes baby tutorial |
Jacket and pants tutorial for little boy. |
Ёто цитата сообщени€ Ўитье_одежды [ѕрочитать целиком + ¬ свой цитатник или сообщество!]
ћетки: boy sewing jacket pants outdoor pattern tutorial |
Lovely set to make for a gift |
Ёто цитата сообщени€ orhideya6868 [ѕрочитать целиком + ¬ свой цитатник или сообщество!]
|
ћетки: hat mittens booties fleece sewing tutorial pattern |
How to make your own pattern from clothing you already own |
Ёто цитата сообщени€ рул€ [ѕрочитать целиком + ¬ свой цитатник или сообщество!]
ћен€ очень часто спрашивают, как € делаю выкройку по уже готовой вещи. –ешила отсн€ть этот процесс, € надеюсь, что мой фото-мастер-класс будет вам пон€тен и полезен. ≈сть вещи, которые станов€тс€ любимыми, они удобны и при€тны в носке, и расставатьс€ с ними не хочетс€. „асто они занашиваютс€ до невмен€емого состо€ни€, особенно детьми :) вот така€ туника есть и у моей средней дочки, выкройка тоже была составлена мной, но уже затер€лась. “ак что буду делать новую, а заодно расскажу вам, как это делать. Ќам нужна бумага (обои ненужные, газета или просто офисна€ бумага), булавки портновские, карандаш, ножницы.
я обычно кладу бумагу на гладильную доску или пол с ковром, чтобы можно было воткнуть булавку
ћетки: pattern making from own clothin tutorial sewing |
Sock Lion Tutorial |
Ёто цитата сообщени€ “омагавк [ѕрочитать целиком + ¬ свой цитатник или сообщество!]
How To Sew Sock Lion (Single Sock)
Difficulty: Intermediate / Avid Beginner
Finished size: approximately 7″ (W) x 8″ (H)Materials:
Make: 1 (adult size)
1. Sock (crew length), single [1]
2. Grey felt
3. Yellow felt
3. Safety eye 1/2″ [12mm], black, 2; or button; or felt
4. Safety Nose 1″ [24mm], brown, 1; or you can use a triangle felt to sew.
5. Embroidery Floss, yellow
6. Black yarn or embroidery floss
7. Orange yarn
8. Poly-fill stuffing material
9. Sewing threadTools:
1. Sewing machine
2. Sewing needle (prefer long) and pins
3. Tapestry needle
4. Cardboard, 2″ wide (to make lion fur)
5. Pen & ruler
6. Scissors
7. Erasable fabric marker
8. IronSeam Allowance: approx. 1/8 – 1/4″
Note: for different sizes of sock lions, use different sizes of socks.
Since the sock is stretched after stuffed, thick sock yields better quality than thin sock.**************************
Update May 2015:
In conjunction with the grand opening of Craft Passion Shop, we are giving 20% off the total sales. Great chance to get some beautiful socks to make the sock animal. Apply coupon code at check out.
/www.craftpassion.com/wp-content/uploads/2015/05/coupon-code.jpg" target="_blank">http://www.craftpassion.com/wp-content/uploads/2015/05/coupon-code.jpg 300w" width="300" />
 Gather all the tools and materials to begin the sewing. The actual quantity of poly-fill stuffing material is a lot more than shown in the picture.
Adjust the sock so that they align properly. Press your sock with warm iron.
Draft the sewing lines directly on the sock with pen.
Yellow – Sew
Yellow (dash) – running stitch
Blue – Cut
 /www.craftpassion.com/wp-content/uploads/2014/01/sock-lion-tutorial-2.jpg" target="_blank">http://www.craftpassion.com/wp-content/uploads/2014/01/sock-lion-tutorial-2.jpg 300w" width="300" />Align the stripe on both sides and pin. This is make sure that the stripe in align at the seam.
Sew the yellow marking with sewing machine, or you can hand-sew with back stitch too.
 /www.craftpassion.com/wp-content/uploads/2014/01/sock-lion-tutorial-3.jpg" target="_blank">http://www.craftpassion.com/wp-content/uploads/2014/01/sock-lion-tutorial-3.jpg 300w" width="300" />Cut the pieces out follow the blue marking.
 /www.craftpassion.com/wp-content/uploads/2014/01/sock-lion-tutorial-4.jpg" target="_blank">http://www.craftpassion.com/wp-content/uploads/2014/01/sock-lion-tutorial-4.jpg 300w" width="300" />a.) Roll some yarns that is 1″ – 2″ longer than sock tail. Tie one side with yarn.
b.) Insert 1″ of yarn into the sock tail (with wrong side facing out). Stitch up to close the opening while secure the yarn.
c.) Turn the sock right side out. Remove the tying yarn, you can cut the yarn to have straight tail tassel or leave it in the loopy shape.
 /www.craftpassion.com/wp-content/uploads/2014/01/sock-lion-tutorial-5.jpg" target="_blank">http://www.craftpassion.com/wp-content/uploads/2014/01/sock-lion-tutorial-5.jpg 300w" width="300" />Turn the rest of the sock components right side out.
Stuff the body and hands with poly-fill stuffing material.
Run a stitch at the yellow dash-marking, pull the thread to gather the sock to resemble the neck of the lion. Knot securely.
 /www.craftpassion.com/wp-content/uploads/2014/01/sock-lion-tutorial-6.jpg" target="_blank">http://www.craftpassion.com/wp-content/uploads/2014/01/sock-lion-tutorial-6.jpg 300w" width="300" />a.) Since I am using safety nose, I snipped a very small hole on the heel, slightly higher than the tip.
b.) Apply some instant drying adhesive to glue the nose in place. The glue will also stop the sock being stretch too much and create a big hole. Install the stopper.
c.) The installed nose. You may use a piece of felt in triangle shape and sew it on the heel, stuff the nose.
 /www.craftpassion.com/wp-content/uploads/2014/01/sock-lion-tutorial-7.jpg" target="_blank">http://www.craftpassion.com/wp-content/uploads/2014/01/sock-lion-tutorial-7.jpg 300w" width="300" />a.) Cut 2 pcs. of grey felts into oblong shape to make the eyes. Cut another 2 pcs. yellow eye lids for more characterized look. Snip 2 small openings at the bottom halve of the grey felts, insert safety eyes into each of them respectively.
b.) Stuff the head of the lion. Place the felt eyes onto the sock lion’s face, mark 2 spots for the stud of the eyes to go in. Make a small opening on each marking respectively.
c.) Install the eyes on the face with the stoppers inside the head. You may take out some of the stuffing to install the stopper, stuff it back when you are done.
d.) Stitch around the eyes, or use glue to glue the pieces up.
 /www.craftpassion.com/wp-content/uploads/2014/01/sock-lion-tutorial-8.jpg" target="_blank">http://www.craftpassion.com/wp-content/uploads/2014/01/sock-lion-tutorial-8.jpg 300w" width="300" />Sew and close-up the opening of the head with running stitches, invert the raw edges into the head as you pull the thread to close. Make another few stitch across to further tighten the gap.
 /www.craftpassion.com/wp-content/uploads/2014/01/sock-lion-tutorial-9.jpg" target="_blank">http://www.craftpassion.com/wp-content/uploads/2014/01/sock-lion-tutorial-9.jpg 300w" width="300" />a.) Knot the black yarn end, insert at the center of the neck, come through from the bottom of the nose.
b.) Insert the needle about 2/3 distant from the nose, go up and out from the bottom of the nose. Pull the yarn to resemble the philtrum of the mouth. Insert the needle into the bottom of the philtrum and come out at the cheek of the face.
c.) Make a french knot to resemble the vibrissa or whisker of the lion. The needle should cross the snout and come out to the other side, pull lightly so that the french knot is indented a little into the snout. Make another french knot on the other side of the snout.
d.) Repeat to make 3 vibrissae at each side of the snout. Finish the sewing with needle out at the neck again, knot and cut yarn off.
 /www.craftpassion.com/wp-content/uploads/2014/01/sock-lion-tutorial-10.jpg" target="_blank">http://www.craftpassion.com/wp-content/uploads/2014/01/sock-lion-tutorial-10.jpg 300w" width="300" />a.) Attach arms to the side of the body.
b.) Close the opening of the tail with running stitches.
c.) Attach the tail to the back of the body by sewing it slant across.
d.) With the same needle and thread, insert the needle from the back and come out at the middle of the body. Loop the thread to the back and insert into the same point and come out from the same point on the front. Pull the thread to make a dented line that creates the look of the limbs.
 /www.craftpassion.com/wp-content/uploads/2014/01/sock-lion-tutorial-11.jpg" target="_blank">http://www.craftpassion.com/wp-content/uploads/2014/01/sock-lion-tutorial-11.jpg 300w" width="300" />Side view of the sock lion before attaching the mane fur.
 /www.craftpassion.com/wp-content/uploads/2014/01/sock-lion-tutorial-12.jpg" target="_blank">http://www.craftpassion.com/wp-content/uploads/2014/01/sock-lion-tutorial-12.jpg 300w" width="300" />a.) Roll the orange yarn around the 2″ cardboard. Gather and stitch about 10 of them. Catch yarn into needle as you passing through them, loop 2 to 3 times and make a knot before proceed to the next group of yarn. Push the yarn out from the cardboard as you work.
b.) Measure the length needed to wrap the head of the sock lion. Make extra length if you want to have a dense mane.
c.) Stitch the yarn mane to the sock lion. For an even mane, divide the mane into 2 parts, pin it at the neck and top of the head. Sub-divide the mane again and pin at the middle of the side head.
d.) Complete look at the back.
 /www.craftpassion.com/wp-content/uploads/2014/01/sock-lion-tutorial-13.jpg" target="_blank">http://www.craftpassion.com/wp-content/uploads/2014/01/sock-lion-tutorial-13.jpg 300w" width="300" />The front of the sock lion with innocent expression on his face.
{More photos on this, click here.}
ћетки: sock lion tutorial |
∆илетка дл€ детки - Lovely waistcoat for kids tutorial |
ћетки: childrens waistcoat sewing turorial tutorial |
Cute pin cushion tutorial. |
Ёто цитата сообщени€ Veh07 [ѕрочитать целиком + ¬ свой цитатник или сообщество!]
|
ћетки: tortoise pin cushion tutorial sewing |
| —траницы: | [1] |


