I did not find a pattern for this pillow
so I wrote down what I did
after I had figured it out
it is made with
short rows
it is much easier than it looks
I make no claim on it
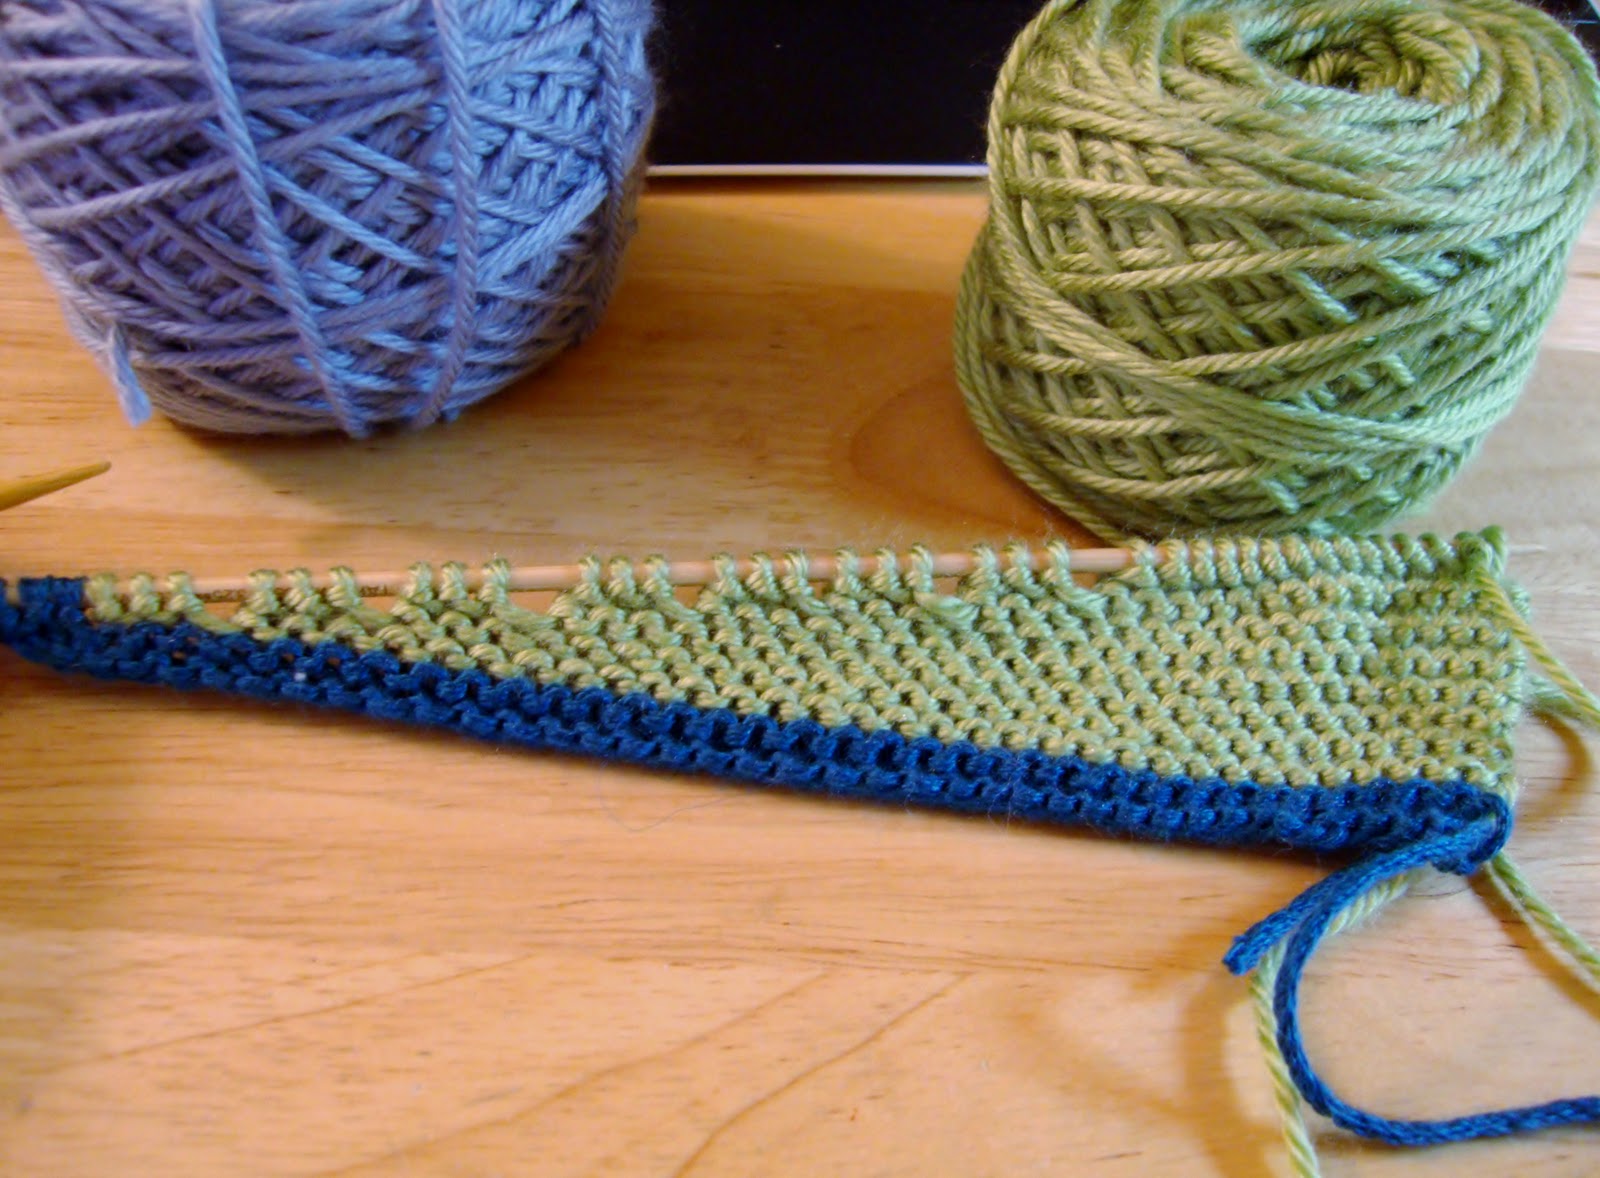
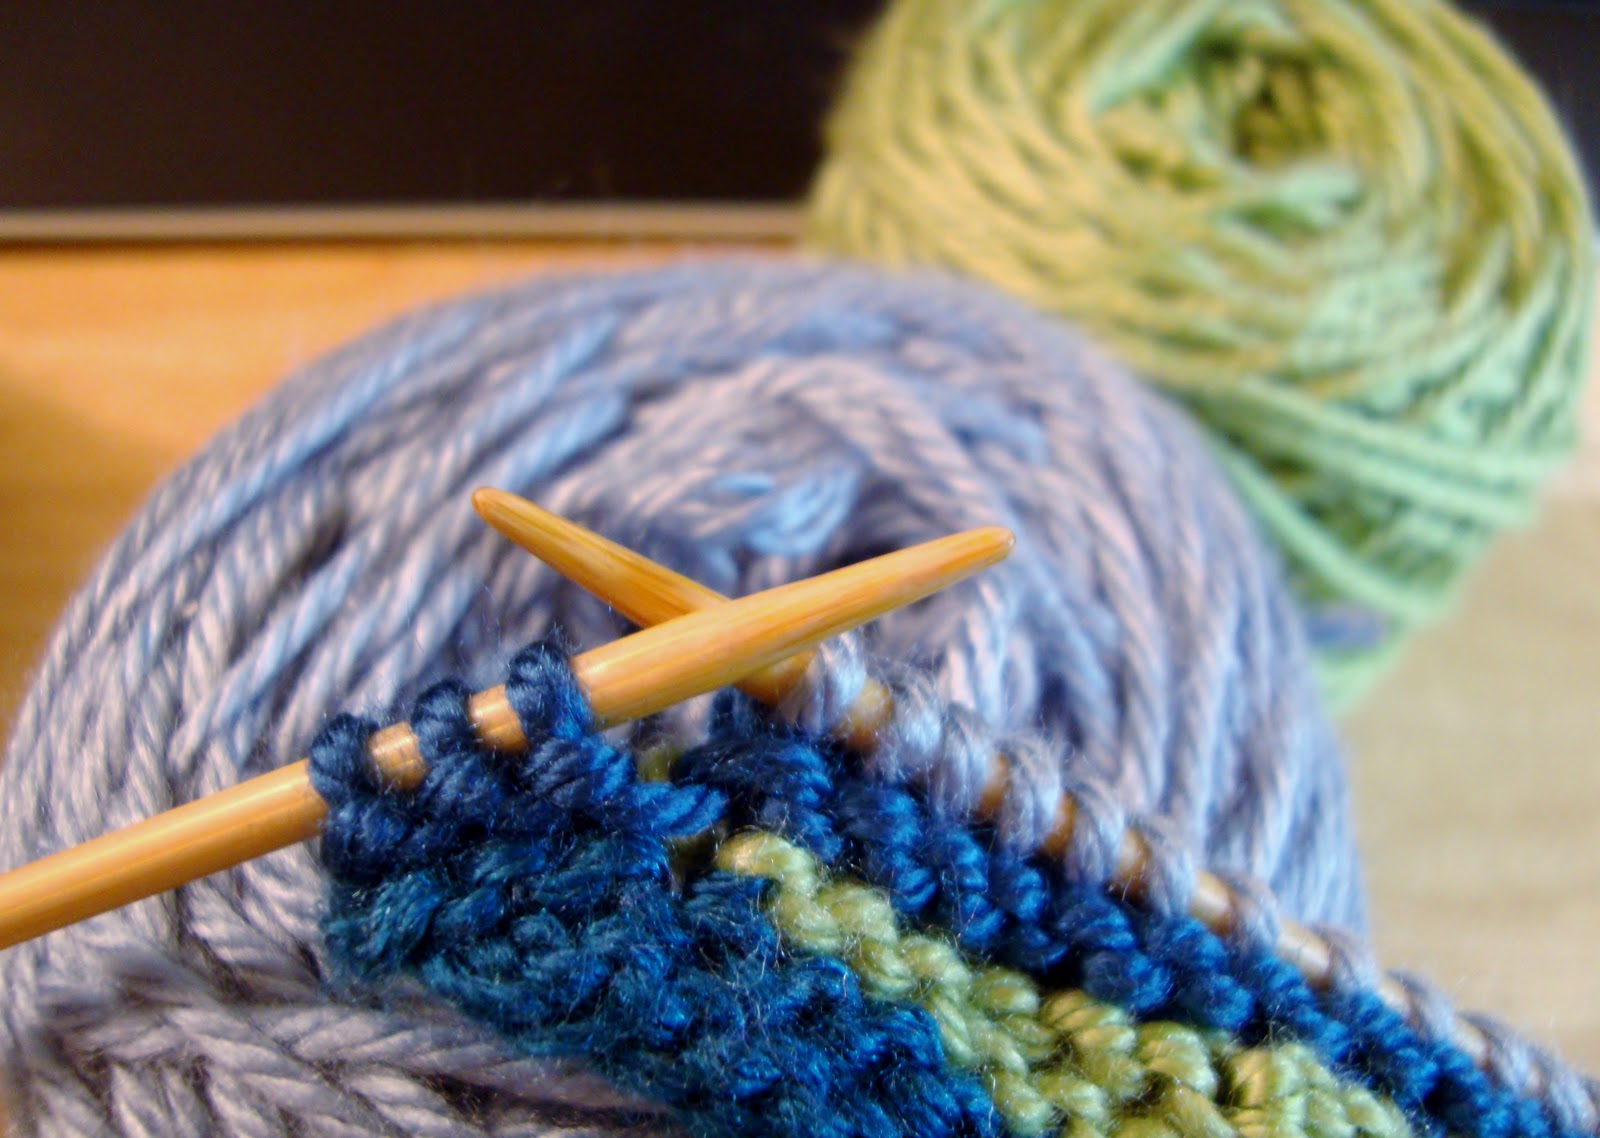
It's made with a 3 count
I cast on
39 stitches (sts)
that made a 14" pillow
I used slightly smaller needles because I wanted it tight
I used acrylic yarn that I have in the stash
with the first colour
cast on your stitches
knit two rows
cut yarn
join new colour
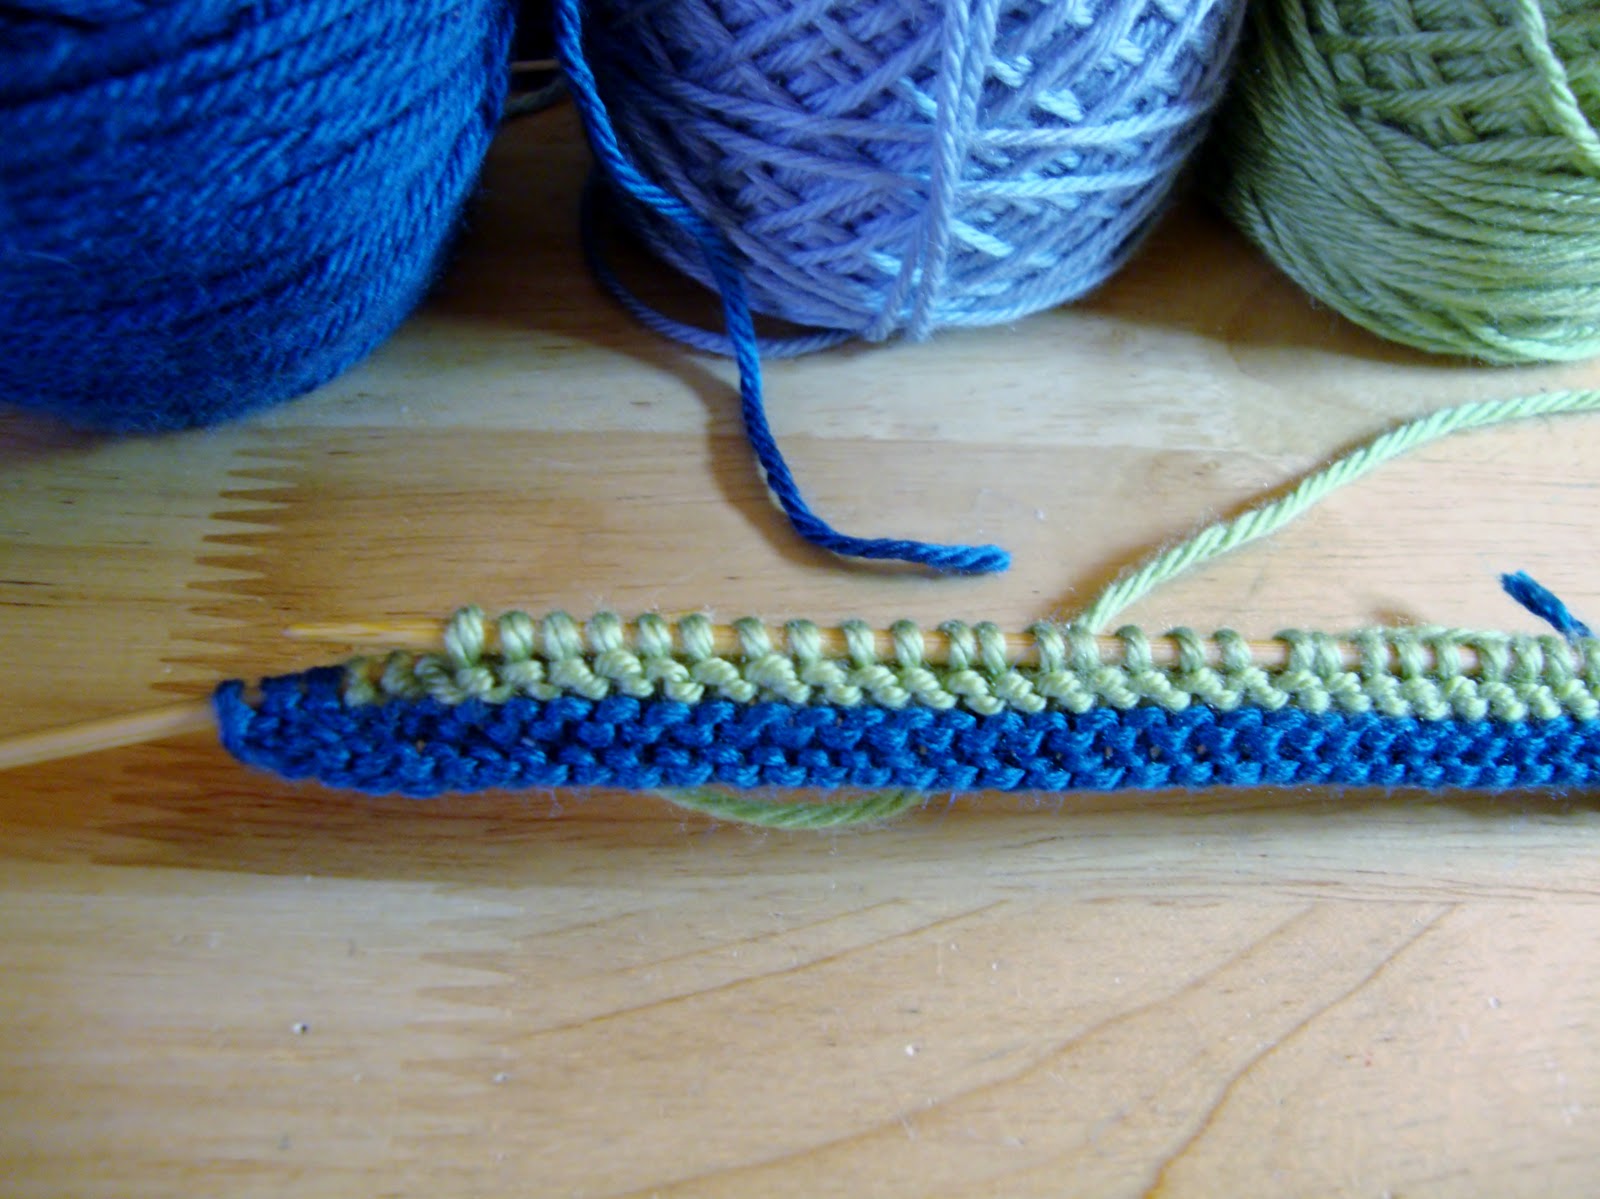
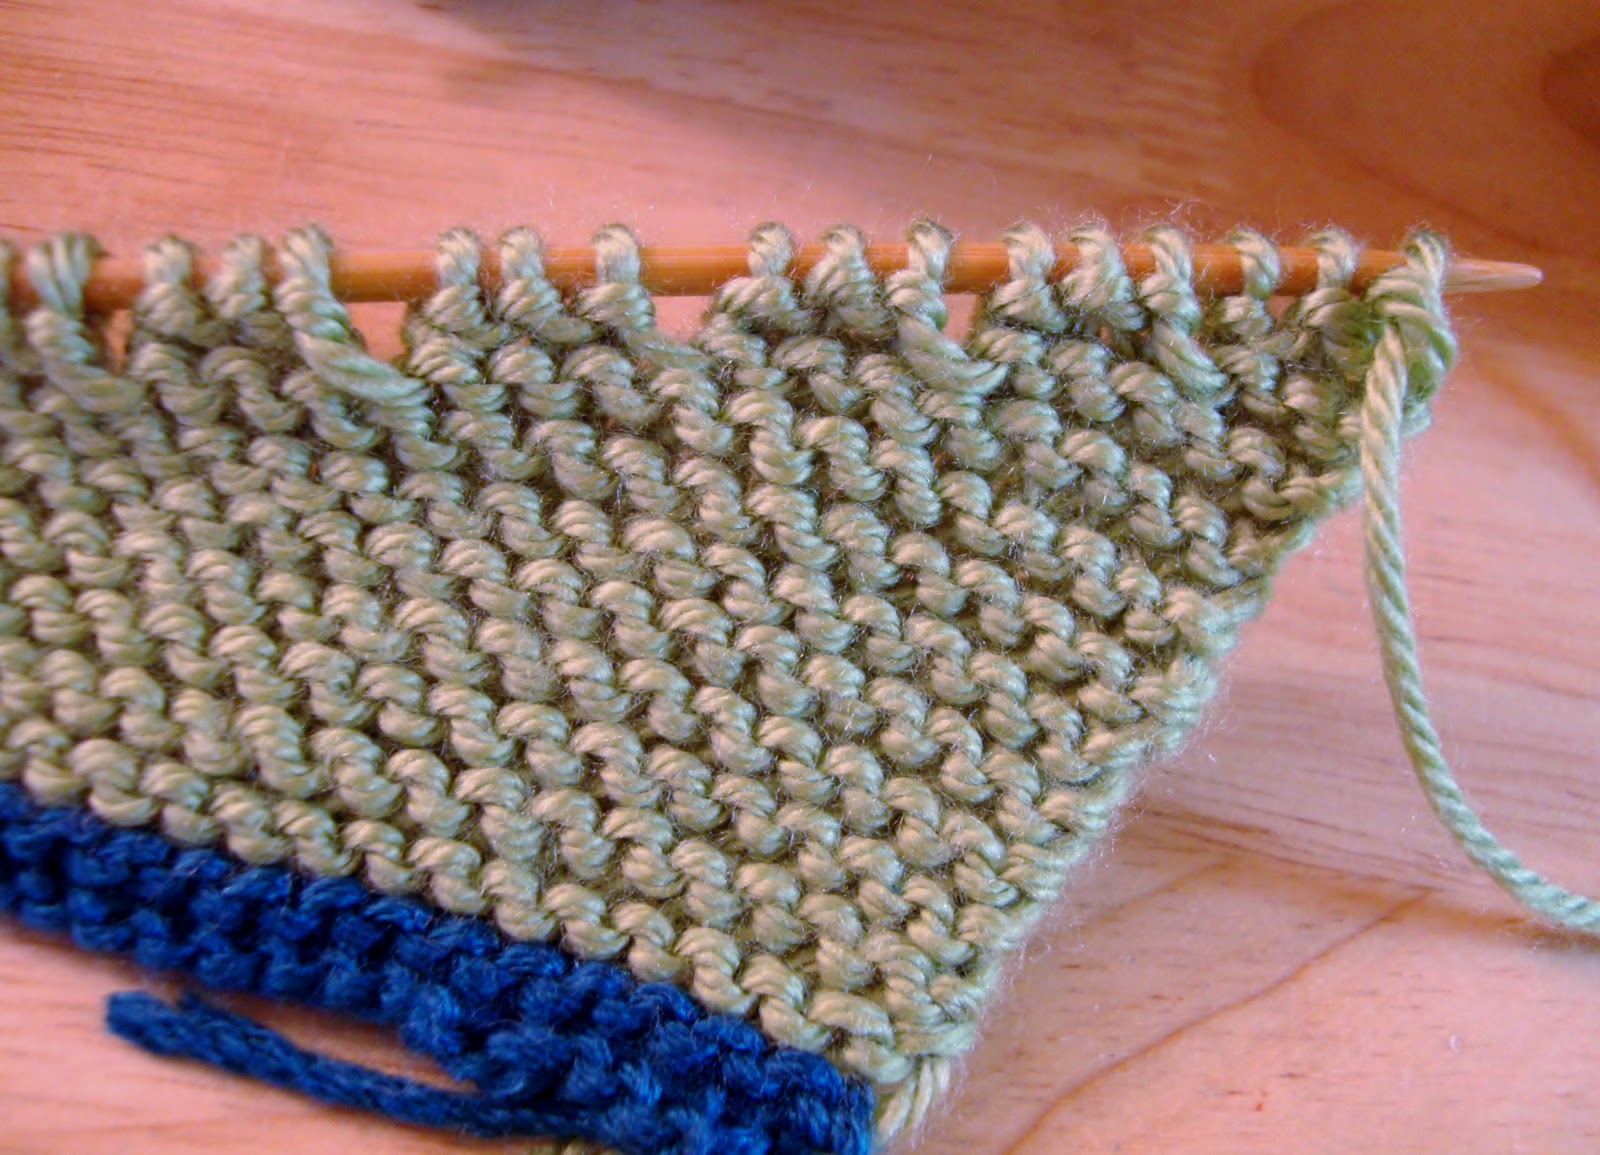
knit to the last three stitches of previous row
do not knit these stitches
leave them on the needle
and turn the work and go back
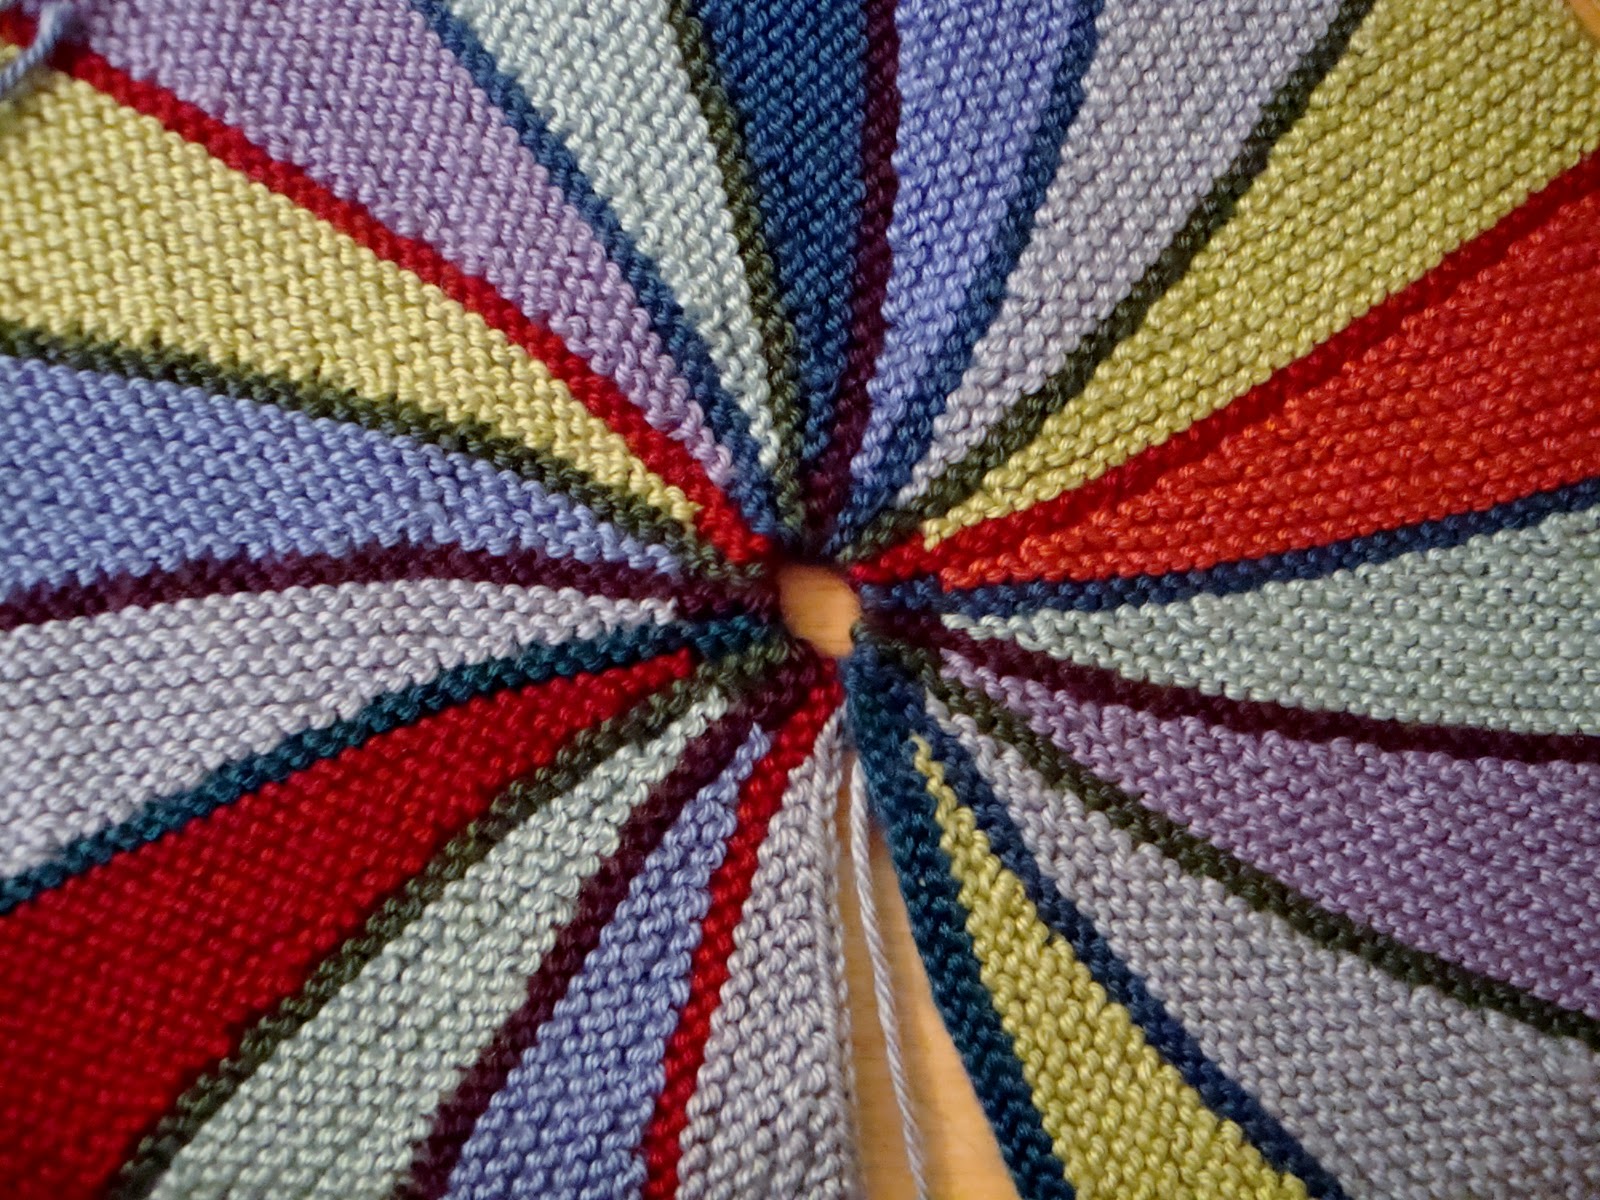
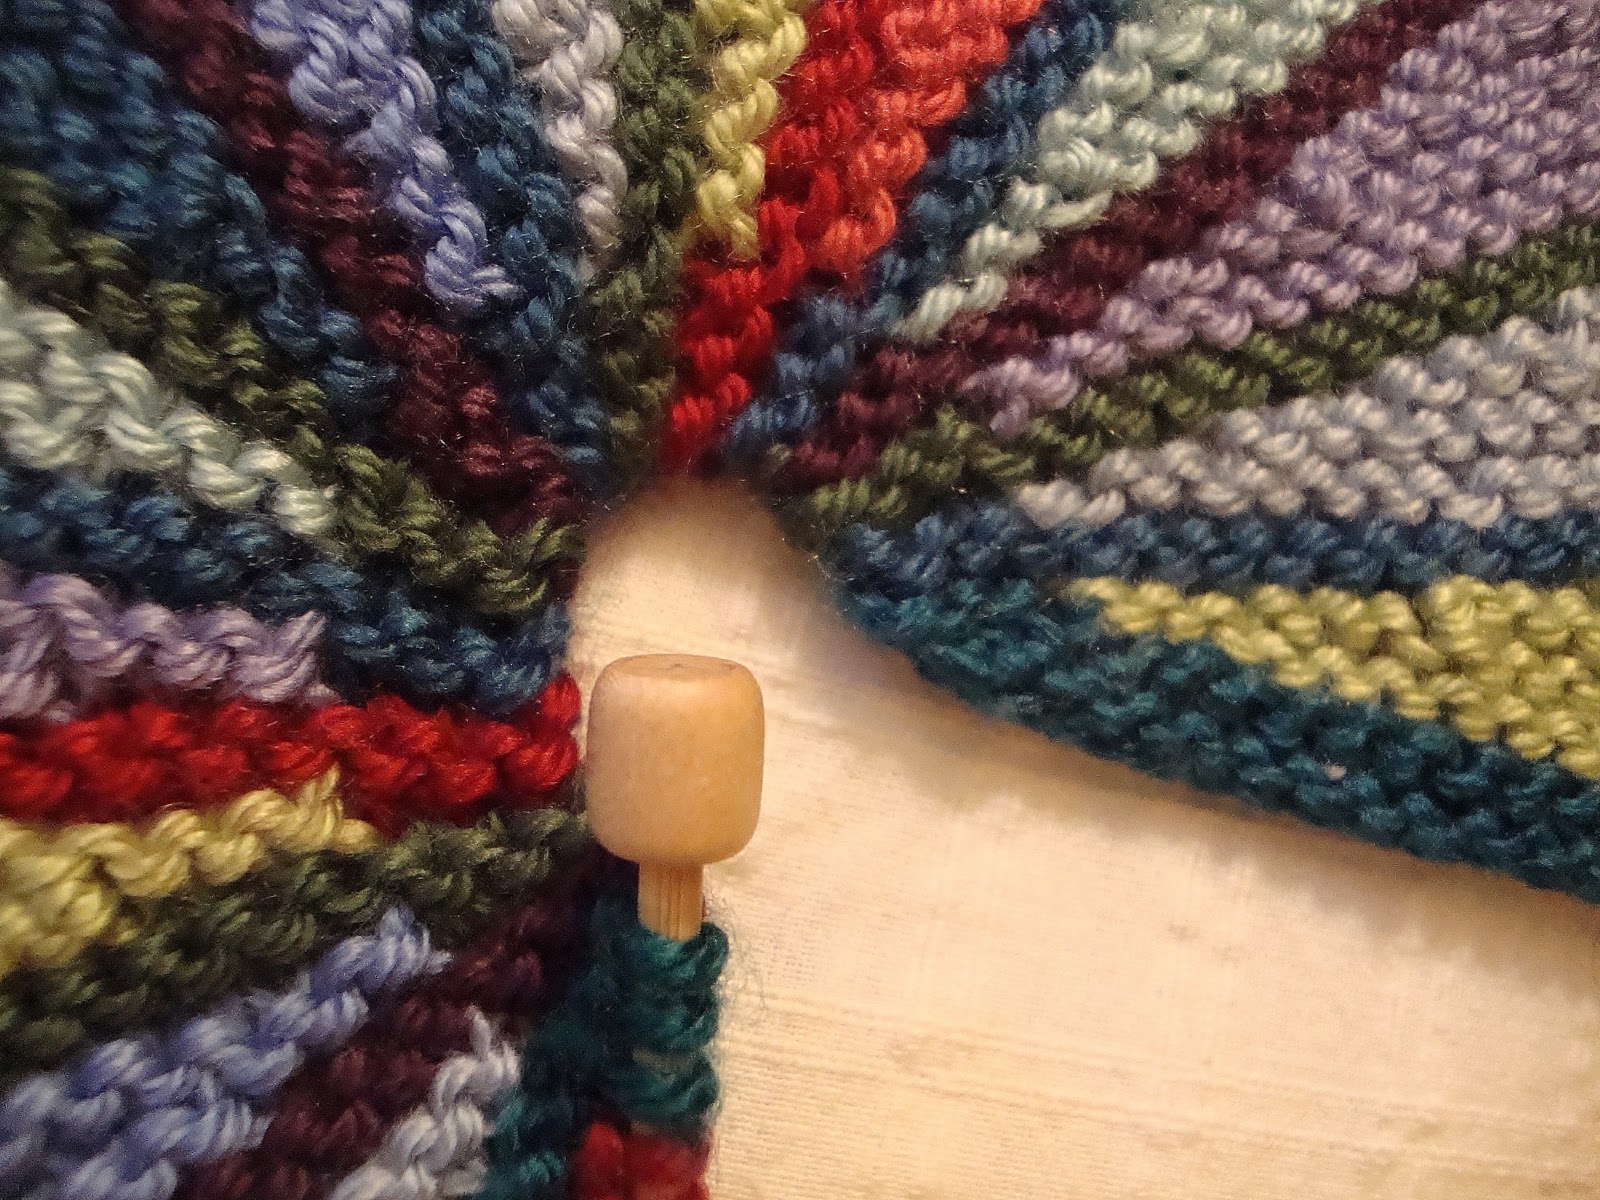
(above you see six stitches that aren't worked )
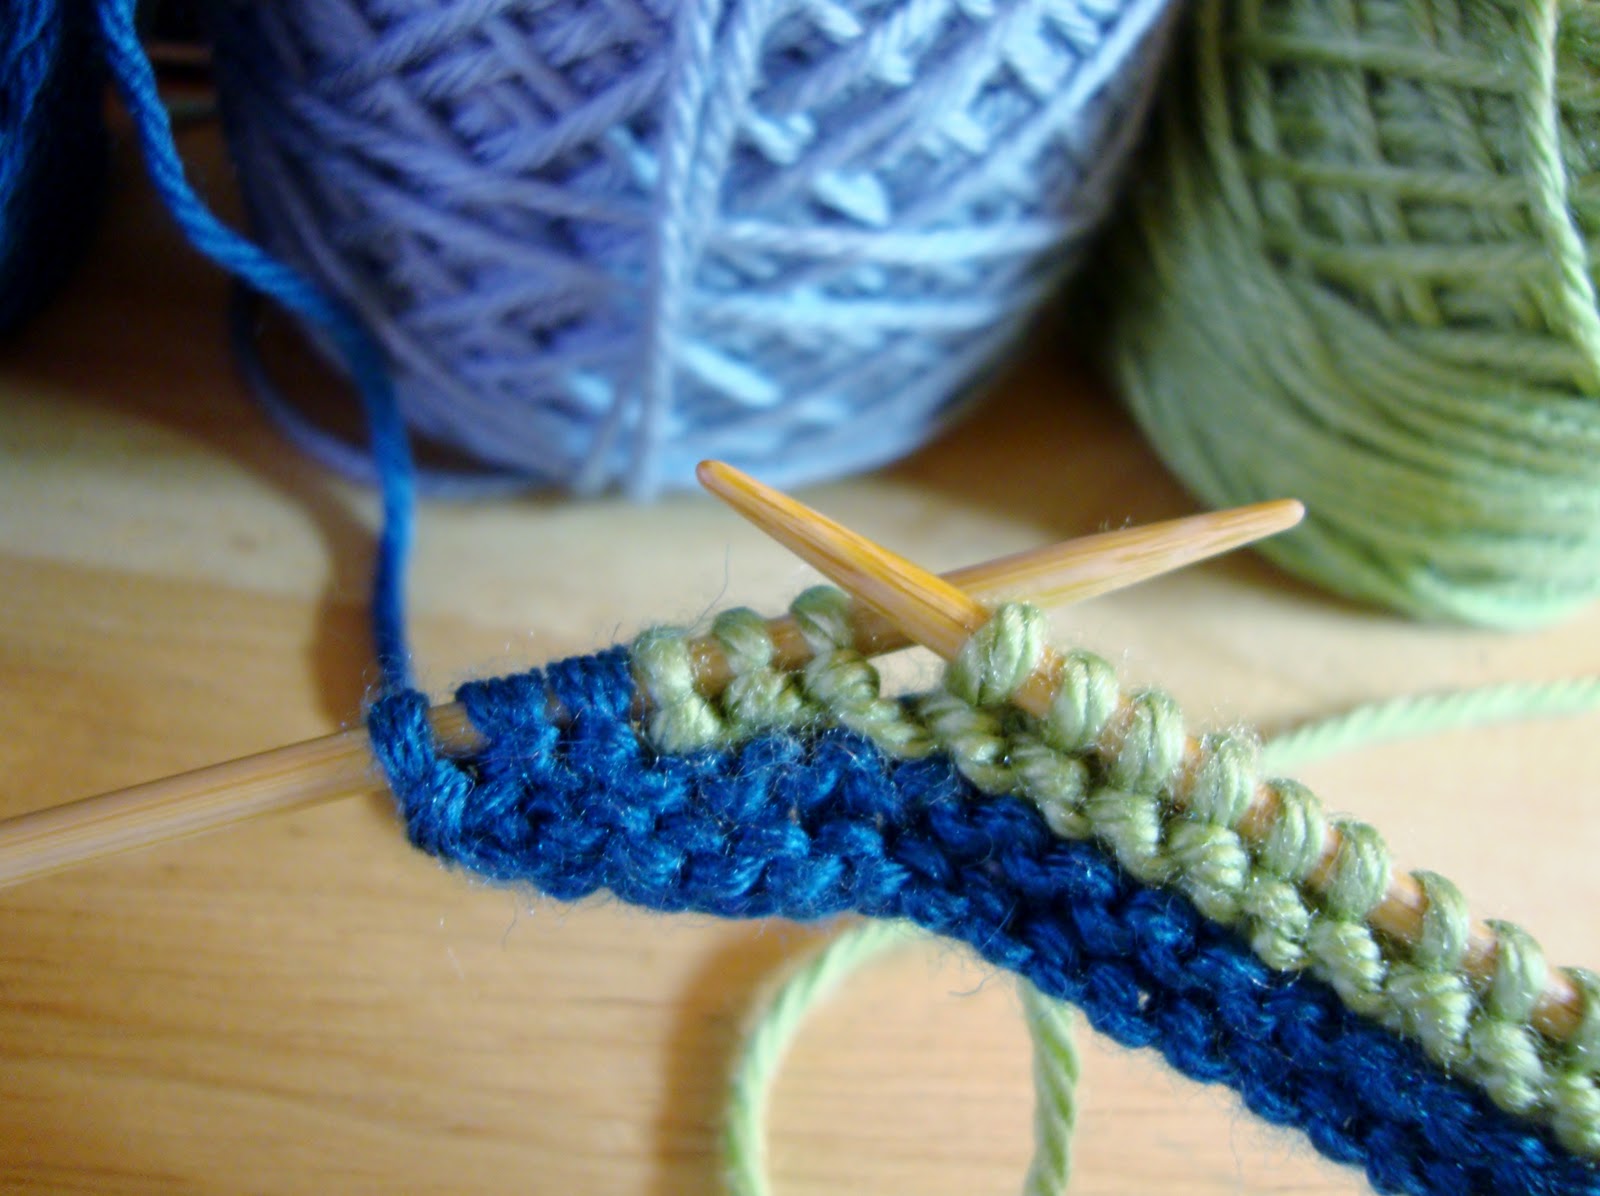
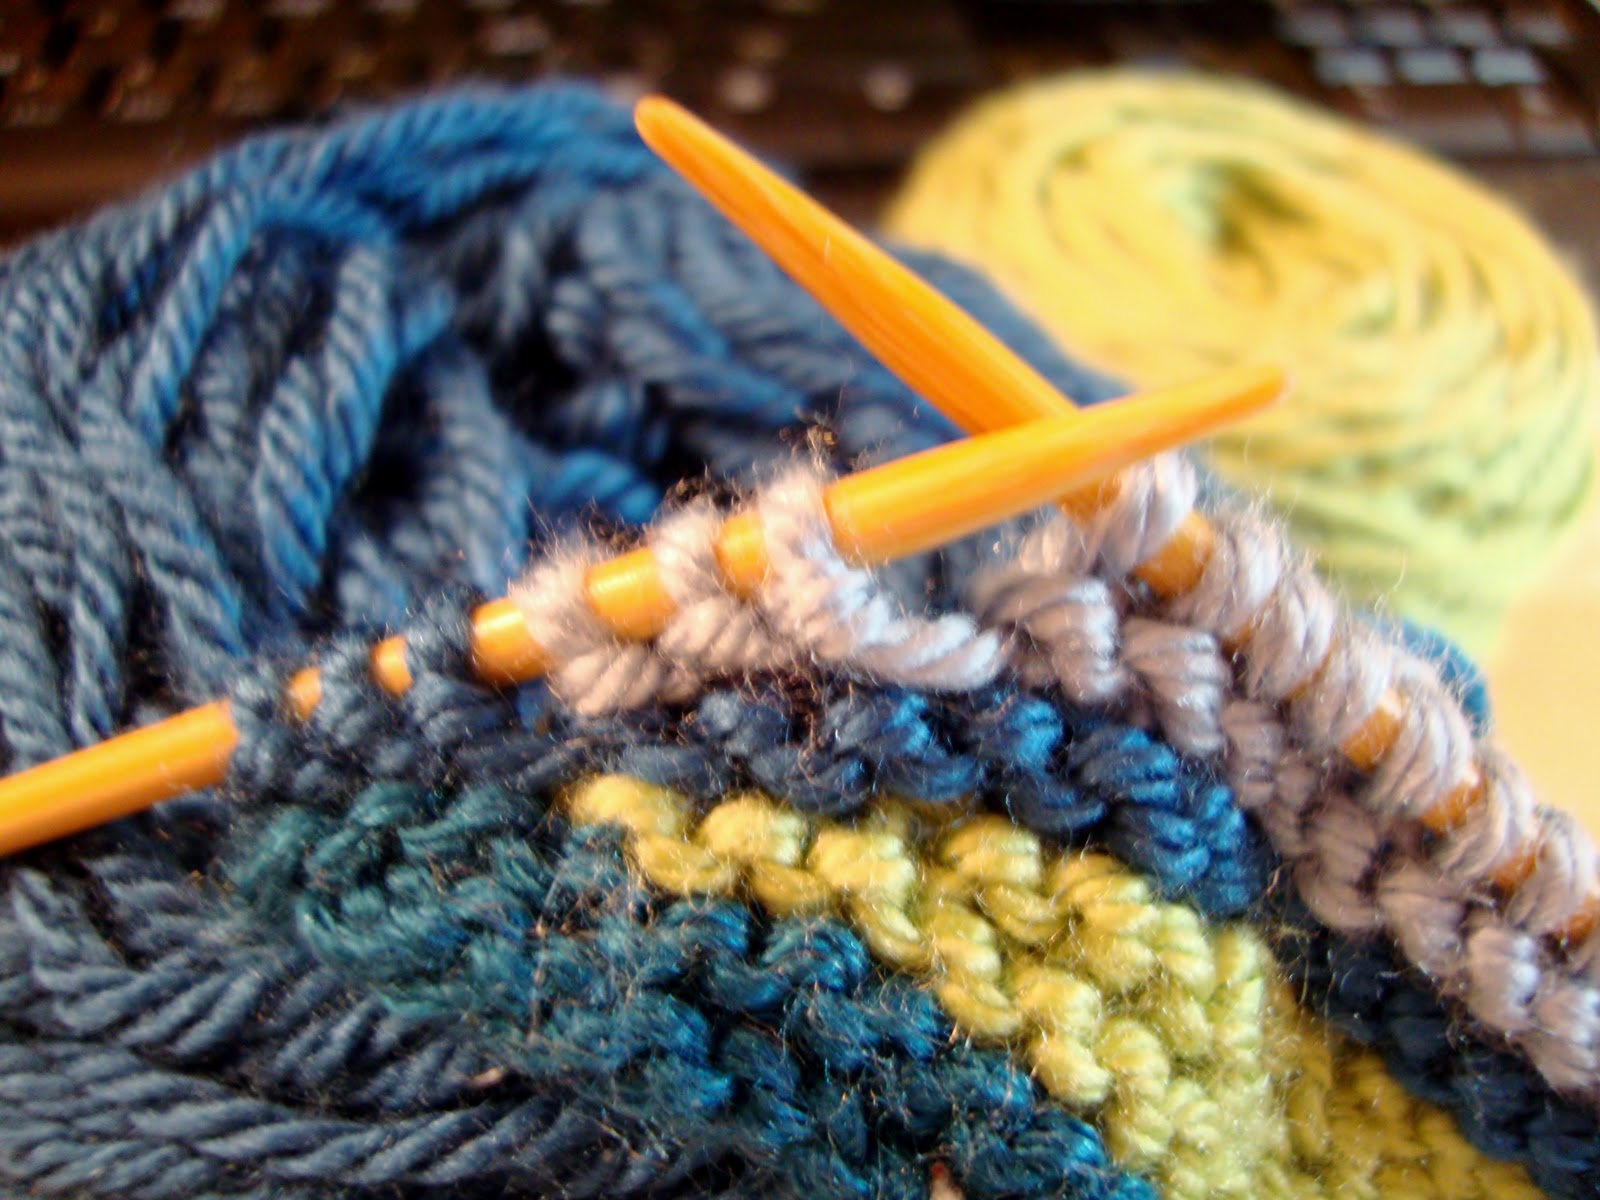
turn the work and knit back on all the stitches
here you can see eight sets of three stitches that were left on the needle as the row is worked back and forth
the row gets shorter as you leave three stitches behind each time you work the row
and here the row is done
there are spaces between the sets of 3 but don't worry they disappear or if they don't they look like little eyelets
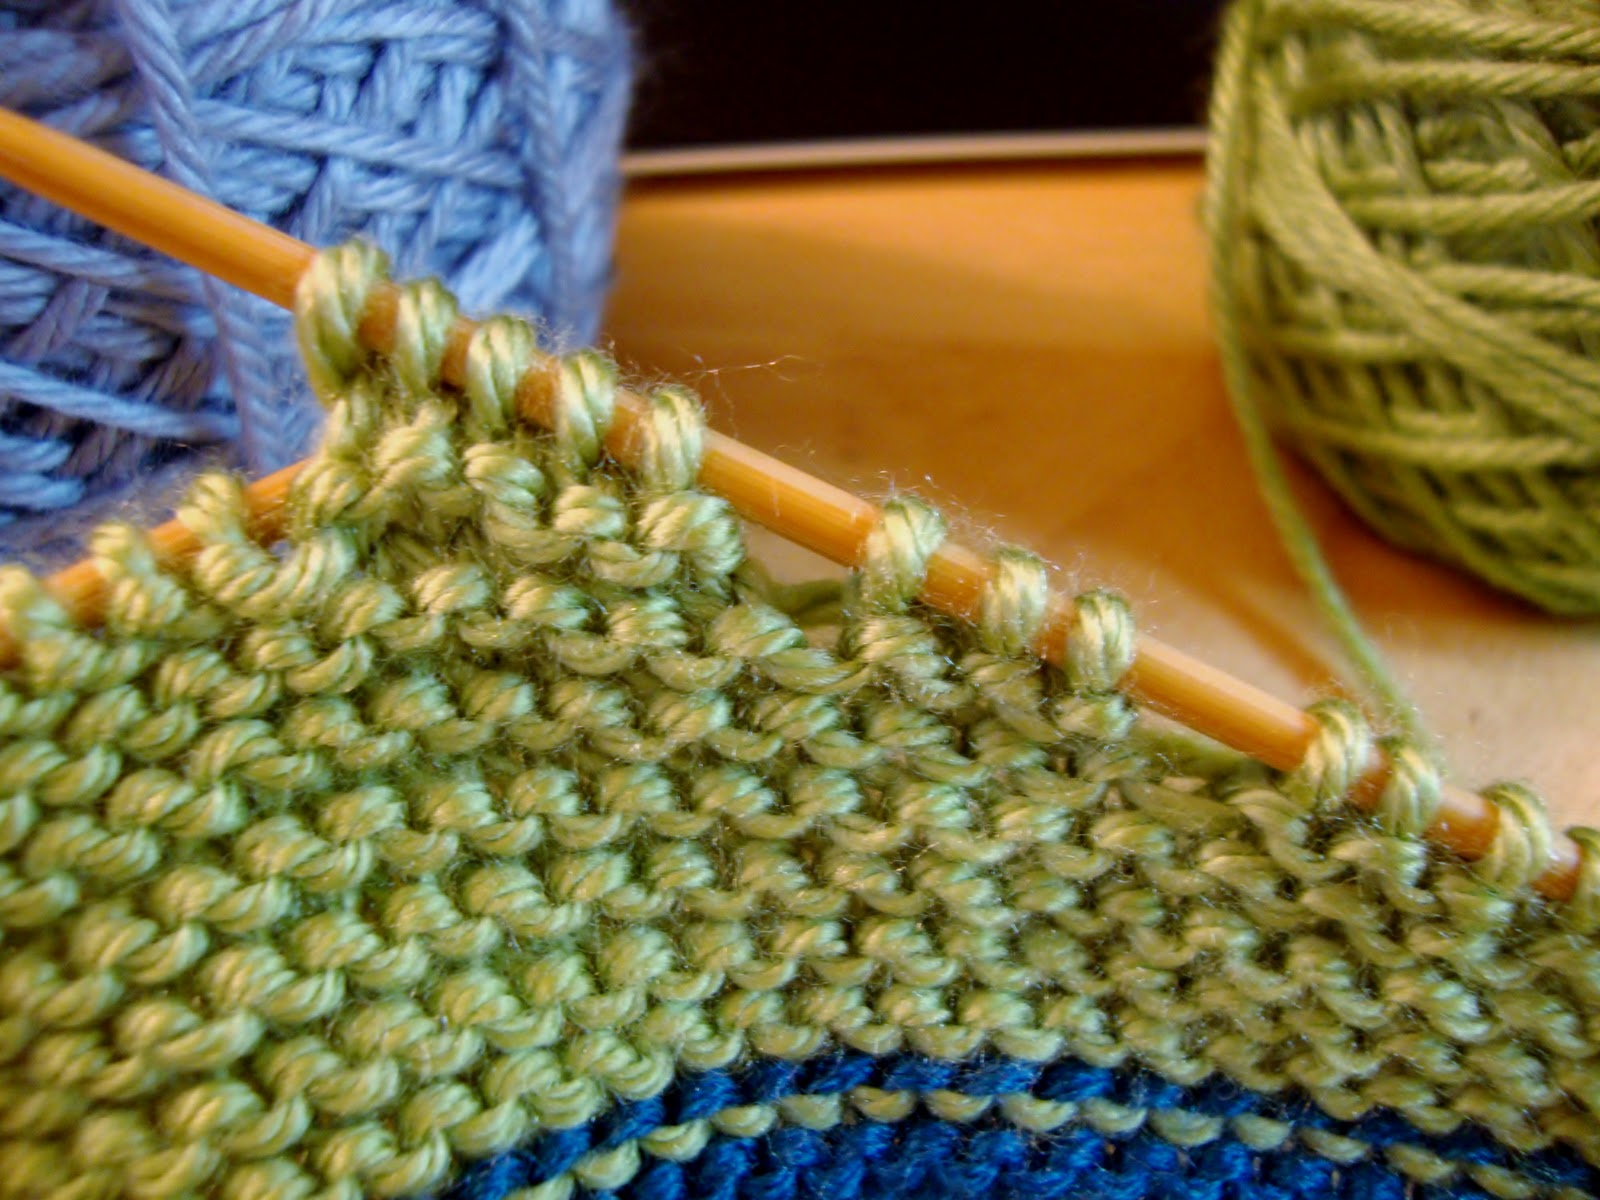
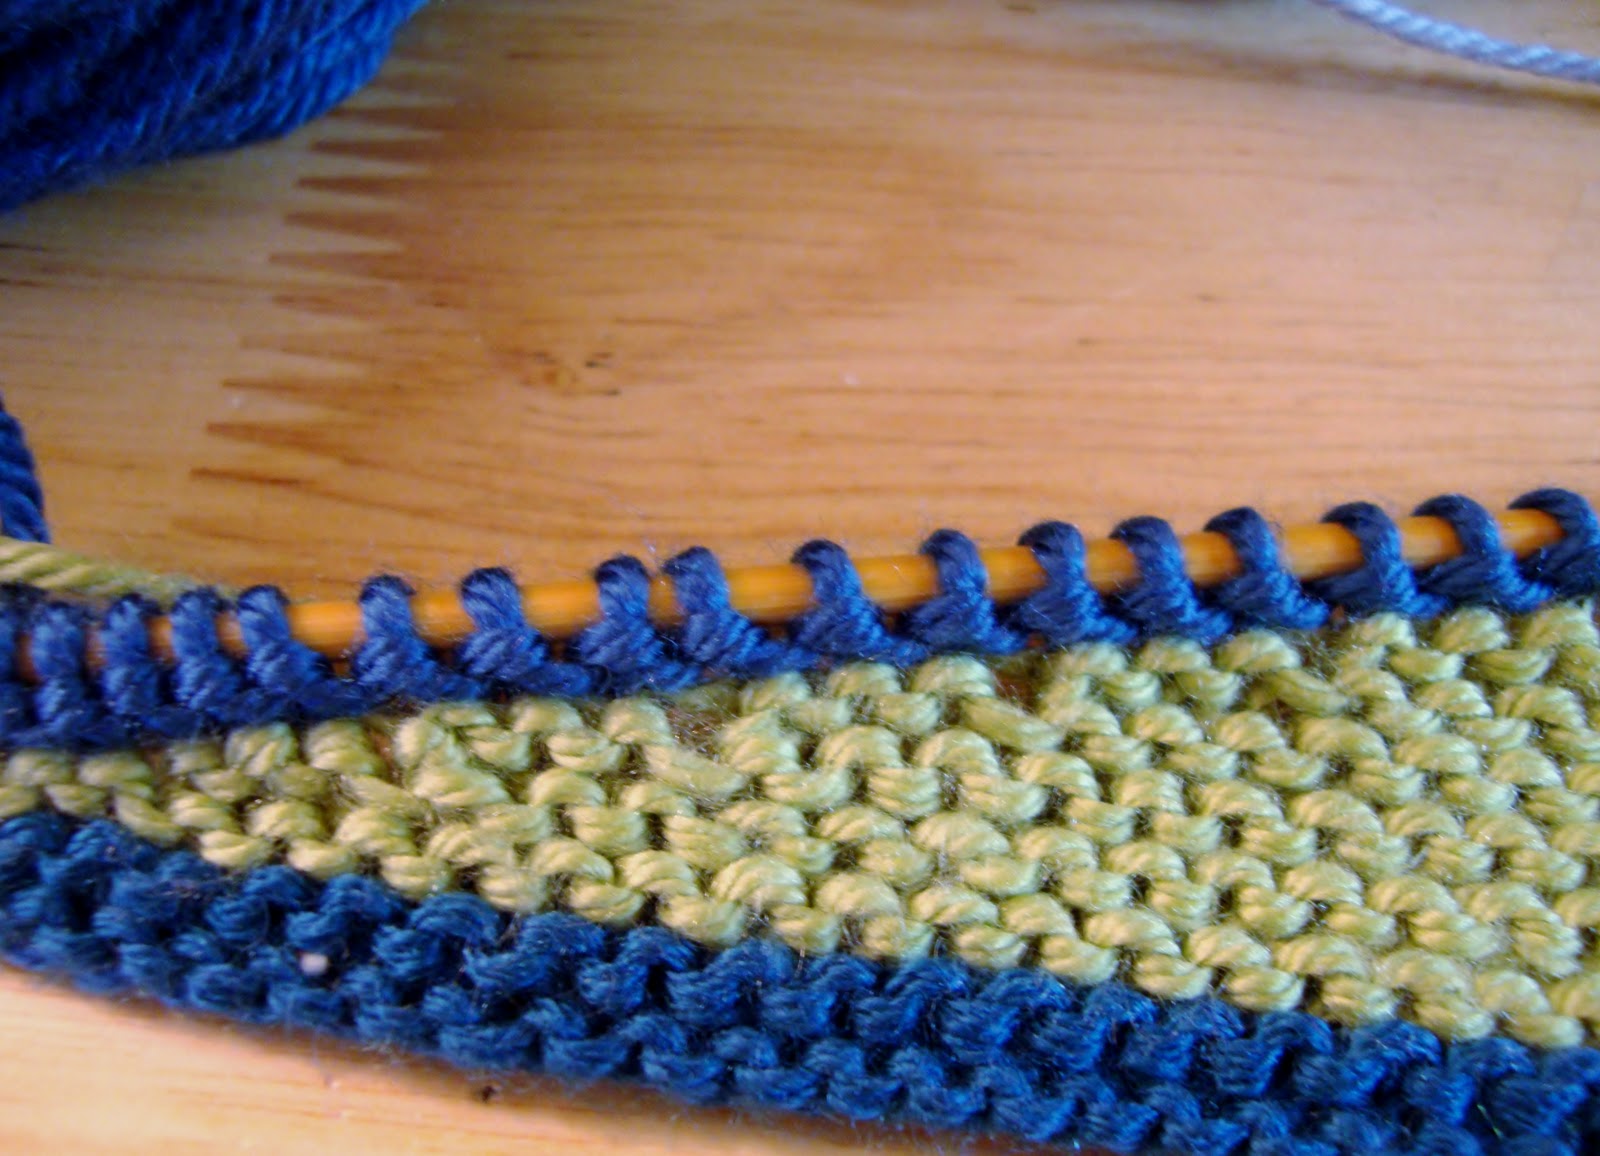
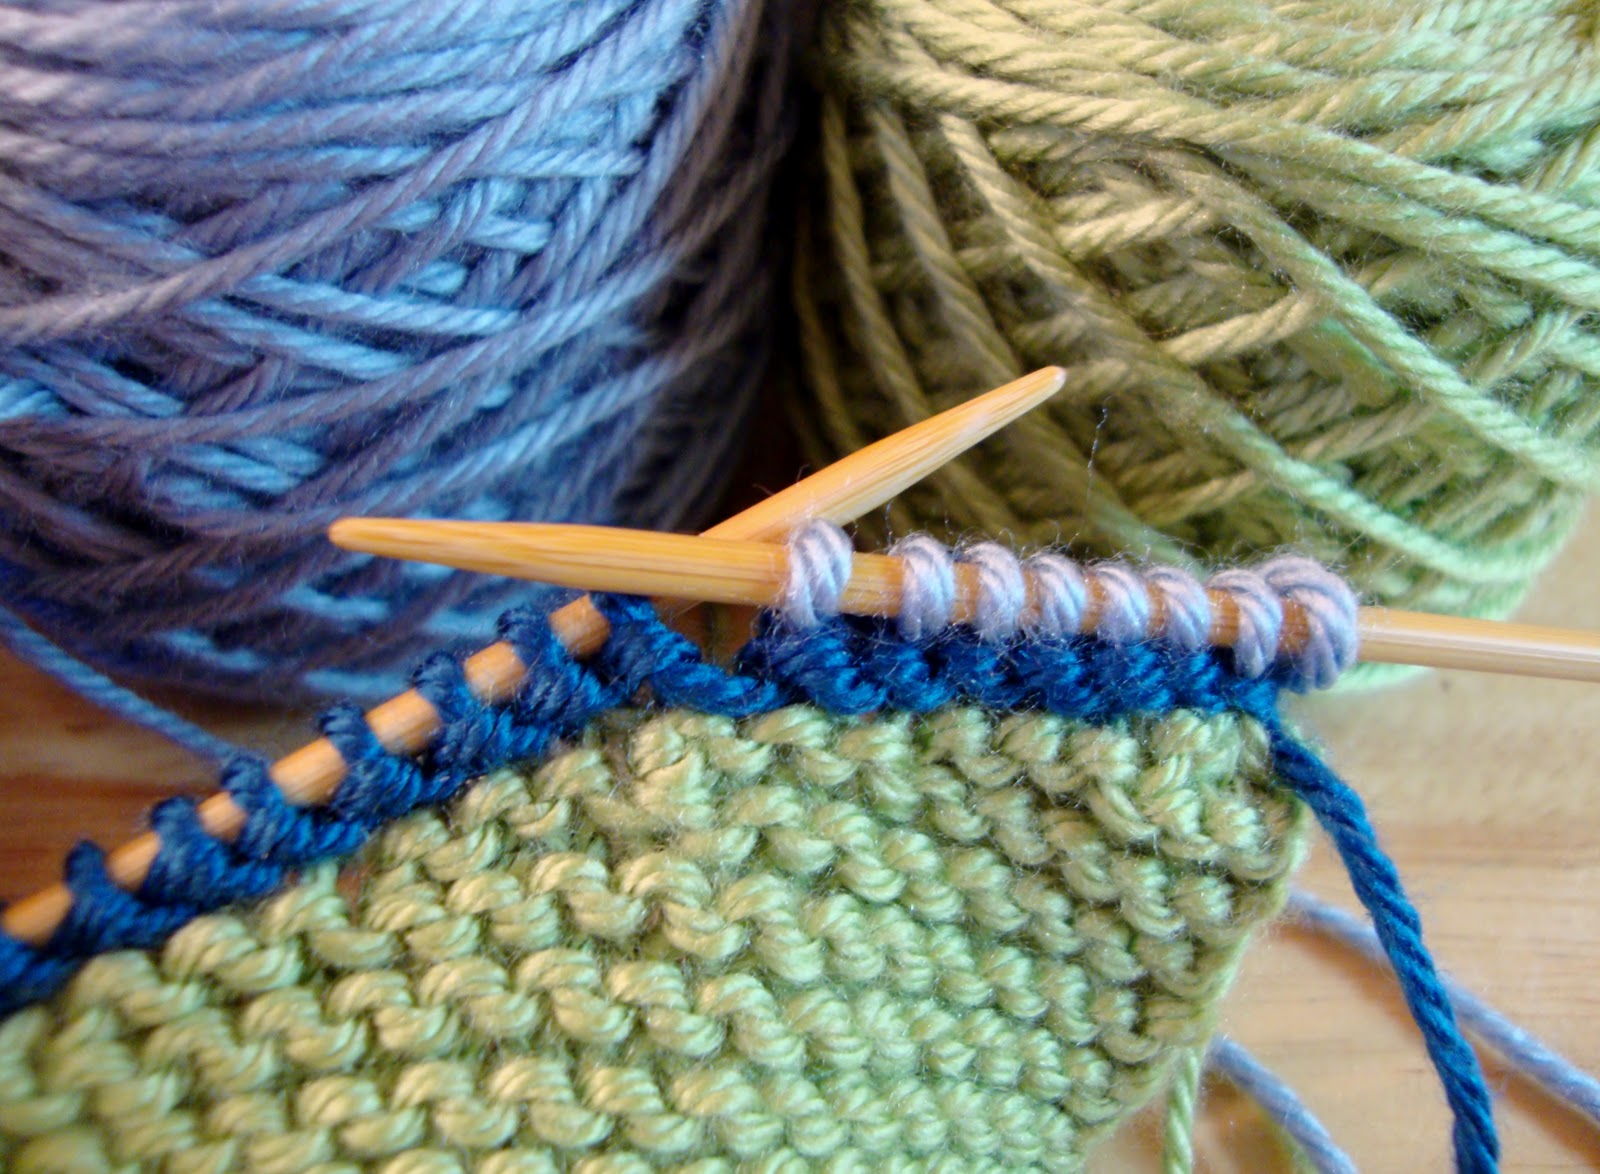
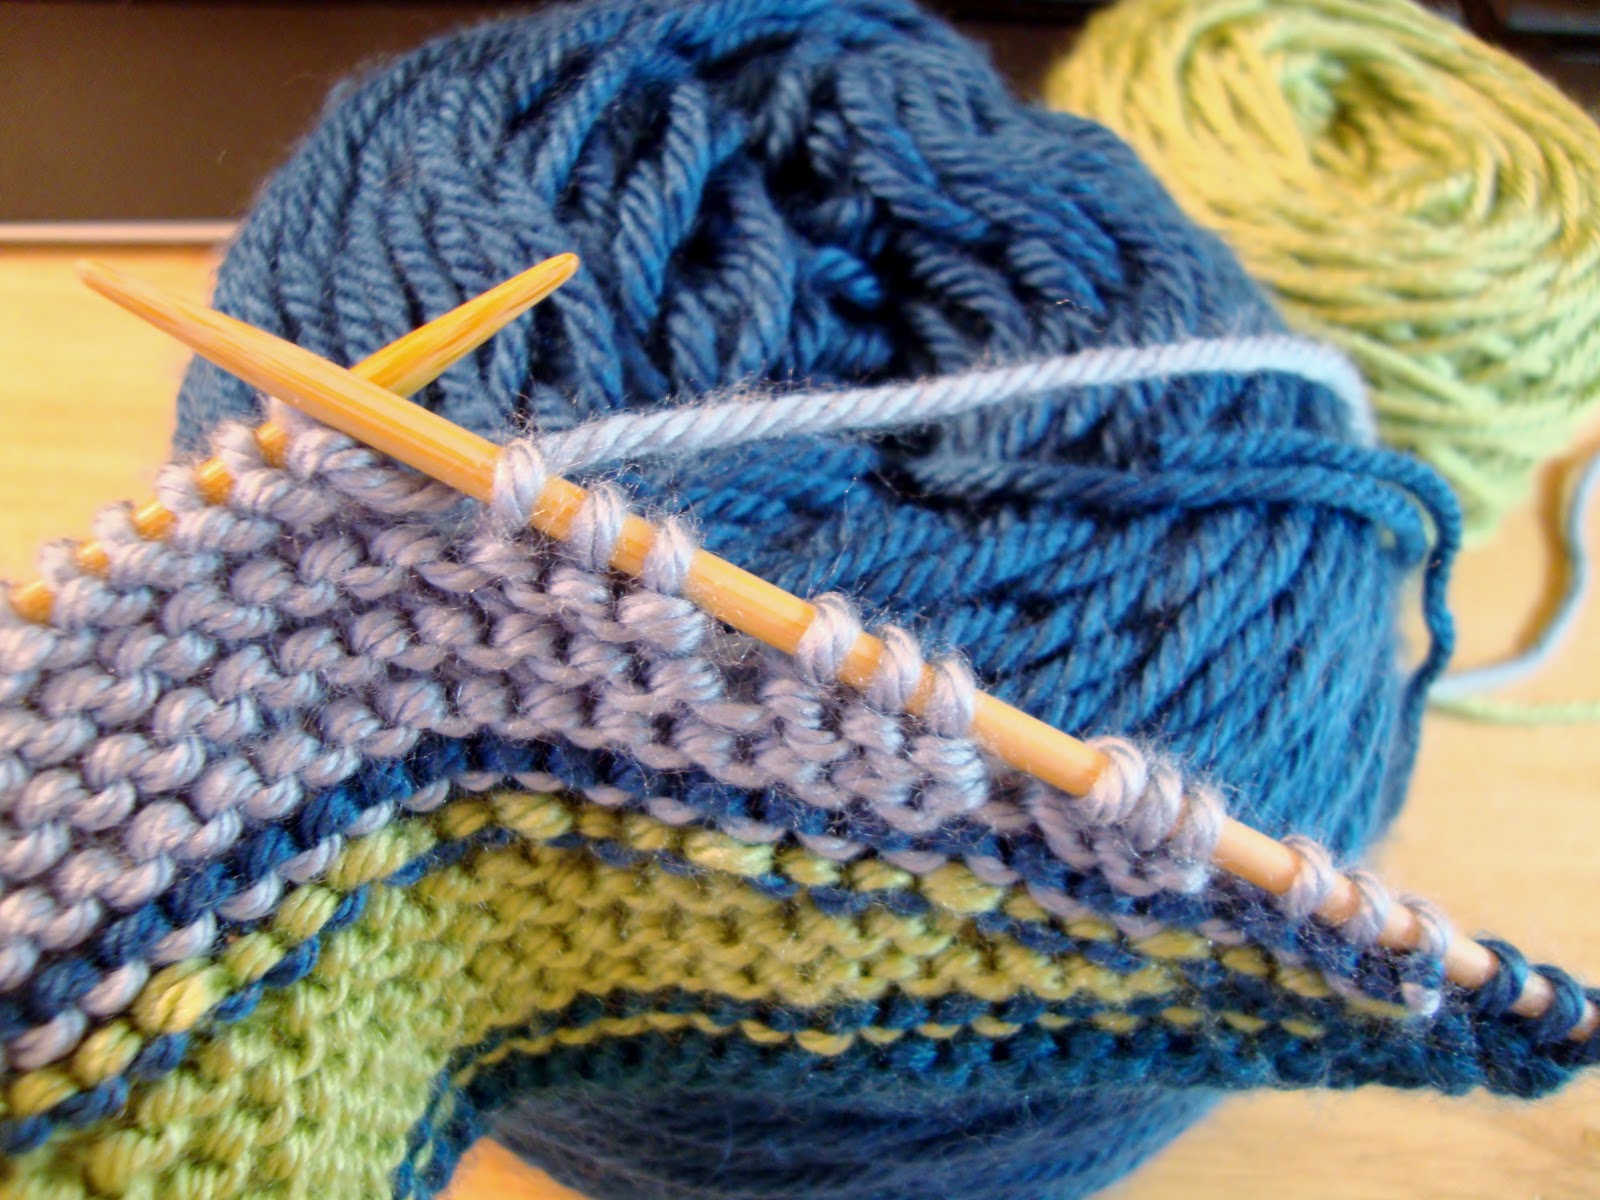
change the colour and knit two rows using all the stitches
cut the yarn
and change to another colour
knit all the stitches until you get to the last three
leave these on the needle and turn the work and go back on the stitches you just worked
turn the work and go back and work all the stitches until you reach the last three
leave them on the needle
turn the work and go back up
and continue working to the last three stitches
turning and working back
and turning and working to the last three stitches
until you have three stitches left to work
when each section is done
cut the yarn and join on a new colour
knit two rows on all the stitches
cut the yarn and join another colour
knit to the last three stitches and repeat the pattern
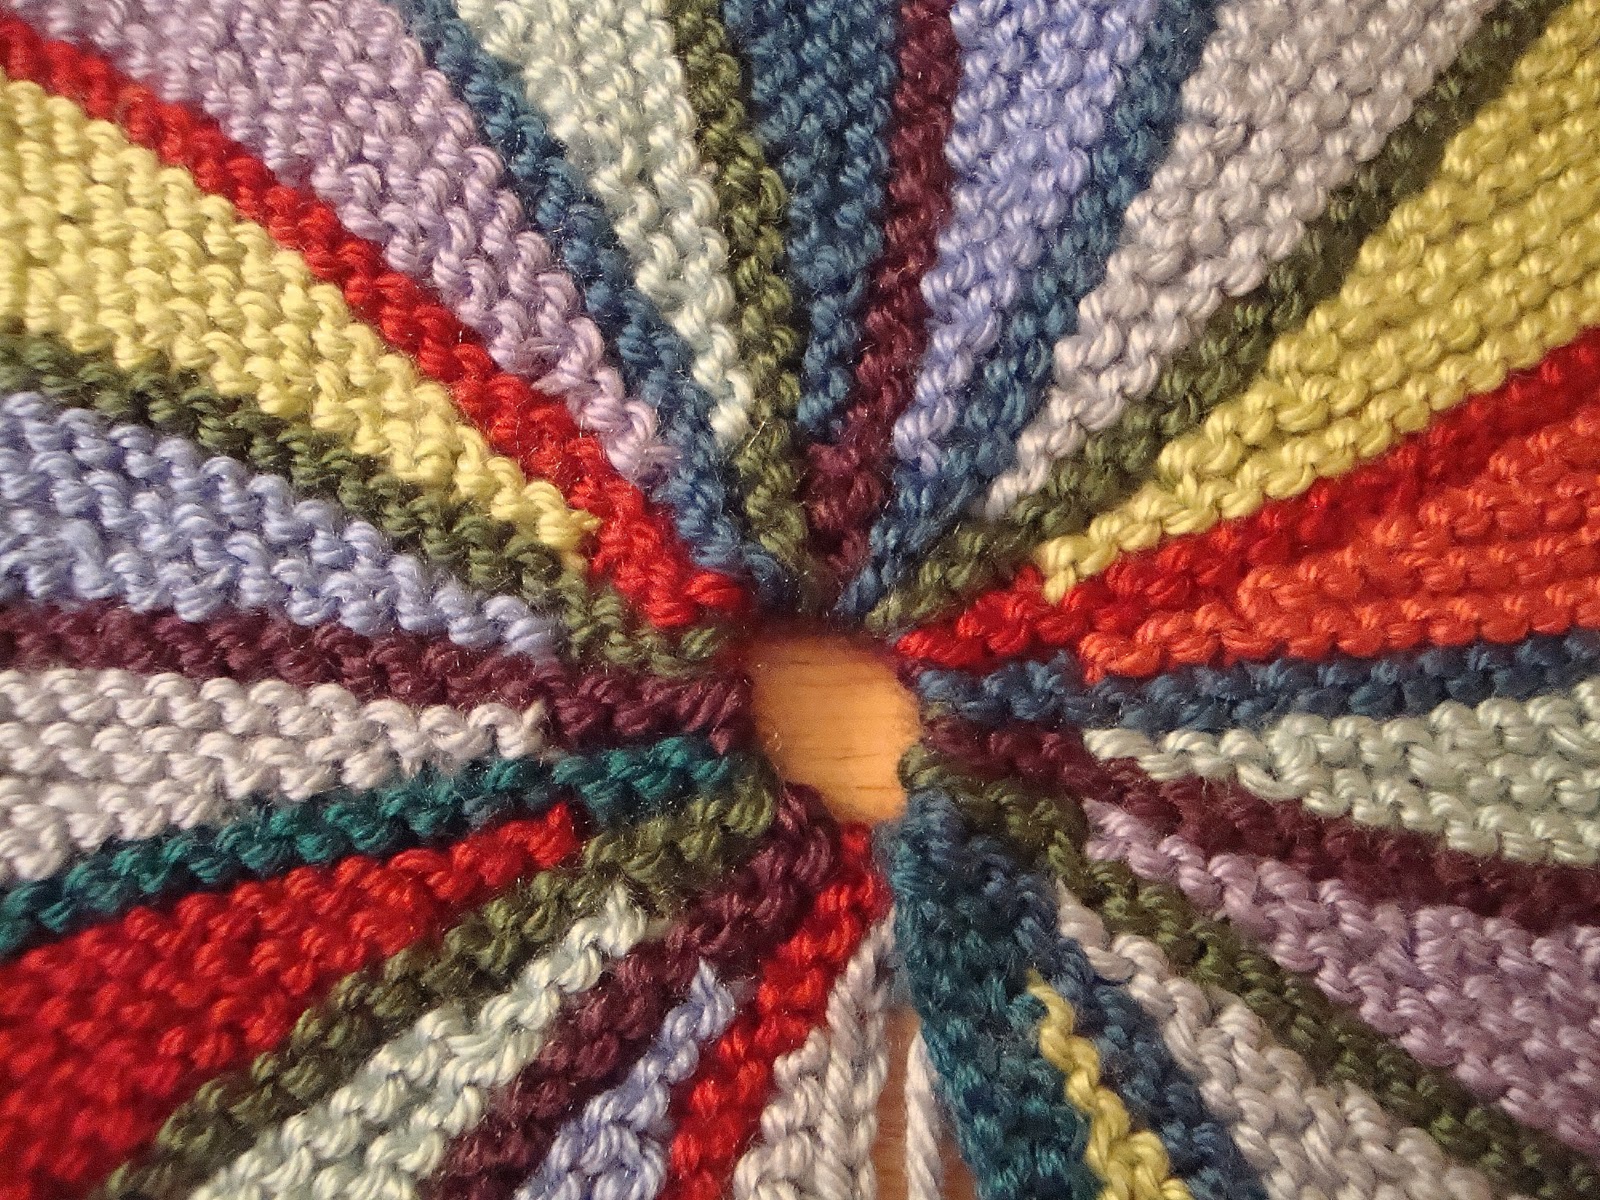
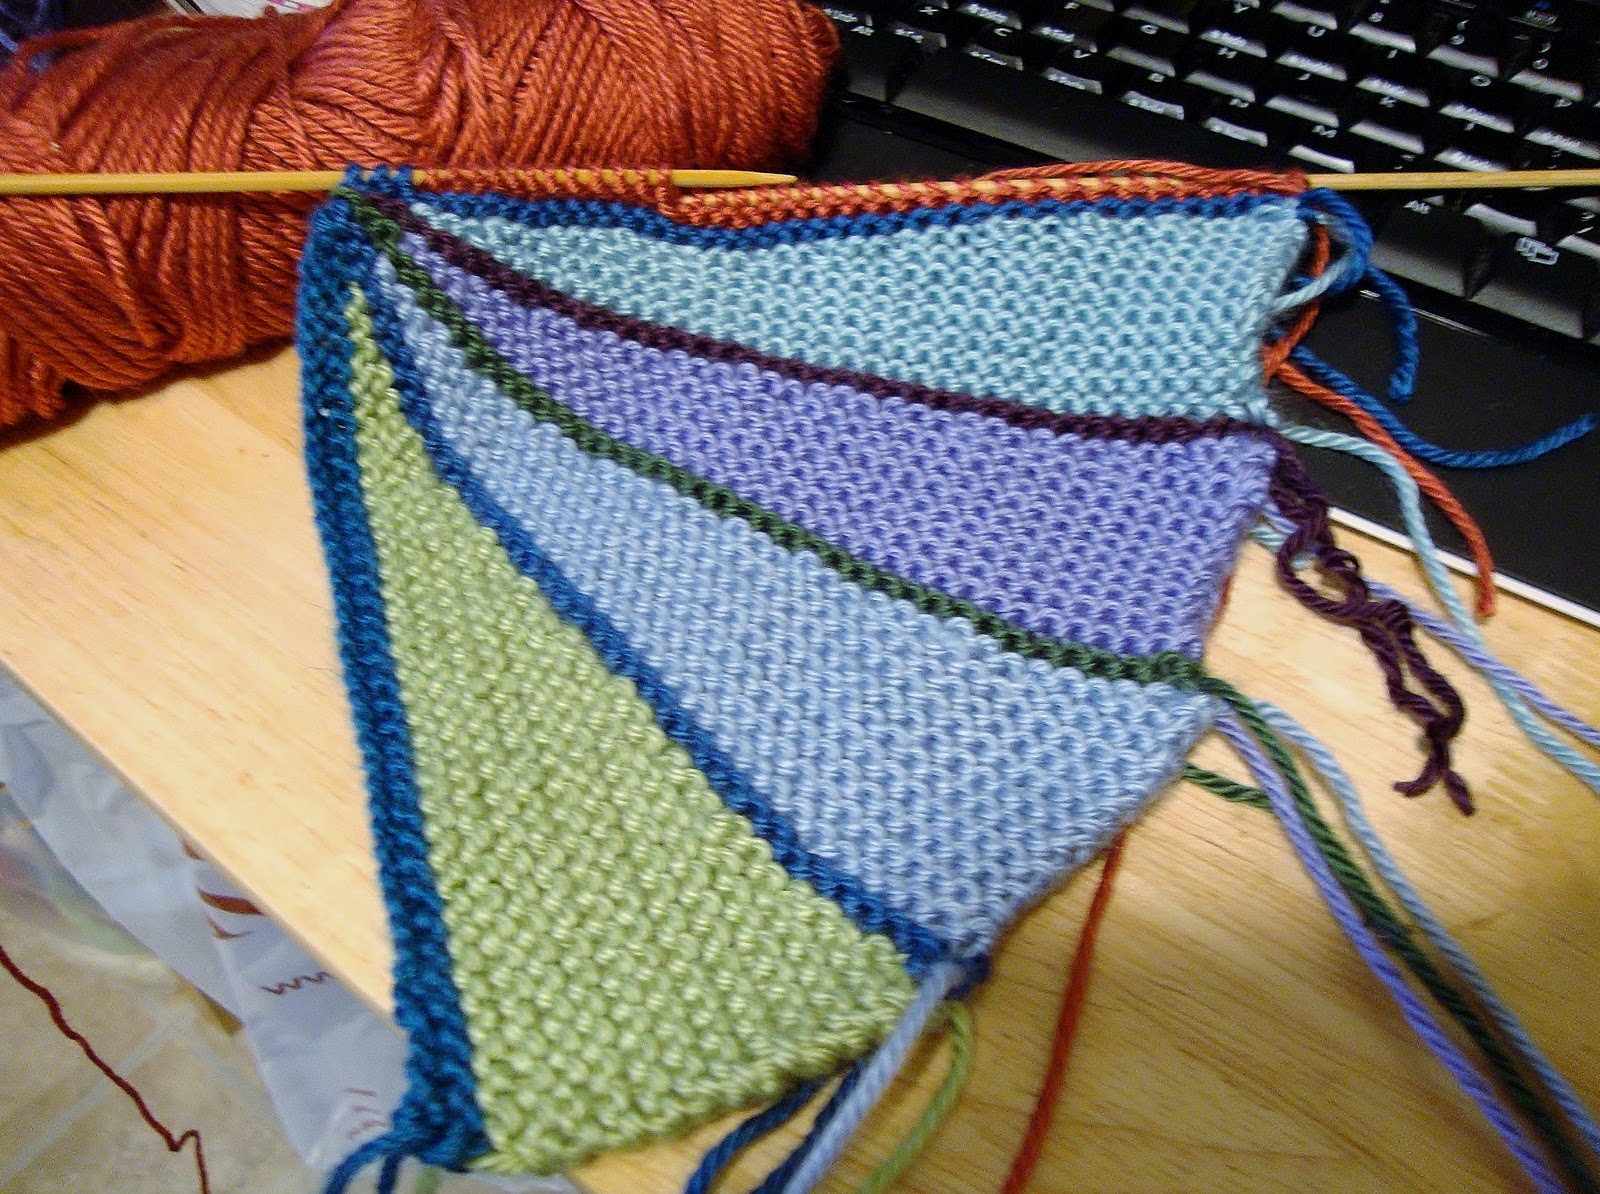
pretty soon you will have different coloured sections separated by two rows
on the pillow I made I had
18 sections
it lays flat and there is no stretching or tugging to make it fit
I have no idea if this is for all stitch counts
I sewed in the tails
I sewed the seam together
and I will make a round pillow for it to be stitched to
you can make a second one if you wish your pillow to be the same on both sides
if there are mistakes please let me know
if you have a question please ask
I hope if you make one you show us
it was fun to make and it took very little time
enjoy!!!
the round vintage pillow...
I did not find a pattern for this pillow
so I wrote down what I did
after I had figured it out
it is made with
short rows
it is much easier than it looks
I make no claim on it
It's made with a 3 count
I cast on
39 stitches (sts)
that made a 14" pillow
I used slightly smaller needles because I wanted it tight
I used acrylic yarn that I have in the stash
with the first colour
cast on your stitches
knit two rows
cut yarn
join new colour
knit to the last three stitches of previous row
do not knit these stitches
leave them on the needle
and turn the work and go back
(above you see six stitches that aren't worked )
turn the work and knit back on all the stitches
here you can see eight sets of three stitches that were left on the needle as the row is worked back and forth
the row gets shorter as you leave three stitches behind each time you work the row
and here the row is done
there are spaces between the sets of 3 but don't worry they disappear or if they don't they look like little eyelets
change the colour and knit two rows using all the stitches
cut the yarn
and change to another colour
knit all the stitches until you get to the last three
leave these on the needle and turn the work and go back on the stitches you just worked
turn the work and go back and work all the stitches until you reach the last three
leave them on the needle
turn the work and go back up
and continue working to the last three stitches
turning and working back
and turning and working to the last three stitches
until you have three stitches left to work
when each section is done
cut the yarn and join on a new colour
knit two rows on all the stitches
cut the yarn and join another colour
knit to the last three stitches and repeat the pattern
pretty soon you will have different coloured sections separated by two rows
on the pillow I made I had
18 sections
it lays flat and there is no stretching or tugging to make it fit
I have no idea if this is for all stitch counts
I sewed in the tails
I sewed the seam together
and I will make a round pillow for it to be stitched to
you can make a second one if you wish your pillow to be the same on both sides
if there are mistakes please let me know
if you have a question please ask
I hope if you make one you show us
it was fun to make and it took very little time
enjoy!!!
 Я - фотографПлагин для публикации фотографий в дневнике пользователя. Минимальные системные требования: Internet Explorer 6, Fire Fox 1.5, Opera 9.5, Safari 3.1.1 со включенным JavaScript. Возможно это будет рабо
 Скачать музыку с LiveInternet.ruПростая скачивалка песен по заданным урлам
 ОткрыткиПерерожденный каталог открыток на все случаи жизни
 Онлайн-игра "Empire"Преврати свой маленький замок в могущественную крепость и стань правителем величайшего королевства в игре Goodgame Empire.
Строй свою собственную империю, расширяй ее и защищай от других игроков. Б
Онлайн-игра "Empire"Преврати свой маленький замок в могущественную крепость и стань правителем величайшего королевства в игре Goodgame Empire.
Строй свою собственную империю, расширяй ее и защищай от других игроков. Б