Бабушкин квадрат... |
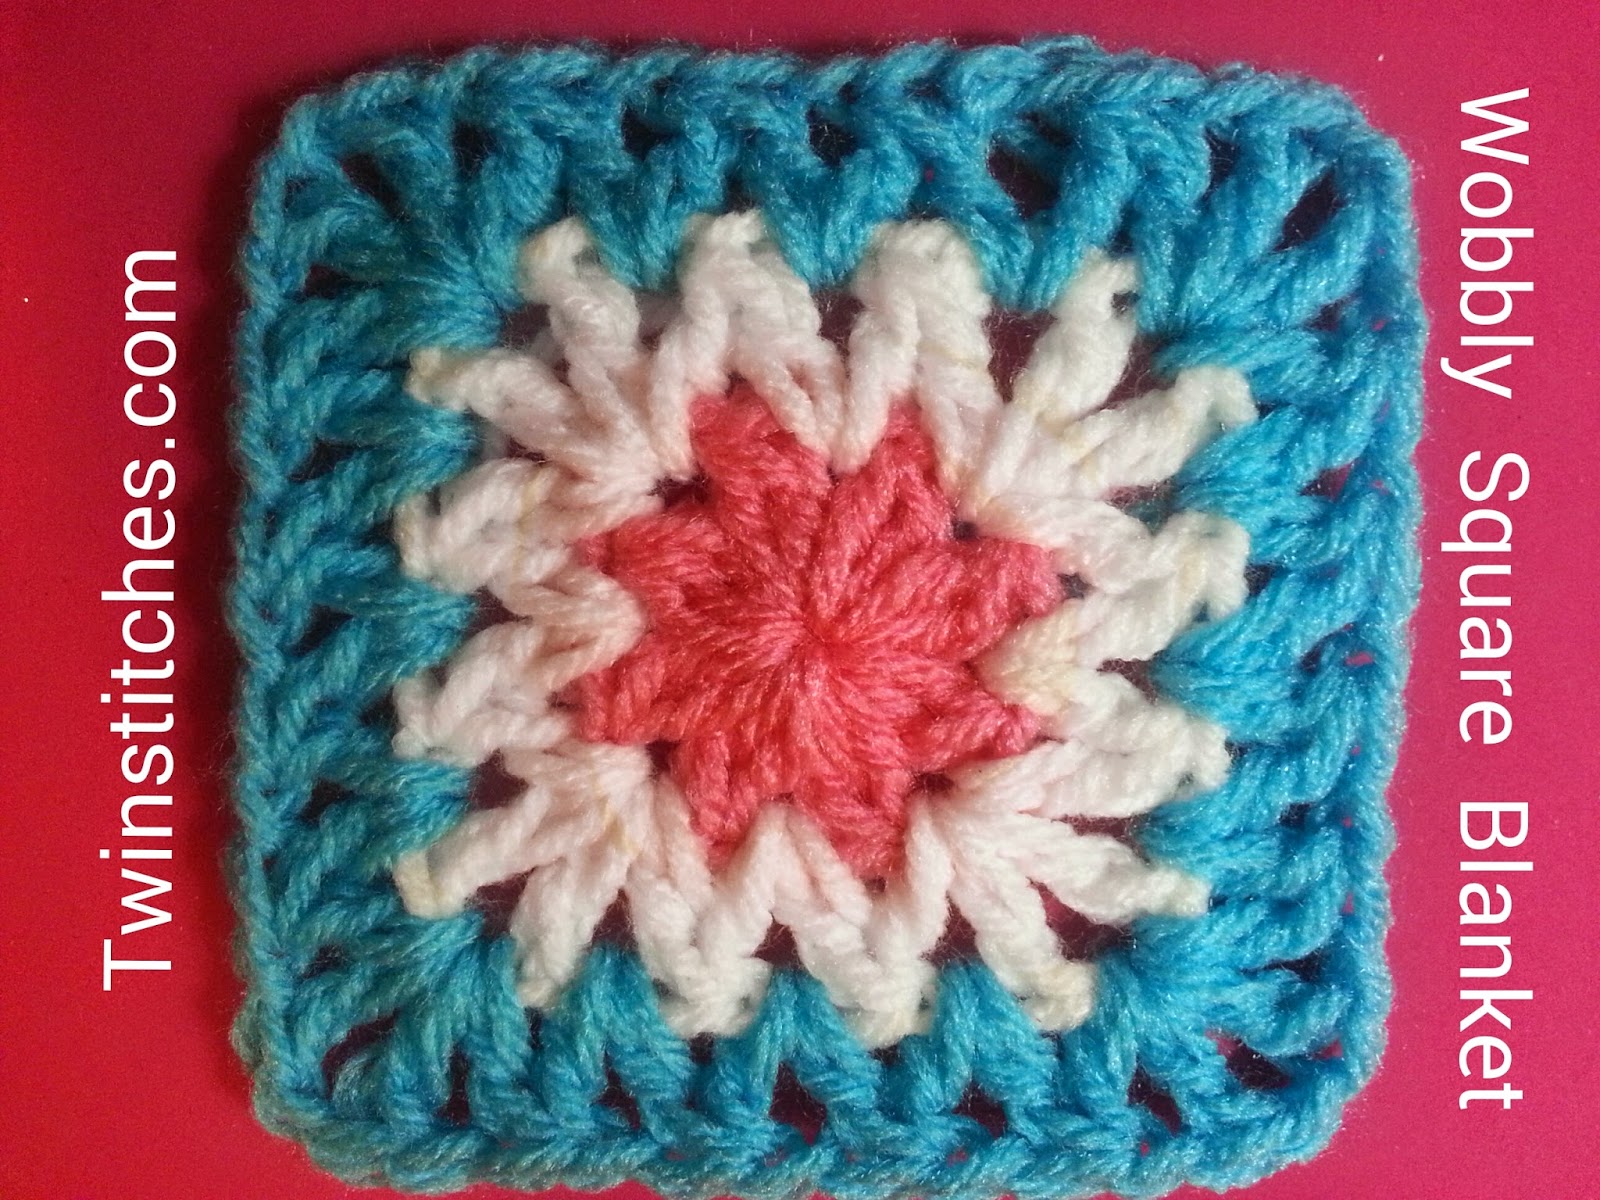
Wobbly Squares Blanket by Jennifer Uribe


Supplies: 3 skeins Red Heart Super Saver Yarn in 3 different colors (7 oz per skein)
- I used white, Perfect Pink, and Petal Pink
- J Hook (6.00 mm)
- Tapestry needle
Stitches Needed:
Magic Circle
Chain
dc2tog (Double crochet together) Click here for a video from Moogly to learn how to crochet this stitch.
slip stitch
Standing DC Click here for a video from Moogly to learn how to crochet a standing dc.
Standing dc2tog: begin a standing dc, pull yarn through first two loops only. Yarn over, insert hook through next chain 1 space and complete the dc2tog.
DC
Note about the corners: Each corner is worked over three stitches. They will consist of the second half of a dc2tog, chain 1, dc, chain 1, dc, chain 1, the first half of a dc2tog. You will have what appears to be 4 dcs in each corner.

Pattern:
** Click here for a photo tutorial of the first 3 rows. **
Row 1: Using Color 1, crochet a magic circle, chain 2 (does not count as a stitch). Crochet one dc2tog, then chain 1. Repeat from * to * seven more times. Join to the top of the first dc2tog. Fasten off. Close magic circle.
In each of the following rows, all stitches will be worked in the chain 1 spaces of the previous row.
Row 2: Using Color 2, using the standing double crochet method, join the new color in one of the chain 1 spaces, but only pull through the first two loops (beginning of first dc2tog started). Yarn over and complete the dc2tog in the next chain space. Chain 1. Begin the next dc2tog in the same space, complete in the next chain 1 space. To form the first corner, we will continue to work in the same space. Chain 1, double crochet, chain 1, double crochet, chain 1 all in the same space. To complete the corner, begin the next dc2tog in the same space and complete it in the next chain 1 space. Begin the next dc2tog in the same space, complete in the next chain 1. *Make a corner (Chain 1, double crochet, chain 1, double crochet, chain 1 all in the same space. To complete the corner, begin the next dc2tog in the same space and complete it in the next chain 1 space.). Begin the next dc2tog in the same space, complete in the next chain 1 space.* Repeat from * to * two more times. Join to the top of the standing dc2tog. Fasten off.
{You may choose to weave in your ends as you go or leave them until the end.}
Row 3: Using Color 3, join using the standing double crochet method in any space but a corner. Remember to only pull through the first two loops (beginning of first dc2tog started). Yarn over and complete the dc2tog in the next chain space. Chain 1. Begin the next dc2tog in the same space, complete in the next chain 1 space. Continue this pattern, dc2tog, chain 1, begin next dc2tog in the same space, until you reach a corner. Complete the final dc2tog in the corner, chain 1, dc, chain 1, dc, chain 1, start dc2tog in the corner and complete in the next stitch. Continue around joining to the top of the standing dc2tog. Fasten off.
Rows 4-27: Continue the pattern as directed in Row 3 for each additional row. Alternate colors so that your wobbly squares are visible.
Finished size at gauge: about 36 inches.
I chose not to add a border to my blanket, but feel free to add one to yours.

Wobbly Square Blanket Photo Tutorial
Кликайте на картинку для увеличения размера
Let's get started!
Here's a hint throughout this pattern: Any time you complete a dc2tog, you will chain 1.
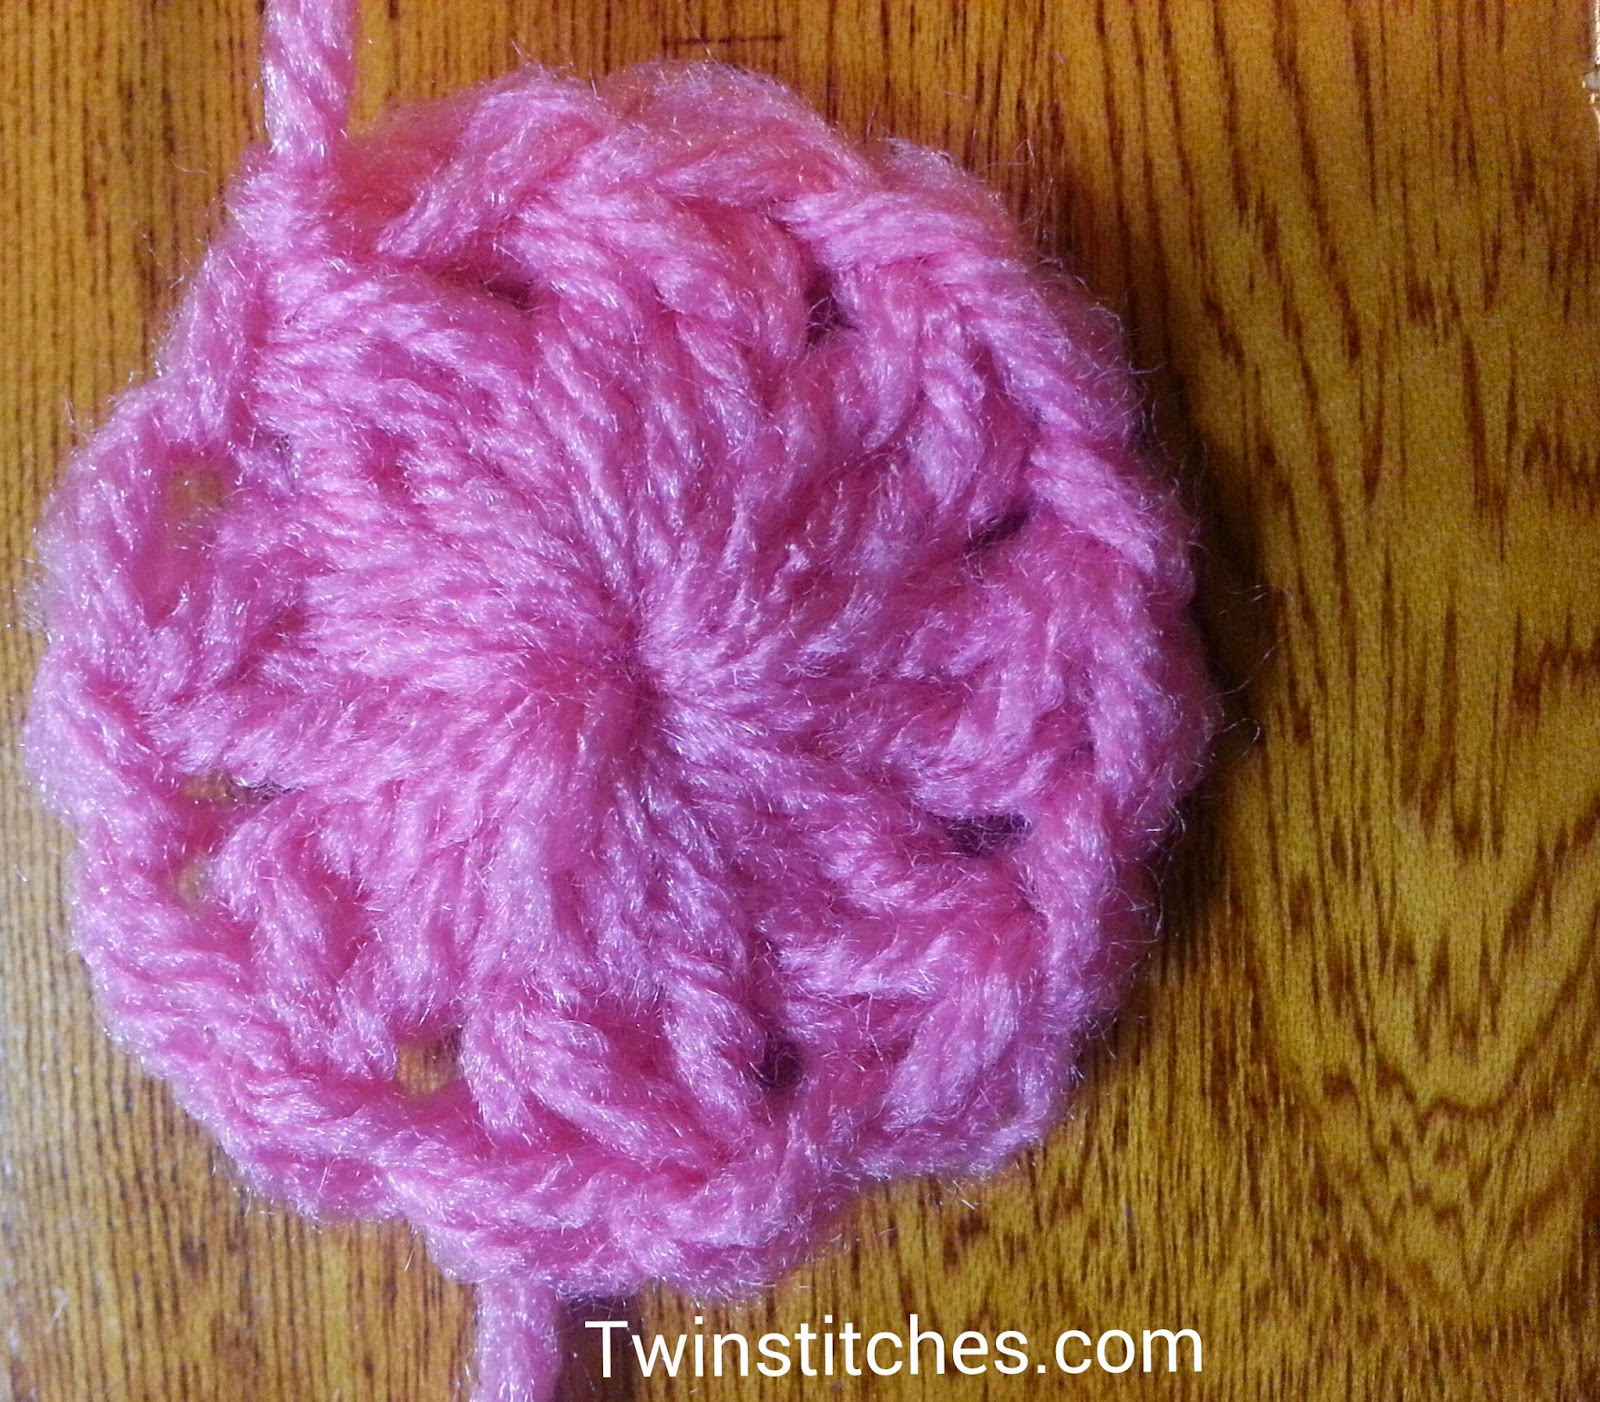
To start, form a magic circle and chain 2 (does not count as a stitch). *Crochet a dc2tog and chain 1.* Repeat from * to * seven times. Slip stitch into the top of the first dc2tog. Fasten off. (8 dc2tog, 8 chain 1s)
 |
|
| Row 1 |
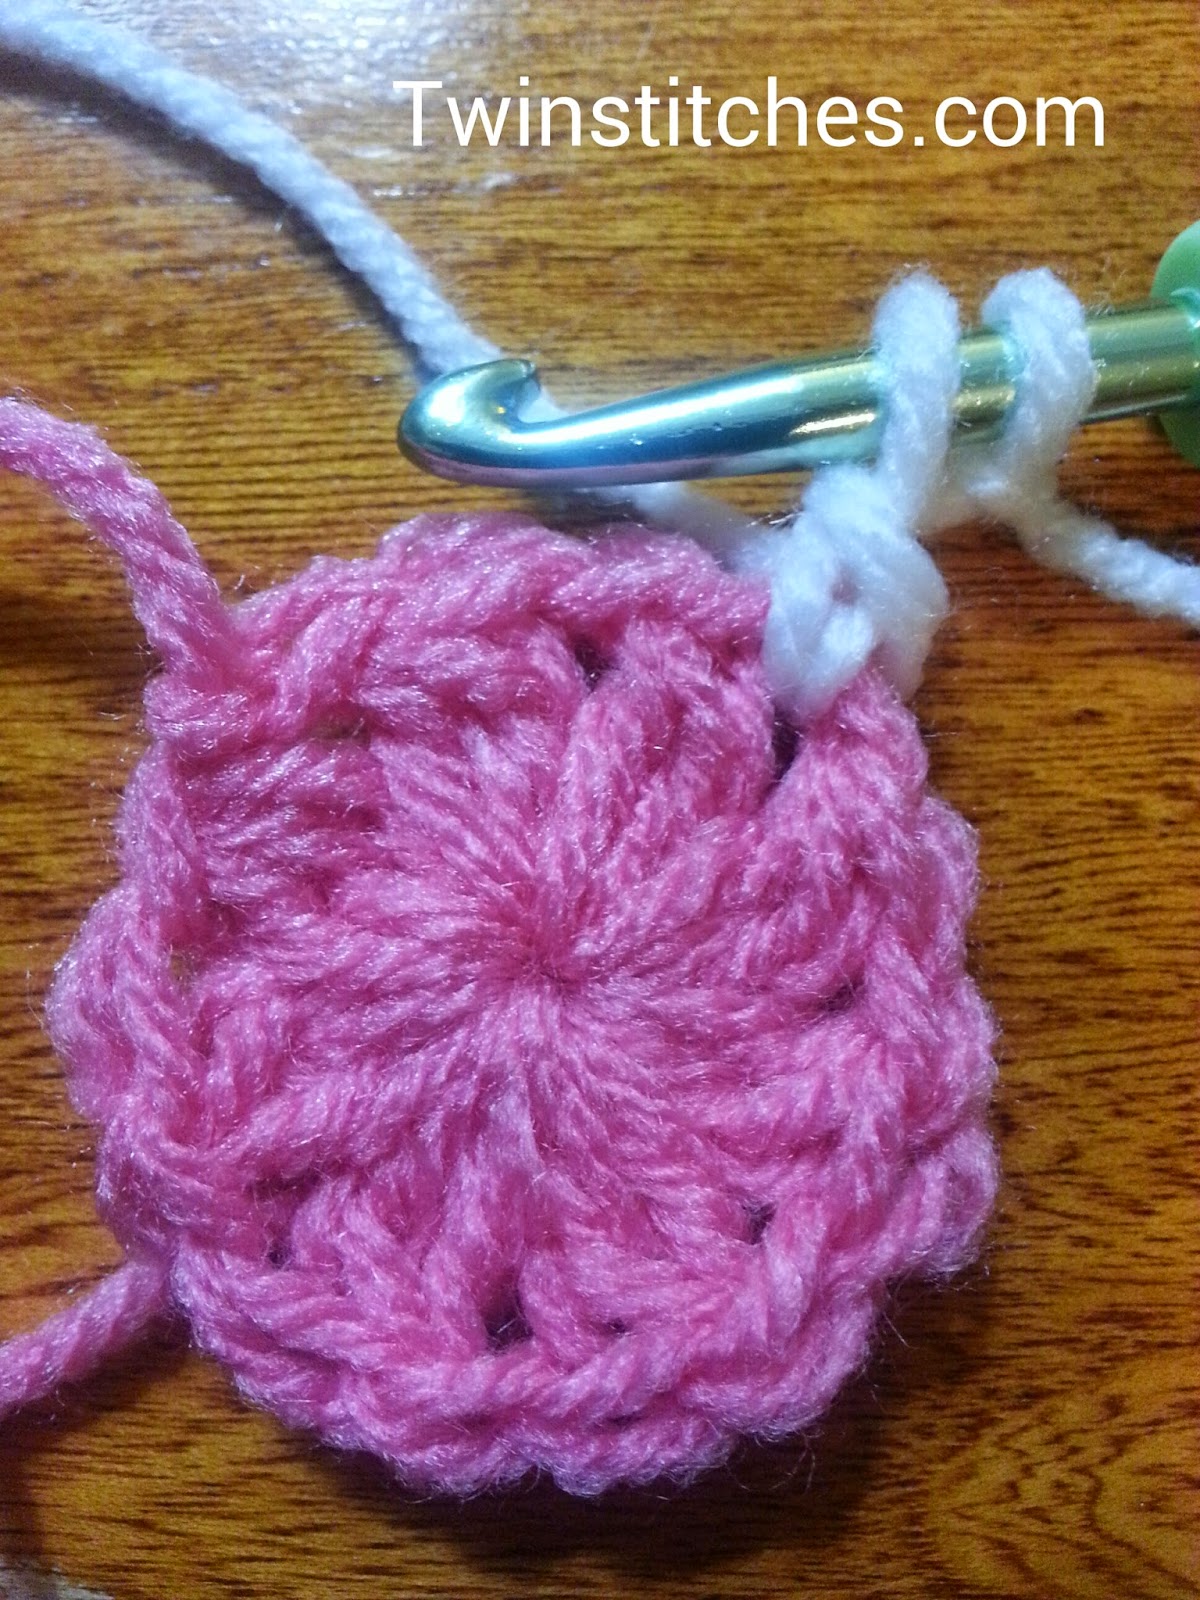 |
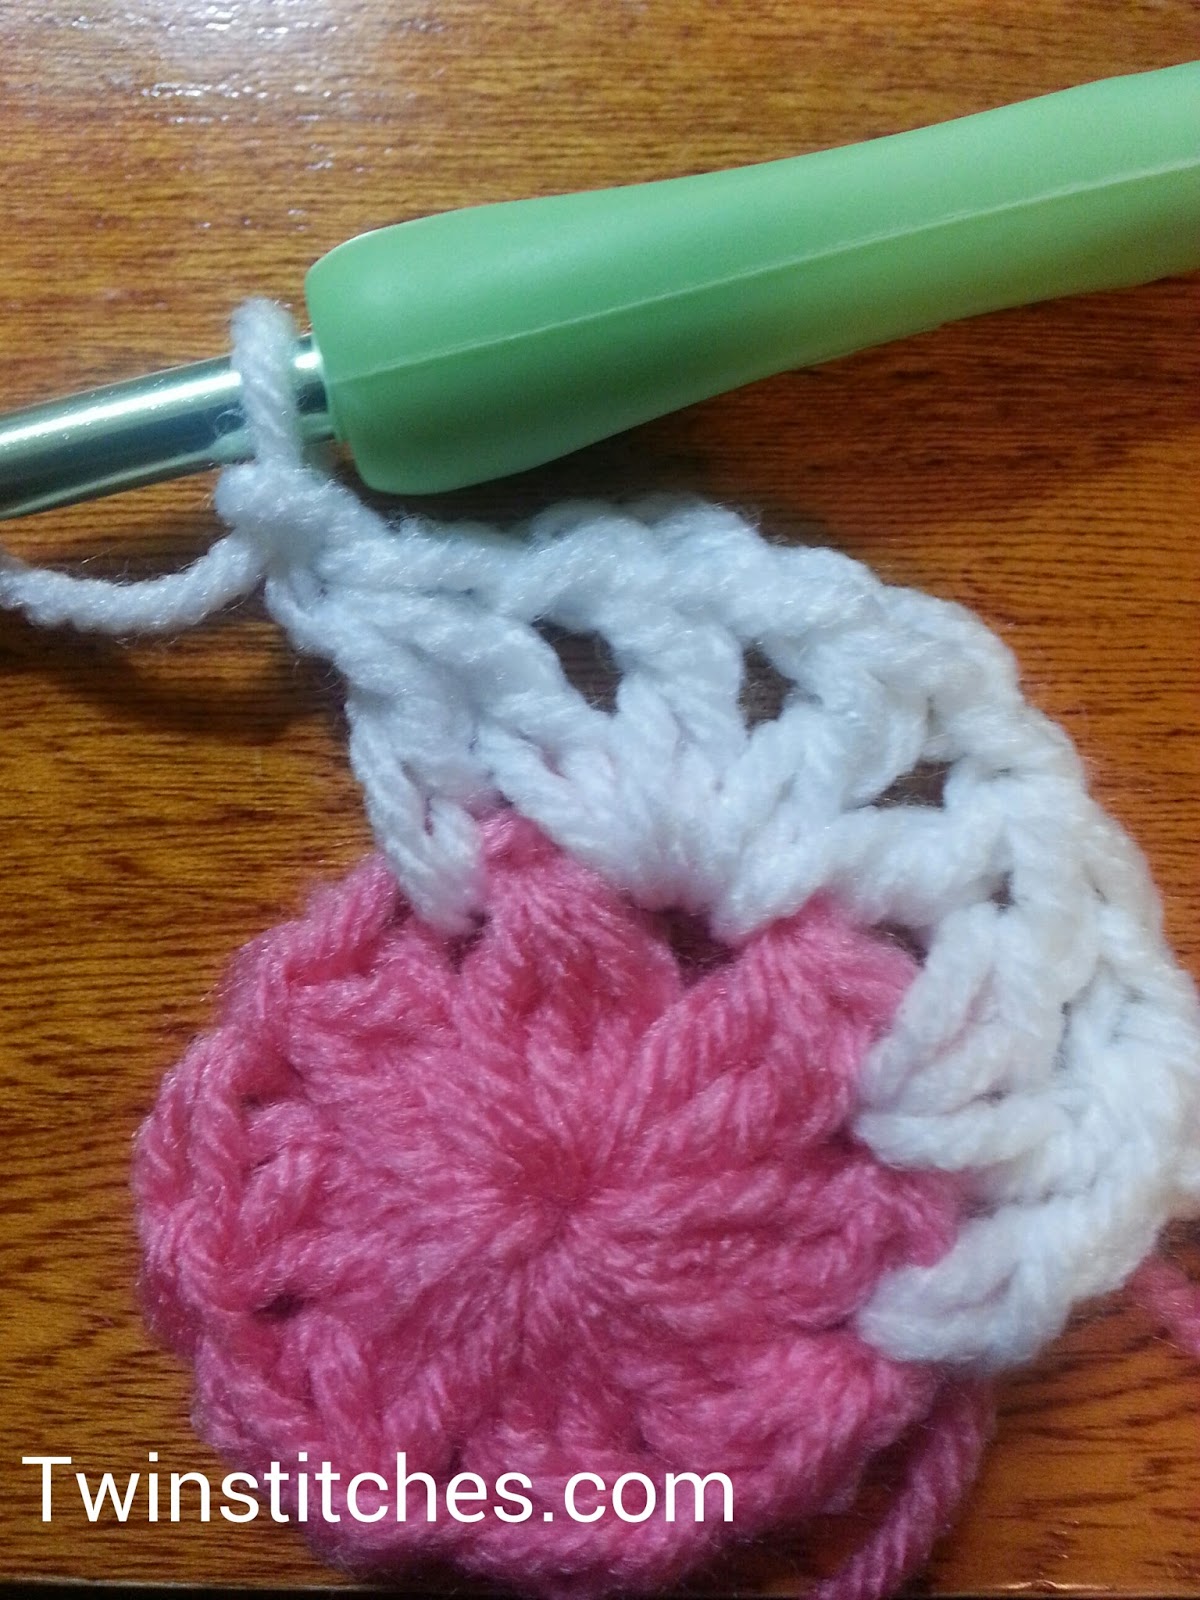
| Join to a chain 1 space using the standing dc2tog. |
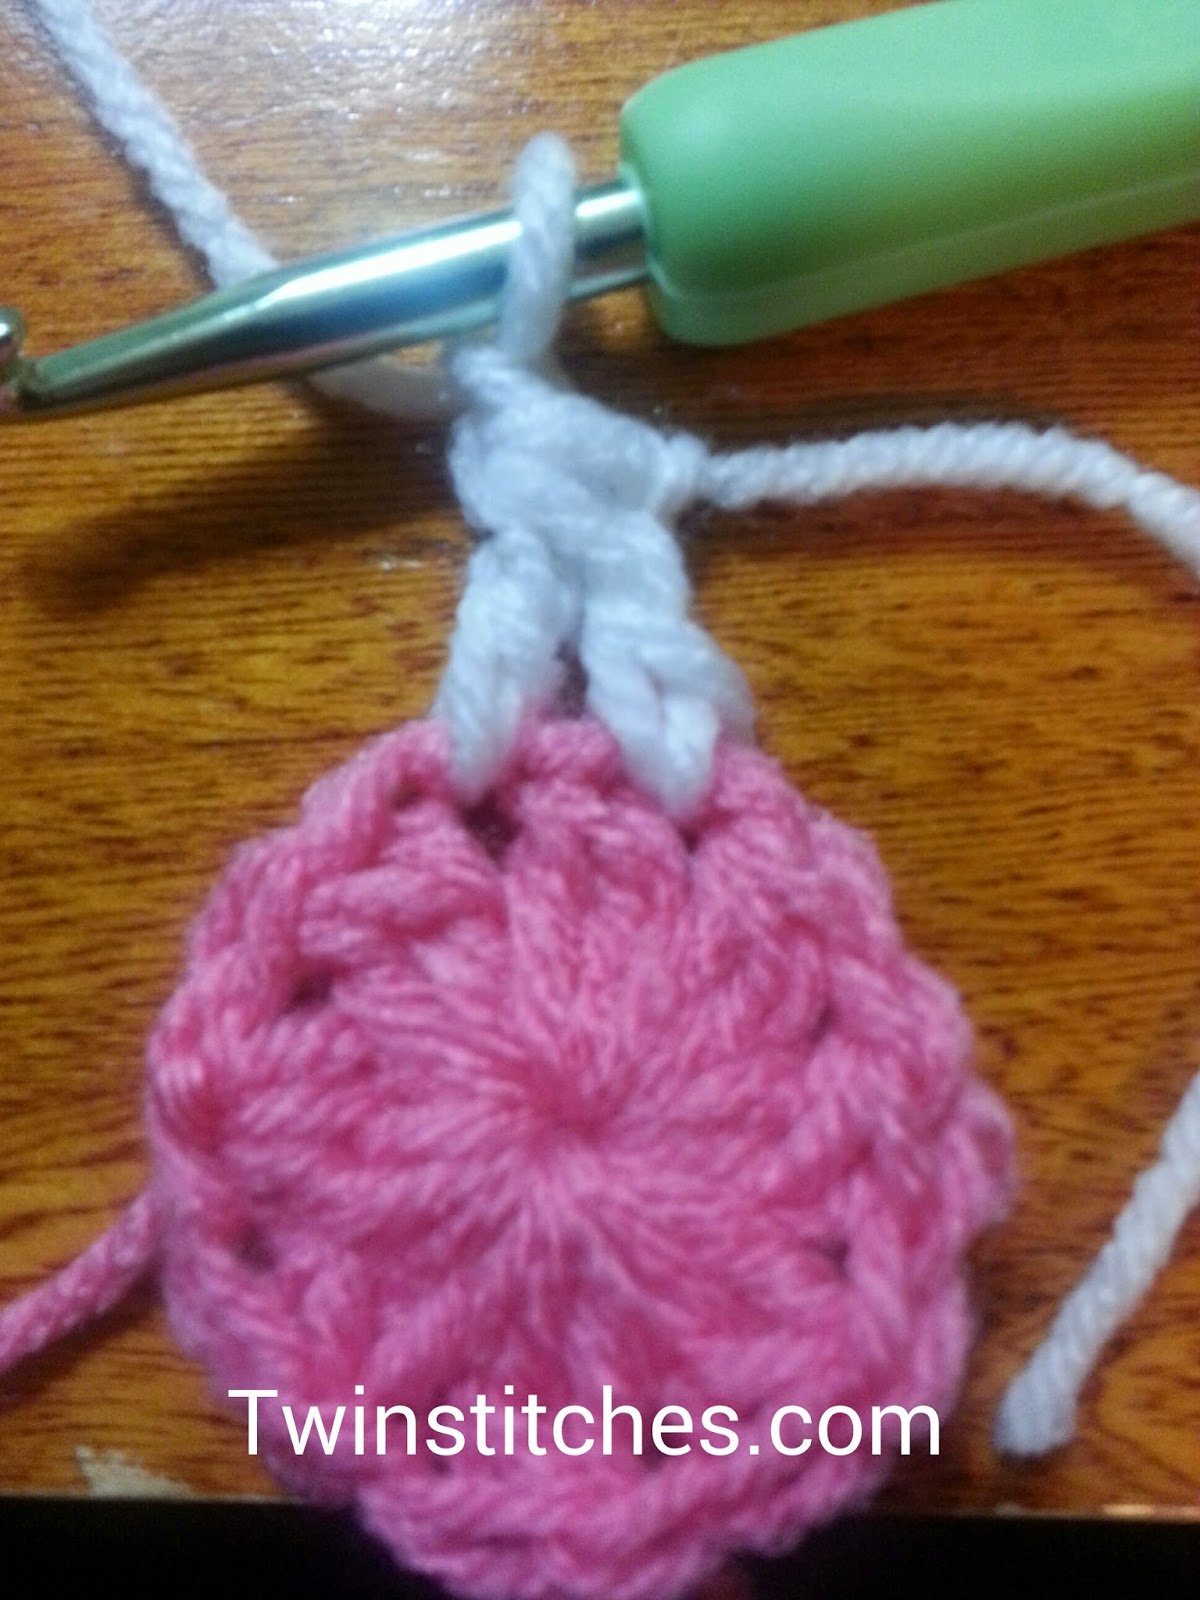 |
| The dc2tog is completed in the next chain 1 space. |
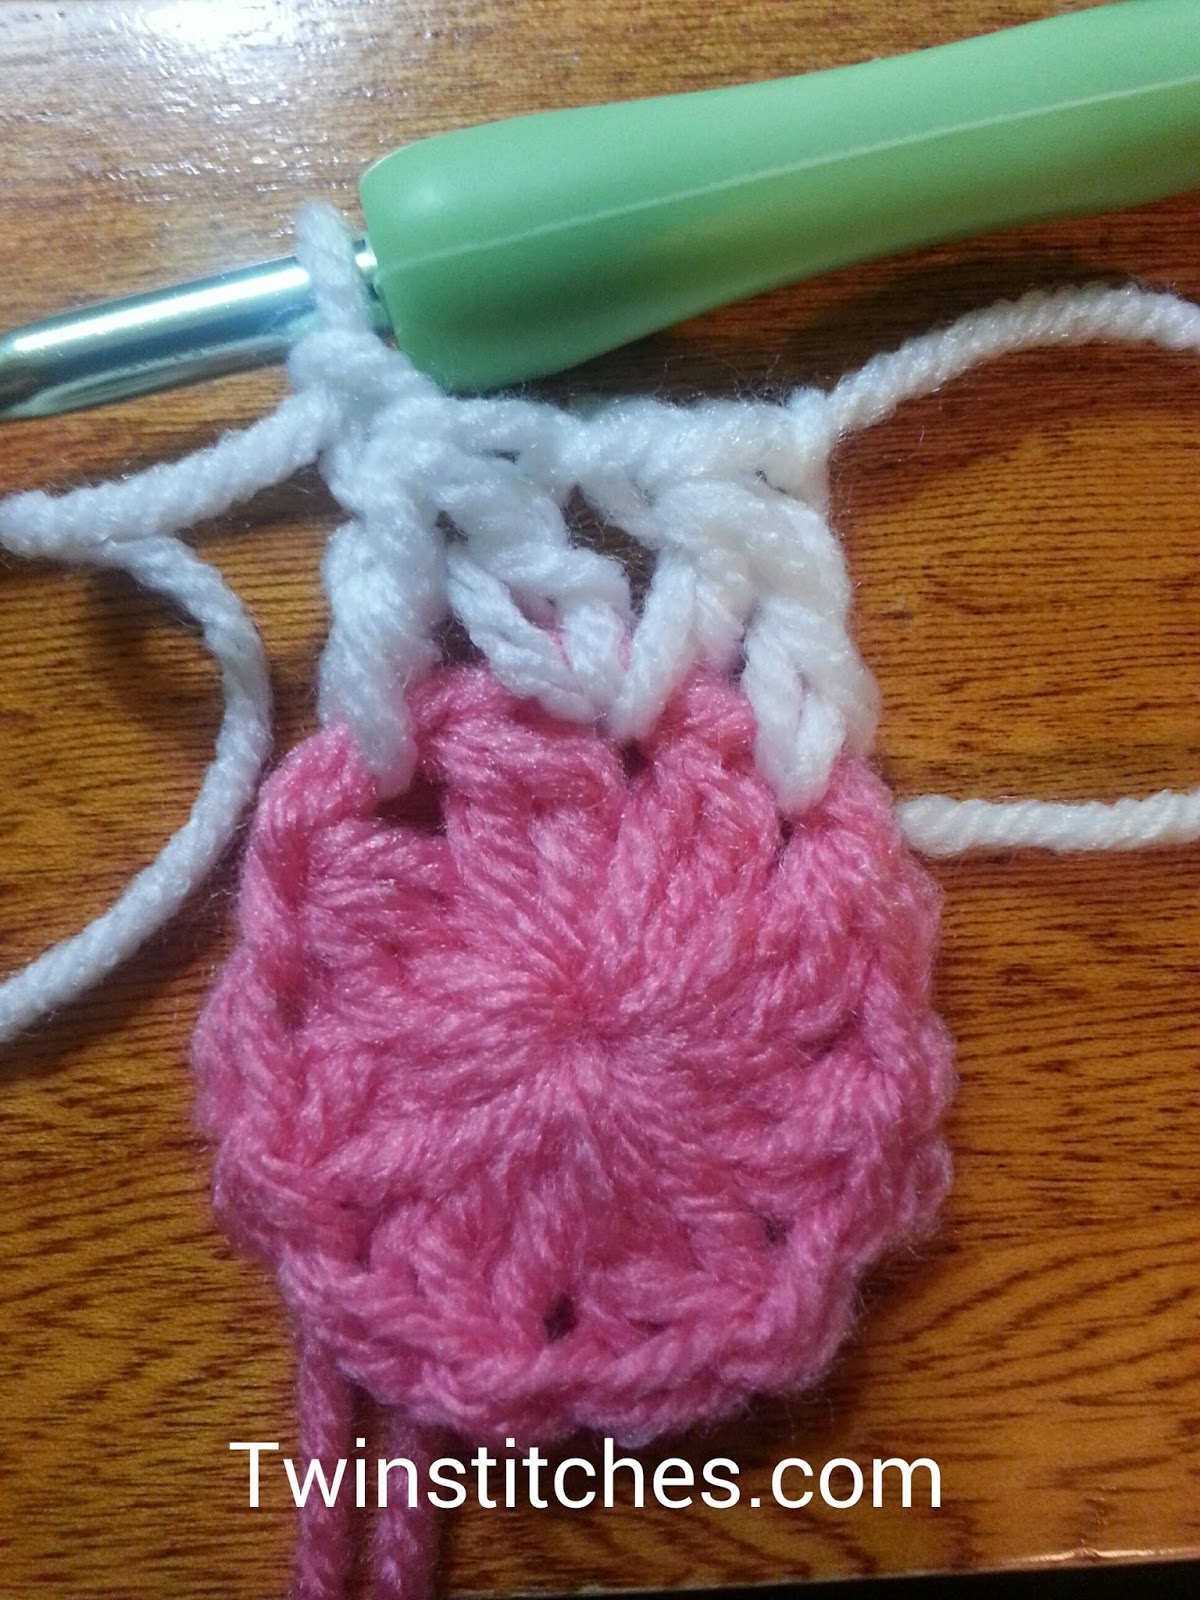 |
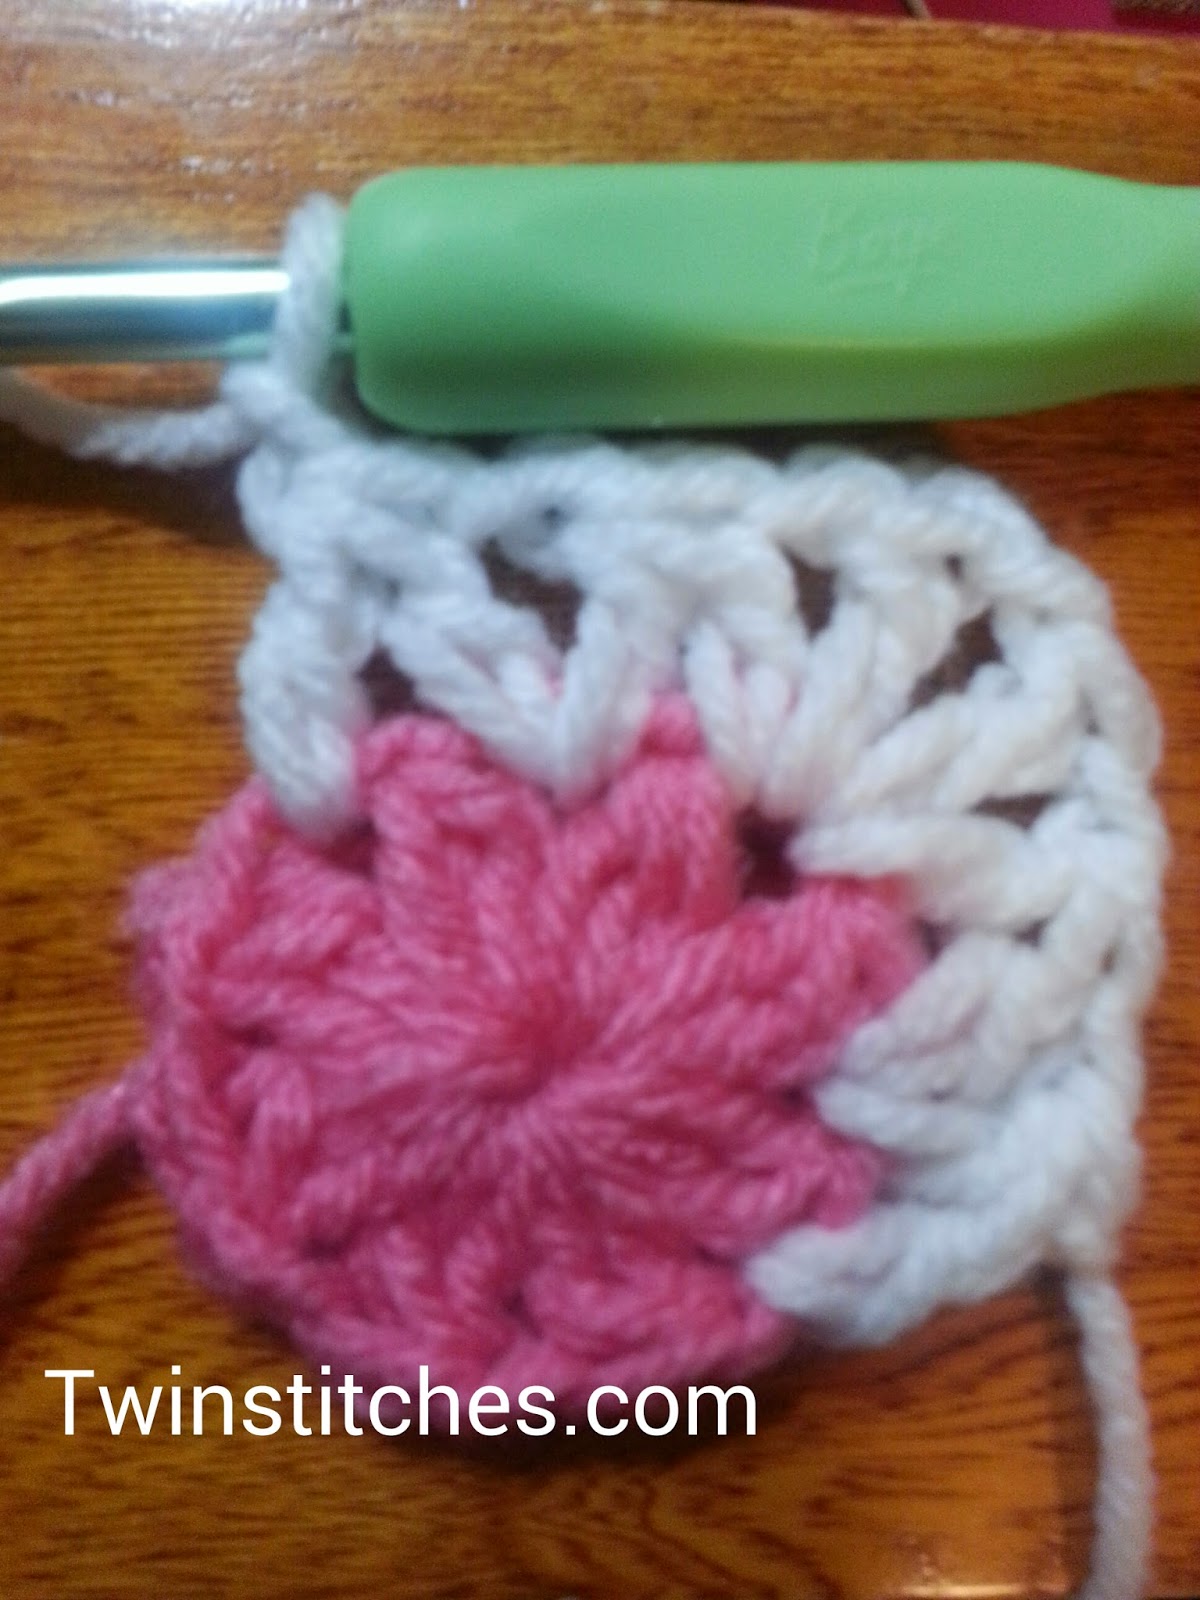
| You can see that a V is formed by the two sides of the 2 separate dc2togs. |
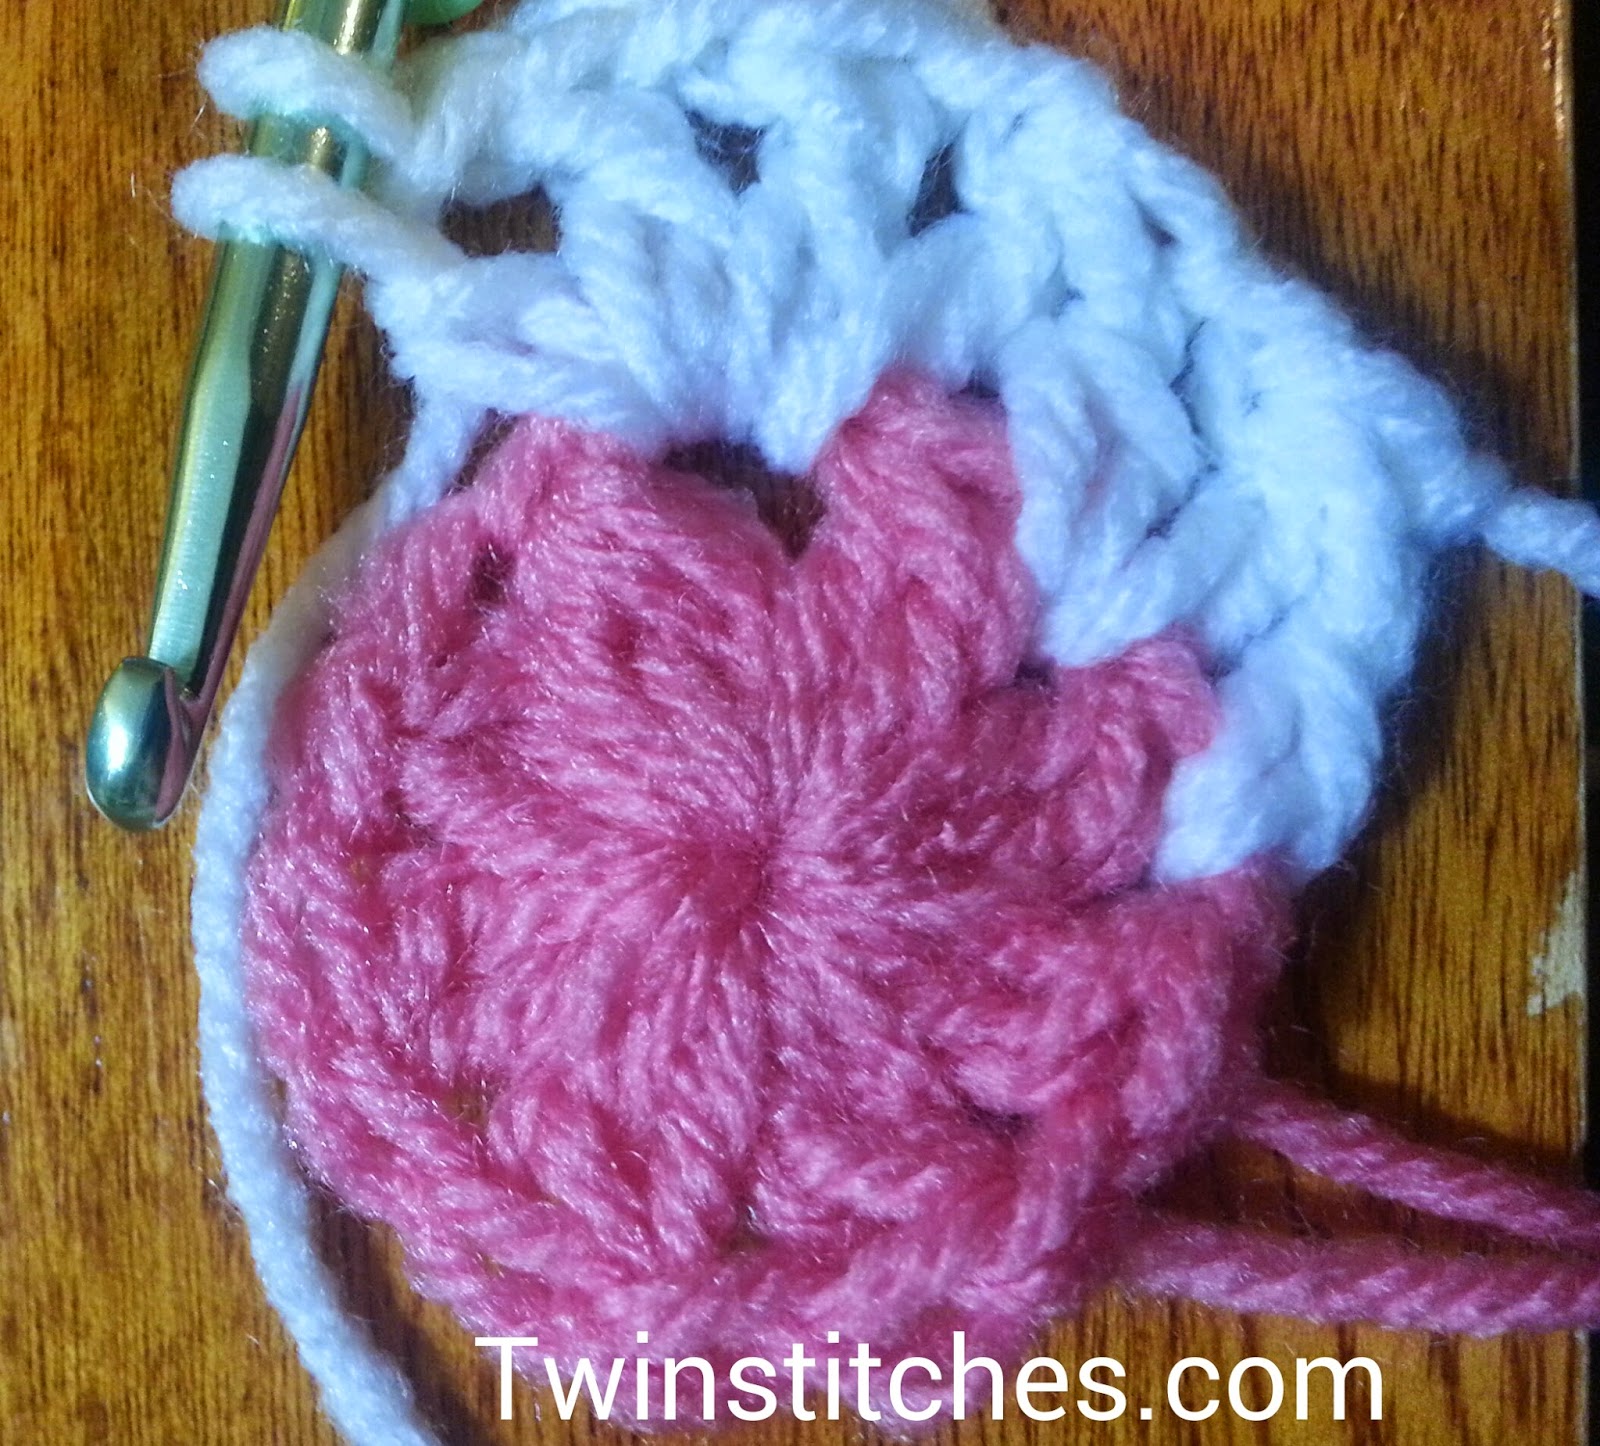 |
| First corner is formed. |
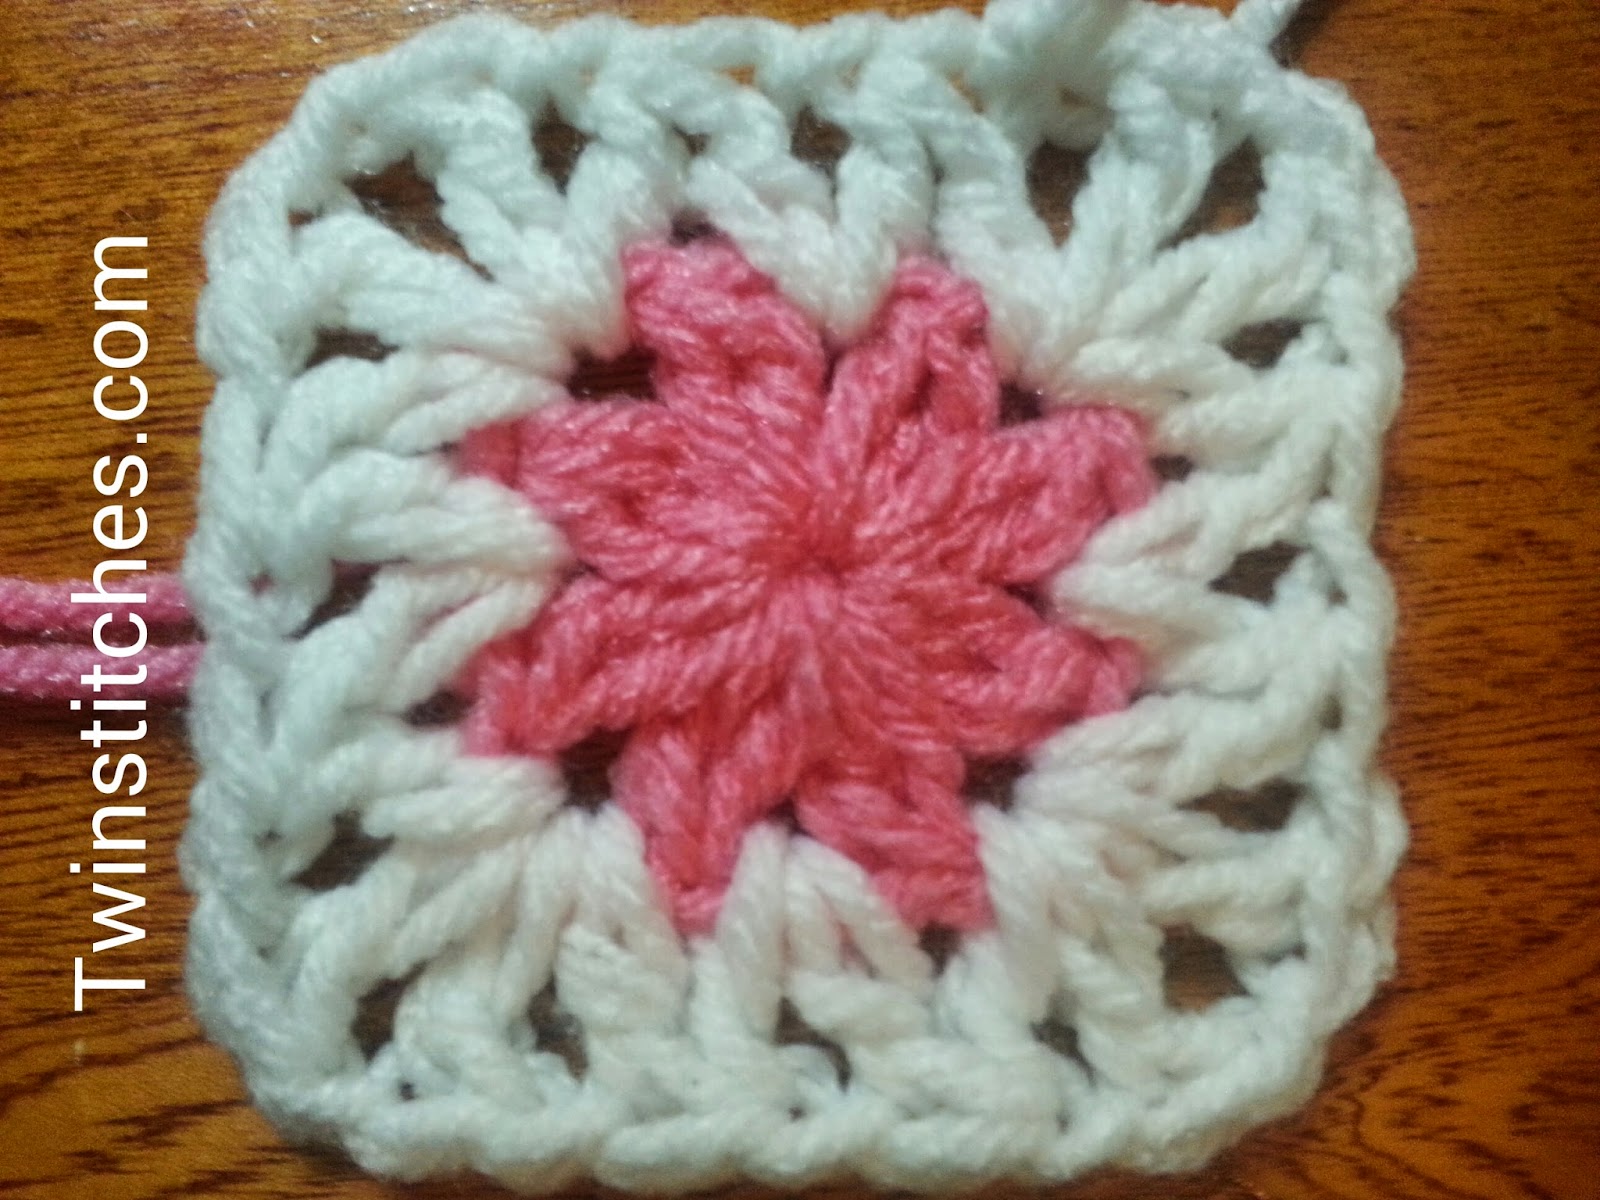
Continue the pattern around so that you have 4 corners separated by 4 Vs. Join with a slip stitch to the top of the first dc2tog. To see the rectangle shape, you can stretch out the dc corner spaces.
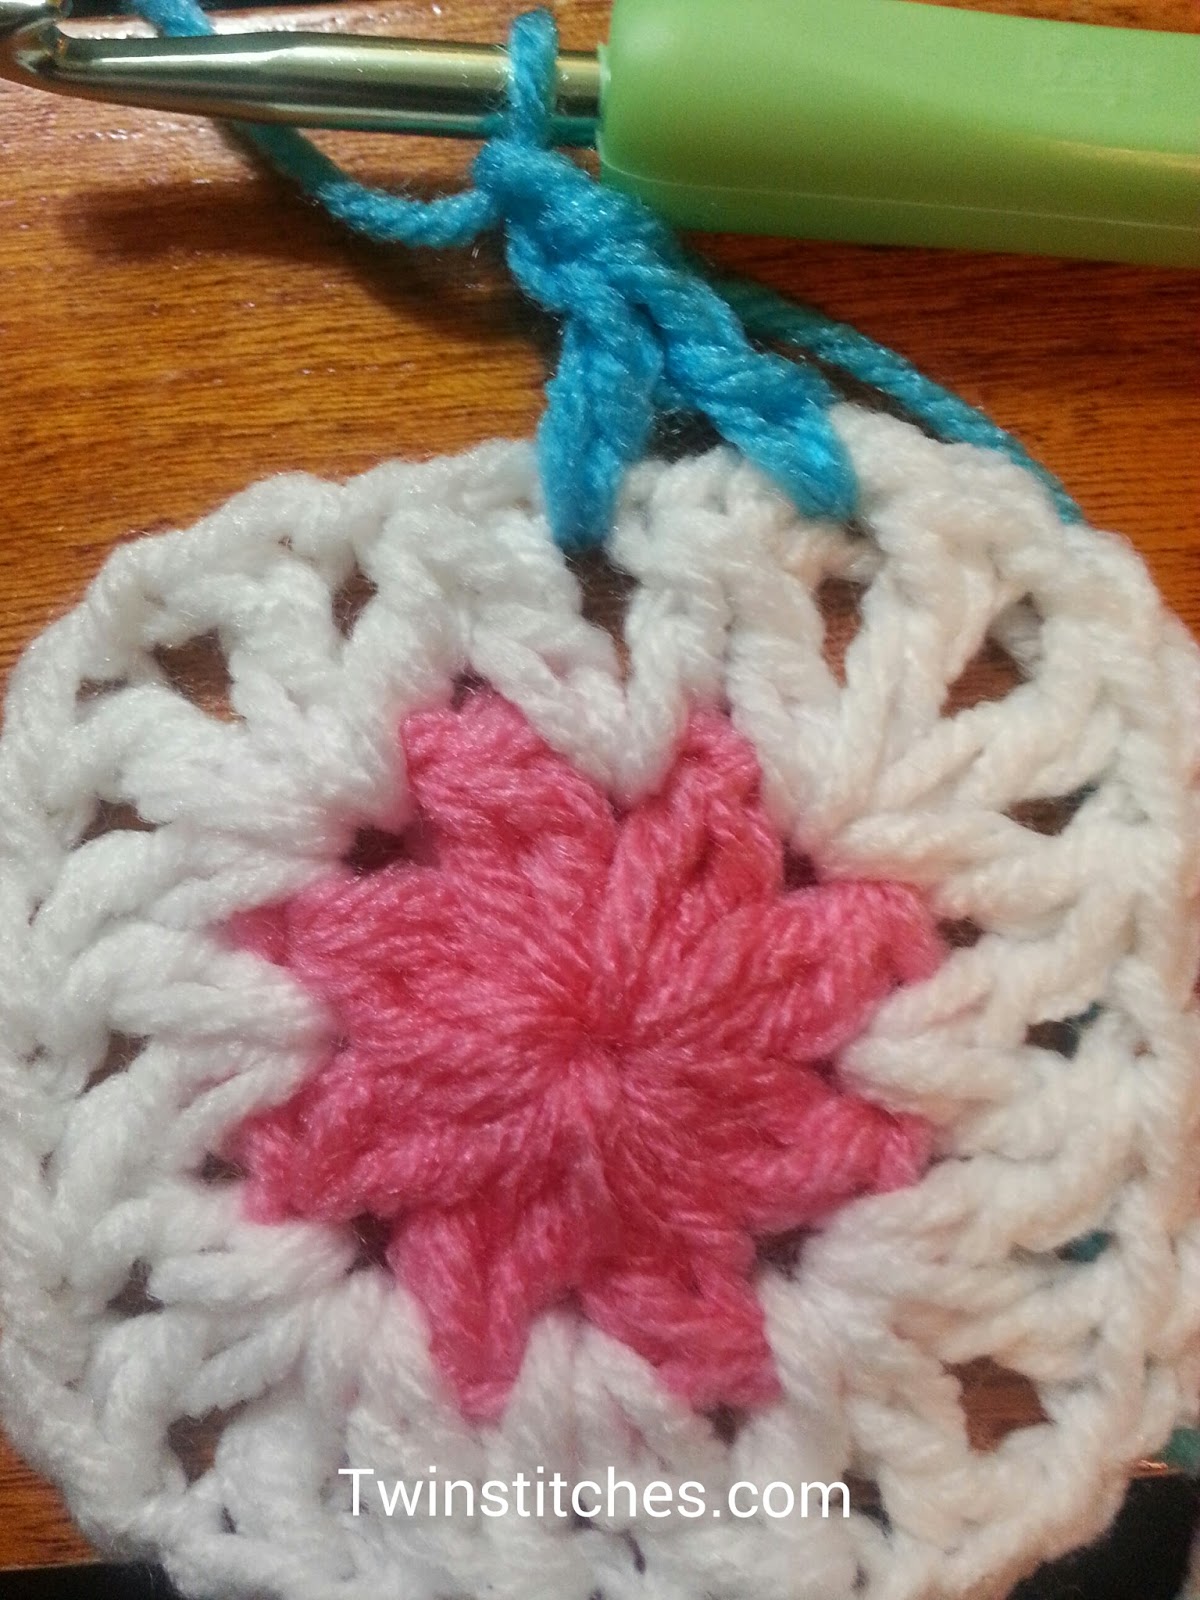
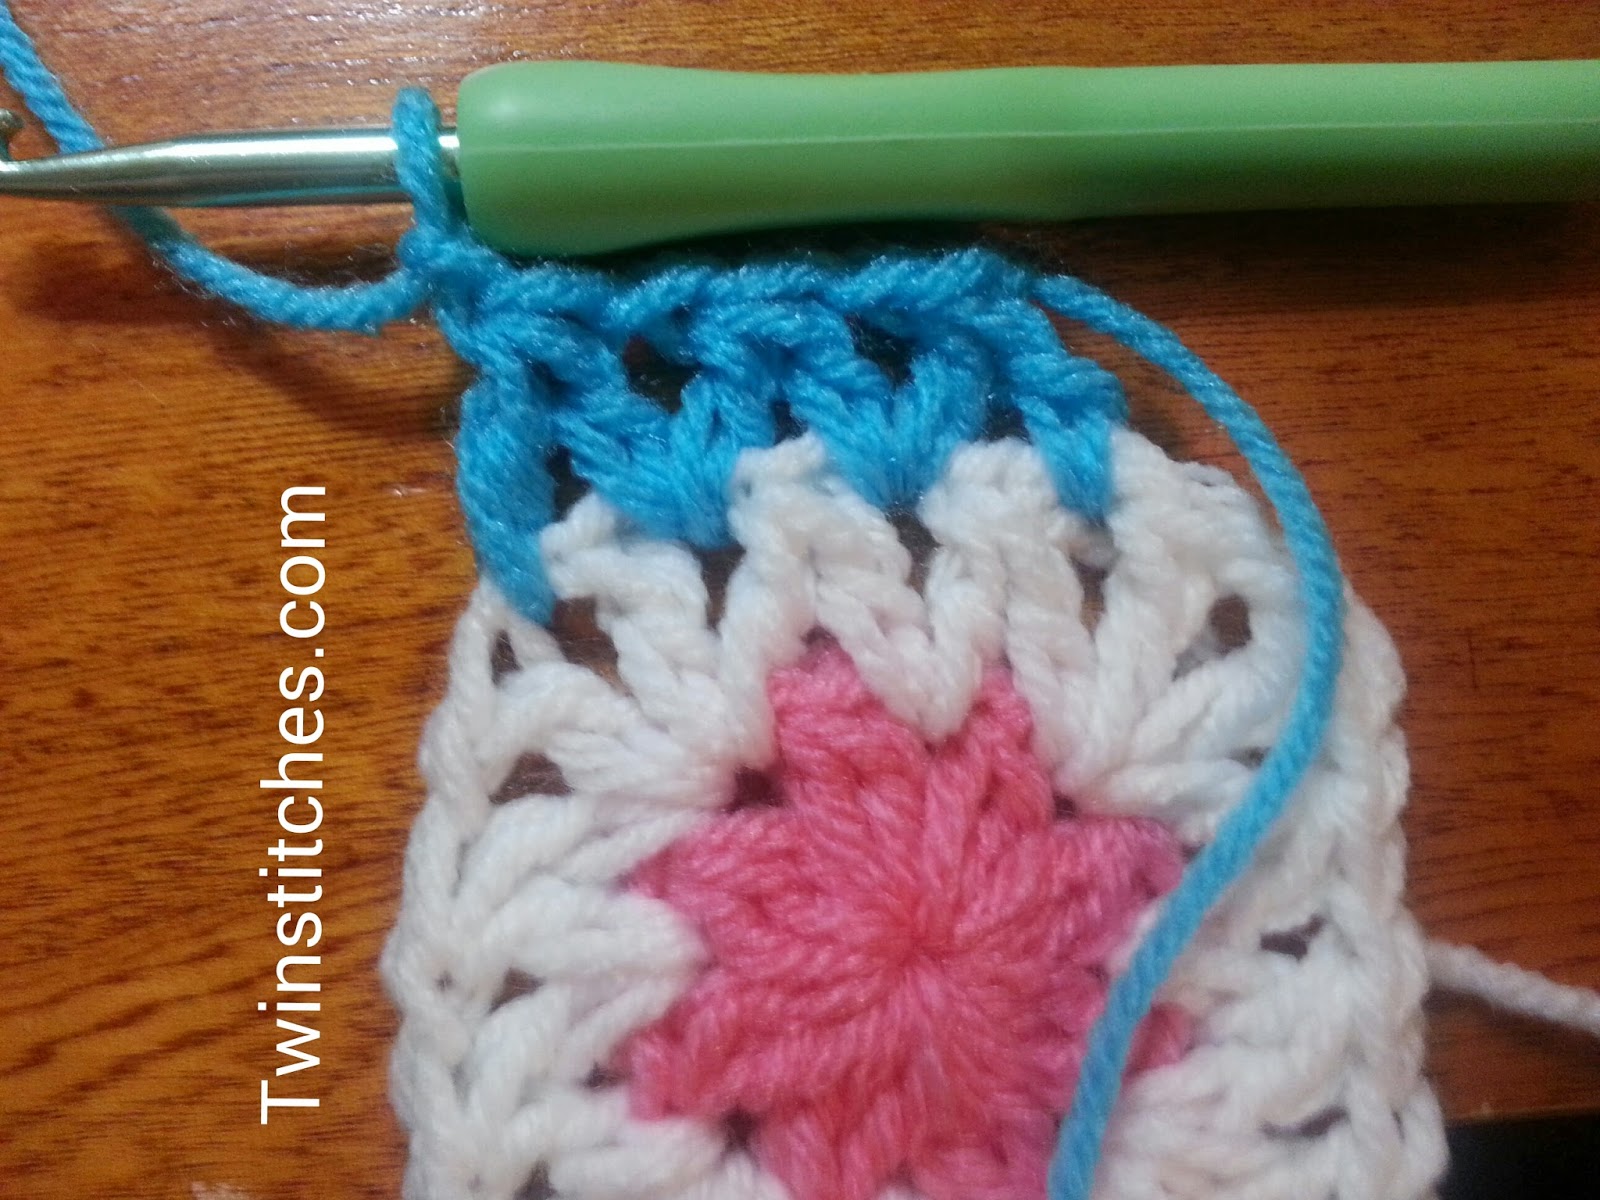
Now let's start Row 3. Join a new color in a chain 1 space using the standing dc2tog method. Complete the dc2tog in the next chain 1 space.
Chain 1 and start a new dc2tog in the same space. Complete it in the next chain 1 space and chain 1. Continue making dc2tog and chain 1 until you reach the middle V of the corner.
To make the corner, dc, chain 1, dc, chain 1, start next dc2tog in the same space. Complete it in the next chain 1 space.
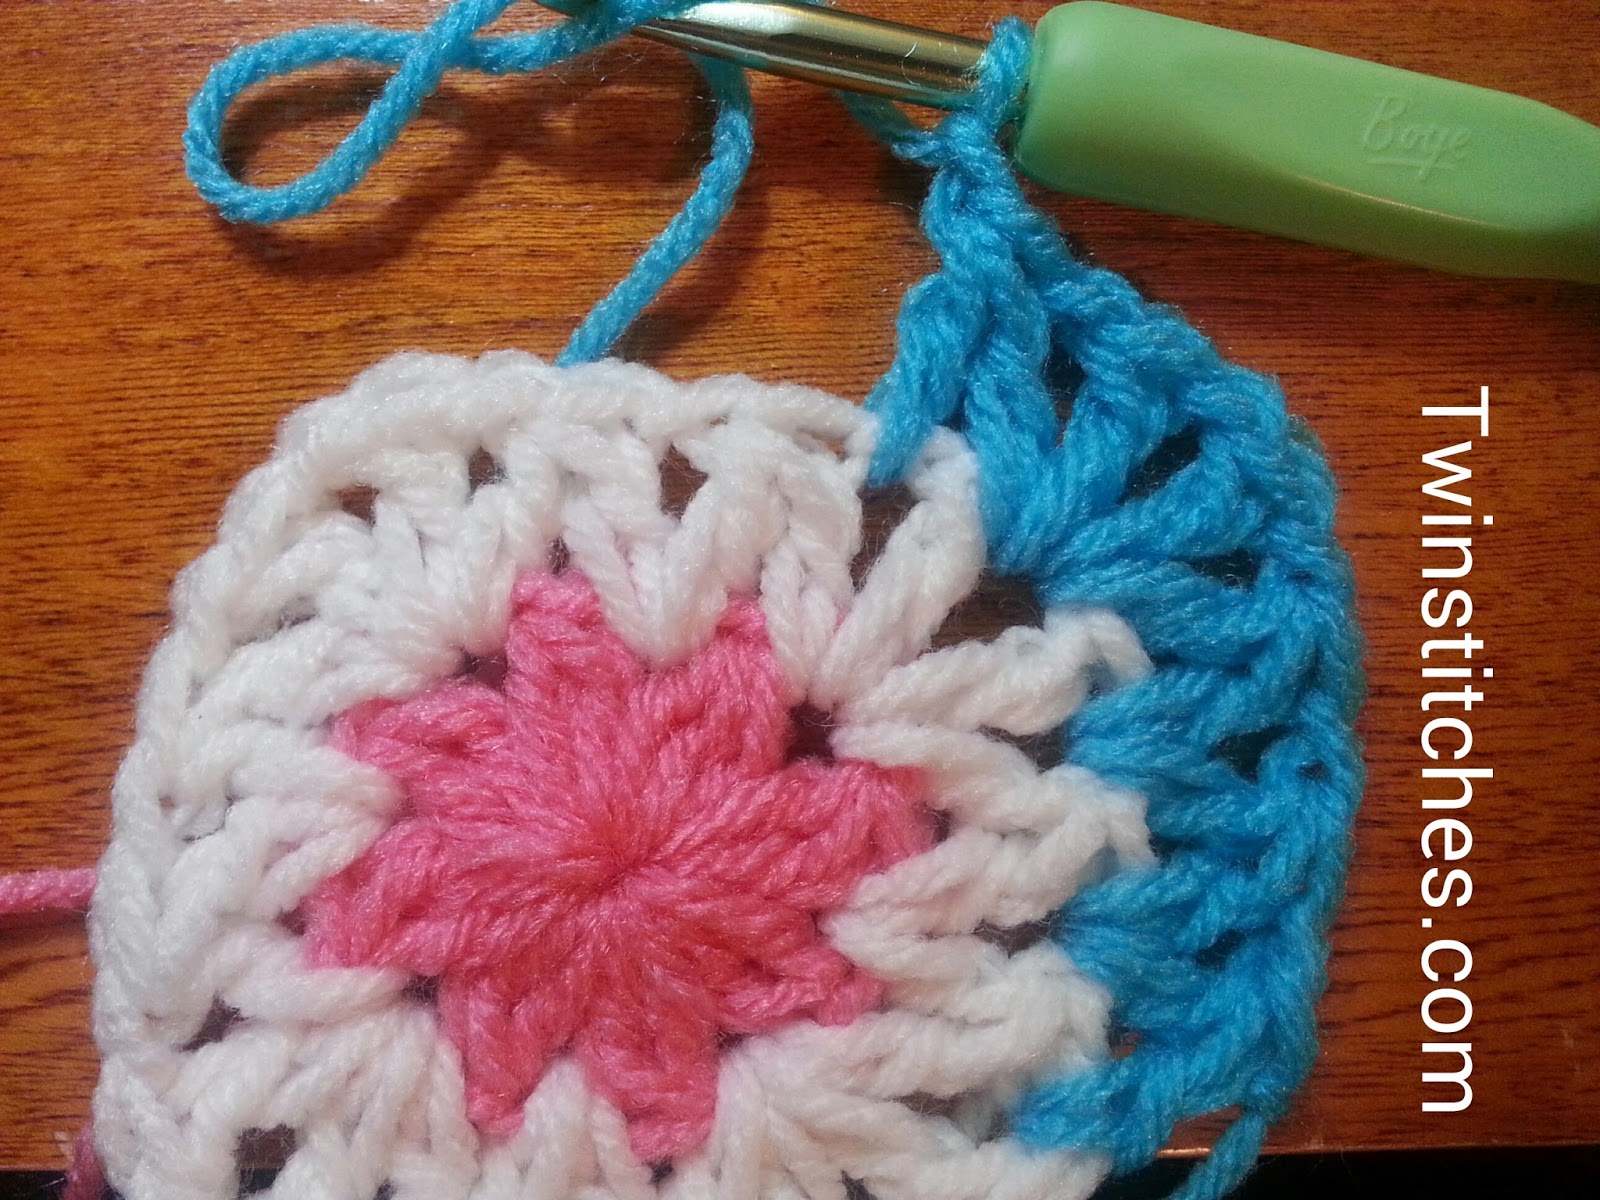
Dc2tog, chain 1 across ( a total of 3 times) to the next middle V in the corner space. Form next corner. Repeat around. After last dc2tog, chain 1 and slip stitch to the top of the standing dc2tog.
To crochet consecutive rows, begin with a standing dc2tog in a chain 1 space. Dc2tog, chain 1 across until you reach the middle V of a corner. Complete a corner and continue across each side, crocheting corners in the middle V of each corner. The number of dc2togs will increase each row as the square gets bigger and bigger.
| Комментировать | « Пред. запись — К дневнику — След. запись » | Страницы: [1] [Новые] |
