сумка-торбинка з вишивкою та китичками мк |


Decorative stitching against a neutral canvas gives this slouchy bucket bag a great hipster style. We used the beautiful stitches available on the Janome Memory Craft 9900, which go up to 9mm in width. For a subtle boho flair, we then incorporated long, soft tassels at the sides and front. Read on to learn our unique steps for making these custom tassels: much less than buying, and in an exact color match!

There are decorative stitch accents along the top of the bag and the top of the exterior pocket, but the main feature is how we use them on the wide cross-body strap.
We added four lines of mirror-imaged decorative stiches down the length of the strap plus an embellished flat cord, which is stitched in place with a wide zig zag - a modern spin on a traditional heirloom technique.

Searching for innovative closures for our bag and tote designs is always fun. We've employed zippers, drawstrings, turn locks, and more. But, we hadn't yet used one of the best "cincher-upper" techniques: the belt! It does an amazing job holding up your pants, and works equally well as a functional, fashionable closure for this cute bag.

Our pretty custom tassels hang luxiously from the bag's side and sprout directly from the ends of twisted cord belt. If you've ever shopped for tassels, you know they can be hard to find in the color you want, and even if you do luck out and locate one to your liking, the price may surprise you. A single, small tassel can run $5.00 and up. Designer Alicia Thommas came up with an innovative way to unwrap twisted cording then sculpt it into perfectly-matched tassels.
This bag finishes at approximately 11" wide x 13½" high x 6" deep. The cross-body strap finishes at approximately 3" x 54½".


 we used vanishes with heat.


|
сумка-органайзер для пирогів мк |

One of the best things about the holidays is the chance to get together with family and friends around a beautiful table filled with traditional dishes. Maybe you'll be passing around Nana's famous baked ham, Aunt Sheila's warm apple-cranberry crisp, or your own delicious cornbread stuffing. If your culinary talents are on-the-go from gathering to gathering this season, you need a carrier that can keep your special dish toasty on the way there. Our wrap-it-up design includes a handy loop to clip a pot holder and an inside pocket for a serving utensil. This would make a wonderful present for the foodies on your gift list. Make the pretty carrier and matching mitt, then wrap up a new baking pan you've filled with yummy homemade treats!

Our carrier is made for a standard 9" x 13" covered baking pan. You'll want to measure your particular casserole dish and adjust the four "fabric wings" to fit. We noticed many newer dishes have large molded handles. This would definitely be something you'd need to account for, especially for the short bottom and long top wings.

We give you the basic sizing and all the steps; all you need to do is adjust to best fit your pan(s). As we often suggest, lay things out on paper first and/or make a prototype in muslin or another inexpensive fabric from your scrap bin. Sometimes, we even make mini-samples out of paper towels to ensure our dimensions are correct.

We originally used two fabrics (one print and one solid) from the Simple Marks collection by Malka Dudrawsky for Moda Fabrics. This is an older collection and can be hard to find. As an alternative, we found two options at Hawthorne Threads. The first includes a print from the Handcrafted collection by Alison Glass for Andover Fabrics paired with a FreeSpirit Designer Solid.


A second option has a festive holiday feel, but not so specific that it couldn't be used anytime of the year. Both prints are from the Dowry collection by Anna Maria Horner for FreeSpirit Fabrics.


To make a matching hotpad as we show in our sample photos, try our Quilted Oven Mitt or Appliquéd Oven Mitt. Both include a downloadable pattern.


 ; we used black

 (optional, to hook oven mitt or hot pad in place)


 .
.


|
2 сумки прямокутні мк |

Today's casual bag features two generous pleated pockets bound with Fold Over Elastic by Dritz (FOE). One of the things we love about FOE is the ability to use it as a binding. You get three benefits in one: color, stretch and finish. There's a built-in crease line down the center that allows easy and accurate folding. The pockets not only look great, they're also super functional – with expandable tops that make dropping in items easy, even one-handed. In addition, the entire top of the bag is also finished with FOE, using it as a flat binding. Plus, the pretty patterns on the Drtiz FOE are woven in, not printed on, and they're fade resistant and colorfast. These good looks will last!

If you haven't experimented recently with elastics, you might still lump them into the "stiff and scratchy" category. Not the Dritz® Fashion Elastic. This stuff is soft and stretchy, yet substantial enough to add stability. Most solids are ⅝" (folding over to 5/16") x 1 yard and the patterns range from ½ (folding over to ¼") to 1" (folding over to ½") x 1 yard. Both are fully machine washable and dryable. We found a great selection of all the new patterns (from graphics to tie-dye to sports themes and more) at Jo-Ann Stores.

The bag finishes at approximately 15" tall x 12" wide with 2" sides and base.

We originally used two fabrics from the Organic Forest collection by Amy Butler. This great collection sold out quickly last Fall and can be hard to find. We were able to find our pretty picks still available at online retailer, Quilt Home, and list those links below. But because of the scarcity, we also selected a pretty new pair from the Cocoon collection by Valori Wells. Both fabrics as well as coordinating fold-over elastic (we like Animal Skin Blrown/Tan for this new combo) are available at Fabric.com.


Yesterday was the first day of Standard Time across most of North America. We got an extra hour of sleep, but in exchange for this bonus snooze time, we are now faced with several months of ever-encroaching darkness. It's the perfect time for a bag with built-in reflective capabilities, which kicks off our new "Did it with Dritz" week. This high-visibility mini-tote is great for kids who are often headed to school and back home in the dark. See how we used four different nifty notions from Dritz.

This cute little bag is made from easy-to-sew, pre-quilted material; no need for a lining or any extra batting or interfacing. We added Dritz Fold-Over Elastic to bind all the raw edges, and fashioned our cool clasp from a key fob and snap (see how easy it is below). Two widths of Dritz Fusible Reflective Ribbon make sure the wearer stands out in street lights and headlights.

Although designed with kids in mind, there's no reason it couldn't be used for adults as well. The cross body strap might need to be lengthened, but otherwise, it would be a great mini tote for anyone.

A big thanks to our friends at Dritz for sponsoring the entire week. Have you been over to see the new Dritz website? They've streamlined it, updated it, and completely revamped how you find their products. Dritz has so many different notions – literally thousands of them – you could fill a good size store with just their products. But on the new site, they've done a great job of figuring out how customers like to find things. And that's visually.

Let's say you want to look at all your different options in fabric pens. Once you've chosen your major category ("Sewing" in this case), you quickly see the Marking section you're looking for. In about three clicks you're looking at a dozen kinds of fabric markers, with the choice to click on each for more details. We've visited many, many notions sites with only a fraction of the selection of products, and the new Dritz.com really is much easier to navigate.

Of course, once you've found what you want, you need to know where to get it. They have a complete store locator, showing where you can buy their products from local stores, national chains, and online retailers.
Our bag finishes at approximately 10" high x 8" wide with a 2" base and sides and 33" cross-body strap.

|
велика проста сумка мк |

Quintessential: representing the most perfect or typical example of a quality or class. We may be blowin' our own horn a bit here, but we absolutely love this plaid tote, and we really believe it has all the traits needed to rocket to the top of the charts for cool and classic totes. We found our perfect plaid at Fabric.com. It's reminiscent of a vintage Pendleton® "49'er" jacket. We also show you its companion plaid in shades of pink. Precision cutting – both straight and on the bias, piping accents, and corded handles are just a few of the styling particulars that give our tote its iconic appeal.

We've pictured the tote relaxing in countryside locales as well as shopping in the urban hustle. It obviously has the fashion muscle to look great in any situation.
Thanks to our easy instructions, classic does not automatically mean complex. Though we recommend reading through the instructions carefully before beginning, and taking care with the stitching details, we still feel the project is appropriate for even newer sewers.

In additional to this beautiful blue and tan palette, this same plaid is available in a pink and camel combination.


The tote finishes at approximately 17" high x 18" wide x 5" deep with an approximate 8" handle loop.


|
кошик-сумка мк |

I think we can all agree little things tend to be pretty dang cute: babies, puppies, kittens, Barbie® shoes... but let's face it, sometimes you need BIG to take care of business. This fun storage bin lives up to its jumbo name. It's a large-and-in-charge fabric basket that's ready to take on your bigger storage tasks. From books to blankets to balls of yarn, if you have a lot to keep track of, this project is for you. We chose two bold fabrics in organic cotton. And what is that dynamite looking "rope" ringing the top and creating the handles? Piping cord! Inexpensive yet just the right soft and strong combo.
We originally used an organic cotton canvas for our exterior fabric, which provided enough natural heft that a single layer of heavy fusible interfacing was enough to allow the basket to easily stand up on its own. We recommend this type of medium-weight substrate for the best results.

The Birch Fabrics cotton canvas we originally used is currently on back order at Fabric.com. However, they carry a wide selection, and we found two new prints from the same Birch Fabrics' Charley Harper collection that would be a great alternative: Foxsimilies in Grey from the Organic Canvas collection by Charley Harper Nurture for Birch Fabrics for the exterior and Feathers in Mineral from the Organic Cotton collection by Charley Harper Nuture for Birch Fabrics for the lining.


In addition to the heavier-weight exterior, the top ring of piping cord adds to the stability and helps hold the round shape.

As with any large project, wrangling the big sections of this basket through your machine can sometimes be a bit of a challenge. Remember our top tips: 1) make sure you test your stitch length, needle type, and tension settings on scraps first to insure your machine is firing on all cylinders; 2) go slowly and stop as needed, with your needle in the down position, to adjust the fabric under the foot; and 3) if you're getting frustrated, take a break... even if you walk away with the project still in the machine.

The tote finishes at approximately 17" high x 16" in diameter.


Supplies shown are for ONE bin and yardage is figured to allow for a vertical motif. Should you choose a different fabric with a more random motif, you may be able to get away with a smaller cut. See the actual cut sizes in the Getting Started section below.


|
кругла сумочка мк |

There are many things that make fall fabulous: leaves on the trees exploding with color, the aroma of a rich stew simmering on stove, morning frost sketching delicate patterns on the window panes. If you're a lover of sewing and craft, it's also the time when we leave behind the distractions of summer and turn once again to our trusty sewing machines. We're taking a very fabulous look at fall this week and next with our friends from Fabric.com. We have two weeks of gorgeous fabrics and the perfect projects to welcome the art of autumn. Our series starts off with today's Canteen Bag, featuring two classic fall fabrics: wool suiting and corduroy.

If you've always been a bit hesitant about sewing circles... especially circles that become tubes, it's time to conquer your fears. Even with all its beautiful curves and professional finishing touches, our Canteen Bag is a project that is so much easier than it seems. We provide a pattern for the front and back exterior circles as well as the pretty front pocket. Even so, you might enjoy reading through our complete step-by-step tutorial: How To Make and Measure a Circle Without a Pattern.

The bag features a layered lining with the resulting interior seam allowances covered by fold-over elastic. This construction method is easier than a traditional two-part lining, and the elastic binding is much more forgiving than fabric bias binding.
Our thanks to Fabric.com for sponsoring the Fabulous Fall series. If you haven't visited Fabric.com before, make today the day you start – or should I say, the day your "addiction" begins?! Be prepared to lose yourself for a few hours. If you're already a Fabric.com shopper, you know there's always something new to see, like the Deal of the Day on their home page or Seasonal Specials.

Depending on the fabric weight you select as well as the weight of the front D-ring, you may wish to add a snap to the top of the exterior pocket or even simply hand tack it in place at the apex of the curve. The wool suiting we selected was interfaced and stood up nicely on its own during our photography session. However, given more weight, it could fall open. A snap or hand tack is a fast and easy addition that can be added during construction or even after the fact.

The bag finishes at approximately 9" in diameter and is 2½" deep. The shoulder strap is fully adjustable.

NOTE: Inventory shifts constantly, and some fabric may not be in-stock when you first visit. However, there are other color options as well as re-stock dates listed when appropriate for each fabric at the Fabric.com site.


|
наплічник-торбинка |

String style backpacks are everywhere for Fall, from ripstop athletic gear to high-end leather bags. They're compact and lightweight but can hold plenty. Ours is made in two bright fabrics from Ann Kelle's Beatbox collection for Robert Kaufman fabrics, which we found at Fabric.com. To give our design even more functionality, we added unique front crossover pockets, which create four individual sections to hold smaller items.

Our Beatbox backpack is modeled by an energetic seven-year-old, but the size and shape would work for any age. It's style that's ready to hit the road: a modern punch of color with a retro design. Tote it to the gym, fill it up with necessities for a day hike or picnic, slip it on for a bike ride to the farmer's market. Fusible fleece between the layers softens and stabilizes, and the adjustable cording shoulder straps, which thread through bottom eyelets, make going smaller or larger a snap.

Our thanks to Fabric.com for providing both the super cute fabric and the fun fold-over elastic in a vibrant chevron pattern that binds the front pockets. If you've never visited Fabric.com or haven't been back in awhile, there's always something new to discover; like the Deal of the Day on their home page; as well as the Just Arrived section for the latest bargains; and special featured items, like the super popular Cotton + Steel collections.

Our backpack finishes at approximately 15½" tall x 12½" wide.

 and Extra-Large (7/16")
 , both in nickel and both offered as eyelets with an installation tool


Stitch across the loop ends to secure, running this short seam approximately ¼" from the raw edge. Trim away the taped ends so the cord lays flush against the fabric.


|
сумка-портфель мк |
Автор: Arina R.

Кто просил мастер-класс по сумке?:) Я наконец-то взялась и запечатлела основные моменты процесса пошива сумочки. Смотрим и шьем вместе, комментируем и корректируем:) Надеюсь, у меня получится объяснить и показать понятно:) Качество фотографий хромает, поскольку процесс занимает не пару часов и время суток везде разное:)


Должно получиться примерно вот так


- берем прочные и красивые ниточки и иглу с острой заточкой (я использую вот такие). Ниточки в машину заправляем только сверху (в шпульке оставляем обычную нить в тон)


* если ваша ткань послушна, припуск можно просто заутюжить


- отмечаем линию сгиба и линию соединительной строчки (расстояние такое же, как на креплениях, у меня это 4 см) на фото почему-то только линия сгиба, вторая, видимо, появилась потом в процессе:)


|
як зробити застібку клевант |

Сейчас большую популярность завоевали застежки-клевант. Застежки-клевант состоят из петли, пуговицы и детали крепления. Да, они есть в продаже. Разных размеров и цветов. Но когда ищешь что-то определенное, по закону подлости его нет в магазинах. Я сама столкнулась с такой проблемой. Ну захотелось на пончо сделать застежки-клевант, а именно того, что виделось, в продаже не  оказалось. Ладно, решила сделаю сама!
Вопрос первый: "из чего?". Можно было, конечно, купить шнур в магазине, но я решила связать гусеничку из любимых ниток "Tulip". Вы можете взять любые нитки или готовый шнур, или сутаж.
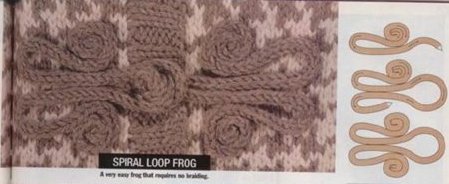
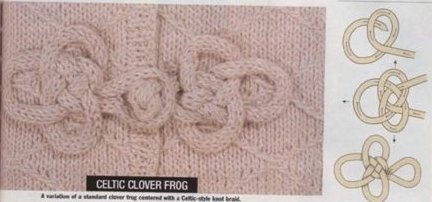
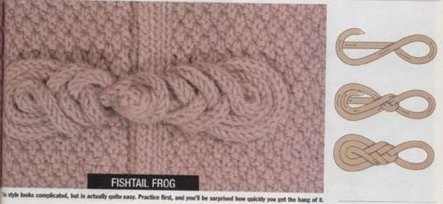
Вопрос второй: "какая пуговица?". Для клеванте пойдет всё, что угодно. Можно свернуть пуговицу из шнура (ниже будет показано как). Можно взять готовую, ту, что вам нравится, той формы, которую вы нафантазировали. Хотя классические застежки-клевант делают из свернутого шнура. Я предлагаю вам ещё один вариант - обвязать бусину.
Вопрос третий: "форма". Вариантов много. Я постаралась собрать как можно больше видов застежек-клевант, хотя найти их было сложновато...
Итак. Покажу, что получилось у меня. Связала гусеничку. Поскольку застежки должны быть одинаковые, считала повороты, чтобы и шнуры получились одной длины. Обвязала бусины. Завернула шнуры, скрепила их той же ниткой. Пришила пуговицы-бусины к одной стороне, ву-а-ля, получились очень красивые, а главное необычные застежки для моего пончо:


Как сделать пуговицу для застежки-клевант, несколько вариантов:



|
сумка з вишивкою (схема та викрійка) |
|
декоративна застібка та тверде дно для сумки |

Сумка сшита, МК заснят, но времени выложить нет...
И вот сейчас, когда вся семья тихо-мирно дрыхнет я покажу Вам некоторые моменты создания этой своей крайней сумки: покажу как сделать декоративную застежку и как укрепить дно сумки.
Сделанная мною декоративная застежка ничто иное как две рамки. Расскажу как это сделать.
Берем деталь от сумки, которая предназначена быть клапаном и два маленьких кусочка замши или кожи размером чуть больше чем предполагаемая рамка.Намечает на маленьких кусочках саму рамку. ( Не смотрим на то что я начеркала на них, а только ориентируемся на рамку)

размечаем точно посередине место рамки


Выворачиваем и отпариваем


Теперь откладываем клапан в сторону и берем полоску замши для хлястика. Шириной она должна быть равной ширине рамки +1 см, а длиной на несколько см больше чем расстояние от верха рамки до низа клапана.
На моем хлястике уголок острый. поэтому я разметила этот угол.


Сначала ставим одну часть магнитной застежки ( простите, фото стерлось). Сложив вдвое, прошиваем, оставив не зашитым верх. Срезаем лишние уголки, выворачиваем и отпариваем.
 Отстрачиваем хлястик
Нижнюю рамочку аккуратно отстрачиваем, захватив уже оба слоя. Аккуратно срезаем ткань от нижней части клапана, который попал в рамку. Получилось окошечко.

Берем хлястик, вставляем его верхний кончик в верх верхней рамки на 0,5 см и прострачиваем.
Так же излишки срезаем.
Вот что получилось:


Ставим люверсы для красоты

Клапан готов!!!
Теперь расскажу как я делаю жесткое дно:
Раскраиваем дополнительную деталь, размером равным: длина=ширине сумки +2 см, ширина = ширине детали днища сумки.

Когда начинаю вшивать дно у сумки, то сложив деталь днища сумки и дополнительную деталь вшиваю их как одну двойной строчкой ( для крепкости). С каждой стороны днища сумка припуск в 1 см застрачиваем наверх, надсекая уголки.


Из пластика ( я использую старую пластиковыю папку) вырезаем прямоугольник со сторонами равными: длина днища Х ширина днища-1,5 см и аккуратно вставляем в получившийся кармашек. Когда мы вывернем сумку, то те загибы наверх по 1 см не дадут выползать пластиковому вкладышу


Буду рада, если этот Мк кому-нибудь поможет. При использовани материала, ссылка на мой блог обязательна
|
сумочка-косметичка на руку мк |
 Sometimes you want to travel light – with just the essentials at hand. For this, you need: the wristlet. A tiny, tidy tote that hangs from your wrist. It's just 5" x 7", but holds all the necessities with room to spare. Zip up your spending cash, a couple o' credit cards, maybe a bit of makeup and a comb. Ours has a detachable strap, so you can unclip it, and drop it into a bigger bag, like a handy wallet. So versatile, so itty-bitty cute, and with our excellent step-by-step instructions and photos ... so easy!
This is a perfect project to use up bits and pieces. Our wristlet was made from scraps of Heather Bailey's Freshcut we had leftover from the summer's Patio Party projects. We added a plain cream linen from our fabric stash, which coordinated nicely with everything. Our only purchases were a little interfacing, the zipper, and the hardware for the strap, which meant we still had a little folding money to put inside the wristlet.


Based on the diagram above, cut all the pieces listed below. These kinds of precise cuts of small pieces are best done with a rotary cutter, mat and see-through ruler. You'll get straighter edges and truer 90˚ corners.
For the bag:
A -- strap: 14" x 3"
B -- strap tab: 3" x 3"
C -- top front accent square: 2½" x 2½"
D -- top front rectangle: 6½" x 2½"
E -- bottom front: 8" x 4"
F -- back: 8" x 6"
For the lining:
G -- back lining: 8" x 6"
H -- front top lining: 8" x 2½"
I -- front bottom lining: 8" x 4:
From the medium-weight fusible interfacing:
C -- top front accent square: 2½" x 2½"
D -- top front rectangle: 6½" x 2½"
E -- bottom front: 8" x 4"
F -- back: 8" x 6"
G -- back lining: 8" x 6"
H -- front top lining: 8" x 2½"
I -- front bottom lining: 8" x 4:
From the light-weight fusible interfacing:
A -- strap: 14" x 3"
B -- strap tab: 3" x 3"


|
сумка мк |


This project was frankly inspired by Queen Bee Creations’ diaper bag line. I love the idea of a functional diaper bag that doesn’t look like a diaper bag – and that can also, of course, be used as a regular messenger-style bag if you want.
The bag has a water-resistant vinyl lining to help make cleaning easy – but you can substitute a fabric lining if you want.
This bag’s finished dimensions are: 14″ long, 12″ high, 5″ wide, with a 36″ long strap. You can customize the bag by coming up with your own measurements – just remember to add 1″ for seam allowances.
Materials
1 1/4 yards cotton (44/45″ wide) for the exterior
1 yard water-resistant vinyl (44/45″ wide) for the lining
1 1/2 yards heavy-weight interfacing (unless you are using heavy-weight fabric for the exterior; if so, skip the interfacing)
coordinating thread
12″ coordinating zipper
2 metallic snaps
1/2 yard Velcro
5/8 yard 1/4″ elastic
Pattern
1. Cut out the pieces.
A) Strap: 37″ x 5″. Cut 1 of fabric and 1 of interfacing (I recommend interfacing the strap or adding another layer even if using heavyweight fabric).
B) Front/back/flap piece: 15″ x 13″. Cut 4 of lining, cut 2 of fabric, and cut 2 of interfacing.
C) Side gusset: 6″ x 13″. Cut 2 of fabric, 2 of lining, and 2 of interfacing.
D) Bottom gusset: 6″ x 15″. Cut 1 of fabric, 1 of lining, and 1 of interfacing.
E) Back zippered pocket piece #1: 15″ x 3″. Cut 1 of fabric.
F) Back zippered pocket piece #2: 15″ x 11″. Cut 1 of fabric.
G) Front exterior pocket: 15″ x 9″. Cut 2 from fabric.
H) Side exterior pockets: 6″ x 9″. Cut 4 from fabric.
I) Interior pockets: 17″ x 9″. Cut 2 from lining.
I recommend labeling your pieces with masking tape and marking them with letters corresponding to the list above. This will help you keep track of the pieces.
Also: if you are using a uni-directional fabric (with motifs that all point the same way, as in the fabric I’ve used) take care when laying and cutting your fabric.
2. Apply interfacing (if using).
Fuse or sew interfacing to strap (A), 2 front/back/flap pieces (B), 2 side gusset pieces (C) and 1 bottom gusset piece (D). Attach interfacing to exterior fabric, not lining.
3. Make strap.
Press under 1/2″ on each long side of strap piece (A). Then press under 1/2″ on each short side. Fold strap in half lengthwise, wrong sides together, matching up all pressed edges. Press flat. Keeping all pressed edges even, topstitch a 1/4″ seam on all 4 sides of the strap. Set aside.

4. Make flap.
a) You will need 1 fabric flap piece (B) and 1 lining flap piece (B). On the lining piece, attach smaller halves of metallic snaps to each corner on one long edge. Snaps should be placed so that they are 1″ in from each side of piece.

b) Pin lining piece to fabric piece, right sides together. Sew a 1/2″ seam around three sides, leaving one long edge (the side without the snaps) open. Turn right side out, using turning tool to push out corners. Topstitch a 1/4″ seam around three finished edges. Set aside.
5. Make exterior pockets.
a) Back zippered pocket: Pin piece E to piece F along long edge, right sides together. Using a 1/2″ seam allowance, stitch a 1.5″ long seam at each end. Stitch the remainder of the seam (12″ in the middle) with a long basting stitch. This will be where you insert the zipper. Press seam open. Pin zipper to middle basted section, placing top of zipper and zipper stop close to the ends of the basted section.

Using a zipper foot, attach the zipper. Remove basting thread. Pin wrong side of zippered pocket piece to right side of a back lining piece (B). Topstitch a 1/4″ seam around all four edges. The lining piece will serve as the pocket’s interior.

b) Side pockets: Pin two side exterior pockets (H) together along shorter edge, right sides together. Stitch a 1/2″ seam; trim. Turn, press, and topstitch a 1/4″ seam along edge. Cut a 2″ piece of Velcro. Stitch the fuzzy half to the interior of the pocket, 1/4″ down from the top edge.

Place the pocket piece against one of the interfaced side gusset pieces (C), matching bottom and side edges. Mark placement for other half of Velcro on piece C, then stitch in place. Place pocket piece against gusset piece, with Velcro lined up, and stitch a 1/4″ seam around three edges. Repeat for other side pocket.

c) Front pockets: Pin the two front pocket pieces (G) together along long edge, right sides together. Stitch a 1/2″ seam; trim. Turn, press, and topstitch 1/4″ around all four edges. Attach other halves of metallic snaps to right side of pocket, through both layers. Measure up 5″ from bottom and in 1″ from each side to place snaps. Fold pocket in half width-wise and press, creating a crease down the center. Place the pocket piece against the remaining front fabric piece (B), matching bottom and side edges; pin in place. Topstitch along center crease, to create two front pocket halves. Cut two pieces of Velcro, each 4″ long. Stitch two fuzzy halves to the interior of the pocket, 1/4″ down from top edge, and centering each piece on each side of the center crease. Mark placement for other halves of Velcro on piece B, then stitch in place. Line up Velcro halves and topstitch 1/4″ seam around edges.

6. Assemble bag exterior.
a) Pin interfaced bottom gusset piece (D) to one side gusset piece (C) along short edges, encompassing bottom of side pocket, right sides together. Stitch a 1/2″ seam, beginning and ending 1/2″ from ends. Press open. Repeat for other side gusset piece.
b) Pin back zippered pocket piece to gussets along sides and bottom, through all thicknesses, right sides together, having zipper near the top. Stitch a 1/2″ seam, pinning corners like this:

Repeat for front pocket piece. Turn right side out. You should now have a bag exterior that can stand up on its own. Set exterior aside.

7. Make interior pockets.
a) Turn under 5/8″ on top edge of one interior pocket piece (I) and stitch in place using a 1/2″ seam allowance, forming a casing. Cut a piece of elastic 10″ long, insert it into the casing, and secure at both ends. Repeat for other interior pocket piece (I).
b) Pin wrong side of pocket piece against right side of one lining piece (B), matching bottom and side edges, easing in fullness at bottom by creating pleats or gathers. (It’s pretty much impossible to gather vinyl, so I used pleats across the bottom. If you’re using regular fabric for the lining, do a gathering stitch across the bottom and pull up the threads to fit). Stitch a 1/4″ seam around each side. Repeat for other pocket piece.
c) To create two interior pockets on one piece, fold the whole piece in half width-wise and mark the center line. Topstitch down that center line through all thicknesses.

d) To create three interior pockets on the other piece, measure in 5″ from each side and mark lines. Topstitch down those lines through all thicknesses.
8. Make bag interior.
Follow step 6 to attach side and bottom gussets and assemble the interior of your bag, with one exception: leave a long opening on one of the bottom seams for turning the bag. Do not turn right side out.

9. Finishing the bag.
a) Pin unfinished edge of flap to top edge of back zippered exterior piece, right sides together (lining side facing out). Stitch 1/4″ seam to attach.
b) Slip exterior of bag into lining, right sides together. Pin top edges together through all thicknesses. Stitch a 1/2″ seam. Trim seam.

c) Turn bag right side out by pulling exterior through the opening in lining. Sew up opening in lining. Push lining down into bag. Topstitch 1/4″ seam around top opening edges of bag.
d) Lap each end of strap 1.5″ over sides of bag. Topstitch strap ends to bag in an X pattern to secure.

You’re now ready to rock your new bag!

|
сумка-торбинка фото мк |
At long last, the promised Bagsket Tutorial.


First off, thank you Claudine for posting her inspirational bag.
Full credit must also go to Diana. She and I worked through the first bag together and her guidance was invaluable. If you’re a knitter, make sure to check out her amazing FREE knitting patterns.
And finally, thanks susankg53 for the name…it’s perfect!
This is a great project for your scraps and I hope you have fun with it. As I’ve stated before, I am NOT an expert seamstress by any means, so I’m sure I’m doing things bass ackwards all over the place.
I would love love LOVE to see what you come up with.
This is a long tutorial with a fair number of pics. If anything is unclear, please email me (foofanagle at gmail dot com) and I’ll be happy to clarify. For those of you who are quick and crafty, here’s a summary of the steps…it may be all you need.
SUMMARY
Cut and assemble pieces
Sew basket (bottom, side, together)
Sew handles and add to basket
Add trim to pocket, sew pocket to inside lining, sew pockets
Iron drawstring flap and sew down top ends for neat drawstring opening
Sew down drawstring flap
Sew drawstring bottom to interior lining top
Sew lining to basket
Trim top of Bagsket and thread drawstring
Ta da!
Read on for the full tutorial in all of it’s badly photographed glory. (you can click on the photos to see a larger version)
Did I mention I’d love to see any bags you make using this tutorial?
::Bagsket – The Tutorial::
PIECES (for a bag that approx. 8 inches in diameter and 8.5 inches tall – for 12in diameter bag, see bottom of post)
Basket
9 inch circle of interfacing
9 inch circle of exterior fabric
29.3in x 9in interfacing
29.3in x 9in exterior fabric (top pieced strip = 29.3in x 4.5 in and bottom exterior strip = 29.3in x 5.5 in sewn together lengthwise with a ½ inch seam allowance.)

Bag
9 inch circle of interior fabric
29.3in x 9in interior fabric
29.3in x 4.5in interior fabric (pocket)
30.3in x 7in interior fabric (drawstring top)

Handles/Trim
2in x 15in (x4) of handle fabric
2in x 14in (x2) of interfacing
30 in of pocket lining double-fold trim
30 in of exterior top double-fold trim
30 in of rickrack, ribbon or trim

NOTES
Use a heavy interfacing like Timtex. I didn’t make it fusible, but that could potentially help when sewing the fabric to the interfacing.
Seam allowances for basting and seaming are different to ensure basting stitches don’t show
PUT IT ALL TOGETHER
Assemble your pieced strip. Have fun with this. It doesn’t really matter how many fabrics or angles etc that you use as long as you end up with the correct sized piece at the end. You can make the whole exterior pieced or use just two fabrics and on and on. If desired, sew decorative trim to exterior fabric. Play now (because the rest is a bit of work!)
Basket Construction:
Pin exterior bottom fabric to interfacing circle (wrong side of fabric to interfacing)

Baste together with a 1/3in seam allowance. We’re basically just holding the fabric to the interfacing. If you have fusible interfacing, you can skip the basting.
Pin exterior fabric to the interfacing rectangle
Baste together with a 1/3in seam allowance

With right sides facing, pin and sew the short ends of the side piece together with a ½ in seam allowance, forming a cylinder
Press seam to one side
Mark the 4 points on both the bottom and side piece.
(You can fold the circle/cylinder in half, mark the crease at each end, open and refold so the pins are together and mark the creases again.)

Line up a pin on the bottom with a pin on the side and pin together (making sure the interfacing side is on the outside on both the side and bottom)

Line up the remaining markers and pin the bottom to the side. Pin generously to ensure the pieces don’t slip apart as you sew.

Sew together the bottom and side piece with a 1/2in seam allowance. Make sure your seam “covers” the basting stitches (that’s why there’s a difference in the seam allowance when basting vs. seaming. Or you can do it haphazardly like I did and pick out the basting stitches later. That’s sooo much fun!
Here’s what the stitching should kinda look like…

This will take a bit of fiddling and manipulating. When you sew over the side seam, you may need to get a “running start” on your machine so that it powers through. If you have a walking foot…use it!
Turn the bucket right side out. I iron the sides of the bucket once more to smooth out the wrinkles that are inevitable when you turn the bucket.
Handle construction:
(I’m sure there’s a better way to do this…but this is how I made mine. And apparently I forgot to take pics of this step…but is pretty much exactly what I did for the headbands.)
With right sides of handle fabric facing, place the interfacing strip on top and pin all together
Sew down each side (length wise) wish a ¼ in seam allowance
Trim the seam allowance down to 1/8 in or pink the seam allowance making sure not to snip the stitches
Turn the tube right side out so that the interfacing is between the handle fabric now
Press
Sew down the side of the handle with a 1/8in seam allowance. When you reach an end, tuck the fabric ends in, making sure one side wraps around the raw end of the interfacing.
Turn the corner and sew the ends, turn and sew up the other length of the handle with the 1/8in seam allowance.
Repeat the end treatment on the other end of the handle, sew to your starting point and snip your thread.
Repeat for the second handle.
Attach handles to the side of the basket
Ends of handles should be about 3.5 inches from the top of the basket and about 4 inches apart from each other.
Pin handle ends in place

Sew handles down in a reinforcing square.

It takes a bit of mushing and smooshing to get this done, but you can do it! Iron the sides of the bucket one more time if you think they need it.
PHEW!
Bag Construction
Sew trim to the top of the pocket edge

Sew pocket to lining along the bottom seam and sew (trimmed edge is towards the top)

Sew pocket lines down at whatever intervals you’d like. I like some narrow and some wide pockets to help hold a variety of notions and tools.
Drawstring Top:
Fold in both sides 1/2” and iron (this is so you have a nice opening for your drawstring)
Fold down ¼” from the top of the fabric and iron. If you’re using a print, you should be folding so that the wrong side of the fabric is inside the fold.
Fold down another 1” from the top and iron. This creates the pocket for you to pull the drawstring through.

Sew down the length of the drawstring fold using a 1/8” seam allowance from the folded edge.

With “inside” sides facing, pin the drawstring fabric to the top edge of the side lining and sew together

Line up edges of the inside lining and sew together at the ends (make sure the pockets are in).
**NOTE** Do not sew together the drawstring opening and make sure to line up the drawstring seam line and the top of the pockets when you sew together
Now for a nice clean look, do a pseudo-French seam along the drawstring flap (you don’t need to go all the way down the lining since only the drawstring flap shows both sides of the fabric.)
Basically, fold/roll the seam of the flap back onto itself. Press it down, pin it and sew it down so that the seam and raw edge is enclosed.


(Yeah, I know my instructions on this part are particularly bad.)
As you did with the bottom of the bucket, mark the 4 points of the bottom round and the bottom of the inside lining.

Pin the bottom round to the lining and sew together with a ½” seam allowance
This is what it looks like with the INSIDE out (when you put it in the basket, you’ll want the pockets on the inside.)

Guess what! You’re ALMOST there! Let’s bring it all together now.
Tuck the lining into the bucket. Make sure the drawstring flap is tucked inside the lining.
Pin the lining to the bucket all the way around the top.

Sew along the top (you’re sewing through the bucket and the drawstring/lining side edges) to secure the lining to the bucket using a ¼” seam allowance. The key here is to sew close enough to the top of the bucket so that the stitches won’t show after you apply the binding.
Are you still hanging in there?!
FINALLY…line up the end of the wide trim with the bucket side seam. Sew the trim to the top of the bagsket. Make sure you catch both sides of the trim as you go. Take your time on this…I recommend pinning (I didn’t pin and I regret it since I didn’t catch a couple of spots of the inside trim.) When you reach the end, fold the end of the trim under so you have a nice neat end when you get back to the side seam.
Guess what! You’re all done! CONGRATS!

For a Larger Bag (12 in in diameter and 12 in tall)
Basket
12 inch diameter circle of interfacing
12 inch diameter circle of exterior fabric
38.7in x 12.5 in interfacing
38.7in x 12.5 in exterior fabric (top pieced strip = 38.7in x 5.5 in and bottom exterior strip = 38.7in x 7 in sewn together lengthwise with a ½ inch seam allowance.)
Bag
12 inch diameter circle of interior fabric
38.7in x 12.5 inch interior fabric
38.7in x 4.5 inch interior fabric (pocket)
39.7in x 9 inch interior fabric (drawstring top)
Handles/Trim
2in x 15in (x4) of handle fabric
2in x 14in (x2) of interfacing
38 in of pocket lining double-fold trim
38 in of exterior top double-fold trim
38 in of rickrack, ribbon or trim
I’m sure I made this more complicated than it has to be. If you have better ways of doing parts (or all) of this project, please let me know. I’d love to hear it!
|
сумка з бічними кишеньками фото мк |
|
сумка-торбинка для покупок фото мк |

Cut the following pieces from oilcloth.
(2) 8″ x 6.5″ front and back pieces
(2) 8″ x 4.5″ side pieces
(1) 4.25″ x 6.25″ bottom piece
(2) 16″ x 3.5″ handles


|
сумка з светру мк |
Today's little craft project is turning this Goodwill purchased alpaca sweater into a lovely rose covered bag. Since I spent the weekend cleaning out the camel house I figured I deserved something beautiful and not smelling like poo!
The sweater was a mens X-large that is felted (washed in hot and dried on hot twice until it shrunk to a large child's size sweater...you know it felted when you can no longer see the stitches and it will not unravel when cut) I paid $3.00 for the sweater...
I found two sweaters with this tag...lucky me!
Start by cutting off the sleeves just inside the arm-hole seams Next cut at the neck...
I lined up a straight edge across the bottom of the armpits to make sure my neck cut would be as deep as my arm cuts.
Try to make the arm curves and the neck curves match...I had to fool with it a little after these pics to get them even. These will be your handles After you cuts are made shift the sweater around till the handles line up.
Next is the bottom of the bag...you don't have to do this, you can just sew the bottom together straight away but I needed the extra room.
I used one of the sleeves I cut off for this. I made mine about 4 inches wide by the same length as the bottom of my sweater.
Turn your sweater inside out and at the bottom edge of the sweater pin your bottom piece, right sides together.
Now how does one fit a square cornered bottom piece into a curved sweater hem?
Well I put a little tuck in the corners of the bottom piece...all pointing in...to make it match up better to the sweater.
Stitch along the bottom where you pinned, feed the sweater into the machine. Don't pull from the back it will stretch and warp the sweater.
Turn right side out. Now you have a perfectly useful wool bag. But... when I noticed all those scraps I knew I just could not let them go to waste.
So I played around with them a little...
Hmmmm...maybe roses?
So I made a couple of roses by handstiching them as I wound them around
And if two were good...
Nine were better, with leaves to boot! All made from the scraps and hand sewn on. And what am I going to do with my newly created bag?
It is my new knitting bag!
I love the ribbing on the bottom...no hiding what this used to be!
There you have it...a thrift store sweater turned new rose knitting bag!
So everybody run...don't walk...to your nearest thrift store and grab a armful of wool sweaters. Let loose your creative genius that I know is hiding in there! Have fun! Update...I have also made a ruffled laptop bag out of an old wool sweater. The tutorial is here.
|
сумка з квіткою мк |

Supplies:

Handle:
To make the handle, fold in half lengthwise, and press.

As if you are making bias tape, fold again so that the raw edges meet the center fold. Press. Topstitch from each side down the length of the handle.

Set aside for now.
Ruffles
**Now let’s work on the ruffles. To make the edges frayed, you are going to snip about 1/4″ and then rip, rip, rip away. I ripped my pieces so that both edges are frayed. Part of the fun of this fabric is it is fairly natural looking. This frays extremely easily and adds texture to the piece.

Fold one ruffle piece in half lengthwise and press. Open up and use the pressed line to stitch a long basting stitch. Gather loosely by pulling one thread while holding the other one still. Repeat with the other ruffle piece.
Take one ruffle piece, tuck the end under and pin to the handle, 2 inches from the end.

Pin the ruffle leaving 2″ from each side. You can fold pleats in the ruffle if your gather wasn’t tight enough. I pinned the ruffle in a wavy fashion to give it a little character. But if you would rather, you can pin it straight. Sew down the center of the handle to keep the ruffle on the handle.
On the outside body piece, use a water soluble pencil (or light pencil because it will be covered with the ruffle) to mark 1 1/2″ from the top down. Mark all the way across the body piece.

Use the line to line up the second ruffle piece. Again, I pinned the ruffle to the body piece in a sort of curvy wave. I also made some pleats as needed. Sew the ruffle to the body.

With right sides together, pin the inside of the basket to the ruffled outer piece. Sew along the top edge. Press.

Turn the right sides out and press again.

We have to do a little frogging here. I find the easiest way to put the handles in is just a bit of unpicking. But if you would rather, you can pin the handle in before you sew the top of the basket together. The handle is fairly short and I find that way I have a harder time getting the handle straight.
I measure from the center of the basket top about 2″ out and unstitch the top 1 inch. From the other side I do the same. This leaves two holes bigger than the handles. (The handles are just there to show you how they will go. Wait a minute to put them in.)

Add your Peltex body piece now. I did this by lifting the outside layer and placing down the Peltex piece, then lay the top down over it so the right side is up and you have a nice sandwich of fabric, Peltex, fabric.

Insert the handles in the holes making sure the ruffle is facing out each time. This does make a loop for the handle. Pin in place. Top stitch along the top of the entire basket.
Top stitch again over the center of the ruffle, about 2″ down from that and finally just up from the bottom. This is to hold the three pieces of the body together.

Now, let’s sew the basket together. Fold the basket in half with wrong sides together. Sew along the edge of the basket.

Turn the whole basket right sides together and sew a 1/4 inch seam. This is going to cover the other seam and leave you with a French seam.

Take your two fabric bottom circle pieces and your Peltex circle. Make a sandwich with the fabric pieces on the outsides and the Peltex inside the sandwich. Zig-zag around the circle to keep them all together. With the right sides of the basket still together, pin the bottom circle to the bottom of your basket. Stitch the two pieces together. Go around it twice if you must.

You can turn your basket right side out now.
For the Flower:
Take your long piece and press it in half lengthwise. I leave it folded.

Prepare a long thread and needle. Remember this is Sew,Mama,Sew! not Hot Glue, Mama, Hot Glue! Slowly roll the flower up, making stitches in the folded end every 1/4 inch or so. More stitches are better because you really want to hold it all together. Continue to roll and stitch until your flower is the size you want or you run out of fabric.

Tuck the end of the flower under and stitch the flower securely. I took more stitches through the bulk of the flower now too to make sure it was all going to stay together nicely. I also fluffed the frayed edge a bit and pulled out and left some exposed fibers to give it more texture.

Hand stitch the flower to your basket and you are good to go!
|
варіант ручок для сумки |
|
После того, как я сделала пару сумок «с веерами» и, соответственно, много ручек со всеми положенными разметками, наметками, заглаживаниями и удалением ниток, моя лень подсказала мне использовать для ручек типа «сендвич» флизелин с перфорацией, который обычно берут для проклеивания поясов в юбках и брюках. Он бывает разной ширины. Для ручек лучше всего использовать тот, у которого ширина между линиями перфорации 3 или 2.5 см. Я попробовала применить его для изготовления ручек к сумке «Волна». Оказалось, эта очень удобная штука значительно упрощает и облегчает этот рутинный процесс. Попробуйте сами – и вы увидите, как легко и просто это можно сделать.  |
|
 |
1. Отрезаем два куска флизелина, каждый длиной, равной длине ручки плюс 3-4 см. С помощью утюга приклеиваем их к ткани, выбранной для изготовления ручки, строго придерживаясь долевой нити. С каждой стороны флизелиновой полосы оставляем по 1 см – это будет припуск на подгибку. Эти заготовки будут служить основой для начинки «сендвича» - так условно названа эта технология. |
 |
2. Далее продолжаем готовить наш «сендвич». Можно, конечно, сначала заметать припуск на флизелин, а потом загладить, но флизелин добавляет жесткости ткани, и заглаживать припуски без всякой наметки не составляет никакого труда. Главное – ткань нужно хорошо увлажнять и следить за тем, чтобы она под утюгом не пригорела и не пожелтела. Сделайте сначала пробу на кусочке ткани. Если сильно горит – значит, нужно заглаживать через влажную тряпочку. Но на этой стадии – это не принципиально. Этот подгиб не будет виден нигде. Тонкая деревянная линейка помогает сделать край ровным и хорошо зафиксированным. |
 |
3. На фотографии видно, что получилось у меня после первой подгибки (см. нижнюю заготовку), и что делаем дальше. А дальше мы вышеописанным способом заглаживаем край заготовки по линии перфорации, также используя деревянную линейку. Внимание! Линейку нужно обязательно «протестировать» на кусочке ткани, иногда древесина линейки при увлажнении дает желтизну и может испачкать ткань! Ну, и естественно, заглаживать тогда нужно обязательно через тряпочку. |
 |
4. Следующим этапом начинаем набирать «начинку». Собираем все мелкие обрезки, оставшиеся после пошива сумка и начинаем набирать их на основу, подгоняя кусочки плотно встык между собой и сшивая их широким и густым швом «зиг-заг». Одновременно этим зиг-загом сшитые кусочки прикрепляются и к ленте основы. За основу я брала нейлоновую швейную ленту шириной 2,5 см. |
 |
5. Таким образом набираем полоску, равную примерно длине заготовки для основы. |
 |
6. Ну, а теперь все уже совсем просто. Внутрь подготовленной основы для «сендвича» вкладываем обрезанную по краю швейной ленты «начинку» из разных лоскутков. В данном случае ручки будут вшиваться внутрь сумки, поэтому вкладываем «начинку» не до конца основы на 1,5 – 2 см. Это для того, чтобы не создавать лишнего утолщения при пришивании ручек. |
 |
7. И последнее. Уже самое простое. Близко к краю настрачиваем заглаженные и подвернутые припуски основы на «начинку». Все, ручки готовы. |
|
як пошити ручки-лямки |
|
Такие ручки-лямки часто можно видеть на сумках разного типа, даже на совсем не рюкзачного. Поэтому решила дать фотокурс по их изготовлению отдельно от фотокурса по шитью самого рюкзачка. Такие ручки очень удобны. При застегнутой молнии у вас получается одна широкая и удобная ручка. А если захотите надеть сумку на спину, как рюкзак, нужно только расстегнуть молнии – и у вас уже две наплечные лямки. Прежде, чем начать шить, необходимо подобрать удобную длину лямки. Я это сделала с помощью сантиметровой ленты, прикрепив один ее конец к верху сумки, а второй пропустив по спине так, как потом ляжет лямка. Прибавила еще 3-5 см , и у меня получилась длина около 80 см. |
 |
|
И теперь уже из опыта. Сейчас, когда я все лето пользовалась свом рюкзаком, могу сказать, что лямки нужно было делать меньшей ширины. После того, как вшита молния, ширина ручки в застегнутом виде становится больше 6 см, и для моей ладони это многовато. Сейчас я сделала бы ширину каждой лямки 2.5 см. Но тут есть еще один нюанс: ладони у меня маленькие. Поэтому вам советую сначала примерить будущую ширину ручки к своей руке. Может, для вас она будет комфортна. Ирина Лукашенко (Iric) г. Киев |
|
|
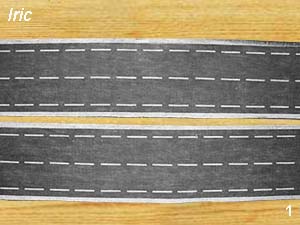 |
1. Ширина одной лямки в готовом виде – 3 см. Ширина заготовки под каждую лямку – 12 см. Я использовала свой любимый «ленивый» способ изготовления всяких ручек – с помощью перфорированного флизелина. В данном случае перфорированная лента двойная, общая ширина ленты – 11 см. Отрезаю две одинаковых полоски флизелина длиной 80 см, с помощью утюга приклеиваю их к ткани, не забыв добавить припуски по обеим сторонам 0.5 см (чтобы получить ширину заготовки равную 12 см) и вырезаю две заготовки. |
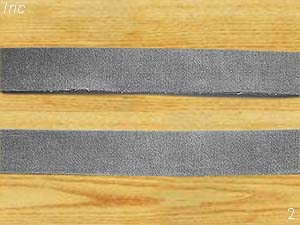 |
2. Заглаживаю каждую полоску пополам по центральной перфорации. Если вы не будете использовать перфорированный флизелин, то заглаживаете просто пополам. |
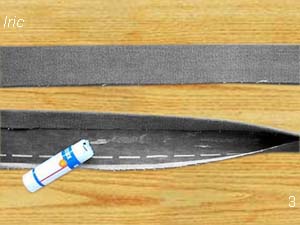 |
3. Каждую заглаженную половинку нужно еще раз загладить к центру, как бы подгибая ее, закрывая открытый срез. Для временной фиксации я пользовалась обычным клеевым карандашом для бумаги. Очень даже неплохо получилось. Фиксировала не сплошной полосой, а местами. |
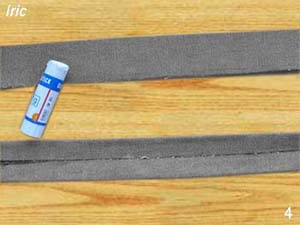 |
4. Вот так выглядят подготовленные к заглаживанию будущие лямки. |
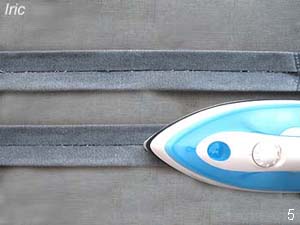 |
5. Еще раз очень хорошо заглаживаем подогнутые полосы к центру. Чтобы получить красивый и четкий внешний край, я обычно делаю так: сразу после утюжки, сильно прижимаю только что отглаженный участок деревянным бруском или широкой деревянной линейкой, и пусть ткань остывает под деревом. Гарантирую – заглажено намертво! |
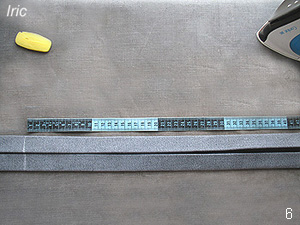 |
6. Совмещаем подготовленные полоски, подравниваем их длину. Отмечаем на обеих половинках точку, от которой будет расстегиваться молния. Молния будет расходиться как бы снизу вверх. У меня длина участка с молнией между лямками - 46 см. |
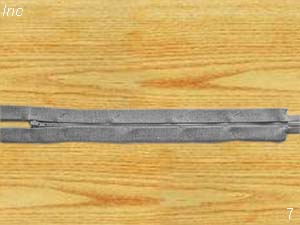 |
7. Вкладываем молнию внутрь сложенных полосок, как показано на фото. Начало молнии совмещаем с отметкой. Если вы хорошо загладили полоски для лямок, то приметывать ничего не нужно. Можно немного зафиксировать молнию внутри полосок тем же клеевым карандашом или булавками. Открытые концы тесьмы молнии около бегунка, естественно, нужно подвернуть внутрь, они тоже уйдут в шов. |
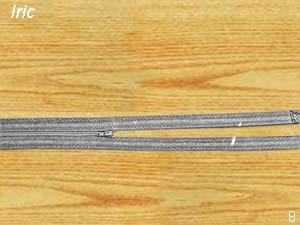 |
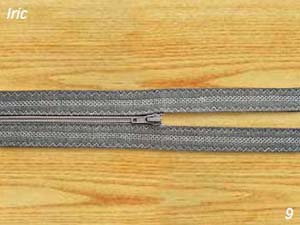
8. Осталось только прострочить наши полоски по внутренним сторонам близко к краю, при этом вшивается и молния. Строчку прокладываем по всей длине лямки. |
 |
9. И последний момент. Для большей жесткости и декоративности я отстрочила лямки еще несколькими швами. Подровнять, если есть необходимость, концы ручки – лямки и обрезать излишек молнии. Вот и все. Можно вшивать в сумку, которую вы скоро сошьете! |
|