ArtMarbleStudio - камины, фонтаны, декор и прочее из натурального камня и бронзы Атмосф...
короб из бумажных трубочек - поэтапно... :) и чуть-чуть про тенты, сетки, пленки... - (2)короб из бумажных трубочек - поэтапно... :) и чуть-чуть про тенты, сетки, пленки... :) кор...
Шьем пилотку к 9 Мая - (1)Шьем пилотку к 9 Мая Шьем пилотку к 9 Мая автор мастер класса Oksana ...
Большая книга научных развлечений - (0)Большая книга научных развлечений 1. 2. 3. 4. ...
Ваза с цветами из бумаги - (1)Ваза с цветами из бумаги в подарок маме Вазу с цветами, открытку ручной работы из бумаги, мож...
![]()


Переход на страничку онлайн логопеда
Губаревой Ольги Анатольевны (жми)...
Видео фрагменты логопедических занятий по скайпу - посмотри как это выглядит на самом деле.
Может ли взрослый человек научиться произносить звук "Р"
Как подготовить ребенка к логопедическому занятию (консультации) по скайпу
![]()
СИМВОЛ ГОДА. ВЯЗАНЫЙ ДРАКОН |
Метки: символ 2012 г. вязаный дракон |
СИМВОЛ НОВОГО ГОДА. ВЯЗАНЫЙ ДРАКОН |
Драконы ручной работы (34 фото)
Метки: символ нового года вязаный дракон вязаный дракоша драконы ручной работы |
СИМВОЛ ГОДА. ВЯЗАНЫЙ ДРАКОН |
Дракоша на диете

Эта Дракоша связана по описанию Алёны leonitta http://www.knitted-toys.narod.ru/dragon_Karamelka.html,
только в отличии от Карамельки у меня получилась весьма стройная особа ![]()
Метки: вязаный дракон вязаный дракончик символ нового года |
СИМВОЛ НОВОГО ГОДА. ВЯЗАНЫЙ ДРАКОН |
Маленькие дракошки крючком
Очень забавные дракончики, вязанные крючком... вот только никак не соберусь перевести руководство на русский... по этому выкладываю так как есть, позже сделаю перевод...=)
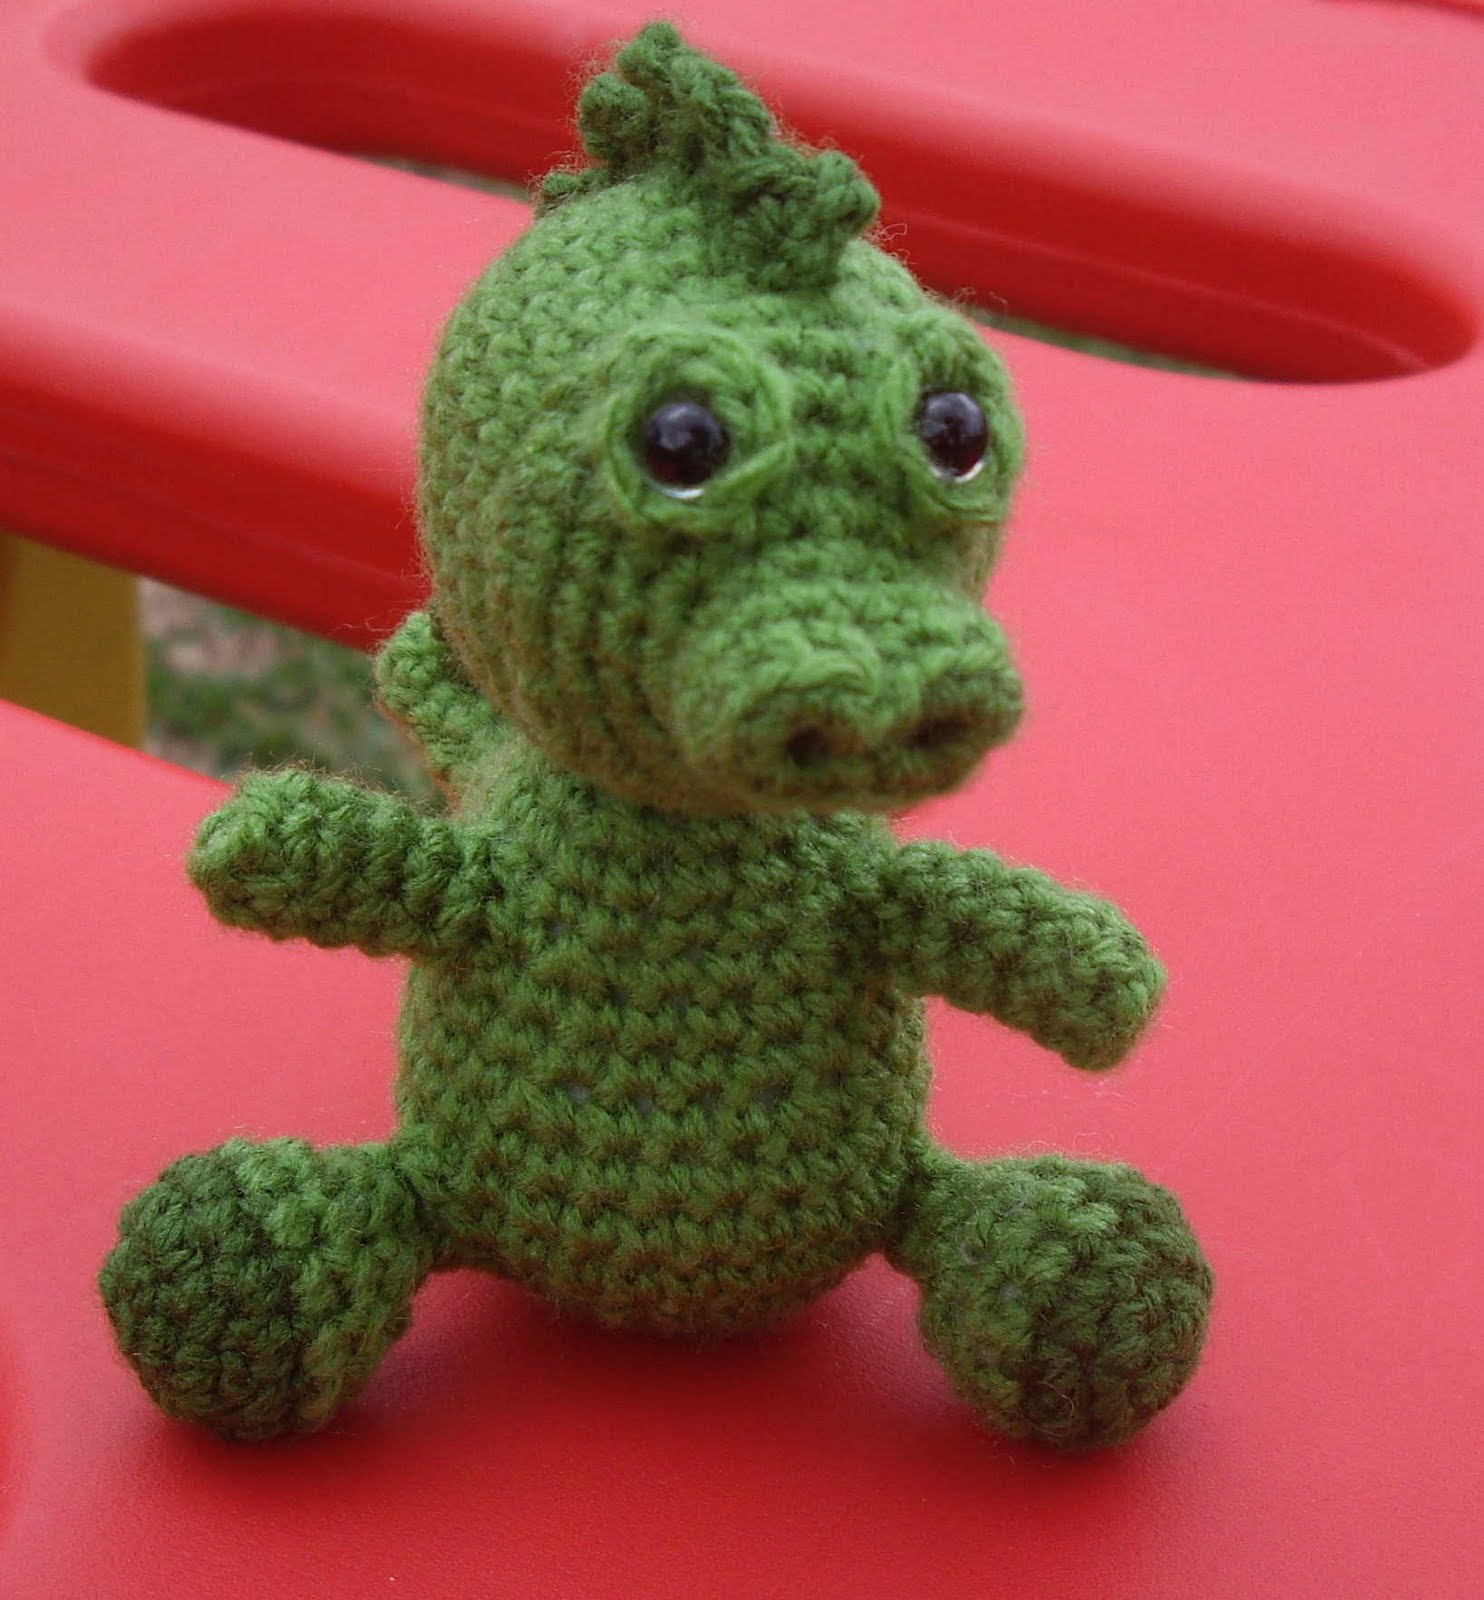
Head:
Using yarn colour A
Row 1: ch 2, then 6 sc into the first chain.
Row 2: 2sc into each of the sc (12 stitches)
Row 3: [2sc into the first sc, sc into next sc] repeat around (18 stitches)
Row 4: [2sc into the first sc, sc into the next 2 sc] repeat around (24 stitches)
Row 5: [2sc into the first sc, sc into the next 3 sc] repeat around (30 stitches)
Row 6 to Row 10: sc into each sc around (30 stitches)
Row 11: [sc2tog, then sc into the next 3 sc] around (24 stitches)
Row 12: [sc2tog, then sc into the next 2 sc] around (18 stitches)
Row 13: [sc2tog, then sc into next sc] around (12 stitches)
Start stuffing the head as firmly as you can, you're just making a basic ball as the face and eyes will be attached later.
Row 14: sc2tog around, cut and finish off leaving enough yarn to sew the hole shut. Weave in loose end.
It should look like a perfect little round ball.
Snout/face:
Row 1: ch 3, then 3 sc into the first chain from hook, sc into the next sc, 6 sc into the next sc. Turn
work around 180 degrees so that the bottom of the row now becomes the top row, and sc in the next sc, and 4 sc into the next sc (14 stitches)
Row 2: sc into the back loops of each sc (14 stitches)
Row 3 and Row 4: sc into each sc (14 stitches)
Row 5: [2 sc into the first sc, sc into the next sc] repeat around (21 stitches)
Row 6: [2 sc into the first sc, then sc into the next 2 sc] repeat around (28 stitches)
Row 7: [2 sc into the first sc, then sc into the next 3 sc] repeat around (35 stitches)
Row 8: sc into each sc around (35 stitches)
Row 9: [2 sc into each sc] for the first 15 sc, then sc2tog around (40 stitches)
The face should have a flatter, broader side on the top half and a curved rounded part on the bottom half.
Eyebrows:
Make two of these! Use yarn colour A. Alternatively, you could use yarn colour B for an interesting contrast.
Row 1: ch 2, then 6 sc into the first chain. Join with a sl st, then finish off and weave in all the ends.
They should look like 2 tiny flowers. The safety eyes will go through the little hole in the middle. Next, the eyes are attached onto the snout/face and the backs of the safety eyes are then attached onto the back of the snout/face. So it should be layered, from the outside in it will go: safety eyes, eyebrows, snout/face, then safety eye backing. If you aim to have the centres of the eyes line up with the outer edge of the nostrils, it should be about right, but you can play with this depending on how you want your little guy to look.
Body:
Using yarn colour A
Row 1: ch 2, then 6 sc into the first chain.
Row 2: 2 sc in each sc around (12 stitches)
Row 3: [2 sc into first sc, then sc into the next sc] repeat around (18 stitches)
Row 4: [2 sc into the first sc, then sc into the next 2 sc] repeat around (24 stitches)
Row 5: [2 sc into the first sc, then sc into the next 3 sc] repeat around (30 stitches)
Row 6 to Row 8: sc into each sc around (30 stitches)
Row 9: [sc2tog, then sc into the next 3 sc] repeat around (24 stitches)
Row 10 and Row 11: sc in each sc around (24 stitches)
Row 12: [sc2tog, then sc into the next 2 sc] repeat around (18 stitches)
Start adding stuffing at this point, make sure it's packed in as firm as possible.
Row 13 to Row 15: sc into each sc around. (18 stitches)
Row 16: [sc2tog, then sc into the next sc] repeat around (12 stitches)
Row 17: sc into each sc around.
Finish off, making sure you leave a long enough piece of yarn so you can attach the head later. Add more stuffing and shape the body in your hand so there's no lumps or ridges.
Legs:
Make 2 of these!
Starting with yarn colour B (the contrasting colour)
Row 1: ch 2, then 6 sc into the first chain.
Row 2: 2 sc into each sc around (12 stitches)
Row 3: sc in each sc around, break off yarn colour B (12 stitches)
Row 4 to Row 5: Join yarn colour A, then sc in each sc around. (12 stitches)
You'll need to add a little bit of stuffing at this point, the little legs get narrow and it gets too hard to
poke it down into the foot part.
Row 6: sc2tog around (6 stitches)
Row 7 to Row 8: sc into each sc around. (6 stitches)
Arms:
He'll need 2 of these, too, in yarn colour A.
Row 1: ch 2, then 6 sc into the first ch.
Row 2: sc in each back loop only (6 stitches)
Row 3 to Row 6: sc in each sc around (6 stitches)
Cut and finish off, making sure you leave enough yarn to sew them onto the body.
Tail:
Use yarn colour A.
Row 1: ch 2, then 4 sc into the first ch.
Row 2: sc into each sc around (4 stitches)
Row 3: 2 sc into the first sc, then sc into the next sc, repeat. (6 stitches)
Row 4 to Row 6: sc into each sc around (6 stitches)
Row 7: [2 sc into the first sc, then sc into the next sc] repeat around (9 stitches)
Row 8: sc into each sc around (9 stitches)
Row 9 to Row 10: [2 sc into the first sc, then sc into the next 2 sc] repeat around (16 stitches)
Row 11: sc into each sc around (16 stitches)
Cut and finish off, leaving lots of yarn to attach it to the body. Weave in the loose end from the tip of the tail. Stuff with polyester filling, making it fat at the open end. The narrow tip of the tail
should be left unfilled, so you can pinch it and shape it as you like.
Assembly:
Start with the snout/face and head. The head should have one side that looks neater than the other side, so use the neater side as the back of the head (you'll see the back of the head but we're covering up the front with the face). So with the less neater side facing you, lay the snout/face over the ball like a mask. Stretch it and play with it until you're happy with the position of the face. Then stitch it onto the head using the yarn you left attached for this purpose! Weave in all loose ends.
Next, attach the head to the body using the length of yarn left on the body. You may need to play
with the angle of the head a bit and be careful when attaching the head, so that the face is straight and facing forward. Weave in any loose ends.
The tail goes on next. It should be placed low down in the very middle of his back so that it sits
level with what is essentially his bottom! Sew it on then weave in loose ends.
Next are the little legs. They should be attached low down on the front of the body, face forwards
and angle out a little bit. If you look at the bottom of the dragon, the feet and the tail should make a triangle shape – this balances him so that he can sit up on his own. Getting there! The arms are the last little appendages to attach, they should go on his body about 1cm (half an inch) under his neck. They should be on the same angle as the legs. Weave in all the ends.
All that's left now is his spines. These are stitched directly onto his body using contrasting colour
yarn B. To do this you will need to crochet a foundation chain from the tip of his tail up to the top of his head.
Row 1: Insert hook into a stitch on the tip of the tail. Yarn over and bring it through, chain 1 then sc along the length of the body. Try to space them fairly evenly, don't worry about an exact number of sc because you'll need to make the sc where ever they will fit!
Row 2: Turn him so you will now work back towards the tail. Ch 3 then sc back into the same place so it makes a little ridge.
[sl st into the next sc, sc into the next sc, ch 3 and then sc back into the same place] repeat the
length of the body.
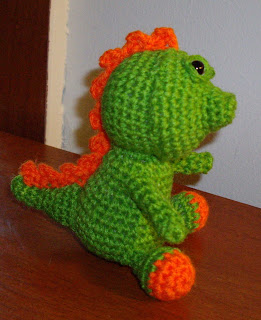
Cut off and weave in loose ends. You should now have a completed dragon with little spines!
Метки: вязаный дракон вязаный дракончик символ 2012 г. |
ГОД ДРАКОНА. ВЯЗАНЫЙ ДРАКОНЧИК |
Метки: вязаный дракон вязаный дракончик символ 2012 г. |
СКОРО ГОД ДРАКОНА. ВЯЗАНЫЙ ДРАКОНЧИК |
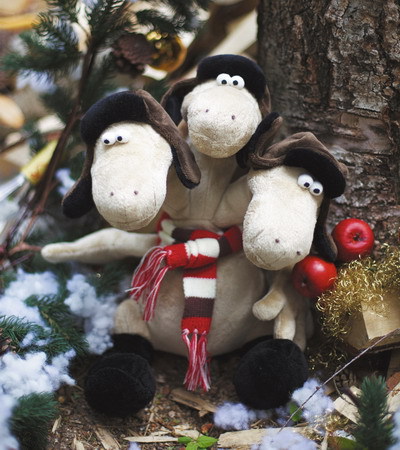
Снова хвастаюсь... дракончик Дино!
Вчера я довязала Дино, но он не такой красавец, как у девочек, которые руку набили на игрушечках.
Вязала по описанию Меджик. Очень понятное описание, но я так редко вяжу игрушечки и немного путалась...


Метки: вязаный дракон вязаный дракончик символ 2012 года |
вязаная Куколка - туземка |
Метки: вязаная Куколка вязаные куклы |
вязаный Веселый цветочек |
Метки: вязаный Веселый цветочек вязаные игрушки |
вязаный Миньон |

Вам потребуется: акрил желтого и голубого цвета, чуть-чуть белой, черной, серой пряжи, крючок подходящий для вашей пряжи, наполнитель.
Метки: вязаный Миньон вязаные игрушки |
Пальчиковый театр крючком. Жабка, мышка и заяц |
Очень симпатичная жабка http://zlulia.blogspot.com/2010/07/blog-post_28.html 
Серия сообщений "Кукольный театр":
Часть 1 - Подставки для пальчиковых персонажей
Часть 2 - Пальчиковый театр крючком. Жабка, мышка и заяц
Часть 3 - Вязаные игрушки для пальчикового театра
Часть 4 - ДОШКОЛЯТА. РАЗВИТИЕ МЕЛКОЙ МОТОРИКИ ПАЛЬЦЕВ РУК. 10 МАЛЕНЬКИХ КОТЯТ
...
Часть 29 - вязаный волк для пальчикового театра
Часть 30 - вязаный медведь для пальчикового театра
Часть 31 - вязаный пальчиковый театр
|
Метки: Пальчиковый театр |
вязаная Снежная Королева |


Метки: вязаная Снежная Королева вязаные куклы |
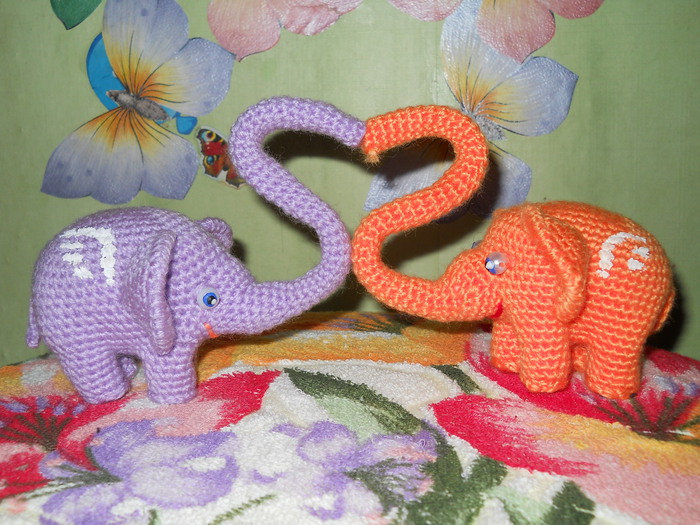
вязаные Цветочные слоники |
Метки: вязаные слоники |
вязаные веселые гномики |
Метки: вязаные гномики вязаные куклы |
вязаная ракета крючком |
К дню космонавтики: ракета_крючком


Вам потребуется: цветная хлопчатобумажная пряжа
Крючок № 4
описание тут 1-й и второй ракеты
Серия сообщений "12 апреля_день космонавтики":
Часть 1 - К дню космонавтики: ракета_крючком
Часть 2 - Летающая тарелка_крючком, готовимся ко дню космонавтики
Часть 3 - Ракета. МК
Метки: вязаная ракета |
вязаная куколка Промокашка |
Метки: вязаная куколка Промокашка вязаные куклы |
вязаная пальма |
 Дерево состоит из ствола и 10-12 листьев.
ЛИСТ (зеленый). Связать цепочку из 30 воздушных петель.
1-й ряд: начиная с третьей от крючка петли провязать: 1 ст. б/н; *)1 в/п; 1 ст. с/н – повторить от *) три раза; 1 в/п; 1 ст. с/2н; **) 1 в/п; 1 ст. с/Зн – повторить от **) 15 раз; ***) 1 в/п; 1 ст. с/2н — повторить от ***) три раза; *)1 в/п; 1 ст. с/н — повторить от*) четыре раза; 1 в/п; (1 ст. с/н, 1 в/п, 1 ст. с/н, 1 в/п, 1 ст. с/н) в первую петлю воздушной цепочки.
2-й ряд (по кругу): 1 в/п; *) 1 ст. с/н; 1 в/п —повторить от *) четыре раза; **)1 ст. с/2н; 1 в/п — повторить от **) три раза; ***)1ст. с/Зн; 1 в/п — повторить от ***) 15 раз; 1 ст. с/2н; 1 в/п; *) 1 ст. с/н; 1 в/п – повторить от*) три раза; 2ст. б/н. Нить закрепить и обрезать
По краю листа пропустить тонкую зелёную проволоку.
СТВОЛ (коричневый). Для обмотки ствола вяжется полоска. Связать цепочку из воздушных петель длиной 50-60 см.
1-й ряд: начиная с третьей от крючка петли провязать по 1 пст. с/н в каждую петлю воздушной цепочки. После каждого ряда работу поворачивать.
2-3-й ряды: 1 в/п; по 1 пст. с/н в каждую петлю предыдущего ряда.
4-й ряд: (6 в/п, 1 соед. п.) в каждую петлю предыдущего ряда. Нить закрепить и обрезать.
СБОРКА. Листья собрать в пучок, скрутить черенки, прикрутить несколько отрезков более толстой проволоки длиной 20-25 см. Начиная от листьев, обмотать ствол связанной полоской (петельками вверх) по спирали так, чтобы витки слегка перекрывали друг друга. Не доходя 5-8 см до конца, закрепить (прошить) по всей длине обмотки ствола. Зафиксировать ствол в горшке. Пришить под (или над) листьями несколько крупных деревянных бусин- кокосов, прикрепить к стволу или посадить рядом обезьянку.

__________________
Весна, пора выползать из толстых свитеров и наводить марафет, в этом нам поможет омолаживающая маска, а также некоторые другие хитрости. Красота спасет мир))
Метки: вязаная пальма вязаные деревья |
вязаный Фиолетовый дракон |
Фиолетовый дракон
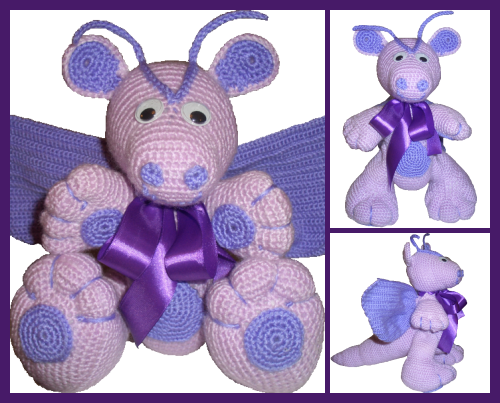
2012 год - год Дракона. Пора начать готовить игрушки для подарков.
Это вам не зайчика связать, тут потрудиться надо!
Материалы:
1. Пряжа Adelia Ivia №119 бл.сиреневый - 2 мотка
2. Пряжа Adelia Ivia №125 св.фиолетовый - 1 моток
3. Наполнитель синтепух - 1 пакет
4. Глаза - MER-18 Глаза круглые с бегающими зрачками d 18 мм - 2 шт.
5. Атласная лента 25мм (1") "Гамма". №046 лиловый - 0,5м.
Читать далее
Игрушка готова! Можно украсить её, повязав на шее яркий атласный бант.
Метки: вязаный дракон. |
развивающая игра "Укрась тортик" |
Укрась тортик

Цветочки, листики, грибочки, яблочки

Подобрать цветочки и листики к цвету пуговки и липучки.

Веселая компания у тортика "Краски осени"

Метки: развивающая игра развивающая игра "Укрась тортик" |
кошечка Китти-ангел |
Метки: кошечка Китти-ангел вязаные кошки |
вязаная курочка |
Метки: вязаная курочка |