Цитата сообщения НатаСеваса
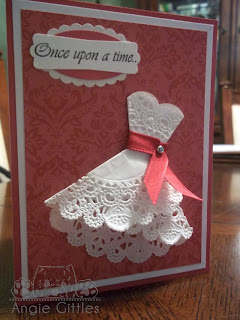
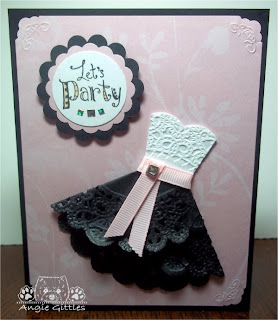
Открытка с платьем из салфетки
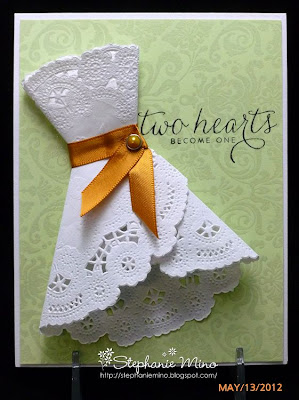
http://stephaniemino.blogspot.com/2012/05/bridal-shower-card.html
http://paperpaws.blogspot.com/2011/05/doily-dress.html
МК по этому платью взят отсюда: http://paperpaws.blogspot.com/2012/05/doily-dress-folds-tutorial.html
Doily Dress Folds Tutorial
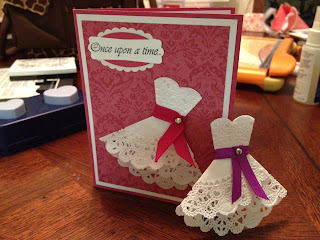 I've had a bunch of folks ask me how to do the folds, so I'm finally gonna do it! Yay!
Hope the following makes sense:
Take a 4" paper doily...the kind you can buy in packs in the cake
decorating section of Michaels, A.C. Moore, etc.
There is a front and back to the doily.
Start with the doily face down.
Fold 1 1/2" from the right (or approximately 11 & 4 o'clock)
Then fold down the other side 1 1/2".
Be sure to line up right side so it is a straight edge.
Adhere the top fold down
Fold tip down toward the back so there is an approximate 3/4" topline
Adhere the folded tip to the back
Take the second doily and put it on a piece of white card stock.
Using a 1 1/2 heart punch (Creative Memories), punch out both pieces at the same time
(the doily doesn't punch well by itself - it's too thin and gets stuck in the punch)
Adhere the punched doily heart to the card stock heart
Trim off edges to form bodice
(I suggest punching out a cardstock heart and trim it to your liking,
then use it for a template so that the sides end up even.
Adhere the bottom of the front of the bodice to the top of the back of the skirt.
The back view is above, and the front view is below.
Wrap a 2" piece of ribbon around the waist,
and ONLY adhere to the BACK of the dress.
Take a 4" piece of ribbon and insert it through the waist ribbon,
fold over as pictured, then trim off the tails to your liking.
(At this point, decide if you will be using a brad or gemstone, etc. - if using a brad, insert it at this step. If using a gemstone, first use adhesive to hold down the ribbon to the waistband.)
Finish off by add the brad or gemstone and/or any other bling of your choice.
Your dress is now ready to adhere to the front of a card or scrapbook page, etc.
 I've had a bunch of folks ask me how to do the folds, so I'm finally gonna do it! Yay!


