Kids in the Kitchen: D is for Donuts |
 after_the_ashes at Kids in the Kitchen: D is for Donuts
|
Метки: recipe dessert |
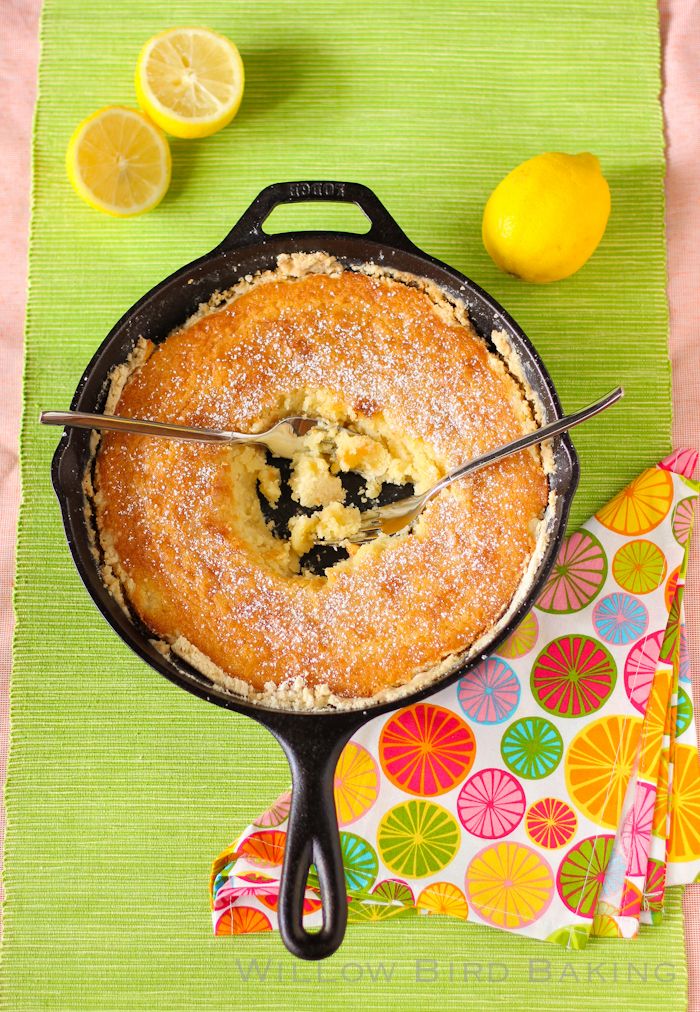
Lemon Raspberry Gooey Butter Cake |
layers_of_eli at Lemon Raspberry Gooey Butter Cake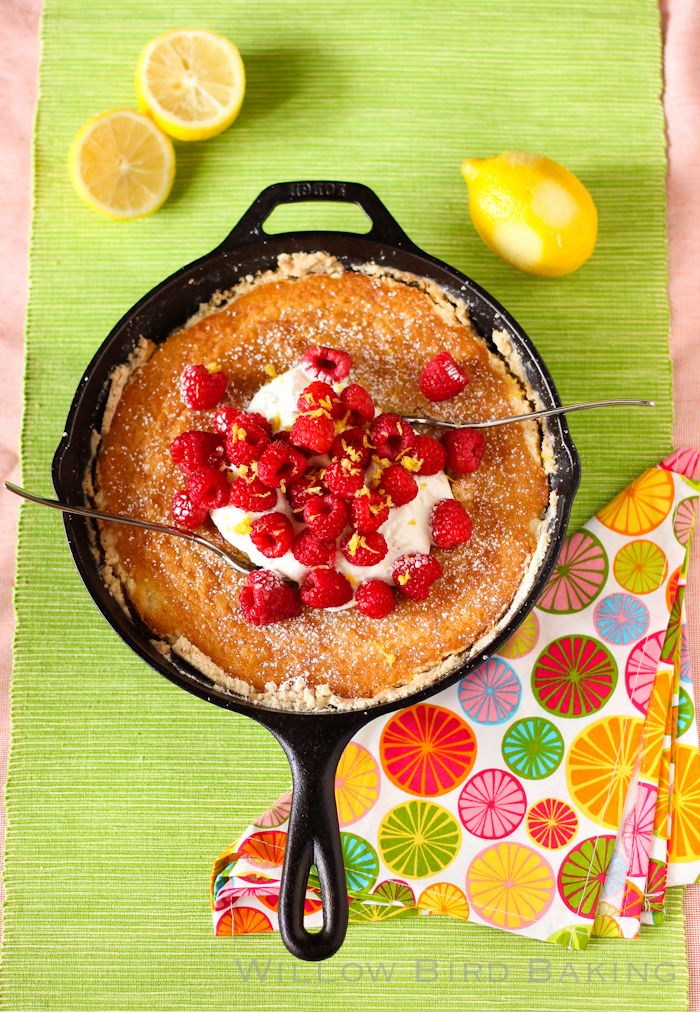
| Lemon Raspberry Gooey Butter Cake Recipe by: Willow Bird Baking, adapted from one provided to St. Louis Today by Fred and Audrey Heimburger of Heimburger Bakery. Yield: would easily serve 4-6 people This was beyond fantastic. The gooey, fluffy texture of this cake along with the subtle lemon flavor was a downright ethereal combination. You're gonna freak out when you taste it! Crust Ingredients: 1 cup cake flour 3 tablespoons granulated sugar 1/3 cup butter, softened 1 teaspoon lemon zest Filling Ingredients: 1 1/4 cups granulated sugar 3/4 cup (1 1/2 sticks) butter, softened 1 egg 1 cup all-purpose flour 2/3 cup evaporated milk 1/4 cup light corn syrup 1/2 teaspoon vanilla extract 1 teaspoon lemon extract 1 teaspoon lemon zest powdered sugar for dusting Toppings Ingredients: fresh raspberries 2 cups heavy whipping cream 2 heaping tablespoons powdered sugar lemon zest Directions: NOTE: If you don’t have a skillet, I believe you can bake this in a greased 9-inch square baking dish (I’d use a glass one if you have it, and check it early and often. Remove when there’s some jiggle left.) Let us know how it goes if you try it this way for all the other skilletless people! Make the crust: Preheat oven to 350 degrees. Whisk together cake flour, zest, and sugar in a medium bowl. Cut in the butter with a pastry cutter or two knives until the mixture resembles fine crumbs and starts to cling together. Press the mixture into the bottom (this step is a lot harder than it sounds, but be patient and use the back of a spoon to help spread/press the mixture down. I also stuck mine in the fridge for a bit to make the butter less sticky) and up the sides of a 10-inch cast iron skillet. Make the filling: Cream together the butter and sugar until fluffy and pale yellow (about 2-3 minutes). Mix in the egg until just combined. Alternate adding the flour and evaporated milk, mixing after each addition. Mix in the corn syrup, vanilla extract, lemon extract, and lemon zest. Pour the filling into the crust and sprinkle the top with icing sugar. Bake and assemble the cake: Bake for 25 to 35 minutes or until cake is nearly set (mine was probably ready around 30). Some jiggle is fine — do not overcook! It’ll finish setting up as it cools. Sprinkle some more powdered sugar on top. Let the cake cool in the skillet for 2 hours. In the meantime, beat heavy cream and 2 tablespoons powdered sugar together in a bowl to stiff peaks. Pile heaps of fresh raspberries into the center of your cooled, set gooey butter cake, top with a mountain of freshly whipped cream and lemon zest, and serve. |
|
Метки: recipe dessert |
Moist Zucchini Carrot Bread |
hardboiledblond at Moist Zucchini Carrot Bread
|
Метки: recipe dessert |
Cannoli with Ricotta Cheese Filling |
a_boleyn at Cannoli with Ricotta Cheese Filling
|
Метки: recipe dessert |
The Best All Butter Pie Crust Recipe |
hardboiledblond at The Best All Butter Pie Crust Recipe
|
Метки: recipe dessert |
Game Day Pretzels |
patsrockmybosox at Game Day Pretzels
|
Метки: recipe dessert |
Pumpkin Cheesecake Pillow Popovers |
layers_of_eli at Pumpkin Cheesecake Pillow Popovers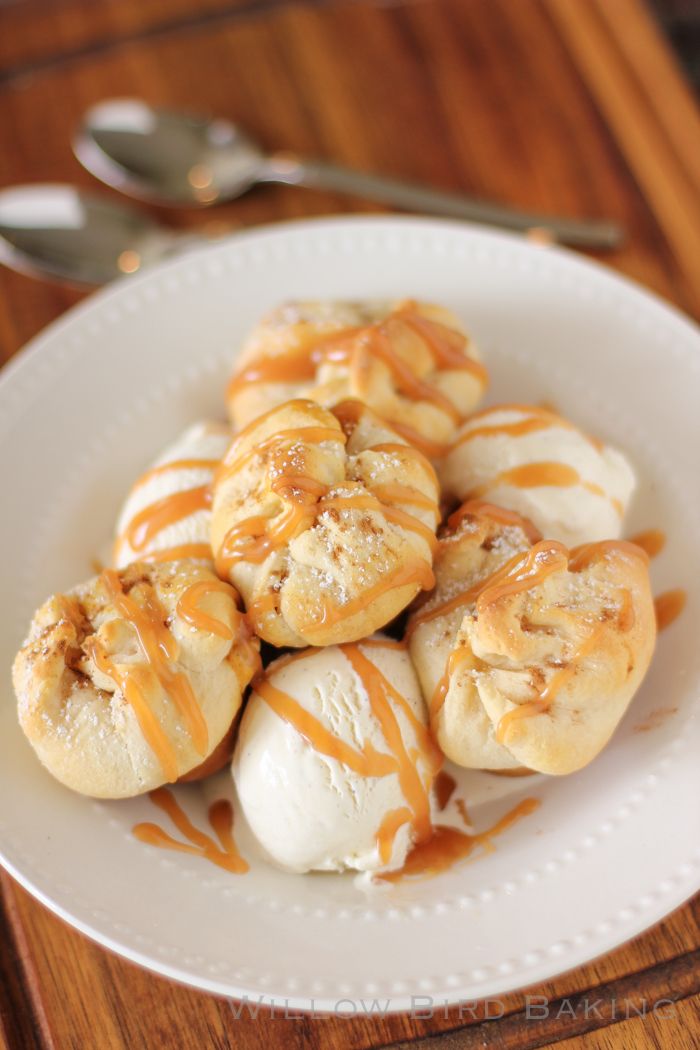
| Pumpkin Cheesecake Pillow Popovers Recipe by: Willow Bird Baking Yield: 39 pillows These little pumpkin cheesecake pillows are amazing served warm with vanilla bean ice cream and a drizzle of caramel. Add some toasted pecans for more delicious fall flavor. This recipe makes 39 pillows, but if you don't need that many, just half it. To half 1 egg, lightly beat it in a small bowl and discard about 1.5 tablespoons of it before adding it to the recipe. Ingredients: 4 cans crescent rolls 2 (8-ounce) package cream cheese, softened 5/8 cup sugar 1 egg 2 cup canned pumpkin 2 teaspoon vanilla extract 2 teaspoons ground cinnamon*, plus more for sprinkling 1/4 teaspoon ground allspice* 1/2 teaspoon nutmeg* 1/2 teaspoon ginger* powdered sugar for sprinkling caramel sauce and ice cream for serving *or substitute 2 teaspoons of pumpkin pie spice for these spices. Directions: Preheat oven to 375 degrees F. Spray two mini muffin tins with cooking spray. In a large mixing bowl, beat together the cream cheese and sugar until light and fluffy. Add egg, pumpkin, vanilla, cinnamon, ginger, nutmeg, and allspice, and beat to combine. Cover this and chill it while you prepare your dough. Unroll one can of crescent baking sheet dough onto a lightly floured surface and roll it out to around 9 x 12 inches. Cut it using a pizza cutter into 9 squares, roughly 3 x 4 inches each. Place the squares into wells of the mini muffin tins, skipping a well between each. Gently push the squares down into the well. Spoon a heaping spoonful of the pumpkin mixture into each well and pinch the corners of the dough together around it, twisting at the top to close. Bake for 10-14 minutes or until browned (let them get good and golden or they'll still be doughy in the middle.) Remove from the oven and top with powdered sugar and cinnamon. Let them cool in the pan for around 5 minutes before serving them in a bowl with heaping scoops of vanilla bean ice cream and caramel drizzle. |
|
Метки: recipe dessert |
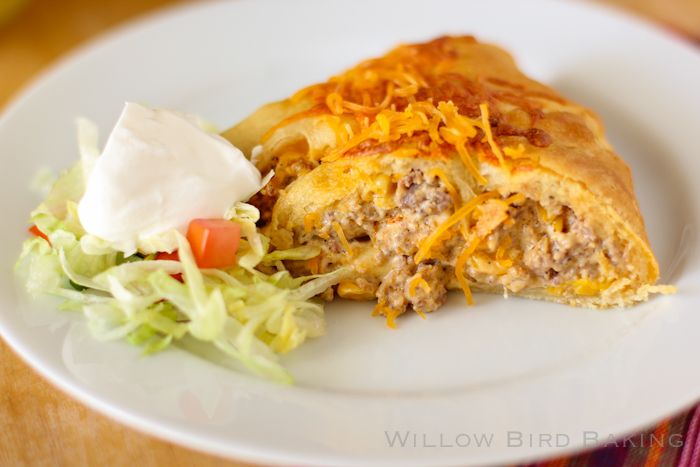
Sausage & Corn Chile Con Queso Taco Ring |
layers_of_eli at Sausage & Corn Chile Con Queso Taco Ring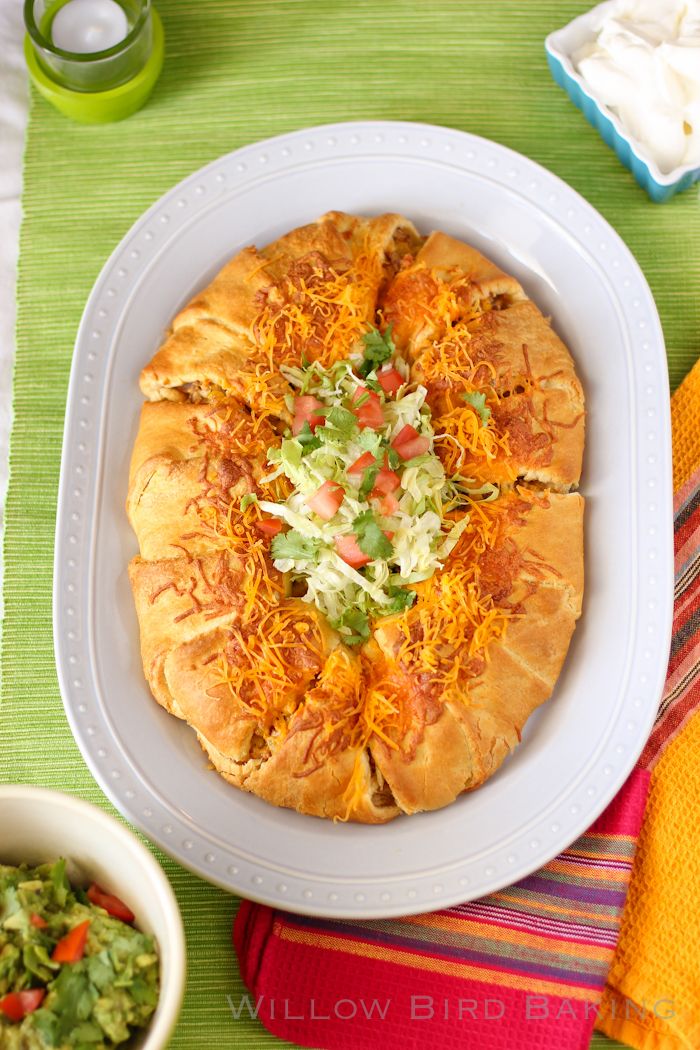
| Sausage & Corn Chile Con Queso Taco Ring Recipe by: Willow Bird Baking Yield: 5-6 portions Forget your usual tacos and even your usual taco rings: this taco ring is an explosion of hot sausage con queso with green chiles. It's gonna blow your mind! And it's so easy to make. Ingredients: 1 (8-ounce) package cream cheese 1/2 cup sharp cheddar cheese, plus more for topping 2 tablespoons salsa of your choice 1 tablespoon diced green chiles 1 pound hot sausage olive oil (if needed) 1 1/2 cups frozen corn kernels 1 tablespoon taco seasoning 2 cans Pillsbury Crescent Rolls Directions: Preheat oven to 375 degrees F and cover a round pizza pan with foil sprayed with cooking spray (or use a pizza stone or baking sheet). Place cream cheese, cheese, salsa, and chiles in a large bowl and set aside. In a skillet over medium-high heat, brown the sausage. Remove the meat to a paper-towel lined plate to drain, reserving the grease in the skillet. As soon as sausage has drained for a minute, pour it into the cream cheese bowl. Set this aside to allow the cheeses to melt. In the meantime, pour corn kernels into the skillet over medium heat (adding a little olive oil if there's not enough grease) and cook 5-6 minutes or until heated through. Stir in 2 teaspoons of taco seasoning towards the end of cooking. Pour the hot corn over the cream cheese and sausage mixture. Stir together until well combined (it'll take a bit, but it'll come together). Carefully unroll packages of crescent rolls, separating them into long triangles. Place triangles, points out, in a sun-like ring (allowing bases of the triangles to overlap). Press down on the overlapping bases to flatten the center of the ring to a consistent thickness. (If you'd like to see a video of these steps, I loved this one). Spoon sausage mixture all around the ring (you'll need to really pile it high) and then tuck the points up and over the mixture. Bake until golden brown (let it get really golden to avoid doughiness), around 15 minutes. During the last few minutes of cooking, top it with cheddar cheese. Serve with salsa, cilantro, sour cream, chips, and guacamole. |
|
Метки: recipe meal |
Stuffed mushrooms! |
sesame_seeds at Stuffed mushrooms!


|
Метки: recipe meal |
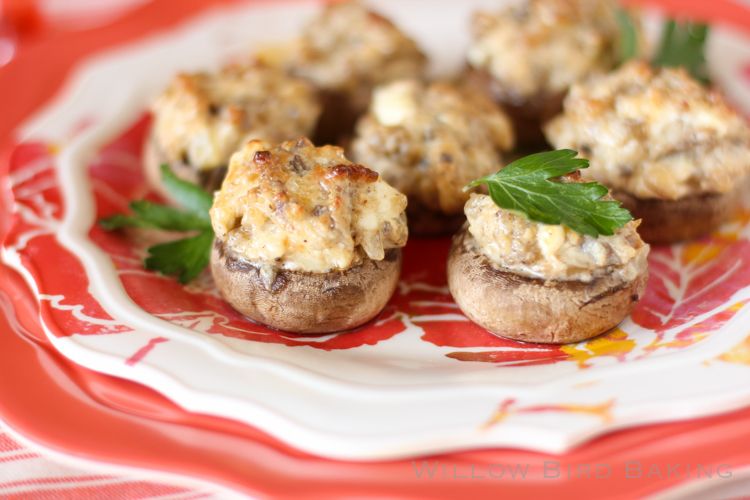
Sausage and Thyme Stuffed Mushrooms |
layers_of_eli at Sausage and Thyme Stuffed Mushrooms
| Sausage and Thyme Stuffed Mushrooms Recipe by: Very slightly adapted from Pioneer Woman Yield: 6 servings Ingredients: 24 ounces white button mushrooms 1 (8-ounce) package cream cheese, softened 1 egg yolk 3/4 cup grated parmesan cheese 1/4 teaspoon dried thyme 1/2 pound hot pork sausage 1/2 medium onion, finely diced 4 cloves garlic, minced 1/3 cup dry white wine (I used Sauvignon Blanc) salt and pepper Directions: Preheat the oven to 350 degrees F and line two baking sheets with aluminum foil. Clean the mushrooms and cut their stems out, finely chopping and reserving the stems. Place the hollowed out mushroom caps on a foil-lined baking sheet. Combine the softened cream cheese and egg yolk in a large bowl. Add in the grated parmesan and thyme. In a medium skillet over high heat, brown the sausage. When it's browned, remove it with a slotted spoon to the bowl with the cream cheese mixture. Let it sit and melt the cheese while you cook the onions until softened in the remaining sausage drippings, about 2 minutes. Add garlic and cook for about 30 seconds before adding in white wine to deglaze the pan. Cook until the liquid is gone, about 2 minutes. Add in the mushroom stems and cook until they're tender, about 2 minutes. Spoon the mixture into the cream cheese bowl and mix it all together. Salt and pepper this mixture to taste. Pile each mushroom cap high with the cream cheese mixture. Bake for 20-25 minutes or until firm. Let the mushrooms cool a few minutes, serving warm. |
|
Метки: recipe meal |
Double Crust Peach Pie made with Fresh Peaches |
hardboiledblond at Double Crust Peach Pie made with Fresh Peaches
|
Метки: recipe dessert |
Peanut Butter Lovers'/Converts' Chocolate Oat Bars |
bubblebubba at Peanut Butter Lovers'/Converts' Chocolate Oat Bars
Directions:
|
Метки: recipe dessert |
Pumpkin spice latte doughnuts |
paradisefraud at Pumpkin spice latte doughnutsDoughnuts? Donuts? Little round doughy bits that taste quite alright. I love the smell of pumpkin spice lattes, but a gnarly caffeine allergy deters me from a morning cuppa. That's okay. I found Krakus, from Poland! I picked it up at my local Bulk Barn. Nope, It's not exactly like coffee, because it's made from the extracts of roasted barley, chicory, rye and beet roots. It does have that nice roasted, full, flavour coffee seems to have. I've made this little ditties in mini muffin and mini doughnut pans, and they turned out nice! The glaze is a ganache made of melted dairy-free white chocolate and a few tablespoons of extremely strong Krakus. This would be rad with a dark chocolate as well, I'm sure!

Ingredients I
1/2 tsp apple cider vinegar
2 tbsp dairy free milk - I used Almond Breeze's almond coconut milk
1/4c strong coffee / coffee substitute (or just more milk alt)
1/2c canned pureed pumpkin
1/4c white sugar
2 tbsp brown sugar, packed
1/4c butter (melted)
Ingredients II
2 tsp baking powder
1/4 tsp baking soda
2 tsp pumpkin pie spice
1/2 tsp salt
1 1/2c flour
Glaze
3/4 cup dairy free white chocolate (bark/chips/bar)
2-3 tbsp strong coffee / coffee sub
In a bowl, combine your dairy free milk and ACV. Stir, and add in the rest of Ingredients I. In a separate, larger bowl, sift in all of Ingredients II. Make a well, and add in your wet ingredients. The consistency will be doughy, a bit sticky, and a bit like a pizza dough (minus the puffiness the yeast provides, but you already know this).
Spoon batter into trays. Don't be afraid to smooth out the tops of batter, it'll then rise nice and evenly. In my picture, I could have smoothed them out more, but let's be real, it was midnight and they had to get to a birthday girl bright and early.
Bake at 350F for 10-12 minutes or until your toothpick comes out clean.
Let sit in the trays for 10 minutes, before removing and placing on a cooling rack.
Once fairly cooled, you can begin making your Glaze. To do this, microwave ..or double-boiler, or VERY carefully put in a saucepan on low!.. your chips until fully melted, stirring a heap. Add in 2 tbsp of your coffee/sub, and see if you like the consistency and flavour. It should be thin enough to drizzle, but thick enough to not run all over the place and be a major bummer. I dunked a fork in my glaze and drizzled each piece. If your glaze starts hardening, nuke it for a few shakes.
Recipe originally posted to The Hardcore Herbivore!
|
Метки: recipe dessert |
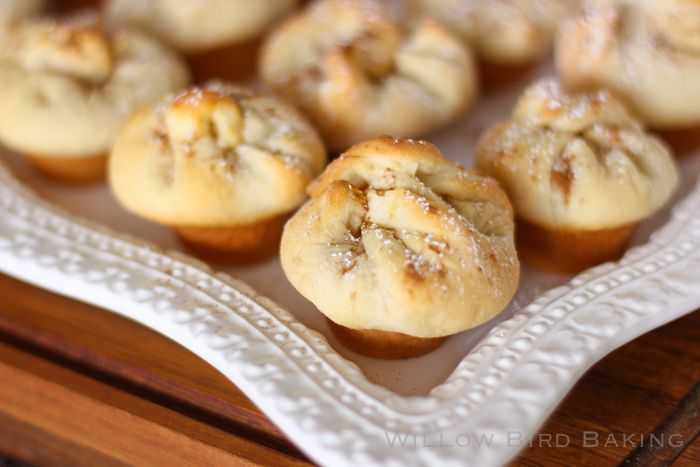
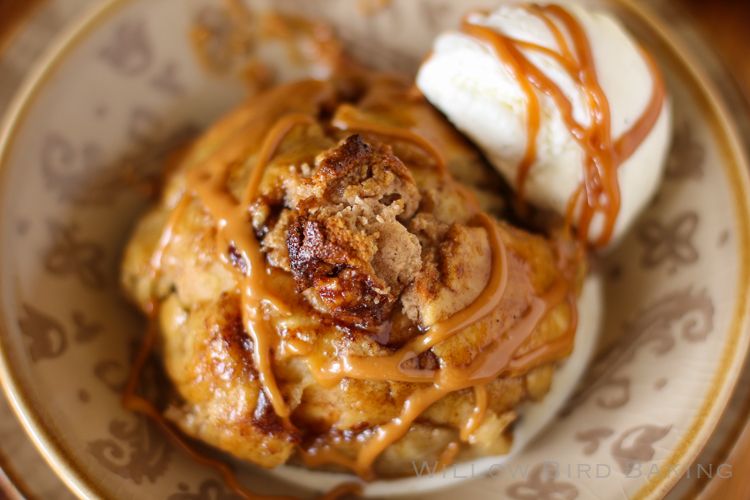
Baked Caramel Apple Cheesecake Dumplings |
layers_of_eli at Baked Caramel Apple Cheesecake Dumplings
| Baked Caramel Apple Cheesecake Dumplings Recipe by: Willow Bird Baking, adapted from Brown Eyed Baker and Taste of Home Yield: 4 servings Baked Apple Dumplings with a cinnamon cheesecake center. These are a heavenly fall dessert! Pastry Ingredients: 1 1/2 cups all-purpose flour 1/2 teaspoon salt 1/4 cup lard or vegetable shortening, chilled 1/4 cup butter, chilled and cut into cubes 3 tablespoons ice water Apple Ingredients: 4 medium apples, peeled 2 1/2 tablespoons granulated sugar 2 teaspoons ground cinnamon Cheesecake Ingredients: 1 (8-ounce) package cream cheese, softened 3 tablespoons teaspoons sugar 2 teaspoon ground cinnamon 1/2 teaspoon nutmeg 1/2 teaspoon ginger 1 egg Sauce Ingredients: 3/4 cups light brown sugar 1/2 cup water 1/4 cup butter, cubed pinch salt Werther's Original® Baking Caramels, melted toasted pecans* Directions: *Note: To toast pecans, spread them out on a baking sheet and bake at 350 degrees F for about 6 minutes or until fragrant, tossing several times. Make the pastry: Pulse the flour and salt together in the bowl of a food processor to combine. Add the lard in hunks and pulse for about 10 seconds until it’s the texture of coarse sand. Add in the chunks of cold butter and pulse for about 10 pulses until butter pieces are no larger than small peas. Add 3 tablespoons of ice cold water and turn food processor on low — the dough should form a dough ball in a few seconds. If the dough remains crumbly and doesn’t come together, add another tablespoon of water. Add as little water total as is required for the dough to form a ball. Divide the dough into 4 equal portions on sheets of plastic wrap, form each into a disk, and chill for at least 20-30 minutes while completing the rest of the recipe. Make the cheesecake: In a medium bowl, mix the cheesecake filling ingredients together. Scrape the filling into a ziplock bag and chill while you complete the rest of the recipe. Prepare the apples: Core each of your peeled apples, taking out a core of about 1 to 1 1/2-inch diameter so you have space for your cheesecake filling. Mix together the 2 1/2 tablespoons sugar and 2 teaspoons cinnamon to form a cinnamon-sugar mixture and roll each apple in the mixture. Reserve any leftover cinnamon-sugar mixture. Assemble: Preheat the oven to 350 degrees F and spray a 9 x 13-inch baking dish with cooking spray. Roll out each portion of the pie pastry on a lightly floured surface to a rough 7-inch square. Place an apple on the center of each. Cut off the corner of the ziplock bag of cheesecake filling and pipe filling into the center of each apple. Then pull up the corners of the pie pastry and tuck each corner into the center of the apple, pinching the dough together to seal. Place the apples into the prepared baking dish and sprinkle with the remaining cinnamon-sugar mixture. Make the sauce: Heat the brown sugar, water, and butter in a medium saucepan over medium-high heat until it boils, stirring occasionally. Pour the sauce over the apples and bake them, basting occasionally, for 50 to 55 minutes or until tender and golden brown. If the cheesecake seems to be getting too dark on top, cover it with a snippet of foil. Serve warm with vanilla bean ice cream, a drizzle of melted Werther's caramel, and toasted pecans. |
|
Метки: recipe dessert |
The Very BEST Tiramisu (Recipe from America's Test KItchen) |
bubblebubba at The Very BEST Tiramisu (Recipe from America's Test KItchen)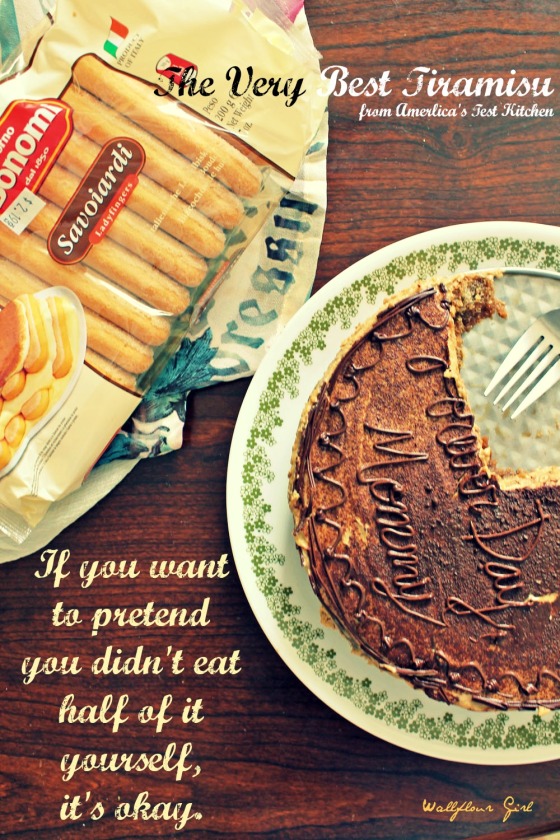
Directions:
1. Stir coffee, espresso, and 5 tablespoons rum in a wide bowl or baking dish until espresso dissolves; set aside.
2. In bowl of standing mixer fitted with whisk attachment, beat yolks at low speed until just combined. Add sugar and salt and beat at medium-high speed until pale yellow, 1-1/2 to 2 minutes, scraping down bowl with rubber spatula once or twice. Add remaining 4 tablespoons rum and beat at medium speed until just combined, 20 to 30 seconds; scrape bowl. Add mascarpone and beat at medium speed until no lumps remain, 30 to 45 seconds, scraping down bowl once or twice. Transfer mixture to large bowl and set aside.
3. In now-empty mixer bowl (no need to clean bowl), beat cream at medium speed until frothy, 1 to 1-1/2 minutes. Increase speed to high and continue to beat until cream holds stiff peaks, 1 to 1-1/2 minutes longer. Using rubber spatula, fold one-third of whipped cream into mascarpone mixture to lighten, then gently fold in remaining whipped cream until no white streaks remain. Set mascarpone mixture aside.
4. Working one at a time, drop half of ladyfingers into coffee mixture, roll, remove and transfer to 13 by 9-inch glass or ceramic baking dish–I used one 9×9-inch springform baking pan (it makes for a great appearance) and one 4×6-inch casserole dish. (Do not submerge ladyfingers in coffee mixture; entire process should take no longer than 2 to 3 seconds for each cookie.) Arrange soaked cookies in single layer in baking dish, breaking or trimming ladyfingers as needed to fit neatly into dish.–Helpful tip: What the instructions mean hear is basically that you should lightly and quickly roll your ladyfingers in the coffee mixture; don’t dunk them in for a long period of time, or they will get soggy in your tiramisu.
5. Spread half of mascarpone mixture over ladyfingers; use rubber spatula to spread mixture to sides and into corners of dish and smooth surface. Place 2 tablespoons cocoa in fine-mesh strainer and dust cocoa over mascarpone.
6. Repeat dipping and arrangement of ladyfingers; spread remaining mascarpone mixture over ladyfingers and dust with remaining 1-1/2 tablespoons cocoa. Wipe edges of dish with dry paper towel. Cover with plastic wrap and refrigerate 6 to 24 hours. Sprinkle with grated chocolate, if using; cut into pieces and serve chilled.
|
Метки: recipe dessert |
Baklava |
delissimo at Baklava


|
Метки: recipe dessert |


