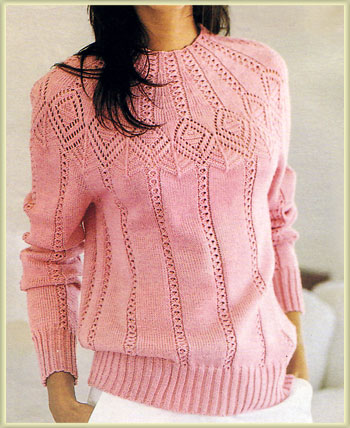
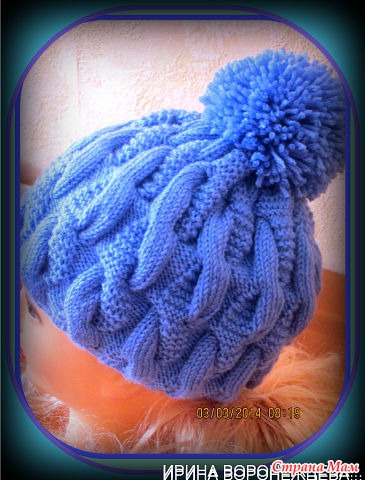
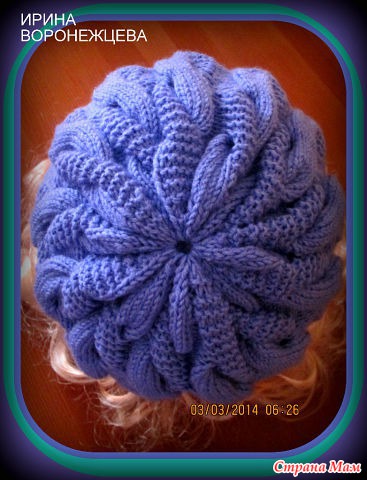
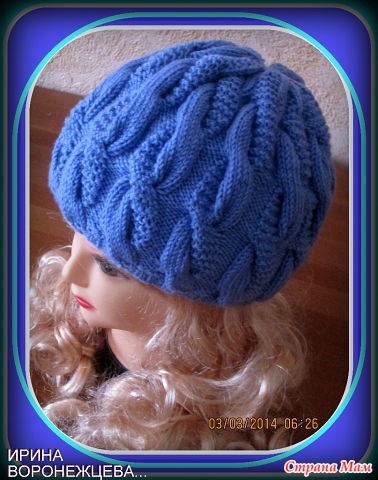
ПУЛОВЕР С АЖУРНЫМ РИСУНКОМ. |
|
ОБОЗНАЧЕНИЯ В ЯПОНСКИХ СХЕМАХ.. |
Узоры в японских схемах обычно включают также изнаночные ряды, но петли в нем изображены так, как при круговом вязании. При вязании прямыми и обратными рядами нужно в рядах с изн. стороны изделия вязать петлю так, как она была бы видна с лицевой стороны (то есть если на схеме лицевая - вязать изнаночную, на схеме изнаночная - вязать лицевую и т.д.).
JIS = Japanese Industrial Standards - японские промышленные стандарты
| JIS | Описание |
|---|---|
   |
K - Knit - Лицевая. Диагональные черточки - обычные лицевые, которые наклонены влево или вправо из-за убавленных или прибавленных петель рядом с ними. |
 |
P - Purl - Изнаночная |
 |
Twist Stitch - K1tbl - Скрещенная лицевая петля (или лицевая за заднюю стенку) |
 |
Скрещенная изн. петля  |
 |
CO - Loop Cast-on - Набор воздушными петлями |
 |
YO - Yarn Over - Накид |
 |
KLL - Knit Left Loop - добавить 1 петлю = 1 лицевая, теперь левой спицей подцепить левую дужку петли на 2 ряда ниже только что провязанной, 1 лицевая в эту дужку за заднюю стенку  |
 |
KRL - Knit Right Loop - правой спицей подцепить правую дужку петли, находящейся на 1 ряд ниже следующей петли на левой спице. 1 лицевая в эту дужку, 1 лицевая в следующую петлю |
 |
Over Increase - лиц, изн, лиц из одной и той же петли |
 |
CO - Cast Off - Закрытие петли |
 |
K2tog - Knit 2 Stitches Together - 2 вместе лицевой |
 |
SKPO - Slip, Knit, Pass Over - 2 вместе лицевой протяжкой (или с наклоном влево)  |
 |
2 вместе изнаночной с наклоном влево  |
 |
Double Vertical Decrease - 3 вместе лицевой, средняя петля сверху |
 |
Double Right-Slanting Decrease - 3 вместе лицевой |
 |
SK2P - Double Left-Slanting Decrease - 3 вместе лицевой = 1 снять, 2 вместе лицевой, протяжка |
 |
2-st Left Cross - коса из 2-х лицевых, 2-я петля сверху |
 |
2-st Right Cross - коса из 2-х лицевых, 1-я петля сверху. |
 |
Коса из 2-х лицевых, 1-я скрещенная петля сверху. |
 |
Left Stitch Pass Through Right Stitch - 2 следующие петли развернуть на левой спице, первую перекинуть через вторую, провязать эти две петли лицевыми |
 |
Right Stitch Pass Through Left Stitch - 2 следующие петли на левой спице провязать лицевыми, предварительно перекинув вторую петлю через первую |
 |
SL - Slip Stitch - Снять петлю |
 |
SL (purlwise) - Slip Purlwise Stitch - снять петлю как при вязании изнаночной |
 |
KB - Knit stitch in row below - лицевая в петлю на 1 ряд ниже |
 |
Twist Stitch in row below - скрещенная лицевая в петлю на 1 ряд ниже |
 |
 |
 |
 |
 |
Stitch Over - перекинуть петлю через одну или несколько. Ввести правую спицу в третью петлю на левой спице и перекинуть ее через 2 петли - 1 петля убавлена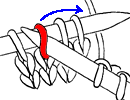 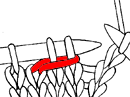 |
Пример 1. Прямоугольник 10 петель на 8 рядов. Набор петель. Закрытие петель.

Пример 2. Трапеция. Убавить 3 раза по 1 петле в каждом 4-м ряду.


Пример 3. Кривая линия. Закрыть 3 петли в начале ряда, затем закрыть 2 петли и 2 раза по 1 петле.


Использован материал: The Basics of Japanese Knitting
http://knitting-club.blogspot.com
|
РОЗОВЫЙ АЖУРНЫЙ ПУЛОВЕР СПИЦАМИ |
|
COUTUREKNIT / 13 |
|
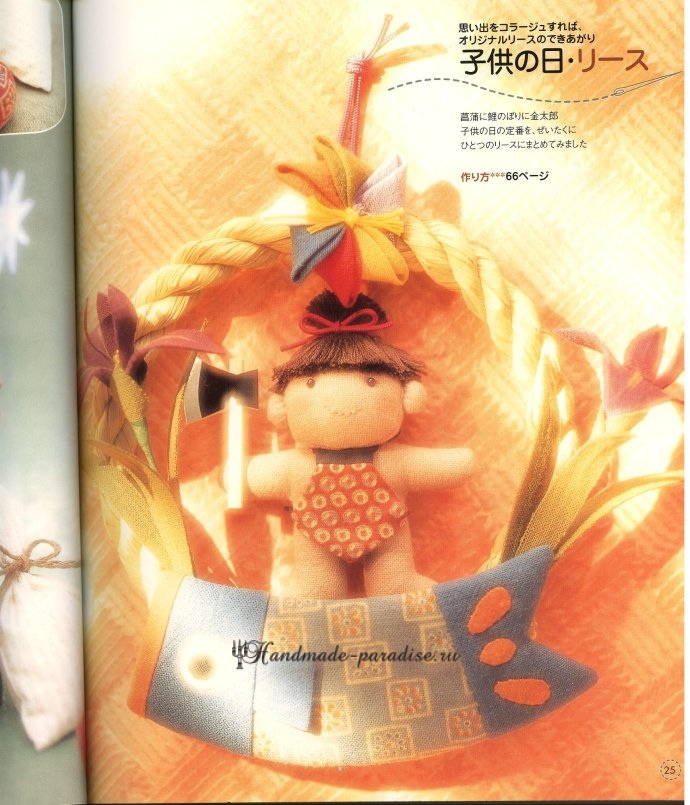
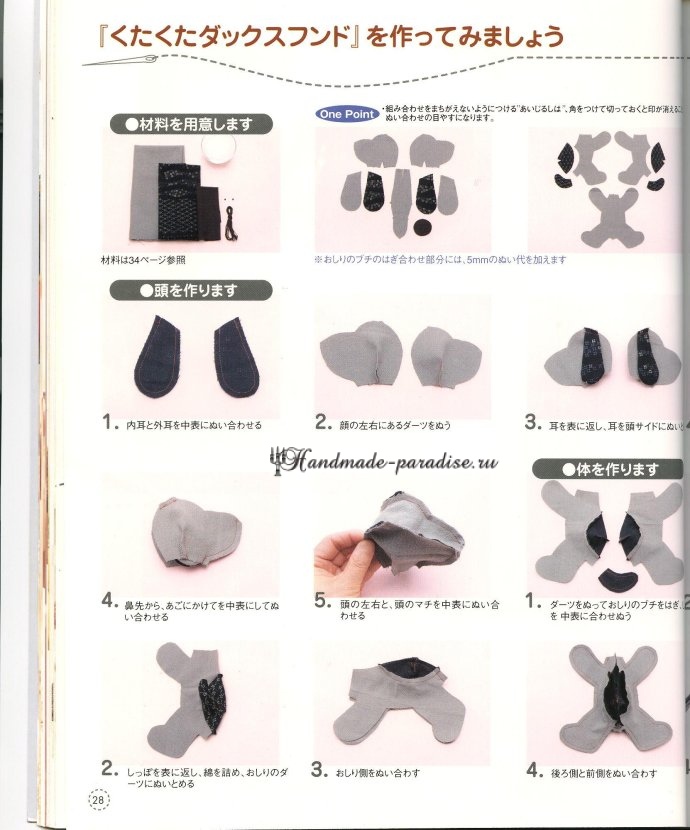
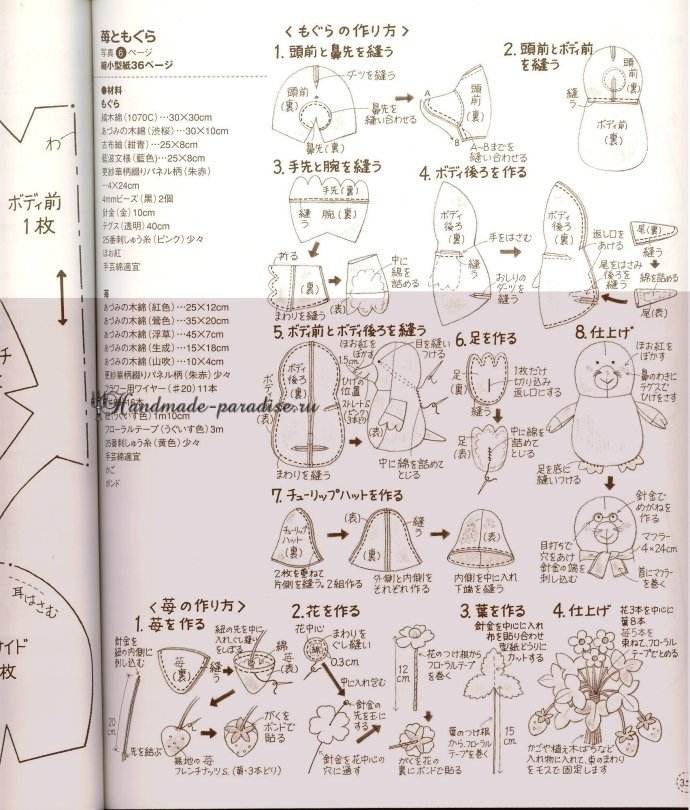
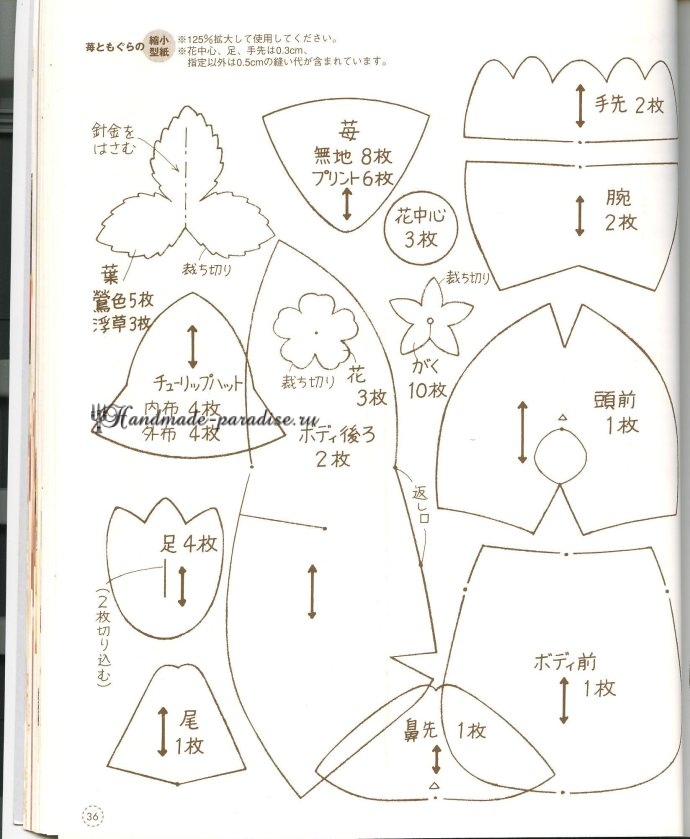
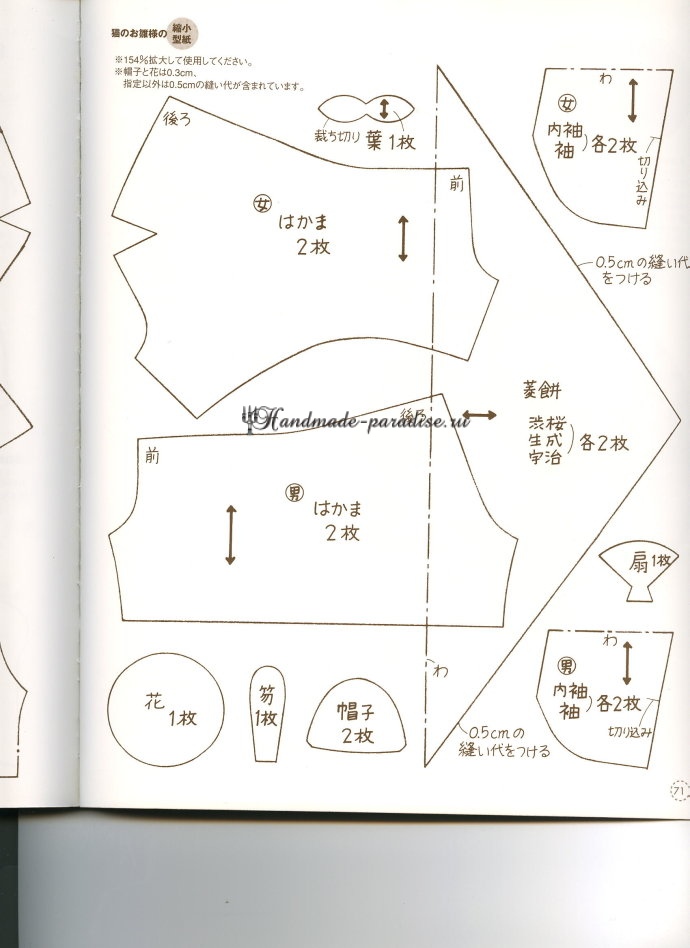
Шьем игрушки. Журнал с выкройками |
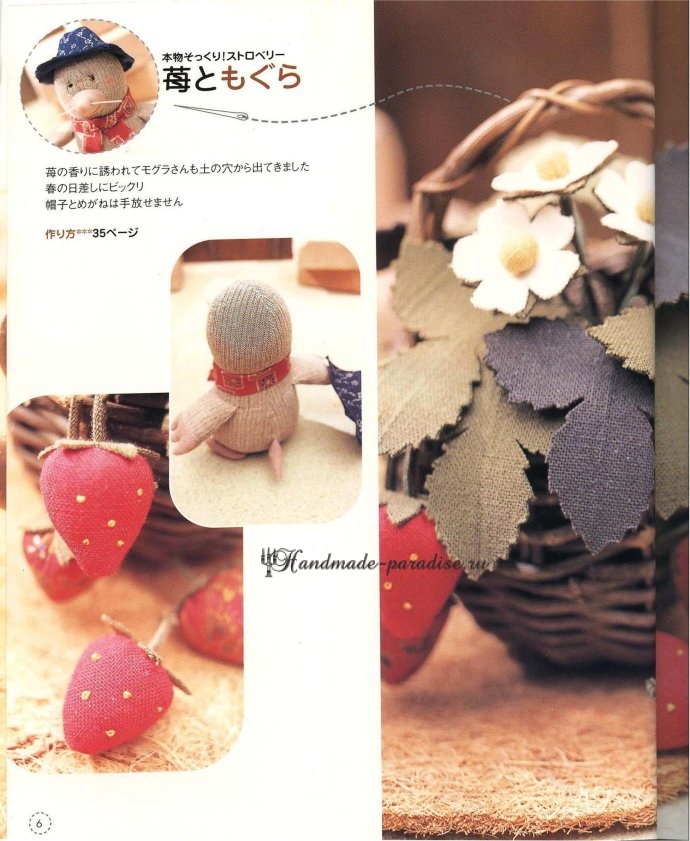
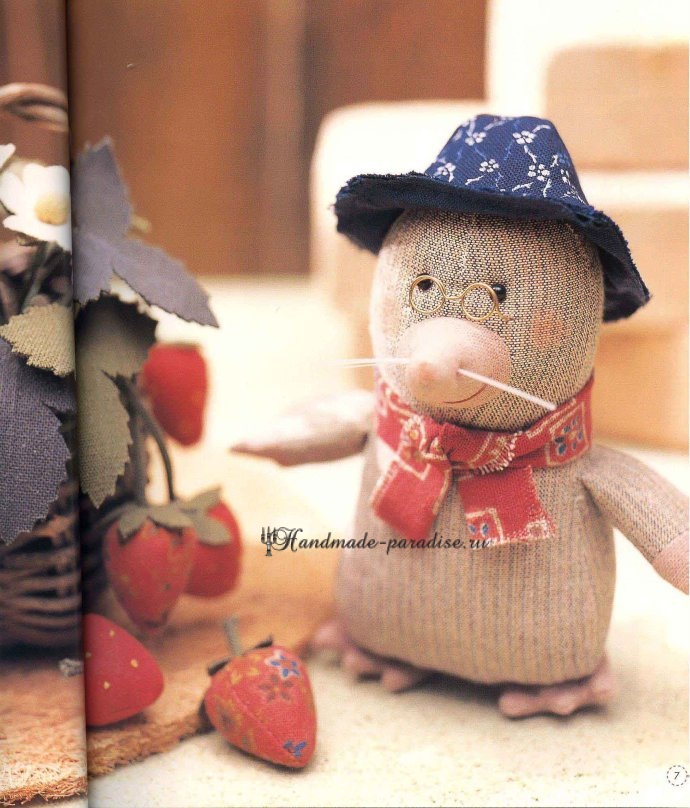
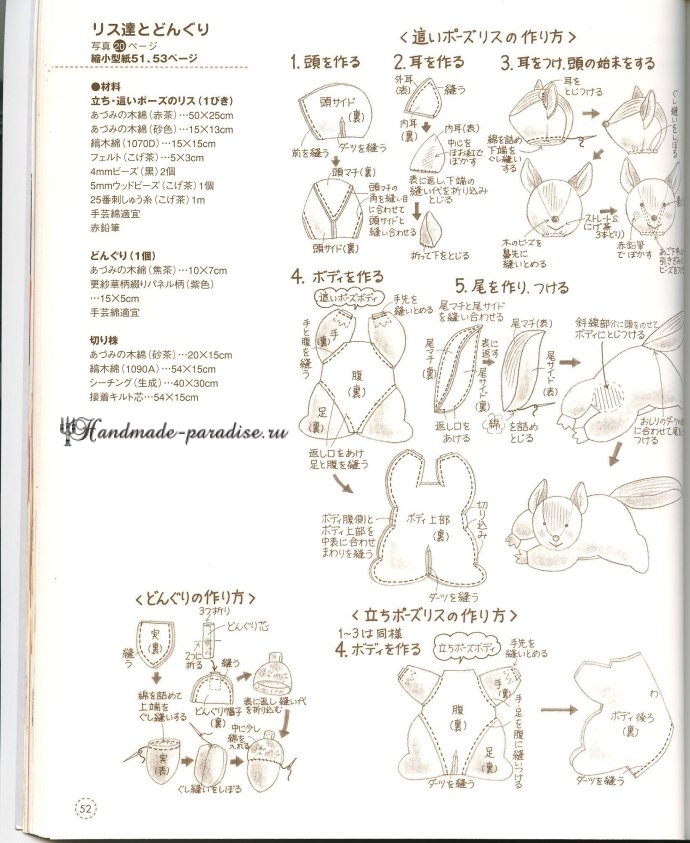
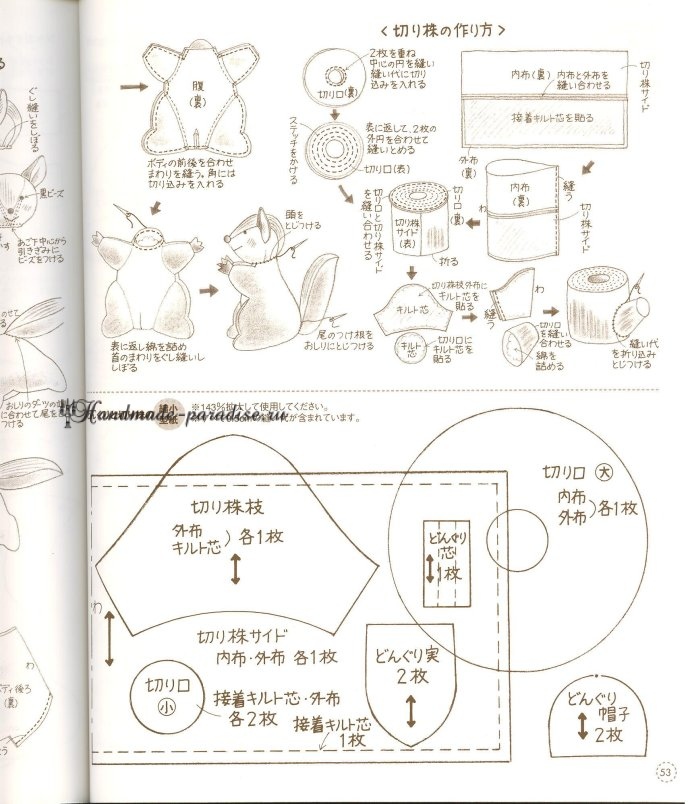
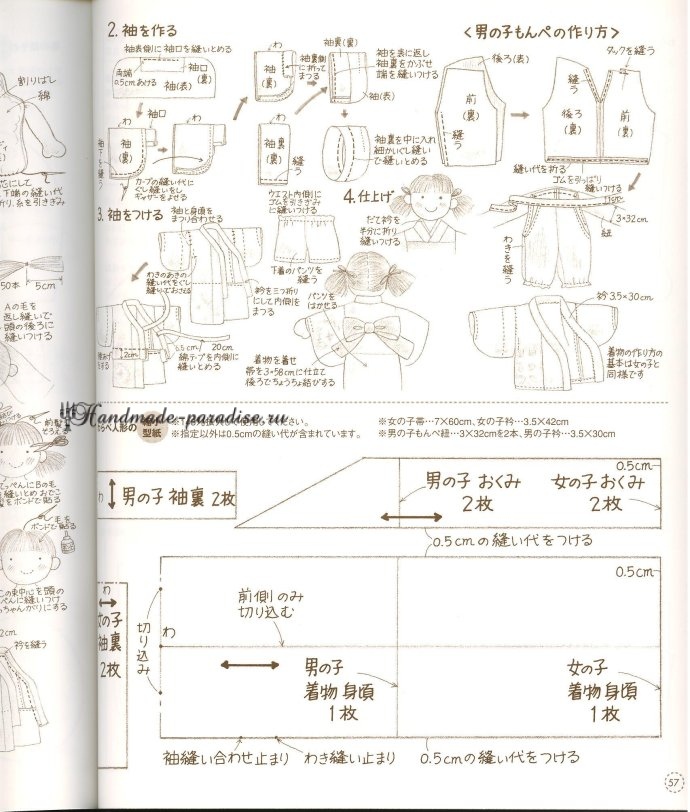
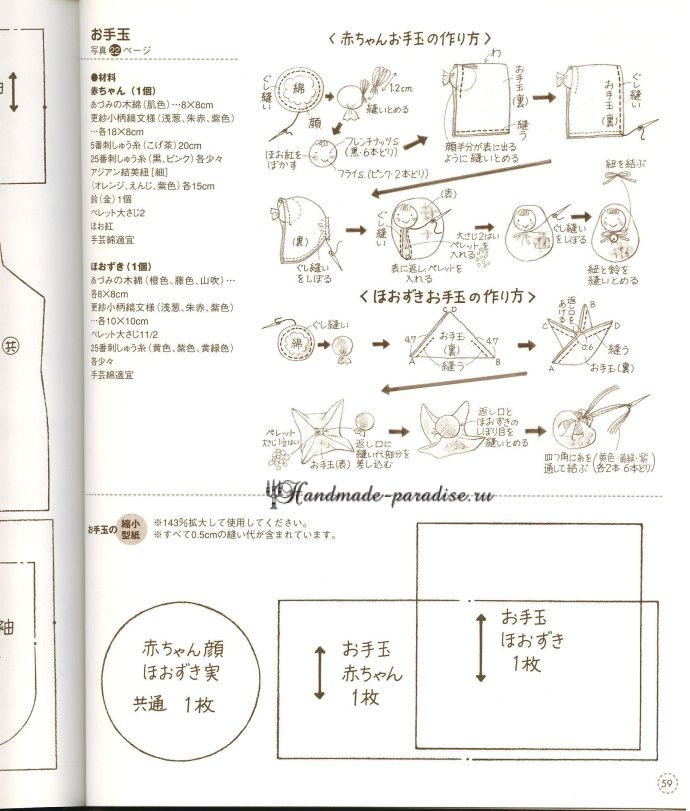
Шьем игрушки. Журнал с выкройками текстильных игрушек от японских издателей. В журнале вы найдете выкройки следующих игрушек: кролика, пингвина, собачки, черепашки, крота, кошки, мышки, медвежонка, лягушки, курочки, цыпленка, лисички, обезьянки, куколки, рождественского оленя и белочки. Шейте игрушки на радость малышам!
Источник http://handmade-paradise.ru/shem-igrushki-zhurnal-s-vyikroykami/



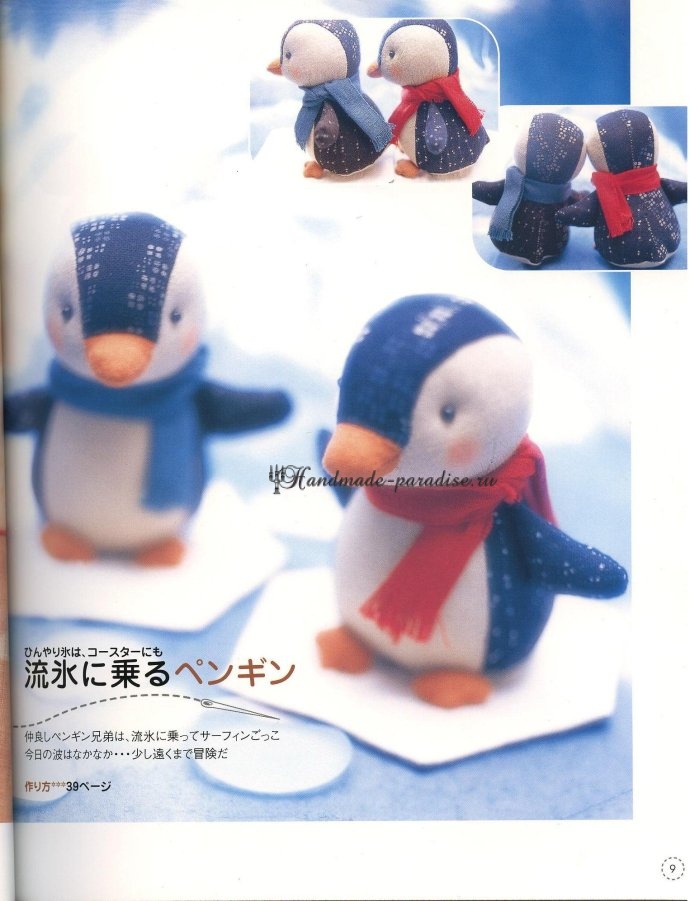


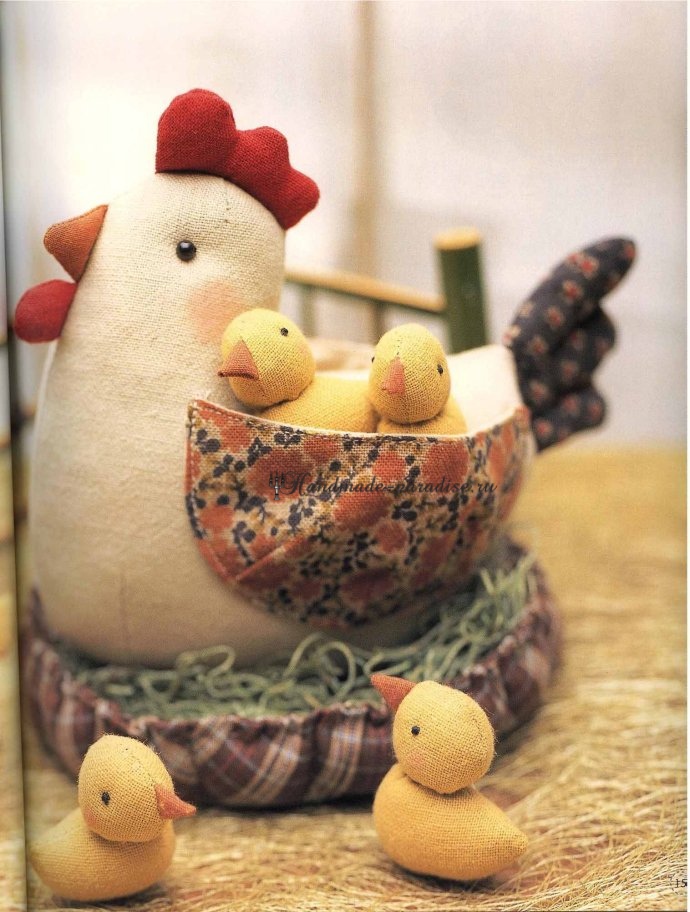


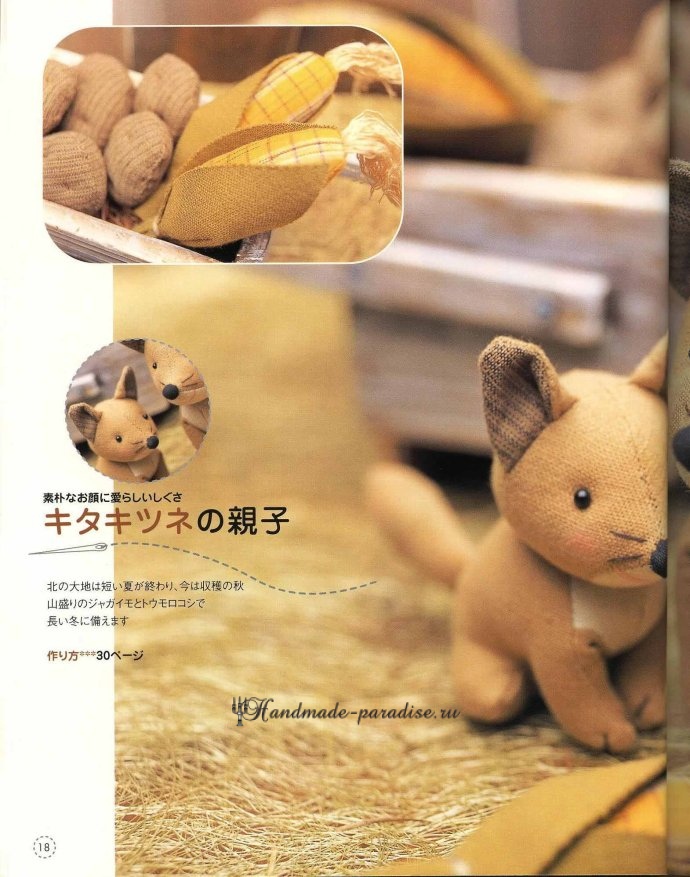
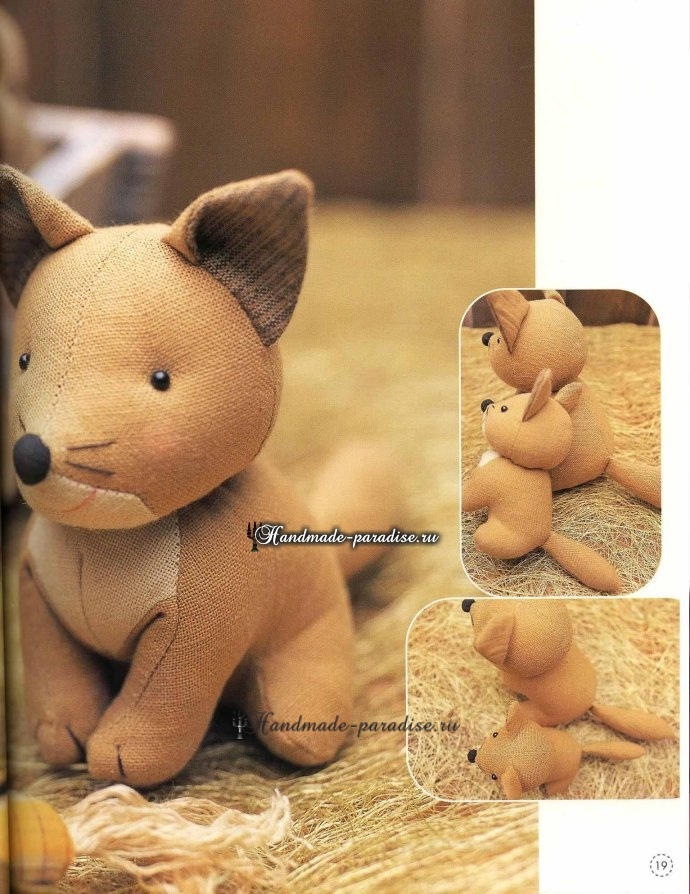
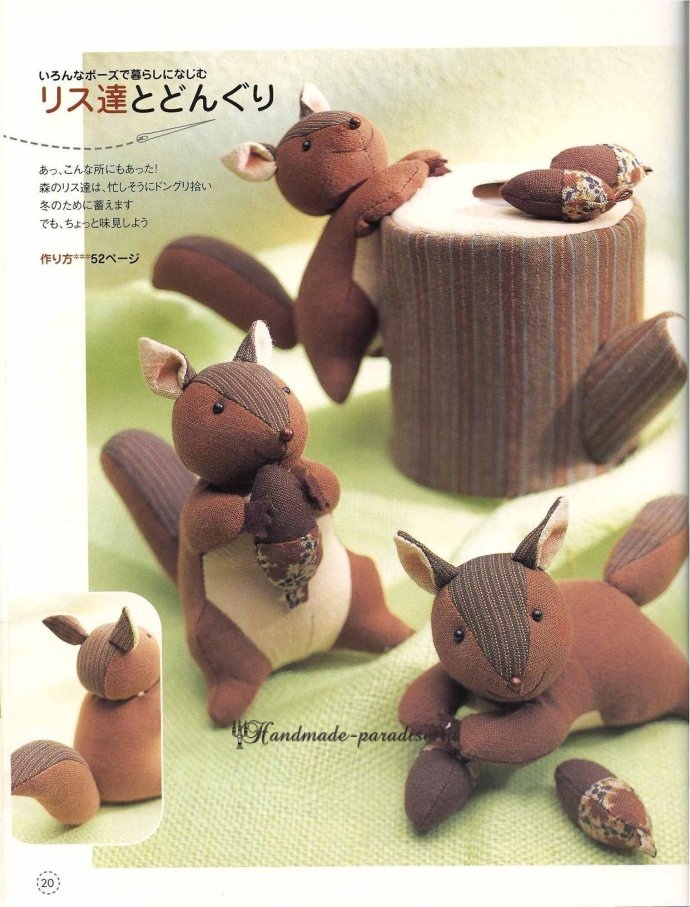
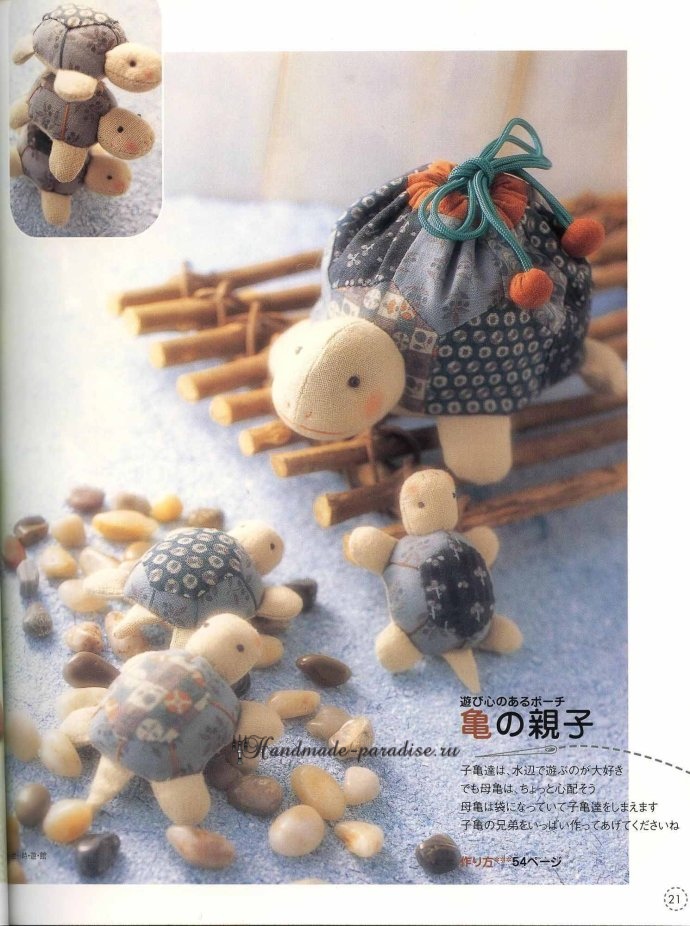
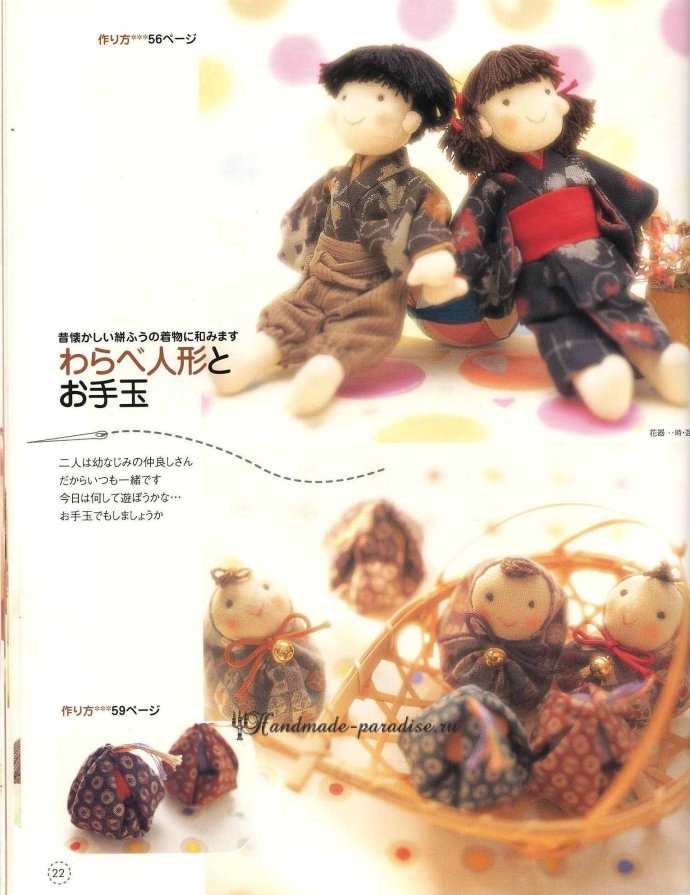

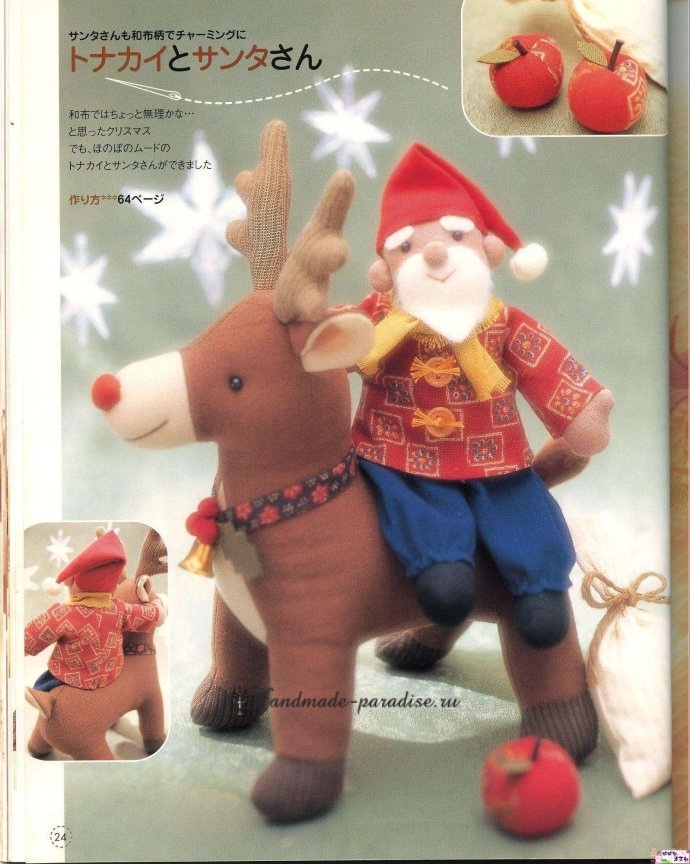




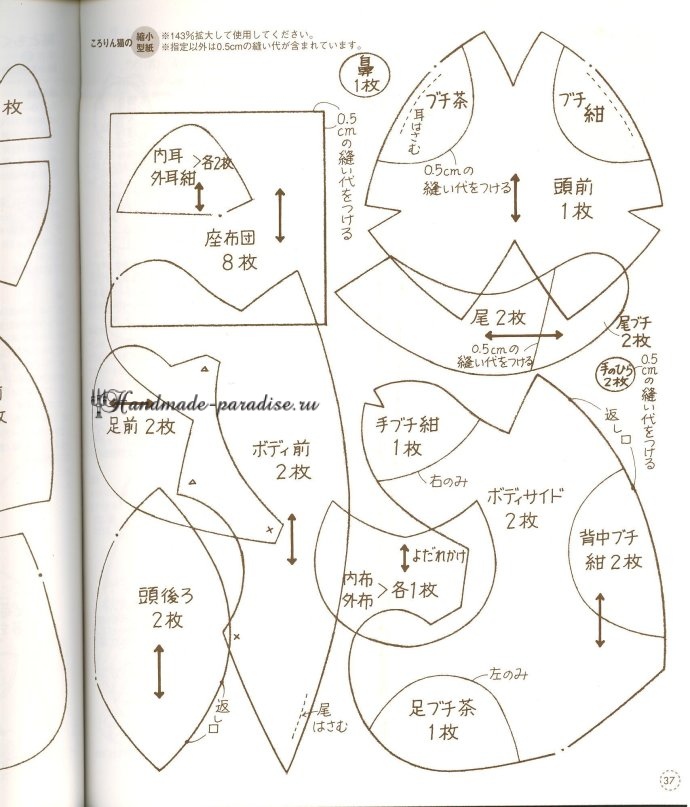


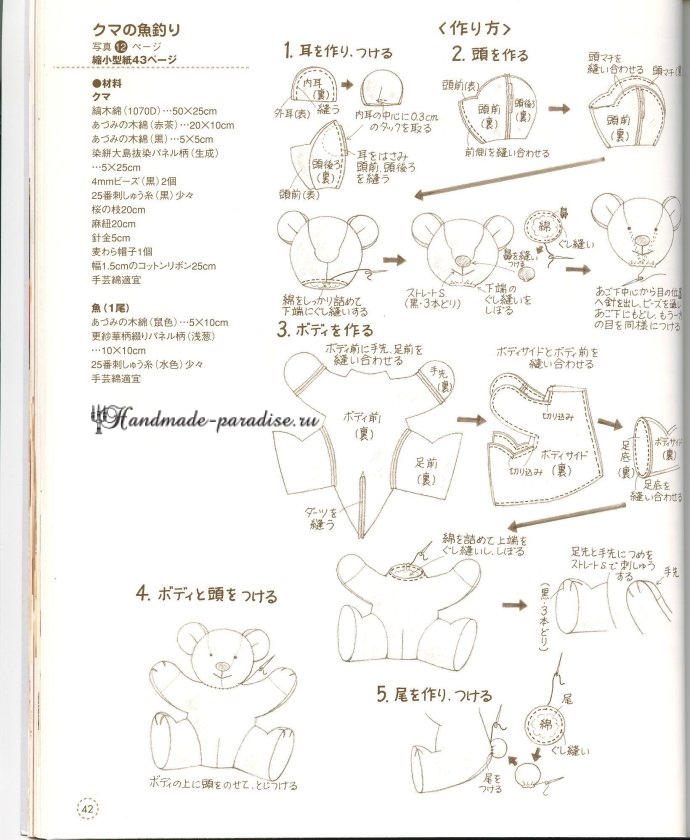


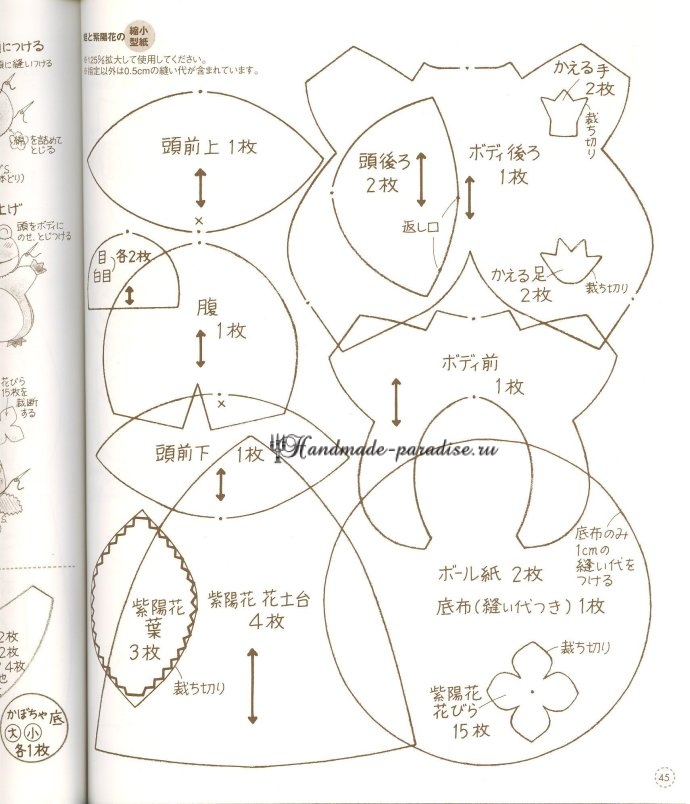


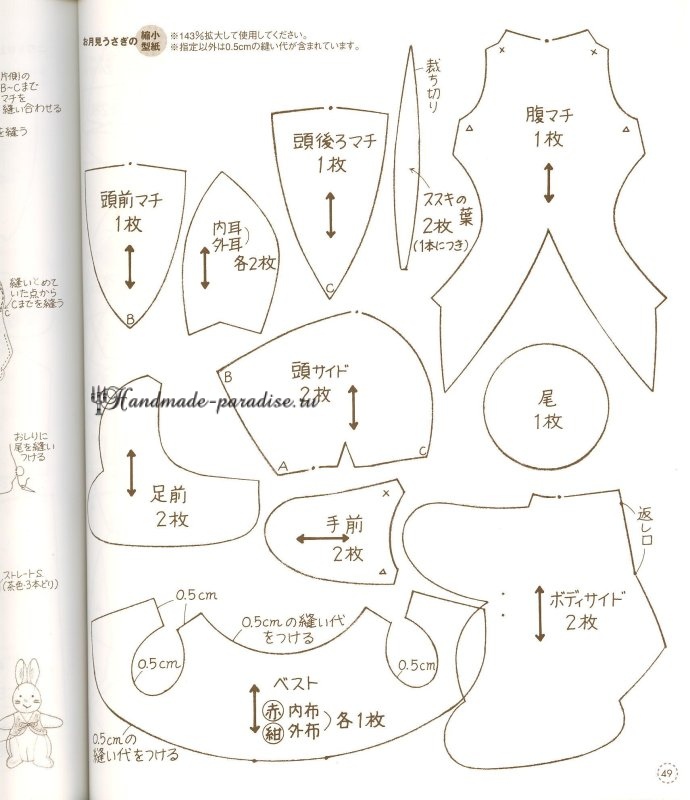







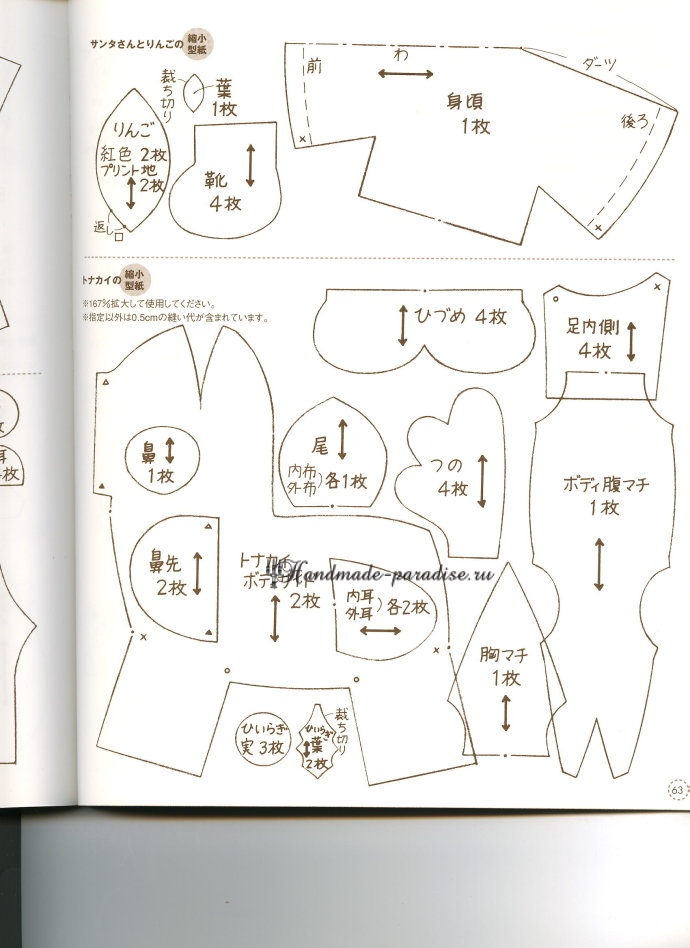


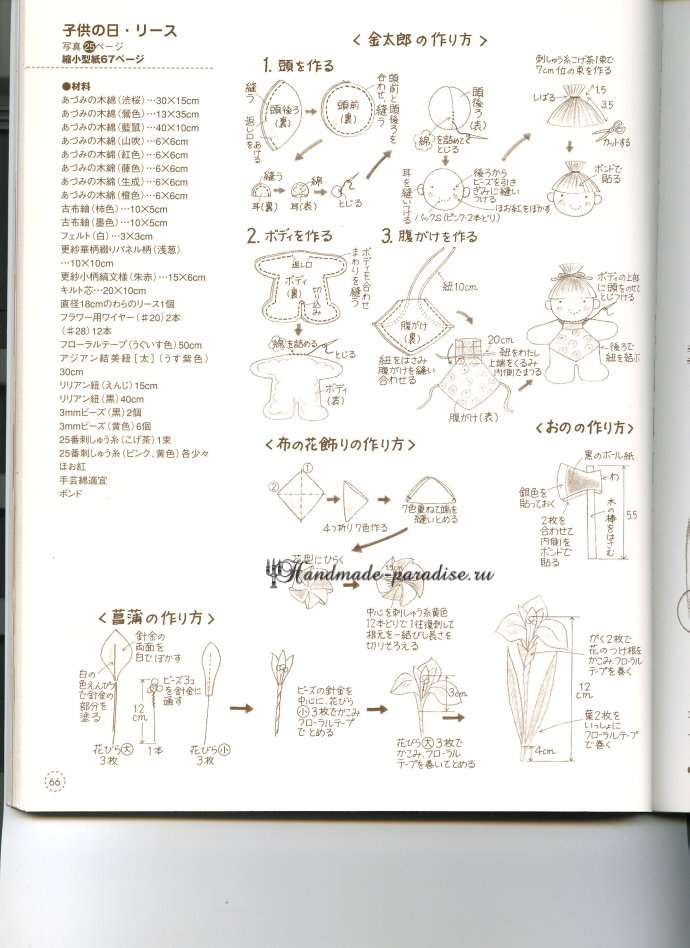

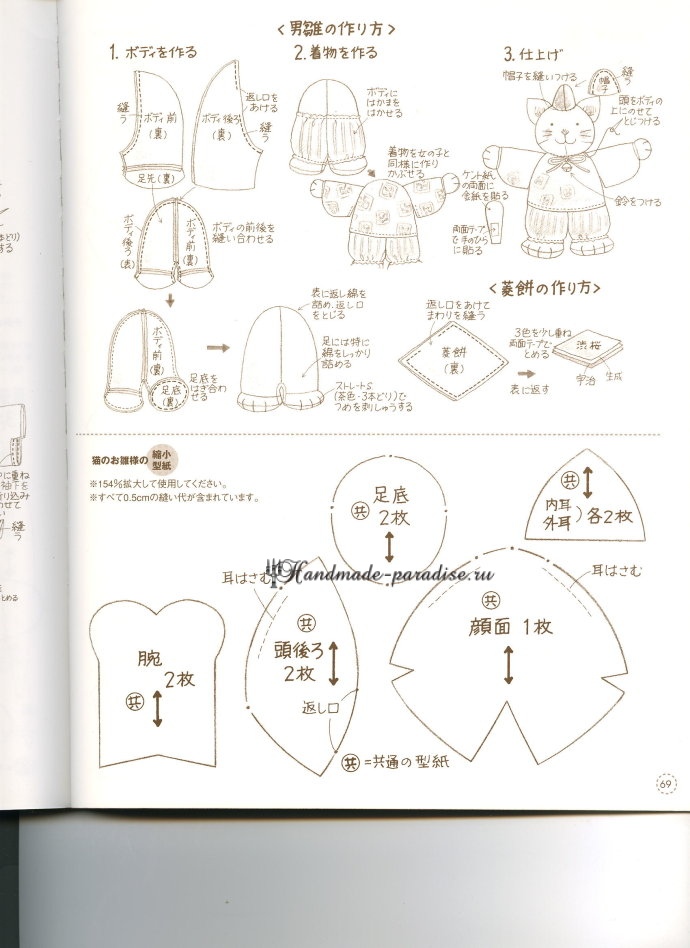
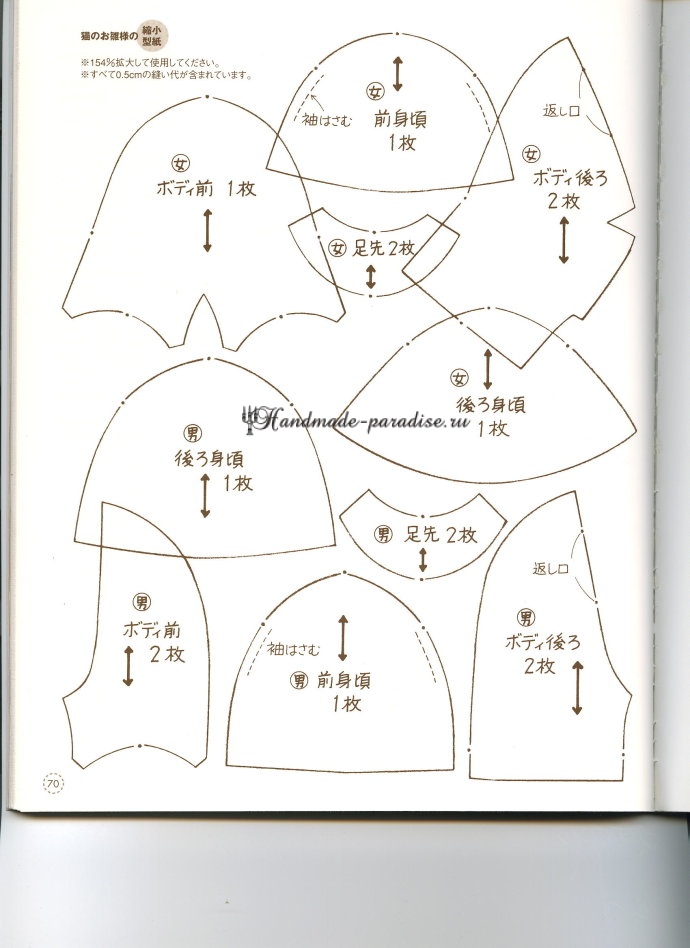
|
ШИТЬЕ ИГРУШЕК. ЯПОНСКИЙ ЖУРНАЛ С ВЫКРОЙКАМИ |
Шитье игрушек. Японский журнал с выкройками
|
ШАПОЧКА-ОВЕЧКА |
Взято здесь: http://www.repeatcrafterme.com/2013/04/crochet-lamb-hat-pattern.html?m=1

The sweet little baby that is growing in my tummy got me thinking of all the cute hats I need be making in preparation for his/her arrival. I loved the idea of making a lamb hat and I had to make a boy version and a girl version since we don’t know the gender yet. There are lots of different yarns you could use to create different effects and you can even add some felt accents to create a lamb face. I can’t wait to see what you come up with! Be sure to post your finished hat on my Facebook page for all to see 


Row 11: SC decrease, and continue to SC around hat and earflaps, when you get to the top of each earflap: chain 40 (or as long/short as you wish), slip stitch in 2nd chain from hook and the rest of the way down the chain. Continue to SC around the hat and fasten off when you get the entire way around.


|
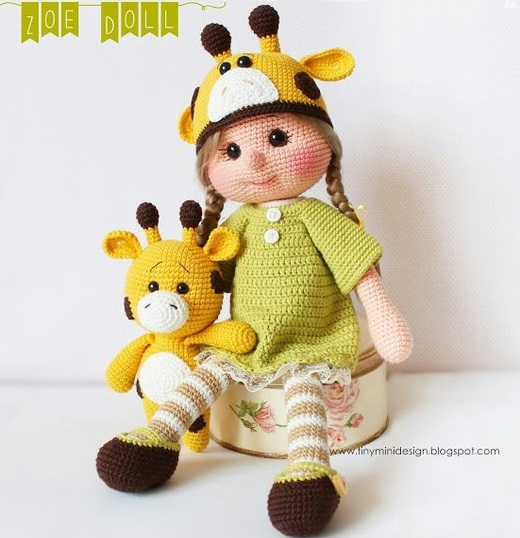
Жираф и куколка Зоя крючком. Описание |
Жираф и куколка Зоя крючком. Описание вязания крючком игрушек для малышей — куколки Зои в шапочке и ее друга — желтенького жирафа.
 /handmade-paradise.ru/wp-content/uploads/2017/01/ZHiraf-i-kukolka-Zoya-kryuchkom.-Opisanie-2-215x300.jpg" target="_blank">http://handmade-paradise.ru/wp-content/uploads/201...uchkom.-Opisanie-2-215x300.jpg 215w" style="margin: 0px; padding: 0px; border: 0px; font-style: inherit; font-variant: inherit; font-weight: inherit; font-stretch: inherit; font-size: inherit; line-height: inherit; font-family: inherit; vertical-align: baseline; max-width: 100%; height: auto; border-radius: 8px; transition: opacity 0.2s ease;" width="382" />
  /handmade-paradise.ru/wp-content/uploads/2017/01/ZHiraf-i-kukolka-Zoya-kryuchkom.-Opisanie-1-300x173.jpg" target="_blank">http://handmade-paradise.ru/wp-content/uploads/201...uchkom.-Opisanie-1-300x173.jpg 300w" style="margin: 0px; padding: 0px; border: 0px; font-style: inherit; font-variant: inherit; font-weight: inherit; font-stretch: inherit; font-size: inherit; line-height: inherit; font-family: inherit; vertical-align: baseline; max-width: 100%; height: auto; border-radius: 8px; transition: opacity 0.2s ease;" width="467" />
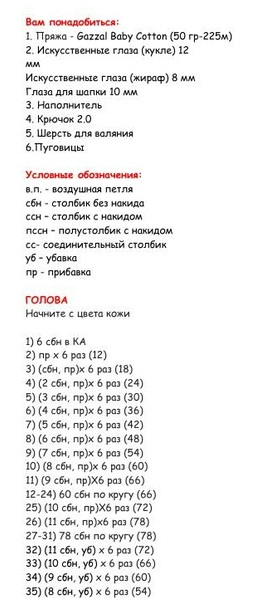
Для работы понадобится:
Описание вязания крючком жирафа. Условные обозначения в описании на китайском языке:
R — ряд
X — столбик без накида
V — прибавка
A — убавка
 /handmade-paradise.ru/wp-content/uploads/2017/01/ZHiraf-i-kukolka-Zoya-kryuchkom.-Opisanie-3-232x300.jpg" target="_blank">http://handmade-paradise.ru/wp-content/uploads/201...uchkom.-Opisanie-3-232x300.jpg 232w" style="margin: 0px; padding: 0px; border: 0px; font-style: inherit; font-variant: inherit; font-weight: inherit; font-stretch: inherit; font-size: inherit; line-height: inherit; font-family: inherit; vertical-align: baseline; max-width: 100%; height: auto; border-radius: 8px; transition: opacity 0.2s ease;" width="557" />
Описание вязания крючком куколки Зои




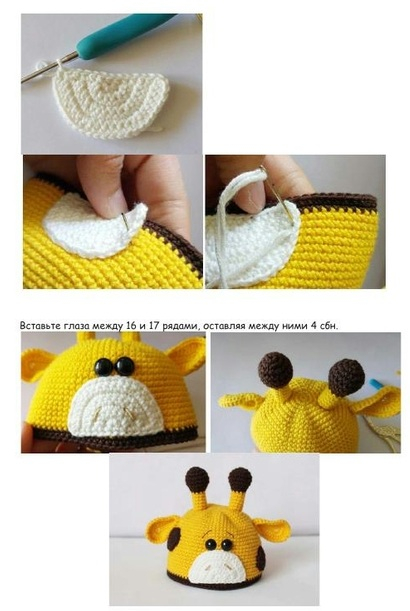
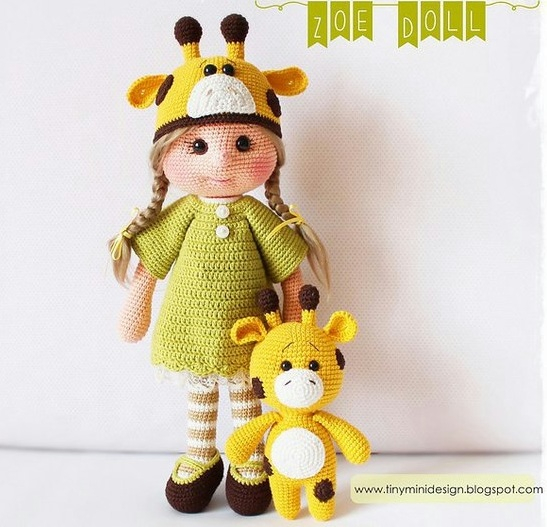
|
Яблочные розы из слоеного теста |
Красивое пирожное небольшого размера в форме розочек украсит любой праздничный стол и покорит даже самого капризного гурмана своей нежностью и ароматом. Для создания яблочных роз вам понадобится минимум ингредиентов — яблоки, слоеное тесто, сахар и немножко корицы. Попробуйте). Розы из слоеного теста понравятся даже тем, кто не очень любит яблоки.
 /handmade-paradise.ru/wp-content/uploads/2016/03/YAblochnyie-rozyi-iz-sloenogo-testa-3-300x209.jpg" target="_blank">http://handmade-paradise.ru/wp-content/uploads/201...z-sloenogo-testa-3-300x209.jpg 300w" style="margin: 0px; padding: 0px; border: 0px; font-style: inherit; font-variant: inherit; font-weight: inherit; font-stretch: inherit; font-size: inherit; line-height: inherit; font-family: inherit; vertical-align: baseline; max-width: 100%; height: auto; border-radius: 8px;" width="563" />
 /handmade-paradise.ru/wp-content/uploads/2016/03/YAblochnyie-rozyi-iz-sloenogo-testa-1-300x213.jpg" target="_blank">http://handmade-paradise.ru/wp-content/uploads/201...z-sloenogo-testa-1-300x213.jpg 300w" style="margin: 0px; padding: 0px; border: 0px; font-style: inherit; font-variant: inherit; font-weight: inherit; font-stretch: inherit; font-size: inherit; line-height: inherit; font-family: inherit; vertical-align: baseline; max-width: 100%; height: auto; border-radius: 8px;" width="599" />
Ингредиенты
 /handmade-paradise.ru/wp-content/uploads/2016/03/YAblochnyie-rozyi-iz-sloenogo-testa-2-300x223.jpg" target="_blank">http://handmade-paradise.ru/wp-content/uploads/201...z-sloenogo-testa-2-300x223.jpg 300w" style="margin: 0px; padding: 0px; border: 0px; font-style: inherit; font-variant: inherit; font-weight: inherit; font-stretch: inherit; font-size: inherit; line-height: inherit; font-family: inherit; vertical-align: baseline; max-width: 100%; height: auto; border-radius: 8px;" width="500" />
Приготовление
Вымыть и высушить яблоки, не срезая кожуры, нарезать тонкими ломтиками. Затем сложить в миску с соком одного лимона и немножко подержать, это предохранит яблоки от потемнения.
 /handmade-paradise.ru/wp-content/uploads/2016/03/YAblochnyie-rozyi-iz-sloenogo-testa-6-300x200.jpg" target="_blank">http://handmade-paradise.ru/wp-content/uploads/201...z-sloenogo-testa-6-300x200.jpg 300w" style="margin: 0px; padding: 0px; border: 0px; font-style: inherit; font-variant: inherit; font-weight: inherit; font-stretch: inherit; font-size: inherit; line-height: inherit; font-family: inherit; vertical-align: baseline; max-width: 100%; height: auto; border-radius: 8px;" width="464" />
Растопить сливочное масло в маленькой кастрюльке или в глубокой сковороде, добавить корицу, сахарный песок и воду. После закипания добавить яблоки и поварить несколько минут. Времени должно быть достаточно только лишь для смягчения яблочных долек, чтобы их легко можно было скрутить в розочку. Достать яблочные дольки и остудить.
 /handmade-paradise.ru/wp-content/uploads/2016/03/YAblochnyie-rozyi-iz-sloenogo-testa-11-300x217.jpg" target="_blank">http://handmade-paradise.ru/wp-content/uploads/201...-sloenogo-testa-11-300x217.jpg 300w" style="margin: 0px; padding: 0px; border: 0px; font-style: inherit; font-variant: inherit; font-weight: inherit; font-stretch: inherit; font-size: inherit; line-height: inherit; font-family: inherit; vertical-align: baseline; max-width: 100%; height: auto; border-radius: 8px;" width="490" />
Слоеное тесто раскатать и нарезать на полоски, шириной около 5 см.
 /handmade-paradise.ru/wp-content/uploads/2016/03/YAblochnyie-rozyi-iz-sloenogo-testa-7-300x204.jpg" target="_blank">http://handmade-paradise.ru/wp-content/uploads/201...z-sloenogo-testa-7-300x204.jpg 300w" style="margin: 0px; padding: 0px; border: 0px; font-style: inherit; font-variant: inherit; font-weight: inherit; font-stretch: inherit; font-size: inherit; line-height: inherit; font-family: inherit; vertical-align: baseline; max-width: 100%; height: auto; border-radius: 8px;" width="493" />
На половинку каждой полоски слоеного теста уложить внахлест яблочные дольки, как показано на фото ниже.
 /handmade-paradise.ru/wp-content/uploads/2016/03/YAblochnyie-rozyi-iz-sloenogo-testa-8-300x159.jpg" target="_blank">http://handmade-paradise.ru/wp-content/uploads/201...z-sloenogo-testa-8-300x159.jpg 300w" style="margin: 0px; padding: 0px; border: 0px; font-style: inherit; font-variant: inherit; font-weight: inherit; font-stretch: inherit; font-size: inherit; line-height: inherit; font-family: inherit; vertical-align: baseline; max-width: 100%; height: auto; border-radius: 8px;" width="533" />
  /handmade-paradise.ru/wp-content/uploads/2016/03/YAblochnyie-rozyi-iz-sloenogo-testa-9-300x165.jpg" target="_blank">http://handmade-paradise.ru/wp-content/uploads/201...z-sloenogo-testa-9-300x165.jpg 300w" style="margin: 0px; padding: 0px; border: 0px; font-style: inherit; font-variant: inherit; font-weight: inherit; font-stretch: inherit; font-size: inherit; line-height: inherit; font-family: inherit; vertical-align: baseline; max-width: 100%; height: auto; border-radius: 8px;" width="534" />
Полоску с яблоками сложить и скрутить. Донышко скрутки слегка придавить, для придания пирожному устойчивости, яблокам придать форму розочки.
 /handmade-paradise.ru/wp-content/uploads/2016/03/YAblochnyie-rozyi-iz-sloenogo-testa-10-300x154.jpg" target="_blank">http://handmade-paradise.ru/wp-content/uploads/201...-sloenogo-testa-10-300x154.jpg 300w" style="margin: 0px; padding: 0px; border: 0px; font-style: inherit; font-variant: inherit; font-weight: inherit; font-stretch: inherit; font-size: inherit; line-height: inherit; font-family: inherit; vertical-align: baseline; max-width: 100%; height: auto; border-radius: 8px;" width="539" />
Выпекать на пергаментной бумаге, в предварительно разогретой духовке, при температуре 180 градусов в течение 20-30-ти минут. Остудить,сверху готовое пирожное, яблочные розочки, посыпать сахарной пудрой.
 /handmade-paradise.ru/wp-content/uploads/2016/03/YAblochnyie-rozyi-iz-sloenogo-testa-5-300x191.jpg" target="_blank">http://handmade-paradise.ru/wp-content/uploads/201...z-sloenogo-testa-5-300x191.jpg 300w" style="margin: 0px; padding: 0px; border: 0px; font-style: inherit; font-variant: inherit; font-weight: inherit; font-stretch: inherit; font-size: inherit; line-height: inherit; font-family: inherit; vertical-align: baseline; max-width: 100%; height: auto; border-radius: 8px;" width="638" />
|
Амигуруми. Рождественский олень |
Амигуруми. Рождественский олень. Дорогие мои рукодельницы, до праздника осталось совсем немного времени, но связать крючком игрушку все еще можно успеть. Хочу вам предложить связать амигуруми — миниатюрного рождественского оленя. Вязаную игрушку можно повесить на новогоднюю елочку, можно использовать как брелок-подвеску или просто подарить малышу к праздникам.
 /handmade-paradise.ru/wp-content/uploads/2016/12/Amigurumi.-Rozhdestvenskiy-olen-4-300x287.jpg" target="_blank">http://handmade-paradise.ru/wp-content/uploads/201...destvenskiy-olen-4-300x287.jpg 300w" style="margin: 0px; padding: 0px; border: 0px; font-style: inherit; font-variant: inherit; font-weight: inherit; font-stretch: inherit; font-size: inherit; line-height: inherit; font-family: inherit; vertical-align: baseline; max-width: 100%; height: auto; border-radius: 8px; transition: opacity 0.2s ease;" width="461" />
Для работы нам понадобится крючок, пряжа бежевого (серого, коричневого), белого (для мордочки) и красного (для шарфика) цвета, а также наполнитель, нитки с иголкой и искусственные глазки или бусины, пуговки, черные кнопки и тд.
Примечание: рожки оленя вяжутся тонкой пряжей крючком 1,25 мм, все остальные детали крючком толщиной 2 мм.
Описание дано на китайском, но разобраться можно — указаны ряды и количество петель.
Условные обозначения к описанию:
Вязание всех деталей начинается со скользящей петли амигуруми.
 /handmade-paradise.ru/wp-content/uploads/2016/12/Amigurumi.-Rozhdestvenskiy-olen-2-300x278.jpg" target="_blank">http://handmade-paradise.ru/wp-content/uploads/201...destvenskiy-olen-2-300x278.jpg 300w" style="margin: 0px; padding: 0px; border: 0px; font-style: inherit; font-variant: inherit; font-weight: inherit; font-stretch: inherit; font-size: inherit; line-height: inherit; font-family: inherit; vertical-align: baseline; max-width: 100%; height: auto; border-radius: 8px;" width="348" />
  /handmade-paradise.ru/wp-content/uploads/2016/12/Amigurumi.-Rozhdestvenskiy-olen-3-300x180.jpg" target="_blank">http://handmade-paradise.ru/wp-content/uploads/201...destvenskiy-olen-3-300x180.jpg 300w" style="margin: 0px; padding: 0px; border: 0px; font-style: inherit; font-variant: inherit; font-weight: inherit; font-stretch: inherit; font-size: inherit; line-height: inherit; font-family: inherit; vertical-align: baseline; max-width: 100%; height: auto; border-radius: 8px;" width="538" />
|
Подушка крючком с объемными мотивами «Бегония» |
Подушка крючком с объемными мотивами «Бегония» — схемы вязания крючком чехла с объемными цветами бегонии для интерьерной подушки.


Для работы понадобится хлопчатобумажная или полушерстяная пряжа нескольких цветов: основная белая и зеленого, сиреневого (голубого), желтого цвета. Следует также приготовить крючок для вязания и нитки с иголкой.
Каждый из объемных мотивов с цветами бегонии состоит из двух частей.
Схема вязания объемного мотива (первая часть), напоминающего цветок бегонии. Вязание начинается с центра, с 3-х воздушных петель. Далее — по схеме.

Схема вязания квадратного мотива с листиками бегонии. Мотивы соединяются между собой в процессе вязания последнего ряда.

Схема вязания крючком второй, нижней, части объемного мотива с бегониями. Эта же схема использована для вязания обратной стороны подушки, только рядов получится значительно больше.

Схема вязания обвязки края подушки с бегониями:

Если появятся вопросы по схемам, спрашивайте в комментариях к публикации.


Источник http://handmade-paradise.ru/podushka-kryuchkom-s-obemnyimi-motivami-begoniya/
|
Мотив с розами. Вяжем плед крючком |
Мотив с розами. Вяжем плед крючком. Очень красивый плед связан крючком из квадратных мотивов с розами. Схемы вязания мотива с розами смотрите ниже. Данную идею можно применить для вязания пледа, подушки, накидки для дивана или кресла, декоративного коврика, а также предметов одежды — шали, палантина, блузы или топика.
 /handmade-paradise.ru/wp-content/uploads/2016/05/Motiv-s-rozami.-Vyazhem-pled-kryuchkom-4-236x300.jpg" target="_blank">http://handmade-paradise.ru/wp-content/uploads/201...m-pled-kryuchkom-4-236x300.jpg 236w" style="margin: 0px; padding: 0px; border: 0px; font-style: inherit; font-variant: inherit; font-weight: inherit; font-stretch: inherit; font-size: inherit; line-height: inherit; font-family: inherit; vertical-align: baseline; max-width: 100%; height: auto; border-radius: 8px;" width="529" />
 /handmade-paradise.ru/wp-content/uploads/2016/05/Motiv-s-rozami.-Vyazhem-pled-kryuchkom-6-300x230.jpg" target="_blank">http://handmade-paradise.ru/wp-content/uploads/201...m-pled-kryuchkom-6-300x230.jpg 300w" style="margin: 0px; padding: 0px; border: 0px; font-style: inherit; font-variant: inherit; font-weight: inherit; font-stretch: inherit; font-size: inherit; line-height: inherit; font-family: inherit; vertical-align: baseline; max-width: 100%; height: auto; border-radius: 8px;" width="618" />
Вязание мотива начинается с центра розочки, со скользящей петли амигуруми. Всего необходимо связать 7 рядов, вяжем по схеме.
В схемах использованы условные обозначения:
 /handmade-paradise.ru/wp-content/uploads/2016/05/Motiv-s-rozami.-Vyazhem-pled-kryuchkom-5-300x161.jpg" target="_blank">http://handmade-paradise.ru/wp-content/uploads/201...m-pled-kryuchkom-5-300x161.jpg 300w" style="margin: 0px; padding: 0px; border: 0px; font-style: inherit; font-variant: inherit; font-weight: inherit; font-stretch: inherit; font-size: inherit; line-height: inherit; font-family: inherit; vertical-align: baseline; max-width: 100%; height: auto; border-radius: 8px;" width="548" />
Схема вязания квадратного мотива с розочкой в центре.
 /handmade-paradise.ru/wp-content/uploads/2016/05/Motiv-s-rozami.-Vyazhem-pled-kryuchkom-1-294x300.jpg" target="_blank">http://handmade-paradise.ru/wp-content/uploads/201...m-pled-kryuchkom-1-294x300.jpg 294w" style="margin: 0px; padding: 0px; border: 0px; font-style: inherit; font-variant: inherit; font-weight: inherit; font-stretch: inherit; font-size: inherit; line-height: inherit; font-family: inherit; vertical-align: baseline; max-width: 100%; height: auto; border-radius: 8px;" width="548" />
При вязании пледа мотивы соединяются между собой в процессе вязания последнего ряда.
 /handmade-paradise.ru/wp-content/uploads/2016/05/Motiv-s-rozami.-Vyazhem-pled-kryuchkom-3-273x300.jpg" target="_blank">http://handmade-paradise.ru/wp-content/uploads/201...m-pled-kryuchkom-3-273x300.jpg 273w" style="margin: 0px; padding: 0px; border: 0px; font-style: inherit; font-variant: inherit; font-weight: inherit; font-stretch: inherit; font-size: inherit; line-height: inherit; font-family: inherit; vertical-align: baseline; max-width: 100%; height: auto; border-radius: 8px;" width="519" />
 /handmade-paradise.ru/wp-content/uploads/2016/05/Motiv-s-rozami.-Vyazhem-pled-kryuchkom-2-300x242.jpg" target="_blank">http://handmade-paradise.ru/wp-content/uploads/201...m-pled-kryuchkom-2-300x242.jpg 300w" style="margin: 0px; padding: 0px; border: 0px; font-style: inherit; font-variant: inherit; font-weight: inherit; font-stretch: inherit; font-size: inherit; line-height: inherit; font-family: inherit; vertical-align: baseline; max-width: 100%; height: auto; border-radius: 8px;" width="604" />
Источник http://handmade-paradise.ru/motiv-s-rozami-vyazhem-pled-kryuchkom/
|
Ажурная радужная подушка крючком. Схема |
Ажурная радужная подушка крючком. Схема вязания крючком очень нежной и красивой разноцветной диванной подушки. Такая подушка украсит интерьер вашего дома, создав в нем тепло и уют.
 /handmade-paradise.ru/wp-content/uploads/2016/10/Azhurnaya-raduzhnaya-podushka-kryuchkom.-Shema-1-300x243.jpg" target="_blank">http://handmade-paradise.ru/wp-content/uploads/201...kryuchkom.-Shema-1-300x243.jpg 300w" style="margin: 0px; padding: 0px; border: 0px; font-style: inherit; font-variant: inherit; font-weight: inherit; font-stretch: inherit; font-size: inherit; line-height: inherit; font-family: inherit; vertical-align: baseline; max-width: 100%; height: auto; border-radius: 8px;" width="600" />
  /handmade-paradise.ru/wp-content/uploads/2016/10/Azhurnaya-raduzhnaya-podushka-kryuchkom.-Shema-2-300x255.jpg" target="_blank">http://handmade-paradise.ru/wp-content/uploads/201...kryuchkom.-Shema-2-300x255.jpg 300w" style="margin: 0px; padding: 0px; border: 0px; font-style: inherit; font-variant: inherit; font-weight: inherit; font-stretch: inherit; font-size: inherit; line-height: inherit; font-family: inherit; vertical-align: baseline; max-width: 100%; height: auto; border-radius: 8px;" width="601" />
  /handmade-paradise.ru/wp-content/uploads/2016/10/Azhurnaya-raduzhnaya-podushka-kryuchkom.-Shema-3-300x231.jpg" target="_blank">http://handmade-paradise.ru/wp-content/uploads/201...kryuchkom.-Shema-3-300x231.jpg 300w" style="margin: 0px; padding: 0px; border: 0px; font-style: inherit; font-variant: inherit; font-weight: inherit; font-stretch: inherit; font-size: inherit; line-height: inherit; font-family: inherit; vertical-align: baseline; max-width: 100%; height: auto; border-radius: 8px;" width="658" />
Размер готовой интерьерной подушки — 45 х 45 см. Для вязания подойдет хлопчатобумажная, акриловая или хлопчатобумажная пряжа нескольких цветов пастельных оттенков.
Схема вязания лицевой ажурной стороны радужной наволочки для подушки. Вязание детали начинается с центра, со скользящей петли амигуруми.
 /handmade-paradise.ru/wp-content/uploads/2016/10/Azhurnaya-raduzhnaya-podushka-kryuchkom.-Shema-6-279x300.jpg" target="_blank">http://handmade-paradise.ru/wp-content/uploads/201...kryuchkom.-Shema-6-279x300.jpg 279w" style="margin: 0px; padding: 0px; border: 0px; font-style: inherit; font-variant: inherit; font-weight: inherit; font-stretch: inherit; font-size: inherit; line-height: inherit; font-family: inherit; vertical-align: baseline; max-width: 100%; height: auto; border-radius: 8px;" width="688" />
  /handmade-paradise.ru/wp-content/uploads/2016/10/Azhurnaya-raduzhnaya-podushka-kryuchkom.-Shema-4-300x281.jpg" target="_blank">http://handmade-paradise.ru/wp-content/uploads/201...kryuchkom.-Shema-4-300x281.jpg 300w" style="margin: 0px; padding: 0px; border: 0px; font-style: inherit; font-variant: inherit; font-weight: inherit; font-stretch: inherit; font-size: inherit; line-height: inherit; font-family: inherit; vertical-align: baseline; max-width: 100%; height: auto; border-radius: 8px;" width="502" />
Схема вязания обратной стороны наволочки для интерьерной подушки. Вязание детали начинается с центра, со скользящей петли амигуруми.
 /handmade-paradise.ru/wp-content/uploads/2016/10/Azhurnaya-raduzhnaya-podushka-kryuchkom.-Shema-7-289x300.jpg" target="_blank">http://handmade-paradise.ru/wp-content/uploads/201...kryuchkom.-Shema-7-289x300.jpg 289w" style="margin: 0px; padding: 0px; border: 0px; font-style: inherit; font-variant: inherit; font-weight: inherit; font-stretch: inherit; font-size: inherit; line-height: inherit; font-family: inherit; vertical-align: baseline; max-width: 100%; height: auto; border-radius: 8px;" width="689" />
  /handmade-paradise.ru/wp-content/uploads/2016/10/Azhurnaya-raduzhnaya-podushka-kryuchkom.-Shema-9-300x206.jpg" target="_blank">http://handmade-paradise.ru/wp-content/uploads/201...kryuchkom.-Shema-9-300x206.jpg 300w" style="margin: 0px; padding: 0px; border: 0px; font-style: inherit; font-variant: inherit; font-weight: inherit; font-stretch: inherit; font-size: inherit; line-height: inherit; font-family: inherit; vertical-align: baseline; max-width: 100%; height: auto; border-radius: 8px;" width="659" />
Источник http://handmade-paradise.ru/azhurnaya-raduzhnaya-podushka-kryuchkom-shema/
|
Лошадка крючком. Описание |

Описание вязания лошадки дано на китайском языке, но разобраться можно и без его изучения). Вязание всех деталей лошадки начинается со скользящей петли амигуруми. На схемах слева указаны ряды, а справа — количество петель, которые должны получиться по окончанию вязания ряда.
Условные обозначения на китайском:
x — столбик без накида
v — прибавка
A — убавка
F — полустолбик
T — столбик с накидом
ch — воздушная петля, вязание цепочки
Для работы следует приготовить пряжу коричневого, белого, бежевого, розового и черного цвета, а также — крючок, наполнитель, нитки с иголкой и искусственные глазки.
Голова лошадки. Вяжем всего 42 ряда, отметить 21-22 ряды для пришивания глазок. Расстояние между глазками — 10 ст. б/н.
В 12-м ряду после 15-ти ст. б/н связать попкорн, затем еще один после 10 ст.б/н.
 /handmade-paradise.ru/wp-content/uploads/2017/01/Loshadka-kryuchkom.-Opisanie-2-162x300.jpg" target="_blank">http://handmade-paradise.ru/wp-content/uploads/201...uchkom.-Opisanie-2-162x300.jpg 162w" style="margin: 0px; padding: 0px; border: 0px; font-style: inherit; font-variant: inherit; font-weight: inherit; font-stretch: inherit; font-size: inherit; line-height: inherit; font-family: inherit; vertical-align: baseline; max-width: 100%; height: auto; border-radius: 8px; transition: opacity 0.2s ease;" width="432" />
Закончив вязание головы лошадки, заполнить ее синтепухом и пришить глазки.
 /handmade-paradise.ru/wp-content/uploads/2017/01/Loshadka-kryuchkom.-Opisanie-3-300x131.jpg" target="_blank">http://handmade-paradise.ru/wp-content/uploads/201...uchkom.-Opisanie-3-300x131.jpg 300w" style="margin: 0px; padding: 0px; border: 0px; font-style: inherit; font-variant: inherit; font-weight: inherit; font-stretch: inherit; font-size: inherit; line-height: inherit; font-family: inherit; vertical-align: baseline; max-width: 100%; height: auto; border-radius: 8px; transition: opacity 0.2s ease;" width="436" />
Туловище лошадки. Вяжем 43 ряда, начинаем со скольз. петли амигуруми.
 /handmade-paradise.ru/wp-content/uploads/2017/01/Loshadka-kryuchkom.-Opisanie-4-223x300.jpg" target="_blank">http://handmade-paradise.ru/wp-content/uploads/201...uchkom.-Opisanie-4-223x300.jpg 223w" style="margin: 0px; padding: 0px; border: 0px; font-style: inherit; font-variant: inherit; font-weight: inherit; font-stretch: inherit; font-size: inherit; line-height: inherit; font-family: inherit; vertical-align: baseline; max-width: 100%; height: auto; border-radius: 8px; transition: opacity 0.2s ease;" width="425" />
Туловище заполняем синтепухом и пришиваем голову.
 /handmade-paradise.ru/wp-content/uploads/2017/01/Loshadka-kryuchkom.-Opisanie-5-300x212.jpg" target="_blank">http://handmade-paradise.ru/wp-content/uploads/201...uchkom.-Opisanie-5-300x212.jpg 300w" style="margin: 0px; padding: 0px; border: 0px; font-style: inherit; font-variant: inherit; font-weight: inherit; font-stretch: inherit; font-size: inherit; line-height: inherit; font-family: inherit; vertical-align: baseline; max-width: 100%; height: auto; border-radius: 8px; transition: opacity 0.2s ease;" width="437" />
Ножка лошадки. Начинаем со скольз. петли амигуруми. 1-8 ряд вяжем бежевой пряжей, 9-13 ряды — белой пряжей, 14-35 ряды — коричневой пряжей.
 /handmade-paradise.ru/wp-content/uploads/2017/01/Loshadka-kryuchkom.-Opisanie-8-267x300.jpg" target="_blank">http://handmade-paradise.ru/wp-content/uploads/201...uchkom.-Opisanie-8-267x300.jpg 267w" style="margin: 0px; padding: 0px; border: 0px; font-style: inherit; font-variant: inherit; font-weight: inherit; font-stretch: inherit; font-size: inherit; line-height: inherit; font-family: inherit; vertical-align: baseline; max-width: 100%; height: auto; border-radius: 8px; transition: opacity 0.2s ease;" width="426" />
  /handmade-paradise.ru/wp-content/uploads/2017/01/Loshadka-kryuchkom.-Opisanie-6-300x151.jpg" target="_blank">http://handmade-paradise.ru/wp-content/uploads/201...uchkom.-Opisanie-6-300x151.jpg 300w" style="margin: 0px; padding: 0px; border: 0px; font-style: inherit; font-variant: inherit; font-weight: inherit; font-stretch: inherit; font-size: inherit; line-height: inherit; font-family: inherit; vertical-align: baseline; max-width: 100%; height: auto; border-radius: 8px; transition: opacity 0.2s ease;" width="492" />
Подкова. Вяжем черными нитками цепочку из 15-ти воздушных петель.
 /handmade-paradise.ru/wp-content/uploads/2017/01/Loshadka-kryuchkom.-Opisanie-7-300x151.jpg" target="_blank">http://handmade-paradise.ru/wp-content/uploads/201...uchkom.-Opisanie-7-300x151.jpg 300w" style="margin: 0px; padding: 0px; border: 0px; font-style: inherit; font-variant: inherit; font-weight: inherit; font-stretch: inherit; font-size: inherit; line-height: inherit; font-family: inherit; vertical-align: baseline; max-width: 100%; height: auto; border-radius: 8px; transition: opacity 0.2s ease;" width="455" />
Рука (верхняя ножка) лошадки. 1-10 ряд бежевой пряжей, 11-15 р белой, 16-24 ряд коричневой пряжей.
 /handmade-paradise.ru/wp-content/uploads/2017/01/Loshadka-kryuchkom.-Opisanie-14-300x290.jpg" target="_blank">http://handmade-paradise.ru/wp-content/uploads/201...chkom.-Opisanie-14-300x290.jpg 300w" style="margin: 0px; padding: 0px; border: 0px; font-style: inherit; font-variant: inherit; font-weight: inherit; font-stretch: inherit; font-size: inherit; line-height: inherit; font-family: inherit; vertical-align: baseline; max-width: 100%; height: auto; border-radius: 8px; transition: opacity 0.2s ease;" width="421" />
Белая деталь на голове лошадки.
 /handmade-paradise.ru/wp-content/uploads/2017/01/Loshadka-kryuchkom.-Opisanie-11-300x182.jpg" target="_blank">http://handmade-paradise.ru/wp-content/uploads/201...chkom.-Opisanie-11-300x182.jpg 300w" style="margin: 0px; padding: 0px; border: 0px; font-style: inherit; font-variant: inherit; font-weight: inherit; font-stretch: inherit; font-size: inherit; line-height: inherit; font-family: inherit; vertical-align: baseline; max-width: 100%; height: auto; border-radius: 8px; transition: opacity 0.2s ease;" width="522" />
Ухо лошадки. Вяжем 10 рядов по кругу коричневой пряжей.
 /handmade-paradise.ru/wp-content/uploads/2017/01/Loshadka-kryuchkom.-Opisanie-9-300x148.jpg" target="_blank">http://handmade-paradise.ru/wp-content/uploads/201...uchkom.-Opisanie-9-300x148.jpg 300w" style="margin: 0px; padding: 0px; border: 0px; font-style: inherit; font-variant: inherit; font-weight: inherit; font-stretch: inherit; font-size: inherit; line-height: inherit; font-family: inherit; vertical-align: baseline; max-width: 100%; height: auto; border-radius: 8px; transition: opacity 0.2s ease;" width="519" />
Уздечку вяжем розовой пряжей столбиками без накида в два ряда. Одна деталь — 35 петель, вторая — 41 петля.
 /handmade-paradise.ru/wp-content/uploads/2017/01/Loshadka-kryuchkom.-Opisanie-12-300x168.jpg" target="_blank">http://handmade-paradise.ru/wp-content/uploads/201...chkom.-Opisanie-12-300x168.jpg 300w" style="margin: 0px; padding: 0px; border: 0px; font-style: inherit; font-variant: inherit; font-weight: inherit; font-stretch: inherit; font-size: inherit; line-height: inherit; font-family: inherit; vertical-align: baseline; max-width: 100%; height: auto; border-radius: 8px; transition: opacity 0.2s ease;" width="502" />
Гриву пришиваем иголкой как показано на фото ниже. Используем белую пряжу для вязания или шерсть для валяния.
 /handmade-paradise.ru/wp-content/uploads/2017/01/Loshadka-kryuchkom.-Opisanie-13-300x263.jpg" target="_blank">http://handmade-paradise.ru/wp-content/uploads/201...chkom.-Opisanie-13-300x263.jpg 300w" style="margin: 0px; padding: 0px; border: 0px; font-style: inherit; font-variant: inherit; font-weight: inherit; font-stretch: inherit; font-size: inherit; line-height: inherit; font-family: inherit; vertical-align: baseline; max-width: 100%; height: auto; border-radius: 8px; transition: opacity 0.2s ease;" width="499" />
Вот такая забавная лошадка может у вас получиться. Спрашивайте, если возникнут трудности в процессе вязания. Удачи!
 /handmade-paradise.ru/wp-content/uploads/2017/01/Loshadka-kryuchkom.-Opisanie-10-300x187.jpg" target="_blank">http://handmade-paradise.ru/wp-content/uploads/201...chkom.-Opisanie-10-300x187.jpg 300w" style="margin: 0px; padding: 0px; border: 0px; font-style: inherit; font-variant: inherit; font-weight: inherit; font-stretch: inherit; font-size: inherit; line-height: inherit; font-family: inherit; vertical-align: baseline; max-width: 100%; height: auto; border-radius: 8px; transition: opacity 0.2s ease;" width="466" />
|
ДЕТСКИЙ ПЛЕД КРЮЧКОМ АЖУРНЫМИ ЗИГЗАГАМИ |
|
РЕГЛАН ОТ МУРМУР. |
Процитировано из дневника Лесенки http://www.liveinternet.ru/users/lesenkag/post199540835/
| Вязание от горловины когдато увлекло меня так, что я абсолютно перестала вязать снизу. Это очень интересное и экономичное(ниток уходит меньше) вязание. |
От горловнны можно вязать все и кофты и платья ,костюмы и пальто.
С чего начинать?
Нужны круговые спицы разной длины.

Как это вяжется?
|
АЖУРНАЯ КОФТОЧКА ИЗ ХЛОПКА. |
Ажурная кофточка из хлопка


http://yiliancn.blog.163.com/blog/static/231938012...94/?suggestedreading&wumi
|
ШАПОЧКА "ЗМЕЙКА" |
|