Most of my duck spots are public, just like most of my bowhunting spots are public. What this means is that a significant portion of my fall is spent on ground open to anyone. And because of that, I've gotten awful good at ferreting out the spots others won't work to get to, or simply don't know about.
Now, that comes with a caveat considering I live in the Twin Cities – there are just some areas where there aren't any secrets left. And if there are enough willing hunters around, a certain percentage of them will work just as hard – or harder – than you to get to the good hunting.
With the playing field leveled in such a way, it becomes a lot more difficult to work around the competition, but not all hope is lost. There are still some ways to hedge your bets while hunting ducks on common ground, but you'll need to plan ahead.
Wednesdays Are Best
The reality is that most of the hunters will be out on Saturday and Sunday. Hunting pressure for ducks – and pretty much all game – flows into full volume on the weekend and ebbs mid-week. What does this mean for you?
Well, you'd better go to your boss and your spouse with your cap in hand and eyes cast downward and plead your case for some time to yourself during the middle of the week. This will do a couple of things for you.
First and most obvious, you'll have fewer sky-blasters out in your spots. The fewer the hunters in your immediate area, the better your hunting will be. Now, there is an argument that more hunters out in general puts more birds in the air, and that is true in certain situations, but it doesn't mean they are going to fly over the public ground you're on. They will, more often than not, suss out as only pressured ducks can, the water where no one is hunting.
This effect, which brings to mind no-hunting refuges with rafts of greenheads flipping off distant hunters, can also push birds into places that can be hunted but just aren't being disturbed currently like public land in the middle of the week. This is the beauty of migrators, because they don't get to know the local hunting pressure the same way resident ducks do. The places these ducks settle are best hunted on a Wednesday or Thursday morning when those lulled-into-a-false-sense-of-security birds are yours for the taking if you can find a few free mornings while the rest of the working stiffs are suiting up and heading to their cubicles and job sites.
Operate Correctly
A few years ago, a buddy and I tucked into a wooded berm near some flooded backwaters hoping to catch the last of the wood ducks or a random greenhead passing overhead. We knew the best in our setup was to pass-shoot them as they cleared the treeline and most likely, spotted us. The hope was that it would be too late by the time they figured out their waterhole was being guarded by a couple of dudes holding 12 gauges and an eager black Lab.
We did manage a drake and a hen wood duck in the spot, and we also got to witness what not to do duck-wise. Two hunters had slipped into a pond 400 yards from our setup. Instead of tucking into the brush at the edge and trying to hide, they stood at the top of a hill and sent three shots apiece at any duck within a football field's distance of where they stood.
Even if you get out mid-week, you've still got to figure out the best way to hunt your spots on public. The ducks that cruise through the airspace overhead will undoubtedly be a bit cautious, because that's just how they operate. How you should operate is to figure out each spot and where you should be set up. Maybe you can build a sweet blind in the brush, or maybe you've just got to count on getting the jump on them when they finally clear the closest trees and give you those few precious seconds as they try to flare out of the way of your pattern.
Really Camo Up
This is a simple one, but so many of the duck hunters I run into on public land seem to take a half-hearted approach camo-wise. It's as if they either don't know what they are doing, or have given up most of their hope for a decent hunt long before they actually go. Honestly, there is probably a lot of both going on.
Either way, camo up. Use a facemask or face paint and make an attempt to keep hidden if at all possible. Don't give those common-ground ducks the extra advantage of a poorly-hidden or poorly covered hunter unless the spot just doesn't allow for much else. You're working hard to earn the birds in this situation, at least make them work somewhat hard to survive any encounter with you.
Conclusion
Public-land ducks can be tough, but there are plenty of ways to hedge your bets and ensure that you'll have better hunts than most of your competition. You might not limit out on greenheads every time you step out of the truck in the dark, but you'll have a good chance of having a better-than-average hunt and just might end up with some of the most satisfying ducks any hunter can take in any given year, and that's not nothing.
What's worse than that is the fact that the remaining deer have usually had enough of the pressure. At no point in the season are they cagier and less wiling to move during daylight than right after the end of the general firearm's season.
This also happens to be muzzleloader season, and while there is the always the chance to knock down a giant, most of us would be well served to tamp down our expectations and set our standards accordingly.
For this particular hunter, smokepole season is a venison quest. Here are three ways to add some healthy protein to your diet while toting a frontstuffer.
Staging City
It would seem that if you're hunting any deer in the herd, setting up on a food source would be the right choice. That's what an awful lot of the whitetail experts will tell you to do. But what if you hunt a place that has been absolutely pounded and the average fawn is savvier than the mature bucks that those hunters protect on premier ground until they are hit-list worthy?
Then you need to back off of the food. Naturally, if it's unseasonably cold and the deer are running a calorie deficit, they might charge into a chopped cornfield with plenty of shooting light left. But probably, they won't.
They will, usually, get up from their beds a little early and browse their way slowly toward the food source. This is a bowhunter's strategy adapted to the muzzleloader's world, and it works. The key is to find the thickest, nastiest cover on your property and get as close as you can without making too much noise, or worse, allowing your wind to blow through the cover.
This may seem like an evening-only strategy, but it works in the morning as well provided you've got the right entrance route. Most of the time, you don't need to be more than 100 or 200 yards off of the destination food source to make this work.
The Mini-Drive
In general, I'm not a fan of driving deer. That's probably because I grew up bowhunting only, and never took part in the traditional deer drive. I have, a few times, found good situations in which to move some deer in the right direction of a stander during muzzleloader season.
A few years ago, while hunting public land in Minnesota, I found a river-bottom that was covered in beds and deer sign. It was a narrow stretch of cover that was too thick to set up in, so I posted my dad on one end and circled wide. Within about one minute of stepping into the thick stuff I heard him shoot. Several does and fawns had trotted by, and one long-nosed doe had made the mistake of stopping 15 yards from him.
If you've got a situation where you can make a mini-push, plan it out and go for it. Just make sure to be quiet, and keep it slow and simple. It doesn't take much to get late-season deer to move, and the goal is to get them up and walking - not sprinting for the next county.
Old-School Still Hunting
I love to still hunt. This tactic, which hasn't been popular in a long, long time, is a lot of fun with a muzzleloader. I keep my eyes glued to the weather and if there some fresh snow on the way, or it's going to be super windy, I plan a sneak. Ditto for any rain in the forecast.
Conventional wisdom says you are supposed to move so slow you'll make a sloth look like Usain Bolt, but that's silly. Very few people can do that, and who only wants to see 100 yards of the woods during a three-hour sneak? I try to move slowly, and stop a lot to glass but I don't go so slow that moss grows in my beard. The key to a successful still-hunt is to hunt in a place where you have confidence the deer will be. If you believe any minute you'll spot a doe or buck slipping through the timber, you'll hunt with the wind in your favor and your eyes peeled for a flash of brown.
The first time I did this, I hunted during a crazy storm and spotted a doe and fawn 50 yards from me. I missed her clean and thought my season was over. Later, I crested a ridge and looked at the valley below me. A doe was bedded 35 yards away, oblivious to my presence. It was the only time I've ever shot a whitetail in its bed.
The key to the second shot versus the first, was that I took a careful rest while lying prone on a rock outcropping. The first I shot off-hand, which is always a bad idea. If you're going to go the sneaky route, carry a pair of shooting sticks or try very hard to remember to take a solid rest. The importance of that can't be overstated.
Conclusion
If you're meat-poor and own a muzzleloader, you've got options. There are plenty of ways to get a tasty doe or young buck in your sights but just remember, it might not happen on a food source like it's supposed to. You just might have to get a little creative in your tactics.
While it's true hunters today are taking more and bigger bucks than ever, it's also true there are more big bucks around. Certainly, technology has revolutionized the way we hunt and, to some extent, made it easier to be successful, but don't let it lure you into thinking you can kick back, watch trailcam images roll into your smartphone, and then know exactly what's going on in the woods.
Fact is, the most successful whitetail hunters combine proven tactics with modern technology to augment their knowledge. They use woodsmanship to determine if there's a mature buck on their property, where deer feed, and how bucks move; trailcams just let them actually see racks. Here are some old-school tactics to enhance your quiver of new tricks.
Boots on the Ground
Google Earth and apps like OnX are wonderful for seeing the general lay of the land, but nothing beats boots on the ground to learn what's happening below the treetops. But don't just barge in anytime. During fall, you'll spook deer and spread scent; in spring and summer, deer display vastly different behavior than during the hunting season. Therefore, the best time to scout is the day after deer season ends.
At this time the woods are an open book with a story to tell. It's also one that's easier to read because the foliage is gone so you can see the bigger picture. If there's snow on the ground, even better. This is when you should walk ground to learn subtle ridge trails, draws, hidden pockets of cover, and any contours that dictate deer travel patterns. You'll find obvious signs, like trails, tracks, scrapes, and rub lines from the past rut. This intel will help you determine stand locations for the coming season.
Rub Lines
Hank Tassitano has been killing big bucks on public land since the 1960s. Back then, hunters had only their wits and a weapon to take a buck, which was a rare sight in itself. Tassitano has killed many mature bucks by hunting near rub lines, especially if he can find where two rub lines converge. While there is debate about the value of a rub, Tassitano feels strongly about them. "The size of the rub is generally indicative of the size of a buck," he says. "And while one rub just means that one buck was there once, a rub line usually means a buck routinely works that area."
Trails
Understanding how deer traverse your property is vital. But don't think bucks just wander down trails like does. In October, when bucks transition into breeding mode, mature bucks walk perpendicular to major trails so they can maximize their chances of winding a doe. So even if your trail cam that's placed on a major trail reveals no mature bucks, it doesn't mean none are around. Rather, think like a buck and trust sign. Find places where bucks cruise so they're somewhat hidden yet can cross as many deer trails as possible.
Food Sources
In fall, food sources alone are probably overrated for attracting big bucks. That's because most years there are so many food sources around, including mast, forbes, browse, crops, and fruit, that betting on one carries lower odds than betting on does to attract bucks. Nonetheless, deer must eat. So, you should be an expert on deer food.
Old-school hunters know what specific trees perennially produce mast and when deer hit them heaviest. If you know that a white oak is raining acorns — something a trailcam can't reveal — strongly consider hunting there immediately. Learn the trees in your area, nearby crops, and what food is most palatable when. This is best learned by spending time in the woods and by observing from a distant vantage point. If you can place trail cams on various food sources, great! Because if you can find the hot food source — especially those in cover — you'll find does and, likely, mature bucks.
Tracks
Tracks are the trailcams of yesteryear. A track made in dirt records when a deer was there and, to an extent, its size. In general, the tracks of mature buck are bigger than all other deer tracks in that area. In my area, for example, a track that measures three inches long is undoubtedly a mature buck, so I notice them. Tracks reveal where a buck has been and where he went.
Rangefinder Trap
Old-school bowhunters were not dependent on laser rangefinders. While rangefinders are revolutionary for long-range shooting, they're also responsible for saving many bucks annually. That's because hunters who have become overly dependent on them often range a close-by buck when they should be shooting. Savvy hunters are accurate to 40 yards or better by using their natural depth perception. All it takes is practice.
Sneakiness
Many modern hunters drive too close to their stands. Some are afraid of the dark; others are just lazy. Fact is, if a big buck is near your treestand — where you'd expect him — and he hears an ATV announce the presence of a human, he's gone. And then you'll wonder why you didn't see him that morning.
Old-schoolers ninja in. Unless you know that deer are absolutely conditioned to living with trucks, say, on a busy ranch, this means parking a half-mile or more from your stand and sneaking in. Use cover and available natural features like creeks or rock ridges to disguise your entry.
Sun and Silhouette
Old-school hunters always factor in the sun before setting a stand. They also avoid silhouetting themselves. While you never want the sun beaming directly in your eyes, just as important is concealing your silhouette as the sun sets at your back. View your stand from a deer's perspective and consider adding foliage behind you.
Wind
"Scent control is huge," says Tassitano. "I'm often surprised to learn that the wind at my stand is doing something different from the predominant wind in the area. So I tie a small feather on a thread and hang it from my bow so I can see how the breeze shifts when I hunt. This teaches me how winds affect certain stand locations so I can more wisely choose where to sit in the future."
October lull: Fact or fiction? I'm still not convinced, though I have on occasion experienced a lull around the third week of October as many others have. But are the deer actually reducing their daytime activity, or are they merely moving it somewhere else? And how do you tell?
Trail cameras can be invaluable in keeping up with how deer make subtle changes in their areas of daytime activity.
In many parts of the whitetail's range, October is a month of transition. It begins with warm temperatures. Leaves are still on the trees and deer are just starting to abandon their summer routines. Things are changing, and in order to stay on top of those changes, hunters sometimes need to double their scouting efforts. Fortunately, they can narrow their focus. In general, deer are on their feet during daylight hours for two things — feeding and breeding.
Feeding
This time of year both food availability and preference change. With less need for protein, deer spend increasingly less time in those clover fields you've watched them in every evening. Instead, more time is used for seeking out foods high in carbs, like hard and soft mast.
Where I live, the white oaks drop their acorns first, and over a relatively short period. Deer will be on the sweeter, smaller acorns right away, but the bounty won't last much beyond mid-October. Then they move on to the more bitter, but larger red oak acorns. Sometimes the change is subtle and other times it can be quite dramatic.
I once did an early season hunt in Kansas where, based on the landowner's reports, we spent the first few days hunting the edge of soybean fields. But the deer seemed to have disappeared upon our arrival. "A typical October lull," we thought. Then somebody discovered a small grove of persimmons dropping fresh, ripe fruit. One of our party killed a nice buck that evening and I saw at least seven rack bucks the following afternoon.
Hunting crops can be hit or miss, as the aforementioned example illustrates. The deer weren't on the beans early, but I've had great luck hunting bean fields in December in Iowa. Corn can be similarly problematic. Hunting in and around standing corn can be tough, but you're going to want to be along the field edge the day after they cut the corn, particularly if it's not a super-efficient machine harvest. These are but a few examples. The deer where you live may go through other diet shifts as need and availability change; and you'll just have to get out there and study.
Breeding
Things are also changing with regard to social interaction in October. The transition is slow at first, but the pace picks up as the month rolls on. Bucks open up a few scrapes in early October, but may not revisit them for a week or more. They're waiting for a trigger.
From reams of research we know that in mid to northern latitudes, most does enter estrus around the same time every year — mid-November. There are exceptions, including a couple smaller peaks, one occurring roughly 28 days before peak rut when a few early does cycle and their pheremones incite a sudden increase in buck activity. But if the does move away from where they were in early-October, so will the bucks — especially with love in the air. If you want to be successful you have to keep up with these transitions.
Keeping Tabs
One way to try and keep up with changes in deer activity is to be in the woods as much as possible. But no one can be everywhere they want to be every day. You can't hunt every day, and even if you could, you wouldn't want to put that much pressure on one place. Additionally, you can't hunt multiple locations at once. But your trail cameras can.
I usually put mine out in late August or early September, mostly to take stock of this year's crop. It will give me a rough idea who is out there and where they hang out, but I know the latter can change over a relatively short period of time, based on the aforementioned factors. It's not at all uncommon for an early-fall spot to go dry. Then I start to move my cameras around and put more out to see where the deer are.
That info is valuable in and of itself, but it can be exponentially more useful when evaluated over time. If you use an app, like ScoutLook, you can plot activity around and between stands from your image files and look for patterns. Over several seasons you may also start to recognize trends using the time and date stamps on your images.
Every situation is different and it may take you several seasons to figure out what's going on in your area. And one year may be different from the next as farmers rotate their crops or natural foods like acorns experience cyclic variations, or environmental conditions like drought alter food availability. But studying your quarry is all part of the fun. The more you learn about the biology and behavior of the animals you hunt, the more enjoyable and successful your efforts will be.
Bob Humphrey is a certified wildlife biologist, registered Maine guide and an outdoor writer. He has studied and hunted white-tailed deer for over four decades across North America and is considered a leading authority on whitetail biology and behavior.
Many things aren’t quite as they seem. Flip through a fashion magazine and you’ll see how drastically someone’s appearance can be altered if enough time is spent and enough cash changes hands. From silkier hair to whiter teeth, fuller lips, thinner thighs and so on, the available tweaks are all but endless. Whoever first said life is but an illusion might have just laid down a copy of Vogue.
There’s also a lot of fakery in the hunting world. Generations of waterfowlers have tossed wooden ducks onto the water. And over the past few years, many hunters have begun using turkey decoys. Bird hunters regularly employ such fakes, in combination with calling, because their sharp-eyed quarry can be notoriously hard to coax into lethal range of a thimbleful of pellets.
Mimicking waterfowl and turkey sounds is something with which nearly all whitetail bowhunters can identify. Over the years, innovative deer calls for making grunts, bleats, snort-wheezes and even “roars” have become standard gear. Around the rut, few archers would think of heading afield without some sort of call in their packs. Being able to make sounds that lure bucks into bow range is often a huge advantage.
But what about the visual fakery? Where’s the deer decoy? Most bowhunters have heard of them, and even seen them used on TV hunts, but they aren’t using one themselves. If the thought of decoying has crossed their mind, it evidently was but a fleeting notion.
I don’t claim to be an expert on whitetail decoying. But maybe that’s why I’m pretty sure I can help you. Because while I don’t decoy that often, I’ve still had great success over the years. That tells me you could, too.
The Point of It All
Decoys work for different species for different reasons. Fake ducks and geese are effective because those birds are gregarious and associate other flocks with safe places to feed and rest. A migrating flock might never have seen the pond your spread is on. They’re relying on other birds to tell them it’s a good place to land.
Of course, with a turkey gobbler it’s all about reproduction. Come spring a tom wants to mate, and few things ignite his passion the way the sights and sounds of a breeding opportunity do.
What we’re looking to do with a whitetail decoy is much closer to a setup for turkeys than for ducks or geese. Even during the rut, when many bucks roam widely, they likely know where the food sources and bedding areas are. They don’t need other deer to confirm it. But they do keep their eyes open for other whitetails, whose presence might signal a chance to reproduce.
If you’ve ever had a 3-D buck target mangled by a yard-invading buck, you know how strong the visual attraction can be. When a feisty buck sees what looks like a rival, there’s potential for an aggressive response. What influences whether or not he comes all the way in is more complex. But you need not be a master decoyer to make it work.
As with most other whitetail tactics, entire books could be written on this one. In fact, my friend the late Gary Clancy did just that a number of years ago. But you can have fun decoying, and fill tags with good bucks in the process, if you follow a few simple rules.
OK, “rules” is too rigid a term. Let’s go with “guidelines.” Which means go by them, but be willing to amend or even ignore them as conditions dictate.
Guideline 1: Buck vs. Doe
You might assume that for a rutting buck, a doe standing by her lonesome, waiting for him to join her, would be the hottest ticket to success. Every nerd’s dream at the school dance, right?
That setup can work. In those rare places where the sex ratio is super tight, resulting in a short window of breeding, every doe is getting checked constantly. There, when the time is right a standing/feeding doe decoy is a real attraction. I’ve seen one of these work on mature bucks even without a buck decoy as part of the setup.
But a doe isn’t what I normally use. Most of the time, I feel, you’re better off with a buck decoy. Maybe with a doe in the setup, but often not. I’ll use a lone doe only if I don’t have a buck available.
The main reason I don’t like lone-doe setups is that real does don’t like them. Put a fake doe in a food plot or field and when the old herd doe arrives, she’s likely to freak out. She’ll often stomp around indignantly, then try to lead the rest of her clan back off the plot. If they don’t follow, she’ll become even more agitated. Prepare to listen to “blowing” for a while, as that doe prances around with her tail hairs flared. She just doesn’t like having a strange lady on her turf.
Replace the doe decoy with a buck and things tend to go better. Yes, it’s still a “new” deer, but the matriarch seems to accept that he’s an outsider just passing through. That sort of thing happens during the rut. In many cases, the boss doe quickly calms down and goes on about her business.
You might feel there’s no harm in letting that old doe lead her pack out of the area. You aren’t trying to shoot a doe anyway. But having live deer around can be helpful. They’re living decoys. Yes, too many does present can distract a buck that otherwise might have come to your decoy, but that’s when a little calling and/or rattling can come in handy.
So in most cases, I feel a lone-buck decoy is best. And in most places, a 30-day window starting around Oct. 25 often is the time to try it. After that the libido of most bucks begins to drop, with less aggression displayed.
I know of a few big deer shot over buck decoys right before velvet shedding and of a few others shot deep in the post-rut. I assume a blend of dominance and curiosity explains those approaches, as it’s unlikely they were related to breeding interest. But we can never be sure just what any buck is thinking.
Maybe because it’s often a chore to lug two decoys, few hunters use the deer equivalent of a “spread.” However, I’ve arrowed two bucks while using buck decoys standing over doe decoys. One of the fake does was a full-bodied model, minus legs and antlers, mimicking a bedded doe in heat; the other was a standing cardboard doe silhouette.
Guideline 2: Positioning Matters
Just sticking a decoy in front of a stand is a good way to educate deer. You’ll get educated too, but it could prove costly. So let’s try to get it right the first time.
Does it matter which way a buck decoy faces? I think so. Young bucks often sheepishly approach from the rear, but a big deer rarely will. He wants to intimidate this intruder, not simply gouge him in the ham. So most big bucks will come in from the side or swing around in front. Position the decoy so that either of these approach angles eventually will result in a close broadside shot.
I always have a buck decoy face me. Maybe not straight at me, but within 20 degrees one way or the other. While broadside can work, I’d rather not set it that way. One thing you’ll never see me do is face a buck decoy away from me. Again, I want to encourage a buck to see the decoy, swing around it to make eye contact with it and, in so doing, offer a good shot angle while looking away from me. Folks, that’s about as easy as bowhunting big whitetails ever gets.
How far? I like to put a buck decoy at least 22 yards out. If picking an ideal range, I’d say 25-27. But what matters most is that it be several yards inside maximum comfortable bow range. We can’t control from where a buck will come or which line he’ll take. If he goes a few yards behind the fake and stops, it might be the best shot you’ll ever get. Make sure that distance isn’t too far.
On the flip side, if the decoy’s too close to you, there’s not much room for a buck to get in front of it. If he starts in from somewhere beyond the decoy, with a tight setup he might never turn broadside until he’s right under your tree.
Be extra careful to avoid this “too close” error if you’re on the ground, as I often am on hunts for North American Whitetail TV presented by Quick Attach. Sure, I want a chip shot if I can get one — but at eye level with a mature buck nearly in my lap, all sounds and movements are magnified. I really don’t want him close enough to spit on.
In general, the more open the habitat, the better for decoying. A roaming buck might be hundreds of yards off when you spot him, and at that point he might not yet have spotted your decoy. You can rattle and/or call to get his attention and hopefully get him to see the setup. Once I know he’s seen it and is showing interest, I call very little, if any.
Don’t assume that because a decoy is easy for you to see, it’s just as visible to deer. Not only cover but also small humps or dips in the terrain can hide it from passing bucks. Even an alert deer’s head is much lower than a person’s. When in doubt, I often kneel where I’m wanting to set the decoy, then just look around. If I can’t clearly see a certain corner or other spot from which I think a buck is likely to appear, I’ll assume he couldn’t see my decoy, either.
This decoy’s ears are “alert” because it had been placed over a bedded doe. With a lone-buck setup, lay the adjustable ears back ..
Is there such a thing as too open? I’m not sure there is. Naturally, it can help to place the fake so a buck will feel secure in approaching. But I’ve seen how much trouble deer often have picking up decoys in timber or brush. And when their first glimpse is at close range, it can spook them. I’ve watched even big bucks bolt upon spotting decoys they felt were too close for comfort.
Setup and takedown can be tricky. If you put up a decoy long before daybreak, you risk having it approached, and even attacked, as you wait for light. This also can happen if you leave it up too long at last light. So I cut both ends of the hunting day as close as I can.
When decoying a field or plot, I’ll wait until right at legal light to pop my decoy into place, assuming no deer are in sight. In the evening, I’ll use the same approach. (Escaping any feeding area at day’s end is easier if a friend bumps deer away with a vehicle as legal light ends.)
Guideline 3: Scent Solutions
I’ve never found that big bucks insist on getting downwind of decoys, as many do when coming to rattling. Still, I often put scent on the ground, to reinforce the ruse. I’ve had great results with Evercalm, from Conquest Scents — but I wouldn’t hesitate to use an estrus scent or buck urine along with it.
Wildlife photographer Mike Biggs once told me that when he began using decoys in his photo setups, he couldn’t tell handling them with bare hands was a negative. He made no effort to keep his decoys clean and still got a lot of great photos of big, hunted bucks coming right up to them. My experience has been similar. Of course, there’s no advantage to pushing your luck on human odor. You can clean a decoy with ozone, a spray-on odor neutralizer or even a garden hose.
Guideline 4: Don't Overdo It
Next to spot-and-stalk, decoying is the most exciting archery tactic of all. Once you’ve seen it work, I think you’ll be hooked. But that’s why I must caution you: It can take serious self-control to keep from burning out a spot.
As with rattling and calling, constant decoying in one location tends to grow less effective. Yes, often we’re trying to intercept bucks roaming a wide area, and that can extend the life of a setup; the buck you fool today might have been two miles away yesterday. But over time, resident whitetails grow leery of seeing the same “frozen” deer standing in the same spot. The young buck you educate to a decoy in 2018 could be the giant that keeps his distance in 2020.
Last Nov. 10, I decoyed a big 9-pointer into crossbow range on my Missouri farm. He came in from an unexpected angle, and grass blocked any shot before he reached the Dave Smith Posturing Buck. He then bumped off a few steps but didn’t bolt. At that point I was able to get on him with my TenPoint, and within seconds it was lights out.
I doubt that buck had ever seen a decoy. Why? Because nobody had used one on the farm since 2009. The deer I shot hadn’t even been alive then.Find a place where deer haven’t been decoyed much. Should you have an encounter there but not fill your tag, maybe tweak the setup or move on to another group of deer. At a minimum, rotate stands often. Try to keep things as fresh as possible for as long as possible.
If you have a big piece of land to hunt, or a number of smaller ones, in theory you can decoy a lot. But if you’re hunting one small property, take care to limit the technique to the times, places and weather conditions in which you feel it’s really likely to pay off. That won’t be every day, and it won’t be every stand. But it doesn’t have to work every time.
In Conclusion
Some bowhunters still see decoys as gimmicks or too much trouble to bother with. But a decoy is a valuable tool. For the time, effort and dollars invested, no other tactic yields as many good shots. Around the rut, I’d far rather go bowhunting with one arrow and a decoy than a full quiver but no decoy.
Figuring out what the conditions call for is the art of all deer hunting, not just decoying. The details vary by time, habitat, weather, hunting pressure and more. But decoying isn’t just some fad. It works. So if you’ve been on the fence about trying it, hop over to the “unreal” side of whitetail bowhunting. See for yourself what all the buzz is about.
If you expect to toss some seeds on the ground and watch them grow into a big-buck Shangri-la come November, you might as well just throw some cash in the trash, too. Because if you don't prep your ground before planting at the right time, you'll just be wasting time and money. Trouble is, most of us aren't farmers — we don't know what to plant or when to plant it. We're hunters who want to improve the herd's nutrition and maybe take a homegrown buck next fall. So here are the basics about what you need to know for sowing a successful food plot.
Steve Scott is vice president of the Whitetail Institute and an expert on food plots. His company makes numerous products to attract, hold, and nourish deer. The Alabama-based firm also provides consumers with free info on how to best grow food plots in their particular regions. What follows is Scott's advice, given in step-by-step form so you won't forget a key date. After understanding the concept and the order of events for food plot planting, go to whitetailinstitute.com to find out when to plant in your area. And don't hesitate to call for custom advice.
January — March
After the fall hunting seasons end but before spring, research and decide what type of crop you wish to plant. This will dictate your to-do calendar.
Scott keeps it simple for beginners by recommending one of two types of forages for deer: a fall/winter annual blend like his company's Pure Attraction that contains oats, winter peas, and brassicas; or a perennial crop like clover that's planted in the spring.
The fall/winter blends are planted in late summer/early fall. Most annuals are designed to top-out in fall and winter to attract and hold bucks and to be hunted over. Seed blends are ideal because they hedge against certain types of seeds not doing well in your soil; plus, they give deer variety, so there's always something sprouting in fall that's palatable. Assuming it all doesn't get eaten, fall blends provide nutritional value to deer all winter long.
Perennial crops like clover provide nutritional value during the spring and summer months. Unless you live in extreme southern states, they're generally not intended to be hunted over. Their role is to help whitetail does during gestation, thereby creating healthier fawns, and they can enhance antler growth in bucks. Clover is best planted in spring; it matures in spring and summer.
For the best of both worlds, hunters can choose a mix of perennials and annuals by planting a big plot and halving it down the middle or by planting multiple plots. Choose a forage or forages based on your goals.
Any time before spring starts to green up, choose ground for your plot or plots and decide on size. Your time, budget,
and machinery along with how many deer you hope to feed and for how long should be deciding factors. To determine plot locations, consider stand location, predominant winds during hunting season, access to treestands, proximity to roads, and ground quality. Obviously, if you select a tract that's laden with rocks, those rocks will need to be removed first for best results. So be smart.
March — May
As soon as the ground thaws and grass starts greening, take a soil sample and send it to your county extension office for analysis or get a kit from the Whitetail Institute and return it. Also, include your crop selection information with it. This is the single most important thing you can do to ensure great results. The test will reveal your soil's pH. The analysis will instruct you in how much lime, if any, to spread over your plot before planting to make the pH ideal. The analysis also will tell you what type of fertilizer you'll need.
March — July
Purchase your products, including lime, herbicide, seed, and equipment, such as spreaders and sprayers. While most crops can be purchased cheaply at your local feed store or co-op, the advantage of paying more for specialized products from firms like the Whitetail Institute, Tecomate, or others is that the seeds are engineered to have a higher nutritional content for deer. No doubt, many hunters do just fine buying locally.
Once you have your equipment, during the spring, spray, brush hog, and/or disc your plot to eliminate grass and weeds. A Roundup-type herbicide is best.
March — June
After the grass dies, disc the plot so that three to four inches of topsoil is broken and is loose for planting. This is best accomplished with a heavy tractor and disc for new plots, but it can be done with an ATV and implements with many passes.
As soon as possible after discing, apply the appropriate amount of lime. Lime needs time to lower the soil's pH. Every month or so after discing and liming — but before planting — disc, spray, and break up the soil routinely to keep grasses from reestablishing.
From March to July, disc your plot to break up grasses and weeds. Then disc the plot again so the soil is loose for planting.
March — July, perennials; August — November, fall/winter annuals
Plant your crop. Try to plant when the soil is moist and rain is expected, but always plant within your area's suggested time window, which can be found at whitetailinstitute.com. Most seed types can be broadcast with a hand, push-type, or mechanized seed spreader.
Immediately after broadcasting, drag the plot. If you have a cultipacker, use it to lightly bury them. Note that the larger the seed, the deeper it should be buried.
Immediately after dragging, fertilize the plot.
March — September
Begin placing stands. Consider placing two or more stands — one on the south side of the plot and one on the north, with corresponding access avenues for north and south winds.
September — November
Wait. If you're religious, pray for rain. Then watch your food plot pop up and the deer flock to it.
Books have been written, stories have been told and lies have been concocted in an effort to identify the perfect North American big game cartridge. Many believe it's the cartridge they've chosen, others think specific cartridges must be matched to specific animals, and some claim perfection does not exist. When it comes to rifle cartridges, perfection may not exist but we should still be able to make a faultless choice given the vast options we have.
But How?
First, we should define the parameters of determining the perfect North American big game cartridge:
The cartridge should be able to push a bullet fast and flat enough to limit trajectory as much as possible.
The bullet should provide enough penetration to pass through the vitals of any animal we shoot, while expanding to increase tissue destruction.
Ideal external and terminal ballistics should be provided without excessive recoil.
The cartridge must fit in a repeating rifle compact and light enough to carry all day, with a reasonable magazine capacity.
Now, for the specifics:
Trajectory (external ballistics)
An 8-inch kill zone is a reasonable average for North American big game animals. From a trajectory standpoint, our cartridge should allow you to hold in the center of this kill zone out to 300 yards and still hit it, even in a moderate cross wind.
Penetration/Expansion (terminal ballistics)
Given reasonable shot angles, for a bullet to pass through the vitals of all North American big game animals, from pronghorn to moose, it should be capable of penetrating 18 to 20 inches in 10 percent ordnance gelatin. To maximize tissue destruction the bullet should also expand between 1.5 and 2 times its original diameter.
Recoil
How hard a rifle kicks is subjective and somewhat dependent on rifle design. That said, most hunters find that a rifle/cartridge combination producing a free recoil energy of more than 25 to 30 pounds is uncomfortable to shoot.
Cartridge/Rifle Size
Long cartridges increase rifle length and weight. Fat cartridges diminish magazine capacity. Long and fat cartridges do both. And some magnum cartridges need long barrels to really be magnums. What's ideal? Eight pounds is a good target weight for a field ready rifle and 40 inches or less is a reasonable length. You must shoot once and a coup de grace might be needed. You also might miss, so you need at least three shots. And, since you never want an empty rifle, capacity must be four or more.
Is there a cartridge that fits these specifications?
The first that comes to mind is the .308 Winchester. It will work splendidly on whitetails — I've done that — and its sufficient for moose — I've done that, too. It's compact and allows for a properly sized rifle with an ample magazine capacity. With good bullets, 20 inches of penetration is easily obtained, even with 2x bullet expansion. When properly zeroed it will allow you to hold dead on out to just the other side of 300 yards. And, in an 8-pound rifle it will generate less than 20 ft./lbs. of free recoil energy.
Your search is over.
But what about the big, mean and nasty brown colored bears you say? We're talking about hunting cartridges, not charge stopping, dangerous game cartridges. If your plan is to shoot a charging grizzly at 20 paces you do not merely need the perfect North American big game cartridge, you need a specialized, dangerous game cartridge and rifle setup. If you hope to hunt and then shoot a big bear at a reasonable distance, the .308 will kill him just like it will kill an elk.
But what about shooting at really long range you ask? Look, if you want to shoot big game animals out beyond a quarter of a mile with regularity and success, again you'll need a specialized rifle and cartridge. This would not be a rifle to tote into the timber with the hopes of jumping a whitetail buck.
What we're talking about is the perfect, general-purpose cartridge/rifle combination, a single solution for all your North American hunting needs. One of the greatest firearms experts and teachers conceived this combination as early as 1966.
Col. Jeff Cooper originated the scout rifle concept just for this purpose, citing it sufficient for animals weighing up to 1,000 pounds. For this rifle he selected the .308 Winchester cartridge. You might opine the .308 not adequate for hunting all of North America and you have a right to your opinion. I do not share it. I've seen the .308 employed with sensational success in North America and Africa on animals large and small.
We really don't need a modern treatise on this subject to discover the truth. Long before Cooper, in his 1927 book, Wilderness Hunting and Wildcraft, Townsend Whelen wrote that the best big game cartridges were the "'¦6.5 mm Mannlicher, .270 Winchester, 7mm Mauser and .30-06 U.S. Government."
Practically speaking, these four cartridges are ballistically identical to the more compact .308 Winchester, which was not invented until 1952. Yes, there are even more modern cartridges and they offer similar or improved ballistics. But none of these more modern cartridges make big game animals harder to kill.
Hunters seem to have figured all this out the same way Whelen did — through field experience, though without stopping power formulas and gun writer drivel. According to a leading ammunition company, last year the most popular big game cartridge sold in North America was the .308 Winchester.
However, we've left out a very important element of big game cartridge anatomy. Many hunters develop an unbreakable and sometimes unreasonable bond with certain cartridges. That relationship can be very important to the overall enjoyment of the hunt and without enjoyment, hunting is just hard grocery shopping. Your perfect North American big game cartridge will and should be one you like. For that reason cartridge anatomy arguments will continue as long as there are campfires.
Which cartridge gets your vote as the perfect North American big game round?
When deer movement slows, get out and lay down some white meat.
It's common for folks to add a fall turkey permit or two to their pocket in case an unsuspecting flock wanders just a little too close to their treestand while bowhunting for deer. Fewer folks actually dedicate hunts specifically to fall turkeys. Some reason that it infringes on their deer-hunting time. Others deem it senseless to invest time and money into a hunt that yields as little as five pounds of meat or less.
These are somewhat-valid points, but let me reason that it's the fun and experience, first, that make fall-turkey hunting alluring. And, with some knowhow, that measly five pounds of meat could be some of the finest you'll eat all year. Plus, what else are you going to do when it's too hot or the wind direction is wrong for your deer stands?
Now, if you've never hunted fall birds or have had little success doing so, I'm outlining five tips that will help you learn the curve and waylay a fall turkey or two. Let's review.
Fall Turkeys Aren't Spring Turkeys
Many folks who hunt spring gobblers never step foot in the fall-turkey woods. If that's you, let me start by saying that fall turkeys rarely behave like spring turkeys. Plus, hens and poults are legal in most states, so you aren't necessarily hunting toms.
Aside from the occasional gobbling that happens on rare fall mornings when the stars align, you won't be locating birds to hunt by listening for gobbles at dawn. However, fall turkeys do make a racket. Hens yelp frequently, and poults create a whistle often followed by yelping. Hen and poult flocks keep continual communication to ensure everyone is in the ranks.
Leaf tossing is another sound you'll hear on calm autumn days. And when there are crunchy leaves on the ground, a flock simply meandering through the hardwoods sounds like an army.
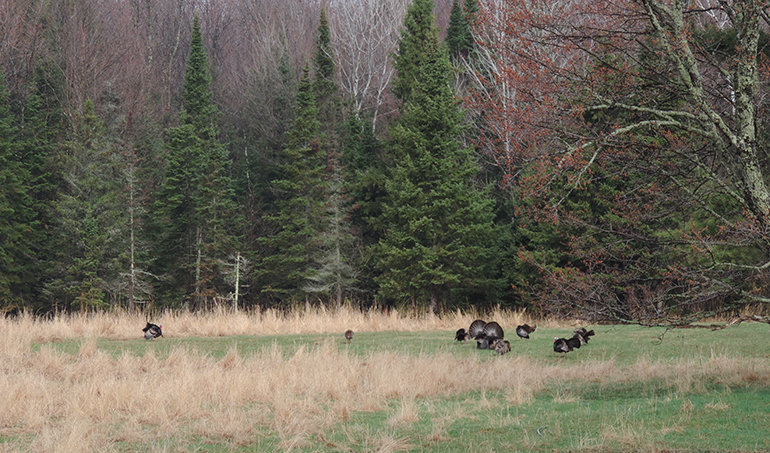
Spot Them
While listening for hen/poult talk or tossing leaves can be productive, I instead prefer to drive back roads rich with agriculture to find birds to hunt without stepping into the woods. Nearly all of my fall turkey success generates this way, and most landowners happily grant access. In fact, most farmers kiddingly tell me to "shoot 'em all."
In my area, turkeys are rather plentiful, so finding a flock generally takes little time. Plus, I've been hunting fall turkeys for years and have several farms at my disposal that are absolutely money each fall.
I suggest taking a pair of decent binos along on your scouting drives. Places to glass are hayfields in early fall and picked cornfields mid-fall through the end of the season.
As for timing, I usually take my drives an hour or two after dawn or flydown. This tells me where the birds hang out after they fly down, as hunting roost sites is dicey. Of course, if you can set up quietly in the pitch dark, then hunting a roosting area in the morning can be productive. This is easier done with a shotgun than a bow.
Observation Hunts
During my early fall turkey hunting days as a teenager, I'd often bowhunt a hayfield or picked cornfield from a blind to observe bird movement rather than scout. Fall turkeys are generally patternable. An observation set can yield a shot opportunity, but at a minimum you can see the specific areas turkeys are frequenting and move in for the kill the following day.
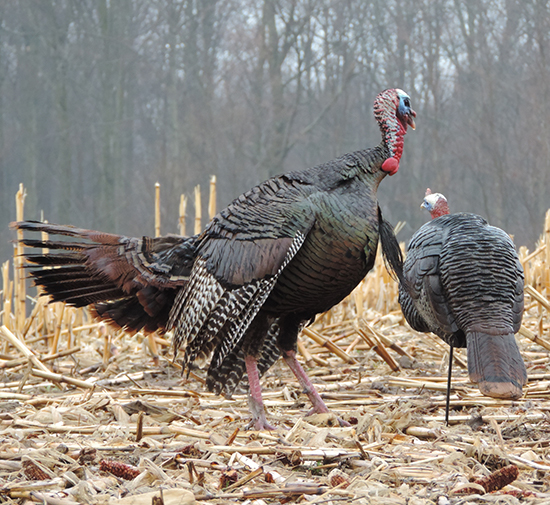
Confidence Decoys
While targeting hen/poult flocks, placing one or two realistic decoys within shooting range can be wise. Fall hens and poults can be inquisitive, and a hen decoy can draw them in for a closer look. Hens can also be territorial, so it's possible one could respond out of anger, even attacking the decoy with pecks, kicks and wing jabs.
In any case, I've never had decoys ruin my fall hunts. In fact, one September while targeting a 10-tom flock, I placed a strutting jake decoy in the large hayfield I was hunting. I did it because the turkeys didn't seem to favor any particular portion of the field, and I needed to try something creative in order to bow-kill one of them.
The first morning I hunted them, all 10 toms came in from 250 yards away, several posturing next to the decoy 18 yards away. I thumped the lead tom just before he attacked the decoy. Yes, decoys have a place in the fall-turkey woods.
Gun and Go
One of my favorite ways to shotgun hunt for fall turkeys is to spot and stalk them. It might seem impossible given a wild turkey’s keen eyesight, but I've claimed a heap of birds using this strategy.
The best days to stalk turkeys are in roaring wind and when the ground can be negotiated quietly — powdery snow or damp leaves are best. It's also important to have terrain features or other natural obstructions at your disposal so you can remain hidden until you're within shooting range.
Fall turkeys often provide more than one shot opportunity, so if you have multiple tags, be quick on the gun. Many of my shotgun stalks end with a double, and that makes for a thrilling hunt.
End Results
Once you bag a fall turkey or two, consider making the spoils part of your Thanksgiving or Christmas feast. Be sure to cut across the grain to ensure tenderness. Also, soak the chunks in salt water or buttermilk for 24 hours prior to cooking, which tenderizes the meat.
I often batter and deep-fry breast chunks and serve them with BBQ or bleu cheese dipping sauces. If that, along with the other points I’ve presented, doesn’t interest you in fall turkey hunting, nothing will.
The ram was in no hurry. He was picking his way along the top of a ridge while my wife and I were easing up a ridge parallel to his. We were only 200 yards apart, and I wanted a good look at his horns. He seemed oblivious to our presence and never looked in our direction. Finally, he turned his head, and I saw all I needed to see.
“Cover your ears,” I said. I settled my rifle on my backpack, which I had arranged on a rock, and found a comfortable prone position. After flicking off the safety, I started the trigger squeeze when a shot rang out from far below. I saw a bullet hit two feet under the ram. The animal took one bound and disappeared. I couldn’t believe it. I was a split-second from making the shot when the other hunter fired. He was at least 600 yards away—and this was before the interest in long-range shooting. The hunter climbed up to our position and apologized. He said he hadn’t seen us, even though I was wearing a blaze orange vest. I shared a few choice words with him that I won’t repeat here.
That incident stands out as a prime example of competition among hunters. All of us compete with one another when we’re in the woods. Of course, there are exceptions, say, a dove hunt in Argentina where thousands of birds are in the air all day long and it doesn’t matter who is standing where. But by its very nature, hunting is the best where people are the fewest. Often, successful hunters are those who get into the woods first or stumble onto the quarry before someone else. Some of that competition can get downright nasty, such as the time our group slogged along in deep mud, carrying heavy loads of duck decoys to our blind far out in the marsh. Another party of hunters carried no decoys and set up just far enough from our spot where they’d get first crack at the ducks we were calling.
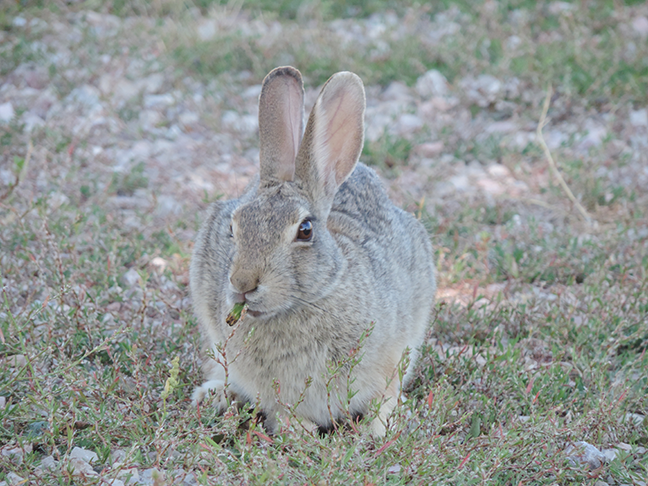
Because of this rivalry, hunters often go through all sorts of shenanigans to outwit others. I have a honey hole for cottontail rabbits that is truly amazing. It’s a one-acre pile of old pipe, culverts, timbers, and all sorts of miscellaneous junk discarded from a nearby oil field. It’s tucked back in a draw and holds dozens of rabbits. You can shoot a limit of 10 with a scope-sighted .22 and not walk more than 10 yards. The bunnies sit boldly in the snow where they can easily jump to safety from an incoming eagle or coyote, but they haven’t learned the perils of a speeding bullet. The only hunters I’ve taken there are visiting pals from other states who would never return without me. I’ve never taken a local hunter there for obvious reasons. One day, while driving through the oil field to my spot, I passed a truckload of local rabbit hunters. They followed me at a distance, staying with me through all the forks and turns, so I led them on a wild goose chase. After a half hour of this, I stopped at one of my lesser spots, plinked a rabbit, and continued on my way. They stopped to hunt, and I circled back to my spot, far enough away that they wouldn’t hear me shooting.
But the most elaborate scheme of trickery I’ve encountered was on public land in New Mexico where I hunted DIY elk for years. I drove down a well-used forest road and saw tents pitched at the mouth of three big draws I liked to hike up and hunt. Disappointed, I drove on to another spot and walked up the mountain. I was on a trail when I saw a hunter walking down toward me, carrying an elk quarter on his back. I congratulated him on his success, and while making small talk, I told him that there were more hunters than usual in the area and mentioned all the tents. He grinned and told me that he and his buddies had set up those empty tents to keep other hunters away. I’ll admit I had to laugh in admiration of their creativity.
Among the outdoor sports, you can be successful in crowds when the fish are running and everyone is catching them. You can enjoy camping in a crowded campground if you’re a social person and like people. But if you’re a hunter, the last thing you want to see is someone else’s pickup parked in “your” spot. As I like to say, all is fair in love, war, and hunting—maybe.
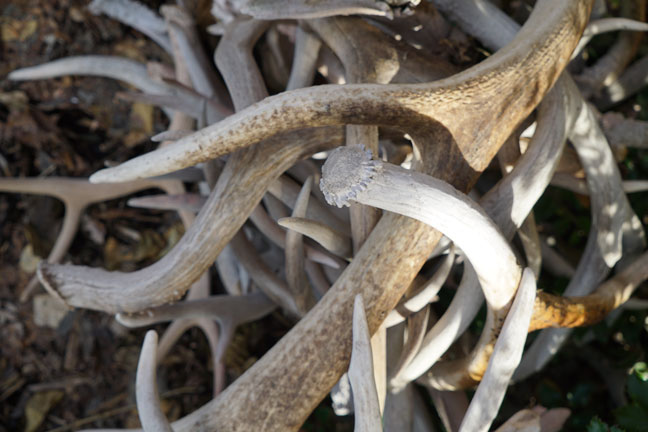
There's no doubt finding sheds can be exciting, but once you've found them, what can you do with them? The answer is: a lot. From collecting and crafting, to decorating and eating, the uses for discarded bones are endless. Even if your wife doesn't approve of such primitive things in the house, all is not lost for a good shed hunter.
There is just something about shed antlers. The way they look and what they mean to the hunter invokes those that find them to want to hold on to them. Keeping shed antlers is a physical record of a particular hunting area, or even a particular animal. There is something valuable about being able to put actual tape on antlers from an area you hunt. There is even more value in being able to track a deer's growth from year to year. This data aside, the excitement of a find makes some sheds too precious to do anything with besides watch collect dust.
For the shed hunter, the most unique antlers deserve a place in the house for all to see. The rest join the collection pile outside. Many avid shed hunters take pride in their shed pile. Like any collection, the collector has a desire to constantly add to the lot and keep searching for the few treasured sheds that are good enough to bring inside.
Some shed piles are a sight to see and can tower the tallest of hunters. The best public collections can be found outside of the National Bison Range in Montana, or the famous shed piles in downtown Jackson Hole, Wyoming.
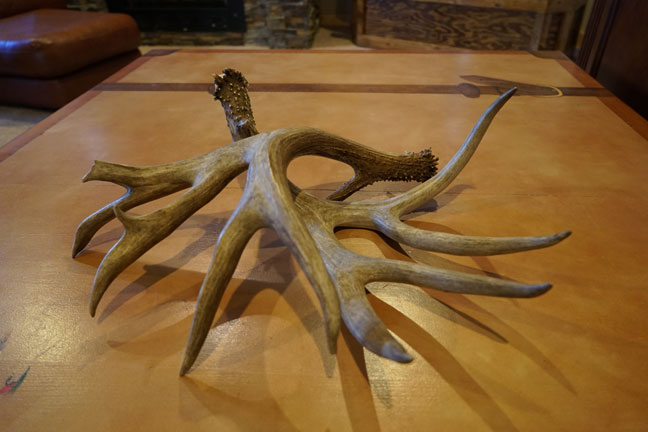
Crafting
Antlers have been crafted into useful things for thousands of years. Although the origins may have been purely for survival, like making weapons and tools, today we can appreciate the art of antlers. Shed antlers can be used for something as simple as making buttons, or something as intricate as making knife handles.
All sorts of items can be easily made at home. Antlers are fairly easy to work with when using the proper tools. A Dremel tool set is the single best tool for antler working. With a little know-how, antlers can be used to create hundreds of different items. Cribbage boards can be a fun and an easy one to start with that almost anyone can craft.
Eating
You've heard the adage "you can't eat the horns," but that's not necessarily true. Deer antlers are edible, and not just as a pill used in eastern medicine or a health supplement. Antlers can be used to make gelatin by boiling the ground antler and straining off the remains, which could be used to make fruit gelatin or added to homemade jellies.
Processed antlers can also be used in baking recipes. Although rare now, some old recipes still call for Hartshorn. This product is made from distilled, ground antler by burning in kilns, which makes ammonium carbonate. This was the predecessor to baking powder, which is still used today in thin shaped cookies and crackers. When heated, the gaseous ammonia is released in the baking process, acting as a leveling agent.
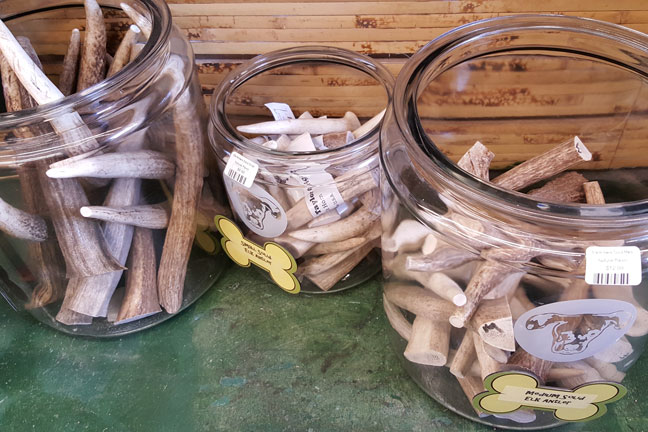
Although you would not just bite into a shed antler or boil it up and put it on a plate, recently antlers have grown in popularity as dog chews. This is now a large part of the shed antler market. Dogs enjoy gnawing on them and get calcium as an added bonus. Just because you're not willing to eat the antler doesn't mean your dog won't be thankful a shed hunting trip.
It's like money just lying in the hills. Shed antlers are big business, and buyers are out there looking to pay you to find them. Most antlers are purchased at a price per pound and on a quality grading system.
As a general average, brown mule deer antlers fetch around $10 per pound and brown elk antlers average $12 per pound. Last year's white antlers in good condition are $8 per pound for mule deer and $10 per pound for elk. Chalky, white antlers still have a value, but around $1-3 per pound. Fresh whitetail sheds generally fetch around $6-8 per pound, but are not as easily sold as mule deer and elk. This is because the market is saturated with humongous whitetail antlers from farmed deer.
Although some buyers will pay a premium for sets, this generally only applies to extremely large or unique antlers. A 400 class elk can fetch over $1500, while a 200-inch mule deer can be worth $500 or more. In some instances, individual antlers or sets have been sold at a much higher price to collectors looking for giant or one-of-a-kind animals.
As for smaller matched sets, a 170-inch mule deer goes for around $60, and 300 class elk sells in the $200 range. If nothing else, shed hunting can turn into a hobby that pays for itself or provides you with a little extra cash for when the real hunting begins.
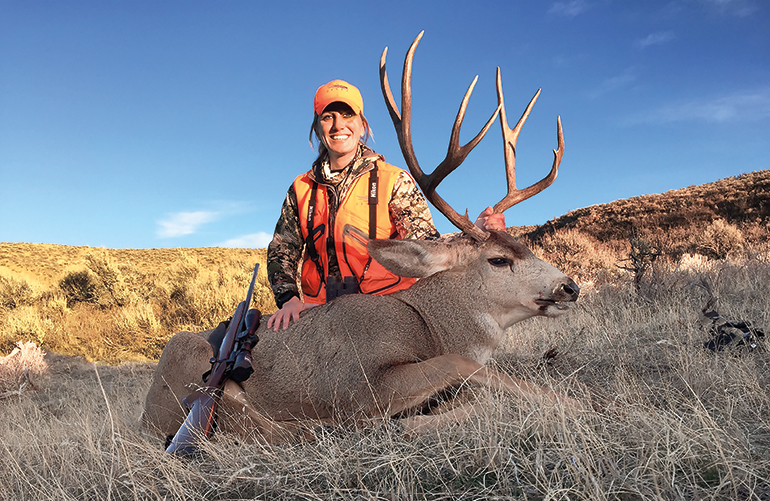
The muley buck was staring directly at me. His tall, dark antlers stood out against the backdrop of sage grass and showcased four nearly-symmetrical tines on each side. He turned his head and revealed a small droptine falling from his right antler. The crosshairs of my scope wavered over his vitals, and my finger lightly touched the trigger. One gentle squeeze would transform him from present to past.
But my instincts said no. The buck stood 150 yards away, and a prone shooting position offered me a rock-solid rest. He would make a fine trophy and provide a freezer full of meat, but that didn’t stop my gut from saying “don’t pull the trigger.”
“Take him when you’re ready,” Clint, my guide, whispered.
“I’m going to pass on this one,” I said. My cheek still resting on the stock, eyes glued to the buck. “I didn’t work hard enough for him.”
Passing Shots
It was November, prime time to be chasing muley bucks over the rolling plains and through the dense forests of Colorado. A musky scent hung in the air as big-bodied bucks ignored all of their innate instincts for self-preservation to focus on breeding. The rut was in full force, leaving no shortage of tall-tined antler sightings.
Clint’s confusion was obvious and understandable. Weren’t we trying to kill a big buck?
Yes, we were. But we had spotted this brute from the road. No hiking had been required, and the stalk consisted of a 40-yard crawl. As my rifle hung over his vitals, it crossed my mind that this buck deserved more respect than that.
This wasn’t the first time I had passed on a respectable animal during a guided hunt—and probably won’t be my last. A black bruin roaming a dirt road in British Columbia would walk away unscathed; a trophy free-range axis deer made his way silently into thick cover, never to be seen again; a Wyoming antelope followed his does into the glare of a setting sun. And over the next week in Colorado, two more mule deer bucks would live to see another day.
Great opportunities can come from hunting with outfitters. It gives those of us passionate about the game we pursue better odds to walk away with a freezer full of meat and a trophy to hang on the wall. Access to private land and expert individuals who are familiar with the terrain is an advantage in the sport. But their main concern is to help you get an animal on the ground.
A trek West to experience these thrills may be a once-in-a-lifetime opportunity. Don’t waste it. Make it your hunt, one that will leave you with memories to tell around the campfire for years to come. Here are a few ways to turn your dream hunt into a great adventure.
“Let’s Hike!”
Trucks and utility vehicles are useful tools. When you have hundreds of acres to cover, they make getting from point A to point B easier and give you a greater opportunity of seeing more game. But they also eliminate a large part of the hunt experience.
On multiple occasions, instead of intently scanning for game, I was lolled to slumber by the hum of the engine. In one instance, after three hours of driving switchback roads through the mountains of British Columbia with my guide Gary, my eyes had glazed over and I stared absent-mindedly out the window. When we finally spotted a mature boar shuffling down the middle of the road, I respectfully passed. Half-asleep with no miles logged was not how I wanted my once-in-a-lifetime British Columbia hunt to end. I wanted to feel the burn in my legs, sweat down my back, and straps of a pack filled with meat and hide cutting into my shoulders.
Instead, I politely asked to spot and stalk. Gary’s eyes lit up. He was more than happy to oblige. He was an avid sheep hunter, and spot-and-stalk hunting was his preference. He just didn’t know it was mine as well.
For the next three days we drove to different locations, leaving the truck behind and trudging into the forest, hiking multiple miles a day, experiencing the rough terrain of British Columbia. A simple request allowed me to crawl within 30 yards of a sow, watch cubs climb trees in the backcountry, and take aim at a big boar that had stormed out of the woods in response to our animal distress call.
Let your guides know how you prefer to hunt. If you’re a spot-and-stalk hunter, speak up. If you prefer a blind, let them know. Outfitters want most of all to ensure you experience the hunt of a lifetime—but they can’t read your mind.
Work Together
Three of us knelt atop a sandy, cactus-strewn hill, glassing the expansive Wyoming landscape for specs of white, hoping to spot wary antelope from afar.
“Isn’t that a lone buck lying in the middle of that field?” my friend and hunting partner Natalie asked. Willie, our guide, and I turned to look in the direction she had indicated. Sure enough, the black horns of the goat were undeniable. The cold October wind stung our faces as we huddled to discuss a game plan. Together, we threw out ideas on how best to make our way undetected to the buck. Working as a team, our hunt ended in a four-mile stalk, 200-yard belly crawl, a buck in my freezer, and a sense of fulfillment that I had helped call the shots on my hunt.
There were times when being guided that I felt detached from the hunt, as if I were following behind someone else who was hunting and I was there just to pull the trigger. My guides weren’t sharing their tactics and had not asked what I would do in certain situations.
Being included in all aspects of the hunt makes the chase more memorable. Don’t play follow the leader and keep your head down. Your guides are there to “guide” you, but that doesn’t mean you can’t be involved in the game plan. Ask them to explain their maneuvers and why they are doing things in certain ways. Share your opinions on the best route for a stealthy approach or ask to blow a bugle or yelp softly to a turkey.
Work as partners, and when you get an animal on the ground, it will be that much more rewarding.
If You Like It, Shoot It
The mule deer buck caught me by surprise. His head took up the entire view of my binos.
I wanted her to experience an exciting hunt, so I had opted to move around for a bit. As we stalked through a secluded pasture, we found ourselves distracted by a curious Border collie who decided to say hello. After a few minutes of petting, he scampered away. I went back to glassing and discovered the buck had snuck in on us undetected.
“Look slowly to your right,” I whispered. When Ashley didn’t reply, I moved my eyes from the binos to look at her. She was frantically searching to her left. “Your other right,” I whispered, trying hard not to laugh.
She spotted the buck, and her breathing quickened. He stood no more than 40 yards away, looking directly at us. He was no 170-inch mule deer. But he made Ashley’s heart race, and that’s all that mattered.
The Border collie I thought had spoiled our hunt was actually its savior. The buck turned from us to watch the dog trot down the road. It was enough time for me to get Ashley settled on shooting sticks. After she took the shot, the buck ran 10 yards before toppling over. Our whoops of excitement could have been heard in the next county.
For Ashley’s first big-game animal, the size of the buck wasn’t as important as the experience, the effort, and the camaraderie. The same can apply to your hunt. If size isn’t everything, let your guide know. If a 120-inch, eight-point whitetail walks out of the woods and gets your heart pumping, let loose an arrow. It’s your hunt, and any animal is a trophy if you work hard for it.
Dream it, do it
The musty stench of rutting deer hit my nostrils before I found him—his body lay camouflaged among the sage brush. Kneeling, I grasped the thick antlers and admired the old muley’s rack. Deep forks adorned his right beam, while his front left fork resembled a crab claw. He wasn’t symmetrical, but that didn’t matter.
After passing on the first mule deer, much to Clint’s disdain, the rest of our hunt together had been filled with miles of Colorado terrain hiked, two blown stalks, one surge of adrenaline while waiting on a big buck to walk out of a coulee for a broadside shot (he never did), and this belly crawl to within 120 yards of—now—my buck. He was hard-earned, and that was all that mattered to me.
We all hunger for adventure in the backcountry. Chasing bugling elk among the aspens in the San Juan NationalForest, glassing for black bears atop a rugged outcropping in the Frank Church– River of No Return Wilderness, or seeing a whitetail’s rack silhouetted against a golden sunset in the Nebraska Sandhills are experiences to be savored. Speak up, be involved, work for it. Make it yours, and you will be guaranteed the hunt of a lifetime.
How cool would it be if your child shared your passion for chasing whitetails? Instead of driving to track meets at 5 a.m. on Saturdays, you could drive your protégé to the woods, discuss tactics, have a great time, and maybe kill a big one that you’d talk about for the rest of your lives. If your child could experience the same exhilaration that you feel in the woods, you’d have it made.
Reality is, no two kids are the same. Nature and nurture form kids into the people they become, and school, sports, and friends exert an awfully strong pull. So there’s no blueprint for forging a hunter out of your son or daughter. Some may never be. I believe there are some things you can do—and some you shouldn’t—to fan the deer fever that may be waiting in your beloved.
Don’t Take Them Deer Hunting
First—and this might shock you because this is a whitetail column—deer probably aren’t the best intro to hunting. In the late 1970s, Robert Norton, PhD, and Robert Jackson, PhD, at the University of Wisconsin conducted a study that identified five stages of hunting. Stage 1 is the Shooting stage wherein new hunters are most interested in the capabilities of the gun in their hand. They love to shoot. Stage 2 is the Limiting Out stage. Here novices are most satisfied after they reach a legal limit of game. Stage 3 is the Trophy stage. Stage 4 is the New Methods stage. Stage 5 is the Sportsman stage that is more about enjoying the experience with friends and family than it is about killing.
Deer hunting effectively skips the first two stages, so most kids are better off shooting, tromping, sneaking, and learning the woods via small-game hunting. But let’s assume your child is ready for deer hunting. Here are a few good tips to employ.
Skip the Blind
First, consider foregoing a blind or treestand. Sneaking to a few good spots in the woods is a lot more fun for a kid, despite the odds being much lower for actually taking a deer. This brings me to another point. It’s a misconception to think that a child must kill a deer the first time he or she goes out or else they won’t return. I’ve seen well-intentioned adults coddle their young hunters so that they don’t feel the slightest bit of cold, hunger, or even effort in killing a deer on their first hunt. But most kids don’t equate fun with killing on their first hunt unless that’s what you tell them. Rather, fun should mean interesting. And it shouldn’t be too easy. Think about it.
Did you kill a deer on your first hunt? If not, did you give up or did you want to go try again? Were your senses not heightened as you felt the slight sting of cold in your fingers and wind on your face? Most hunters I’ve interviewed say it took them several fun and frustrating seasons before they bagged a buck. It was this challenge—the focus and effort spent in accomplishing a goal—that pulled them back to the woods. It’s precisely why your kids play video games. They play them to win. If they won on the first try, they wouldn’t play them anymore. I believe hunting should challenge children, not coddle them. Yet it shouldn’t be torturous, either.
Gadgets and Games?
Hornady’s Neal Emery knows the task of introducing kids to hunting all too well. His eight-year old son, Weston, started hunting with Neal when he was just six. He took his first deer a year later. Unsurprisingly, Neal says that Weston didn’t have much patience back then.
“Until they’re old enough to enjoy the hunt even when it’s slow, make it fun,” said Emery. “Don’t overdo it and don’t chastise them for saying they’re bored.”
So what did Neal do when Weston said he was bored?
“I brought him snacks and cards to play with.”
And that brings up a great question. Is it okay for young hunters to bring along toys to the woods? The hunting community is split.“We go deer hunting to enjoy the outdoors, not video games,” said Thomas Pennington, whose two sons became avid hunters.
On the other hand, there are others who say it’s fine to bring along a gadget if it helps the child stay out longer and see more deer.
“Let’s face it,” said Chris LeMond, a hunter who has a son and two daughters. “Deer hunting can be boring. Even though I love it, I text and check scores on my phone occassionally while in my tree. It keeps me from going to sleep. So if I use my phone, why should I deprive my son of a video game if it gets him through the lulls or gets him out in the woods at all?”
Bring Kids on Your Hunt
Capt. Bob Weatherald owns Maryland’s Mid River Guide Service. His son, Dawson, has been helping his father guide clients since he was waist-tall.
“I believe it’s all about showing enthusiasm and excitement for an unpredictable adventure,” said Weatherald. This means sharing stories with them, talking about the mounts on your wall, studying animals, and talking tactics and gear like regular hunting buddies. Weatherald also believes your child should accompany you on your hunt rather than the other way around.
That means you don’t necessarily have to change your style of hunting just for a kid. Take them along so they can learn how you do it. This might mean buying a two-man treestand. If you hunt from ground blinds, that’s fine, just make sure he can see out of it. Regardless of where you hunt, give your charge a job, whether it’s using the binocular to spot, wrangling the dog, or blowing a grunt call. Let a kid collect a memento or two to bring to grandma.
Finally, let Jack or Jane shoot a small deer if they want. Encourage it. Now’s not the time to teach trophy hunting; they’ll pick that up soon enough. Then make them get their little hands dirty by helping you clean the deer. Most kids are fascinated by deer guts. They’ll learn biology and shot placement and that hunting comes with responsibility.
Most importantly, relax when you hunt with your kid. It doesn’t matter if you kill a deer, as much as that you do your best to make the hunt interesting. Your child will sense your ease and will be more apt to have a good time, too. After all, isn’t that your ultimate goal?
I’ve heard many people say, “Turkeys are meant to be shot in the head with a shotgun.” The gist is that a turkey brain-rocked by a swarm of dense shot is going nowhere but down. There is peace of mind in that, and toting a shotgun certainly puts you more in control of the hunt.
Of course, most turkey hunters who are serious bowhunters during the fall are eventually bit by the I-want-to-kill-a-turkey-with-my-bow bug. Turkey hunting with a shotgun isn’t always easy, but if you’ve become good at it, perhaps it doesn’t feel very challenging anymore. You can add excitement and challenge back into turkey hunting by laying down the shotgun and picking up your bow.
If you’re ready to make the leap and hunt spring gobblers with your bow, let me help you taper the learning curve a bit. Following are some tips that have helped me bow-bag dozens of turkeys over the last 18 years.
Get Them in Close
The most exciting aspect of bowhunting turkeys is that, to kill them consistently, they must be close. I rarely kill a bird beyond 20 yards anymore. When a bird gobbles, spits and drums within 20 yards, it’s an entirely new level of exciting. But pulling toms within 20 yards isn’t always easy, so let’s consider our options to get that top-pin shot.
Choose Your Approach
I bowhunt turkeys without a blind as often as I do with one. My approach is based almost solely on the amount of pre-hunt scouting I’ve done. If I know birds are on the property but haven’t seen them do the same routine for several consecutive mornings, I usually go blindless. I dress in camo from head to toe, pack a folding saw in case I need to craft a quick blind and head onto the property with my bow and decoys — a very mobile approach.
Once I hear a gobbler, I move in as close as possible without being spotted, then choose a setup location where toms approaching my decoys will move behind trees or other obstructions so I can draw my bow undetected. I place my decoys 15 yards away. I call almost exclusively with a mouth call to eliminate movement. I’m not going to elaborate on calling since I rely more on my decoys and less on calling for a top-pin shot.
The beauty of a mobile approach is that if the bird(s) move in another direction, I’m not tied to my initial location. I can move to subsequent setups and try to make something happen. It works well for me, and I find that I hunt fewer hours and kill more birds.
That said, I’m a big advocate of using ground blinds. When I’ve patterned birds that do the same thing every morning — especially in ag fields — I want to be in the exact location they’re frequenting. I can do that with a ground blind. Unlike deer, turkeys (unless they’ve been majorly educated) will accept a ground blind placed in the wide open, especially with realistic decoys placed 10 to 15 yards away. I’ve arrowed many gobblers from this exact setup.
If turkeys are frequenting a large field daily but not in the same exact spot, I choose the highest point in the field as my setup. This makes my decoys most visible, and for whatever reason, turkeys are prone to approach decoys uphill from them. I’ve never had a gobbler come downhill to my decoys.
Tackle for Turkeys
If I had to choose between using cheap decoys with great camo or using mediocre camo with expensive, realistic decoys, I’ll choose the latter every time. I used cheap decoys during my early years of turkey hunting with very sporadic results.
I switched to Dave Smith Decoys 10 years ago, and they paid for themselves right away in the time they saved me. I haven’t done the exact math, but I’d say eight out of 10 toms respond to them. What’s more, they lock onto them so intently that I can draw back undetected. I almost always use one hen and one jake. Why? Because it works and I see no sense in bogging myself down with the additional weight of more decoys.
When hunting without a blind, I wear a HECS suit underneath my camo, which makes my electromagnetic fields undetectable. I carry a small folding chair so that I can keep my bow cam above dirt and vegetation while shooting.
If you don’t have a ground blind and want to hunt from one, you have two options. Either borrow one from a buddy or buy one. If buying, consider it an investment. Cheap blinds don’t last. Buy a blind made from quality materials, take good care of it, and it will last you decades. Thus, you can justify spending more. I have two Primos Double Bull blinds — the Darkhorse and SurroundView 270 — and both are great for deer and turkey hunting.
Broadhead Selection
The exact bow setup you use for deer hunting will work well on turkeys. Some folks reduce their draw weight, which is fine, but I don’t. I want to set up my bow once for the entire year. I don’t want to reconfigure sight pins or sight tapes after turkey season, so I shoot the same setup for turkeys as I do for big game.
Broadheads are very important. A small broadhead placed through a bird’s lungs will do the trick every time, but the lungs are a tiny target that even the best archers cannot hit every single time during a hunting situation. As a bowhunter, the worst nightmare is thumping a bird and watching him go airborne into the unknown. And that can happen if you miss the mark even slightly.
For that reason, I shoot big, forgiving mechanical broadheads. First, the additional cutting diameter will often compensate if a marginal hit is made (don’t use that as an excuse to attempt low-odds shots). Second, the shock a large mechanical broadhead transfers to the bird on impact is astounding. That combined with the large cutting surface will help anchor a bird more quickly. Having shot birds with both fixed-blade and mechanical heads, I’m putting my money on mechanicals.
Take Your Time and Make the Shot
In the past, I rushed more shots on turkeys than I care to admit. It gets really exciting when a boss tom is pummeling your decoy 12 yards away. It creates a false sense of urgency to shoot quickly. I’ve learned to ignore that anxious feeling. I make sure the tom is still and that I know the angle at which he’s standing. A tom locked on the decoys will usually give you all the time in the world — no need to rush.
Now, you’d be surprised at how many turkeys are missed or hit marginally at 10-15 yards. A strutting tom is mostly feathers, so if you don’t know the anatomy and how to place your arrow according to the angle, it’s very easy to botch a gimme, especially if you rush the shot.
Study anatomy diagrams online before and during your hunt, and then when an opportunity presents itself, SLOW DOWN. Don’t just aim for the center of the bird and hope for the best. Choose the feather you want to hit and fixate your sight pin on it. Trust me, rushed shots will lead to lost birds. Don’t settle for that.
Go For It!
There’s a level of fear that comes with downgrading from a long-range weapon to a more primitive or short-range weapon. I mean, why lay down the sure thing and make things more difficult? You’ll know the answer when you bow-kill a gobbler from 10 yards as he attacks your jake decoy. It’s a rush that keeps me toting my bow every spring.
When our son asked me a few years ago if he could ride the four-wheeler over to a friend's house and blow up Tannerite with a .30-06, I remember thinking, That sounds like a good idea; what could go wrong?
When my best friend, who was sitting on the bank behind me as I cast for trout, started throwing big rocks to see how close he could get to my head without actually hitting it, my otherwise predisposed mind registered, That sounds like a good idea; what could go wrong?
"What could go wrong?" are the famous last words of many a YouTube hero. Fortunately, our son still has all his limbs and senses. I wish I could report the same result from my trout stream experience.
So, this month, I am going to explore what can go wrong when the focus of our season is standing right there, 30 yards away. Knowing what could go wrong, hopefully, gives us the chance to avoid the seemingly inevitable calamity.
YOUR BOW
Bowstring
I once arrived at an elk hunt only to find my bow was shooting so low I couldn't even hit the target at 20 yards. It was a hot week, and the bow was in a black case on the trip out. The string stretched. Fortunately, I had a portable press and was able to twist it back to the right length.
Your string is made up of several strands of soft extruded polyethylene. The word "soft" should immediately make you cringe. Almost everything else on a bow is made of something hard that can take a licking and keep on ticking.
The string can let you down in many ways. Obviously, it can stretch. The center serving can break or slip. The peep sight can stop rotating correctly. If you have an older string on your bow, or shoot several thousand arrows per year, it is wise to buy a new custom string and break it in before the season. This is the most important accessory on your bow.
After the string, your sight pins are the most vulnerable parts on your bow. I have had pins break and bend during the course of a tough hunt, and I have had the filaments break on plenty of cheap fiber-optic pins. The obvious solution is the best one: buy a better sight. The best sights now feature well-guarded pins that fully protect the fibers. If you have not upgraded your sight recently, you don't know what you are missing. The best have amazingly bright, well-protected pins and are a joy to shoot.
If you choose not to replace your sight, at least make a point of studying your pins several times per day to be sure they are sound.
Arrow Rest
I missed a good buck in the mid-90s because my rest got bumped at some point prior. I hadn't been shooting during midday, so I didn't catch the change. I shot right under that heavy 8-pointer as he worked a scrape just 15 yards away. Back at the target later that morning, the bow hit eight inches low at 20 yards.
Obviously, you have to shoot as often as possible during the season to head off these problems before they cost you a buck. That is the main takeaway from my sad day in the stand, but you can also prevent this from happening, to some extent, by selecting the right accessories. Now I only use rests with secondary setscrews that lock them in place, or I use rests that mount into pre-shaped cutouts in the riser. I no longer trust the notion that I can tighten a single retaining screw enough to keep a rest from pivoting if it takes a hard knock.
EXECUTION ERRORS
Oh, boy. Now we are in the same league as the four-wheeler, Tannerite and .30-06. There are a ton of things that can go wrong here. Let's look at the most obvious ones.
Rushing the Shot
This has cost me a couple of trophies over the years. We all have a built-in tendency to want to shoot quickly. I have more or less eliminated this problem by forcing myself to squeeze the trigger on all my shots. On the range it is not hard to do, but on live game this takes discipline and a very intentional approach. Force yourself to do it on every shot you take.
Hitting Limbs
Three very good trophies (an elk, a whitetail and a woodland caribou) ran off unscathed because my arrows hit mid-flight branches that were above my line of sight. Your eye takes the laser-beam line, but the arrow arcs above this. The only way to prevent hitting these unseen twigs is to actually look for them!
Now, every time I hit full draw, my first mission is to make sure there is nothing above my line of sight. If so, I crouch down or pick a different shooting lane. Seems obvious, but it is very easy to ignore.
String Jumping
I have written about string jumping several times in this magazine, but it is such a huge issue it deserves another mention. Not handling alert deer correctly has been my curse in recent years. I am starting to get a grasp on it, but that education came at a terrible cost. Some really big whitetails have gotten away because I didn't aim low enough.
If the deer is alert, I now aim for the heart on 20-25-yard shots. I aim for the brisket on 30-yard shots. On shots between 30 and 40 yards, I aim increasingly below the brisket. I don't take shots past 40 yards on alert deer. In fact, given how quick deer are, 40 yards is a reasonable maximum range even on relaxed deer — no matter how well you can shoot on the range.
Pin Visibility
I hunt from blinds a lot more now than I used to, for a couple reasons. Number one, I am getting older and softer and like the comfort of a warm blind on a cold day. And second, because blinds are the most effective way to kill deer in a number of situations — especially on or near food sources. To set up a blind well so the deer can't see in, you have to keep the windows shaded. This means it is dark inside — making it hard to see your pins. I had a really big buck get away in 2012 because I used the wrong pin and shot right over him. To be accurate from a blind, even at short range, you need a lighted sight. I have added the optional light to my Fuse sights, and now I aim with confidence right up to the end of legal shooting time.
CONCLUSION
If you are vigilant for changes in the string, the sight and the rest, you will eliminate 90 percent of the nightmares your bow could inspire. But, when it comes to execution errors, things get considerably more complicated. I have found dozens of ways to blow big opportunities. All you can do is anticipate (and try to eliminate) the most obvious ones.
Someday, if I hunt long enough and hard enough, an absolute monster will come past. I don't want him to get away. It is just that simple.
f you've shot a bow for any length of time, you have heard about follow-through. In this column, I am going to take a closer look at follow-through, specifically as it relates to your release hand/arm. In short, proper follow-through involves your release hand and arm falling away from the anchored position as the shot fires. A lot of people misunderstand what follow-through actually is. Most will say, "You really need to work on your follow-through," or "Make sure you remember to follow through," or something along those lines.
In reality, follow-through isn't something you should be working on to have a great shot. Rather, it's the result of a great shot. The goal in execution is a surprise release, where you aren't anticipating the timing of that shot. When that happens, a good follow-through is inevitable.
I often hear the comment, "Man, that guy has a horrible follow-through." But I learned long ago it does you absolutely no good to work on your follow-through, because "that guy" is just anticipating his shot, which is causing his horrible follow-through. Or rather, his lack of follow-through. You see, if I fire my release via conscious command, I am tensing those small muscles it takes to execute the shot, and my release hand will stay right next to my face instead of falling back.
If you have a poor or non-existent follow-through, here is a test to prove my point: Come to full draw and have a buddy slowly squeeze your trigger while you concentrate on nothing but aiming. When the bow fires, your release arm and hand will fall away from the position, because you're not fast enough to stop it. This means that when you are executing your own shot, you know the exact moment to tense up, causing the lack of follow-through.
Instead of spending time pointlessly trying to work on having a follow-through, work on executing a surprise release where you are focused on nothing but aiming. You should be slowly squeezing the trigger until the shot fires. This will result in a great follow-through. Anyone can fake a follow-through, but that will not make you a better shooter. Honestly, when I see a bad follow-through, it is just a red flag that the person has target panic. The two just go together. Working on your follow-through WILL NOT not fix your target panic. However, if you fix your target panic, you WILL have a smooth, consistent follow-through.
If you are really struggling to fire a surprise shot, I suggest getting a release aid you can't punch or command. Back-tension releases are great training tools for this purpose. When it comes to index-finger trigger releases, the Panic X from Tru-Fire has a setting that makes you slowly squeeze the trigger or it will not fire. Shoot with one of these releases until you aren't thinking about the shot or your follow-through anymore; only aiming.
There are a lot of myths on follow-through and how it's a necessary part of a great shot. While it is an indicator of a great shot, it's not something that needs to be practiced. Follow-through is when your release hand and arm fall away from the static full-draw position as the bow fires. This normally doesn't happen if you are commanding the shot or if you know the exact millisecond the shot is firing. Simply put, learning to execute a surprise release is a critical component of becoming the best archer you can be, and it will also produce that picture-perfect follow-through you've been looking for.
I've used almost all the principles that made me a champion archer to make myself a better bowhunter. It's all about complete preparation. For me, the most important part of that is prepping my mind.
All serious hunters spend so much time and money preparing for the fall. We have the best bows, accessories and camo that money can buy. We set up stands, plant food plots and shoot all summer long. We are ready! Or are we? The truth is, most probably aren't, even if they've done everything I just mentioned. See, no matter how physically prepared you are or how prepped your spots are or how patterned that big buck is, if you're not mentally capable of holding yourself together in the moment of truth, all that hard work is for nothing. I may have never stumbled across the importance of mental visualization had I not grown up in the competition world, but nevertheless, I now use it every time I pick up my bow.
In the realm of competitive archery, confidence is everything. Of course, my equipment must be flawless and so must my form. But that won't mean anything if I can't keep myself together on that final arrow. How do I prepare for that moment? I visualize every shot — every possible scenario; I shoot every arrow in my mind before I shoot it in real life. And every time, the outcome in my mind is the same; I win! I do this over and over waiting on the finals or at night in my hotel room. Then when I'm there, in that moment, instead of feeling uncomfortable and nervous, I already know the outcome, because I've won 100 times in my head over the last 24 hours. Obviously, I don't always actually win, but that confidence has carried me through more times than not. The problem is, sometimes the other guy has won 100 times in his head too.
Hunting camera
If you love bowhunting like I do, then you already do some form of mental preparation and you don't even know it. I involuntarily daydream about shooting giant bucks all the time, but then I take it a step further — and you should too. Every time I climb into the tree, I instantly go into "what if" mode. I think the deer is going to come from that patch of timber, but what if he comes from behind me? Most failure is prompted by surprise, which causes us to panic and then rush. I try to go over every scenario, every way that big buck could come. I want to imagine it and know exactly what to do when it happens, because nine times out of 10, things don't go the way they are supposed to when you're hunting a mature animal. Then, when that 180-inch buck steps out in the one spot you never figured he would, you're cool, calm and collected because you just shot him there a few minutes ago in your mind.
Mental training has been one of my most important edges in competition for my entire career — if not the most important — and I've used the same method in bowhunting with similar success. We all put in so much work preparing for our favorite time of the year, but for most the mental training goes untouched, causing a lot of heartbreak in the moments that should be our biggest victories. Don't let those opportunities slip away because you didn't prepare your most valuable piece of equipment — your mind.
When our son asked me a few years ago if he could ride the four-wheeler over to a friend's house and blow up Tannerite with a .30-06, I remember thinking, That sounds like a good idea; what could go wrong?
When my best friend, who was sitting on the bank behind me as I cast for trout, started throwing big rocks to see how close he could get to my head without actually hitting it, my otherwise predisposed mind registered, That sounds like a good idea; what could go wrong?
"What could go wrong?" are the famous last words of many a YouTube hero. Fortunately, our son still has all his limbs and senses. I wish I could report the same result from my trout stream experience.
So, this month, I am going to explore what can go wrong when the focus of our season is standing right there, 30 yards away. Knowing what could go wrong, hopefully, gives us the chance to avoid the seemingly inevitable calamity.
YOUR BOW
Bowstring
I once arrived at an elk hunt only to find my bow was shooting so low I couldn't even hit the target at 20 yards. It was a hot week, and the bow was in a black case on the trip out. The string stretched. Fortunately, I had a portable press and was able to twist it back to the right length.
Your string is made up of several strands of soft extruded polyethylene. The word "soft" should immediately make you cringe. Almost everything else on a bow is made of something hard that can take a licking and keep on ticking.
The string can let you down in many ways. Obviously, it can stretch. The center serving can break or slip. The peep sight can stop rotating correctly. If you have an older string on your bow, or shoot several thousand arrows per year, it is wise to buy a new custom string and break it in before the season. This is the most important accessory on your bow.
Sight Pins
After the string, your sight pins are the most vulnerable parts on your bow. I have had pins break and bend during the course of a tough hunt, and I have had the filaments break on plenty of cheap fiber-optic pins. The obvious solution is the best one: buy a better sight. The best sights now feature well-guarded pins that fully protect the fibers. If you have not upgraded your sight recently, you don't know what you are missing. The best have amazingly bright, well-protected pins and are a joy to shoot.
If you choose not to replace your sight, at least make a point of studying your pins several times per day to be sure they are sound.
Arrow Rest
I missed a good buck in the mid-90s because my rest got bumped at some point prior. I hadn't been shooting during midday, so I didn't catch the change. I shot right under that heavy 8-pointer as he worked a scrape just 15 yards away. Back at the target later that morning, the bow hit eight inches low at 20 yards.
Obviously, you have to shoot as often as possible during the season to head off these problems before they cost you a buck. That is the main takeaway from my sad day in the stand, but you can also prevent this from happening, to some extent, by selecting the right accessories. Now I only use rests with secondary setscrews that lock them in place, or I use rests that mount into pre-shaped cutouts in the riser. I no longer trust the notion that I can tighten a single retaining screw enough to keep a rest from pivoting if it takes a hard knock.
EXECUTION ERRORS
Oh, boy. Now we are in the same league as the four-wheeler, Tannerite and .30-06. There are a ton of things that can go wrong here. Let's look at the most obvious ones.
Rushing the Shot
This has cost me a couple of trophies over the years. We all have a built-in tendency to want to shoot quickly. I have more or less eliminated this problem by forcing myself to squeeze the trigger on all my shots. On the range it is not hard to do, but on live game this takes discipline and a very intentional approach. Force yourself to do it on every shot you take.
Hitting Limbs
Three very good trophies (an elk, a whitetail and a woodland caribou) ran off unscathed because my arrows hit mid-flight branches that were above my line of sight. Your eye takes the laser-beam line, but the arrow arcs above this. The only way to prevent hitting these unseen twigs is to actually look for them!
Now, every time I hit full draw, my first mission is to make sure there is nothing above my line of sight. If so, I crouch down or pick a different shooting lane. Seems obvious, but it is very easy to ignore.
String Jumping
I have written about string jumping several times in this magazine, but it is such a huge issue it deserves another mention. Not handling alert deer correctly has been my curse in recent years. I am starting to get a grasp on it, but that education came at a terrible cost. Some really big whitetails have gotten away because I didn't aim low enough.
If the deer is alert, I now aim for the heart on 20-25-yard shots. I aim for the brisket on 30-yard shots. On shots between 30 and 40 yards, I aim increasingly below the brisket. I don't take shots past 40 yards on alert deer. In fact, given how quick deer are, 40 yards is a reasonable maximum range even on relaxed deer — no matter how well you can shoot on the range.
Pin Visibility
I hunt from blinds a lot more now than I used to, for a couple reasons. Number one, I am getting older and softer and like the comfort of a warm blind on a cold day. And second, because blinds are the most effective way to kill deer in a number of situations — especially on or near food sources. To set up a blind well so the deer can't see in, you have to keep the windows shaded. This means it is dark inside — making it hard to see your pins. I had a really big buck get away in 2012 because I used the wrong pin and shot right over him. To be accurate from a blind, even at short range, you need a lighted sight. I have added the optional light to my Fuse sights, and now I aim with confidence right up to the end of legal shooting time.
CONCLUSION
If you are vigilant for changes in the string, the sight and the rest, you will eliminate 90 percent of the nightmares your bow could inspire. But, when it comes to execution errors, things get considerably more complicated. I have found dozens of ways to blow big opportunities. All you can do is anticipate (and try to eliminate) the most obvious ones.
Someday, if I hunt long enough and hard enough, an absolute monster will come past. I don't want him to get away. It is just that simple.
If the only time you shoot at game is when the buck or bull of your dreams appears, it's difficult to approach that shot opportunity confidently. I gain confidence by repetition. The more I do something and succeed, the more confident and comfortable I become with accepting greater challenges.
It's often said that nothing instills greater bowhunting confidence than placing your pin on real hair, feathers or scales and executing perfect shots. It positively reinforces good shooting mechanics, and it's the only practice that replicates a real hunting-shot scenario. There's no better way to build your confidence than shooting game in low-pressure hunting situations.
Grouse
Each year while bowhunting elk, I carry an arrow tipped with a "shocker" point for grouse encounters. Elk-country grouse are commonly calm and only wise up once a few arrows have strayed past their heads.
For that reason, these succulent birds make excellent low-pressure targets. They generally give you time to burn the sight pin through them at close ranges before sending carbon their way. Often, they'll pose stock still, but other times they'll walk while bobbing their heads as if to determine what you are. This, of course, adds challenge to an already small target, which is a good thing.
The goal is to settle the pin and use back-tension to trigger a perfect shot. You won't believe how satisfying it is to nail several of these small targets.
Turkeys
Want another moving target? A fall turkey is it. Unlike spring gobblers that strut and then stop, these suckers are like Pac-Man — they're always moving. Anchor one or more of them with perfect shots, and you'll surely boost your confidence for tougher challenges.
Tons of folks focus so heavily on deer hunting that turkeys aren't even thoughts in their minds. At a minimum, I suggest adding a turkey tag or two to your pocket to use if a flock wanders too close to your deer stand. You also might find that taking a break from the deer — perhaps when warm conditions slow deer movement — is a welcome change. The chance to loose an arrow or two can be great after weeks of sitting in treestands without shot opportunities.
Turkeys have larger kill zones than grouse but are more difficult to anchor since they're so powerful. Don't take sloppy shots that will result in a wounded, departing bird. This will drain your confidence and leave a turkey for dead or a coyote feast. Bare down and make good shots to boost your confidence.
Rabbits
Wild rabbits are plentiful and appear in places that won't ruin your deer spots. If you're needing a confidence booster, take a morning stroll into a meadow or pasture with some brush piles nearby. In years of plenty, a morning outing can yield multiple shot opportunities.
Since rabbits sit so still until spooked, you can really take your time to make your shots count. A 30-yard kill shot on a rabbit is similar to a 50- or 60-yard shot on a large animal. Rabbits are perhaps the lowest-pressure species you can hunt — if you miss a chance to shoot, simply move on a find more rabbits.
Rabbits are more comparable to larger four-legged critters than birds in that a behind-the-shoulder hit constitutes a perfect kill shot. Drill rabbits behind the shoulder, and you'll gain confidence to do the same on deer and other big game.
Wild Hogs
Want to add a little more pressure to the equation? Hogs are the answer. These mudders are considerably larger than the species we've covered so far, but still smaller in most cases than deer.
Pressure comes because they're a larger "small game," and because they have sharp senses of smell. More forethought goes into bow-killing hogs than birds or bunnies. And, if you choose the spot-and-stalk approach, you'll get to perfect that skill for an upcoming mule deer or antelope hunt. Perfecting your shooting and stalking skills in one — that's hard to beat.
Last Shot
As I mentioned earlier, nothing instills greater shooting confidence for high-pressure big-game encounters than picking off small-game critters in both low- and moderate-pressure situations. It enables you to duplicate your practice-range skills in hunting situations, which positively boosts your confidence and ability to do the same when a large buck or bull is on the receiving end of your arrow.
If you ask me, heading to a deer stand with confidence in your shooting is an unbeatable feeling. And it can be yours if you get out and boost it on small targets.
By simply increasing your maximum effective range from 25 yards to 35 yards, you significantly increase your odds of having a deer within bow range this fall. Think about that for a second. If you are hunting an open ridge or the edge of a field, every yard of maximum shooting improves your odds for success. There is no reason why a dedicated bowhunter can't be deadly at 35 yards when the opportunity is right. These seven tips will help you make great shots at 35 yards this fall.
STEADY YOUR AIM
Any tension in your body will go straight to the bow and make the pin skip around the target like a moth around a street light. Ideally, the pin floats in small circles around the tiny aiming point you've picked out. It never has to completely stop moving; it just needs to stay close to the spot while you squeeze the trigger.
Start with your legs and work up; focus on each body part while shooting to ensure it is free of tension. It amazes me after all these years of shooting that tension can still find places to hide in my body when I am at full draw. I don't notice it until I consciously focus on each body part and force it to relax.
Most important is your bow arm. Strength from regular shooting (or a reduction in draw weight) will help steady your bow arm, and so will a slight bend in the elbow —just enough to unlock the joint and allow the arm to act as a shock-absorber.
CONCENTRATION
I shoot my best when I focus my attention on the spot I am trying to hit and let the pin blur. It calms my bow arm to focus on something that isn't moving.
Pinpoint focus is critical to increasing your range. Concentrate as hard as you can on every practice arrow. Never get mentally lazy on the range for even one shot.
BREATHING CONTROL
I have learned many of my shooting methods from great archers. Randy Ulmer and John Dudley are two of my favorite teachers, and both emphasize the importance of controlling your breathing during the final seconds of an encounter with game.
It is important that you take deep breaths before drawing your bow. Pull in a big breath as you draw, let it half way out as you settle the pin and then hold it as you squeeze the trigger.
You can get by with rough shooting on close shots, but when you stretch it out you have to be buttery smooth. With a release aid, this means squeezing the trigger while focusing on the spot you want to hit. If you don't break your concentration on the target to mentally shout "now," the release will be good. Ideally, it will take you by surprise.
Your only job while aiming is to keep the pin near the spot you want to hit until the bow fires. You will immediately eliminate target panic shooting this way, and your long-range groups will become much more consistent.
FOLLOW-THROUGH
Follow-through is the most important part of your form when trying to improve long-range shooting. I've helped a lot of average bowhunters improve their shooting at 35 yards by doing nothing more than suggesting they keep their bow arm pointed at the target until the arrow hits.
By the same token, keep your mental focus on the spot you want to hit until the arrow gets there. I've heard it explained that you should "keep aiming" until the arrow hits — both physically and mentally. That's good advice.
LONG-RANGE PRACTICE
You can fine-tune your skills and build confidence by doing most of your practicing at ranges beyond what you would take in the field. For example, if you want to be a great shot at 35 yards, do most of your shooting at 50 yards. After only a few weeks, a 35-yard shot will feel the same way 20-yard shots used to feel.
INCREASE ARROW SPEED
Being accurate at 35 yards in the field is more than just holding your bow steady and squeezing the trigger. You also have to know the range. Obviously, a laser rangefinder is very important on shots past 25 yards, but you can also reduce the effects of errors in range estimation by shooting a faster arrow. Here are two easy ways to increase arrow speed.
Shoot a faster bow: Bow design has a big effect on arrow speed. There are lots of fast bows on the market today. If you have not upgraded in a while, it might be time.
Shoot a lighter arrow: For every five grains you reduce arrow weight, you increase arrow speed by approximately one foot per second. However, to keep a good balance between penetration and speed, don't drop your finished arrow weight (including broadhead) below five grains per pound of maximum draw weight. For example, a 60-pound bow equates to a minimum finished arrow weight of 360 grains.
PUTTING IT ALL TOGETHER
Just because you can make the shot under ideal conditions doesn't mean you should always try the same distance when hunting. Other factors, such as wind speed, how cold your muscles are, how jumpy the animal is and even how much clothing you are wearing will affect your ability to pull off 35-yard shots in the field. It is always better to wait if you aren't comfortable with the shot you are facing.
Unknown distance also complicates real maximum range. Even though you may be deadly on the range, hold your shots to 25 yards on deer-sized game unless you know the exact distance. Beyond that, errors in range estimation can result in a high hit or low miss. It is better to risk the extra couple of seconds to get the range right than take a shot past 25 yards unaided.
Bowhunting is supposed to be up close and in-your-face. That's the real excitement of this sport. But 35 yards is still "in your face."
With careful preparation, that's a shot any serious deer hunter can be ready, willing and able to make every single time.
Have you ever killed a whitetail deer while bowhunting on the ground? If so, then you understand the voltage-like effects it has on your sensory neurons. Why is it such a rush? Well, because every single move or twitch you make must be executed at precisely the correct time, or you’ll get pegged and lose the shot opportunity. Staring your prey in the eyes adds unequivocal pressure to an already adrenaline-heavy event.
If you haven’t bow-killed a deer on the ground, just know that getting into a situation where a shot opportunity could unfold will likely be half your battle. Sure, you might unexpectedly encounter deer while hiking to your treestand, but to head out and strictly hunt on the ground is another matter entirely. It goes without saying that whitetails have keen senses with the ability to determine when something is amiss, making this hunting style very challenging, but certainly shy of impossible.
Whether you’ve never bow-killed a deer from the ground or you’ve had little success, there are several ways to increase your chances for an in-your-face encounter. Let’s review.
You Must Try
I believe the number one reason few folks are deadly on whitetails while hunting from the ground is that most bowhunters fear leaving their comfort zone. I mean, treestands arguably provide advantages — they put you above the whitetail’s general field of view, and in some cases, they provide greater shooting coverage of the area. So why hunt on the ground and make killing a deer more difficult than it already is?
To that point, I pose a second question: Ever wonder what’s happening in other locations when your treestand is void of action? I wonder constantly. And that curiosity has caused me to spend more time toting my bow on the ground.
The group of whitetail fanatics who produce Whitetail Adrenaline hunt exclusively from the ground, and I’ve spent a few years now picking Jared Scheffler’s brain on how he and his crew annually arrow impressive – even huge – bucks at eye level. Mind you, the crew hunts exclusively on public land, and Scheffler himself uses a longbow. Talk about stacking challenges on top of challenges.
Each time I visit with Scheffler, I can’t help but wonder if he and his crew would have the number of outstanding bucks to their credit that they do had they continued hunting from treestands. It’s worth pondering.
To conclude this section, let me state the obvious: You won’t bow-kill deer on the ground if you don’t try.
Experience Triggers Success
Nothing replaces experience. Successes and failures are all part of mastering the art of hunting on the ground. Spend as much time as possible hunting from the ground each fall, and always have the mentality that you will learn something new every time you enter the woods.
It’s important to note that when you hunt on the ground, you will make mistakes. That is nothing to be ashamed of. In fact, it’s completely normal. However, you must be attentive to every detail. Determine what went wrong and why the outcome unfolded how it did. Whether you blew deer out well before you saw them or simply whiffed a shot opportunity, it’s imperative you learn from mistakes and work to avoid them next time.
Scheffler believes ground hunting is a continual learning process. “I try to learn something each time I’m in the woods,” he said. “I still make mistakes, but I get lots of encounters and multiple shot opportunities each year.”
Be Flexible
When most folks think about bowhunting deer from the ground, makeshift or pop-up blinds naturally come to mind. However, the style the Whitetail Adrenaline crew uses most involves tons of flexibility and mobility.
“We don’t like to get hung up in unproductive spots,” Scheffler shared. “Since we exclusively hunt on public land, we sort through lots of acreage to find truly productive spots. When we spot deer or sense that something is about to happen, we put on the brakes and get ready.
“One example is my 2014 Iowa hunt,” Scheffler continued. “My cameraman and I covered 30 miles in five days. Most of the ground we saw wasn’t worth our time. On the final morning, we encountered three bucks that would’ve scored 160-175. I didn’t kill one, but we’d located a productive pocket using our aggressive ‘sorting’ approach.
“During the rut, stationary bowhunters often wait for those few magical days each year when bucks are galore,” Scheffler added. “With our mobile ground approach, we’re not waiting so long for that to happen. We’re able to get into the action and make things happen. Our mobile approach helps us encounter more bucks than we used to when we hunted from treestands.”
Decoys are Deadly
Folks who hunt in small patches of timber on the expansive plains commonly watch bucks court does in the wide open. And unless the doe pulls the buck to your stand location, the encounter doesn’t become a shot opportunity. However, a ground hunter can make a play in many of these cases.
It’s best if the buck and doe are bedded, in which case you can crawl within bow range and hopefully get your shot without ever alerting the buck to your presence. However, terrain and cover might be sparse, allowing you to only get so close.
In this case, a buck decoy can be your ticket to the show. The goal is to get within the buck’s comfort zone and then impose a threat by deploying the decoy and grunting or snort-wheezing. This is a very natural scenario that unfolds all the time in the wild — a buck is in lockdown with a hot doe, and subordinate bucks are circling and looking for a way in.
Now, there are two possible outcomes. It’s either fight or flight. In option A, the buck will typically approach stiff-legged with ears laid back. He’ll many times approach head-on, which is a shot that can be ethically made, but only at top-pin range and if you’ve studied anatomy charts and have practiced the shot. The buck could instead circle the decoy trying to acquire the downwind advantage, which could equal a broadside shot. In any case, those pesky open-country bruisers become huntable if you leave the treestand and grab a decoy.
Final Words
One note of caution: When using a decoy, you always must be totally aware of your surroundings. Don’t use one if firearm seasons are running concurrently with archery season. Also, use caution when roads are in view. Unfortunately, poachers exist. You must always expect the worst that can happen. Never use decoys in situations where safety is risked.
Lastly, try not to get tunnel vision when that adrenaline surges through your veins as you look into the eyes of your prey. It can be intimidating and nerve-rattling, but the focused bowhunter who is aware of his surroundings will act methodically and close the deal with a well-placed arrow. And when that bowhunter is you, it’ll likely be the wildest success story you’ve ever told your friends and family.


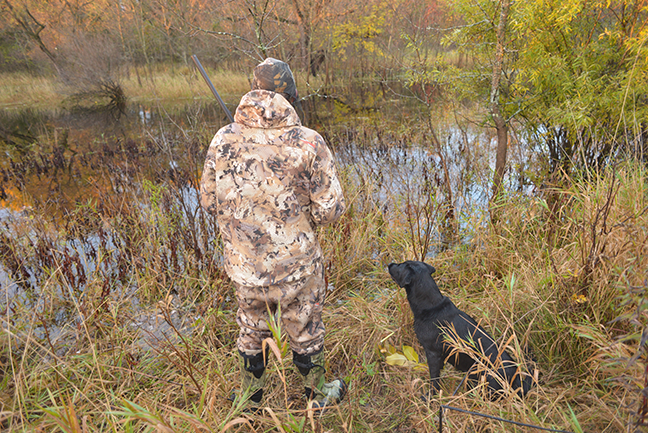
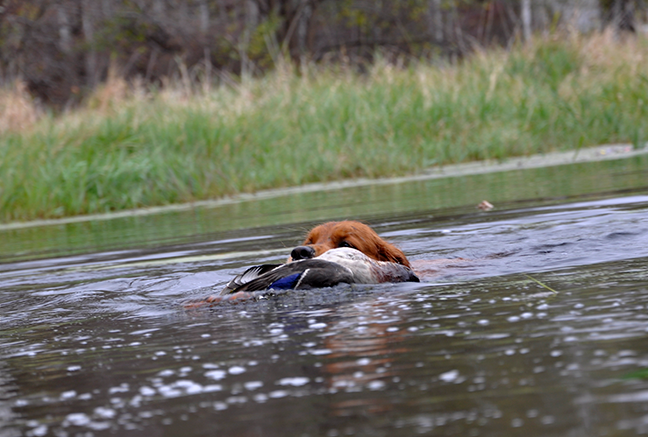
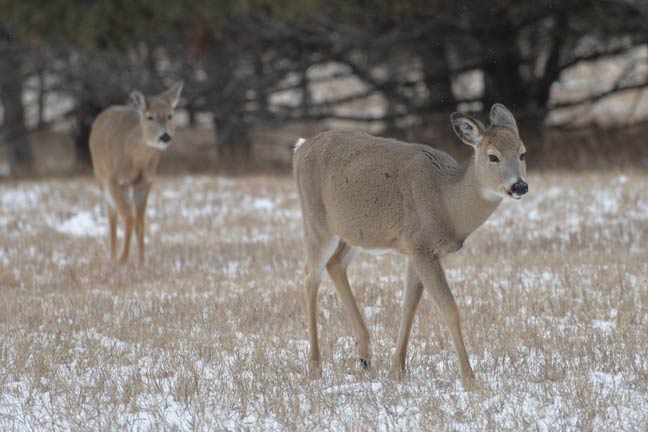
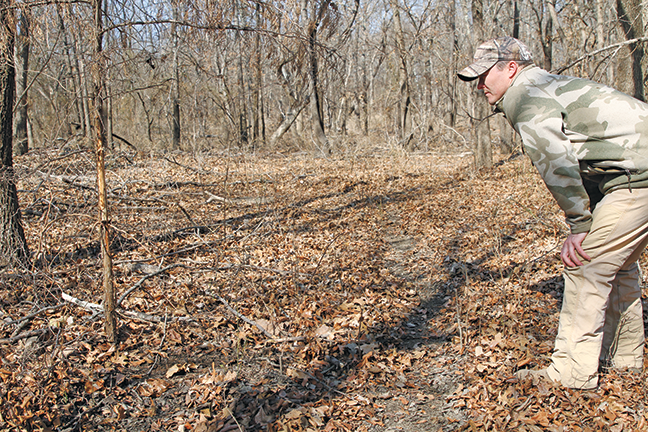

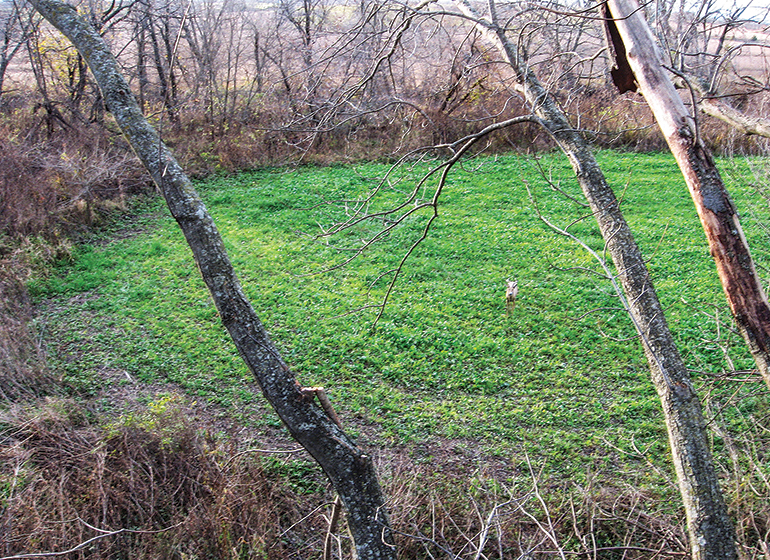
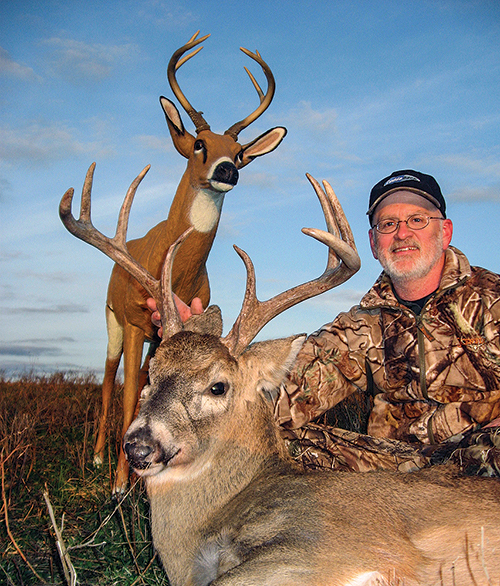
 Given reasonable shot angles, for a bullet to pass through the vitals of all North American big game animals, from pronghorn to moose, it should be capable of penetrating 18 to 20 inches in 10 percent ordnance gelatin. To maximize tissue destruction the bullet should also expand between 1.5 and 2 times its original diameter.
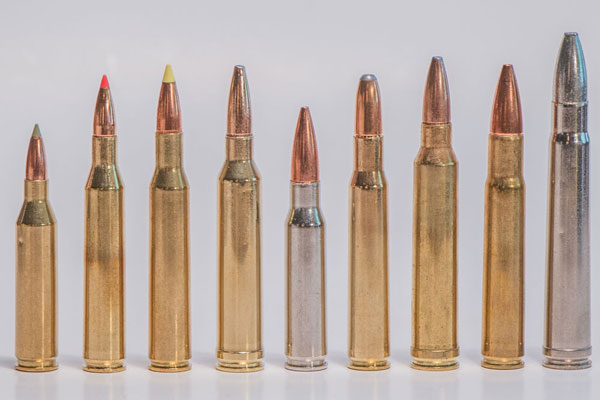 Long cartridges increase rifle length and weight. Fat cartridges diminish magazine capacity. Long and fat cartridges do both. And some magnum cartridges need long barrels to really be magnums. What's ideal? Eight pounds is a good target weight for a field ready rifle and 40 inches or less is a reasonable length. You must shoot once and a coup de grace might be needed. You also might miss, so you need at least three shots. And, since you never want an empty rifle, capacity must be four or more.