(и еще 23748 записям на сайте сопоставлена такая метка)
Другие метки пользователя ↓
english Браслет африка вязаные интересности вязаные цветы грызуны декор для рукоделия для самых маленьких елка зайцы земноводные интересное коврики конфетка кошачьи кукла лесные жители люди мальчикам мелочи мишки мужчинам мультяшки на голову на ноги на руки на шею насекомые пернатые платье подводный мир подушка подушки полезное программы сердце серьги сказки скотный двор собаки схемы тильда топ топики узоры украшения цветы шапочка юбка
Шапочка с ушками. |
Метки: шапочка english |
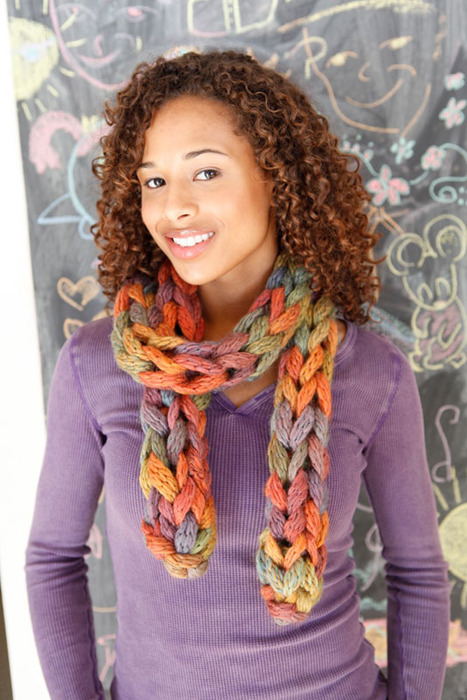
Шарф из шнура |
Метки: english шарф на шею |
Мужская шапка спицами (English). |
Дневник |
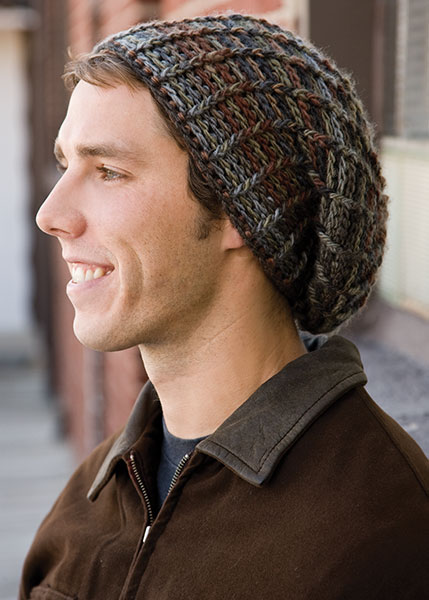
Intermediate
Instructions given for small/medium; changes for large/X-large are in
Yarn you might also like: Universal Yarn Classic Shades medium (worsted) weight acrylic/wool yarn (3 1/2 oz/197 yds/100g per ball): 2 [2] balls color of choice
4 post sts = 1 inch
Chain-2 at beginning of round does not count as first double crochet unless otherwise stated.
Join with slip stitch as indicated unless otherwise stated.
When working back post double crochet decrease, work same as double crochet decrease working back post double crochet sitches instead of double crochet.
Rnd 1: Ch 4, 9 dc in 4th ch from hook (first 3 chs count as first dc), join (see Pattern Notes) in top of beg ch-4. (10 dc)
Rnd 2: Ch 2 (see Pattern Notes), fpdc (see Stitch Guide) around first st, dc in sp between sts, [fpdc around next st, dc in sp between sts] around, join in beg fpdc. (20 sts)
Метки: english мужчинам |
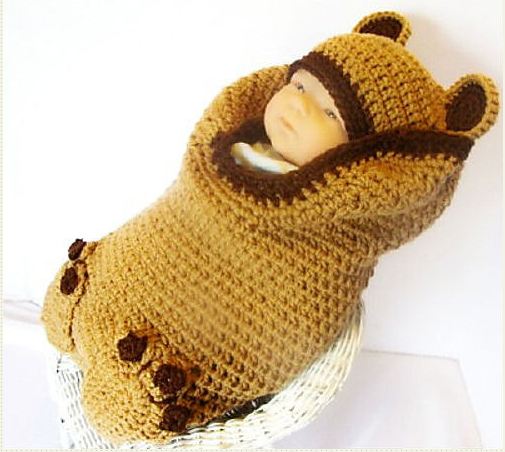
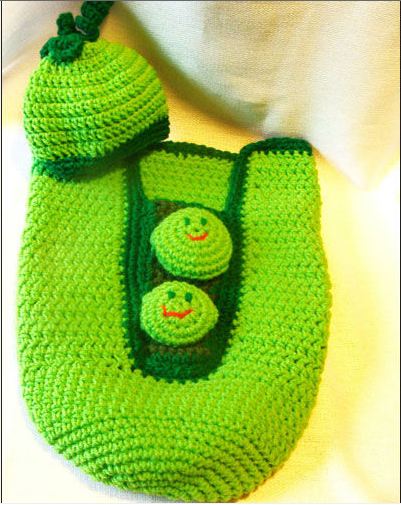
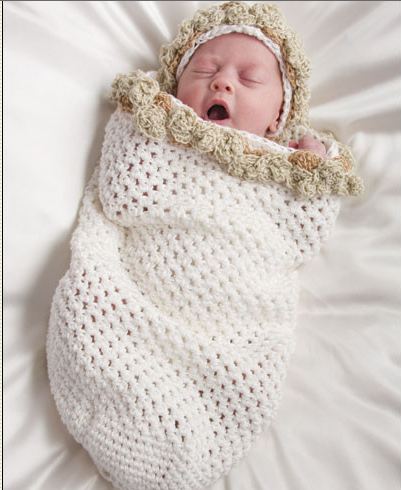
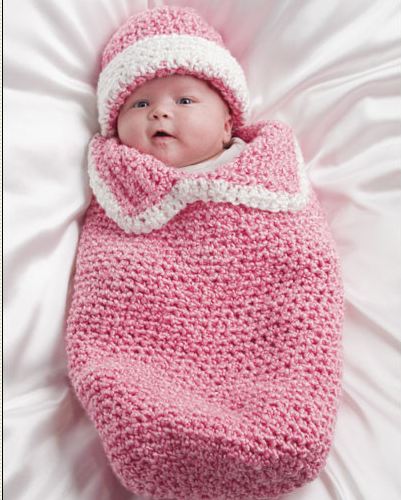
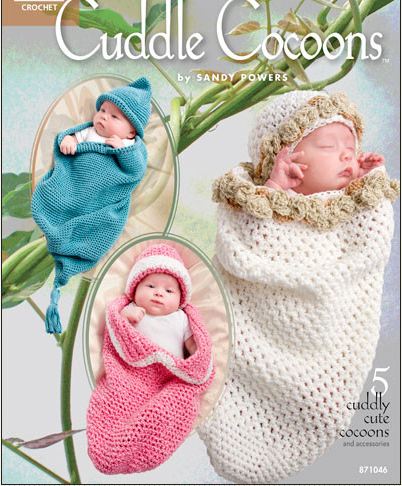
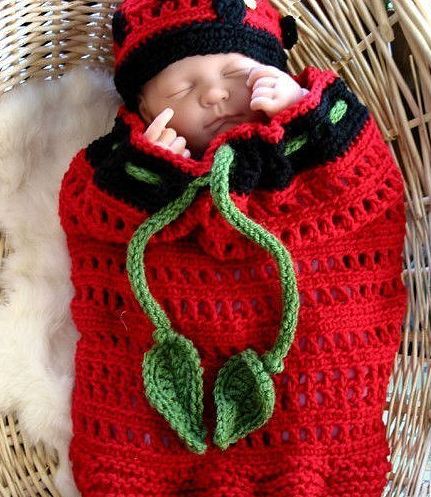
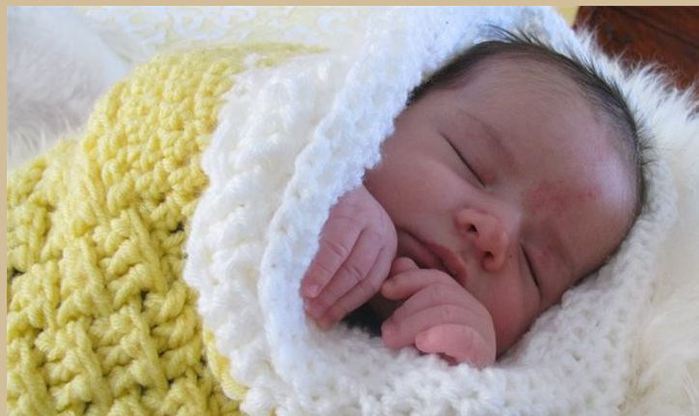
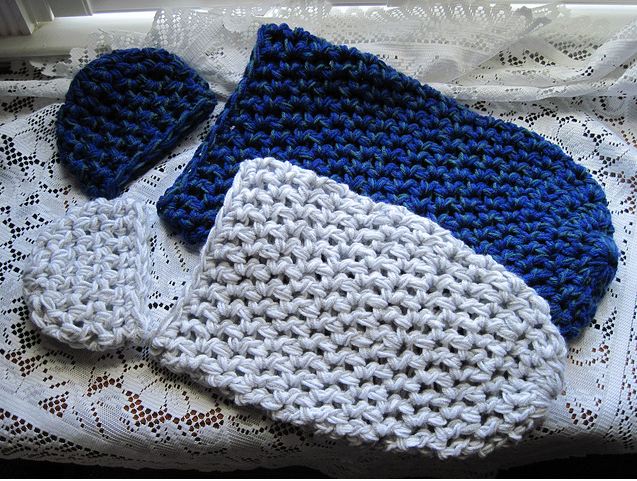
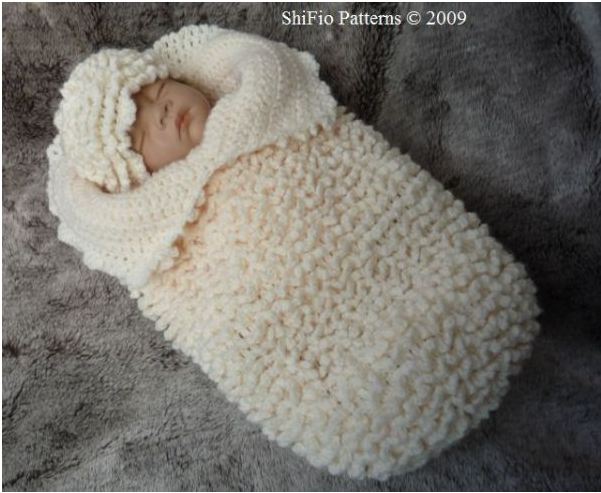
Кокон для новорожденного |
Очень удобная вещь, не нужно завязывать или пеленать
Нашла описание на английском
Directions are for Newborn to 3 months.
Finished Cocoon Circumference: 24".
Finished Hat Circumference: 18".
Materials:
GAUGE: 9 sts = 4"; 8 rounds = 4" in sc. CHECK YOUR GAUGE. Use any size hook to obtain the gauge.
Instructions:
COCOON
Round 1: Beginning at lower edge, ch 9; sc in 2nd ch from hook and in next 6 ch, 3 sc in last ch, PM in center sc of the last 3 sc, working on opposite side of ch, sc in next 6 ch, 2 sc in last ch, PM in last sc made – 18 sc. Do not join but work in continuous rounds. Move markers up each round.
Next Round: [Sc in each sc to 1 sc before marked sc, 2 sc in next sc, sc in marked sc] twice – 20 sc. Repeat last round until there are 54 sc.
Body
Work even on 54 sc until 21" from beginning.
Fasten off. Weave in ends. Fold top edge down for cuff.
HAT
Round 1: Beginning at top of hat, ch 5; sc in 2nd ch from hook and in next 2 ch, 3 sc in last ch, PM in center sc of the last 3 sc, working on opposite side of ch, sc in next 2 ch, 2 sc in last ch, PM in last sc made – 10 sc. Do not join but work in continuous rounds. Move markers up each round.
Next Round: [Sc in each sc to 1 sc before marked sc, 2 sc in next sc, sc in marked sc] twice – 12 sc.
Repeat last round until there are 42 sc.
Body
Work even on 42 sc until 8‖ from beginning.
Fasten off.
Weave in ends. Fold bottom edge up for cuff.
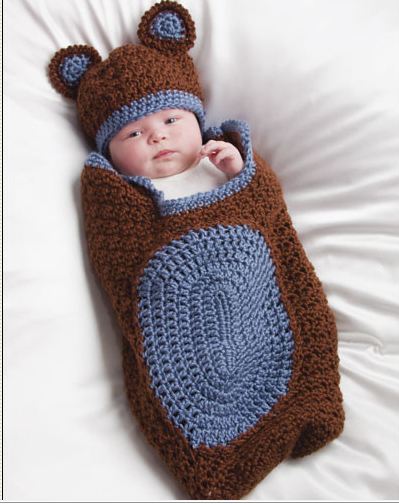


Метки: english |
242 часа английских уроков бесплатно |

Дорогие друзья, сегодня я хочу рассказать вам о бесплатном интерактивном учебнике английского, который вошел в топ лучших образовательных онлайн-курсов 2009 года. Общий объем учебного материала – 242 часа: от уроков для начинающих до курса Business English.
Метки: english |
How To Design Your Own Hat. English. |
Дневник |

One of the main reasons I started designing my own hats was because I struggled to find crochet patterns that didn't look like those crocheted Barbie toilet paper covers my grandmother had.
Метки: english шапочка |
Мишка - Debbie Bliss "Toy Knits" |
Метки: мишки english |
Amigurumi Turtle Girl |
Метки: english |
Bunny in carrot |
Метки: english зайцы |
Sweet Lil Bearalyn McRaggle |
Метки: мишки english |
Koala & Baby |
Метки: лесные жители english |
улитка |
Метки: земноводные english |
мишка-гном |
Метки: мишки english |
Mole - Крот |
Метки: english лесные жители |
Yoshi - Обезьяна |
Метки: english африка |
Ferdinand Raven - ворона |
Метки: english |
Bear in lamb sleep suit |


Метки: english |
Cat bag crochet pattern |
Дневник |
Cat bag crochet pattern
Materials:
1) 4.00 mm hook
2) Worsted Weight yarn (white, orange, brown and light green)
3) Black embroidery floss
4) Two 10 mm black buttons
5) Tapestry needle
6) Sewing needle and thread for attaching buttons
7) One 6.5 “ Zipper
Size:
approximately 4”x 8” (10 x 20.5 cm)
Abbreviations:
ch = chain
sc = single crochet
st = stitch
sl = slip
tog = together
rnd = round
Notes:
1) The bag is working in rows; the rows start with chain one and join with slip stitch at the end of the row.
2) Tail and Eyes are working in continuous rounds.
3) Mark first stitch of each row/round.
Bag:
Row 1:
With
orange
, ch 31, sc in second chain from hook, sc in next 28 chs, 3 sc in next ch; working in remaining loops on opposite side of ch, sc in next 28 chs, 2 sc in next ch, join with sl st in first st. (62)
Row 2:
Ch 1, 2 sc in next st, sc in next 28 sts, 2 sc in next 3 sts, sc in next 28 sts, 2 sc in next 2 sts, join with sl st in first st. (68)

Row 3:
Ch 1, sc in next st, 2 sc in next st, sc in next 28 sts, (2 sc in next st, sc in next st) 3 times, sc in next 28 sts, (2 sc in next st, sc in next st) 2 times, join with sl st in first st. (74)
Row 4-13
: Ch 1, sc in each st around, join with sl st in first st.
Row 14:
Ch 1, (sc in next 35 sts, sc next 2 sts tog) 2 times, join with sl st in first st. (72)
Row 15:
Ch 1, (sc in nest 34 sts, sc next 2 sts tog) 2 times, join with sl st in first st. (70)
Row 16:
Ch 1, (sc in next 33 sts, sc next 2 sts tog) 2 times, join with sl st in first st. (68)
Row 17:
Ch 1, (sc in next 32 sts, sc next 2 sts tog) 2 times, join with sl st in first st. (66)
Row 18:
Ch 1, (sc in next 31 sts, sc next 2 sts tog) 2 times, join with sl st in first st. (64)
Row 19:
Ch 1, (sc in next 30 sts, sc next 2 sts tog) 2 times, join with sl st in first st, fasten off. (62)
Bow:
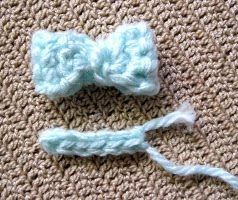
Bow: Working in rows
.
Row 1:
With
light green
, ch 2, 3 sc in second chain from hook, turn. (3)
Row 2-5:
Ch 1, sc in each st across, turn. (3)
Row 6:
Ch 1, sc 3 sts tog, turn. (1)
Row 7:
Ch 1, 3 sc in first st, turn. (3)
Row 8-11:
Ch 1, sc in each st across, turn. (3)
Row 12:
Ch 1, sc 3 sts tog, fasten off. (1)
Sew row 1 and row 12 together
Middle piece:
Row 1:
Ch 7, sc in second ch from hook, sc in next 5 chs, leave long end for sewing, fasten off. (6)
Sew the middle piece around middle of bow.
Ear (make 4):
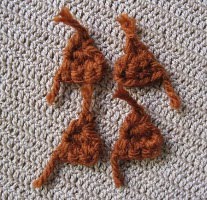
Row 1: Working in rows
. With
brown
, ch 2, sc in second chain from hook, turn. (1)
Row 2:
Ch 1, 3 sc in first st, turn. (3)
Row 3:
Ch 1, sc in each st across, fasten off.
Sew 2 pieces of ears together.
Tail:

Rnd 1:
With
brown
, ch 2, 6 sc in second chain from hook. (6)
Rnd 2:
(2 sc in next st, sc in next st) around. (9)
Rnd 3-4:
Sc in each st around.
Rnd 5:
(Sc in next st, sc next 2 sts tog) around. (6)
Rnd 6-11:
Sc in each st around.
Rnd 12:
Sc in each st around, join with sl st in first st.
Leave long end for sewing, fasten off.
Eye (make 2):
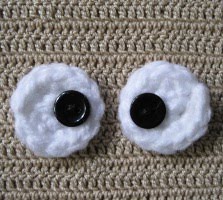
Rnd 1:
With white, ch 2, 6 sc in second chain from hook. (6)
Rnd 2:
2 sc in each st around, join with sl st in first st, fasten off. (12)
Sew black button on each eye as in picture.
Finishing:
Sew Bow, Ears, Eyes and Tail on Bag as shown in picture on first page.
With black embroidery floss embroider Nose and Mouth.
Sew a Zipper to the Bag. (the bags I made still do not have zipper: Need to buy them :)
You can design your own bag by changing the color of yarn or use patches, beads, flowers,...etc. to decorate the bag.

|
Метки: english |
| Страницы: | [1] |