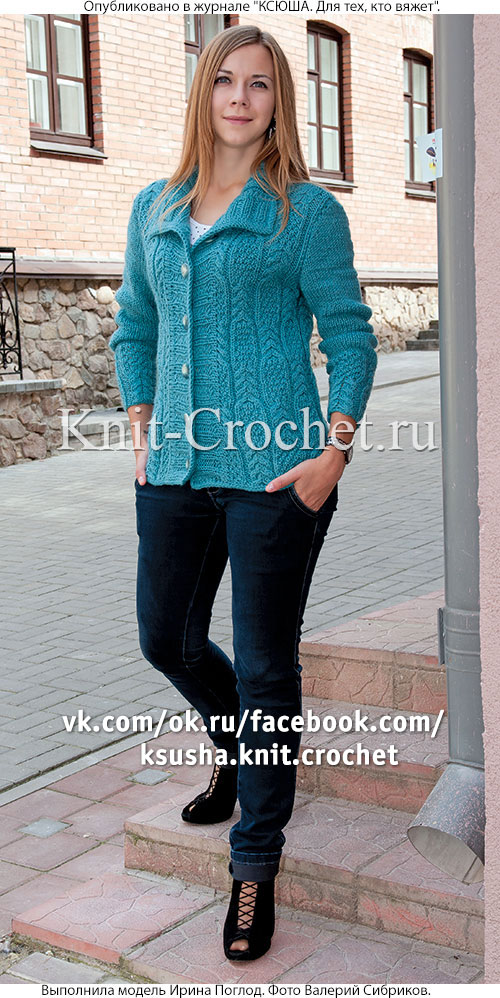
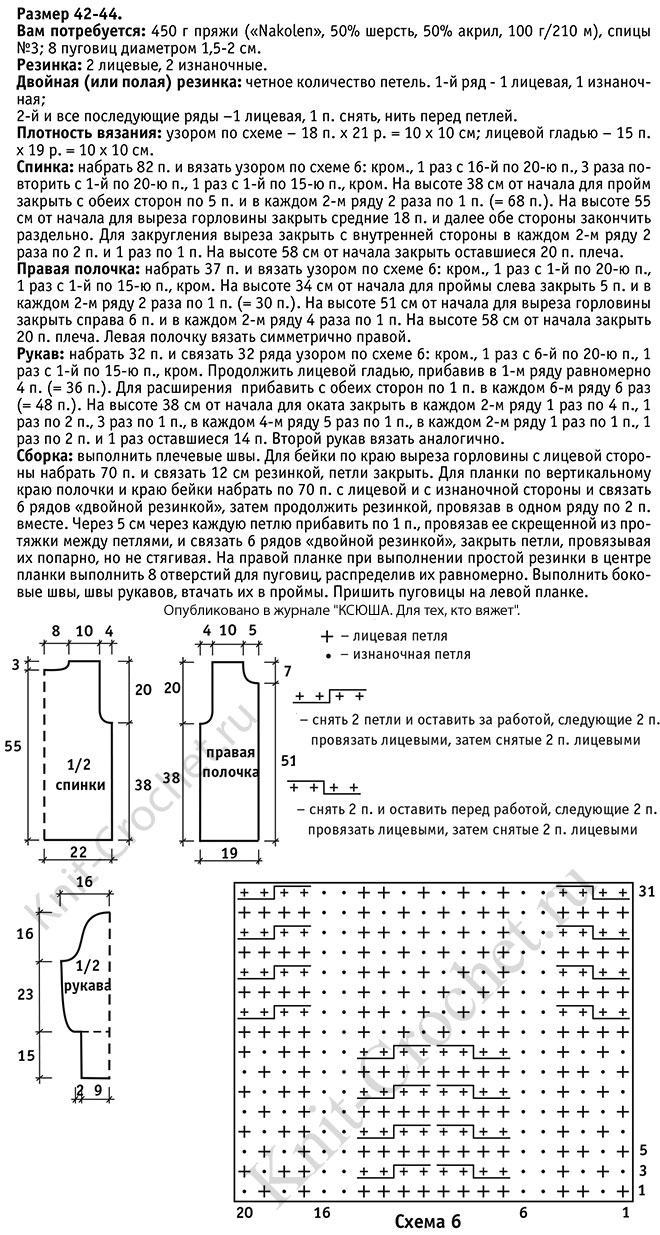
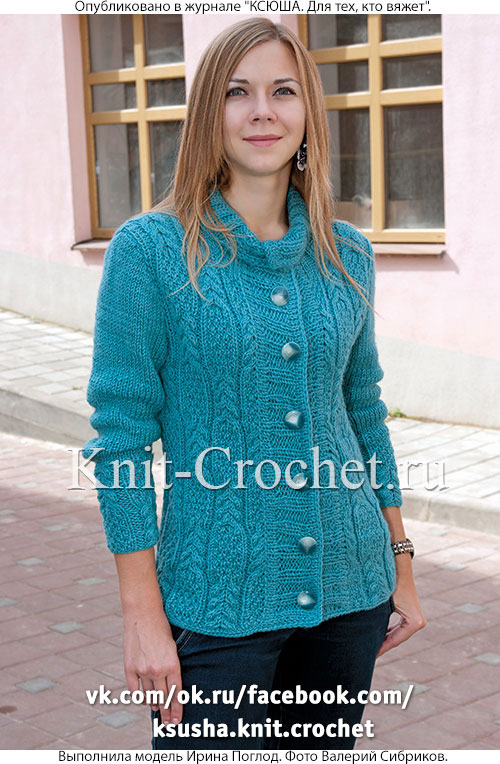
ЖАКЕТ СПИЦАМИ |
|
|
|
Вторник, 22 Марта 2016 г. 19:15 + в цитатник
|
Метки: ЖАКЕТ СПИЦАМИ |
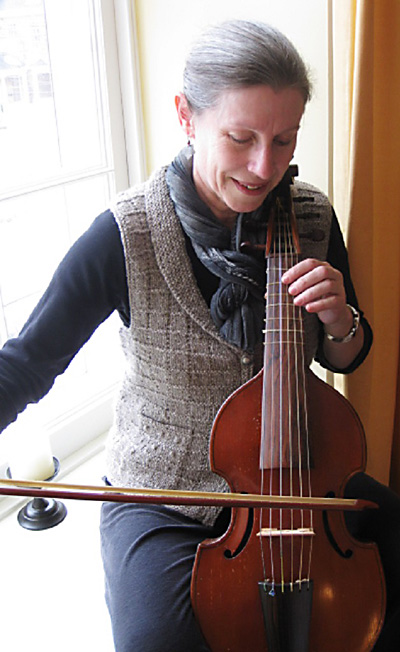
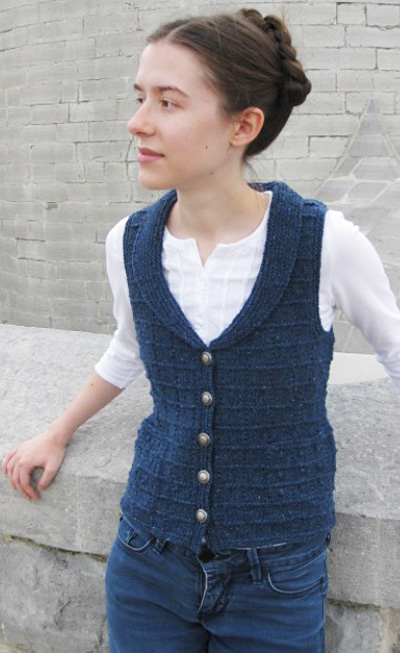
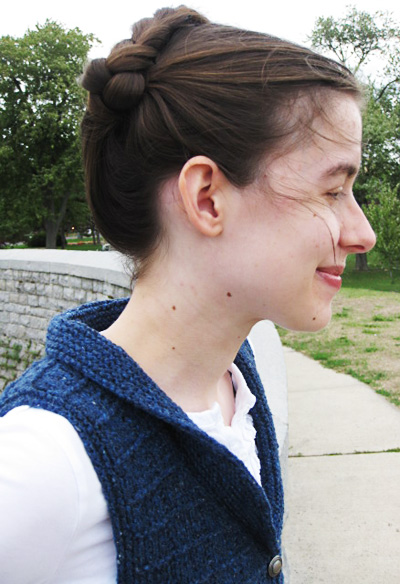
Women's vest |
 http://www.knitty.com/ISSUEss13/KSPATTbuttonbox.php
 |
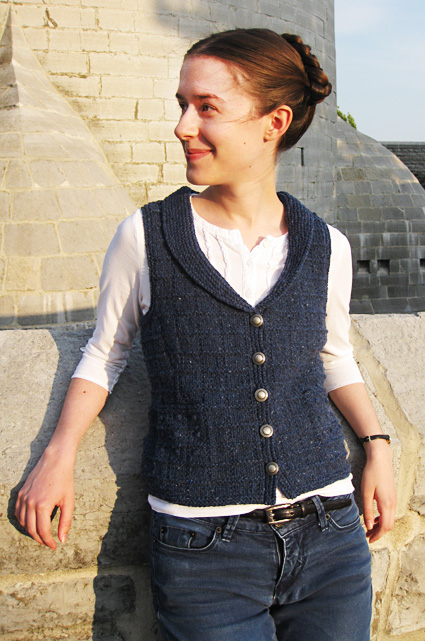  by Elizabeth McCarten by Elizabeth McCarten
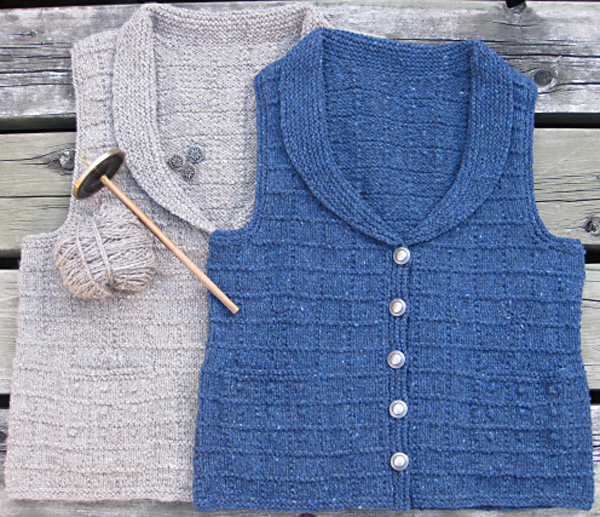
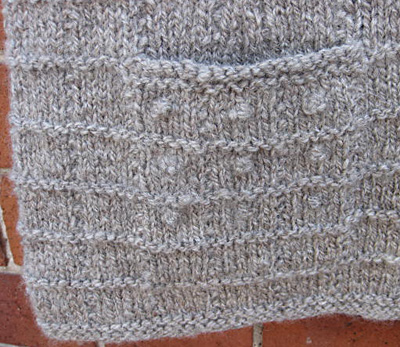
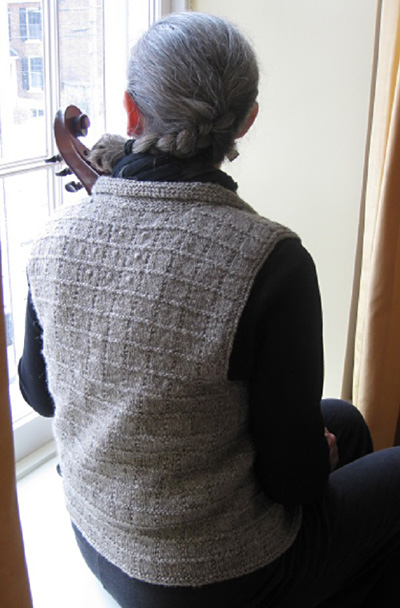
The pattern stitch for this vest, with its little boxes, is an adaptation of the traditional Gansey stitch, "Grampian Steps", consisting of eight rows, five of which are in just plain knitting. It reminded me of my button box, with all its little compartments calling out to be filled with treasures. In this case, I answered the call with small French knots, adding subtle texture to the pockets and upper back. |
||
 models + photos: Isabel McCarten, Elizabeth McCarten models + photos: Isabel McCarten, Elizabeth McCarten |
|
|
|
|
||
|
SIZE |
  |
|
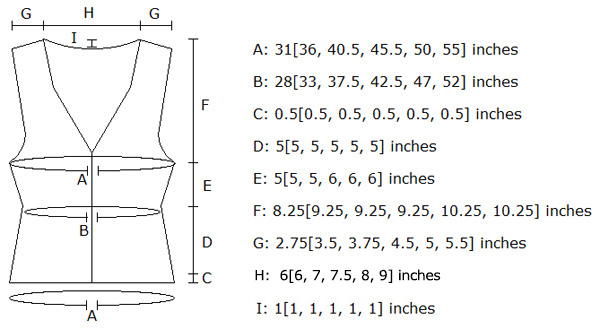
FINISHED MEASUREMENTS |
|
|
MATERIALS
Drafting Method:
Tools |
|||||
|
|
GAUGE |
| 20 sts/28 rows = 4" in stockinette stitch after wet blocking 20 sts/31 rows = 4" in Chart A buttonbox pattern stitch after wet blocking |
|
PATTERN NOTES |
|
Since this pattern stitch tends to relax when blocked, I recommend putting all stitches onto a length of waste yarn before dividing for the underarms and wet blocking the work to check that you are satisfied with the length. To adjust length, add or subtract one or more full repeats of the Chart A pattern. cdd: Centred double decrease. Slip 2 together knitwise, knit 1, pass the slipped stitches over (together). knot: (K1, p1, k1, p1) into next stitch, pass second, third, and fourth stitches over first. M1L (bl): Make 1 left-leaning increase by this backward loop method. M1R (bl): Make 1 right-leaning increase by this backward loop method.. Always work into the back of this increase on the following row. SWR: Slip, wrap, replace. This is the short row method favoured by Meg Swansen and Lucy Neatby. Slip next stitch, bring yarn to opposite side of work, replace the slipped stitch, turn, and continue. In garter stitch there is no need to do anything more to neaten the wrapped stitches; they blend in with the garter stitch bumps. Unless otherwise indicated, references to markers are to ring markers. |
|
|
|
DIRECTIONS
With US #7/4.5mm 24-inch or 32-inch circular needle, CO 155[179, 203, 227, 251, 275] sts. Row 1 [WS]: P1, knit to last st, p1. Row 2 [RS]: K39[45, 51, 57, 63, 69], pm, k77[89, 101, 113, 125, 137], pm, k39[45, 51, 57, 63, 69]. Side markers are now in place. Row 3 [WS]: P1, k to last st, slipping markers, p1. Row 4 [RS]: Knit all sts. This is Row 1 of Chart A. Note: Front selvedge sts will be maintained in St st throughout remainder of garment. Begin pockets: Cont to work Chart A, slipping markers and maintaining front selvedge sts, andAT SAME TIME on the third through fifth reps of the Chart, counting from beg of work, make knots where shown on Chart A in the two pocket sections only. End after Row 8 of the fifth rep.
Remove pocket markers as you work across next row. Work in patt to 1 st before pocket marker, SSK next st tog with first st of pocket lining; slip next 19[19, 19, 19, 25, 25] body sts to waste yarn; k7[7, 7, 7, 10, 10] sts from pocket lining, work Row 1 of Chart B over next 5 sts, k7[7, 7, 7, 10, 10]; k next st tog withnext body st, work in patt to side marker, sl side marker; work 12[18, 18, 24, 30, 30] sts, work Row 1 of Chart B over next 5 sts; work 43[43, 55, 55, 55, 67] sts, work Row 1 of Chart B over next 5 sts; work 12[18, 18, 24, 30, 30] sts, sl side marker; work to 1 st before pocket marker,SSK next st tog with first st of pocket lining; slip next 19[19, 19, 19, 25, 25]body sts to waste yarn; k7[7, 7, 7, 10, 10] sts from pocket lining, work Row 1 of Chart B over next 5 sts, k7[7, 7, 7, 10, 10]; k next st tog with next st of body, work to end. 147[171, 195, 219, 243, 267] sts. 8 sts decreased. Place locking st markers in the center st of each of the four Chart B sections to indicate where Chart B waist shaping is in progress. Continue to work Chart A, slipping markers and maintaining selvedge sts, and AT SAME TIME dec and then inc at 4 marked points following Chart B until waist shaping is complete. Remove locking st markers. Work even in Chart A patt until 10[10, 10, 11, 11, 11] reps of Chart from beg of work are complete, ending after Row 8. 80[80, 80, 88, 88, 88] rows of Chart A patt in total. Divide fronts and back:
Begin dec for underarm and front neck shaping: Row 1 [RS]: K1, SSK, patt to last 3 sts, k2tog, k1. 29[34, 38, 43, 47, 51] sts. 2 sts decreased. Row 2 [WS]: P1, p2tog, patt to last 2 sts, p2. 28[33, 37, 42 46, 50] sts. 1 st decreased. Row 3 [RS]: Rep row 1. 26[31, 35, 40, 44, 48] sts. 2 sts decreased. Row 4 [WS]: Rep row 2. 25[30, 34, 39, 43, 47] sts. 1 st decreased. Armhole decreases are now complete. Continue to decrease at neck edge as follows maintaining 1 armhole st in St st. Row 5 [RS]: K1, SSK, patt to last 1 st, k1. 24[29, 33, 38, 42, 46] sts. 1 stdecreased. Row 6 [WS]: P1, patt to last 2 sts, p2. Rep Rows 5 and 6 until 13[17, 19, 23, 25, 27] rem for shoulder. Maintaining 1 selvedge st in St st at each end of row, work even in Chart A patt until 8[9, 9, 9, 10, 10] reps have been completed from start of armhole. 64[72, 72, 72, 80, 80] rows of Chart A patt in total from underarm. Left Front Rep Rows 5 and 6 until 13[17, 19, 23, 25, 27] rem for shoulder. Maintaining 1 selvedge st in St st at each end of row, work even in Chart A patt until 8[9, 9, 9, 10, 10] reps have been completed from start of armhole. 64[72, 72, 72, 80, 80] rows of Chart A patt in total from underarm.
Join yarn at RS. Row 1 [RS]: K1, SSK, patt to last 3 sts, k2tog, k1. 61[71, 79, 89, 97, 105] sts. 2 sts decreased. Row 2 [WS]: P1, p2tog, patt to last 3 sts, p2togtbl, p1. 59[69, 77, 87, 95, 103] sts. 2 sts decreased. Row 3 [RS]: Rep Row 1. 57[67, 75, 85, 93, 101] sts. 2 sts decreased. Row 4 [WS]: Rep Row 2. 55[65, 73, 83, 91, 99] sts. 2 sts decreased. Work even in patt until 3[4, 4, 4, 5, 5] reps of Chart A have been completed from start of armhole, AT SAME TIMEmaintaining 1 selvedge st at each side in St st. End after Row 8 of Chart A. Begin knot motif in center back: Work one more rep of Chart A without any knots. Total of 7[8, 8, 8, 9, 9] reps of Chart A from start of armhole. Back neck shaping: Join yarn at armhole edge of right shoulder: Join yarn at neck edge of left shoulder: Note: there are 2 rows less in back than in fronts so that buttonbox patt will appear uninterrupted after shoulder join. Join shoulders with right sides tog using 3-needle BO.
With US #6/4mm 32-inch circular needle and starting at RS of lower right front edge, knit up sts in selvedge as follows, making small adjustments as necessary to make the left and right sides symmetrical. Pick up 3 sts for every 4 rows up right front edge; pm at beginning of V neck; pick up 1 st for every st along the V neck slope; pick up 1 st in corner between V neck and back sts by picking up loop and knitting into the back of it; knit each of the live sts across the back of the neck; pick up 1 st in corner between back sts and V neck; pick up 1 st for every st along V neck slope; pick up 3 sts for every 4 rows down left front edge. The total number of sts may vary slightly from knitter to knitter, depending on whether the length has been altered; it is not critical. Mark placement of 5[5, 5, 6, 6, 6] buttonholes on right front with locking st markers placed BETWEEN 2 sts at desired points. Row 1 [WS]: Knit all sts, slipping markers. Join yarn at RS of right front edge of collar: BO loosely using US #8/5mm dpn. Armhole Borders Knit each of live sts from center of underarm; pick up 1 st in corner between underarm sts and dec slope by picking up loop and knitting into the back of it; pick up every st along the dec slope; pick up 3 sts for every 4 rows along the straight edges of the armholes; pick up every st down the dec slope; pick up 1 st in corner between dec slope and underarm sts; knit to end of rnd. The total number of sts may vary slightly from knitter to knitter; it is not critical. Place marker to indicate start of rnd. Rnd 1: Purl, dec 5[5, 5, 5, 6, 6] sts evenly spaced on straight edges and 1 st at shoulder top. 11[11, 11, 11, 13, 13] sts dec in total. |
|
|
FINISHING Weave in ends. Sew on buttons. Wash and block to finished measurements. |
 |
| ABOUT THE DESIGNER |
|
|
|
Pattern & images © 2013 Elizabeth McCarten. Contact Elizabeth |
|
|
Метки: Woman's vest |
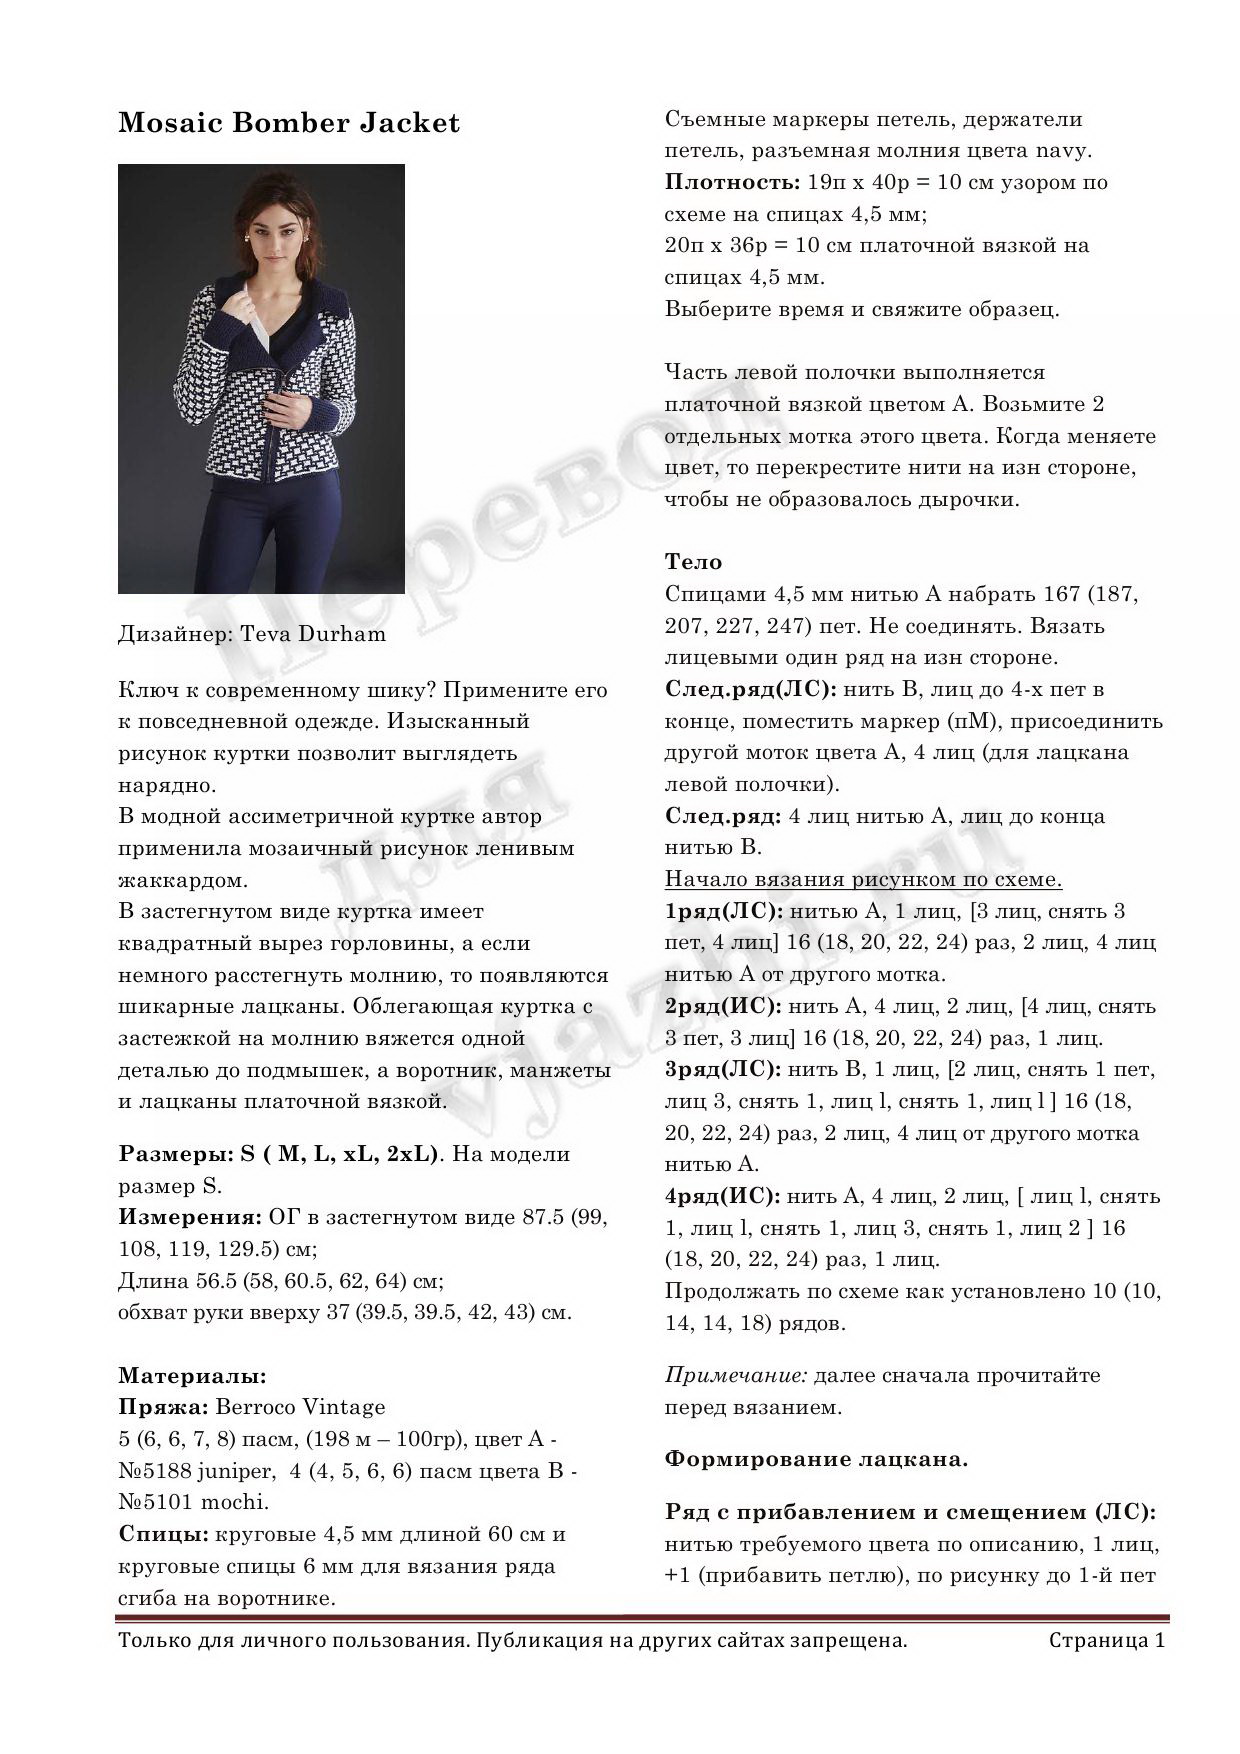
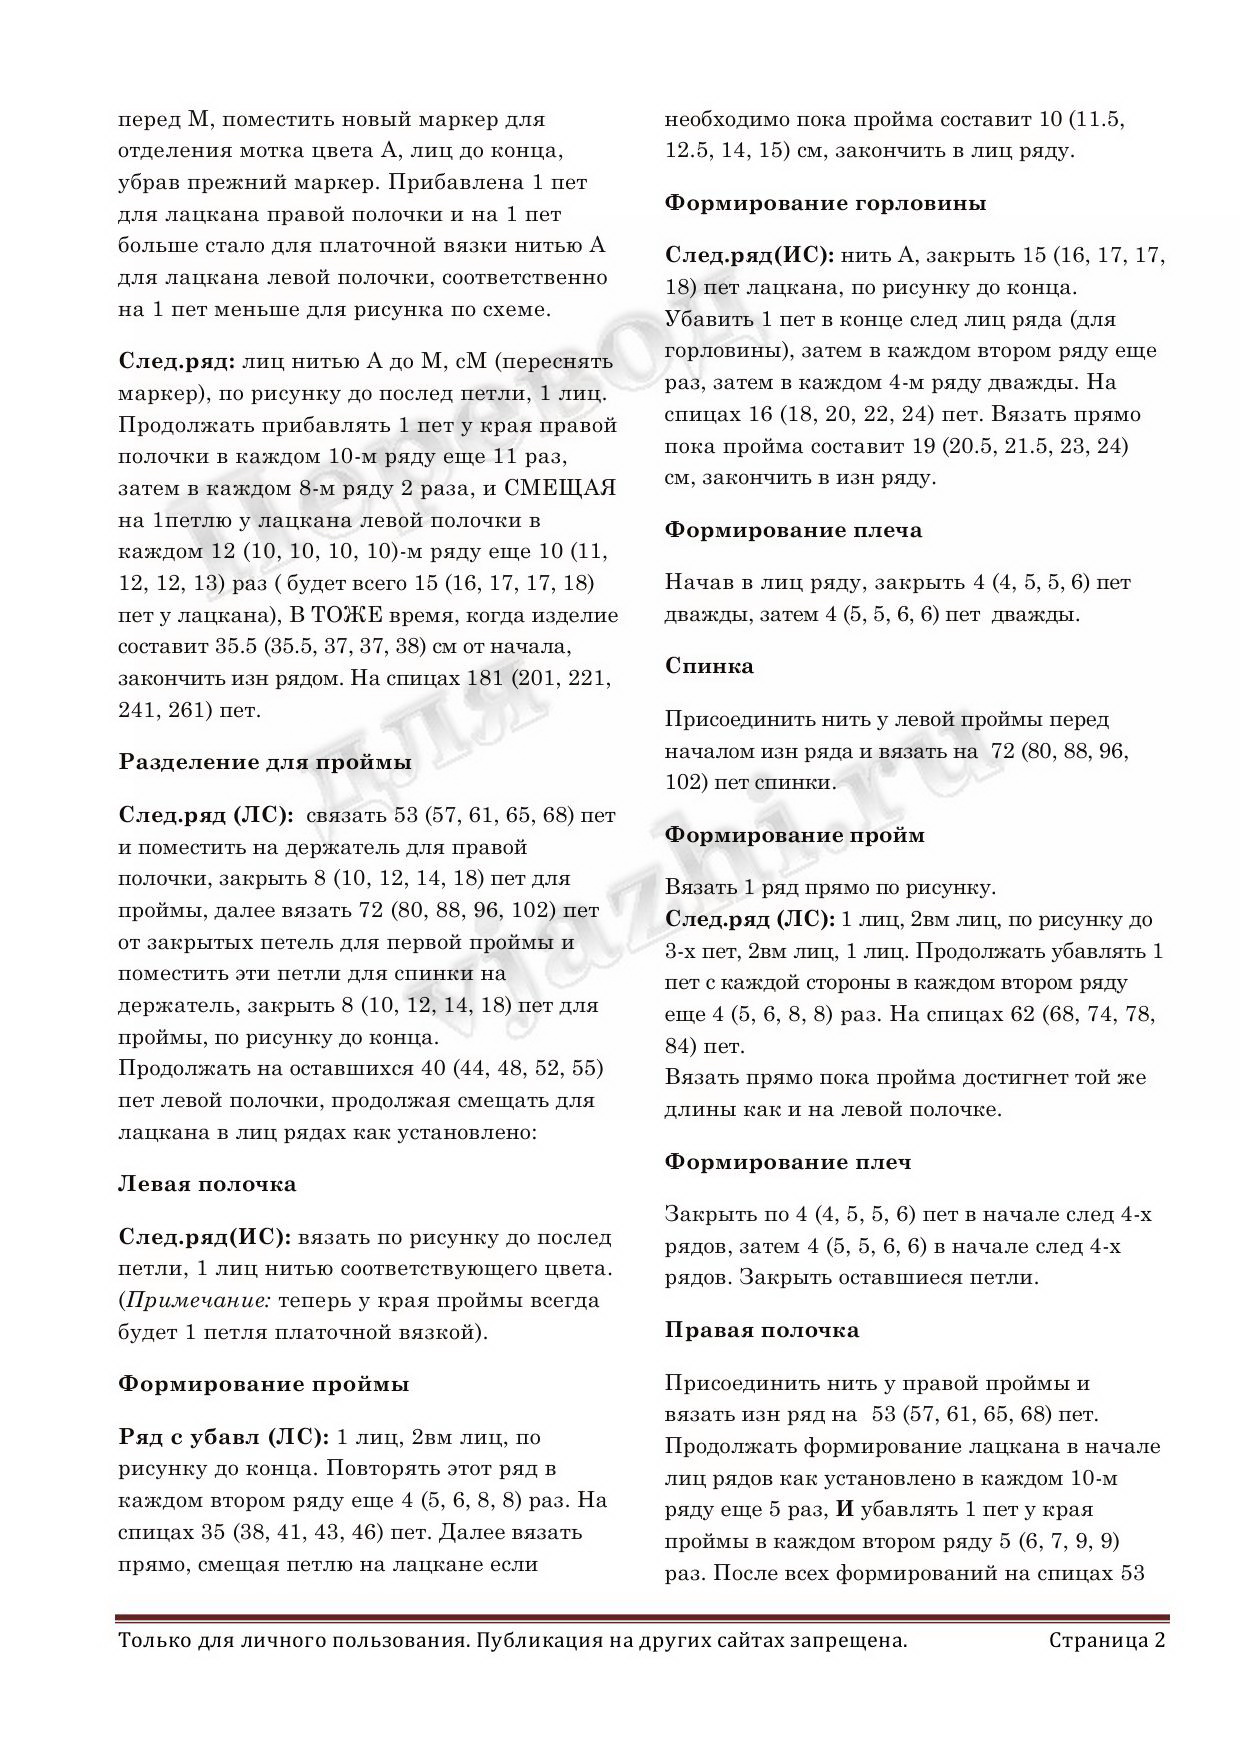
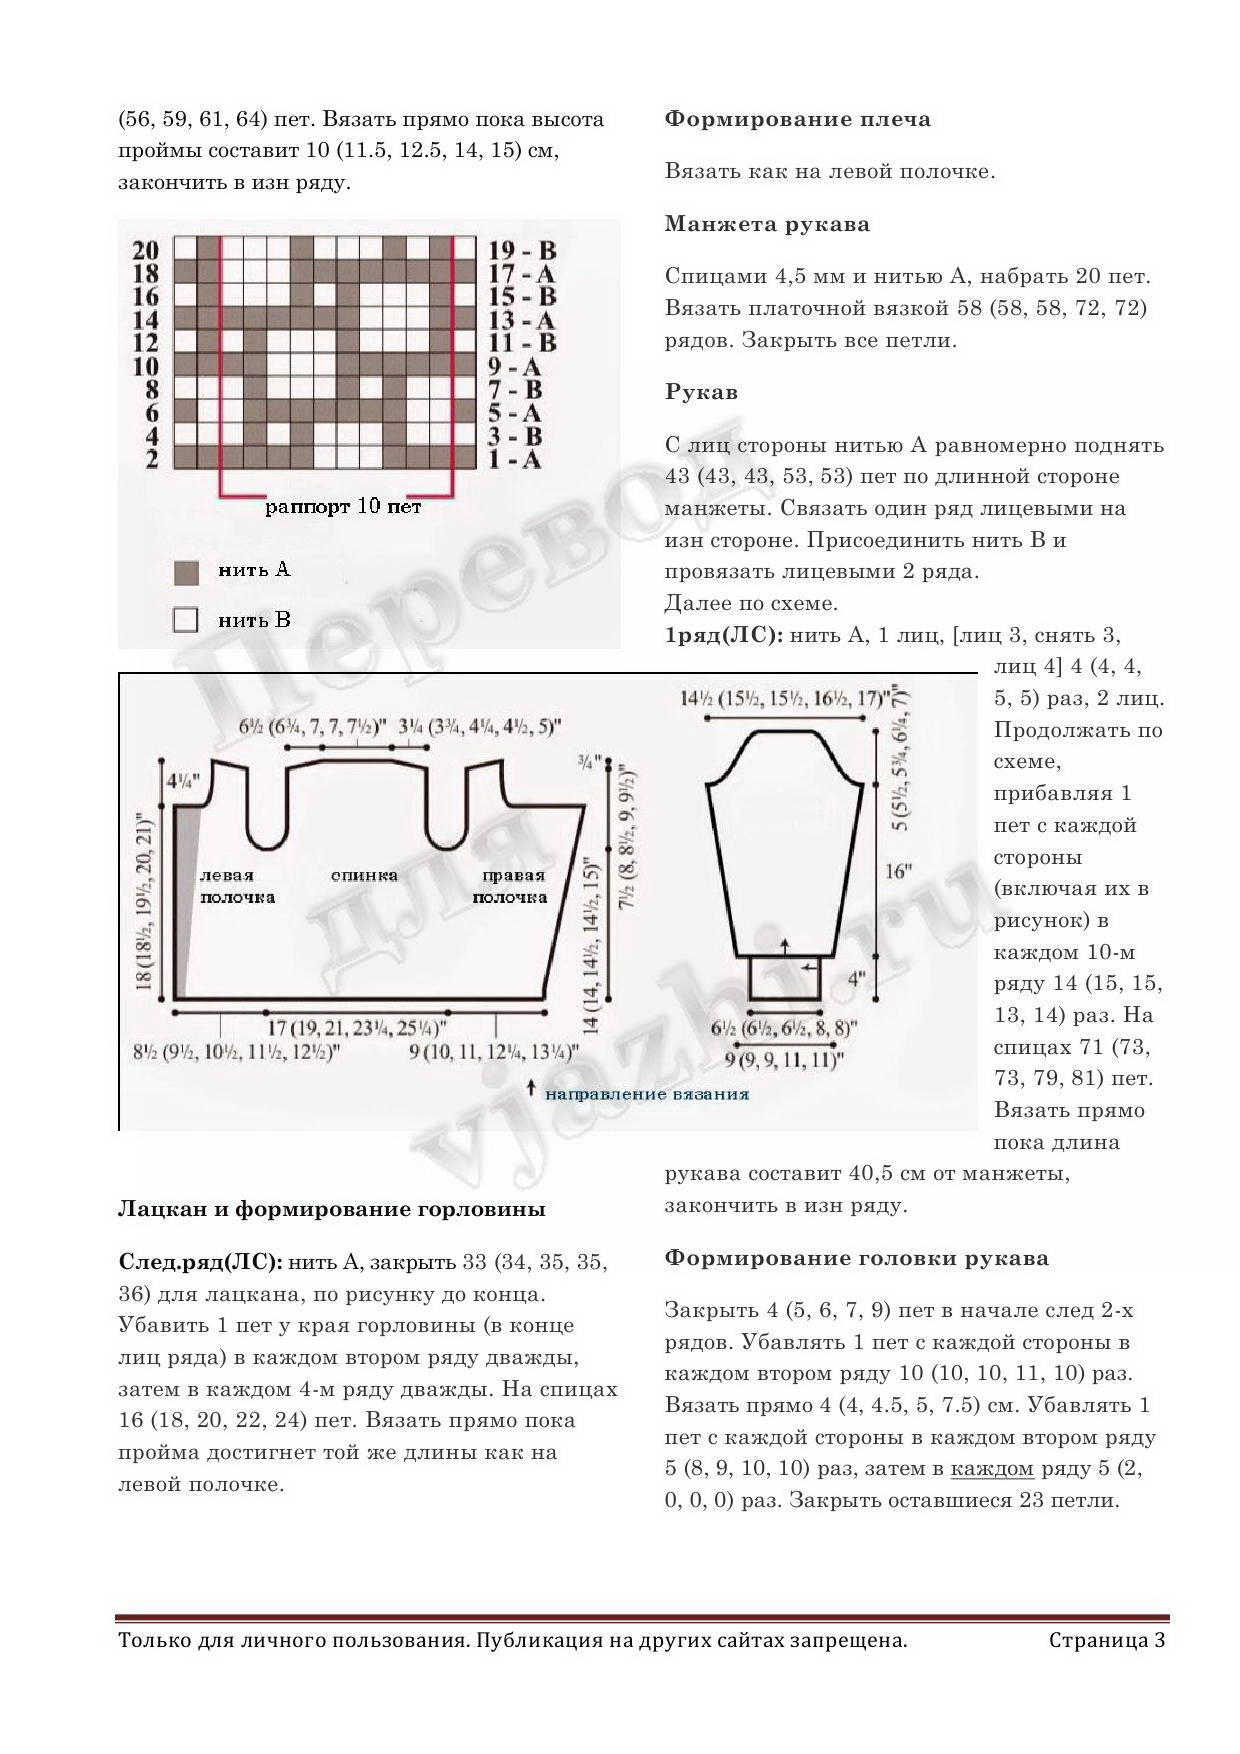
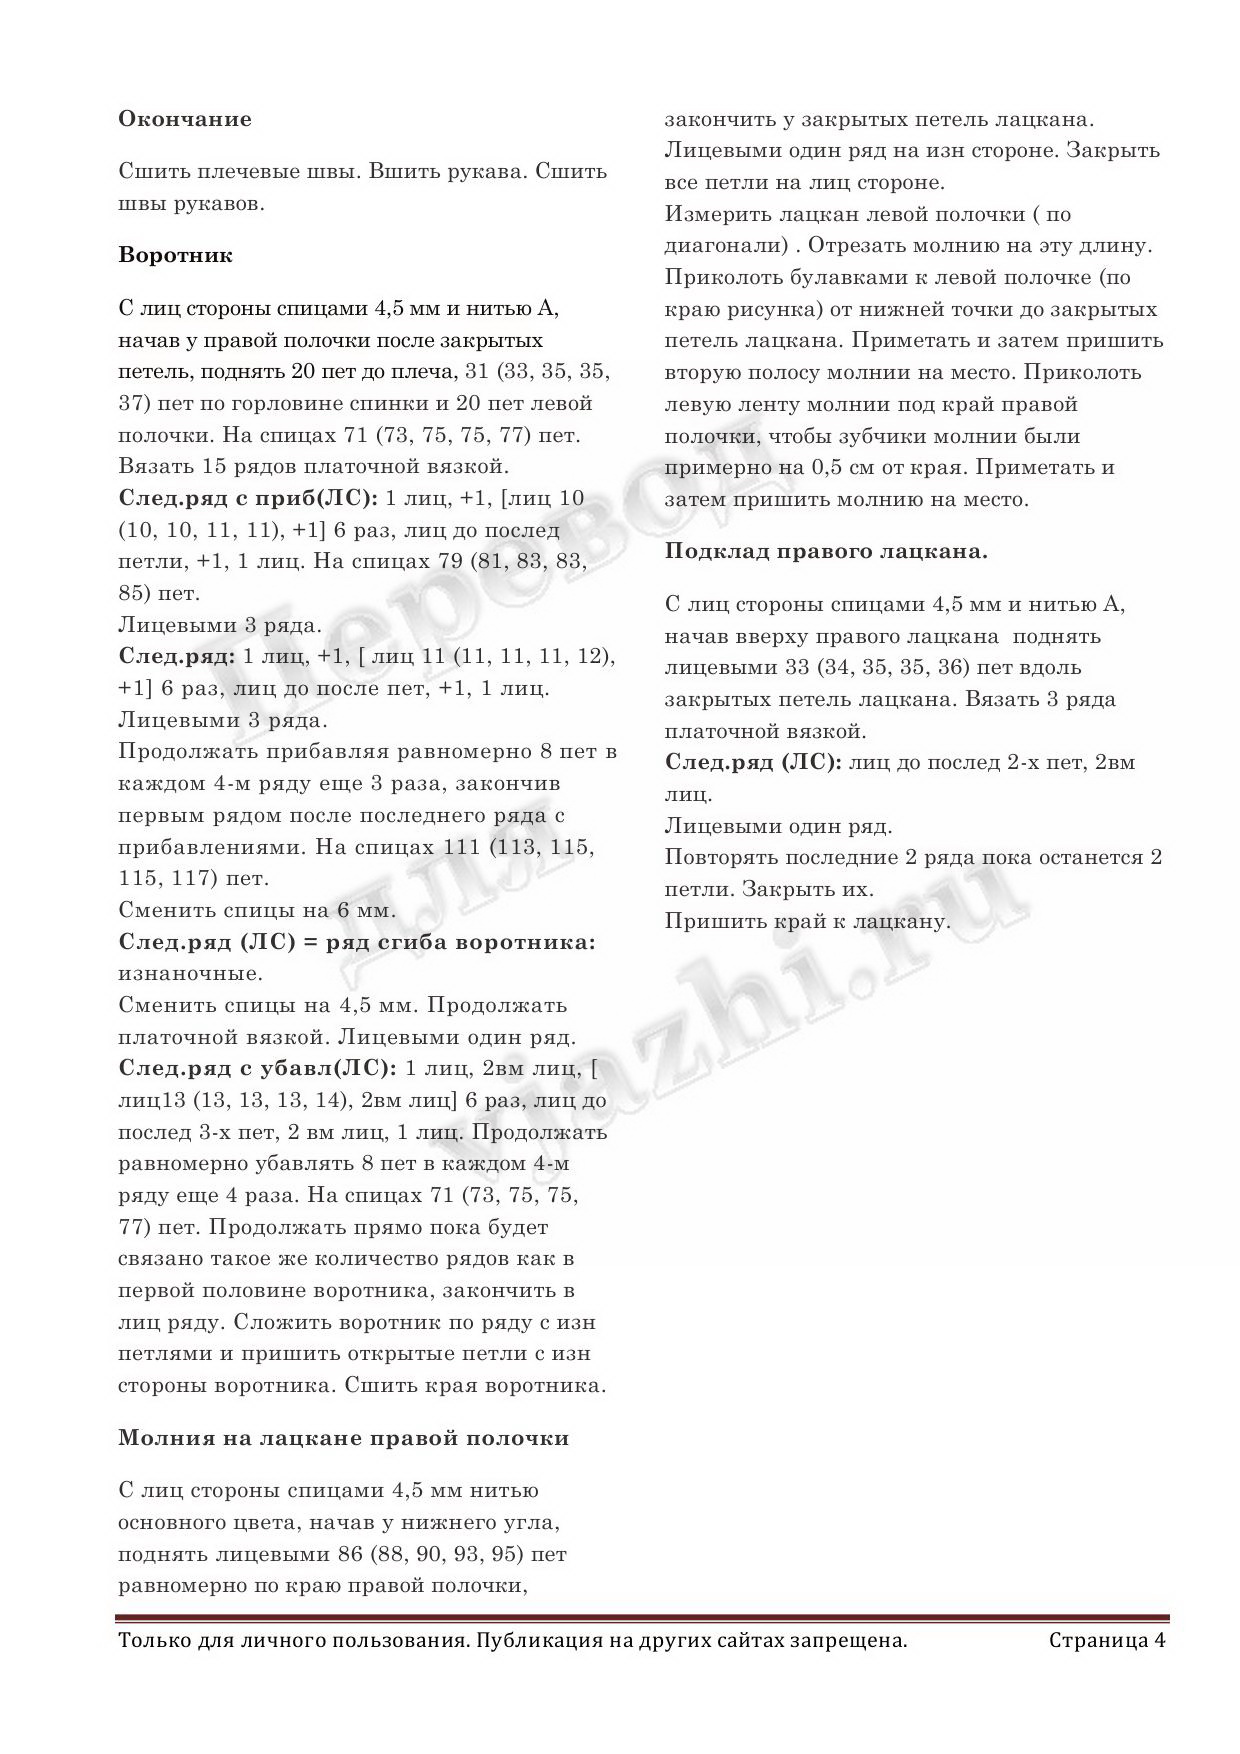
Вязаная куртка Mosaic Bomber, Vogue Knitting, зима 2014 - 15. |
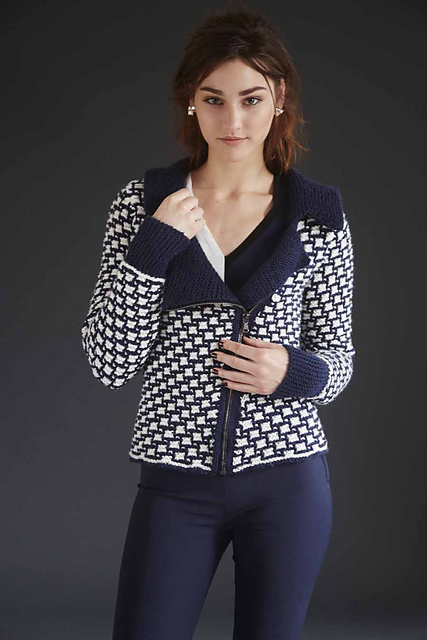

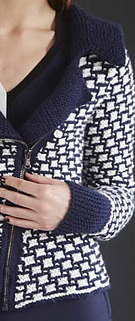
Дизайнер: Teva Durham
Ищете ключ к современному шику? Примените его к повседневной одежде. Изысканный рисунок куртки позволит выглядеть нарядно. В застегнутом виде асимметричная куртка имеет квадратный вырез горловины, а если немного расстегнуть молнию, то появятся шикарные лацканы.
Размеры: S (M, L, xL, 2xL). На фото показан куртка размером S.
Пряжа: Vintage (198 метров в 100 граммах), цвет А - №5188 (juniper) - 5 (6, 6, 7, 8) пасм; цвет В - №5101 (mochi) - 4 (4, 5, 6, 6) пасм.
Спицы: круговые 4,5 мм длиной 60 см.
Спицы: прямые 6 мм для вязания ряда-сгиба на воротнике куртки.
Съемные маркеры петель.
Держатели петель.
Разъемная молния темного цвета navy.
Плотность вязания:
19 петель и 40 рядов в 10 см мозаичного узора, вязанного спицами 4,5 мм.
20 петель и 36 рядов в 10 см платочной вязки, вязанной спицами 4,5 мм.
Перевод описания вязания куртки с английского языка.
|
|
Вязание спицами. Описание женской модели со схемой и выкройкой. Жилет с косами, на пуговицах, и с жаккардовой полосой Лапки |

Размеры: 38/40 (44/46).
Вам потребуется: 200 (250) г жёлтой и 50 г лиловой пряжи Nivolа (88% мериносовой шерсти, 12% полиамида, 150 м/50 г);
прямые и круговые спицы № 4.5; 5 пуговиц.
Лицевая гладь: лиц. р. - лиц. п., изн. р. - изн. п.
Изнаночная гладь: лиц. р. - изн п.. изн. р. - лиц. п.
Двойная планка: набрать петли с лицевой стороны, связать 3 р. лиц. гладью и в 4-м р. петли отложить.
Затем набрать петли с изнаночной стороны и вязать так же. Далее связать 1 р. лиц., провязывая по 1 п. с обеих спиц вместе.
Резинка: попеременно 3 лиц. 3 изн.
Жаккардовый узор: вязать лиц. гладью по счётной схеме, на которой приведены лиц. и изн. р. При смене цвета свободно протягивать нерабочую нить по изнаночной стороне работы.
Начинать с 1 кром., повторять петли раппорта, заканчивать 1 кром.
Выполнить 1 раз с 1-го по 13-й р. и 1 раз с 8-го по 13-й р.
Узор с косами: вязать по схеме, на которой приведены только лиц. р., в изн р. петли вязать по рисунку.
Начинать с 1 кром., повторять петли раппорта, заканчивать 1 кром. Повторять с 1-го по 12-й р.
Отверстие для пуговицы: в лиц. р. закрыть 2 п., в изн. р. снова их набрать.
Плотность вязания. Жаккардовый узор: 21 п. и 33 р. = 10 х 10 см; узор с косами: 22.5 п. и 33 р. = 10 x 10 см.
Спинка: лиловой нитью набрать 104 (116) п. и связать между кром. 5 см резинкой, при этом через 2 см от наборного края вязать жёлтой нитью.
Затем связать 19 р. жаккардовым узором равномерно прибавив в последнем ряду 6 п., и 1 изн. р. изн. п.
Далее вязать узором с косами жёлтой нитью. Через 48 (50) см от резинки закрыть для выреза горловины средние 20 (22) п. и обе стороны закончить раздельно.
Для закругления закрыть с внутреннего края в каждом 2-м р. 2 х 5 п. Через 50 (52) см от резинки оставшиеся петли закрыть.
Правая полочка: лиловой нитью набрать 44 (50) п. и связать между кром. 5 см резинкой, при этом через 2 см от наборного края вязать жёлтой нитью.
В последнем ряду резинки равномерно прибавить 4 п. Затем связать 19 р. жаккардовым узором, равномерно прибавив в последнем ряду 3 п., и 1 изн р. изн. п.
Далее вязать узором с косами. Через 22 см от резинки закрыть для скоса выреза с правой стороны 1 п. и в каждом 6-м р. 15 (16) х 1 п.
Через 28 (30) см от начала скоса выреза оставшиеся петли закрыть. Левую полочку вязать симметрично.
Сборка: выполнить плечевые швы; по вырезу горловины и полочкам набрать жёлтой нитью 254 (262) п. и связать двойную планку.
Затем связать 2 см резинкой, при этом на планке правой полочки в 1-м р. равномерно выполнить 5 отверстий для пуговиц и через 1 см от начала резинки вязать лиловой нитью.
По каждой пройме (на 22 см с каждой стороны от плечевого шва) набрать жёлтой нитью 96 п. и связать двойную планку.
Затем связать 2 см резинкой, при этом через 1 см от начала резинки вязать лиловой нитью.
Выполнить боковые швы и швы планок. Пришить пуговицы.
По материалам журнала "Маленькая Диана".


|
Метки: Жилет с косами на пуговицах |
Красивый жакет спицами, описание и схема |
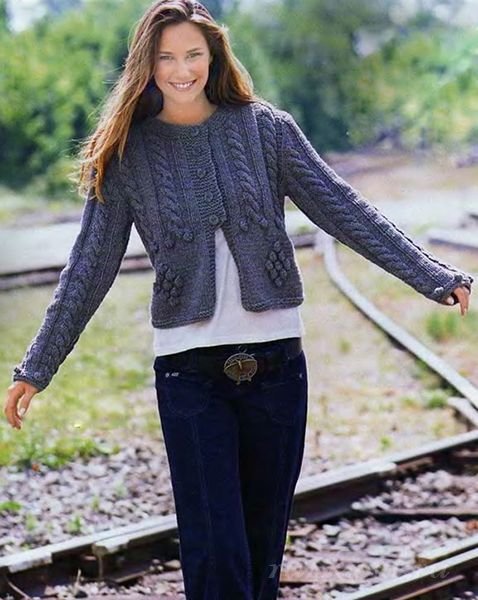
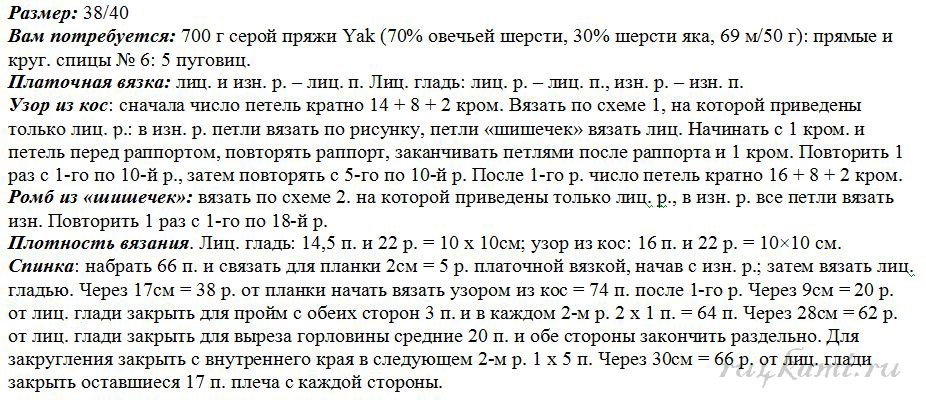
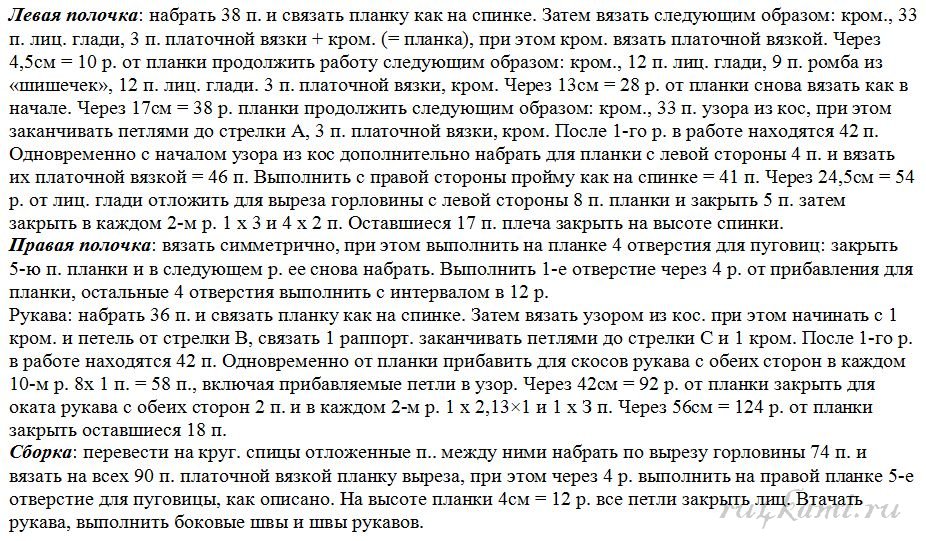
Красивый жакет спицами, описание и схема:
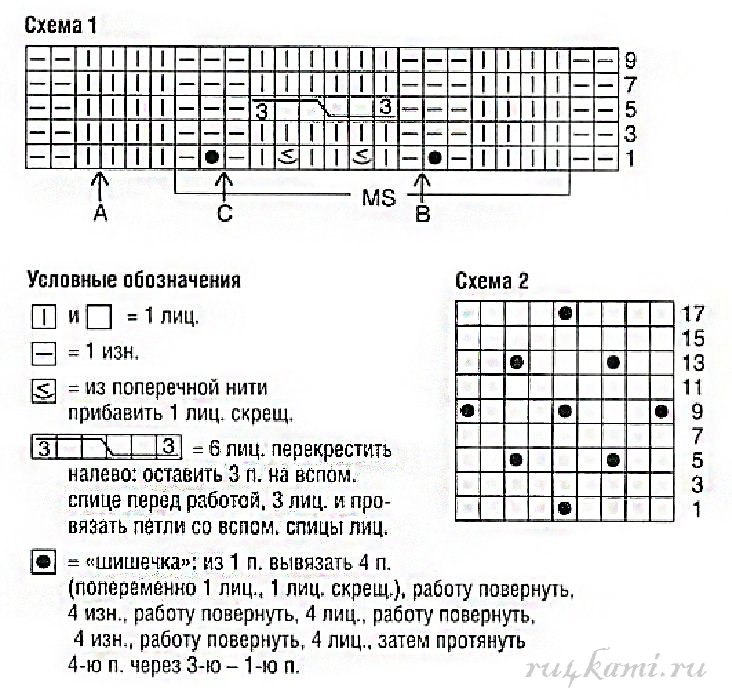
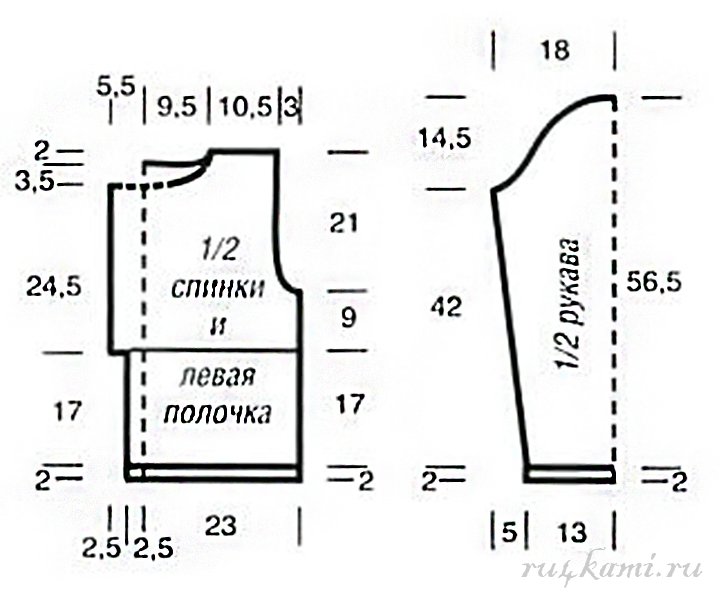
|
Метки: жакет спицами описание и схема |
| Страницы: [1] Календарь |