Ажурные зигзаги крючком! |


|
Вязаный зонтик |


|
Авторский медвежонок Тедди от Ольги Ястребовой. Мягкая игрушка |
Последнее время большое внимание рукодельниц приковано к мишкам Тедди. Ну и как их не любить-таких милых,пушистых и обаятельных.И каждая из нас, хочет сделать своего неповторимого,единственного плюшевого друга.
Может быть авторский медвежонок, которого предлагает сшить теддистка Ольга Ястребова -это тот самый единственный и неповторимый......
Для вдохновения зайдите на сайт ЗДЕСЬ мастерицы вы получите истинное наслаждение.

Серия сообщений "выкройки":
Часть 1 - Мишки Тедди
Часть 2 - Выкройки мишек Тедди. Часть 6.
...
Часть 8 - Медвежонок Роберт. МК.
Часть 9 - Книга "Шьем мишек Тедди. Очень подробно и с выкройками"
Часть 10 - Авторский медвежонок Тедди от Ольги Ястребовой. Мягкая игрушка
Часть 11 - Слоники (со схемами).
Часть 12 - Выкройка авторского мишки Елены Виноградовой
|
|
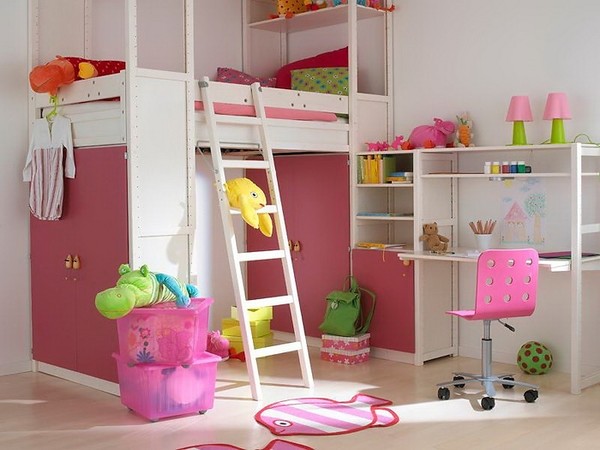
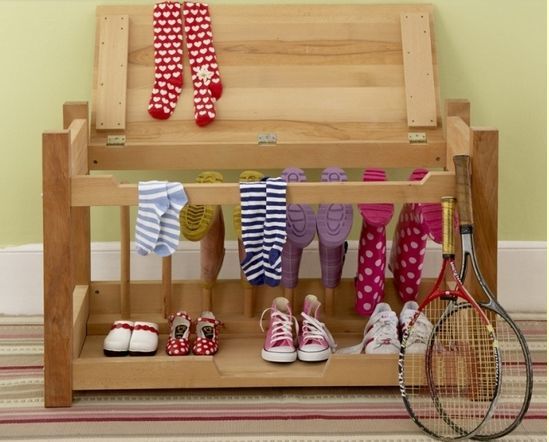
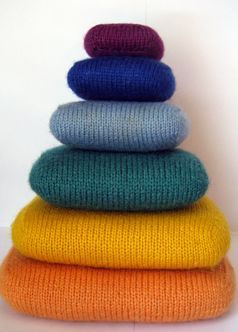
Яркие идеи и МК для детской комнаты |
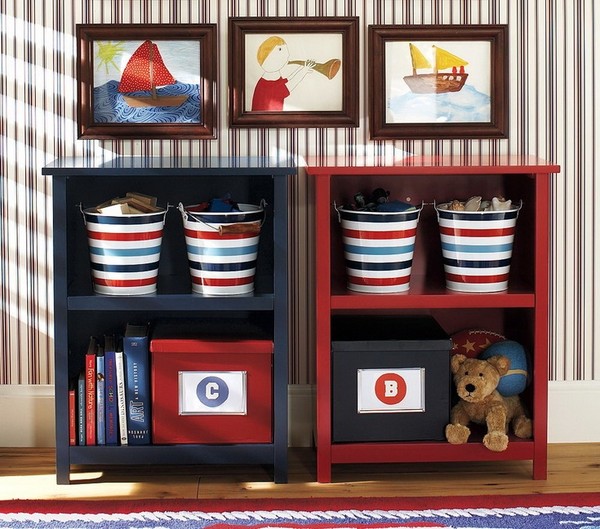 Хранение детских игрушек.
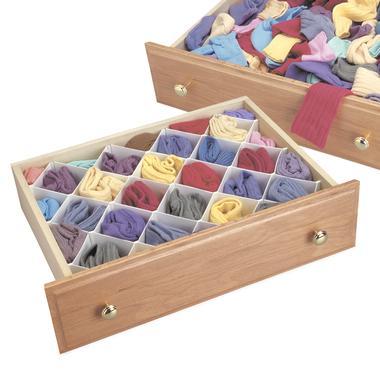

|
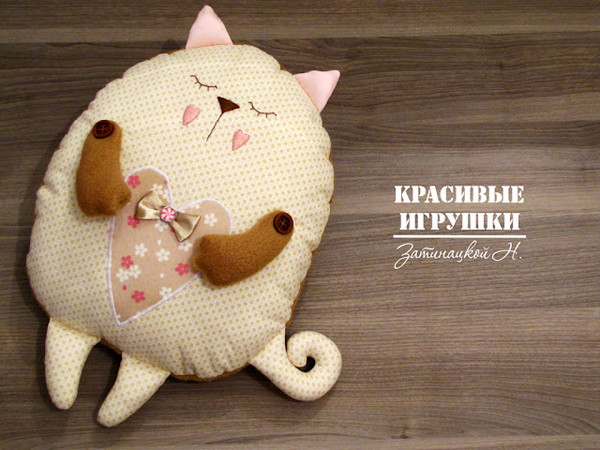
Оформление мордочки игрушки методом сухого валяния. МК |
Оформление мордочки игрушки методом сухого валяния. МК


1. готовая тушка будущего малыша
2. шерсть
3. иглы для валяния.
|
Шьем яркое воздушное платье на лето! |

|
Без заголовка |
|
Без заголовка |

 Das alte T-Shirt (oder Stoffreste) doppelt zusammenlegen und circa 2,5 Zentimeter breite und unterschiedlich lange, am Ende spitz zulaufende Streifen schneiden.
 Auch die Kette auf unterschiedliche Längen durch Aufbiegen von Ketten-Gliedern trennen. Die geöffneten Glieder brauchst du noch!
 Im Schulterbereich mit der Nagelschere immer je zwei ganz kleine Löcher in den Shirt oder Sweatshirt stechen …
 … und die Stoffstreifen durchziehen. Ich habe circa 4 Zentimeter unterhalb der Schulternaht auch jeweils zwei Stoffstreifen durchgezogen.
 Mit der Nadel wieder 2 Löcher durchbohren (siehe großes Foto) und ein offenes Ketten-Glied durchziehen.
 Nun die Kette daran einhängen und das offenen Ketten-Glied mit der Zange schliessen. Alternativ kannst du die Ketten auch auf dem Oberteil annähen. FERTIG!!!


|
Без заголовка |
|
Из старой футболки |
1.

2.


|
Из старой футболки |
Yeah, more DIY! I made this fringe shirt/dress thing last week with just an old shirt and some scissors. I really like how it turned out, and I've worn it out twice already...with no stares! I thought everyone would give me a lot of greif for this one, but nobody really seems to care.


|
Платье из 2х мужских футболок |
Футболки соединяются на линии талии одна горловина к другой, так чтобы на верхней рукава были как рукава,
а на нижней рукава были карманы.
Очень оригинально смотрится!
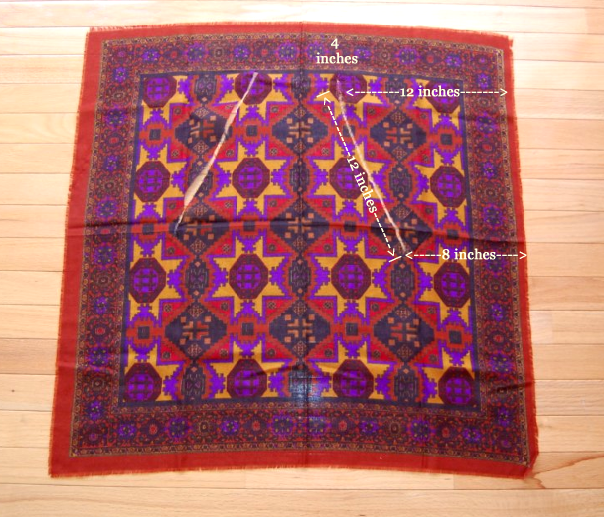
  I created this dress using 2 men's T shirts which are sewn together at the neck. Supplies: * 2 identical cotton T shirts (I used Hanes white undershirts, size Large. I dyed them blue before making the dress) Men's size large T's will make a XS/S dress. If you wear a larger size, buy larger T shirts) * 4 1/2 length of braided elastic that is 3/8 wide 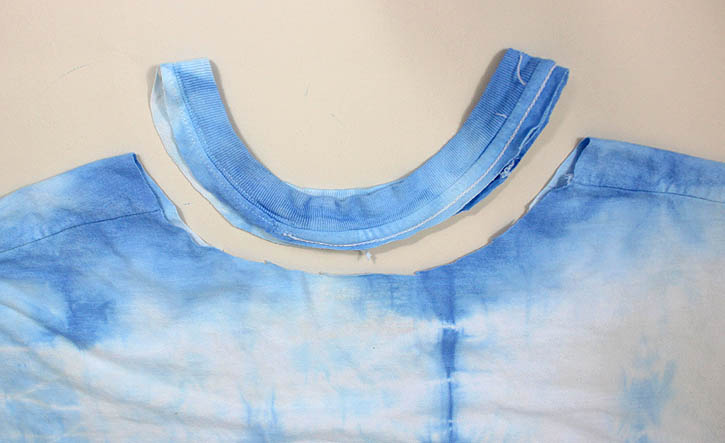 [Cut off the neck on both T shirts]  [Step 2: Create the pockets. Sew the arm holes closed on the right side of one of the shirts. Stitch a line approximately 1/2 inch above the arm bands]  [Step 3: Cut off the arm bands- I found that the pockets lay better without the added thickness. Don't cut too close to the stitches. Leave about 1/4 inch. This T shirt will be the skirt part of the dress]  [Step 4: Turn both shirts inside out and then sew them together at the neck]  [Step 5: I sewed a small piece of elastic on the front waistband to give the dress a better fit. At this point the front and back of the dress are the same. Just choose a side to be the front. Mark the middle with a pin. Measure 4 1/2 inches on both sides of the pin and mark those off spots off. This is where the elastic gets sewn]  [Here is the sewn on elastic. Make sure you stretch the elastic while sewing it. It creates a nice, gathered look in between the pockets]  [Final step: Turn the dress right side out, put it on and tuck the pockets in] |
|||
|
|
|||
1.


|
Из старой футболки |


|
Из старой футболки |


|
Брелочки с бусинками |


Серия сообщений "Игрушки":
Часть 1 - Кукла Калинка (Гейша
Часть 2 - Идеи со всего мира
...
Часть 18 - Мешочек с мышками.Описание
Часть 19 - Нашла такую картинку
Часть 20 - Брелочки с бусинками
Часть 21 - Подарки к Пасхе
|
Мешочек с мышками.Описание |
Вот и готовы мои мышки в мешочке.Еще один гостинчик к новогодним праздникам!Огромное спасибо автору этой прекрасной идеи!

***
|
Болеро с розами |


|
Роскошные вечерние платья Shady Zeineldine |
Серия сообщений "идеи":
Часть 1 - Обновление футболки!:)
Часть 2 - Как быстро очистить микроволновую печь
Часть 3 - Роскошные вечерние платья Shady Zeineldine
Часть 4 - Всё дело в шляпе!:) Замечательное украшение для маленьких модниц: идеи и видео мастер-классы.
Часть 5 - Обалденный бисерный паук!!!!!!!!! Фото - МК.
Часть 6 - Аппликации для детской одежды
|
|
Burda 160 |
|
Чесночный картофель |

|