-–убрики
- ¬я«јЌ»≈ (1333)
- - »√–”Ў » (121)
- - жакеты, кардиганы, пуловеры (173)
- - топы, блузки, болеро (55)
- - плать€, сарафаны, туники (152)
- - куртки, пальто, пончо (24)
- - мужские модели (7)
- - малышам (198)
- - дл€ девочек (97)
- - дл€ мальчиков (22)
- - носочки, тапочки (59)
- - шали, палантины (28)
- - шапки, шарфы, варежки (179)
- - детские шапочки, варежки, носочки (41)
- - пледы, подушки (29)
- - разное (50)
- - модели без описани€ (17)
- ”«ќ–џ » —’≈ћџ (70)
- “≈’Ќ» ј ¬я«јЌ»я (71)
- –ј—ќ“ј и «ƒќ–ќ¬№≈ (248)
- - косметика своими руками (1)
- - уход за лицом и телом (105)
- - уход за волосами (28)
- - укладка и стрижка волос (44)
- - маки€ж (5)
- - нейл-арт (30)
- - следим за фигурой (3)
- - рецепты здоровь€ (34)
- - детское (5)
- ”Ћ»Ќј–»я (222)
- - закуски (23)
- - копчение, соление рыбы/сала/м€са (9)
- - сладости (7)
- - десерты (5)
- - хлеб (4)
- - гор€чее (25)
- - салаты (6)
- - торты и сладка€ выпечка (70)
- - пироги (14)
- - напитки (2)
- - консервирование (12)
- - украшение блюд (9)
- - украшени€ из мастики (11)
- ќЅ”¬№ (205)
- - дл€ больших ножек (24)
- - декор обуви (8)
- - дл€ маленьких ножек (159)
- WIRE WRAP (146)
- ѕ–ј«ƒЌ» » (77)
- - новогоднее (60)
- - хэллоуин (6)
- - детские праздники (4)
- - украшение праздничного стола и интерьера (4)
- ј’, ј ќ≈ ѕЋј“№≈! (36)
- - плать€ дизайнерские (17)
- - детские плать€ (1)
- - разное (6)
- - инди€ (2)
- - кукольна€ мода (4)
- - плать€ 18-19 веков (1)
- —јƒќ¬ќ-ќ√ќ–ќƒЌќ≈ (18)
- ћќƒј » —“»Ћ№ (18)
- - цвет в одежде (10)
- - с чем носить...? (2)
- HANDMADE Ќј √–јЌ» ‘јЌ“ј—“» » (17)
- ЎЋяѕ » (12)
- дл€ дневника (11)
- ƒЋя –јЅќ“џ (9)
- PET'S (8)
- ѕќЋ≈«Ќџ≈ ѕ–ќ√–јћћџ (7)
- SELF DEVELOPMENT (6)
- ¬—≈ ƒЋя —¬јƒ№Ѕџ (6)
- ћќ» –јЅќ“џ (5)
- ——џЋ » (5)
- ј–Ќј¬јЋ (5)
- –укодельнице (4)
- »Ќ“≈–≈—Ќќ≈ (4)
- ÷¬≈“џ (3)
- THE PLACES (3)
- «ј√ќ¬ќ–џ (1)
- ÷¬≈“ќ—ќ„≈“јЌ»я (1)
- ƒ≈ ќ–»–ќ¬јЌ»≈ (141)
- - вс€кое разное (41)
- - упаковка подарков (14)
- - вазы, шкатулки и прочее (12)
- - нова€ жизнь старых вещей (12)
- - декор одежды (8)
- ƒ≈“» (144)
- - воспитание (5)
- - рисуем, вырезаем, лепим (3)
- - вс€ка€ вс€чина (62)
- - развивающие игры (15)
- ƒЋя ƒќћј (251)
- - подушки (63)
- - коврики (12)
- - светильники (32)
- - уютные вещи (54)
- - интересные идеи дл€ интерьера (26)
- - и удобно и красиво! (16)
- - мебель своими руками (23)
- - делаем ремонт (7)
- ƒќћќ¬ќƒ—“¬ќ (16)
- ¬џЎ»¬ ј (39)
- »Ќ“≈–№≈–џ (33)
- - детские комнаты (8)
- - интересные решени€ (4)
- - цвет в интерьере (3)
- Ќ»√»/∆”–ЌјЋџ (33)
- ” Ћџ / »√–”Ў » (290)
- - игрушки (132)
- - околокукольное (42)
- - текстильные куклы (22)
- - игрушки дл€ малышей (17)
- - тильда (26)
- - тр€пиенсы (52)
- вдруг пригодитс€ (42)
- разобрать (159)
- –” » Ќ≈ ƒЋя — ” » (633)
- - сумки & co (69)
- - чудеса из фетра (29)
- - шаблоны, трафареты и т.д.... (14)
- - скрапбукинг (8)
- - свечи рукодельные (8)
- - роспись по стеклу (7)
- - открытки hand-made (6)
- - редкие рукодели€ (6)
- - плетение шнуров и узлов (4)
- - темари (4)
- - эпоксидка (3)
- - роспись (3)
- - часы (3)
- - фоамиран (1)
- - бисероплетение (89)
- - канзаши (26)
- - квиллинг, цветы из бумаги и не только (34)
- - холодный фарфор, полимерна€ глина, гипс (142)
- - мозаика / витраж (6)
- - мыловарение (24)
- - плетение из газет (16)
- - разные разности (73)
- - цветы из ткани, цветы из лент (62)
- ‘Ћќ–»—“» ј (60)
- Ѕукеты из конфет (44)
- ”роки аранжировки (7)
- - необычные букеты (2)
- Ў№≈ћ (423)
- - шьем юбки (23)
- - шьем плать€ (18)
- - идеи и модели без описани€ (15)
- - шьем пальто, куртки и пр... (14)
- - аппликаци€ (9)
- - моделирование (9)
- - шторы (6)
- - шьем одежду дл€ дома (5)
- - шьем аксессуары (5)
- - дл€ дома (4)
- - швейный ликбез (42)
- - малышам и дет€м до 3-х лет (97)
- - дет€м от 3-х лет и старше (107)
- - дл€ дам (120)
- - дл€ мужчин (4)
- ” –јЎ≈Ќ»я —¬ќ»ћ» –” јћ» (210)
- - украшени€ из бисера (51)
- - дл€ девочек (27)
-ћетки
-ѕоиск по дневнику
-ѕодписка по e-mail
-—татистика
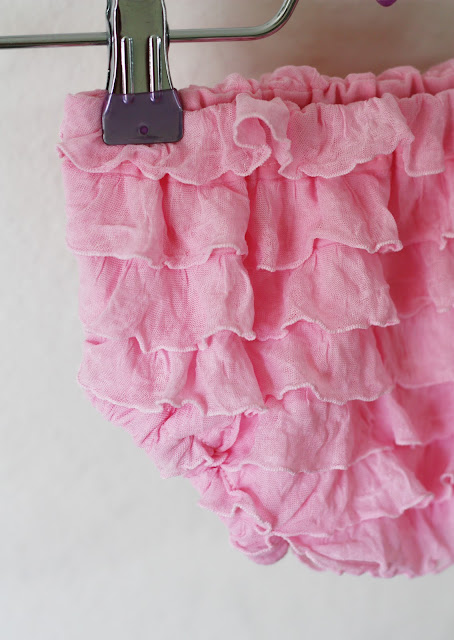
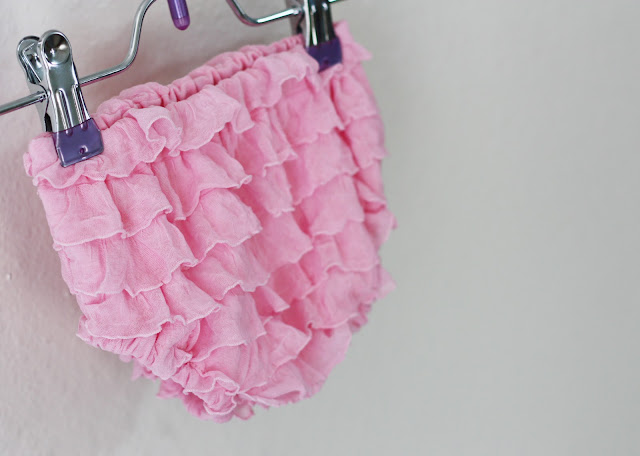
–озовые трусики дл€ малышки |
 |
| Photo of my niece Lydia - courtesy of Kyla Beth Photo Studio |
When cutting the bottom of each piece, flip the ruffle nearest the bottom up so it does not get in the way of cutting.
A few tips before we start sewing with ruffle fabric:
* Since ruffle fabric is a knit, always use a ballpoint needle.
* Before pinning and sewing ANY seam, always make sure every ruffle is laying flat and in place. Sewing in the direction that the ruffles are laying will help them to stay put while being sewn (example: sew the side seams from the top of the diaper cover towards the bottom).
* Pin, pin, pin! I can't say that enough, especially on any curved edges, where it's more difficult to keep the ruffles in place as their sewn.
* Don't stretch the fabric as it's sewn. Allow the feed dogs on your machine to gently guide fabric through.
* Sergers work great with ruffle fabric, but I like to sew the seams with a sewing machine first and serge afterwards to give myself the opportunity to unpick any areas where the ruffles might have gotten out of place when sewn. Do what works best for you :).
* Ruffle fabric raw edges will not fray, so if you don't have a serger, you can just leave the raw edges after they're stitched - no need to zigzag.
3. Pin and stitch front and back pieces together at sides and bottom edges, leaving leg holes open and using a 1/2" seam allowance. The ruffle nearest the waistband should be flipped upwards toward the top of the diaper cover while sewing the side seams (I didn't do this, but I'll explain why you should in a later step). When stitching the bottom seam, you may have to decrease your seam allowance to avoid stitching into a row of ruffles - I only had about a 1/4" seam allowance on the bottom in this case, but use 1/2" if you can.
Your ruffles should be laying nice and flat (your top ruffle will be facing upward though, right?).
If you had sewn the side seams with the top row flipped upward, you would not see this at the side seams, which makes it more difficult to sew the waistband casing without catching the top row of ruffles:
5. Stitch close to edge of pinned waistband, forming a casing for elastic, and leaving an opening to insert elastic. Pay special attention to keeping ruffles out of the way of the seam.
6. Pin one leg opening 1/2" toward wrong side of fabric, using plenty of pins to keep ruffles in place.
8. Repeat steps 6-7 with remaining leg opening.
9. Use a safety pin to insert a 8" piece (you can adjust the length of elastic based on the size of your baby's thighs - take off a bit for an extra tiny baby, add a bit for a chubby baby, or if you want the cover to fit longer, you may also want to add a bit extra length) of 1/4" elastic into casing of one leg opening. Overlap elastic ends 1/2" and sew together using a zig zag stitch. Repeat with other leg opening and stitch opening of each casing closed.
10. Use a safety pin to insert a 14" piece (again, adjust the length as needed) of 1/2" elastic into waistband casing. Overlap ends 1/2" and sew together using a zig zag stitch. Stitch casing opening closed.
I'm excited to share some pics of our little one wearing her ruffle fabric diaper cover when the time comes, but in the meantime, please share pics of your covers in the Sew Much Ado Flickr group - I'd love to check them out!
| –убрики: | Ў№≈ћ/ - малышам и дет€м до 3-х лет |
| омментировать | « ѕред. запись — дневнику — —лед. запись » | —траницы: [1] [Ќовые] |


