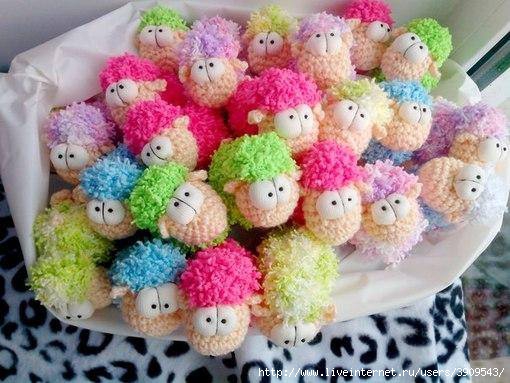
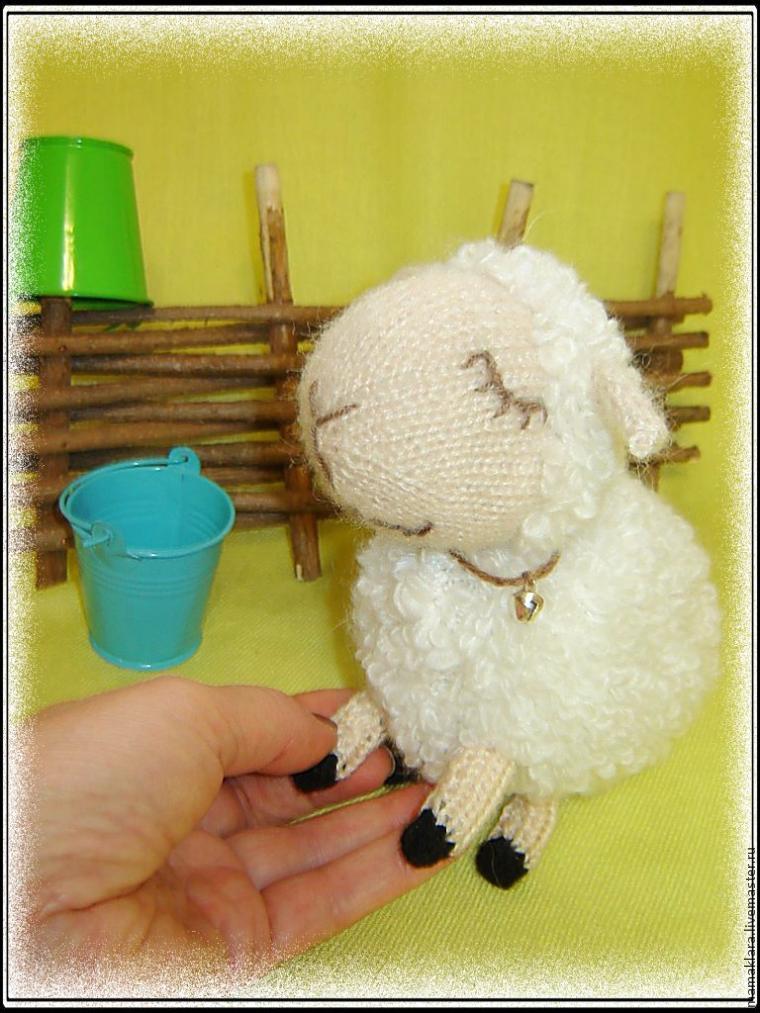
Барашки |
|
|
http://labhousehold.com/beautiful-pattern-crocheted-master-class.html |
|
|
Веселые наушники овечки |
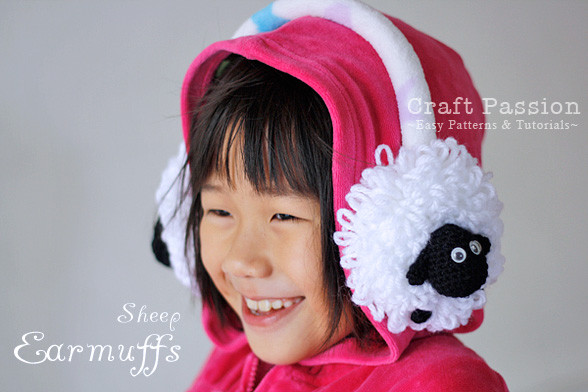
“Watching the snow accumulated outside your window, this winter is sure freezingly cold”, my heart whispering when watching the news about the cool winter weather…. It is fun to have some outdoor activities with the thick snow; snowball fighting, making snowman, sleigh ride, skiing, et cetera… and I hope you are able to keep warm too while enjoying the snow play; especially to the little one who needs your tenderly care.
The design of this sheep earmuffs was inspired by the hilarious flock in the “Shaun The Sheep“, a children animation TV series. I specially love the big fat sheep, Shirley, who basically eats everything and get into trouble for consuming those uneatable. Isn’t her big fluffy body so perfect as the muff? The muffs are made up of loop stitches with 1″ loop length. The head, ears and legs are single crochet stitches amigurumi. Sewing all the parts to assemble the sheep, then attach the headband to become a earmuffs. That’s it! Hope your kid finds it warm yet entertaining when wearing the earmuffs.
By the way, if you are also a fan of “Shaun The Sheep”, don’t miss out the tutorial by using pom-pom to make sheep key chain.
Get the crochet pattern and the how-to for this sheep earmuffs after this jump:
Difficulty Level: Advance Beginner, must know how to crochet ls [loop stitch], ls2tog, sc, sc2tog & ch.
Finished size: approx. 4″ diameter for each sheep (including the loops).
Materials & Tools:
1. Yarn : medium worsted DK, White (approx. 40g), Black (approx. 20g).
2. Crochet hook: 3 mm
3. Tapestry Needle (to join body parts and hide yarn ends)
4. Plastic Headband (choose a strong type so that it won’t break easily yet able to keep the earmuffs to the ears), or salvage an old headphone that able fit into the sheep body/muff.
5. Wiggly eyes, 8 mm x 4 pcs.
6. Microfiber or microfleece
7. Poly-fill for stuffing
8. Sewing kit
9. Craft glueAbbreviations:
ch = chain
sc = single crochet
ls = loop stitch
sc2tog = single crochet 2 together or single crochet decrease
ls2tog = loop stitch 2 together or loop stitch decrease
st = stitch
MM= move marker
FO= fasten offCrochet Patterns
Body (White) – Make 2
(Loop’s length: about 1″ long)
Round 1: Ch2, 8sc in 1st chain. MM. (8)
Round 2: *2ls in each st*, repeat from * around. MM. (16)
Round 3: *2 ls in first st, 1 ls in next st*, repeat from * around. MM. (24)
Round 4: *2 ls in first st, 1 ls in next 2 sts*, repeat from * around. MM. (32)
Round 5: *2 ls in first st, 1 ls in next 3 sts*, repeat from * around. MM (40)
Round 6 – 8: 1 ls in each st around. MM (40)
Round 9: *ls2tog, 1 ls in next 3 sts*, repeat from * around. MM (32)
FO, hide yarn endHead (Black) – Make 2
Round 1: Ch2, 6sc in 1st chain. MM. (6)
Round 2: *2sc in each st*, repeat from * around. MM. (12)
Round 3: *2sc in first st, 1sc in next st*, repeat from * around. MM. (18)
Round 4: *2sc in first st, 1sc in next 2 sts*, repeat from * around. MM. (24)
Round 5 – 6: 1 sc in each st around. MM (24)
Round 7: *sc2tog, 1sc in next 2 sts*, repeat from * around. MM. (18)
Round 8 – 10: 1 sc in each st around. MM (18)
Round 11: *sc2tog, 1sc in next st*, repeat from * around. MM. (12)
Round 12: 1 sc in each st around. MM (12)
Stuff
Round 13: sc2tog in each st around. MM. (6)
FO with at least 6″ yarn tailEar (Black) – Make 4
Round 1: Ch2, 6sc in 1st chain. MM. (6)
Round 2 – 3: 1 sc in each st around. MM (6)
Round 4: sc2tog in each st around. MM. (3)
Round 5: 1 sc in each st around. MM (3)
FO with at least 6″ yarn tailLeg (Black) – Make 4
Round 1: Ch2, 6sc in 1st chain. MM. (6)
Round 2: sc2tog in each st around. MM. (3)
Round 3 – 4: 1 sc in each st around. MM (3)
FO with at least 6″ yarn tail
 Crochet all sheep amigurumi parts (picture shown only 1 set).
Cut 2 pcs. of circles from microfiber or fleece, diameter of the circle (including seam allowance) is about 4″ or 1 1/2″ larger than the opening of the body.
 With tapestry needle, sew ears at round 10 of the head, 10 stitches apart.
Sew head to the body with top of the head at the center of the body.
Sew legs at round 6 of the body, 5 stitches apart.
Glue eyes at round 8 of the head. (You can glue the eyes later for faster process)
Repeat the same to another sheep.
Set aside while waiting for the glue to dry.
 While waiting for the glue to dry and eyes to fix, measure the length (L) and width (W) for the headband.
Cut 1 rectangular from the microfiber with about 1″ seam allowance at each side for the length (total = 2″+L), add 1″ + 1/2″ seam allowance at each side (total = 2″+W) for the width. The extra 1″ is to ensure that the headband pocket is big enough to let the plastic headband to pass through.
 With right side facing each other, sew along lengthwise of the microfiber. Turn the tube rightside out.
Insert the headband into the tube pocket.
Sew to close bother ends.
 When the eyes are safe to handle, sew with slip stitch to attach the microfiber circle to the body of the sheep. Leave 1″ opening at the top of the sheep, for stuffing and headband attachment.
 Stuff some poly-fill into the earmuffs through the opening.
 The length of the headband needed for a kid is about 12 1/2″ or slightly longer for adult. Mark the headband then insert the end into the opening, pin to secure then slip stitch to attach. You will find part of the plastic end is inside the earmuff.
Repeat the same to the other side.
If you haven’t glue the eyes, you can do it now. Leave the glue to dry before handling.
~Done~
 Cute sheep earmuffs especially for kid to protect their ears during the freezing winter.
 The inside is soft microfiber that keeps the ears warmed.

|
|
Вязание жаккарда видео уроки |
|
|
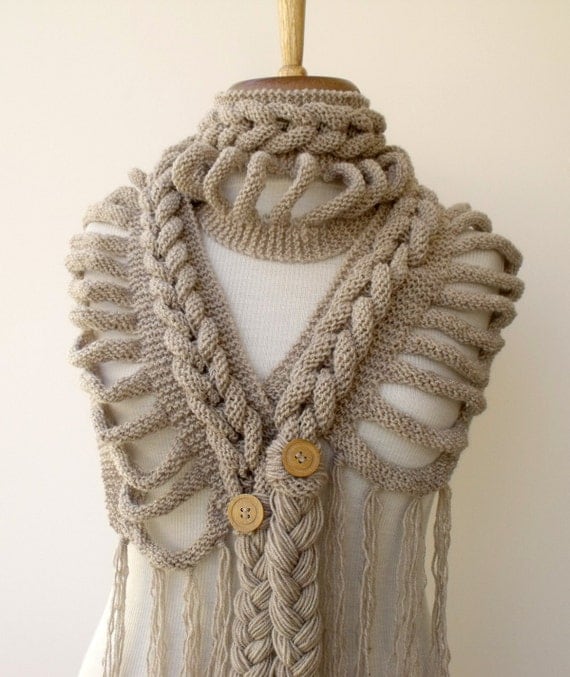
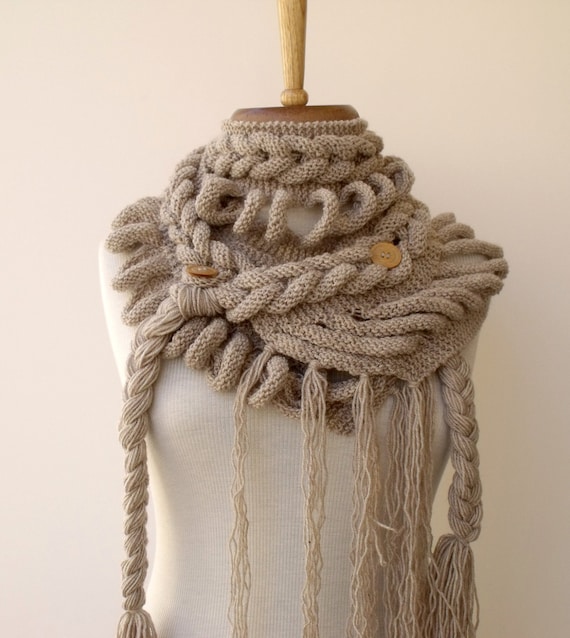
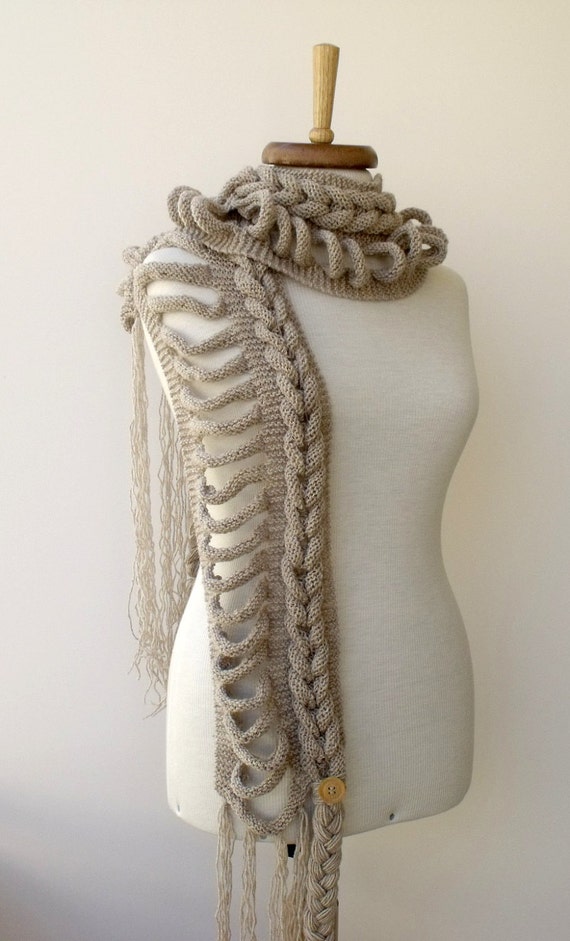
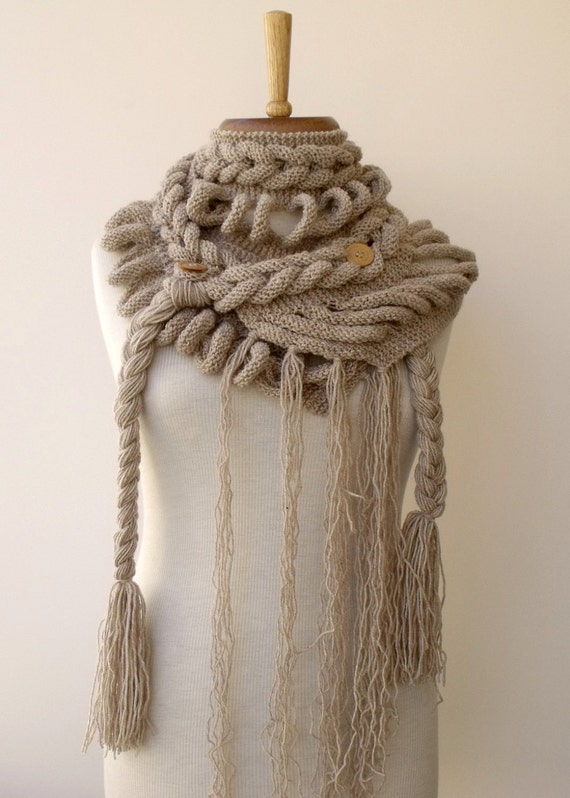
шарф азиатский колосок |
Девочки, этот шарф, наверное, уже видели все. По ссылке ниже его можно даже купить. Но я не о покупке, а о подходе! Ведь здесь использованы самые обычные лицевые и изнаночные петли, а какой эффект! Все ищут описание, а некоторые девочки берут спицы в руки и делают! Ниже есть шапочка и шарф с описаниями. Главное захотеть!
Хочу обратиться к девочкам, знающим португальский, может подскажете названия петель в описании шарфа? Гугл не потянул совсем!
http://www.etsy.com/listing/84432403/winter-fashio...pping-new?ref=tre-1867159254-1
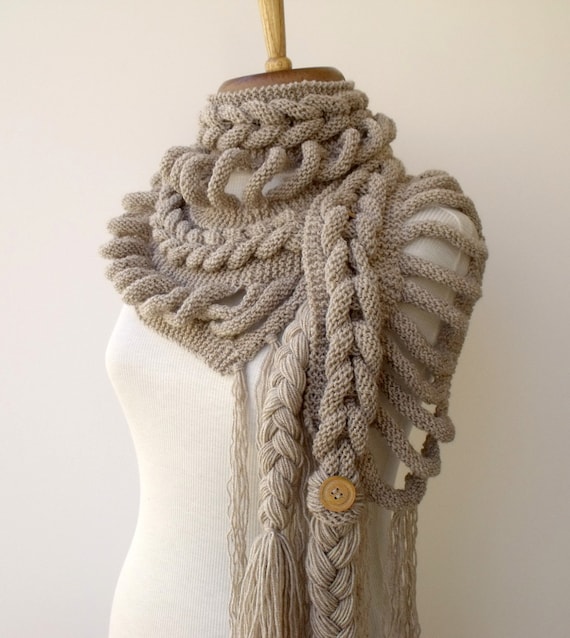
http://s30592971209.mirtesen.ru/blog/43591023633/I...vyazaniya-spitsami#42824305178


http://www.vitoriaquintal.com.br/receita20.htm


Material:
3 novelos de Cisne Cetim na cor nº1539
Agulha para Tricô Corrente nº6
Execução:
Com 1 fio de cisne cetim colocar 52 pontos na agulha nº 6 e fazer 18 cm do ponto sanfona 1/1 ( 1tr,1m).
A seguir fazer as carreiras abaixo começando pelo lado do direito:
- 20 pontos sanfona 1/1, 6 tr, aumentar 8 pontos, 6 tr, 20 pontos sanfona 1/1
- 20 pontos sanfona, 20 m, 20 pontos sanfona
- 20 pontos sanfona, 20 tr, 20 pontos sanfona
-20 pontos sanfona, arrematar 20 pontos, 20 pontos sanfona
A Seguir fazer 23 vezes as 8 carreiras abaixo:
1ª carreira: 20 pontos sanfona, recolocar os 20 pontos, 20 pontos sanfona
2ª, 4ª e 6ª carreiras: 20 pontos sanfona, 20 m, 20 pontos sanfona
3ª, 5ª e 7ª carreiras: 20 pontos sanfona, 20 tr, 20 pontos sanfona
8ª carreira: 20 pontos sanfona, arrematar 20 pontos, 20 pontos sanfona
A seguir para terminar o trabalho fazer da seguinte maneira:
- 20 pontos sanfona, recolocar 20 pontos, 20 pontos sanfona
- 20 pontos sanfona, 20 m, 20 pontos sanfona
- 20 pontos sanfona, 6tr, arrematar 8 pontos, 6 tr, 20 pontos sanfona
Fazer mais 18 cm de ponto sanfona 1/1 ( 1 tr, 1 m) e arrematar o trabalho.
Colocar franjas e passar uma argola por dentro da outra formando a trança, depois no final dar um ponto na ultima argola com um ponto invisível.
http://vyzalkina.ucoz.ru/news/zhenskaja_vjazanaja_...hkom_na_osen_zimu/2012-01-13-8

Материалы: нитки Angora RAM 1 моток 100 гр/500 м, 40% moheir 60% acrylic, спицы N4, круговые спицы N3, крючок N2, 5 бусинок, швейные нитки в тон вязальным.
Описание работы: набрать на спицы 45 петель.
1 ряд: 45 лицевых петель
2 ряд: 45 изнаночных петель
так повторять еще 6 рядов.
Далее вяжем 3 лицевые петли, 18 петель закрыть, 3 лицевые, 18 петель закрыть, переворачиваем работу. Далее 3 изнаночные, 18 петель набрать, 3 изнаночные, 18 петель набрать. Так вязать все полотно, через каждые 8 рядов делать "прорези" в полотне. Получившееся полоски сделать в виде петель и соединить их между собой, вдевая друг в друга (как соединяются петельки на колготках), таким образом у нас получаются две косы Так вяжем до требуемой нам длины, согласно обхвату головы. Последние две прорези не соединять с основным полотном, это видно на фото ниже:


Полосу с косами соединить в кольцо, стараясь вдеть начальные и конечные петли друг в друга так, чтобы не было видно места соединения. Сшить.
Со стороны нашего круга набрать равномерно петли на спицы ( я набирала так: из одной петли – 1 петля, из следующей – 2 петли и так повторять). Вязать резинку 20 рядов (2 лицевые петли, 1 изнаночная петля).
Донышко шапочки (вяжем крючком):
6 воздушных петель соединить в кольцо и обвязать столбиками без накида.
1 ряд: по 2 столбика б/н в каждый столбик предыдущего ряда
2 ряд: 1 столбик б/н в столбик предыдущего ряда, прибавка (2 столбика б/н в следующий столбик предыдущего ряда); и так до конца круга
3 ряд: 2 столбика б/н в следующие столбики предыдущего ряда по порядку, прибавка; и так до конца круга
4 ряд: 3 столбика б/н в следующие столбики предыдущего ряда по порядку, прибавка; и так до конца круга
5 ряд: 4 столбика б/н в следующие столбики предыдущего ряда по порядку, прибавка; и так до конца круга
6 ряд: 5 столбиков б/н в следующие столбики предыдущего ряда по порядку, прибавка; и так до конца круга
7 ряд: 6 столбиков б/н в следующие столбики предыдущего ряда по порядку, прибавка; и так до конца круга
8 ряд: 7 столбиков б/н в следующие столбики предыдущего ряда по порядку, прибавка; и так до конца круга
Так вязать, делая прибавки и увеличивая количество столбиков между ними с каждым рядом на один, пока не достигнете нужного диаметра донышка.
Вшить донышко в нашу шапочку.
Связать 5 цветочков (какие Вам нравятся) крючком N2 (пряжа в одну ниточку). Пришить цветочки на край донышка шапочки. Сердцевинки цветочков украсить бусинками.
Наша шапочка готова!


Еще один мастер-класс по этой теме (добавлено 10.05.12): http://mizrah.ru/post219385594/
Добавлю еще одну ссылку:

Плетеное ожерелье спицами, тоже интересный вариант http://mizrah.ru/post172103427/
Думаю, это видео поможет понять, как это делается:
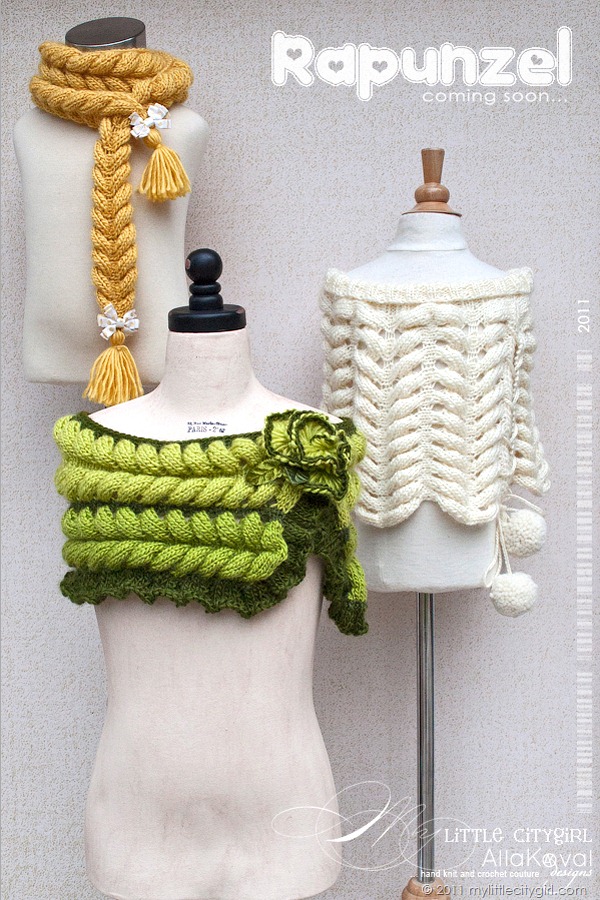
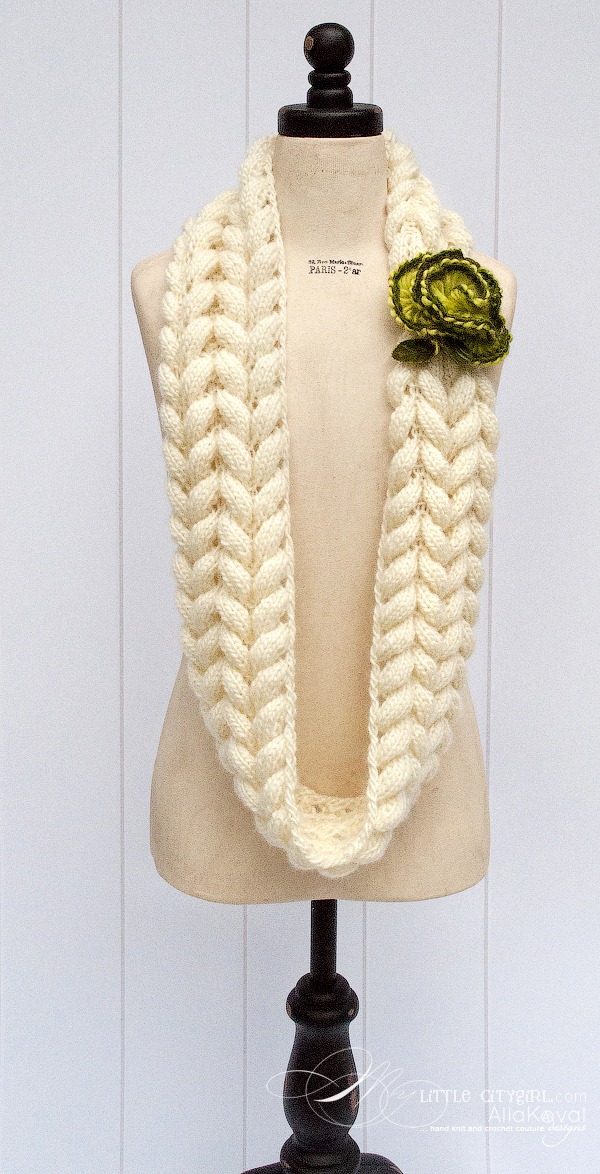
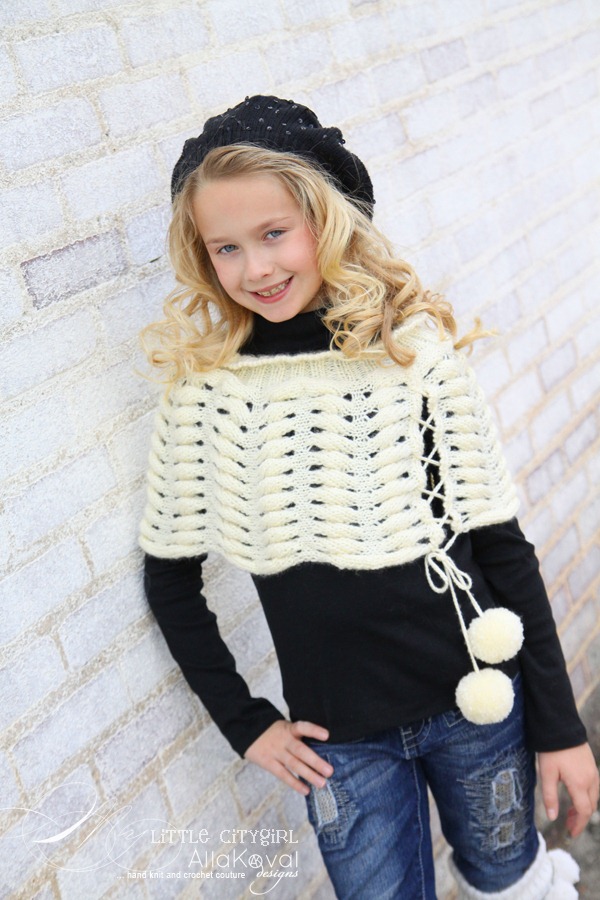
А это несколько образцов из новой коллекции Аллы Коваль, по ссылке Вы можете увидеть больше:
http://mylittlecitygirl.com/category/creations/

А это многим известный "азиатский колосок"! Вам ничего не напоминает? Пол картинкой ссылка на описание. Главное - захотеть и не бояться!

Описание здесь: http://kniti.ru/2011/02/pulover-uzorom-aziatskij-kolosok-master-klass/
Всем желаю вдохновения, не забывайте, скоро придет ВЕСНА!
|
овечка |
Нам понадобится:
|
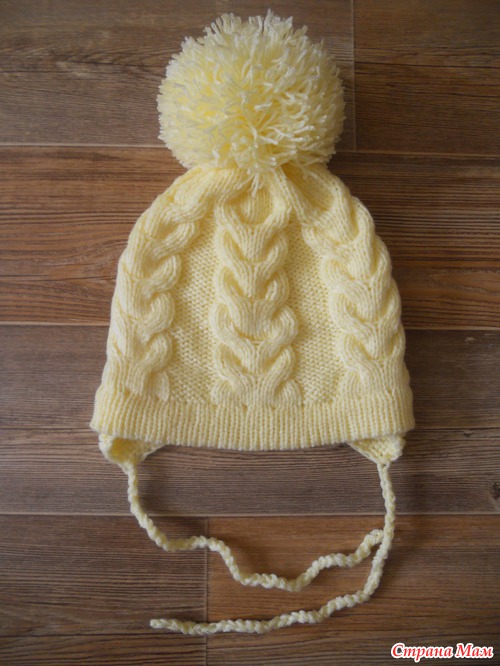
шапка |
|
Платье |
|
шапка |
|
Полувер |
|
шапка |
|
Панама |

|
Шапка |

|
Кепка для мальчика |
|
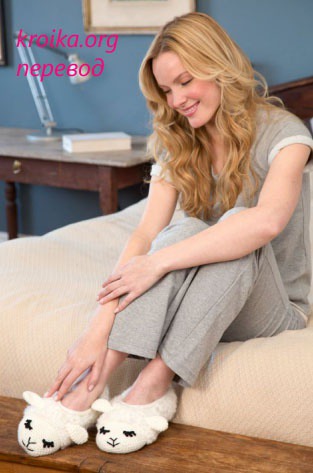
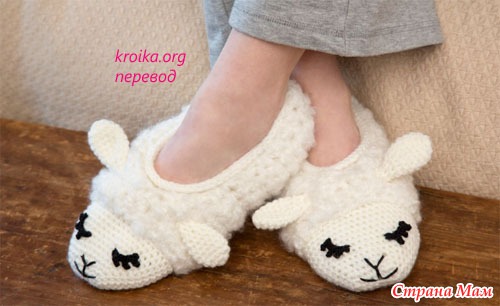
Тапки овечки |
|
Без заголовка |
|
Без заголовка |
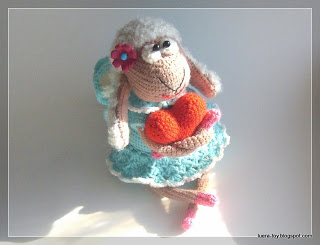

Размер феечки, не считая ножек - 17 см
Чтобы сделать это милое создание, потребуется:
- Пряжа акриловая 330м/100г; немного любой пушистой пряжи белого цвета, можно букле, травку, мохер и т.п.. (Я использовала букле "Пряжа из Троицка, Фантазия, 50%шерсть/50%акрил, 160м/100г")
- Крючок (я использовала №2,5 для акрила, и №4 для букле)
- Две бусины черного цвета
- Наполнитель (синтепон и т.п.)
- Игла с большим ушком (для сшивания деталей)
Примечания: Детали игрушки вяжутся по спирали за одну стенку петли, набиваются по ходу вязания, если не указано иное. Для удобства, отмечайте начало ряда контрастной нитью или булавкой.
|
Без заголовка |

Плюшевая овечка - маленькая, быстрая и потрясающе милая. Обязательно для шерстки используйте фактурную пряжу.
Подробный мастер-класс по вязанию по ссылке - http://amigurumi.com.ua/forum/index.php?showtopic=9437.
|
Без заголовка |

Онлайн по этой чудесной овечке, связанной на спицах проходит вот здесь - http://holomi.pp.ua/forum/index.php?topic=257.0.
Требуется регистрация.
|
Без заголовка |
вязаная овечка
автор описания Тетя Лена
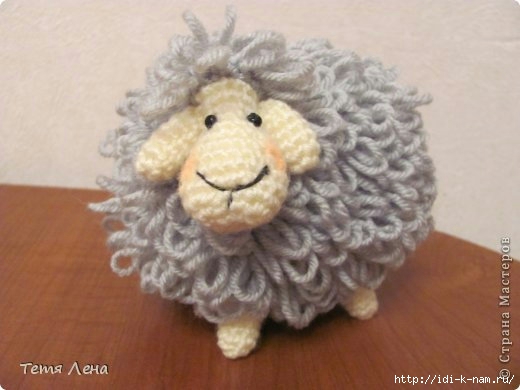
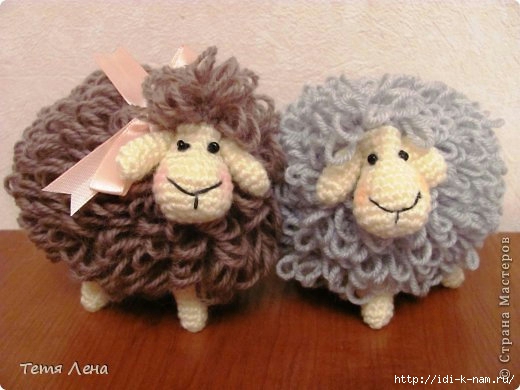

Для вязания использовала пряжу средней толщины. Для туловищаа 100 г-250 м, крючок 2,5. Для остальных деталей пряжа желательно чуть тоньше, крючок 1,5.
Честно говоря, разных овечек я вязала из того, что осталось :))
|