Без заголовка |
|
Без заголовка |
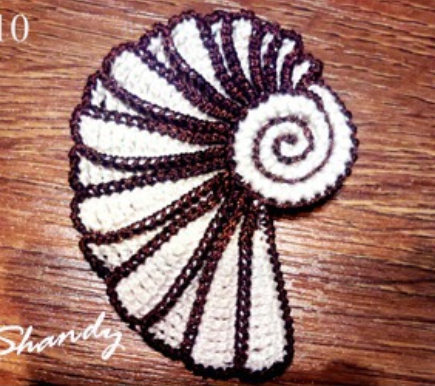
Я очень люблю мотивы из "Дуплета". Но мне часто приходится продумывать схемы к мотивам с бурдоном, так чтобы можно было бы связать без него. У меня с ним особые "высокие" отношения. Мне сложно такое количество ниток прятать. Пока мотивы вяжешь, уже столько ниточек напрячешь)) ещё и с бурдона, с одной стороны 5-7 ниточек, с другой стороны так же. А мотивы мне нравятся и очень хочется их связать. И тогда я размышляю так, а попробую придумать способ, как связать тот или иной мотив с бурдоном, не прокладывая дополнительную "дорожку" из ниточек, например, на цепочке воздушных петель. И всякий раз что-нибудь придумываю. У меня, конечно, не так рельефно и плотно получается - как это было бы с бурдоном, но всё таки нужный эффект достигается.
|
Без заголовка |
|
Без заголовка |
|
Без заголовка |
Нашла в интернете "Морское вязание от Симочки Расимочки", мне очень понравилось. Сделала пост : http://www.liveinternet.ru/users/3266779/post363167161/ и стала искать автора и её творения в интернете. Не сразу, но нашла в Одноклассниках.Это Расима Минатуллина - Симочка Расимочка.Она такая умница! Ручки золотые! Человек очень
творческий, с богатой фантазией,которая наталкивает её на создание прекрасных работ,
Просто шедевры выходят из её рук!
Например то,что вошло в "Морское вязание от Симочки Расимочки" это часть её
фотоальбома в Одноклассниках "Сарафан Мировой океан в процессе".Судя по всему сарафан ещё не готов, я нашла только такое его фото :
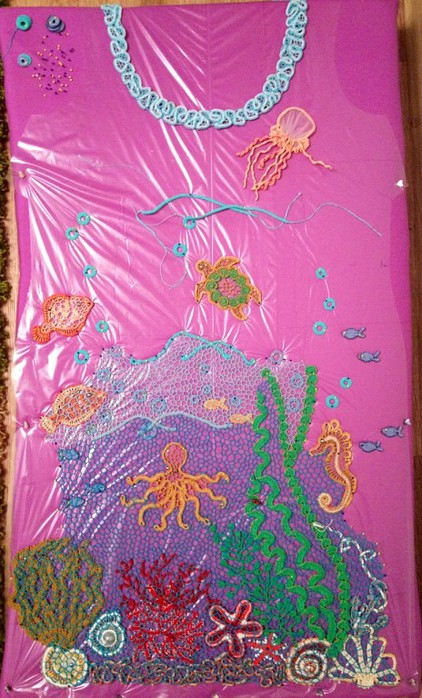
но все красоты из "Морского вязания" оттуда и там ещё много интересного.
Мастерица пишет :"Выкладываю не для того, чтоб схемы и описания просили. А ЧТОБ ВИДЕЛИ И ПОНИМАЛИ что связать можно почти ВСЕ. Развивайтесь!Учитесь сочинять СВОЕ! Не от того что мне жалко. Просто КАЖДЫЙ кто вяжет на это СПОСОБЕН! Не лишайте себя удовольствия ,придумайте свое."
Конечно,скажу честно - я была бы рада,если бы были схемы, описания, но как автор решила, так есть,это её право. Спасибо за то, что есть. Там много фото (кроме её вязалок она выкладывает фото,вдохновившие её на процессы), много подсказок и по комментам Расимы я поняла, что много материалов в инете и она тоже ими пользуется. В общем выкладываю фото из её альбома.
Комментарии с вашими идеями и ссылками на то, как по вашему это лучше связать приветствуются.
|
Без заголовка |
ч.1- http://www.liveinternet.ru/users/3266779/post363498648/

|
Без заголовка |
| |
|
|
Без заголовка |
|
Без заголовка |
|
Без заголовка |
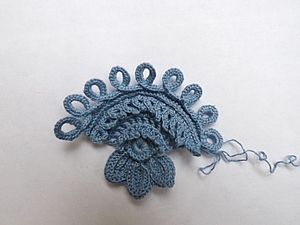
элемент ирландского кружева «Аурика»
автор мастер класса Тушницкая Юлия
далее слова автора

Предлагаю вашему вниманию мастер-класс по вязанию крючком авторского мотива «Аурика».
Материалы:
- пряжа белая (100% хлопок). Толщина пряжи: в 100 г — 500...600 м;
- крючок — от № 1,75 до № 2,2;
- иголка с большим ушком;
- ножницы.
|
Без заголовка |
Вот, мы и связали первые элементы, соберем букетик.. или кустик.. кому как нравится.. рассмотрим метод соединения элементов "встык".Прежде чем собирать изделие, нам необходимо сделать набросок или эскиз будущей композиции, для этого отвязываем десяток или два понравившихся мотивов, разных
Серия сообщений "Ирландское кружево":
Часть 1 - Ирландское кружево (часть 1)
Часть 2 - Ирландское кружево (часть 2) основы вязания крючком.
...
Часть 4 - Ирландское кружево (часть 4), вяжем листик
Часть 5 - Ирландское кружево (часть 5), рачий шаг
Часть 6 - Ирландское кружево (часть 6), собираем букетик.
Часть 7 - Книга: 101 узор ирландского вязания
Часть 8 - Виноград. Урок от OLGEMINI.
...
Часть 17 - Сочетание цветов.
Часть 18 - ВЯЗАНИЕ НА ВИЛКЕ + ИРЛАНДИЯ...
Часть 19 - ЖМ 566
|
Без заголовка |
|
Без заголовка |

Бесплатно скачать журнал на свой ПК можно здесь:
turbobit здесь: depositfiles или здесь: uni bytes
|
Без заголовка |

Дуплет – заочная школа рукоделия. Журнал по вязанию крючком, полностью посвящен сборке Ирландского кружева. В номере дано большое количество образцов сеточек для соединения разнообразных мотивов.
|
Без заголовка |

Журнал по вязанию крючком ирландских мотивов и кружев.
|
Без заголовка |

The insert can be taken out, in case you want your regular old purse back. But mine is staying put.

Now I don’t have to worry about my poor camera/lenses getting thrown around.

And what’s cool, is that there are little velcro inserts that divide your camera and supplies. And are adjustable so that you can create the right sized compartments for all of your stuff. (This concept is not my own. Many camera bags are made this way.)

And I can move the insert out of the way and still have access to all of the regular pockets for my keys/phone/etc.

Oh, and maybe you’d like to have a camera bag/diaper bag/purse combo?? This bag works for that too. You can change up your dividers and put all of your regular purse items in one section……but then leave enough room for a padded camera section. Just change it up how you need it.

Yeah, sometimes I can’t stomach a hefty price-tag.

So I love when it’s something that I can figure out and make work for me.

Do you have a purse you’d like to turn into a camera bag?
SUPPLIES:
**The quantity of your supplies will vary, depending on the size of purse you’re converting.
First, you’ll need a purse. Use one of your old ones or buy a new one. You’ll need one that has one large compartment and is a larger in size, if you want to be able to section it off with the dividers. Or you could use a smaller purse if you just want to add padding to it and forget the dividers. It’s up to you.
To begin, you need a piece of foam for the bottom of your purse. Turn your purse over and check out the shape of the bottom of the purse. Then cut out a piece of 1/4 inch foam (I found mine at Hancock Fabric for about $8 for enough for about 3 purses) that is the same size as the very bottom of your purse.

Then place your foam down inside to make sure it fits. Adjust if necessary. Then measure from where the foam is at the bottom of the purse, up to how high you’d like the foam sides to be. If your purse is nice and tall (like mine is), you may not need the whole height of the purse. You may just be wasting foam. All you need is for it to be high enough to protect your camera and lenses.
I decided I wanted my foam to be about 8 inches tall.

So I cut a strip of foam that was 8 inches tall and was long enough to go around the piece that fits in the bottom of the purse. Measure around the top of the piece of foam…….not around the sides of it.

Then you’ll have a nice strip of foam that will make the walls of the foam insert. However, cut about an inch off of one end because after you add the fabric, you’ll be sewing those two ends together with their extra fabric ends. And you don’t want to have to sew through foam. (This will make more sense in later steps.)

Next, time to cut the fabric.
**You will need to add extra fabric along all the edges to account for the thickness of the foam……so be sure to add a little extra to your seam allowances.
For the bottom piece of foam, you will need 2 layers of fabric that are a 1/2 inch wider than the foam piece, around all edges. (A 1/4 inch is for the seam allowance and another 1/4 inch is for the foam thickness.) Just lay the foam down and cut around it. For the long strip of foam, you can either cut 2 pieces of fabric and sew them together into a strip (but then you’ll have 2 seams) or you can cut one strip of fabric and fold it over into a tube of fabric and sew it, resulting in only one seam. I only wanted one seam, so since my foam is 8 inches tall and is 1/2 inch thick, I needed my fabric to be 18 inches tall to wrap around the foam. (8 inches tall on the front + 8 inches tall on the back + 1/2 inch foam thickness at the top + 1/2 inch foam thickness at the bottom + 1/2 inch seam allowance + 1/2 inch seam allowance). My foam strip was about 37 inches long but I added another 2 inches at each end, so that I could later tuck the ends in and sew the foam into a tube. So cut my large fabric strip 41 inches wide by 18 inches tall. (Below it is folded in half under the foam.)

Next, place the two bottom pieces together (with right sides together) and sew all the way around with your 1/2 inch seam allowance, leaving a few inch opening on one side.

Turn it right side out and put your foam inside. You’ll have to fold it in half to wriggle it in there…..but it will get in there eventually. Promise. :)

Then tuck the raw edges inside and hand-stitch the opening closed. (Need help with hand-stitching? Click here.)

Next, open up your strip of fabric and sew some strips of velcro to one half of the strip. Be sure that you aren’t going down too far to be caught in the seam allowances…….and leave 2 inches free on each end to stay out of the way of each end seam too. I used 1 1/2 wide industrial strength velcro (I found it at Hancock Fabric) which worked great for this. I only needed 2 strips to cover a good majority of this half of the fabric. (If you can’t locate any really wide fabric, sew several narrow strips of velcro to this section of the fabric.) You just want enough velcro here to keep your dividers nice and secure. **Make sure and use the SOFT side of the veclro here so that the velcro not in use will not scratch your camera.

Then fold this fabric in half length-wise (with right sides together) and sew into a tube (using your 1/2 inch seam allowance). Then turn it right side out and maneuver your foam inside. Like I mentioned before, folding the foam in half and then sliding it in there works best. But then wriggle it around in there until it’s nice and flat and the side seam is along the bottom of the foam.

Then, tuck each end under about a 1/2 inch and then sew each end closed, then sew another seam, nice and close to your foam, creating a little flap on the end. Do the same thing to the other end.

Next, fold your fabric covered foam strip into a circle, overlap the ends, then sew them together.

Then, place the bottom together with the circle and pin them in place. Then hand stitch the bottom right to the sides……to keep the pieces together. (Need help with hand-stitching? Click here.)


Next, you need little inserts. I didn’t want mine quite as tall as the foam sides…..only 7 inches instead of 8. And as far as how wide…….you may want them wider than the base of your purse like I did. Once you put your foam base down into your purse, the sides kind of open up with the shape of the purse. If I wanted my foam walls to be rigid and just go straight up, I probably would have only cut my little inserts 5.5 inches wide. But I wanted this foam section to open up a bit, giving me more room inside of it, so I cut them 7.5 inches wide. So each of my little inserts were 7 x 7.5 inches.
I cut 2 pieces of fabric for each insert that were 1/2 inch taller on the top and the bottom and 2 inches wider at each side. So I cut 2 pieces of fabric for each of my 2 inserts that were 8 inches tall and 12.5 inches wide. I sewed 2 of the fabric pieces together, with right sides together, along the top and the bottom. Then I turned it right side out and placed my foam inside.

Next, I turned the ends in a 1/2 inch and sewed them closed with 2 seams, just like I did above with the bigger foam strip. Then I cut some of the other half of the 1.5 inch wide velcro strips, into more narrow strips to fit the flaps on each end (about 3/4 inch for me). Then I sewed the velcro right onto each end flap of the foam insert. Both on the same side of the insert. Do the same thing with your other foam insert (or more if you decide you want more inserts).

And that, my friends, is all you need to do.
Just place your foam inserts into your purse and load it up with all your gear. And you’re all set!
|
Без заголовка |

|
Без заголовка |
|
Без заголовка |
|
Без заголовка |
|