Без заголовка |
источник http://www.odnoklassniki.ru/profile/80359325719/album/478776806423
1.


|
|
Без заголовка |
Свежей клубникой и мёдом тягучим,
Лёгкой ванилью и ветром полей
Пахнут волосики, щёчки и ручки
Спящих малышек и малышей.
В запахе тёплом, насыщенным детством-
Только покой, безмятежность и мир.
Запахом этим все мамы согреться
Могут в тяжёлые, страшные дни.
Запах ребёнка...Душистый и светлый
Запах малины в июльском саду.
Запах ребёнка...
Вдыхаю и...этим,
Этим дыханием снова живу.
автор: Маняша


|
|
Без заголовка |
|
|
Без заголовка |
В Иркутске через пару дней обещают минус и первый снег. Пора готовится к Новому году :-)) На прошлогодних предновогодних ярмарках, да и как подарки для друзей, пользовались популярностью кофейно-коричные снеговички, которых я тогда сшила целую армию))) Их можно посмотреть здесь и здесь.
Думала, с чего же начать подготовку к празднику, и поняла, что для поднятия настроения и творческого потенциала )) сошью новенького снеговичка. В итоге получилось три. Делюсь фото и кратким описанием процесса и буду рада, если это кому-нибудь пригодится.
Для таких снеговичков нам понадобится:

|
|
Без заголовка |
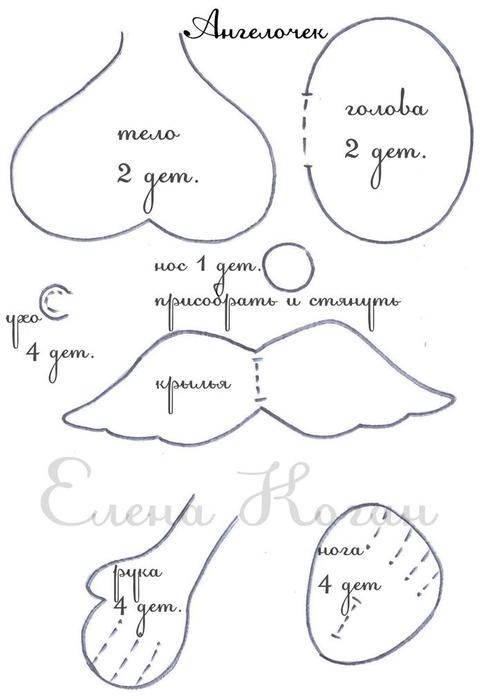
Игрушка Елены Коган http://emeobp.blogspot.com/search/label/%D0%B2%D1%8B%D0%BA%D1%80%D0%BE%D0%B9%D0%BA%D0%B8

|
|
Без заголовка |
|
|
Без заголовка |
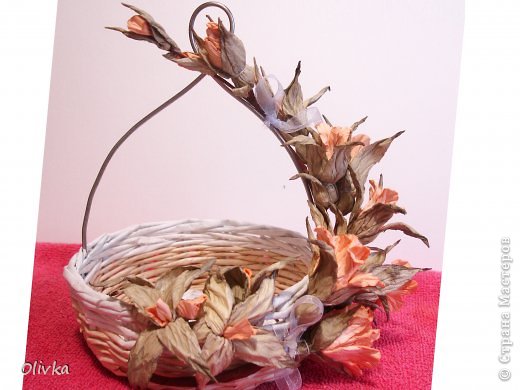
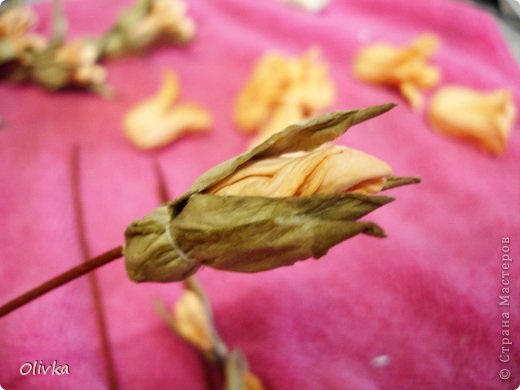
Вы только посмотрите, какая красота! Веточка сделана из листов бумаги для акварели. Очень красивая композиция для украшения плетенок из газетных трубочек. Автор работы - Olivka

|
|
Без заголовка |
|
|
Без заголовка |
|
|
Без заголовка |
Кофейное деревце в форме сердца своими руками + Фото

Уже никого не удивить кофейным деревом, но такое деревце в форме сердца будет смотреться весьма символично и оригинально! В данной статье продемонстрируем подробный мастер-класс по созданию деревца в форме сердца своими руками.
Для создания деревца в форме сердца потребуется:
- кофейные зерна;
- ватные диски;
- пряжа;
- картон;
- клей «Момент Кристалл»; клей-пистолет
- нож, ножницы
- шпажки для шашлыка
- алюминиевая проволока
- двухсторонний скотч, шпагат
Кофейное деревце в форме сердца шаг за шагом:
Нарисуйте на бумаге сердце необходимого вам размера, вырежьте. Затем перенесите на картон и вырежьте в двойном экземпляре (рис 1).

Далее нужно подготовить ствол, в данном случае это четыре склеенные между собой деревянные палочки для шашлыка. Положите стволик между картонными заготовками и склейте все вместе при помощи горячего клея-пистолета.
Для набивки равномерного сердца, и придания ему объема, можно использовать ватные диски. Подрезайте по необходимости, наносите на них клей и приклеивайте один за другим (рис 5).

Клейте равномерно, без пустот (рис 6).
В результате начинает вырисовываться объемное сердечко (рис 7).
Сделайте тоже самое и с другой стороны (рис 8).
Одновременно можно сделать несколько сердец (рис 9). Два сердечка в одном горшочке смогут стать отличным подарком ко дню Святого Валентина.

Далее для закрепления сердечки нужно обмотать пряжей или нитками мулине. Нитки могут быть любого цвета (рис 10-12).
Если вы использовали яркие нитки, то их нужно покрасить коричневой гуашью сильно разведенной водой. После чего сердечки нужно оставить в теплом месте на ночь до полного высыхания.

Для создания изогнутого стволика возьмите обычную алюминиевую проволоку, и согните ее как угодно (рис 14). Обмотайте ствол скотчем, а сверху намотайте шпагат, все прекрасно держится и делается без особых проблем (рис 15-16).
Далее к сердцу приклеиваем кофе (рис 17). После чего сердце нужно посадить в горшочек с раствором гипс + вода, консистенция сметаны. Дайте время застыть.

Декорируйте кофейное деревце по вашему вкусу.
Кофейное деревце в форме сердца готово!
Автор работы: Оксана Лебедь
|
|
Без заголовка |


|
|
Без заголовка |
|
|
Без заголовка |

Congratulation to the 3 winners who won the Green, Red and White trees during the Kanzashi Christmas Tree Giveaway Draw recently!!! For those who didn’t win or missed the boat, don’t be disappointed, here is the tutorial with complete step-by-step photos and even videos to guide you all the way to make the Christmas Tree!!!
Though it looks tedious but if you get your hands on it, it is pretty simple!!! Try it out!!!!
The Christmas Tree is made from 2 types of Kanzashi fold (or TsuNami) petals, round tip and pointy tip. Watch these 2 videos which I made to show you how to fold it. Perhaps you need to practice first before you can get a perfect fold for a start. Trust me, it is not as difficult as you see and think 
I also prepared a pattern drawing for all the cut-out materials you need, you can download it here!
Christmas Tree and Pot
 Material:
1. Fabric glue or good craft glue
2. Sharp point Tweezer
3. Fabric for the cone base
4. Fabrics to fold the Kanzashi petals
5. Matching color sewing thread and needle
6. Cardboard for cone
7. Cardboard for the base of the cone
 Prepare the cone:
Roll the cone and glue it at the glue line. You might need to place 1 or 2 tapes to secure the joints before the glue dries.
Clip the curve of the base and fold it up as shown and apply glue on the that area.
 Insert the base into the bottom of the cone.
Glue the fabric to the base. Clip the curve and glue it up to the cone.
Make a small hole at the center of the base. You need this to poke through the floral wire later.
 Get ready your Kanzashi petals, both round tip and pointy tip.
Arrange them in alternate sequence, round, pointy, round, pointy and so on….
Apply glue on the 1st row. Raise the cone by placing a stand, it will be easy for you to work on.
Dip the petal base on a pool of glue so that it has enough glue to adhere to the cone.
 Start gluing the petals on the cone row by row, make sure the whole petal base touches the cone. Follow the numbers of petal required for each row as instructed in the pattern sheet.
Rotate the stand as you go on. Adjust the position of the petal if needed.
 A close-up view showing the alignment of the petals and the base.
 Top view: after completing the first row.
 Continue to work upward row by row.
Side view: after completing 5 rows of big petals.
 Side view: after completing another 5 row of small petals. Reserved the last row for final assembly.
 Top view.
 Prepare the pot of the Christmas tree while waiting for the glue on the petals to dry or at least semi dry. You can skip this part if you can find any alternative pot to substitute it.
Material:
1. Tube 30mm height (I used shuttercock tube which is about 65mm diameter)
2. A circle base (size: outer diameter of the tube) which I have glued the floral wire on.
3. A circle top with a small hole at the center. (the photo showed 2 but you need only 1)
4. A small cable tie
5. A small bell
6. A short length of ribbon (about 300mm)
7.A short length of paper ribbon 2.5 times the circumference of the tube.
 Assemble the pot by gluing the base and the top to the tube.
Cut the paper ribbon into half.
Open/unwrap one of the paper ribbon as shown, wrap it around the pot and glue it.
Glue the unopened paper ribbon at the top edge of the pot.
Cut off extra paper ribbon at the joint.
 Tie the cable-tie 15mm above the top of the pot. Apply some glue to secure it.
Tie a ribbon and sew the bell on it, glue it to the pot.
Apply some glue on top of the cable-tie.
Option (left): You can embellish the pot by putting some dry wood.
 Now, slowly insert the Christmas tree through the floral wire.
Apply some glue at the tip of the tree.
Continue with the petal attachment for the last row. Top half of the petal should touch the floral wire.
 Cut off the floral wire 10mm above the tip of the Christmas Tree.
Apply glue and insert a star on it.
You are ready to decorate your Christmas tree with some beads and bead garland.
 Place a circle of bead garland at the 1st row of the Christmas tree.
Glue the first and last beads onto the petals. Secure it with pins.
Apply some glues on the next few beads to secure the garland better.
Cut some beads from the extra garland that you left and glue it on the petal randomly to decorate it.
 Let the glue dry by leaving it over night or as long you can.
Done!!! Now you can decorate your table with the Kanzashi Christmas Tree you made for this holy season

|
|
Без заголовка |

Trapunto Baby Quilt
Material:
1. Panel fabric
2. Backing fabric
3. Binding fabric, 2″ wide, slightly longer than the baby quilt circumference [don't have to be bias cut]
4. High Loft polyester batting
5. Cotton battingTools:
1. Sewing machine that able to do free motion quilting and able to lower it’s feed dog
2. Curved safety pins or spray on temporary adhesive
3. Ruler
4. Roller cutter
5. Cutting mat
6. Iron
7. Clover 1″ (25mm) bias tape maker (optional)
 High loft batting is for trapunto on the prints that you want to make it pops out, and, cotton batting is for the whole baby blanket.
 Determine which objects/prints you want to apply for trapunto, cut a piece of high loft batting slightly bigger than the print.
Place the batting at the wrong side of the fabric, under the print. Secure with curved safety pin and make sure it covers the whole print.
Change sewing machine presser foot to darning foot, if you are using Bernina, change it BSR (Bernina Stitch Regulator). Lower your feed dog. Stitch around the outlines of the prints with thread color closest to the print main color or the outline color. I used grey or blue.
 Follow the outlines and free motion stitch 2-3 rounds, don’t worry that you can’t follow exactly. Make sure the beginning and the end thread were overlapped, clip them off near to fabric after you have finished, or, you may bring the thread to the back, knot it and cut.
Turn to the wrong side and clip the batting near to the stitching lines outside the print.
 After you have finished trapunto all the objects, sandwich the cotton batting with the top fabric and a backing fabric. The batting should be a round at least 1″ bigger than the top fabric and the backing fabric is bigger than the batting. Secure with curve safety pins or spray on adhesive.
Stipple stitch the area that you want them to “sink”, for this instances, the sky, the sea and the border. Start from center and work towards the edges. When you reach the trapunto outline, go around it a little outside of it’s outlines.
Notice that the cloud, ship and the white part of sea has no high loft batting underneath them to make the trapunto effect, it give a little raised effect but not as high as those with high loft batting underneath them.
 Trim the quilted blanket to the correct size with proper right angle corners.
Change presser foot to normal sewing foot, raise the feed dog.
To make the 1/2″ binding with mitered corners, follow this video I found in Youtube. Or, follow this photo tutorial at Craft Stylish.
 A quilted blanket with trapunto effect is done, faster than I thought it would take.
Thanks to Bernina, I really love this new toy.

|
|
Без заголовка |


I fell in love with hook locking after I bought the book Hook, Loop ‘n’ Lock: Create Fun and Easy Locker Hooked Projects
The way I hook and lock is a little different from the book, so if you want to know how Theresa did it, please refer to Hook, Loop ‘n’ Lock: Create Fun and Easy Locker Hooked Projects
Due to the details of this tutorial, I have to split it to 3 parts:
1. Basic preparation
2. How to hook and lock the loops
3. Finishing touch
 To start off with the basic preparation of locker hooking, you will need to get the following materials:
1. Hooking rug canvas
2. Crochet hook (2-3mm size) & the locking “chopstick” or locker hook if you are able find one
3. Fabrics or pre-cut fabric strips (you can also use wool yarn, T-shirt yarn, or plastics strips)
4. Strong yarn or thread for the “locking”
5. Permanent marker
6. Scissor
7. Measuring tape
8. Pattern
9. Rotary cutter, ruler and cutting mat (if you choose to cut your own fabric strips)
 Prepare the Canvas
Draw and mark the pattern [click the link to get the free pattern of the coasters] on your hooking rug canvas with permanent marker. Though it is not a must but it is easy so that you don’t have to refer to the paper pattern while lock-hooking.
Leave at least 2 extra squares at the edge for a smaller project (eg. coaster) and 5 squares for bigger project (eg. rug). We are going to fold the edge in for a steadier construction.
 Snip off the corner of the extra square so that you can fold it in nicely.
 Make a few stitches to secure the fold of the edge.
 Prepare the Fabric Strips
Cut the fabric by using scissors or rotary cutter. The latter will give you straighter and more even strips and it is faster then using scissors.
As a rule of thumb, cut the fabric about 3 times the width of each small square of the canvas. For thicker fabric like upholstery material, cut 1/2 a square smaller, and for thinner fabric, cut 1/2 to 1 square bigger.
To make the cutting faster, fold the fabric to 2 – 4 layers thick, press the cutter a little and cut it by using new blade.
 Which way to cut the strip, horizontal or vertical? Good question…. I would say both ways work depend on the type of fabric you use. Cotton or quilt-weight fabric can be cut in both way, you can even use “tear method” if you want a fray look on your project as tearing fabric strips create more frays on the bare edges.
Since I am using poly jersey interlock material, I cut it vertically so that it won’t curl up like my T-shirt yarn.
All set and we are ready for the lock hooking adventure!!!
Now, you have all the materials ready, let’s hook and lock the loops!!!! I illustrate it with one of the coasters I made for the giveaway.
I am currently working on a bigger project for my home, should be able to complete just in-time for the Chinese New Year which falls on the same day as Valentine’s day this year, yes, double celebration on 14 Feb 2010!!!!
As I mentioned in my basic preparation post, my method is a little different since I am using my own locking chopstick. Pro – this is suitable for beginners and for those who can’t find a locker hook, Con – slower in process. If you are able to find a locker hook, Theresa is more than happy to share with you how to locker hook with the hook. Please find the video at the end of this post that she demonstrates it with a trivet making. A big thank you to Theresa, who allows me to embed her video in Craft Passion.
 Get all your materials ready:
1. Rug canvas with pre-drawn pattern and with the edges sewn up.
2. Crochet hook and the chopstick “locking” tool I invented
3. Tapestry needle
4. Fabric strips
5. Scissors
 Sew A Border
First, sew a border at the 4 edges of the project. Thread a fabric strip of about 1.5m through the eye of the tapestry needle, it will caused excessive fraying if your strip is too long. Start whip stitching on the second square from the edge, you can whip stitch on the 1st square if you prefer thinner border. Leaving a tail of about 4cm long, catch the tail and whip stitch it along the edge as you go to secure it.
 You will need to pass through the square twice when you reach the corner. This is to make sure that you can cover the corner nicely with fabric.
 Adjust the fabric so that it covers nicely by overlapping each fabric a little before tightening the stitch.
 When you reach the end of the strip, pass the needle through a few loops and pull the end through the loops. Trim off excessive strip. Continue with a new strip and repeat the steps above.
 Hook And Lock The Loops
Use a length of about 2 m long yarn or strong thread, tie one end to the locking chopstick and the other end to the 1st square that you are going to hook a loop. Place the fabric strip under the canvas.
If your locking yarn happens to finish before your project, just cut the yarn out from the locking chopstick and tie a knot to the end with a new yarn, leaving about 2-3 cm length for the ends, tie the other end of the new yarn to the locking chopstick and you can continue with the locker hook. Be a little careful when pulling the yarn with the knot through the loops, sometime it will get stuck, just help it pass through the huddle by “massaging” the loops a little.
 Use a crochet hook to hook up a loop of fabric from bottom to top via the rug canvas square. Insert the locking chopstick through the loop. The strip tends to fold up into halve the width when hook up. I like my fabric to open flat so that it wrinkles between the square. Some people like a folded type, in that case, just let it be and don’t open the strip flat. Leaving a tail of about 4cm, don’t do anything on the tail yet, we are going to take care of it after the project is finished.
 Pull the strip so that the loop sit on the chopstick tightly. The locking chopstick not only act as a locking tool, it is also a tension gauging medium. You will have an even height of loops through-out the project.
 Continue hooking up the fabric strip onto the chopstick, move the chopstick forward a little as you go. When you reach the end, pull the chopstick completely out with the yarn passing through all the loops. The function of the yarn is to lock all the loops in place so that the loop won’t get out from the canvas square.
Rotate the canvas 180 deg and work on the second row and so on.
Besides locker hooking row by row horizontally, you can also go round and round, just rotate the canvas 90 deg and work on the column.
 Locker hooking a single color is simple, just keep on locker hook with the same color fabric strips, one after another. But if you have a pattern which uses different colors, managing the strips becomes challenging. In order to complete a neat and tidy locker hook project, we must keep the strips-crossing at the back to the minimum. You don’t want to have a bumpy bottom, right?
As an example, I used 5 strips for the coaster of the number “0″. When I locker hooked row by row, I just used the correct strip according to the pattern on the canvas to avoid bringing it across at the back each time I need to change color.
 Just look at the back of the coaster, I ended up having only 10 ends to manage. You can see that the back is flat without any messy zigzag crossing here and there.
You are near to completion, just left the finishing touch and you are done!
Now you have seen my Locker Hook tutorial on the Basic Preparation and Hook-Loop-Lock, and probably finishing a project up to this point (pattern here). I am going to show you how to tidy up the project by hiding away all the ends (fabric strips and locking yarn) and cover up the back of the work.
I am so proud of myself to come out with these coasters which I am giving them away! I brought them to Starbucks one afternoon when I needed a coffee kick to get my brains going. Took some photos of them with the coffee mug for the keepsake as I am going to mail this to Diana, the lucky winner who won them in my January Giveaway Draw. Well, I can always reproduce them, but the feeling will be different.
 Hiding The Ends
Turn to the back, bring all the ends to front by using a tapestry needle. Insert the needle to the next square of the end, pass the end through the eye of the needle and pull it over to the front. Never use the same square when passing the ends from back to front as you will undone your last loop.
 the back of the coaster is so tidy…
 The front is full of “ends”.
 Just like looping the ends of the border in the previous post, traverse the end by using the tapestry needle and bring them into the loops and hide it there. Trim off the excessive length. If you are afraid that end will come off for some heavy usage project eg. rug, you can apply some glue to the end.
Do the same to the locking yarn ends.
 After all ends are hidden!
 Handling The Back
Iron on a piece of interfacing with the size smaller than the border. The loops will be extra secure if you do this step. The interfacing will glue the fabric in place and hence further lock it there.
Cut a piece of lining fabric for the back of the coaster with the size exact to the dimension of the coaster. Fold the 4 edges in so that it is slightly smaller than the coaster, iron it to fix the fold.
 Place it on the back of the coaster and secure it with pins.
 Stitch them up with slip stitch. Stitching on the coaster.
 Stitching on the lining.
You can use heatnbond double-sided adhesive interfacing for non-wash projects, in that case, you don’t have to fold the edges and stitch them up, just cut the lining to the exact size you want, iron it with heatnbond onto the coaster’s back.
Personally, I like to stitch them up though it is more time consuming, but I like everything to be long lasting and flexible, as I never know if I will wash the project one day even though it is just an ornaments, it will cover with dust overtime, right!

The coasters are ready to get into service!!!!
I hope you enjoy these 3 parts of tutorials. Just like all my handmades and tutorials, I have put a lot of afford on them because I believe beautiful crafts are meant to be shared and not to be kept to myself. Please throw in any questions or comments as it is always opened for you. I will try my best to answer, if I can’t, I believe Theresa would be happy to help.
Also, you should get a copy of Theresa‘s “Hook, Loop & Lock” she has plenty of beautiful projects and patterns there.
|
|
Без заголовка |

“It’s Back To School time, boys and girls.” This zip-it-up pencil case would be of great help for them to keep their stationary in place. Not only that, it is also a great topic for “Show And Tell” session to their new class-mates of how the magic works with this zipper + ribbon strip…”See, this is a strip of ribbon, and I am going to turn it into a pencil case…. *zip**zip**zippppp***…. tadaaaa…. a pencil case!!!!”. School is fun with friends and books around.
Recently, I received an overwhelming and fantastic responses came all over the world to visit the tutorial of the Zip-Itself Tetrahedron Coin Purse, the same concept of this zip-it-up pencil case. Among the feedback and comments, some of you found it difficult to understand at some point, but I am glad that after putting you hands on it, you’ve made yourself some successful coin purses. As usual, practice makes perfect! Grandma G even tried it on with her sewing machine with a wider ribbon that her daughter Jessica of How About Orange designed. Jessica also shared the post with her readers. I was so happy that you all like the coin purse so much. As an appreciation to all your visits and feedback, I developed another tutorial to the same concept. This time both boys and girls can use this zip-it-up pencil case (just have to be fair to the boys too, right?).
I hope you like this Zip-It-Up Pencil Case as much as the coin purse. Please find the tutorial after this.
Finished Dimension: approx. 4″ x 8″ x 1 1/2″
Materials:
1. Zipper (nylon) – 80″
2. Ribbon (7/8″)- 80″ (Note: you can use grosgrain, woven, satin ribbons, or other alternative materials like lace, fabric strip, soft twill tape etc.)
3. Ribbon – short length for the purse loop.
4. Lining fabric strip (1 1/2″) – 80″ (optional)Tools:
1. Sewing needles.
2. Matching threads
3. Pins
4. Marker
5. Warm iron (optional, use only with lining)
 Get ready the materials and tools as per quantities stated above.
You can get the long nylon zipper from craft shop that cut into your requested length, and don’t forget to add a zipper pull.
Sew a few stitches to make a bottom-stop about 1″ from the end of the zipper.
Tie 2 knots on both top zipper tapes to prevent the zipper-pull from accidentally glide out from the zipper.
 Measure 4 3/4″ from zipper’s bottom-stop. Mark, this is the START point.
Pin and backstitch the ribbon to the zipper tape along line A, start at 3/4″ from the ribbon end and 1/32″ away from the teeth in order for the zipper pull to glide through.
I sewed with longer stitch on the wrong side but shorter loop stitch on the right side for the backstitch so that the thread is not obviously seen on the right side.
When you reach the bottom stop, bend the zipper tape down, smooth the corner by crossing of zipper ends, continue sewing your ribbon till you have done around 70″ from the start point.
 Come back to the start point. Arch the tape at the marking where the marking should be at the center of the ribbon’s width, pin the ribbon to the tape along line B.
Sew ribbon to the tape of the other side of the zipper.
Fold the ribbon’s end in and slip stitch the ribbon to the tape by following the curve.
A nice smooth curvature determine the beauty of the pencil case.
 Continue back stitching the ribbon to the zipper tape until you have done 65″ from the start point.
There will be a different of 5″ of stitching between line A & B.
 Zip-up the zipper and the pencil case shape is formed through a upward spiral closure.
Measure your pencil case from the bottom stop, it should be around slightly over 8″ and your zipper goes 7 rounds of zipping.
 Press the top edge of the pencil case to find the top corners of a rectangular shape.
Mark both points on line A & B.
The point above the the bottom-stop is the end point, whilst, the point above the start point is the pencil case top-stop with a ribbon loop (please refer the last step-by-step photo for clearer picture).
 Unzip the pencil case a little. Arch the line A zipper tape at the marking, the zipper ends should meet and intersect at the other marking on line B.
Place a ribbon loop on the intersection point of the zipper, pin & sew to join.
Trim off the extra zipper, crossed them and make a few stitches to stabilized the position.
Trim off the extra length of the ribbon and fold the raw edge of the ribbon, just like the start point, slip stitch to the tape.
Whip stitch the zipper edges at the back of the pencil case to complete it.
 You may add a lining at the back of the pencil case. The lining will add some stability and aesthetic look to the workmanship of the pencil case.
Iron the lining strip by folding in both edges to form a 7/8″ double-fold tape.
Slip-stitch along the backstitch line to cover the stitches done for the ribbon. When you reach the curve of the start and end points, trim the ends to follow the curvature, fold in and slip stitch like you did the ribbon.
 Zip it all the way up and you will get a pencil case.
Or, zip it all the way down to return it to a ribbon with edges full of zipper teeth.

|
|
Без заголовка |


|
|
Без заголовка |
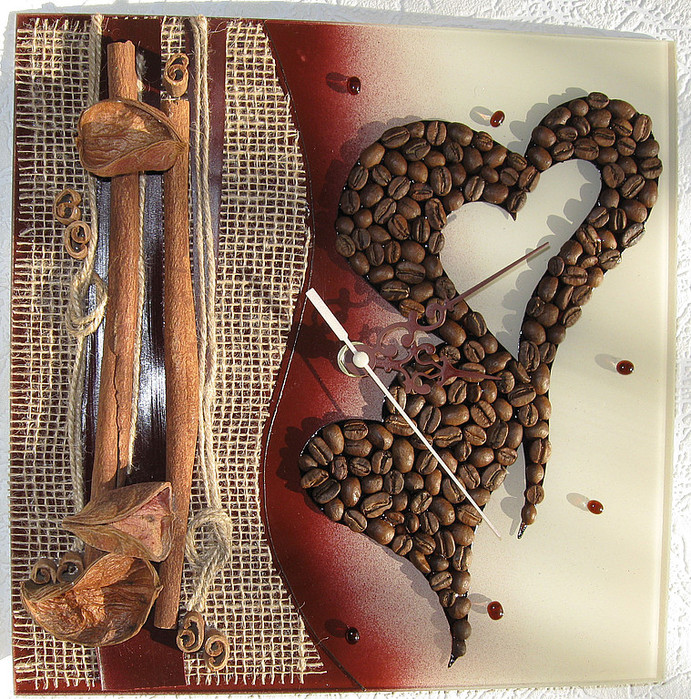
Всем кофеманам посвящается! Не знаю как вы, а я не представляю себе утра без чашечки ароматного, бодрящего кофе..... Может быть поэтому к поделкам из кофе у меня особенное отношение. Предлагаю вашему вниманию замечательные идеи часов, декорированных натуральными кофейными зернами.
К примеру, вот такая замечательная авторская работа от Ларисы Beatriche
с сайта http://larisa-beatriche.narod.ru/avtorskie_chasi/chasi_kofeinie/


|
|
Без заголовка |
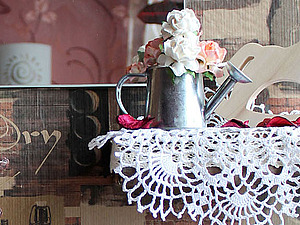
В этот раз мы будем делать объемный фон для фотосъемки игрушек и разной там мелочи. То ли Ярмарка Мастеров перенасыщена Тильдами, то ли подача у меня не верная. Только интересом, на мой взгляд, мои зайцы и Ангелы обделены. ))) Одним словом, решила я их переснять!...
Фон пожелала сделать многофункциональным: и для небольших работ и в то же время, что бы соответствовал моим стандартам зайцев, высота которых 55-56см.
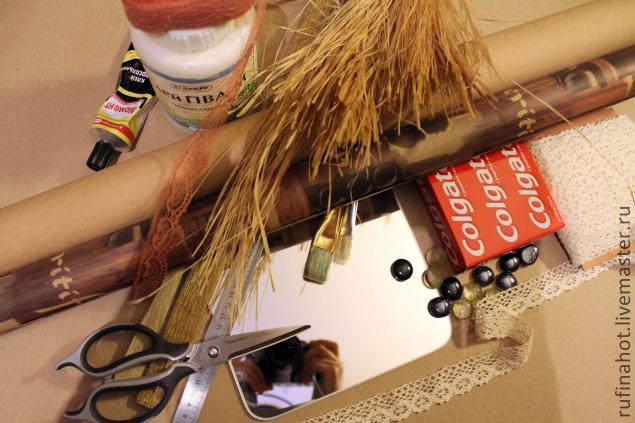
Нам понадобится:
Лист картона. В моем случае гофрированный картон 55х75см.
Крафт-бумага размером с ватман 3-4 листа.
Подарочная, упаковочная бумага 1 лист.
Коробочка небольшая для полки.
Зеркало любого размера.
2-сторонний скотч.
Ножницы.
Линейка.
Клей ПВА и клей Титан (или Момент).
Кисть.
Кружево льняное, капроновое.
Лыко обыкновенное.
Крючок декоративный.
Песок крупный ракушечный.
Камешки, бусины декоративные.
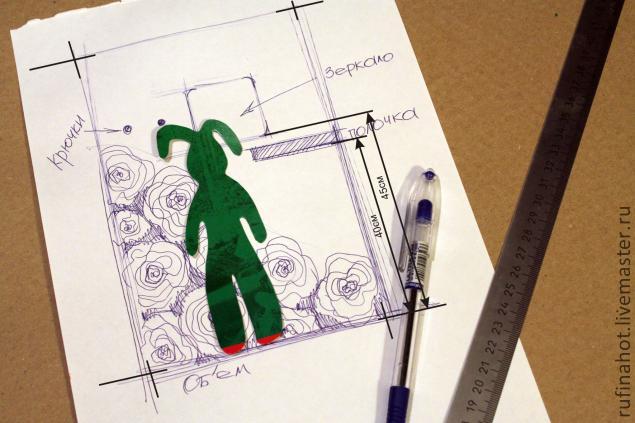
Начнем с эскиза
Так как я знала уже, чего хочу, то мне осталось только определиться с компоновкой деталей. Полочку я пожелала, что бы в дальнейшем снимки были более интересными и насыщенными. А зеркало! Оно придает бОльший объем и глубину фотографиям.
Определив высоту своих зайцев у меня получилось так:
Первым нашим действием будет разметка на картоне
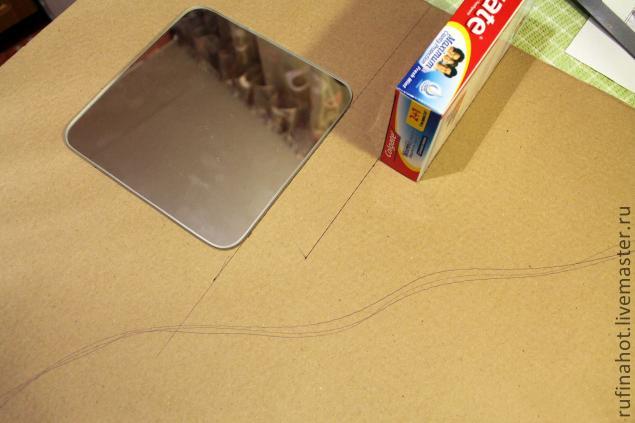
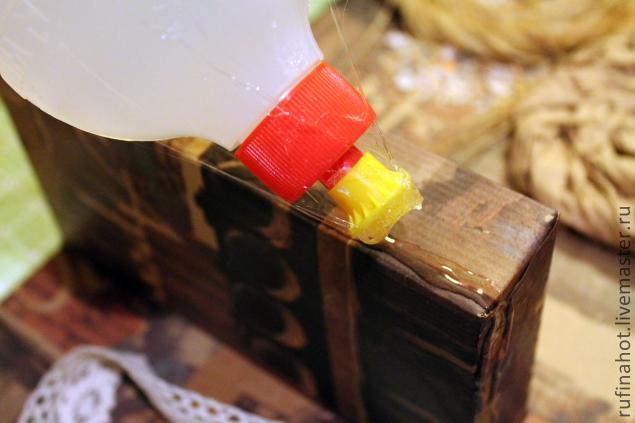
Затем наносим клей Титан (Момент) на коробочку и даем 4-5мин ему подсохнуть.
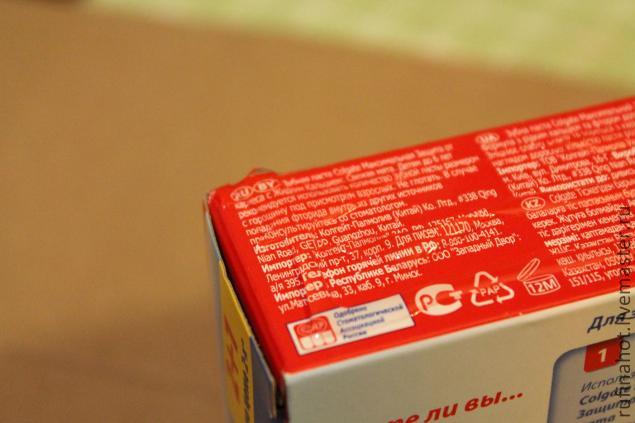
После чего сажаем её на заданное место.
Вторым действием станет обклеивание полочки оберточной бумагой.
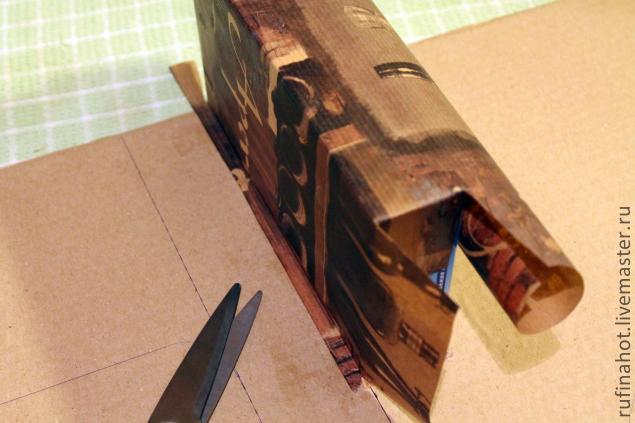
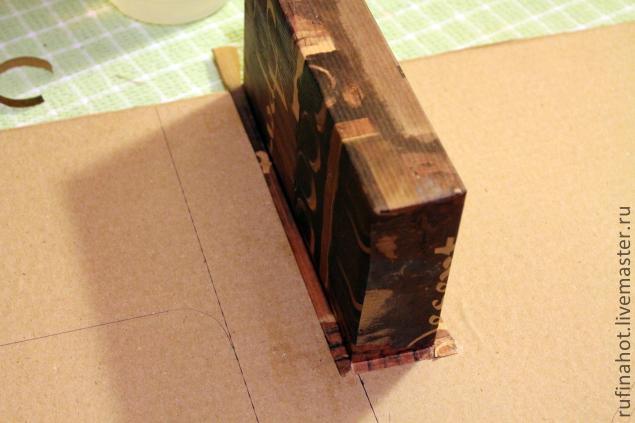
Я не стану подробно описывать данный процесс. Скажу лишь, что в данном случае работаем тоже клеем Титан. Его секрет в том, что в отличие от Момента он по своему составу гуще и прихватывает поверхности быстрее, не оставляя в процессе неровностей.
Вот что получилось
Дальше крОем картон клеем. В ход идет ПВА. Поверхность большая, поэтому клеем Титан уже не обойтись.
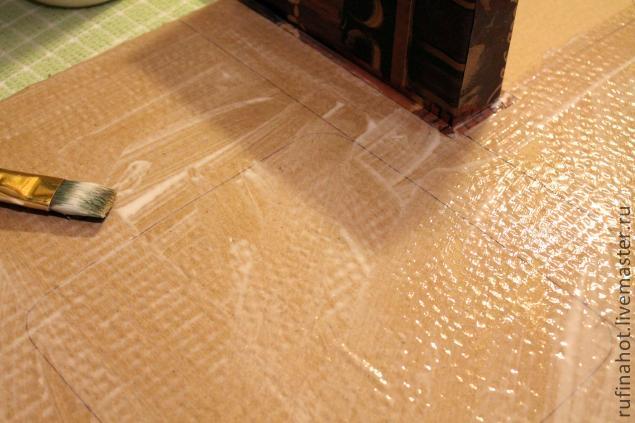
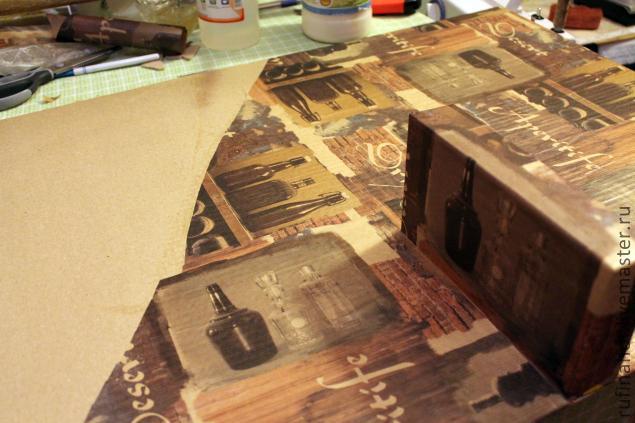
По технологии, проклеенный картон придется на время оставить. Если бы это была фанера или пластик другое дело, а картон от ПВА начинает деформироваться… На 6-8 часов кладем его под пресс до полного высыхания.
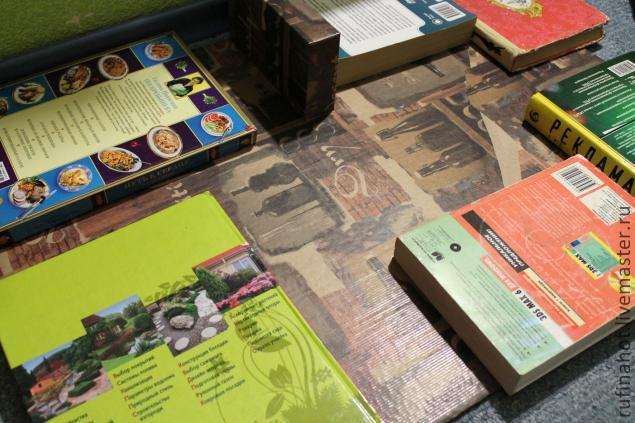
За это время можно подготовить наш объемный декор.
Нарезаем или рвем из листов крафт-бумаги 10-12 полос
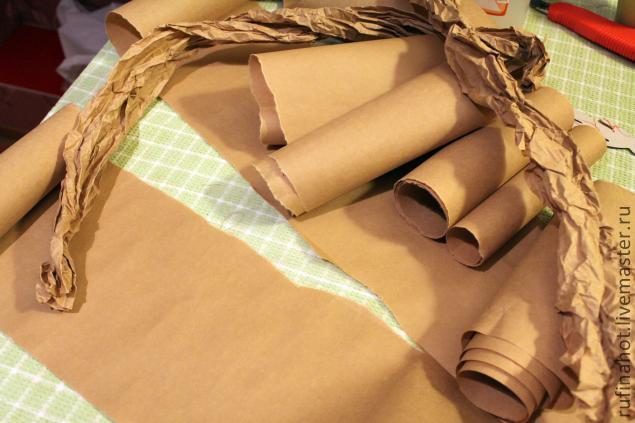
Хорошенечко мнем их, образуя «колбаски»
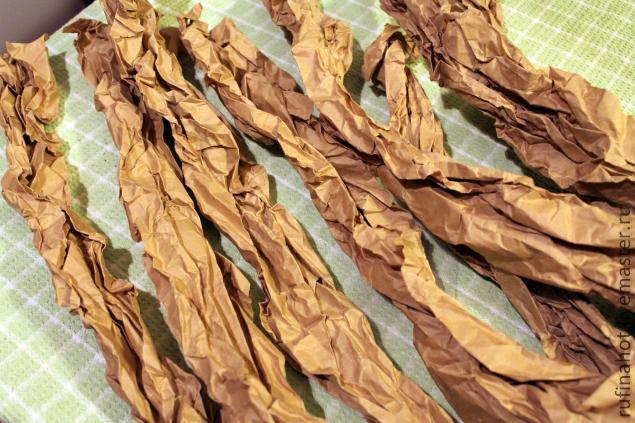
И начинаем формировать спиральки-цветы, слегка перекручивая заготовки.
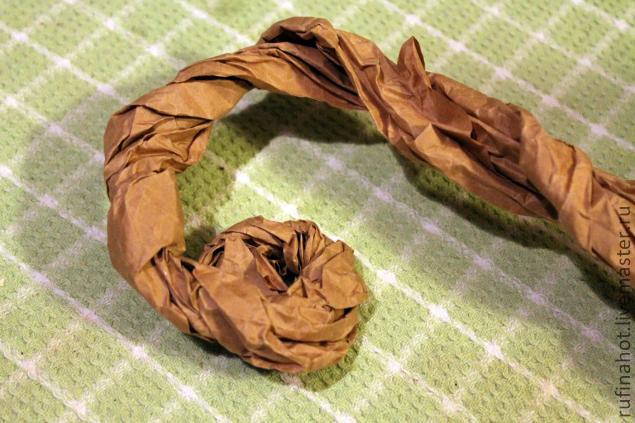
Вот что получилось.
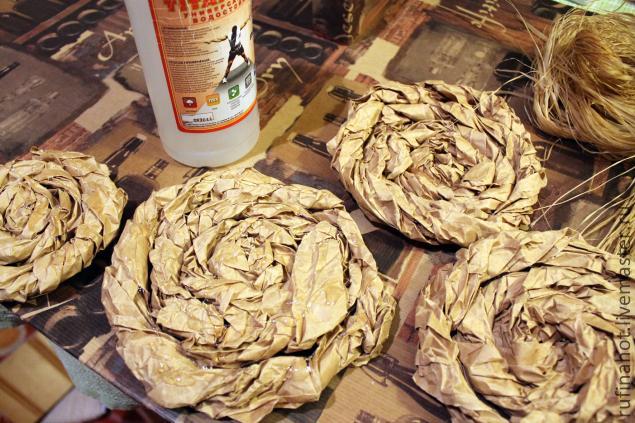
Для того чтобы цветок был шире, начатую спираль доращиваем второй заготовкой-«колбаской» (поняли о чем я?).
Разметив их расположение на картоне, клеим каждую к основанию.
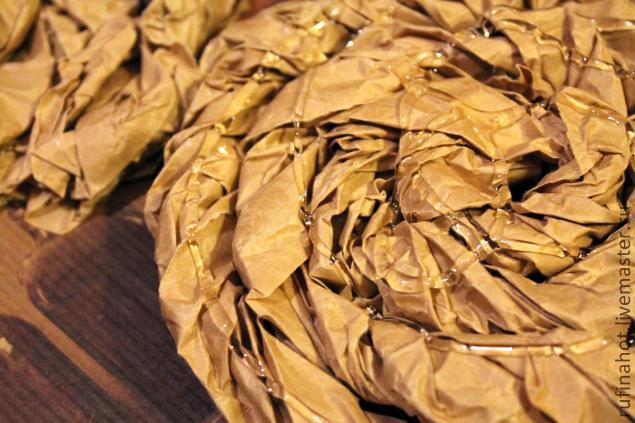
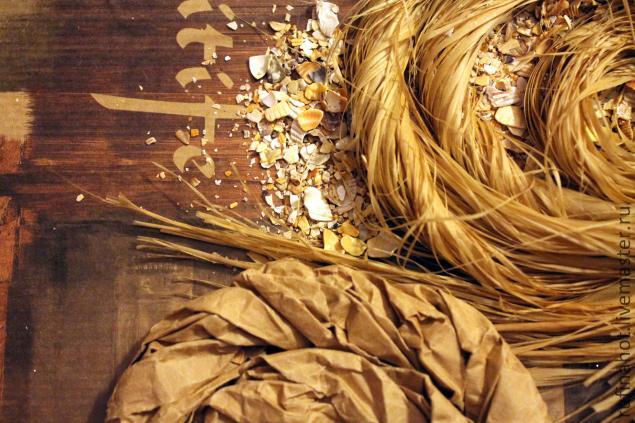
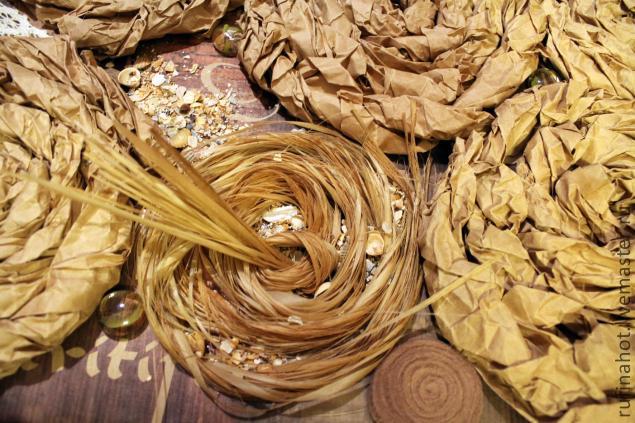
Я также сделала несколько завитков из лыка, а там где клей стал проступать, засыпала крупным песком (так же не плохо будут смотреться кофейные зерна, декоративные камешки…
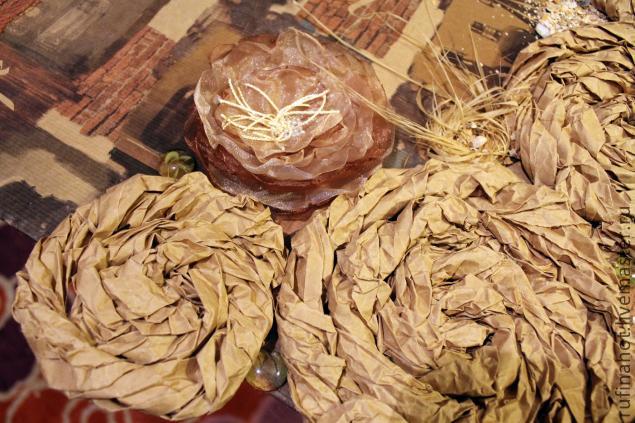
У меня давно лежал цветок из органзы, а здесь самое то! В тему)))
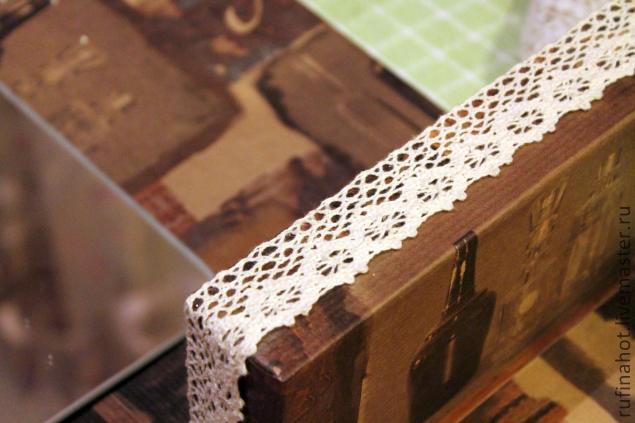
Обклеиваем полочку кружевом
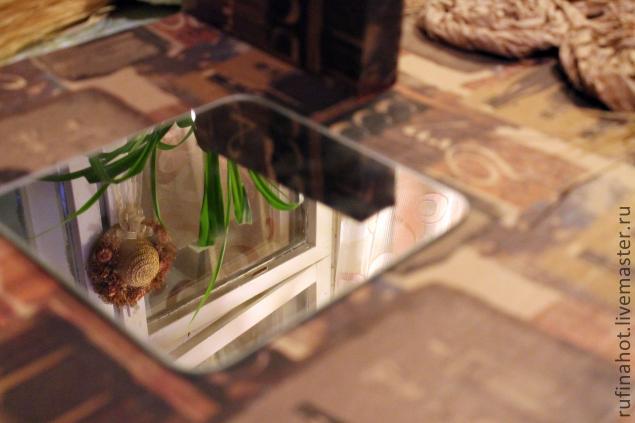
Сажаем на двухсторонний скотч зеркало
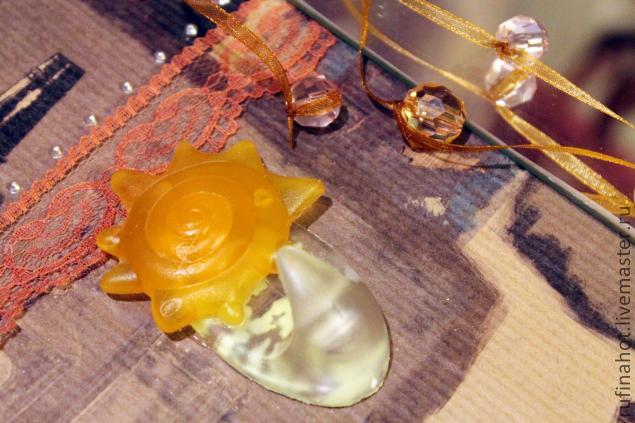
Приклеиваем крючок
И, в общем-то, ГОТОВО!
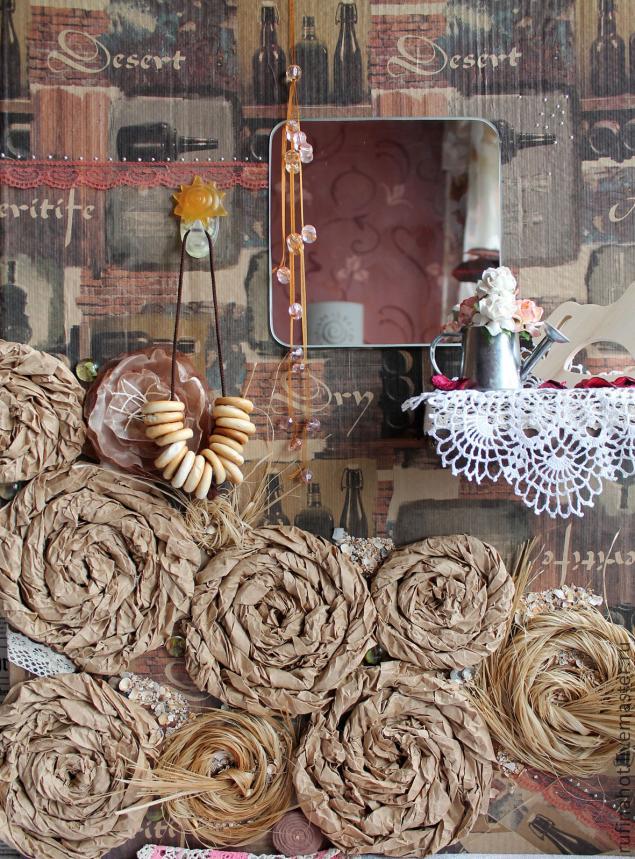
Как вы поняли, в ход идет всё, что плохо лежало. ))) Можно воспользоваться остатками обоев, красивыми декупажными салфетками, тканью, пуговицами, ветками, цветами… Нужно только, согласно задуманной идеи, со вкусом и с сочетанием цвета подобрать весь материал…
Этот фон будет еще хорош для передвижения. Например, вас, приглашают к участию в какой либо выставке, чем не вариант украшения им своего уголка на выставке?!
А вот и пробная съемка! )))
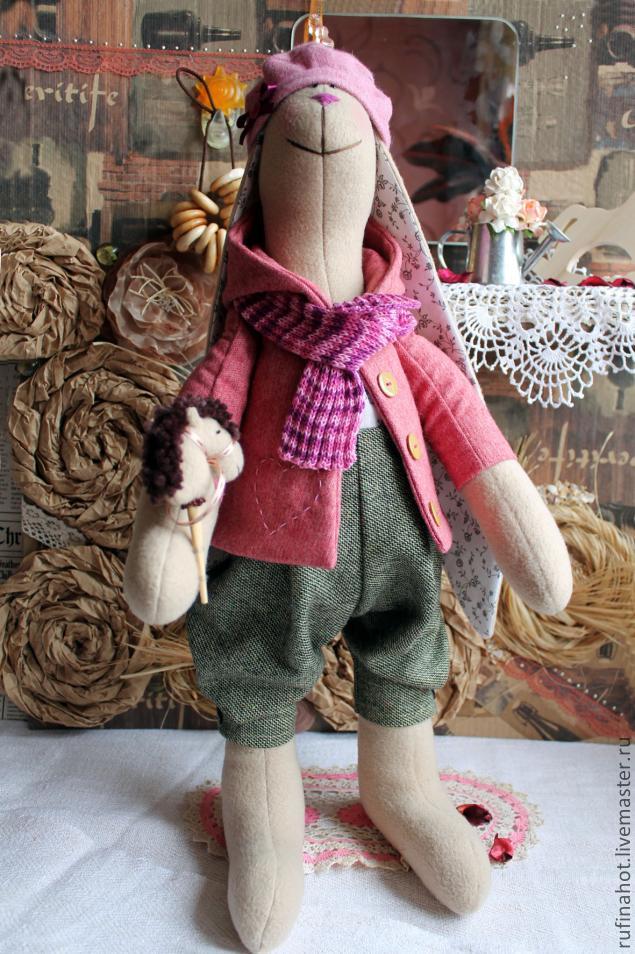
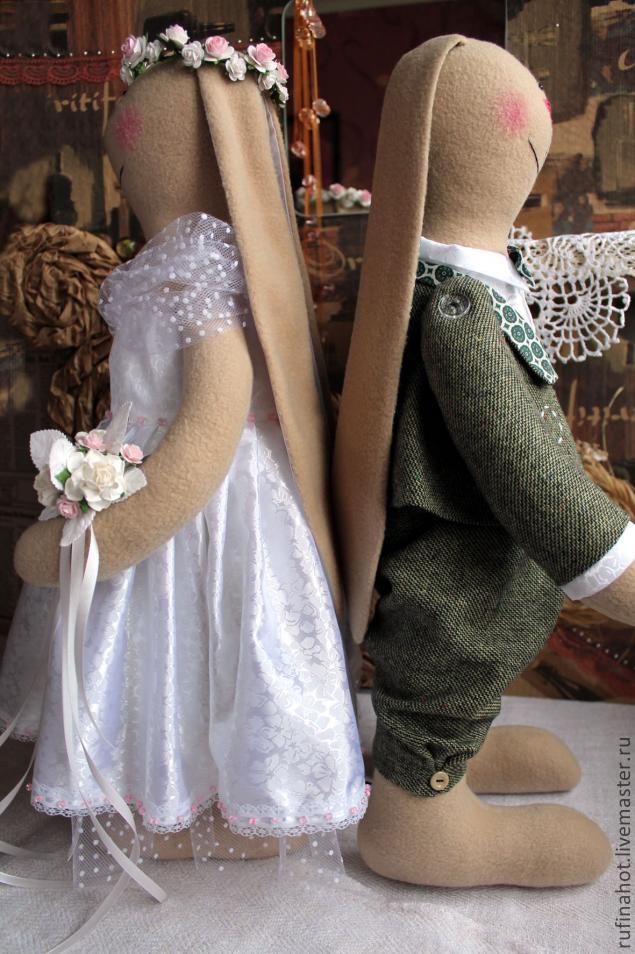
пусть тоже покрасуется... ))))
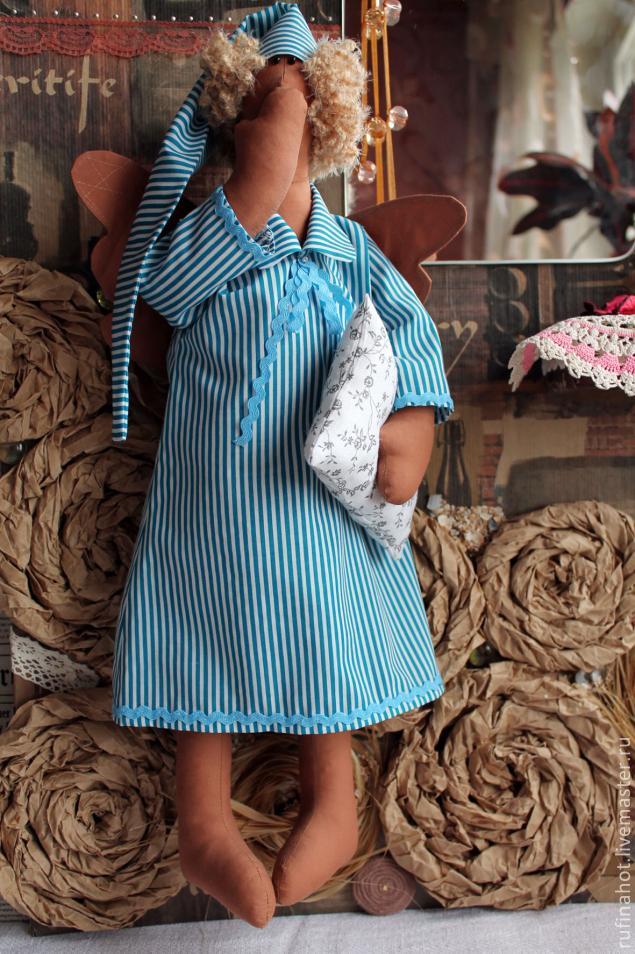
Надеюсь МК был вам полезен и вы тоже воспользуютесь моими идеями
|
|
Без заголовка |
| Время работы: | 4 часа |
Добрый день, дорогие друзья! На этот мастер-класс меня подтолкнули вынужденные обстоятельства.))) А именно - отказ купить для своей 5-летней дочери очередную плюшевую игрушку Hello Kitty в магазине. Все бы ничего, и может быть я бы и купила этого котенка, он не был безумно дорогим, но он показался мне каким-то бездушным. Сделан он был как ангелочек - Hello Kitty с крылышками и в платьице. Но каждый ангел должен быть каким-то особенным, у меня их много в доме и каждый ручной работы и с говорящими глазами. А этот Hello Kitty был какой-то мануфактурный, в глупом сатиновом платье. Но ребенок захотел. У ребенка в спальне висят ангелы самых разных мастей - от примитивов и тильд до деревянных и выдувных стеклянных. Но тут кошмар. Тут без этого японского кота она не хотела выходить из магазина. А мне он все больше и больше казался нелепым. И тогда я решила, я пообещала ей, что у нее будет ангелочек Hello Kitty, но мы его сделаем сами - в духе самых лучших традиций: из белого флиса и хлопка и кружева на наряд и крылья. Я была на 100% уверена: покупного она забросит и недооценит; с тем, который мы сотворили, она не расстается вообще. Мода есть и на игрушки, и нравятся эти Hello Kitty девочкам, но если у каждой будет такой котенок-ангел, не только модный и популярный, но еще и ручной работы, а значит один единственный и неповторимый, это будет чудесно и правильно. Поэтому я решила поделиться нашей работой с теми, кому это пригодится. Матерые волшебники-создатели игрушек могут просто посмотреть)))). Мастер-класс рассчитан скорее на таких же мам как я, во-первых делали мы все совместно с ребенком - это отличное времяпрепровождение. Во-вторых, уровень сложности этой игрушки невысокий, девочки постарше могут сотворить ангелочка для себя или в подарок подруге. Ангел - это очень хороший подарок, а Hello Kitty ангел еще и моднявый))). Моя беременная подруга, увидев мастер-класс, также сшила со своей 6-летней дочкой такого ангелочка для будущей сестренки, и повесили над кроваткой.
Это вполне может быть первая игрушка, сделанная Вашими руками! 
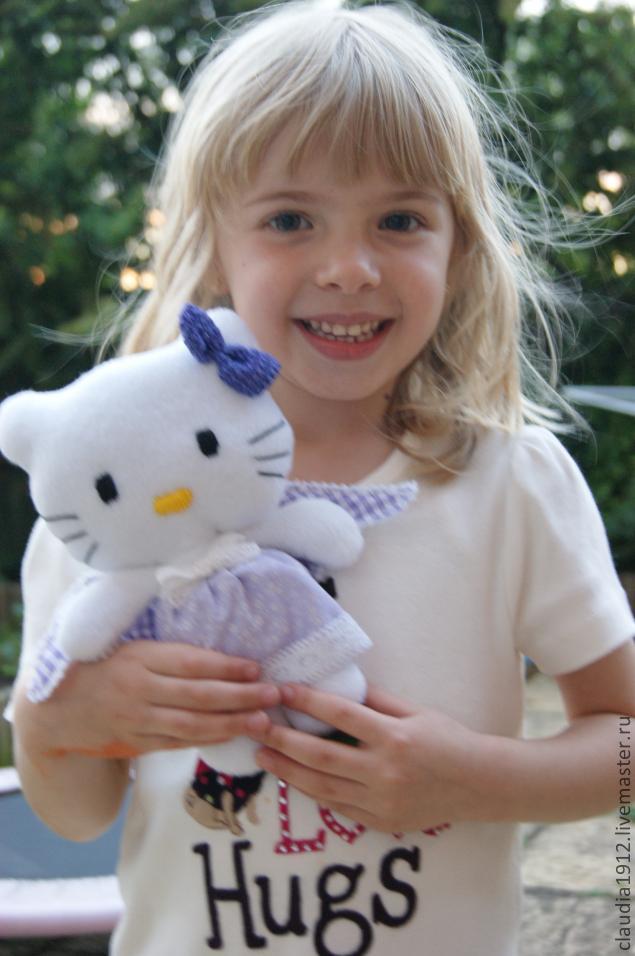
Вот довольный и счастливый обладатель нового друга.
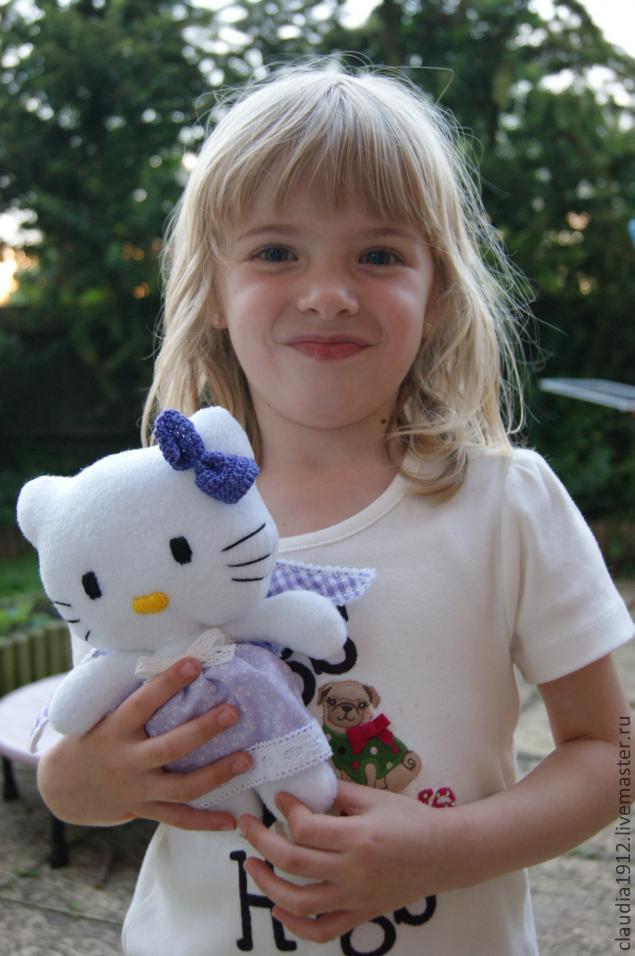
Итак, приступим. Выкройку мы нарисовали сами. Картинок Hello Kitty в интернете полно. Мы обвели голову, туловище и лапки. Туловище я немного видоизменила в районе шеи - сделала такую же форму, как у текстильных кукол. Таким образом, голова держится крепко, не шатается и гораздо удобнее пришивается. Ручки мы тоже удлинили, чтобы удобнее было пришивать, и чтобы они не топорщились. Вот такая выкройка у нас получилась. С удовольствием делимся со всеми.
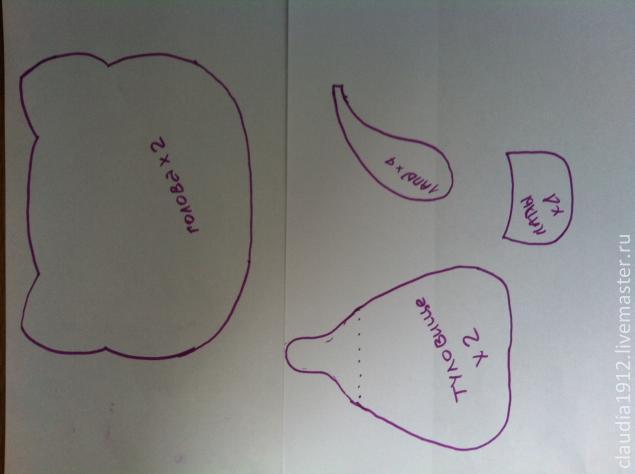
Можно распечатать эту выкройку, можно обвести с экрана компьютера.
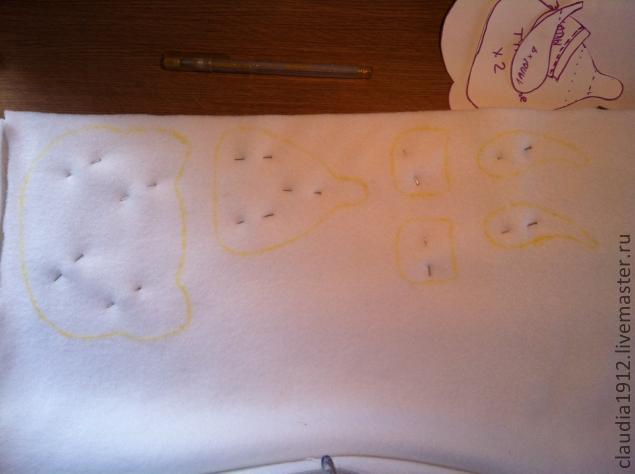
Вырезаем детали и раскладываем на белом флисе. Обводим все детали, скалываем флис, чтобы не двигался при шитье.
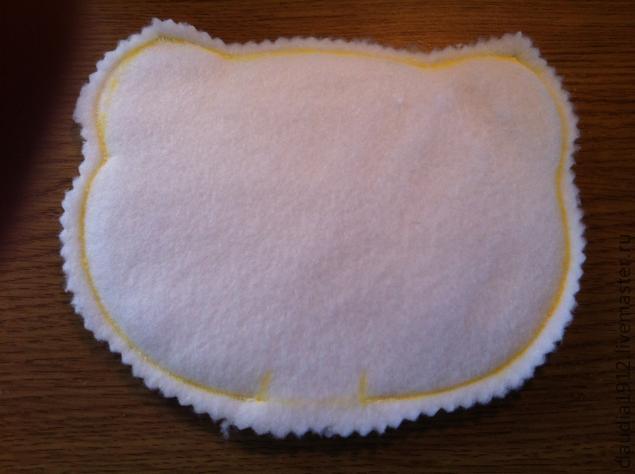
Начинаем с головы. Сшиваем детали головы на машине или вручную, оставив в районе шеи дырочку))))). Я оставила около 2 см, потому что выворачивала и набивала моя дочка.
Вот она, голова - простроченная и вывернутая.
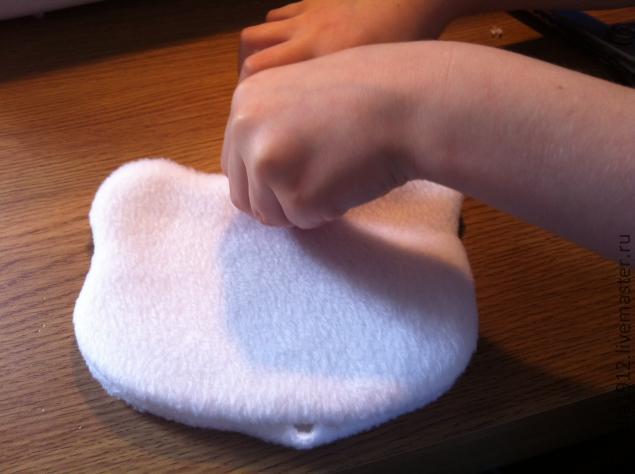
Теперь гордо вручаем ребенку голову (кота), наполнитель, палочку, и занимаемся лапами и туловищем под довольное пыхтение маленькой рукодельницы.
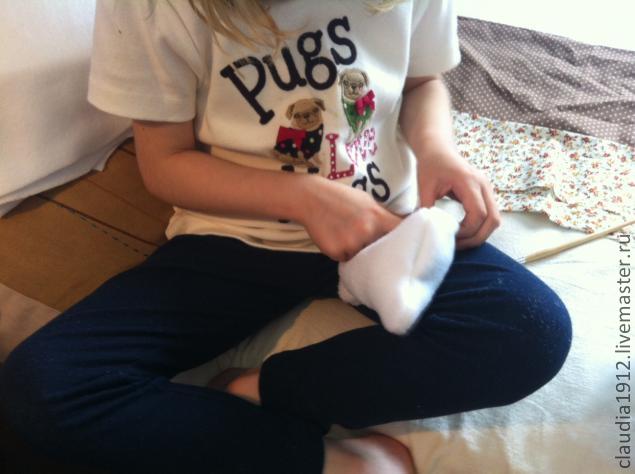
Теперь лапки и все остальное.
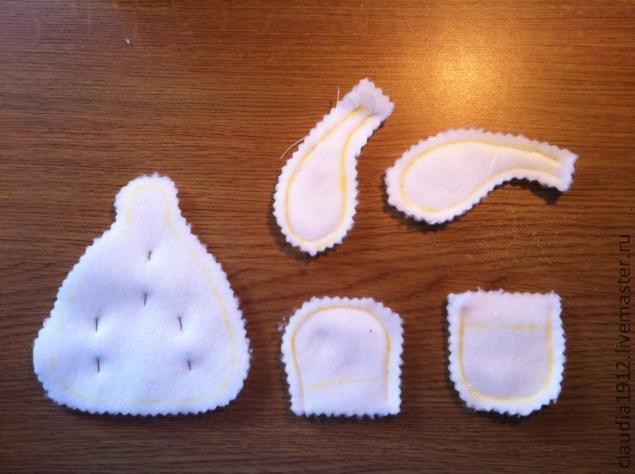
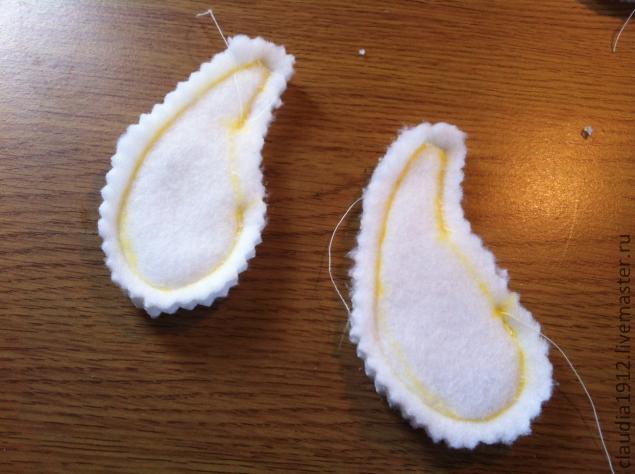
Ноги сшиваем и вырезаем. Туловище вырезаем, пока не сшиваем. Ручки (или лапки)))) сшиваем таким образом, чтобы под мышками остались дырочки, чтобы наполнить наши ручки. Вот так:
Теперь на туловище намечаем места, где будут ручки и ножки и сшиваем его, оставив намеченное не зашитым. Для ножек у меня получился не зашитый целый низ. Через него потом я вывернула и набила туловище.
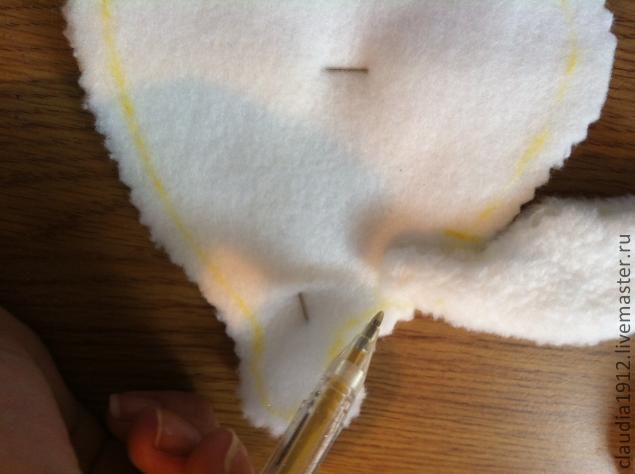
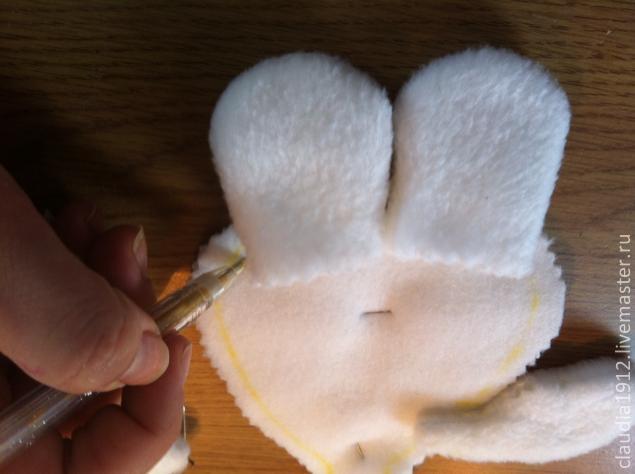
Набиваем ручки и ножки, но не плотно, в отличие от головы и туловища. Так чтобы они были подвижные и не топорщились. Пришиваем к пустому еще туловищу - ручки.
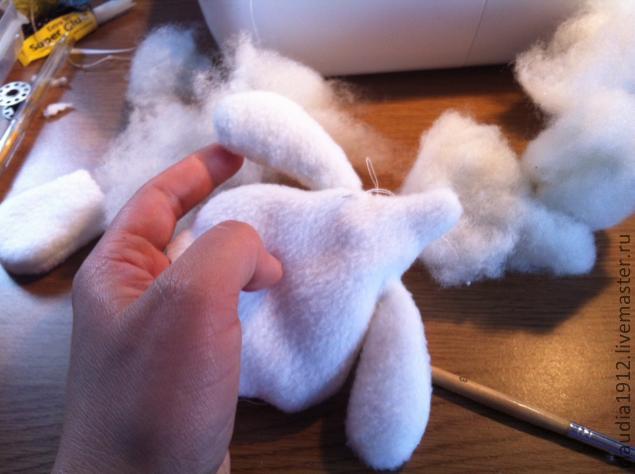
Потом плотно набиваем туловище и пришиваем потайным швом ножки.
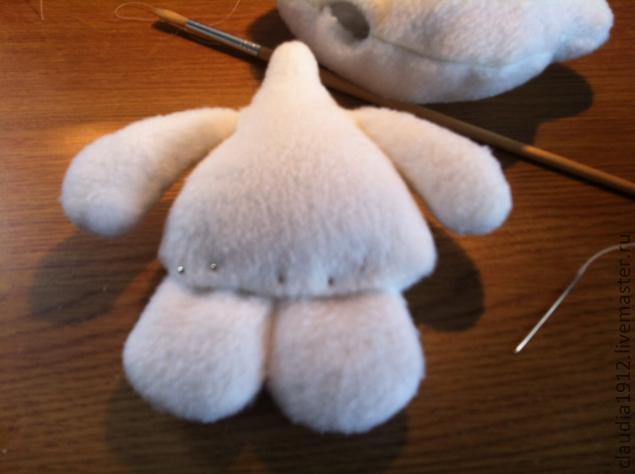
Пришла очередь очень плотно набитой головы))))
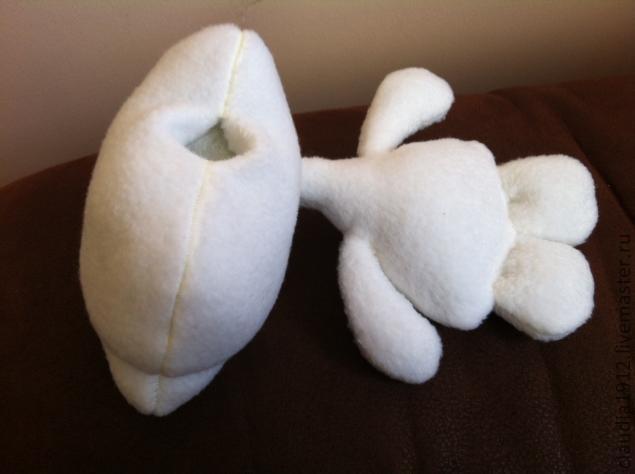
Одеваем голову на шею, как можно плотнее и пришиваем по кругу потайным швом.
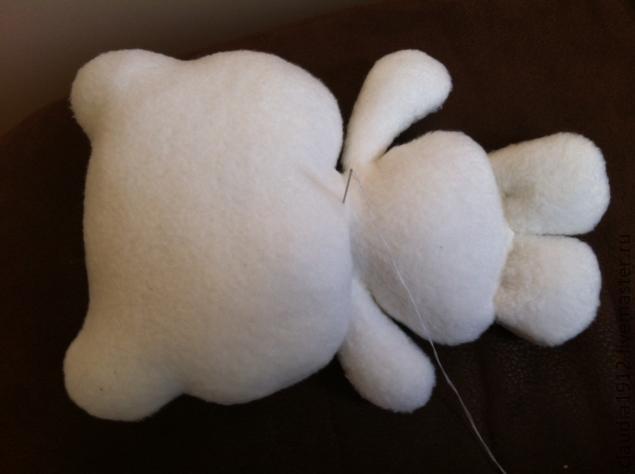
Ну вот, готово то, что можно одеть, украсить и любить))).
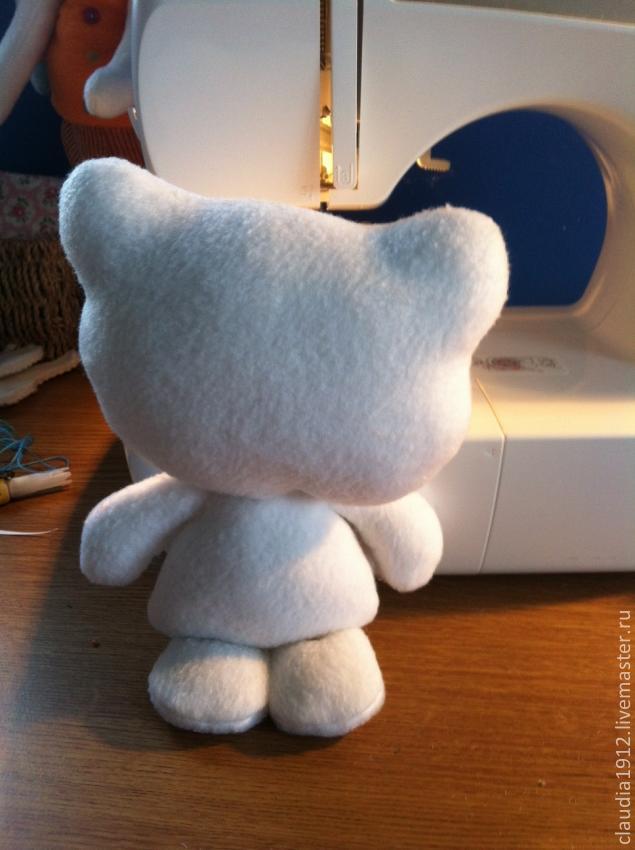
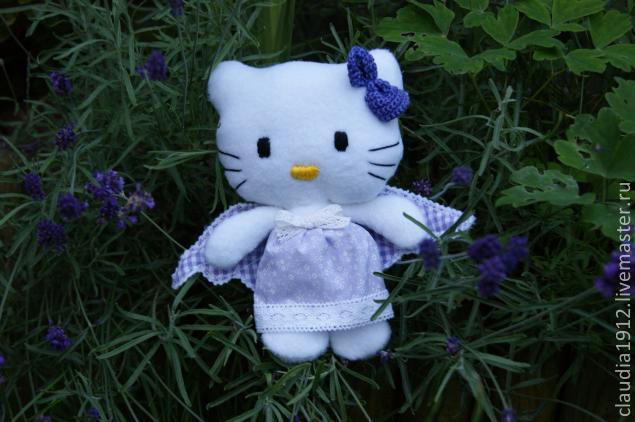
Шьем платье. Тут простор фантазии. Мы решили наша кошечка будет в лавандовых тонах, лаванда сейчас цветет и пахнет везде. Доделывали мы все, когда уже было темно, поэтому нашего ангела не удалось сфотографировать в лаванде в саду. Но завтра с утра - первым делом))).
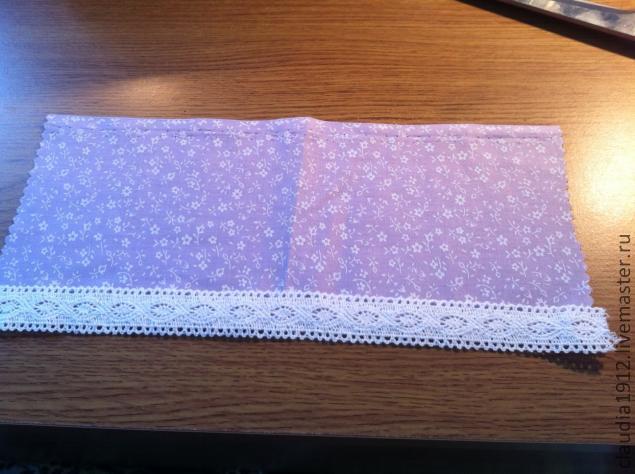
Кроим платье. Прямоугольник из хлопка, где высота - длина нашего платья, ширина - объем талии Hello Kitty плюс на пушистость)))). Мы не хотели делать прям солнце-клеш, поэтому прибавили половину объема талии))). Можно прибавить и целый объем. Украсили мы низ кружевом и прострочили боковой шов.
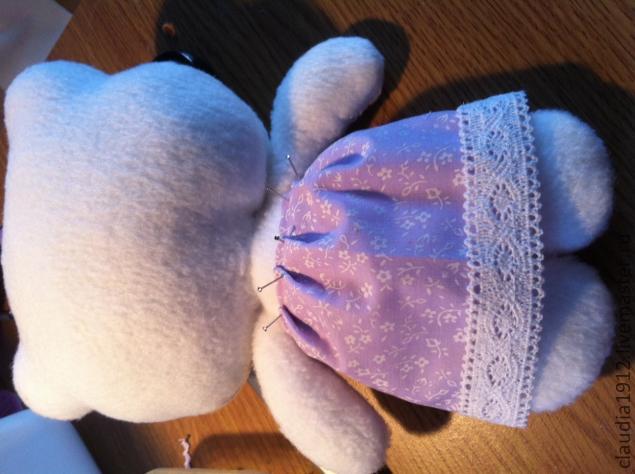
И одев юбочку на ангела, распределяем равномерно зажимы. Я прям делаю это на туловище, закалывая булавками. Когда все равномерно присборено, пришиваем сарафанчик к туловищу потайным швом.
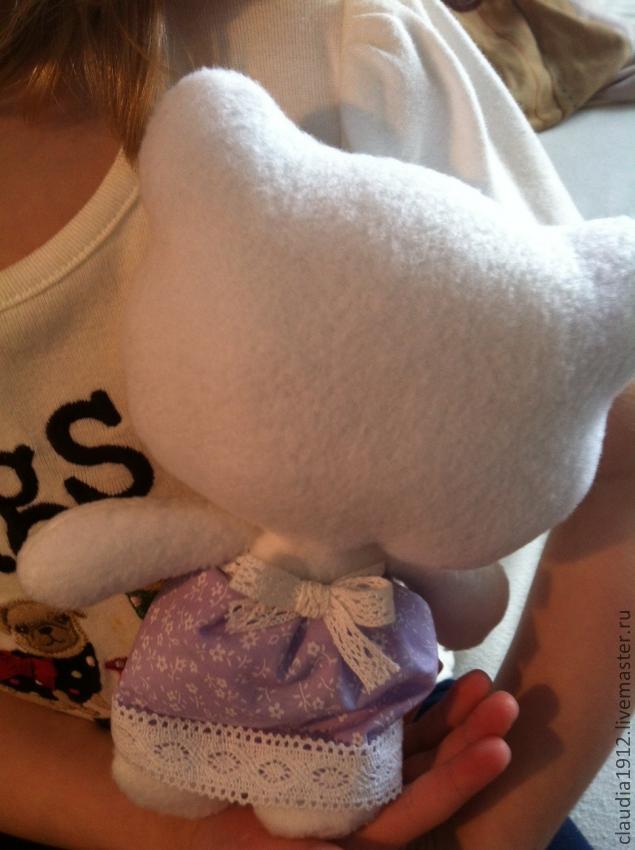
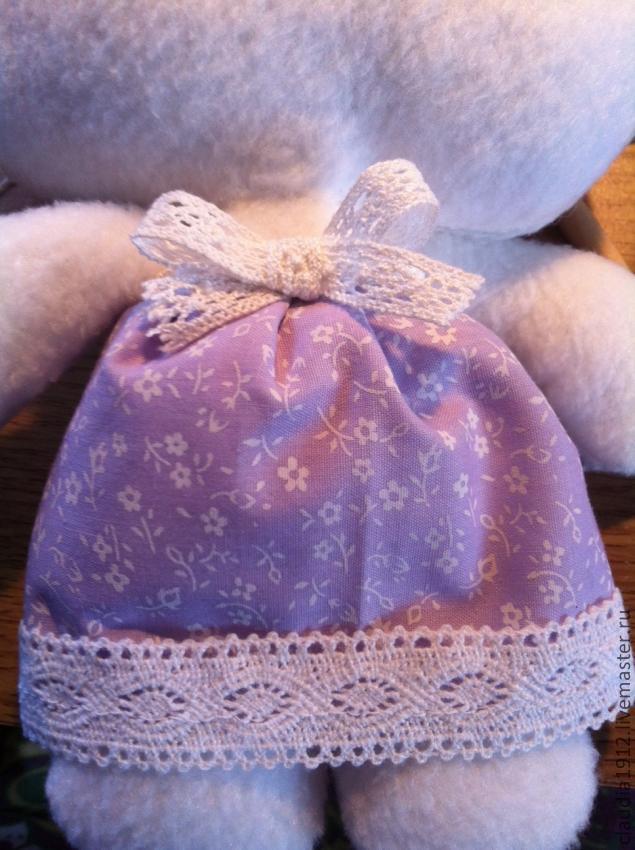
Закрываем шов узким кружевом и завязываем кокетливый бантик на груди)))).
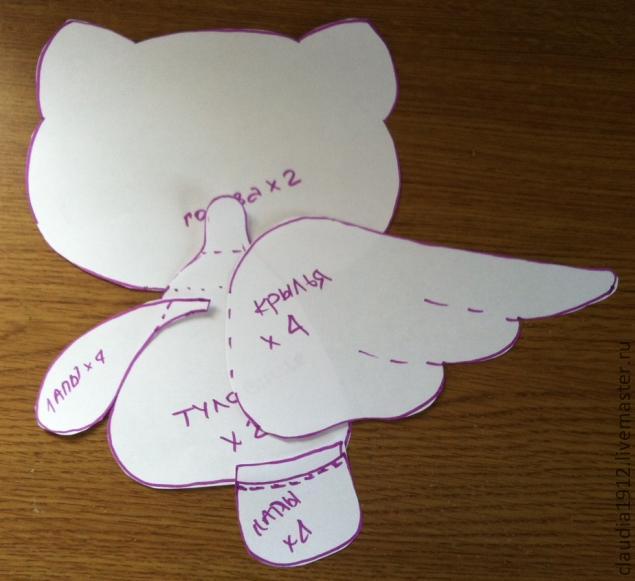
Крылья. Какой же ангел без них. Мы решили использовать Тильдовские крылья. Вот выкройка.
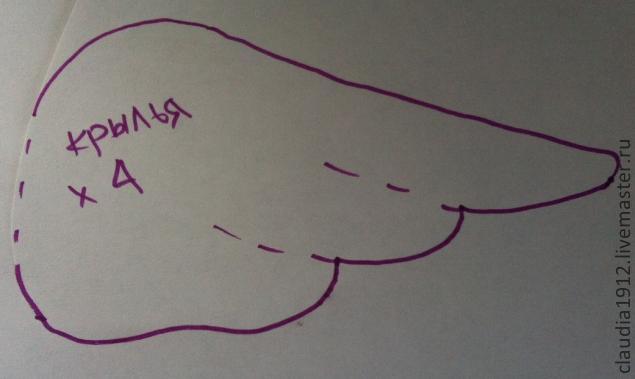
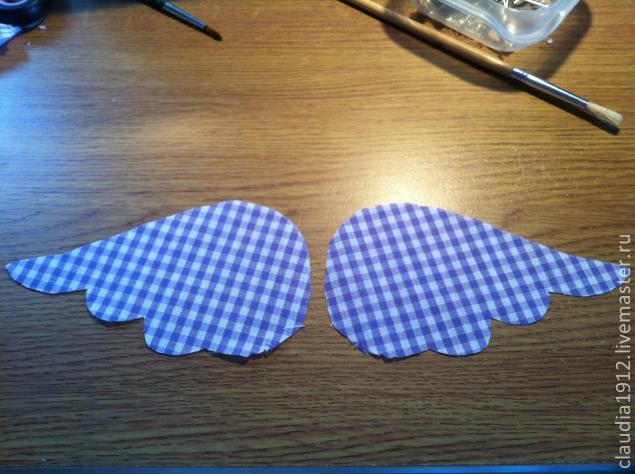
Мы сделали двусторонние крылья. Из хлопка в лавандовую клеточку и из белого флиса. Сшили их между собой. Дочка моя так хотела пошить на машинке, причем зиг-загом. Сделала она это не один раз. Вот такие крылья у нас получились. По-моему, неплохой примитив)))) Я потом прошлась по краям еще раз и сделала строчки, показанные пунктиром на выкройке.
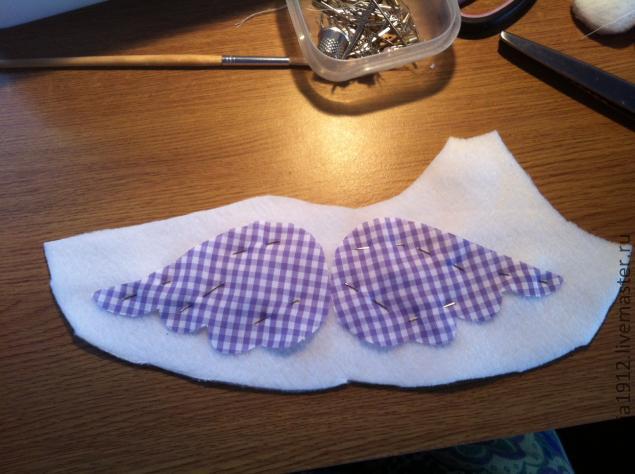
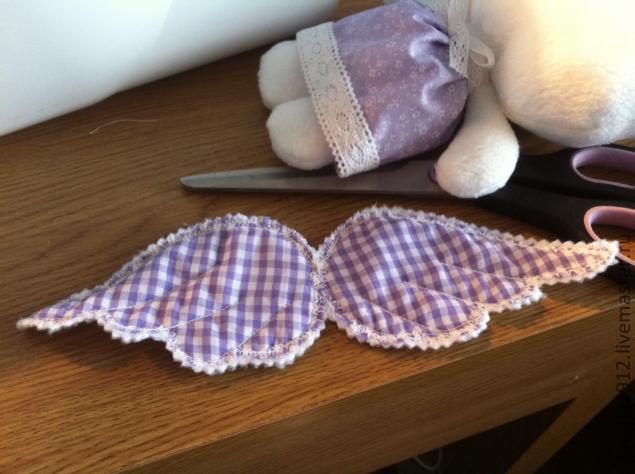
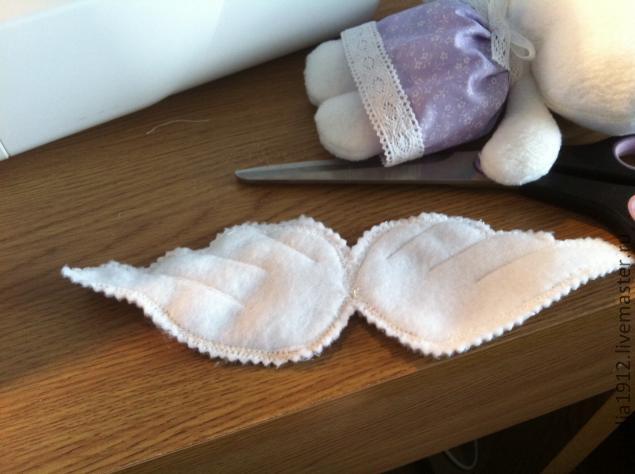
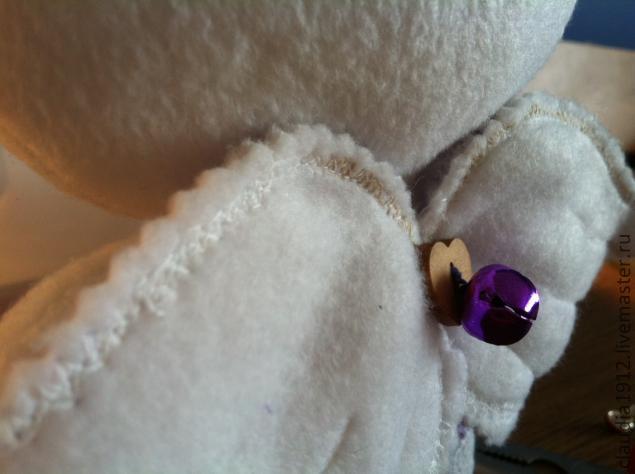
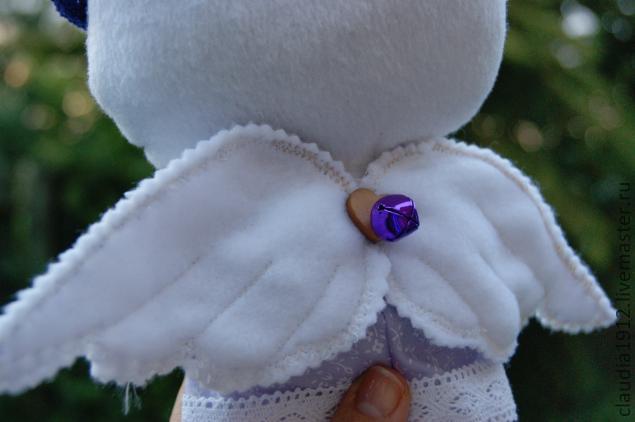
Теперь осталось пришить крылья. Мы пришили еще деревянную пуговичку и нашли фиолетовый бубенчик. Клаудиа (дочка) сказала - бубенчику быть! Пришили и его. Вот, что получилось.
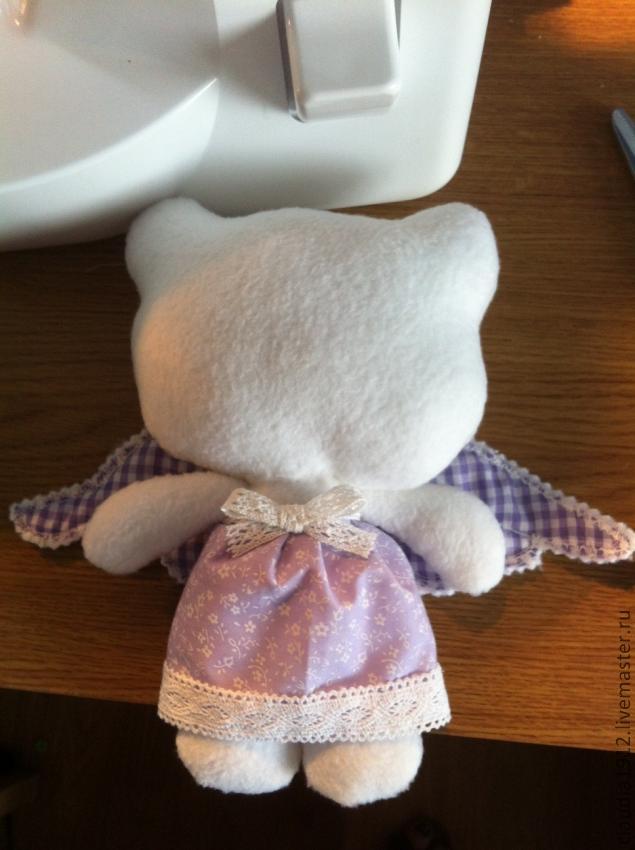
Теперь намечаем глазки и носик, и вышиваем. Я вышивала черным и желтым Ирисом.
Аха, и усы!))))
Бантик. Я связала бантик крючком из хлопка. Его можно сшить, слепить, связать. То есть проявить все свои таланты.)))
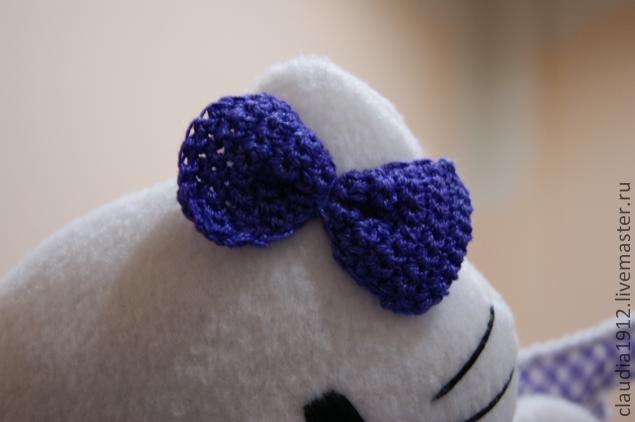
Ну вот и все готово. Еще немного фотографий для вдохновения и удачи!
|
|