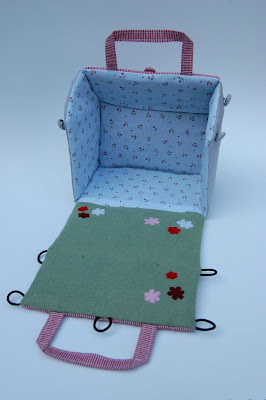
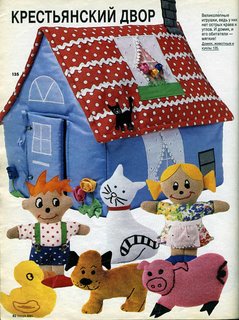
I made my daughter a fabric barn for Christmas and several people asked me for a tutorial. So, um, 8 months later (yes, I'm hanging my head in shame) I'm finally getting around to it. This was the barn:
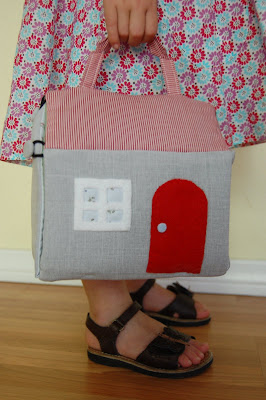
This time around I wanted a smaller, lighter version, that my kids could carry around. The barn was made of plywood, covered in batting and fabric. For this version I'm replacing the wood with plastic canvas (the plastic sheets sold at craft stores for doing cross-stitch on) .

What you will need:
..........:: Fabric for the interior: 9 inches by 21 inches and two pieces 6 inches by 9 inches (I'm being generous with the seam allowances here, as the actual size needed will depend on which batting you use)
..........:: Fabric for the exterior: (same as interior) 9" x 21" and two pieces 6" x 9"
..........:: 2 10.5"x 13.5" sheets of plastic canvas (I used #10 mesh)
..........:: Batting / wadding
..........:: Duct tape / insulation tape (optional)
..........:: Buttons and elastic cord (I used tiny hairbands) or velcro or 2 zips (if you do not have my fear of sewing zippers) or some ribbon
..........:: 2 Sewn fabric strips for handles (optional)
.
How to:(nb. sorry about the diagrams - my bloomin' husband has managed to unload my scanner software, most likely while messing around loading and unloading things for the computer game he is obsessed with... Anyway, I just did these quickly on the computer, so please use your imagination when trying to decipher them!)
.
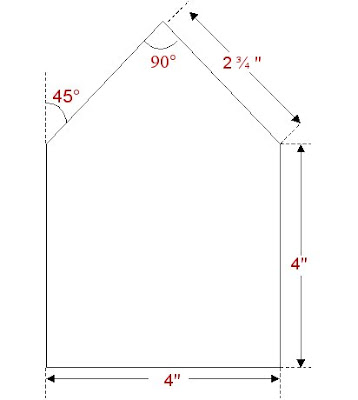
1. From the plastic canvas cut out
..........three 4" by 6" rectangles
..........two 2¾" by 6" rectangles
..........and 2 house-shaped pieces with 4" base, 4" sides and 2¾" roof (see diagram)
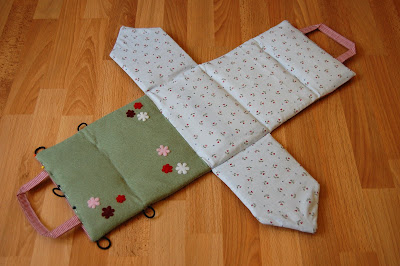
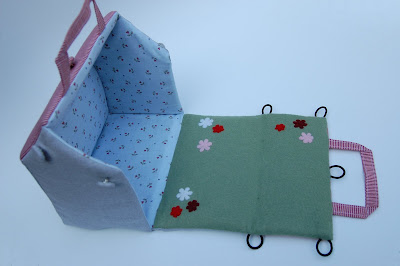
 The pieces should fit together like this:
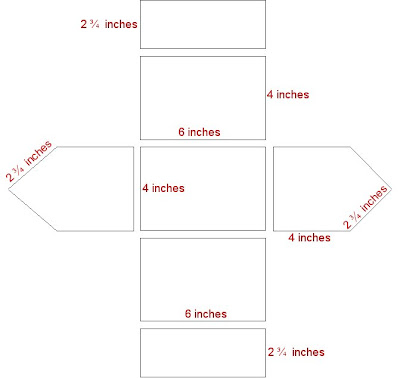 2. Wrap the plastic canvas with the batting (nb. When making the barn, I wrapped duct tape around the batting to keep it in place, so that the sharp points of the wood were safely padded. I found that the duct tape made the shaped pieces nice and easy to handle, so this time around, I wrapped the batting covered plastic canvas with insulation tape).
.
3. Using the 6" x 9" pieces, place an interior fabric piece right sides facing an exterior fabric piece, with a house-shaped batting-covered end panel sandwiched between them. Pin the fabric snugly around the end panel, leaving the bottom end open. Slide out the batting-covered end panel.
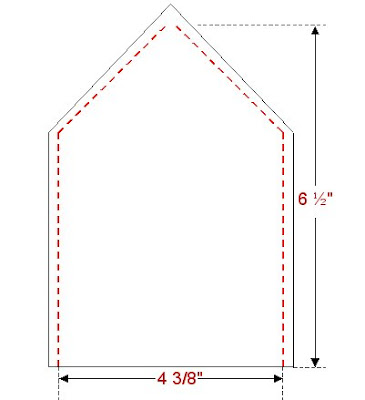 Sew along the lines you have pinned, marked by the red dotted line on the above diagram (The dimensions on the diagram show the dimensions I used, but yours may differ, depending on the thickness of the batting that you used, so I suggest using this pinning method to ensure a good fit). Turn right side out and slide the batting covered end panel back in. Repeat for the other end panel.
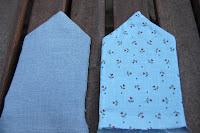 4. Using the 9" x 21" pieces, place the fabric right sides facing. The following should then be sandwiched between the fabrics, so that their edges / ends will be caught when you sew along the side edge of the fabrics:
..........one of the end panels
..........elastic loops (or flap for velcro or zip or ribbons for ties at both ends - whichever you chose)
.
Again, I like to first sandwich the batting covered panels between the fabrics - in the order shown in the 2nd diagram above - and pin the fabrics around them, including a pin between each panel, to ensure that I will have a good fit and also to mark the correct placement of the end panel and the loops for the buttons. I place the button loops at the corners of the roof panel (the 2 3/4" x 6" panel). After I have marked the edges and the correct placement, I then remove the panels, leaving just the end panel and the button loops sandwiched, ready to be sewn on.
.
I used contrasting fabric for the roof panels and the garden panel, but you can use just a solid piece of material. I sew them like patchwork strips onto the main interior or exterior panels, using the pinning method to ensure correct positioning.
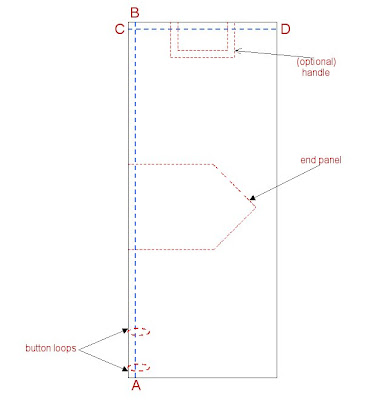 Sew along line A to B, catching the bottom of the end panel and the edge of the button loops.
 .
5. Pin the handle between the fabrics, with ends facing outwards (optional). Sew along line C to D, catching the ends of the handle.
.
6. Repeat step 4 for the other long side of the rectangle. Turn it right side out and slide in the batting covered panels in the order shown in the second diagram (roof panel - 2 3/4" x 6", then wall panel - 4" x 6", then floor panel - 4" x 6", then wall panel - 4" x 6", then roof panel - 2 3/4" x 6") . Pin between each panel to keep the panels in place.
Turn the edges of the opening over and pin closed - pinning the ends of the other handle and an additional button loop (optional). It should now look like this:
 7. Sew the opening closed, catching the ends of the handle and button loop, if used.
.
8. Add a couple of stitches between panels to keep the panels in place and remove the pins.
.
9. Hand sew the edge of the end panel to the wall and roof panel on each side, so that it forms this shape:
 10. If using the button loop closure, sew buttons onto end panels and roof panel to match the loops.
 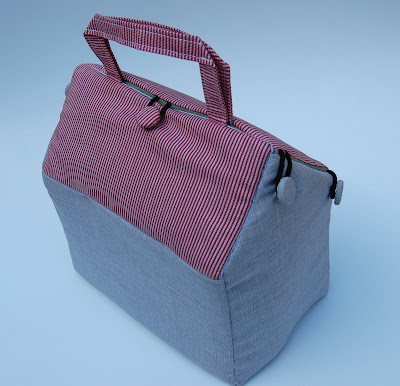 I appliqué the exterior decor on at this point (the window and door, in this example) as it is easier to position them correctly at this point.
 You're done.
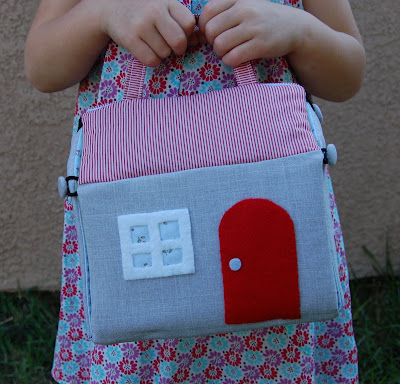 I know I'm not very good at explaining things clearly, so let me know if I've confused you. Really, they are very simple to make.