Цитата сообщения Helam
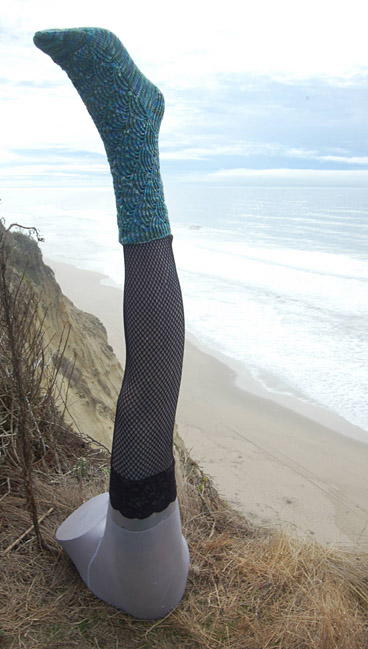
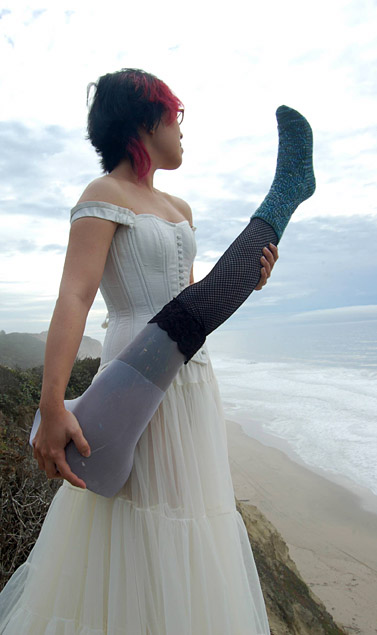
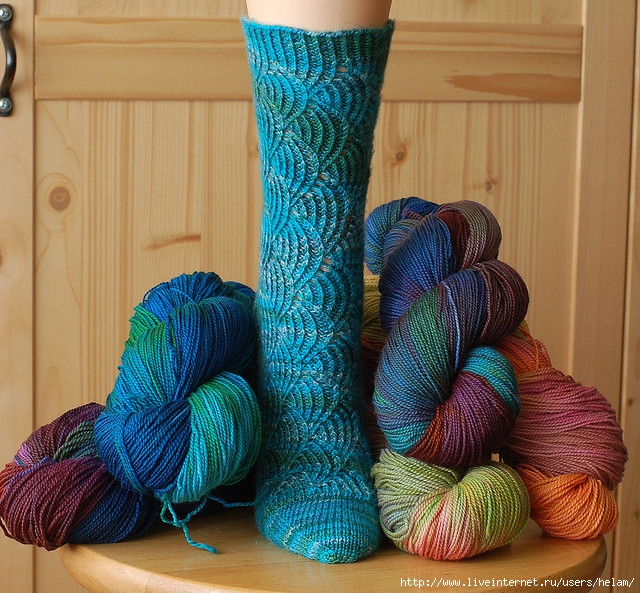
Носочки Pomatomus!

 Носочки Pomatomus!
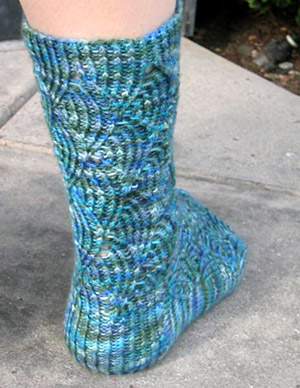
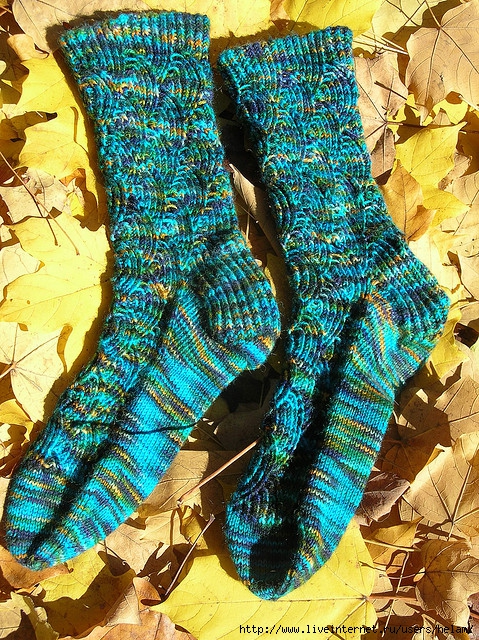
Дизайнер - Cookie A,были опубликованы на knitty.com.
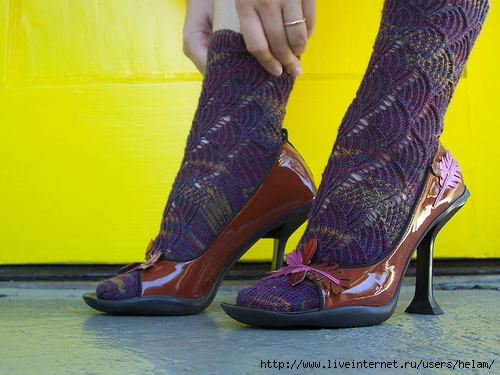
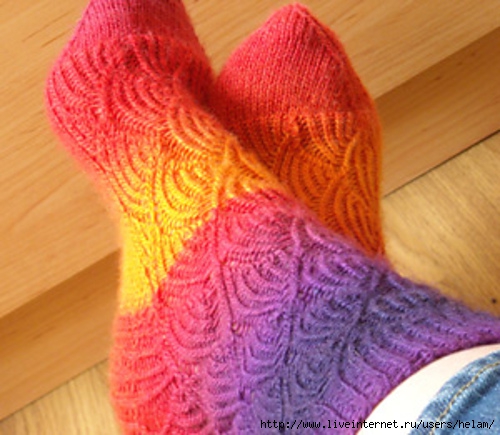
Неимоверно популярные носочки связаны необычным очень модным узором -похожим на чешую!
Этот узор можно использовать для митенок,варежек,гетр,чулок,шапочек и свитеров.
На Осинке появилась тема
Комплект для Русалочки - шапочка и митенки спицами
Они тоже вяжут подобный вариант чешуек!
SIZE
To fit an adult woman's foot
FINISHED MEASUREMENTS
Length: to fit (sock shown measures 9 inches; fits a woman's size 9 foot)
Circumference around leg: 6 inches (when rib is relaxed)
Circumference around foot: 7 inches (when rib is relaxed)
MATERIALS
Shelridge Farm Soft Touch Ultra Fingering Weight [100% superwash wool; 194 yds/175 m per 50g skein]; color: handpainted; 2 skeins
1 set of 5 US #2/2.75mm double-point needles
Stitch marker
Tapestry needle
GAUGE
32 sts/48 rows = 4 inches in stockinette stitch
48 sts = 4 inches in pattern stitch, when relaxed (it is quite stretchy)
PATTERN NOTES

Though 5 needles are required, only 4 of them will be used for most of the sock. (Dividing the sts over 3 needles, instead of 4, will help you keep track of the stitch pattern.) Only the gusset is worked with all 5 needles.
If you are unfamiliar with grafting, instructions can be found here.
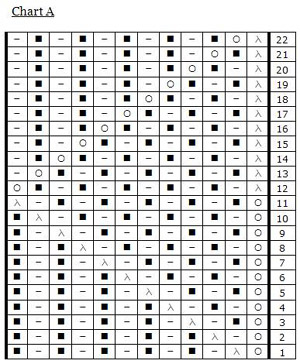
Pomatomus is knit using a top-down construction. The cuff and heel flap are knit in 1x1 twisted rib. The gusset, bottom of the foot, and toe are worked in stockinette stitch. Chart A gives the stitch pattern for the leg.
Chart B is a modified form of Chart A, used for the top of the foot. While Chart B may seem confusing and unnecessarily complex, the modifications are necessary to make the top of the foot rectangular as Chart A does not create a rectangular pattern (despite what the chart may lead you to believe).
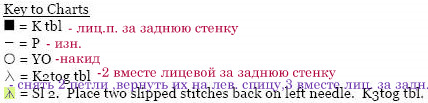
Due to the circular construction of a sock, the only parts that are knit back and forth are the heel flap and turning. The patterned parts are knit in the round where every row is a right side row. Therefore, the charts are read from right to left (the same direction as you knit) on every row. The following is a key to the chart. Note that these symbols may not mean what you are used to!
DIRECTIONS
Cuff
CO 72 sts. Divide sts evenly between 3 needles (24 sts on each needle), place marker and join to begin working in the round, being careful not to twist.
Round 1: [P1, k1 tbl] to end.
Repeat this round 9 times more.
Leg
Set-Up Round: [Yo, k2tog, (p1, k1 tbl) five times] to end of round. (The sequence will be repeated twice for each needle, or 6 times in total.)Work Rounds 2-22 of Chart A.
*Rearrange stitches on needles as follows:
Move first stitch from Needle 1 to Needle 3 by knitting the first stitch on Needle 1 through the back loop onto Needle 3.
Move first stitch from Needle 2 to end of Needle 1.
Move first stitch from Needle 3 to end of Needle 2.
Work Rounds 1-22 of Chart A.
Repeat from * once more.
Heel Flap
Rearrange stitches on needles as follows:
Move first stitch from Needle 1 to Needle 3 by knitting first stitch on Needle 1 through the back loop and transferring that stitch onto Needle 3.
Transfer first 13 stitches from Needle 2 to Needle 1.
Transfer remaining stitches from Needle 2 to Needle 3.
You will have two needles with 36 stitches each.
The heel flap is knit back and forth over the sts on Needle 1 only. Turn your work after each row of the heel flap.
Row 1 [RS]: K2tog, [p1, k1 tbl] to end.
Row 2 [WS]: Sl 1, [k1, p1 tbl] to end.
Row 3 [RS]: Sl 1, [p1, k1 tbl] to end.
Row 4 [WS]: Sl 1, [k1, p1 tbl] to end.
Repeat Rows 3 and 4, 12 times more.
Turn Heel
Row 1 [RS]: Sl1, k19, ssk, k1, turn work.
Row 2 [WS]: Sl 1, p6, p2tog, p1, turn work.
Row 3 [RS]: Sl1, k7, ssk, k1, turn work.
Row 4 [WS]: Sl 1, p8, p2tog, p1, turn work.
Row 5 [RS]: Sl1, k9, ssk, k1, turn work.
Row 6 [WS]: Sl 1, p10, p2tog, p1, turn work.
Row 7 [RS]: Sl1, k11, ssk, k1, turn work.
Row 8 [WS]: Sl 1, p12, p2tog, p1, turn work.
Row 9 [RS]: Sl1, k13, ssk, k1, turn work.
Row 10 [WS]: Sl 1, p14, p2tog, p1, turn work.
Row 11 [RS]: Sl1, k15, ssk, k1, turn work.
Row 12 [WS]: Sl 1, p16, p2tog, p1, turn work.
Row 13 [RS]: Sl1, k17, ssk, k1.
Row 14 [WS]: Sl 1, p18, p2tog, p1. 21 sts rem.
Gusset
The gusset is knit with 5 needles.
K 21 heel sts; this needle will be designated Needle 1.
Using a second needle, pick up and k 15 sts along side of heel flap, and 1 st between top of heel flap and held sts; this needle will be designated Needle 2.
Using a third needle, work across held sts as follows: [Yo, k2tog, (p1, k1 tbl) five times] three times; this needle will be designated Needle 3.Using a fourth needle, pick up and k 1 st between last st worked and top of heel flap, then pick up and k 15 sts along edge of heel flap; this needle will be designated Needle 4.
Needle 1: 21 sts
Needle 2: 16 sts
Needle 3: 36 sts
Needle 4: 16 sts
Total: 89 sts
Next Round: K all sts on Needle 1; k tbl all sts on Needle 2; work Row 2 of Chart B over all sts on Needle 3; k tbl all sts on Needle 4.
Next Round: K all sts on Needle 1; k to last 2 sts on Needle 2, k2tog; work Row 3 of Chart B over all sts on Needle 3; ssk, k to end of Needle 4.
Next Round: K all sts on Needle 1; k to last 2 sts on Needle 2, k2tog; work next row of Chart B over all sts on Needle 3; ssk, k to end of Needle 4.
Next Round: K all sts on Needle 1 and Needle 2; work next row of Chart B over all sts on Needle 3; k all sts on Needle 4.
Repeat these 2 rounds 8 times more. 6 sts rem on Needle 2 and Needle 4 each.
Note: On Rows 17-22 of Chart B, there will be 1 extra st on Needle 3 (37 sts).
Next Round: K all sts on Needle 1; k to last 2 sts of Needle 2, k2tog; work next row of Chart B over all sts on Needle 3; k all sts of Needle 4, then k first 10 sts from Needle 1 onto this needle.
Foot
K 11 rem sts from Needle 1 and all 5 sts from Needle 2 onto one needle; this will now be designated Needle 3.
Work all sts from next needle in patt; this will now be designated Needle 1.
K rem sts from rem needle; this will now be designated Needle 2.
K all sts of (new) Needle 3; you are now at the newly designated beginning of the round.
Needle 1: 36 sts (37 sts on Rows 17-22 of Chart B)
Needles 2 and 3: 16 sts each
Total: 68 sts
Work in patt as set, working through Rows 1-22 of Chart B on Needle 1 and working sts on Needles 2 and 3 in stockinette st, until foot measures 2 inches less than desired length.
Toe
Next Round: Work all sts in patt as set, EXCEPT: omit all yarnovers (YOs) in Chart B. 3 sts decreased. You will have 33 or 34 sts, depending on which row of Chart B you last worked.
Next Round: Work all sts in patt as set, EXCEPT: if you have 33 sts remaining on Needle 1, omit the first yarnover in Chart B; if you have 34 sts remaining on Needle 1, omit the first 2 yarnovers in Chart B. In both cases, omit the sts that would have been formed by the yarnovers in the previous row.
You will now have 32 sts on Needle 1; 64 sts in total.
Next Round: K all sts.
Next Round: K1, ssk, k to last 3 sts on Needle 1, k2tog, k1; k1, ssk, k to end of Needle 2; k to last 3 sts of Needle 3, k2tog, k1. 4 sts decreased.
Repeat these 2 rounds 12 times more. 12 sts rem.
Slip sts from Needle 2 onto Needle 3. Break yarn, leaving a 12 inch tail.
Graft sts on Needle 1 to sts on Needle 3.
FINISHING
Weave in ends.
Серия сообщений "Вязание-носки,гольфы,гетры":Вязание-носки,гольфы,гетры
Часть 1 - Носочки с цветущей веткой Bloomin' Socks!
Часть 2 - Носочки Esther Socks!
...
Часть 7 - Носки спицами "Мой маленький колокольчик"(My Little Bluebell)!
Часть 8 - Ажурные носочки из Drops!
Часть 9 - Носочки Pomatomus!
Часть 10 - Носочки с пауком "Садовник"(The Gardener)!
Часть 11 - Носочки с листиками-листочками Polly Jean!
...
Часть 20 - Оригинальные носочки. Новая техника "свинг"!
Часть 21 - Носки спицами из Regia.
Часть 22 - Шапочка, накидка и гетры из SMC!


