Mooshie Stitch Mondays: Mountmellick Thorn Stitch |


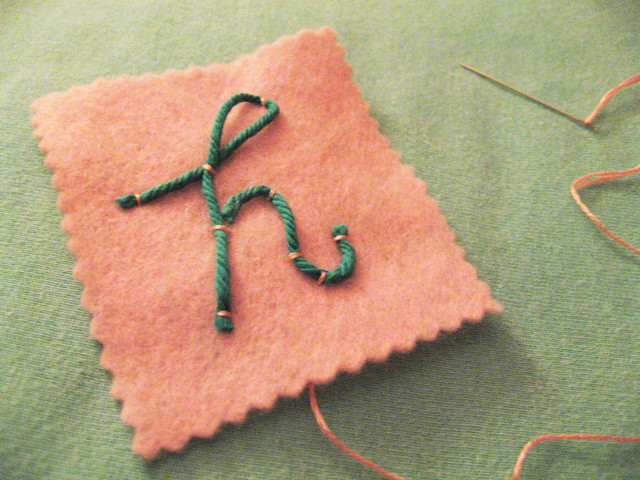
I know this isn’t exactly how to stitch the Mountmellick thorn stitch - it definitely looks different from the few examples I found online - but that's ok. It’s my version of it. :)


Interested in reading more about Mountmellick Embroidery? One great website I found is Vetty Creations. Yvette Stanton's embroidery is amazing. I started following her awesome board on Pinterest and I think I will be purchasing her book on Mountmellick embroidery also.
http://www.feelingstitchy.com/2015/03/mooshie-stitch-mondays-mountmellick.html
|
Метки: Mooshie Stitch Mondays mountmellick thorn stitch whitework |
Mooshie Stitch Mondays: Mountmellick Thorn Stitch |
I know this isn’t exactly how to stitch the Mountmellick thorn stitch - it definitely looks different from the few examples I found online - but that's ok. It’s my version of it. :)
Interested in reading more about Mountmellick Embroidery? One great website I found is Vetty Creations. Yvette Stanton's embroidery is amazing. I started following her awesome board on Pinterest and I think I will be purchasing her book on Mountmellick embroidery also.
http://www.feelingstitchy.com/2015/03/mooshie-stitch-mondays-mountmellick.html
|
Метки: Mooshie Stitch Mondays mountmellick thorn stitch whitework |
Patterns: Satsuma Street Garden Cat |

http://www.feelingstitchy.com/2015/03/patterns-satsuma-street-garden-cat.html
|
Метки: cat cross stitch patterns Satsuma Street |
Friday Instagram Finds, No. 001 |

http://www.feelingstitchy.com/2015/03/friday-instagram-finds-no-001.html
|
Метки: embroidery FeelingStitchyIG FIF Friday Instagram Finds hand embroidery |
Welcome to new blogger: Amy on Instagram! |
http://www.feelingstitchy.com/2015/03/welcome-to-new-blogger-amy-on-instagram.html
|
Метки: Amy Instagram Random Acts of Amy |
Interview with Rosalind Wyatt - and giveaway! |


http://www.feelingstitchy.com/2015/03/interview-with-rosalind-wyatt-and.html
|
Метки: artists giveaway interview Karen Thiesen Rosalind Wyatt Strange Material |
Diary of an Intern: Julia at Hand and Lock |


http://www.feelingstitchy.com/2015/03/diary-of-intern-julia-at-hand-and-lock.html
|
Метки: Diary of an Intern Hand and Lock Julia Titchfield |
Thimblenest Thursdays: Tutorial for an Embroidery Scissor Wrist Cuff |
.JPG)


.JPG)
.JPG)
.JPG)
.JPG)
.JPG)
.JPG)
.JPG)
.JPG)
.JPG)
.JPG)
.JPG)
.JPG)
.JPG)
.JPG)
.JPG)
.JPG)
.JPG)
.JPG)
.JPG)
.JPG)
http://www.feelingstitchy.com/2015/03/thimblenest-thursdays-tutorial-for.html
|
Метки: scissors Thimblenest Thursday tutorial wrist cuff |
Thimblenest Thursdays: Tutorial for an Embroidery Scissor Wrist Cuff |
http://www.feelingstitchy.com/2015/03/thimblenest-thursdays-tutorial-for.html
|
Метки: scissors Thimblenest Thursday tutorial wrist cuff |
Welcome to Wendy from Thimblenest! |

http://www.feelingstitchy.com/2015/03/welcome-to-wendy-from-thimblenest.html
|
Метки: free pattern freebie Thimblenest Thursday Wendy |
Welcome to Wendy from Thimblenest! |
http://www.feelingstitchy.com/2015/03/welcome-to-wendy-from-thimblenest.html
|
Метки: free pattern freebie Thimblenest Thursday Wendy |
Adventures in Whitework: Mountmellick Stitch |
Hi all - floresita here to introduce our first new blogger on Feeling Stitchy - Michelle! On her blog, Mooshie Stitch, Michelle does some amazing, detailed stitch work with Take a Stitch Tuesday stitches and other talented projects. We are very thrilled to have her here at Feeling Stitchy with her first Mooshie Stitch Monday post - tune in every other Monday to hear from her! Welcome, Michelle!


http://www.feelingstitchy.com/2015/03/adventures-in-whitework-mountmellick.html
|
Метки: Mooshie Stitch Mondays mountmellick whitework |
The Knitting and Stitching Show - Spring 2015 |
http://www.feelingstitchy.com/2015/03/the-knitting-and-stitching-show-spring.html
|
Метки: Charlotte Bailey Knitting and Stitching Show |
Jo live tweeting from the London Knitting and Stitching Show! |
Also on @MrXStitch stall, Paperclip Parrot, Stumpwork by Charlotte Bailey pic.twitter.com/zPDCrPI7Ma— Feeling Stitchy (@feelingstitchy) March 7, 2015http://www.feelingstitchy.com/2015/03/jo-live-tweeting-from-london-knitting.html
|
Метки: Jo Knitting and Stitching Show Twitter |
We found our volunteers! |
http://www.feelingstitchy.com/2015/03/we-found-our-volunteers.html
|
Метки: call for volunteers volunteers |
We found our volunteers! |
http://www.feelingstitchy.com/2015/03/we-found-our-volunteers.html
|
Метки: call for volunteers volunteers |
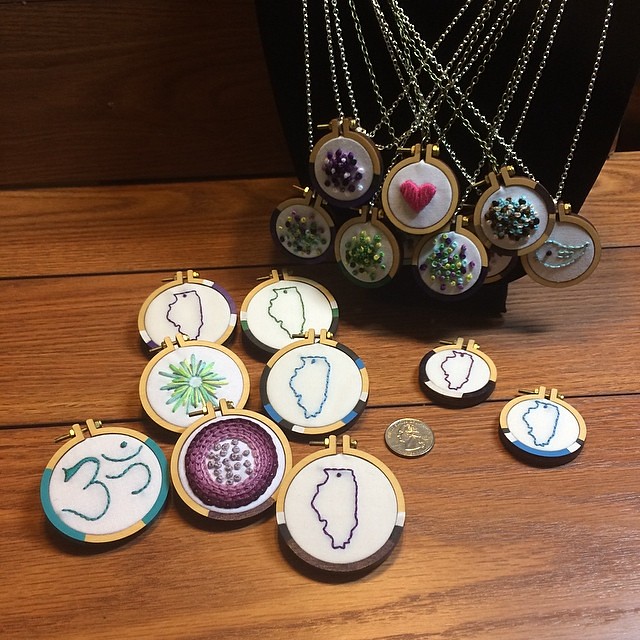
Craftster's March Hoopla Along: COLOR! |

http://www.feelingstitchy.com/2015/03/craftsters-march-hoopla-along-color.html
|
Метки: Craftster hoopla along |
Subversive Cross Stitch review and giveaway! |


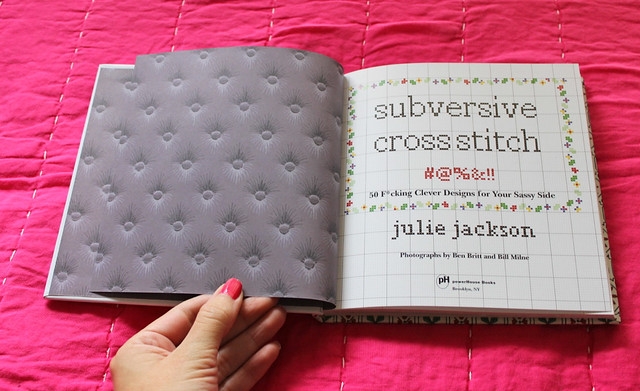
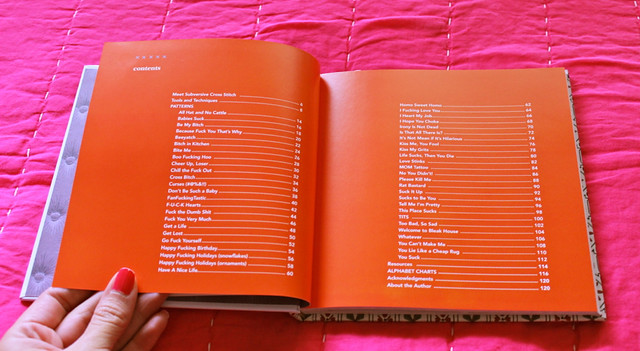
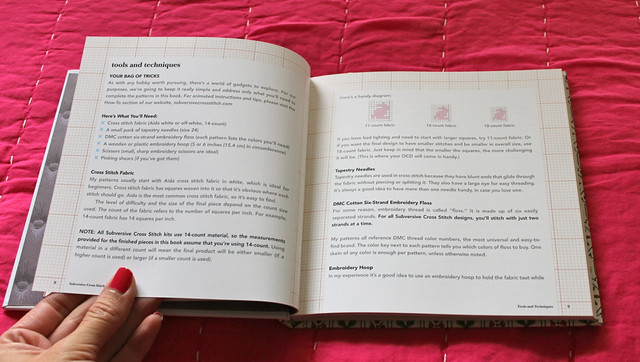
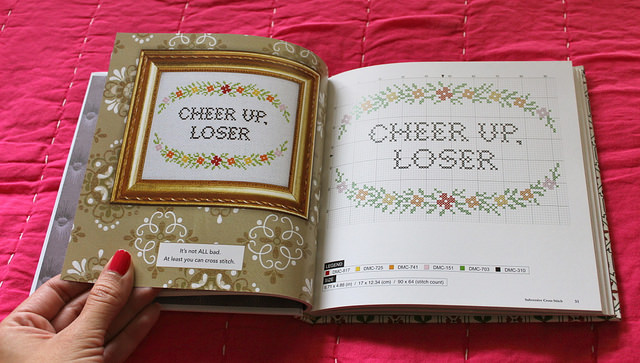
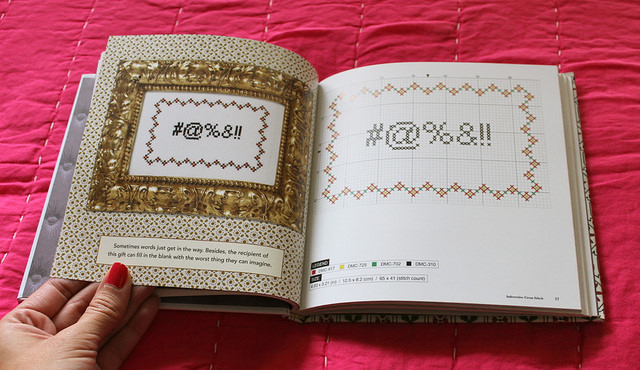
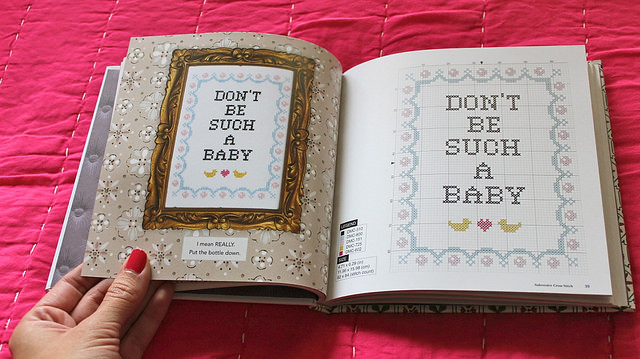
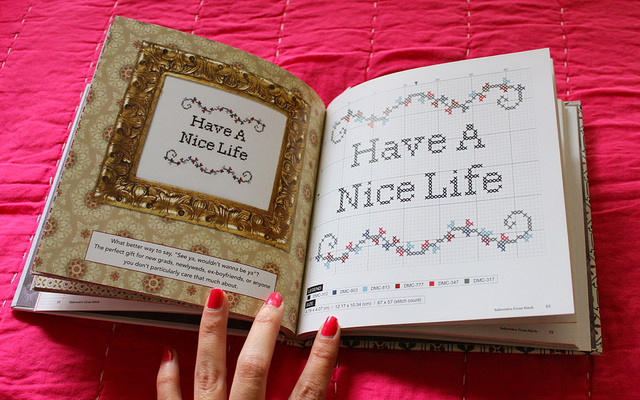
http://www.feelingstitchy.com/2015/02/subversive-cross-stitch-review-and.html
|
Метки: book preview book review cross stitch giveaway Subversive Cross-stitch |


