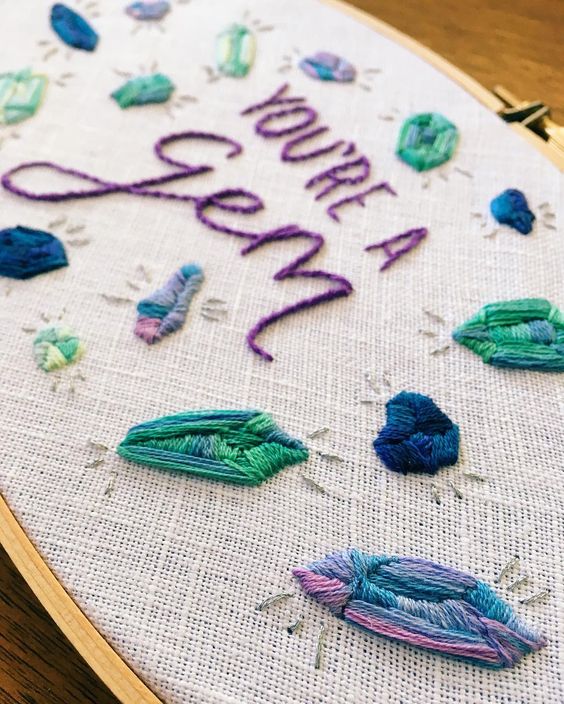
Friday Instagram Finds No. 68 with Plaid Love Threads |

http://www.feelingstitchy.com/2016/09/friday-instagram-finds-no-68-with-plaid.html
|
Метки: Amy embroidered necklace embroidery FIF Friday Instagram Finds Plaid Loves Thread Random Acts of Amy |
Friday Instagram Finds No. 68 with Plaid Love Threads |
http://www.feelingstitchy.com/2016/09/friday-instagram-finds-no-68-with-plaid.html
|
Метки: Amy embroidered necklace embroidery FIF Friday Instagram Finds Plaid Loves Thread Random Acts of Amy |
Wonderful Wednesday #16: Gulush Threads |

http://www.feelingstitchy.com/2016/08/wonderful-wednesday-16-gulush-threads.html
|
Метки: cactus Gulush Threads PDF patterns Wonderful Wednesday |
Wonderful Wednesday #16: Gulush Threads |
http://www.feelingstitchy.com/2016/08/wonderful-wednesday-16-gulush-threads.html
|
Метки: cactus Gulush Threads PDF patterns Wonderful Wednesday |
Mooshiestitch Monday: Plushwork |


http://www.feelingstitchy.com/2016/08/mooshiestitch-monday-plushwork.html
|
Метки: amish stumpwork chenille work DMC tapestry wool Mooshie Stitch Mondays plushwork stumpwork tapestry wool wool embroidery |
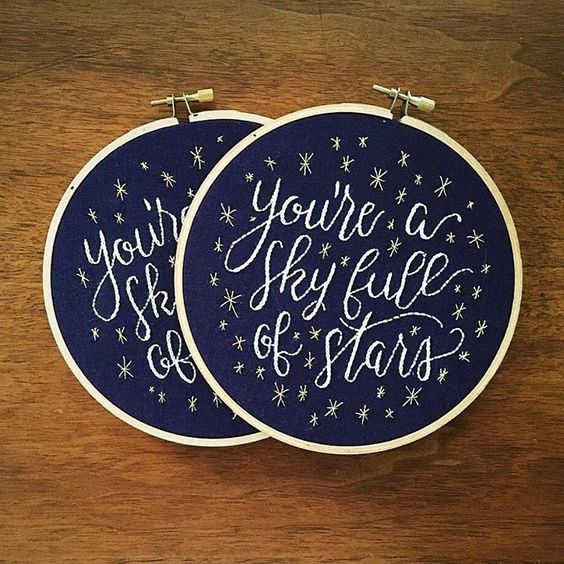
Friday Instagram Finds No. 67 with Kristin Axtman |

http://www.feelingstitchy.com/2016/08/friday-instagram-finds-no-67-with.html
|
Метки: Amy embroidery FIF Friday Instagram Finds Kristin Axtman printed fabric Random Acts of Amy |
Wonderful Wednesday #15: Lilipopo |

http://www.feelingstitchy.com/2016/08/wonderful-wednesday-15-lilipopo.html
|
Метки: Etsy Lilipopo Wonderful Wednesday |
Stitchy Snippets - Susie Vickery |


http://www.feelingstitchy.com/2016/08/stitchy-snippets-susie-vickery.html
|
Метки: animation Asia collage community freehand machine embroidery hand embroidery Stitchy Snippets Susie Vickery |
Friday Instagram Finds No. 66 featuring Lady Scrib |


http://www.feelingstitchy.com/2016/08/friday-instagram-finds-no-66-featuring.html
|
Метки: Friday Instagram Finds Instagram Kassie Scribner Lady Scrib |
Wonderful Wednesday #14: Maggie Gee Needlework |
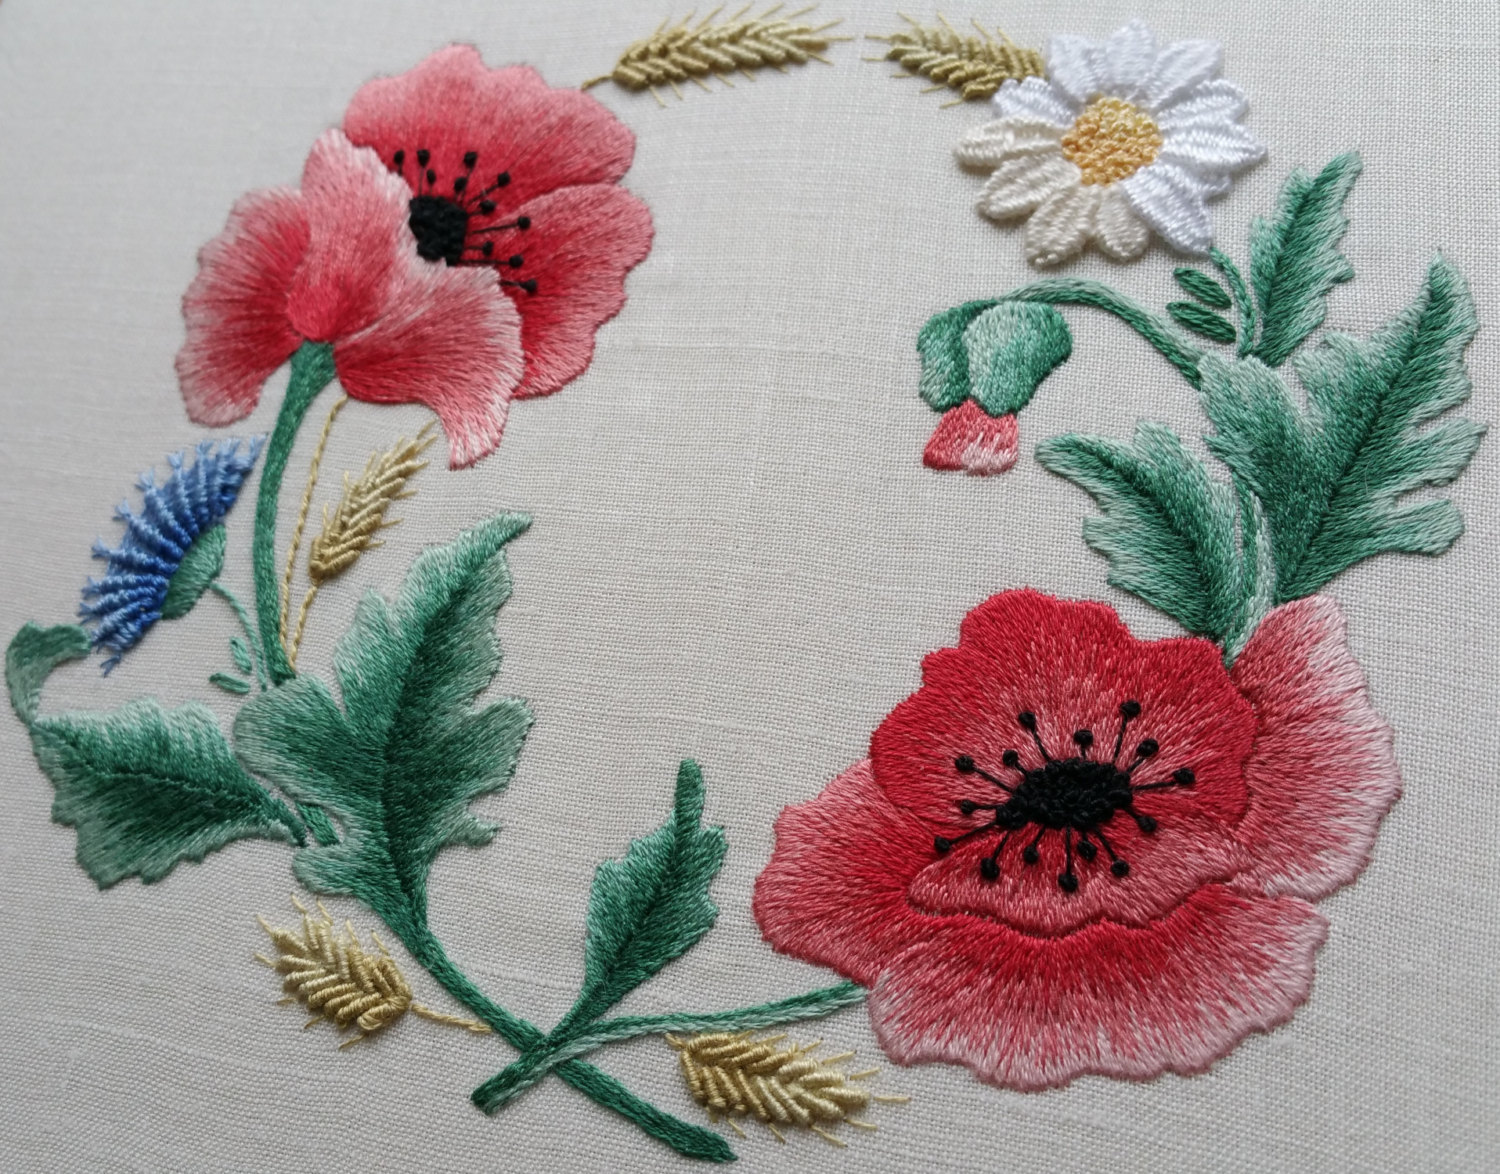
http://www.feelingstitchy.com/2016/08/wonderful-wednesday-14-maggie-gee.html
|
Метки: embroidery kit Etsy Maggie Gee Needlework poppies Wonderful Wednesday |
Wonderful Wednesday #14: Maggie Gee Needlework |
http://www.feelingstitchy.com/2016/08/wonderful-wednesday-14-maggie-gee.html
|
Метки: embroidery kit Etsy Maggie Gee Needlework poppies Wonderful Wednesday |
Tutorial: Double Brussels Needle Lace Stitch |


http://www.feelingstitchy.com/2016/08/tutorial-double-brussels-needle-lace.html
|
Метки: Catherine Thomas Double Brussels needlelace Needlelace tutorials |
Winner of Simply Stitched! |

Lynne • 6 days ago Yes I love stitching on wool! Mug rugs. I really like variegated floss a d pearl gotten. Sullivan brand. Very silky cotton. Lynne
http://www.feelingstitchy.com/2016/08/winner-of-simply-stitched.html
|
Метки: giveaway simply stitched |
Friday Instagram Finds No. 65 featuring Pyro Dog Pins |
http://www.feelingstitchy.com/2016/08/friday-instagram-finds-no-65-featuring.html
|
Метки: Amy cross stitch FIF Hitchhiker s Guide to The Galaxy Random Acts of Amy Terminator The Big Lebowski X-Files |
Wonderful Wednesday #13: Pumora Embroidery |
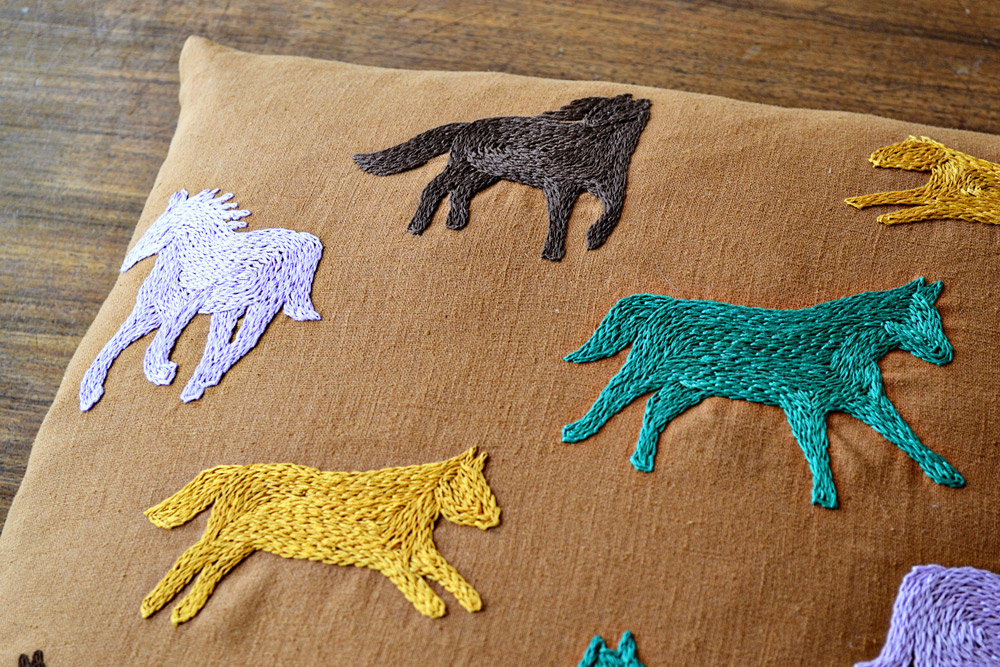
http://www.feelingstitchy.com/2016/08/wonderful-wednesday-13-pumora-embroidery.html
|
Метки: chain stitch Etsy horses pumora Wonderful Wednesday |
Stitchy Snippets - Karen Nicol |


http://www.feelingstitchy.com/2016/08/stitchy-snippets-karen-nicol.html
|
Метки: freehand machine embroidery hand embroidery Karen Nicol Ruthin Craft Centre Stitchy Snippets |
Book Review: Simply Stitched (and Giveaway!) |


http://www.feelingstitchy.com/2016/08/book-review-simply-stitched-and-giveaway.html
|
Метки: book review embroidery book review Mooshie Stitch Mondays simply stitched tapestry wool wool embroidery yumiko higuchi |
Friday Instagram Finds No. 64 featuring Destiny City Threads |
http://www.feelingstitchy.com/2016/08/friday-instagram-finds-no-64-featuring.html
|
Метки: Amy embroidery FIF Friday Instagram Finds hand embroidery pop culture Random Acts of Amy Stay Golden |
Wonderful Wednesday #12: Na Nee Embroidery |

http://www.feelingstitchy.com/2016/08/wonderful-wednesday-12-na-nee-embroidery.html
|
Метки: cactus Etsy NaNee Hand Embroidery Wonderful Wednesday |
Floss Review & free pattern: DMC Coloris Floss |

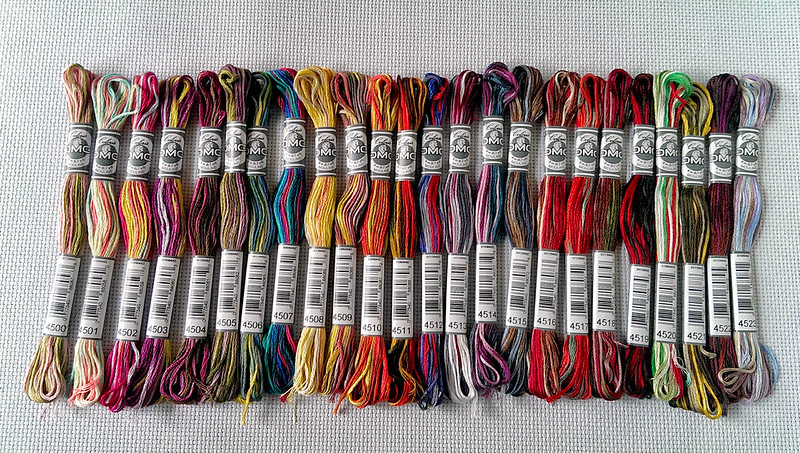

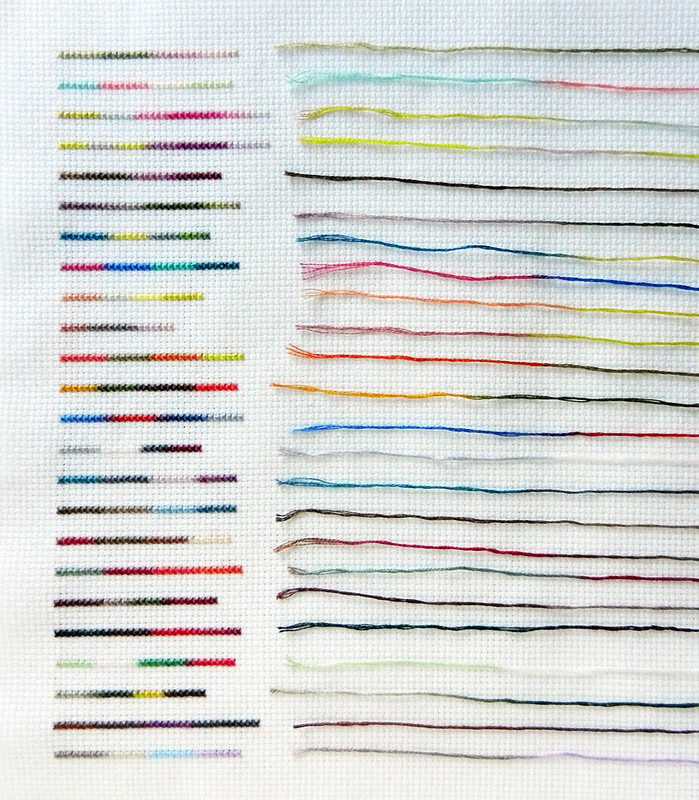
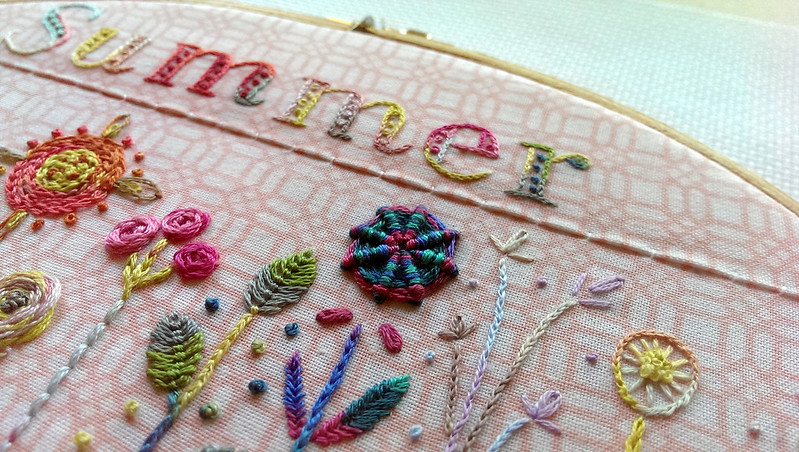
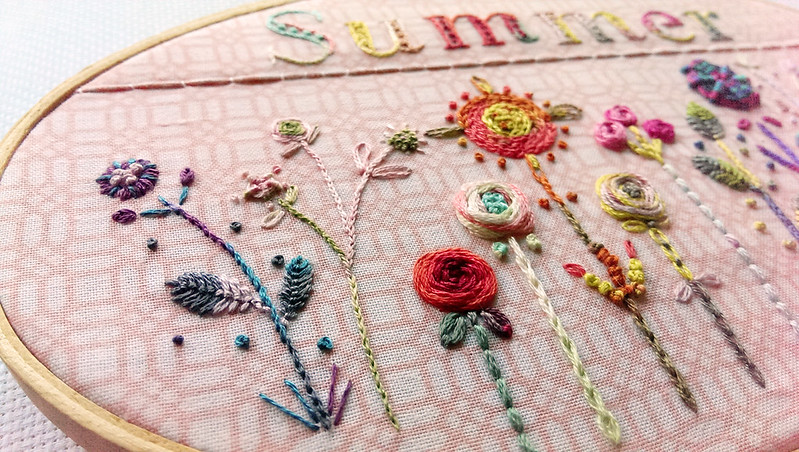
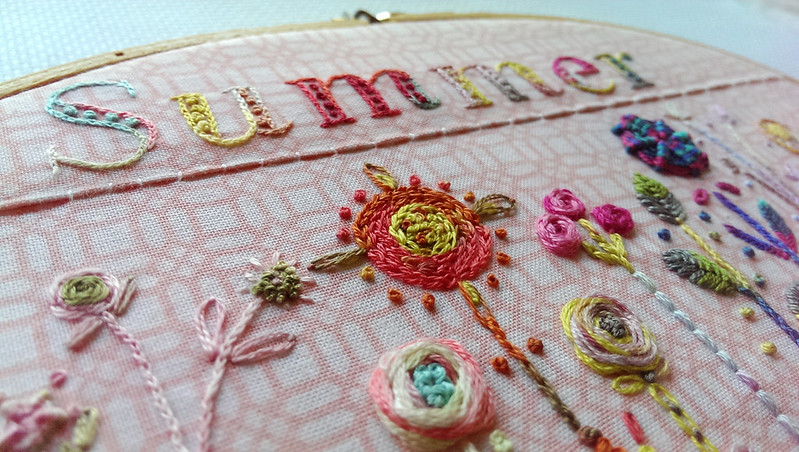
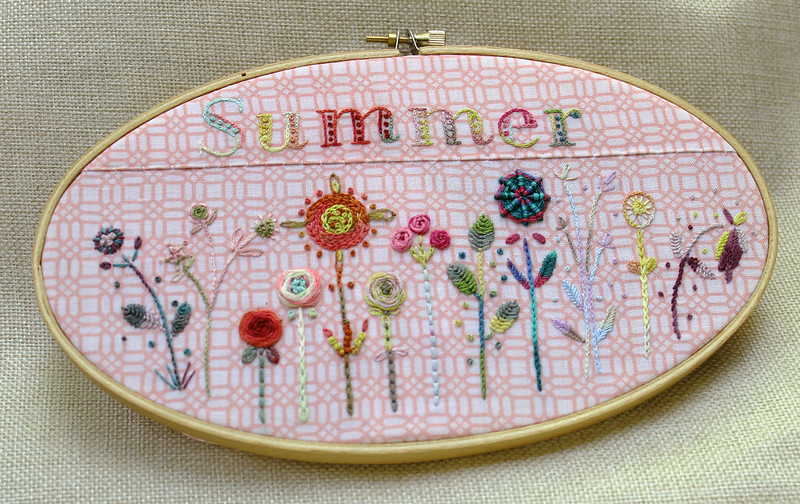
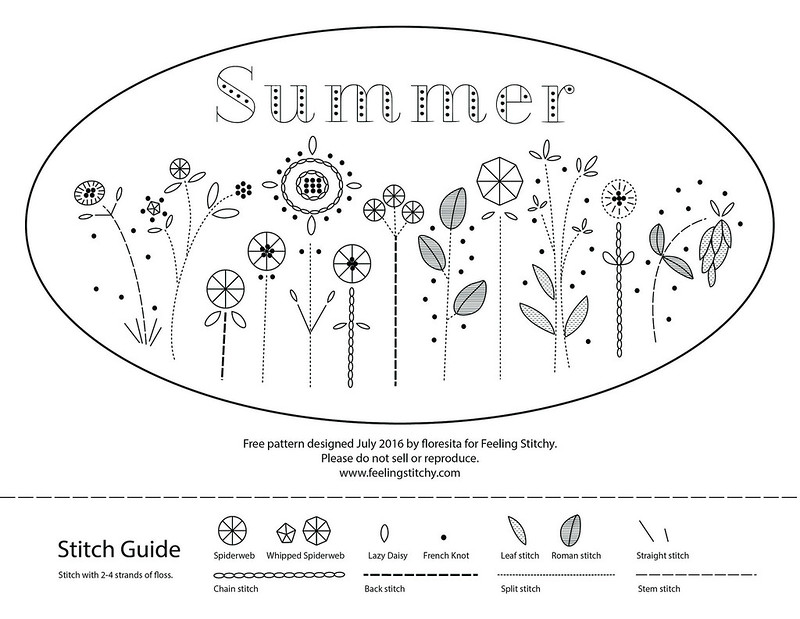
http://www.feelingstitchy.com/2016/07/floss-review-free-pattern-dmc-coloris.html
|
Метки: Coloris floss DMC floss embroidery floss review free pattern Modern Maker summer |


