Hi! ������! Here comes my tagcard tutorial. Here Comes My tagcard ��������. It is on how to make a card that you can put many tags in. ���, ��� ������� �����, �� ������ ��������� ����� ����� ����� I will also show a tip on how to make the tags. ����� ������ ���� ���������� ������ �� ��� ������� �����. Hope you will like it!:) �������, ��� �� ������ ����, ��� ���:)
First you have to start with a bazzill paper measuring 30x30 cm. ������� ��, ��������, �������� ������ � ������ Bazzill ��������� 30x30 ��. Like the one under: ��� �������� ����:
I have a pen to mark out where to fold, and a cutter which folds the paper. � ���� ���� ������� ��� ������ ����� wherefores ��� ����, � ����� ����� ������� ������.
I start with folding the paper like you see on the next photo: � ������� �� �������� ������, ��� �� ������ �� ��������� ����������:
I fold it in the middle. � ������� ��� � ��������. And when it is folded it looks like this: � ����� �� ������ ��� �������� ��������� �������:
I open the paper again and start to measure where to fold on the other side. � �������� �������� ����� � ������� ��� ���� wherefores ��� ���� �� ������ �������. The card is going to have four sides, so I therefor have to devide 30 by four. ��������� ����� ����� ��� ������ ��������, ������� ��� ��� �, ��������, �������� ��������� 30 �� ������. So then I fold on 7,5 cm, 15 cm, and 22,5 cm like you can see on the photo under. ����� ������ ��� � �� 7,5 ��, 15 �� � 22,5 �� ����� �� ������ ������ �� ���� ����. The fold in the middle (at 15 cm) you have to take on the opposite side of the paper, because you are going to fold it the other way. ��� � ������� (�� ���������� 15 ��), ��, ��������, �������� ����� �� ��������������� ������� ������, ������ ��� �� ����������� � ��� ���� ��� ������ ����.
When you are finished folding, the paper looks like this. ����� �� ��������� ��������������, �������� �������� ��������� �������. Like a small accordian:) ��� ����� Accordian:)
It is now time to make the pockets to put the tags inside. ������ ������� �����, ����� ������� ��� ������ �������� ���� ������. You can cut of small parts of all four sides. �� ������ �������� �� ��������� ������ �� ���� ������� ������. And it is not nesassary to have any measurments. � ��� �� nesassary ��� ���� ����� ���������. I have just cut of paper very randomly:) But I will show you how I did it, so you have an idea. � ������ ��������� ������ ����� ��������:) �� � ������ ���, ��� � ��� ������, ��� ��� �� ��� ����.

I first started with two sides, and cut off a bit, and then I used a borderpunch on the remaining part, so the edge looked nicer. � ����� � ���� ���������, � �������� �������, � � ������ ������������ ������� ������ �� ���������� �������, �� ���� �������� �����. Then I started with the two other sides. ����� � ����� � ���� ������ ������. First I cut of a triangle. ������� � ������� �����������. I then took the cut-off part and placed it on the other side, so the side would look the same -only opposite from eachother. � ������ ������ ��������� ������ � �������� ��� �� ������ �������, ��� ��� ������� ����� ��������� �� �� �����, ������ ��������������� ���� �� �����.
Like this: ��� ���:
You will have a better view of it later. �� ������ ����� ������ ������������� � ��� ������. Now I wanted to make the front and the back of the card a bit thicker and stronger. ������ � ����� ������� ��� �������� � �������� ������� ����� ������� ����� � �������. So I cut out two rectangles: ��� ��� � ������� ��� ��������������:
I then inked and decorated them with some gorgeous Maja Design paper. � ������ �������� � ��������� ����������� � ���-�� ������������ ������ Maja �������.
And I also measured up some more patteren paper (30x15 cm) to have inside the card. � � ����� �������� ���-�� ����� patteren ������ (30x15 ��) ��� ��� ������ �����. It is a bit easier than making four parts (something you also can do, of course). ��� ������� �����, ��� ������� ������ ������ (���-�� � �� ������, �������). I folded the pattern paper like the bazzill, and then fasten it with glue to the bazzill. � ������ ������ ������� ��� Bazzill, � ������ ��������� ��� � ������� ���� ��� Bazzill.
When you fold up the paper it looks like this: ����� �� ������� ������ ��� �������� ��������� �������:
Now I am going to show you how I made the tags to put inside the card. ������ � ��������� �������� ���, ��� � ������ ���� ������� ��� ������ �����.
I used some leftovers and cut them up so they will fit the pockets on the card. � �������� ���-�� ������� � ��������� ����������� �� ������ ����, ����� ��� �������� ������� � �����.
You can cut them at any size you like as long as they fit the pockets. �� ������ ��������� ��, ��� ������ ������� �� ������, ���� ��� �������� �������. This is a great way to use all the leftovers:) ��� �������� ������ ��� ������������ ��� �������:)
I then cut of a rectangle on one side. � ������ �������� �� �������������� �� ����� �������. I just cut randomly. � ������ ��������� ��������. 
I then use the cut-off rectangle to make the same on the other side. � ������ ������������ ��������� ������������� ��� ������ �� �� ����� �� ������ �������.
I will decorate these two tags with some cute images:) ������ ���� �������� ��� ��� ����� � ���-�� ����� ������:)
I now use some hours which I don't have pictures off, to decorate both four tags and the card:) ������ � ������������ ���-�� ����, ������� � �� ��� ���������� �, ��� �������� ��������� ������ ����� � �����:)
And here is what I came up with: � ��� ��� � ��������:
Here is the front. ��� ������.
When it was too late I saw that I should have figured out something more clever with the ribbon to hold the card together. ����� ��� ���� ������� ������, � ������, ��� � ����� ���� �����, ���-�� ������ � ����� ����� ��� ������� ����� ������. But for this one I have just wrapped it around the card. �� ��� ����� � ���� ������ �������������� � ���� �����.
Under you can see the tags inside the card. ��� ������ ���� ������ �����.
Here is the whole inside with the tags taken out. ��� ��� ������ � ������ ��������.
A close up: ������� ������:
And the last one, the back: � ���������, �������:
I hope this made sense..:) � �������, ��� ��� ����� ����� ..:)
Have a lovely day! ���� ���������� ����! Hugs, Camilla . �������, ������� .


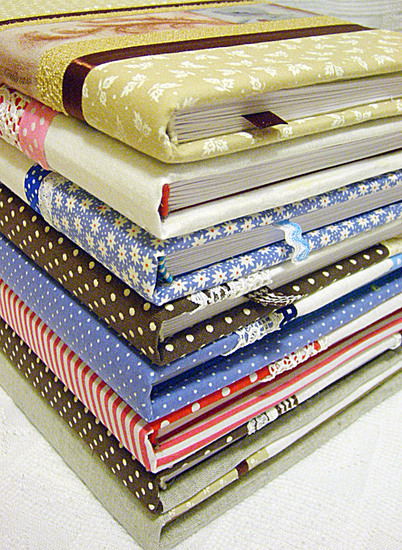
 Today I want to show you three cards that I have made. ������� � ���� �������� ��� ��� �����, ������� � ������ � ���. They are all Confirmand Cards, something that are very popular here in Norway. ��� ��� ���������� �����, ���-������ ����� ��������� � ��������. I have already been asked to make a few:) ���� ��������� ��� ��� ���������� ����:)
 It was a bit hard to figure out how to show the inside the best, but first comes the side where you write your greetings. ��� ���� �������� ������ ������, ��� ���������� � ������, �� ������� �������� ������� wherefores ��� �������� ������������.
 On the other side I have made a criss-cross envelope to put the money in. � ������ �������, � ������ �����-������� ��� ������� ������� ������ �����
 Here is the second card: ��� ������ �����:
 And under you can see how you can place the money. � ��� ������ �� �� �������, ��� �� ������ ���������� ������. It is quite easy:) I have fasten the paper with brads. ��� ����� ������:) � ���� ����� ������ � ��������.
 Here comes the third card: Here Comes ������� �����:
 I have made the outside match the inside. � ������ �� ��������� ����� ������. When I cut the paper for the card it is four cm longer than my normal card (15 cm). ����� � ������� ������ ��� ���� ��� ������ �� �������, ��� ��� ���������� ����� (15 ��). So this measures 15x19cm. ��� ��� ��� 15x19cm ����. Then I fold it in the middle as usual, and also at 15 cm down. ����� � ������� ��� � ��������, ��� ������, � �����, ��� 15 �� ����. The remaining 4 cm is folded up. ���������� 4 �� � ���������.
 The images are from Whiff of Joy . ����������� �� ��������� Joy .
 I hope you got some tip and inspiration!:) Thank you for looking. � �������, �� �������� ����� �� � �����������:) ������� �� �������.
 Hi! ������! Today I will show you how I made an Easter giftbox. ������� � ������ ���, ��� � ������ Giftbox �����. Under you can see the papers I used, pluss the gorgeous stamp illustrated by Norma Fickel for Whiff of Joy . ��� ������ ����� ��������������, � ����� ������������ ����� �������������� ����� Fickel ��� ��������� Joy .
 Here are the measurements for the box. ��� ��������� ��� �������. With this measures I will have a box at the size 11x11x3,5 cm. � ���� ������ ���� ���� � ���� �� ������ ������� 11x11x3, 5 ��.

 Under you see how the papers looks like after I have inked and sewed them. ���� �� ������, ��� ������ �������� ��� ����� ���� ��� � �������� ��� � ���� �����������.
 I use some adhesive tape to fasten them on all four sides. � ��������� ����� ���-�� ����� ��� ������� ����������� �� ���� ������� ������.
 And now for the cover: � ������ ��� �������:
 I have put them together and seved the cover aswell. � �� ������ ������ � seved �����. Then I place it on the side of the box, to see where I am going to fasten them together. ����� � ���������� ��� �� ������� �������, "����� �������, ��� � ��������� ������ ��� ����������� ������.
 I use the strips I made with the word window punch, and eight brads. � ��������� ������ � ������ � ����� ���� �����, ����� � ������. Make sure you have some space between the to parts, so it also can bend. �������� ���-�� ������ �� ��� ������������ ����� ����� ���������, ������� ��� ����� ����� ���������.
 I also use the strips with some smaller brads to fasten the sides together. ����� � ��������� ������ � ���-�� �������� �������� ��� ������� �������� ������. Under you see the inside of the box. ���� �� ������ ������ �������. I could also have fasten them on the outside... � ��� �� ����� ��� ������ ����������� �� ������� ������� ...
 And under you see the outside of the box. � ���� �� ������ �� ��������� �������.
 Now all sides are fastened, and the box is ready to be decorated. ������ ��� �������� ����������, � ������� ������ ������ ��� ���������.
 And here it is! � ��� ���! The girl with the lamb is coloured with Distress Ink, re-inkers on water colour paper 300g. ������� � �������� �������� �������� ������ �������� inkers �� ���� 300 � ������� ������. I have used a 00 size brush. � ���� �������������� ������ 00 �����.
 A closeup: ������� ������:
 The whole cover: ����� ����������:
 And inside some yummy chocolate-balls filled with milkcream;)) � ������ ���-�� ������� ���������-���, ����������� ������;))
 Here you see the box from the other side, with the strips. ����� �� ������ ���� � ������ �������, � ���������. I think they made a spesial decoration. � �����, ��� ��� ������� ����������� ���������.
 Thank you so much for looking at my tutorial today! ������� ��� ����� ��� ������, ��� ��� ������� �������! Hope you got inspired! �������, ��� �� �������� �������������!